Week3. Computer Controlled cutting
1. Assignment & Result
About the process, I made new page and made links are below, because the long page makes me confuse.
| GROUP ASSIGNMENT | THE RESULT |
|---|---|
| - characterize your lasercutter's focus, power, speed, rate, kerf, joint clearance and types | Kitakagaya: Week3 |
| INDIVIDUAL ASSIGNMENT | THE RESULT |
|---|---|
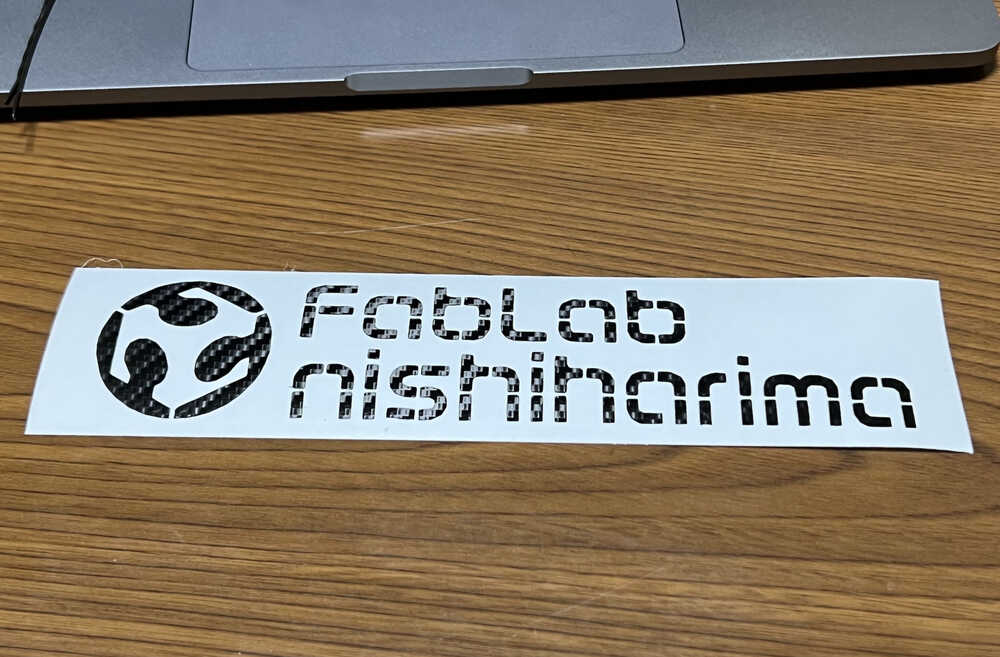
| - cut something on the vinylcutter | I made a sticker of Fablab West-Harima. Process - Vinul cut |
| - design, lasercut, and document a parametric construction kit, accounting for the lasercutter kerf, which can be assembled in multiple ways, and for extra credit include elements that aren't flat |
I made parametric construction kit. Process - Lasercut |
2. HERO SHOT
Here is the Heroshot!
- Sticker
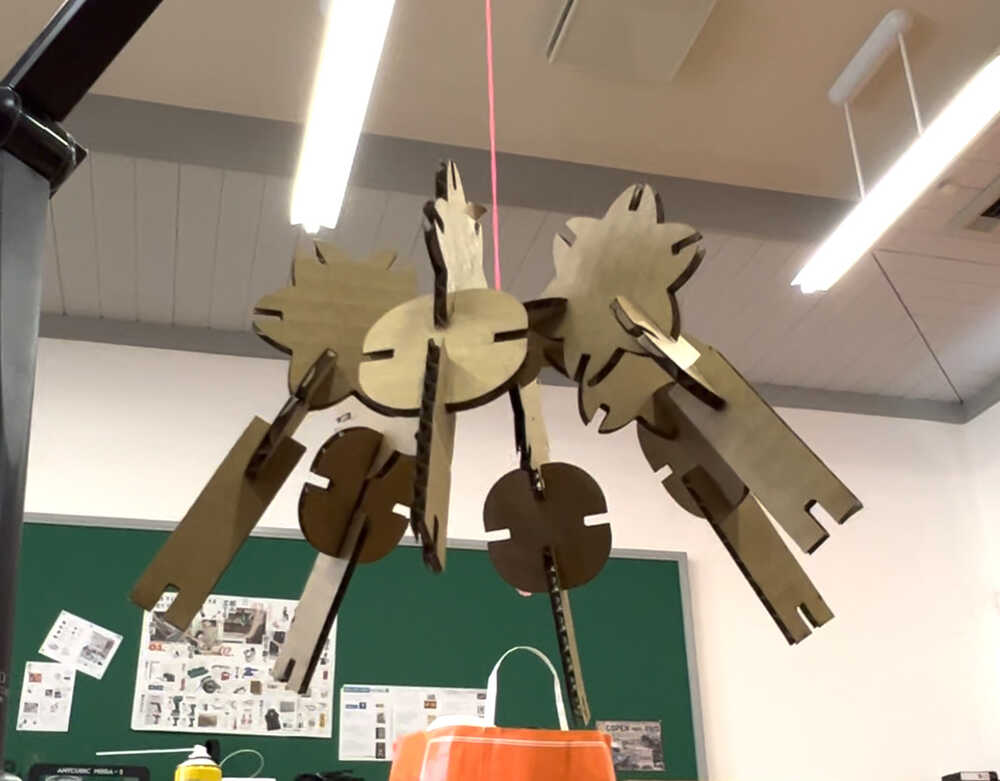
- 1st Assemble (image: lamp shade) parametric construction kit.
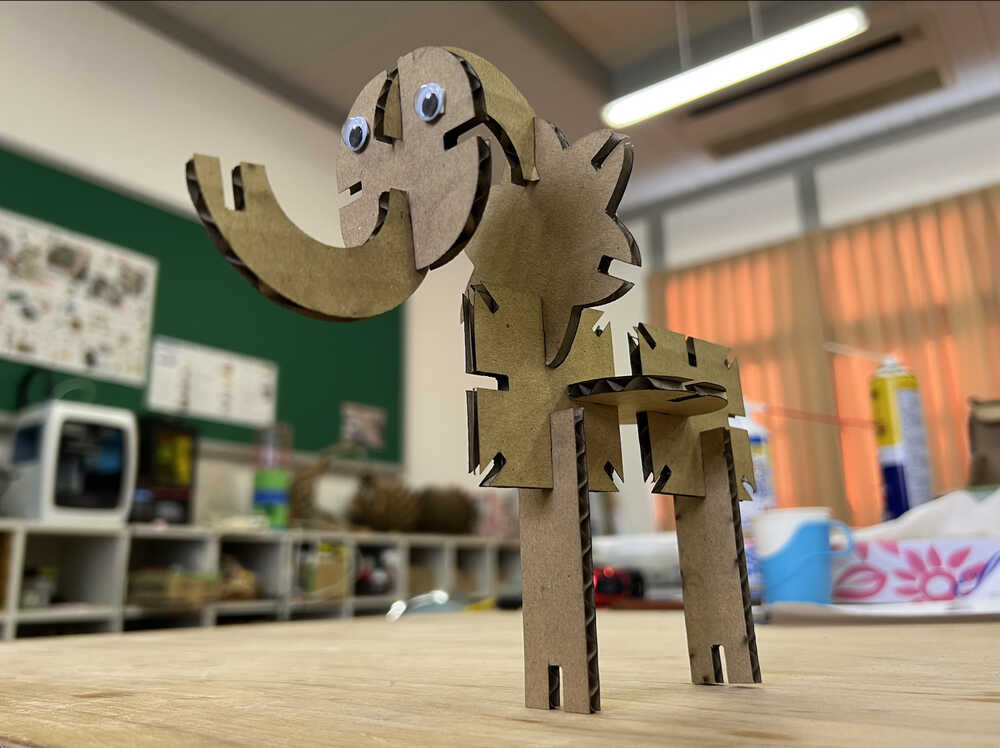
- 2nd Assemble (image: elephant) parametric construction kit.
- 3rd Assemble (image: Kabut- samurai helmet)

3. HERO VIDEO
4. PC working environment
- PC:MacBook Pro (13-inch, M1, 2020)
- OS: macOS Ventura (ver 13.0.1)
- Terminal:zsh
- Setting : Rosetta
5. Plan
Vinul Cutter
1. Make design
2. Prepare material
3. research for machine
4. confirm (install) software
5. cut
6. photo
7. document
lasercutter
1. Search best fit (group)
2. Design Parametric construction kit, and prepare material
3. Laser cut
4. Assembly - heroshot
6. Data file
- Vinul cutter - Sticker (dxf)
-
Laser cut (f3d)