- 3D Scannig (Process)
We don't have 3D scanner in Fab Lab West harima. So for 3D Scanning, I used QLONE with my Smartphone, and secondly I use CREAFORM HandySCAN 700™|Elite. (LED:Red), industrial level scanner, that I could borrowed it from PROTE DESIGN. Special Thanks to their cooperation.
What I learned and Process of Scan are below.
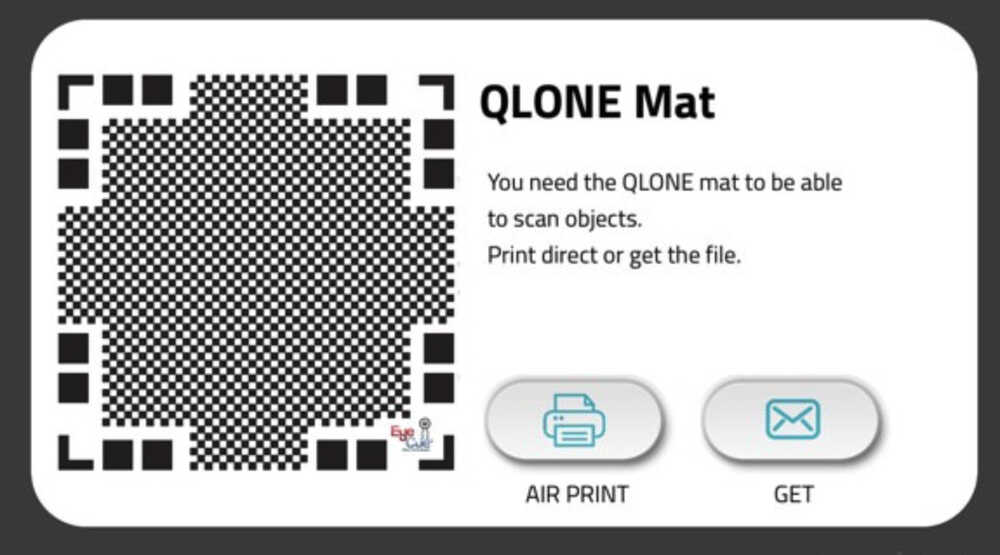
1. QLONE
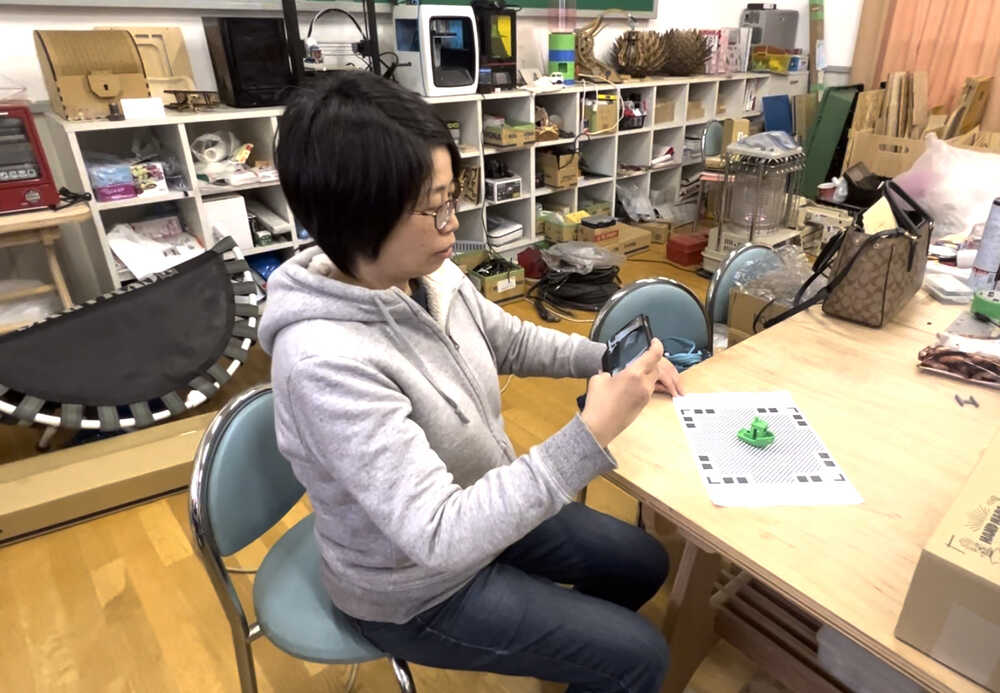
Qlone is application of 3D Scanner. I use the QLONE with QLONE MAT, and Smartphone (iPhoneX).
- Items that are difficult for the scanner
- Do not use shiny or refrective plate
- Do not use a table with similar color
- Process of QLONE
-
At first, download application of Qlone to my Smartphone.

-
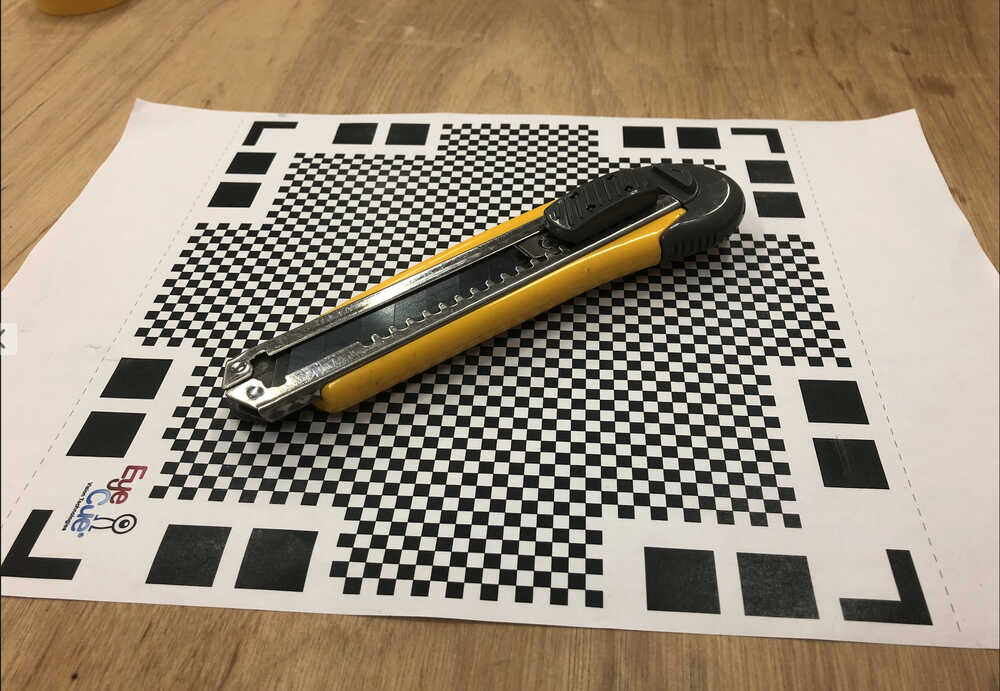
Print out a QLONE MAT for scanning. If the paper is glossy, it will not scan correctly. I printed on A4 copy paper. The mat format can download it from the official site and application.
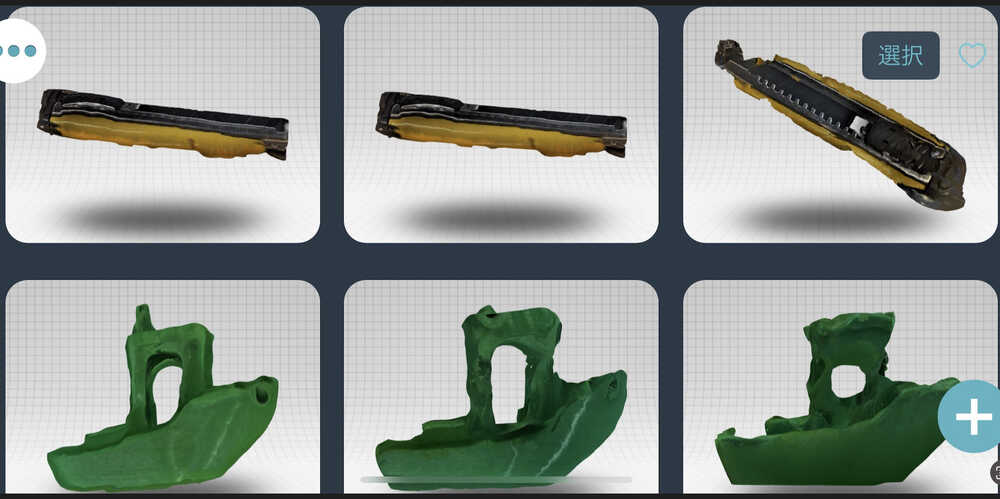
- As a target object, cutter knife
-
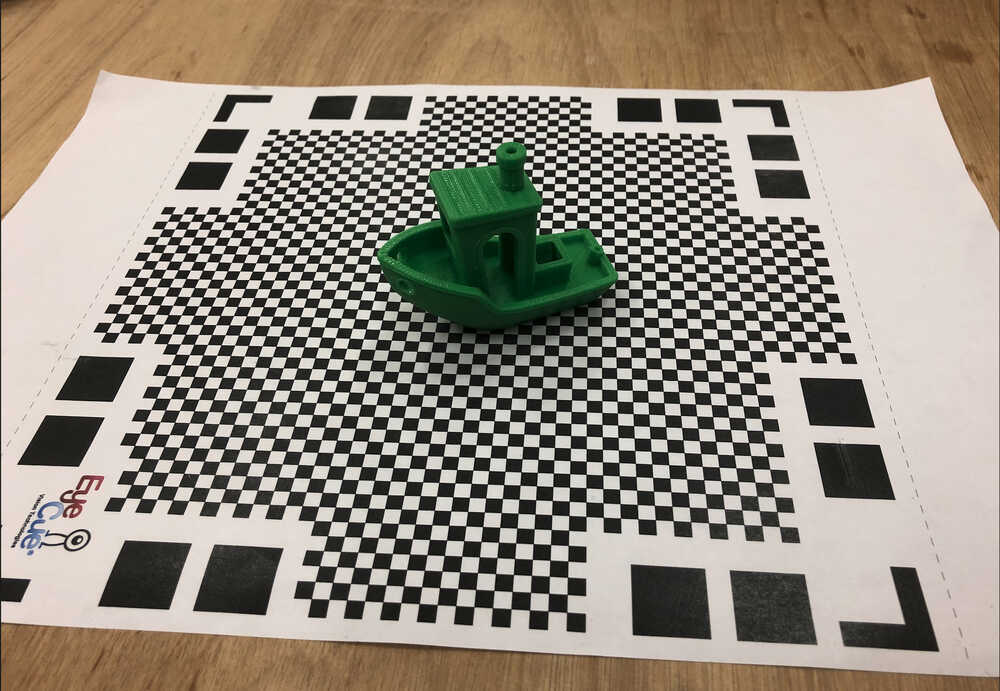
As a target object, #3DBenchy which a model made by CreativeTools.
-
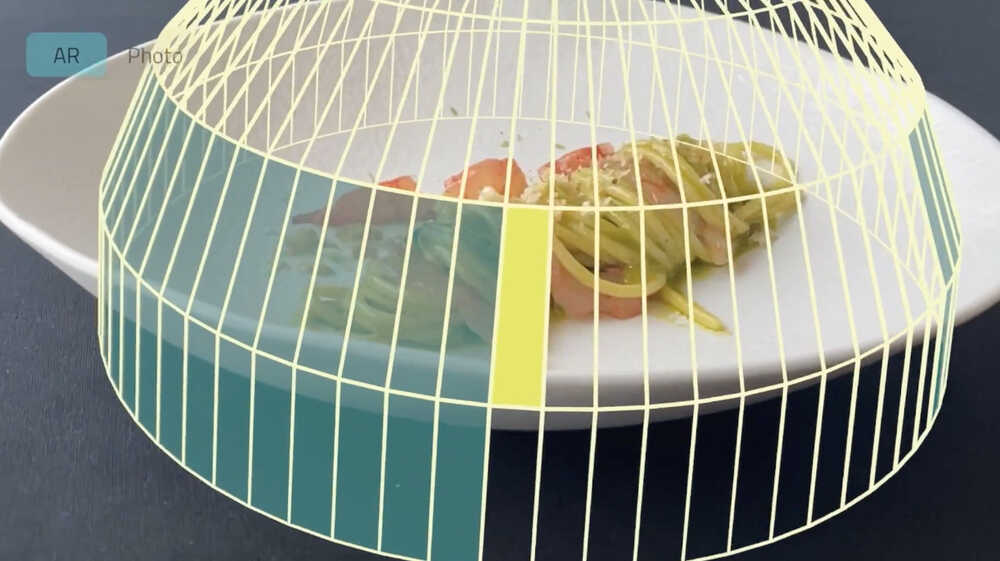
Open the QLONE, and the target object on the mat is scanned from all directions, 360 degrees, like below image. When the scan is complete, the shell of the dome surrounding the object will be removed. Scanning is possible without QLONE MAT. But, for me, It is easier to scan with the QLONE MAT.
Scan image by QLONE.
- At first I could not scan properly and had to retry several times.
- Main changes made in the process to get the result:
- Change to small target: I thought it was difficult to scan when the pattern of the QLONE MAT was hidden.
- Rotate the QLONE MAT, not myself.
- speed of rotation of the mat: Keep speed as constant as possible
- angle:Keep angle as constant as possible
- Main changes made in the process to get the result:
-
I saved a few that were better.
-
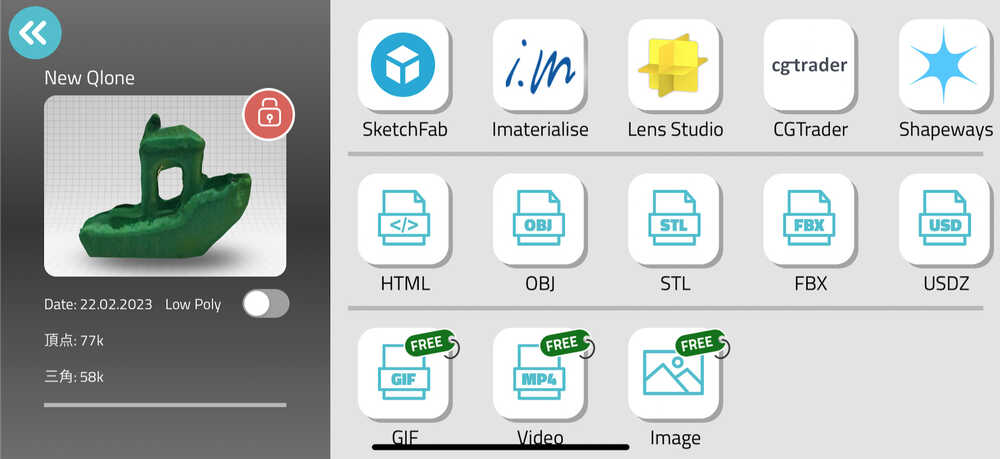
In Free version, we can export GIF, Video(MP4), and Image.
-
I export the Video(MP4), then I compressed FFmpeg. Below Video is the result. It seems good to see the image with Texture, but the shape seems not correct.
2. CREAFORM HandySCAN 700™|Elite. (LED:Red)
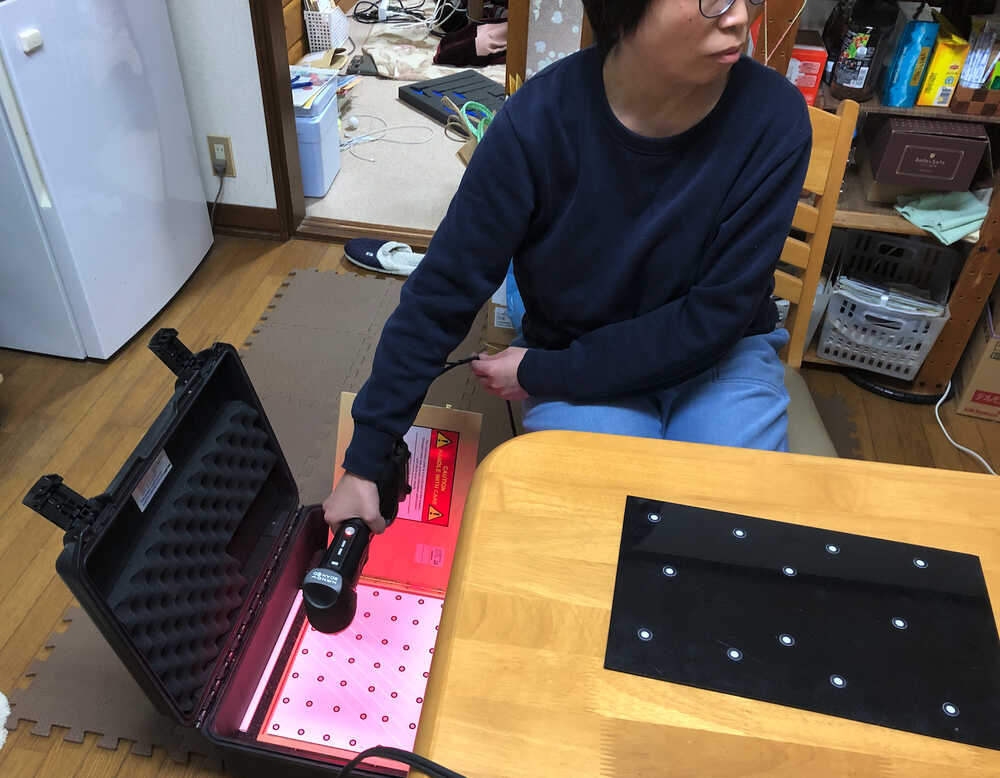
I borrowed the scanner CREAFORM HandySCAN 700™ Elite(LED:Red) of industrial level and the Software (VXelements, DesinX) in High Performance PC from PROTE DESIGN. Special Thanks to their cooperation.
At first, I learned how to use it from the founder in Fab Lab West-Harima, and search the spec.
2-1) Spec
The Creaform is Handheld type, Mechanism (triangulation), and Technical Specifications.
The Spec is refer to the site of CREAFORM about HandySCAN 700™|Elite
| about | Description |
|---|---|
| Accuracy | Up to 0.030 mm |
| Volumetric accuracy | 0.020 mm + 0.060 mm/m |
| Volumetric accuracy with MaxSHOT | 0.020 mm + 0.015 mm/m |
| Measurement resolution | 0.050 mm |
| Mesh resolution | 0.200 mm |
| Measurement rate | 480,000 measurements/s |
| Light source | 7 red laser crosses |
| Laser class | 2M |
| Scanning area | 275 x 250 mm |
| Stand-off distance | 300 mm |
| Depth of field | 250 mm |
| Part size range | 0.1–4 m |
| Software | VXelements |
2-2) Items that are difficult for the scanner
- Black objects (absorb light)
- Metals (Glittering)
- Mirrors (total reflection)
2-3) What I learned with Scanner Practice
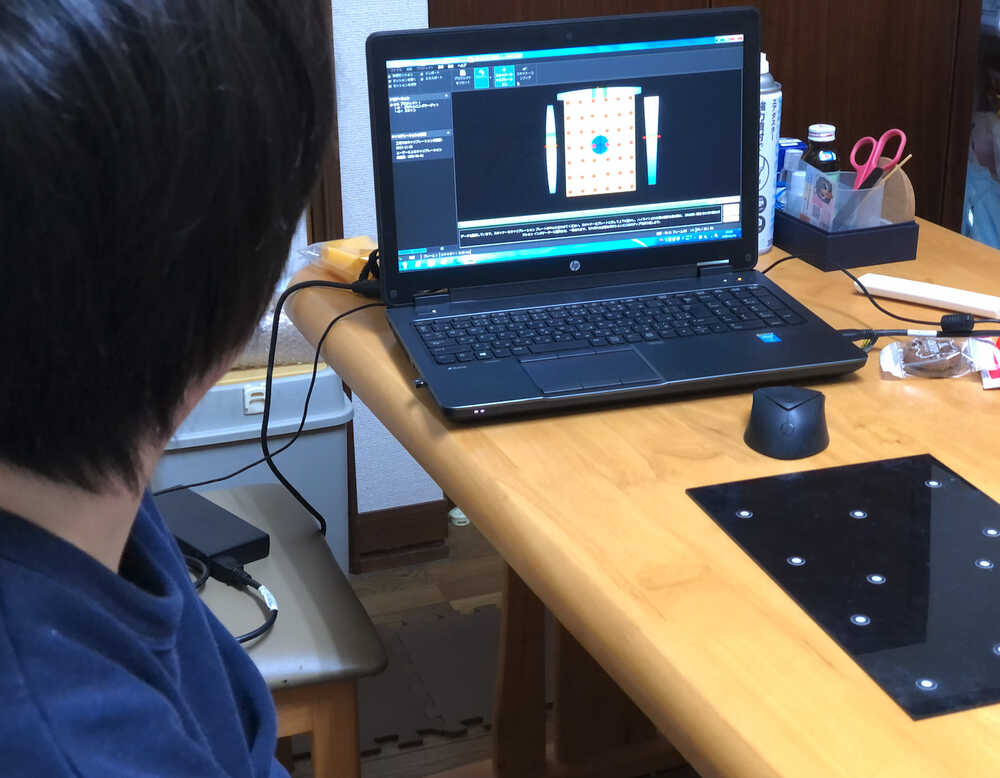
As scanning of CREAFORM HandySCAN need a skill to get good scan result, I tried a lots of scanning test.
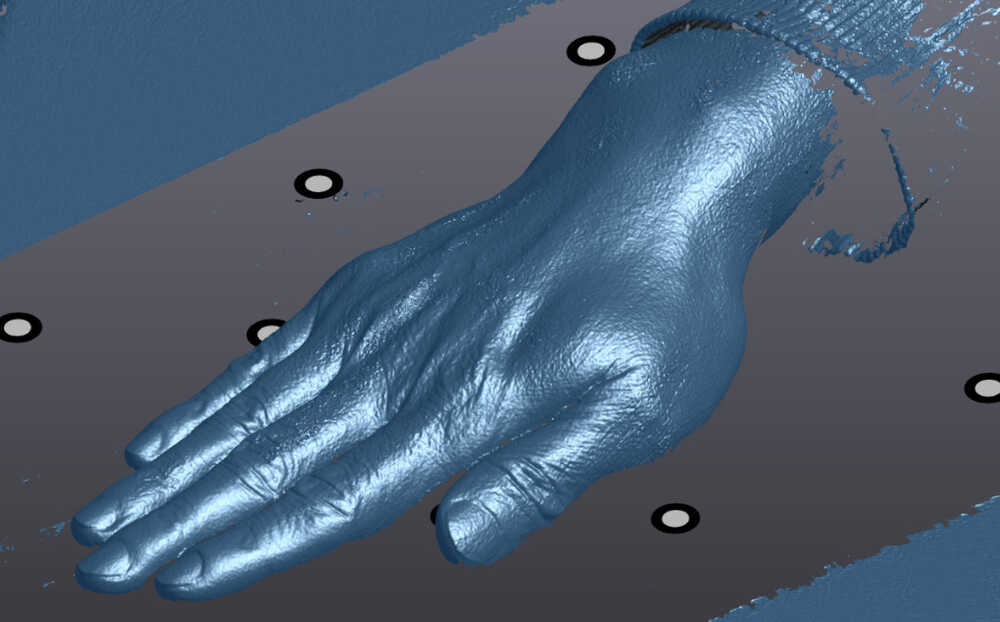
- At first I take scan my hand. When scanning, I took pictures while inserting several "target seals. Scanning while confirming on the PC screen that the angle, height, and mesh of the shot are continuously formed" It took a lot of time, although we were told that the data capacity would increase if we did not scan as quickly as possible. With the result, I was surprised to see so many wrinkles.
- Then I tried scanning some object, Trying to scan mandarin oranges, apples, and cookies.
- I scanned the top and bottom of each object and merged the data. The merge required me to choose three distinctive shapes, but surprisingly, I found it was difficult to find three distinctive dots, even objects that you thought were distinctive.
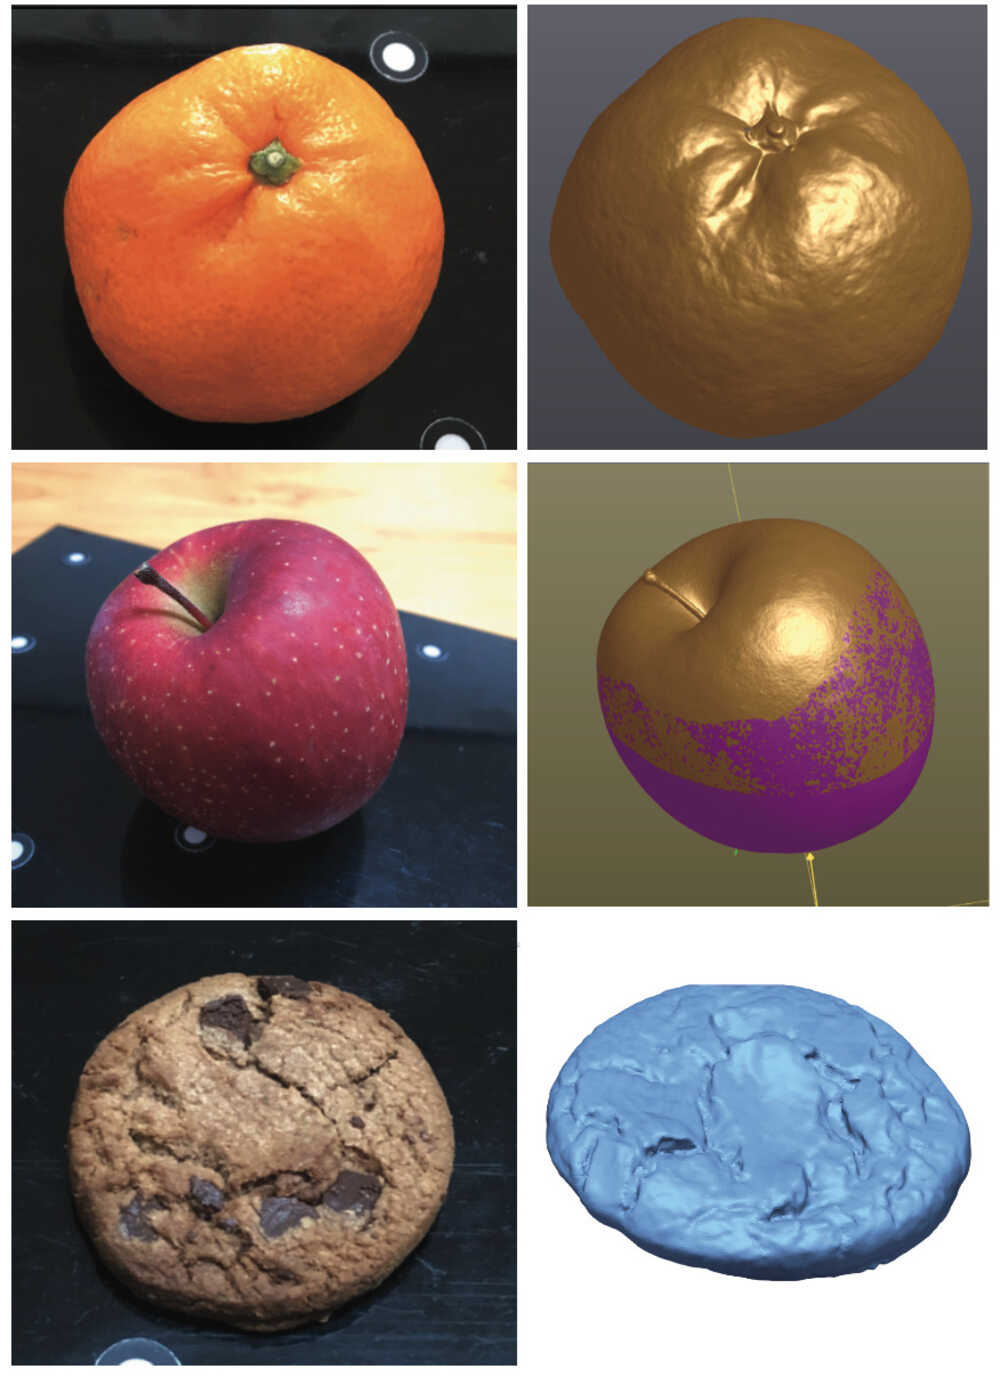
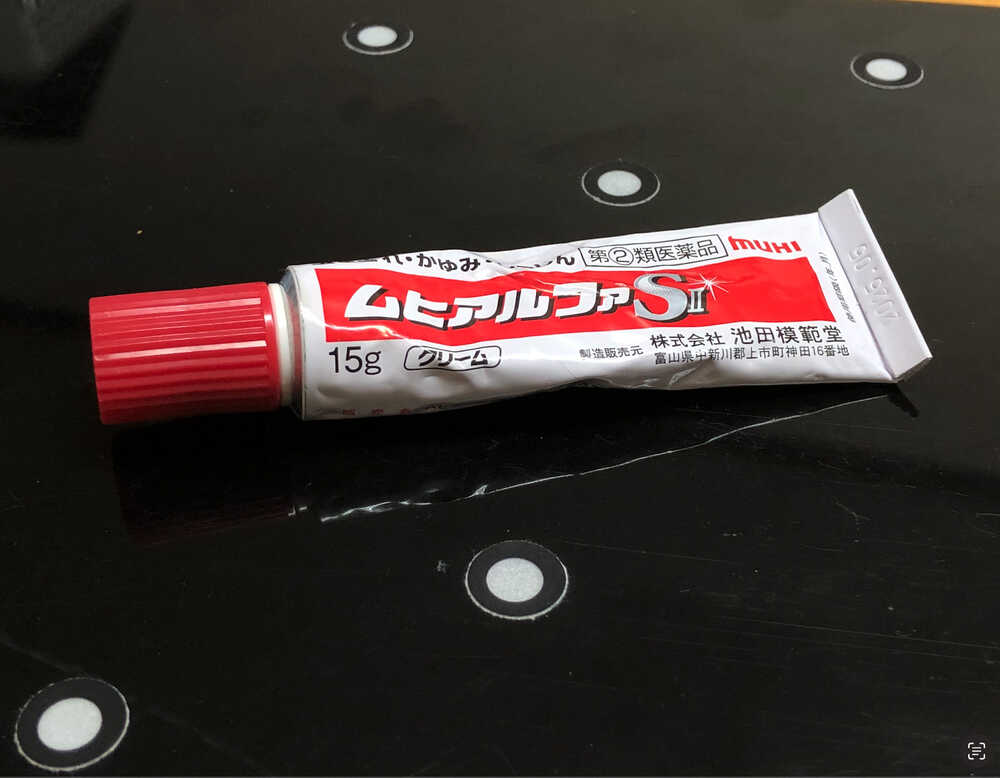
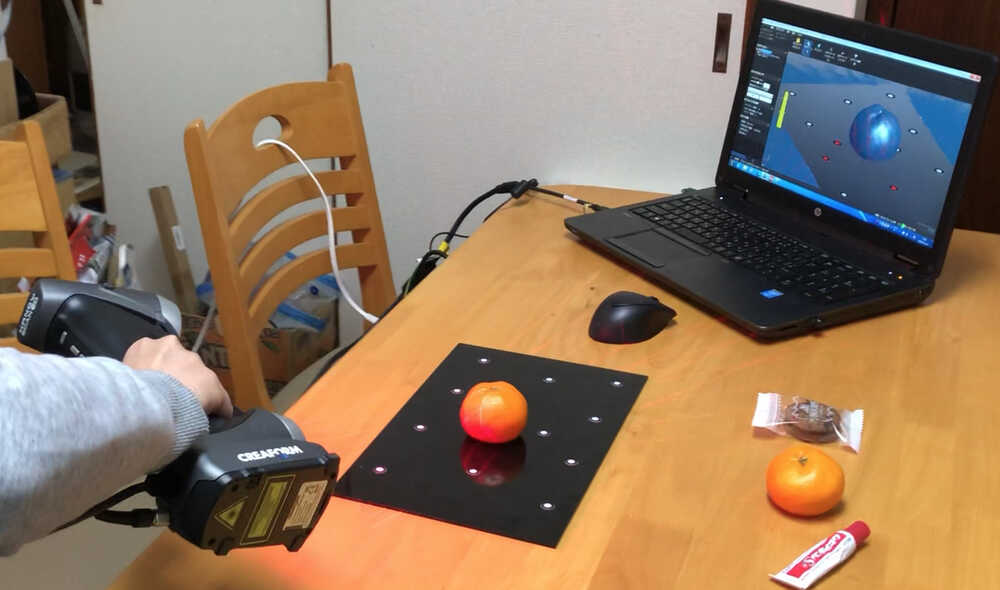
For the object with clear distinctive shapes, I decided to scan the tube of ointment。
2-4) PEOCESS SCANNING
-
Calibration with the CREAFORM official calibration board:
- (In VXelements, select "Scanner Calibration" → Scan)
- This process need to match 2 angles and height. I was not used to this process, which took about 10 to 15 minutes.
-
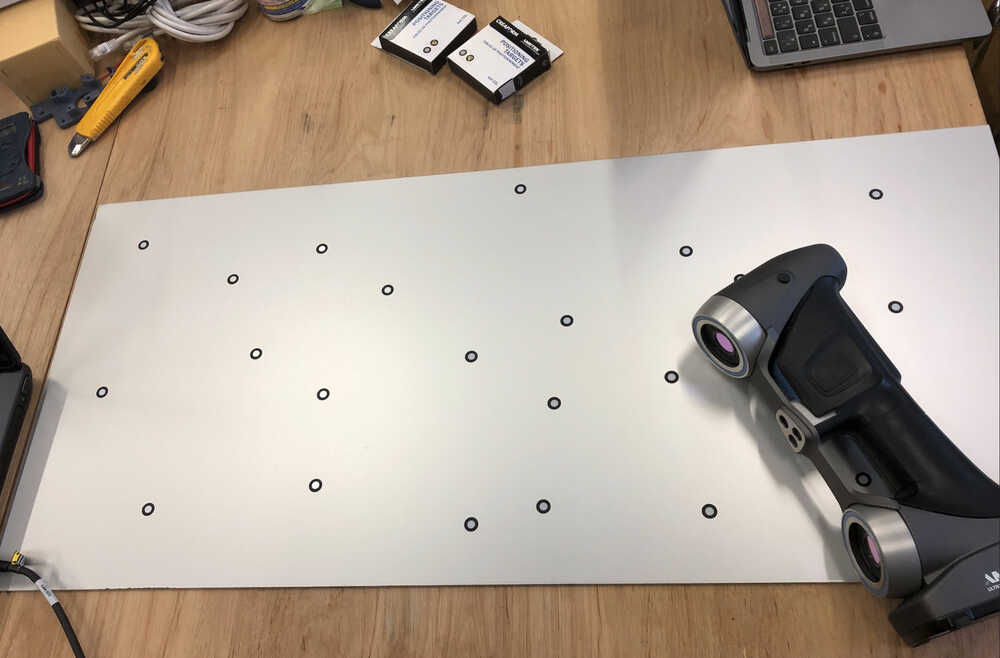
Create the target board.(to be used as a reference surface):
- The non warped board, resin or metal board is better.
- 15 cm sensation Apply target seals randomly (unbalanced target seals are best to create a feature point).
-
Record the target seal position:
- Put the target seal on the flat sure board is recorded, To clarify the location of the target.
- (In VXelements, select "Positioning Target" → Scan)
-
Set the object on target board:
-
Scanning an object:
- Scan while always including the target seal with Take care of distance and angle. Alerts you if you get too close or too far away.
- Scanner work until a clean shape is obtained, the data will be heavy. I was nervous because I heard it was an expensive scanner and I needed to handle it carefully so as not to break it.
- In this time, I scan top side and bottom side. It seems more time to scan depends on the shape.
-
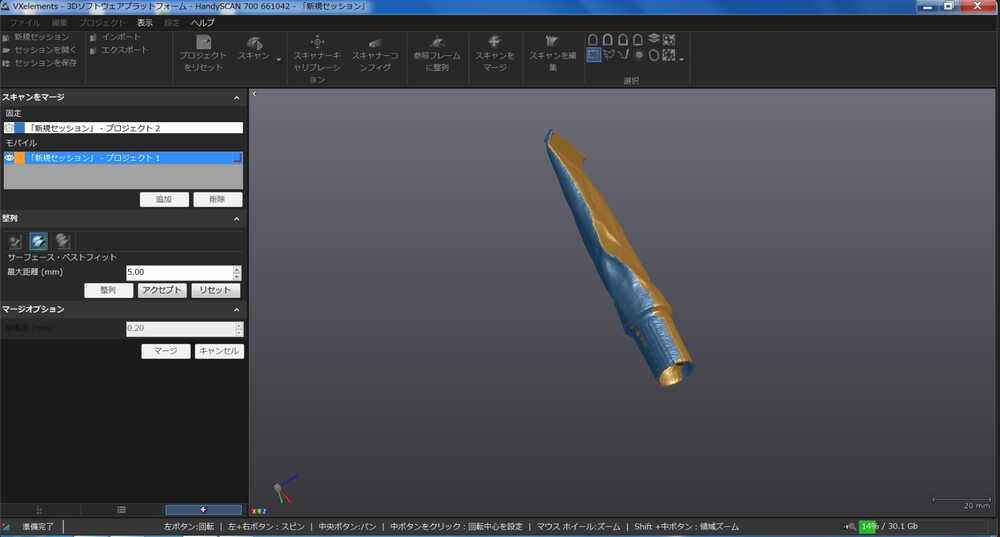
Merge Scan data
- Import the 2 scan data.
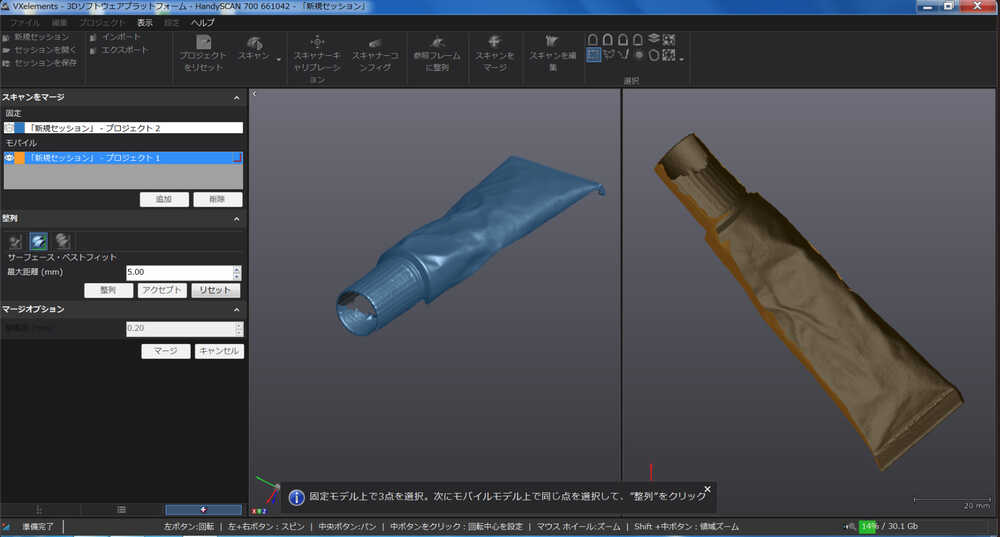
- Select 3 characteristic points
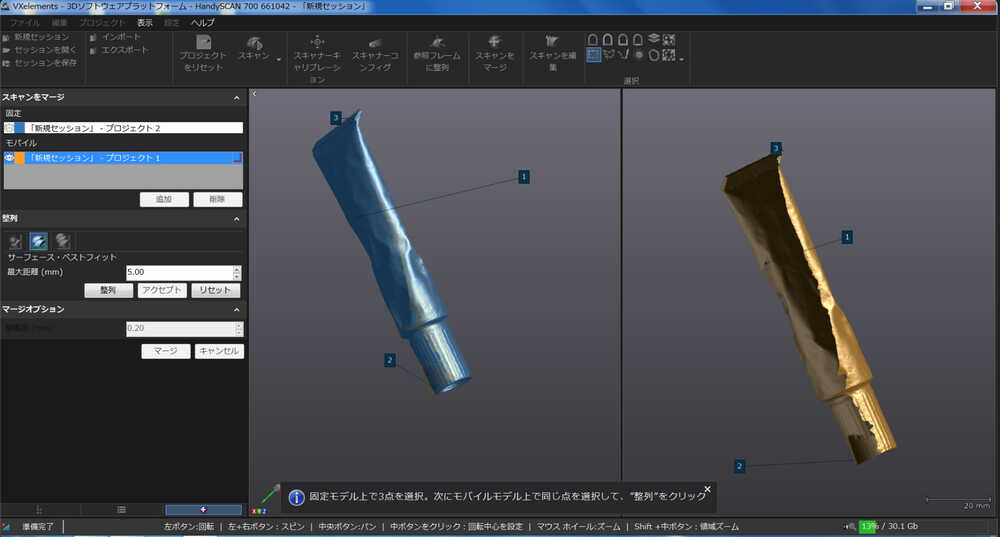
- merge complete!!
- Import the 2 scan data.
DATA file: muhi(stl) - CREAFORM scanned and merged
-
EDIT MESH with Design X
Remove non-contiguous meshes and unnecessary parts. And I Filled the hole.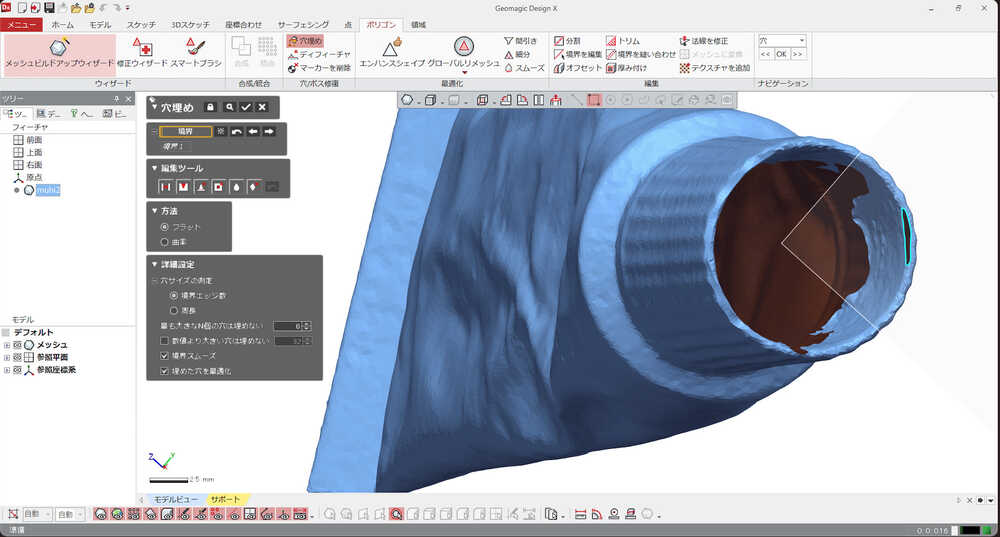
-
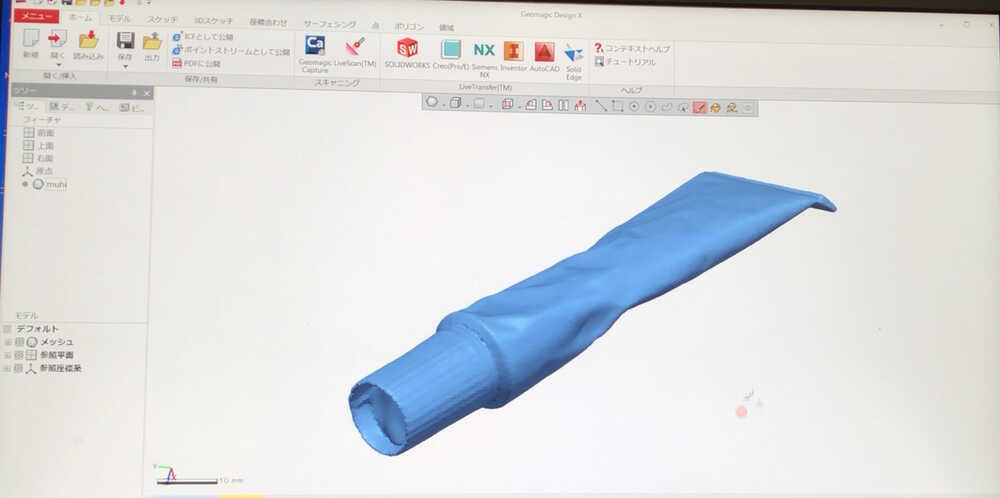
Export mesh with Binary stl:
(Mesh editing is on the other software)
DATA file:
muhi(stl) - EDIT MESH with Design X
- As optional, I did 3d printing with form3. link to 3d printing
Reference Links
- https://3d-scantech.jp/column/about-3dscanner/
- https://systemcreate-inc.co.jp/products/3dscanner/3dscanner_guide.html