- Digico-MILL48
CNC is a machine that can cause injury, blindness, death, and even fire due to mistakes. Therefore, Pay attention to Clothing and prohibitions on the Safety Training of Group assignment, and start the operation.
Reference
Keyboard operation of XYZ Axes
 Tool Name

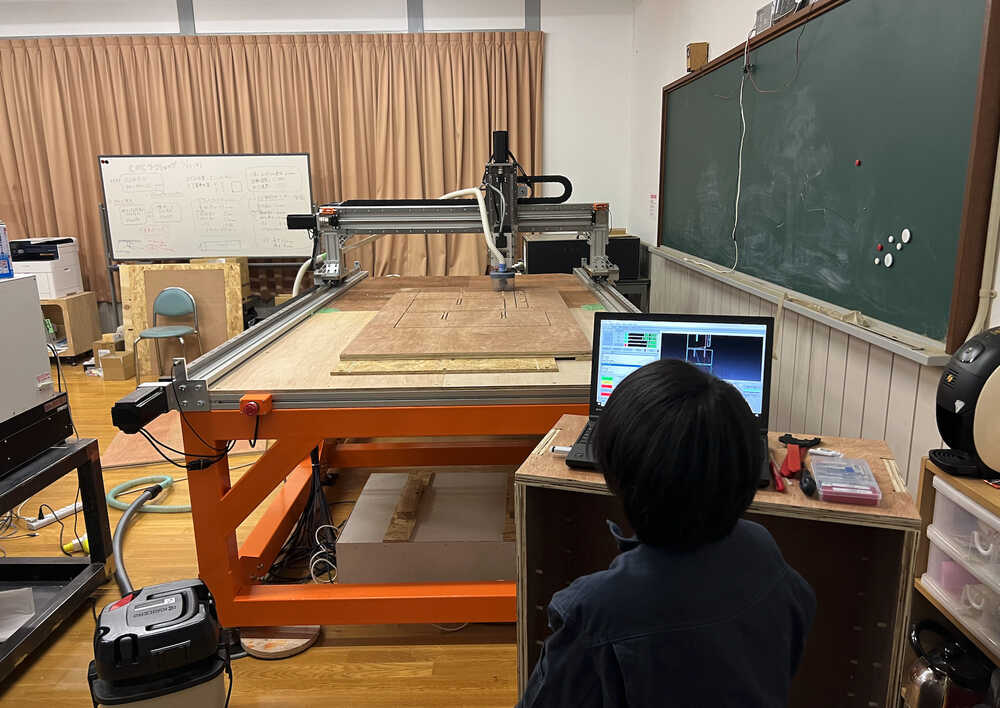
1. Machine setup
- Connect PC to machine with USB cable.
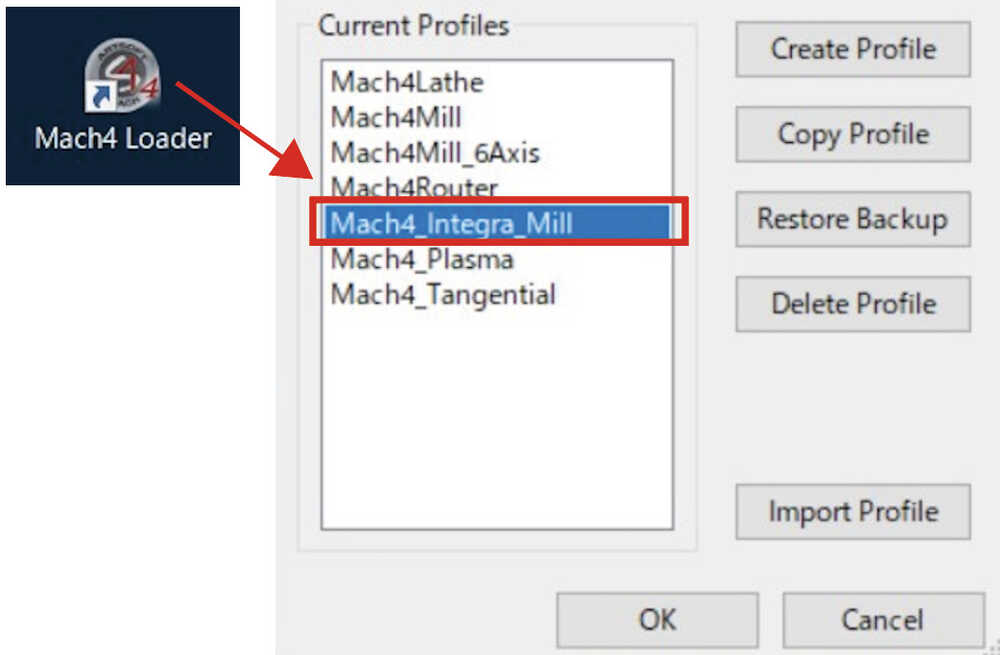
- In PC, Right click on "Mach4 Loader" on Desktop, and Open "Mach4 Integra_Mill".
 - Connect Power line of Machine, and Power on.
2. Safety check
- Check the sensors and emergency stop button are responding. (Operation is disabled when respond.)
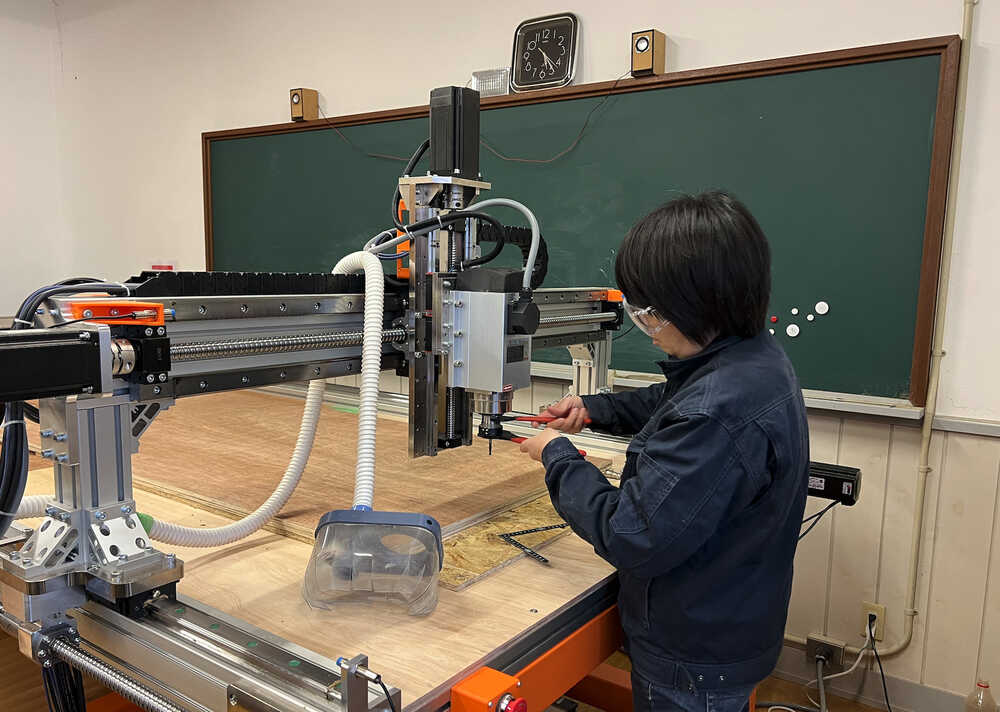
3. Where to put the fixing screw / Fix the stock
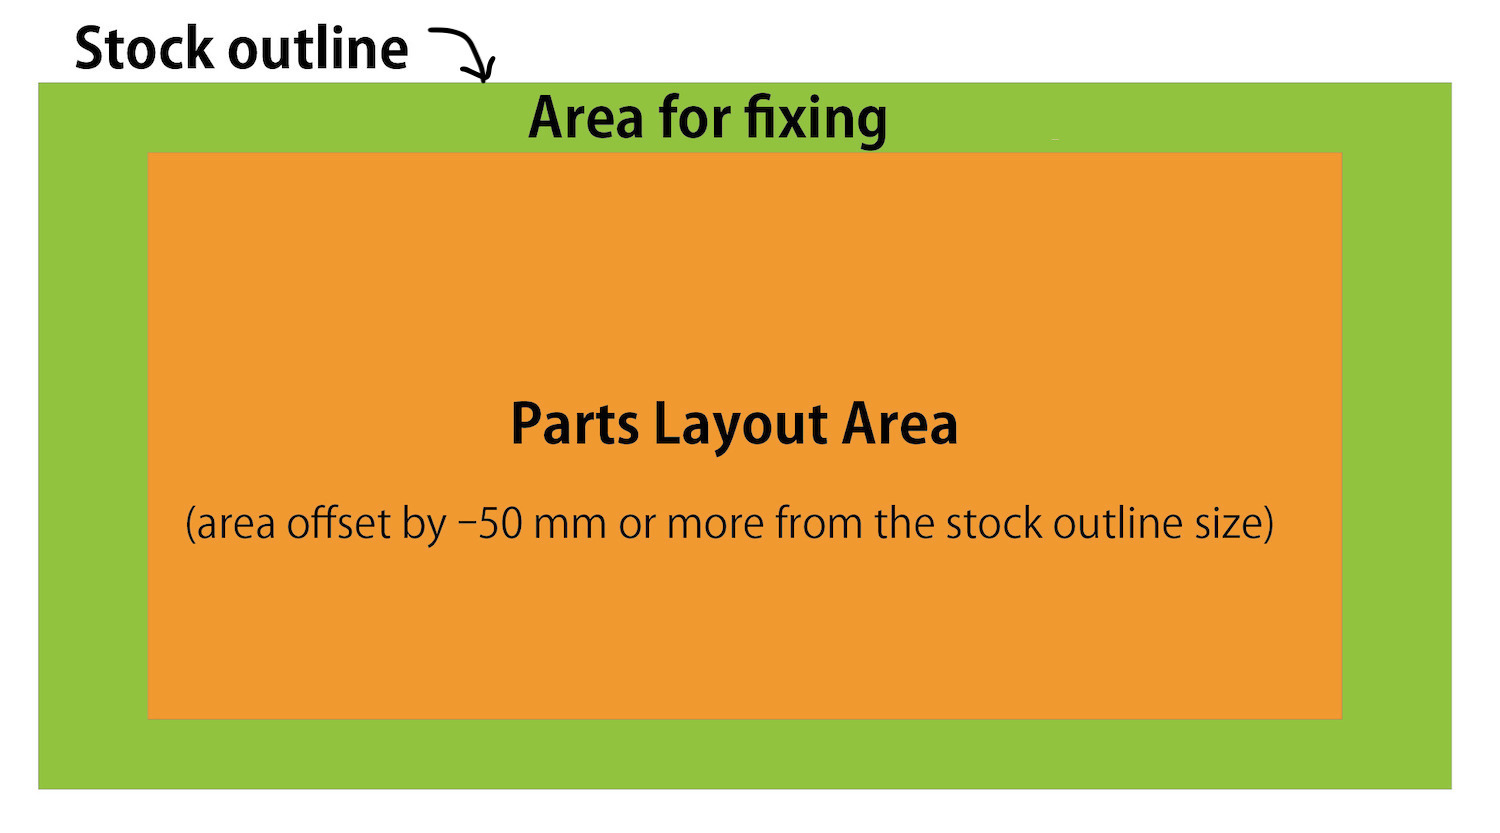
For safety reasons, the area of the fixing and the area of the part layout should be clearly defined. Parts Layout Area (Orange area) should offset by -50mm or more from the stock outline size.
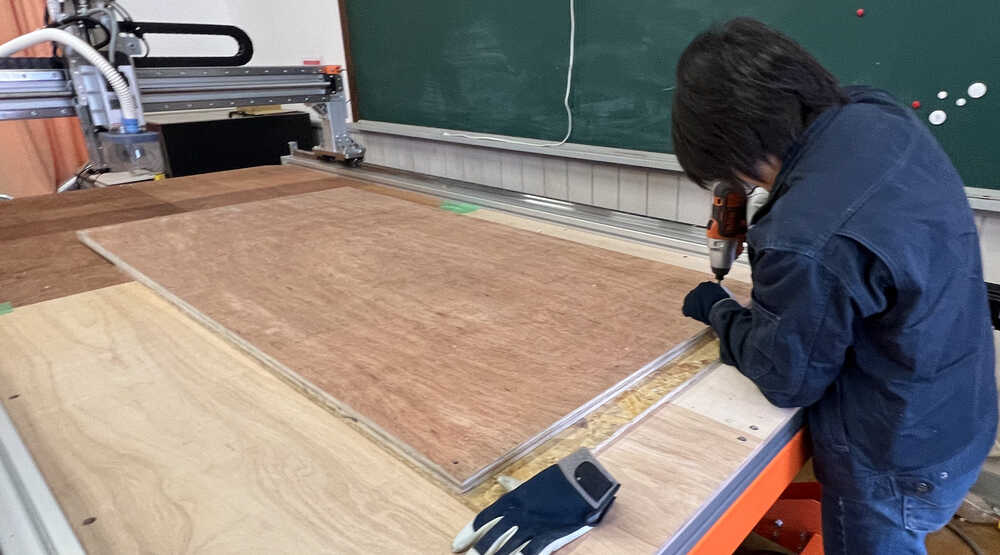
Place the material on the machine table and screw it to the area of fixing (Green area).
CAUTION:
In my case, I fix a nail on the border between the green area and the orange area, resulting in an accidental contact between the end mill and the nail. Avoid the border, and be sure to fix nail in a safe place with plenty of space.
4. Homing
- Take off the Vacume part on the Spindol.
- For Homing, Move near the sensor X-, Y-, Z-, with Keyboard.
- Click Reference All Axes (Home).
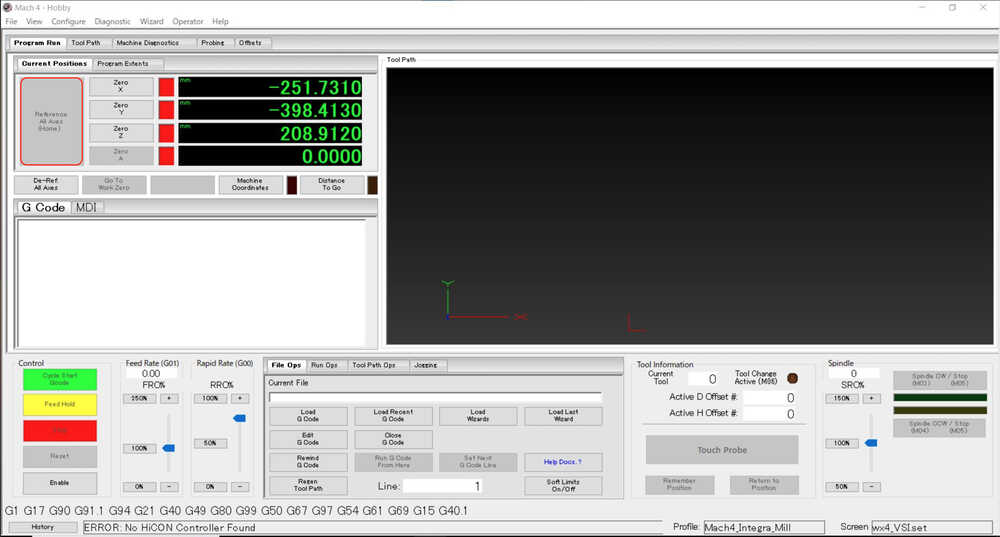
(Automatically, Machine check limit point of XYZ)
NOTE: In case of emergency, if machine action has any strange behavior, press the emergency stop button to stop.
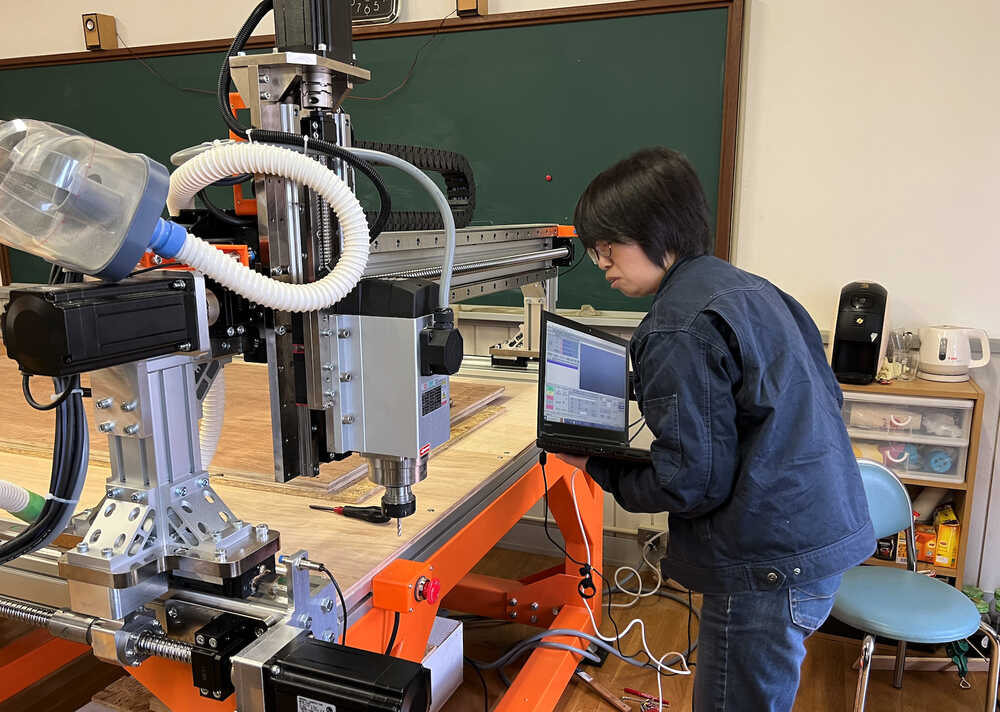
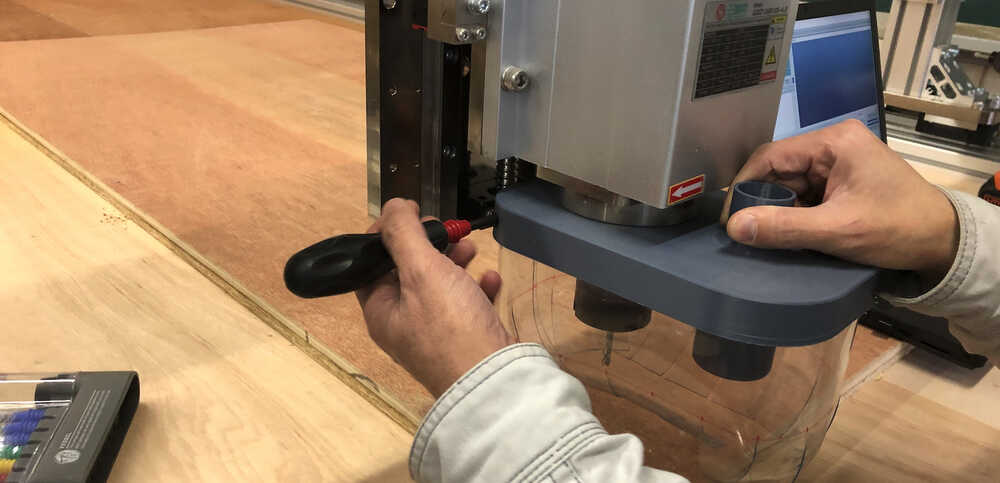
5. Set the mill to chuck
- Move the XYZ AXES with Keyboard, where the place to set the mill.
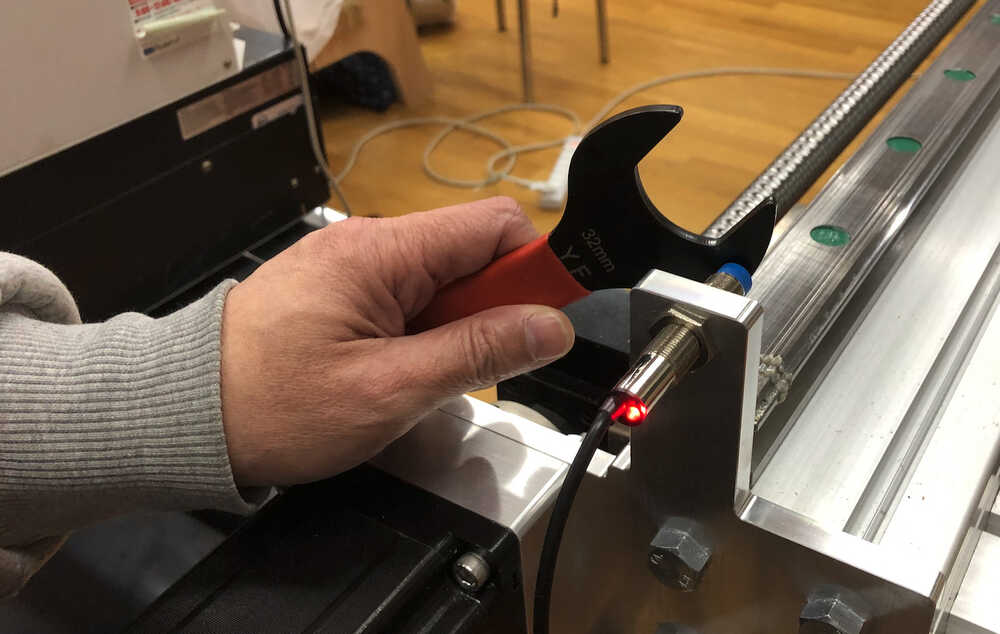
- Place the mill 10 mm or more into the collet chat and pinch it.
- Length end mill after attached = "Material thickness + more than 5mm".

Then, For next step, Check Stockpoint(Box point)in tool path. NOTE: Stockpoint(Box point)of tool path, and Stockpoint(Box point)of machine set (Next step: 3-4 & 3-5) should be same.
6. Set Z0
- Set the Probe on the stock point Z. ( In this time, I choose "material bottom".)
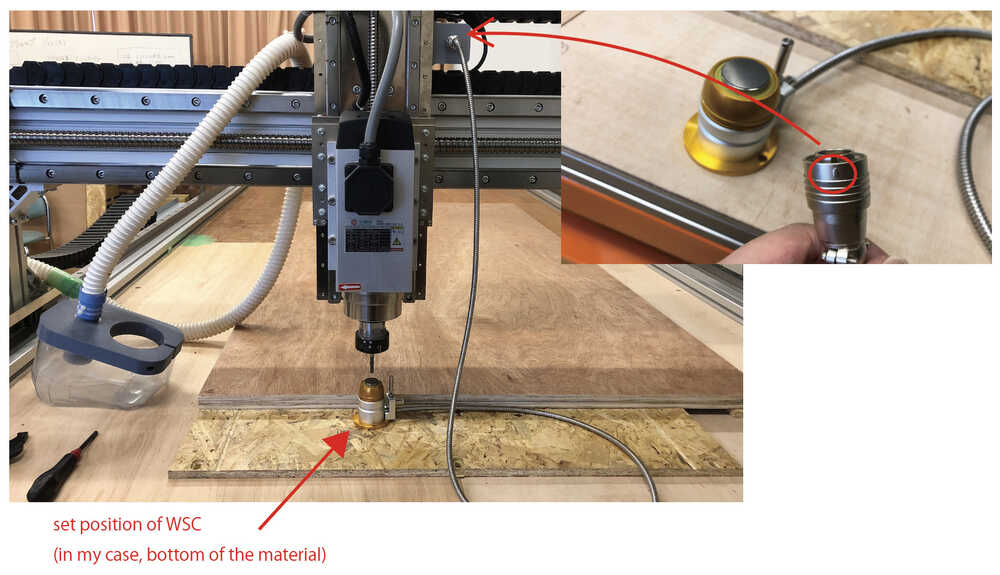
- Touch Probe > Find Z0(zero)
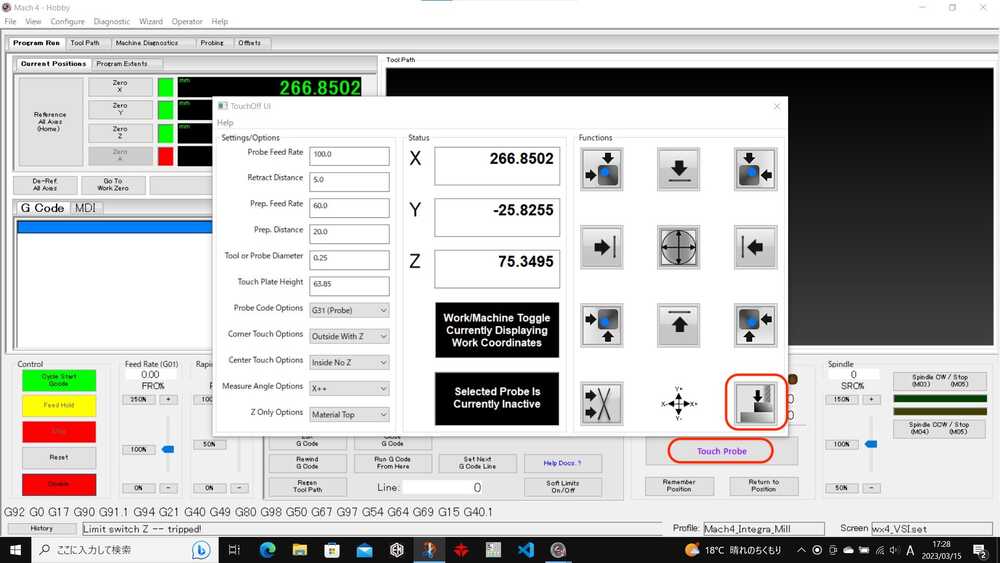
- Z AXES move down until touch the probe.
- If the machine action is strange, push the emergency stop bottom.
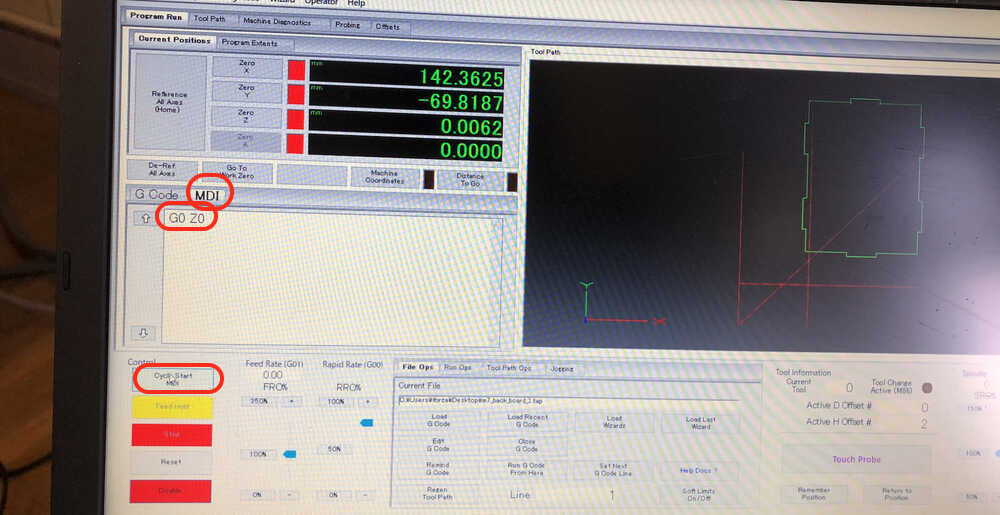
- If you want to confirm Z0 point, move the place away from the board, and change to MDI and enter "G0 Z0", and click Cycle Start MDI.
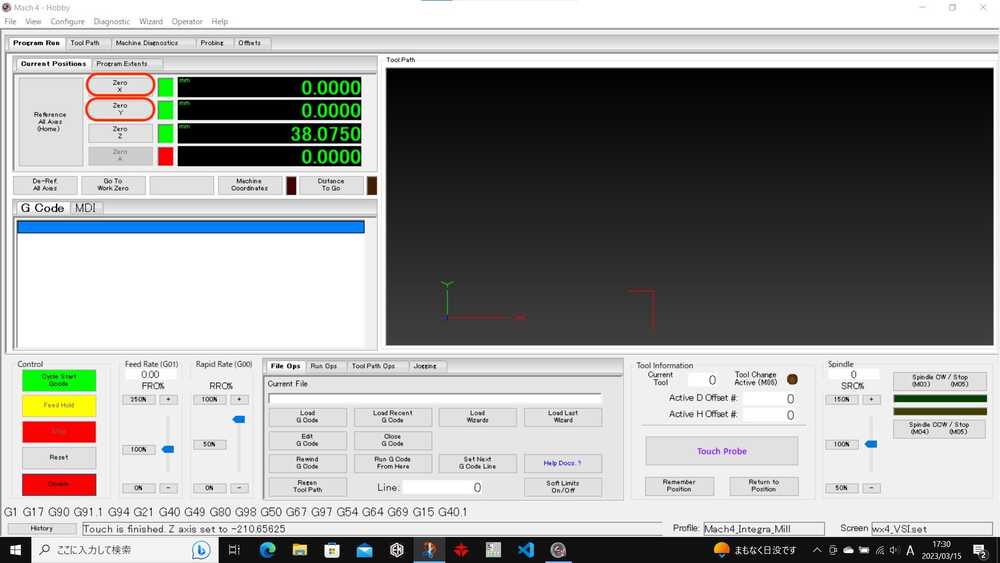
7. Set X0, Y0
- Move the XY AXES with Keyboard, where the place to set the origin.
- Click ZeroX, ZeroY.
8. Set dust collector
Set dust collector part on the spindle.
 Connect the cyclone parts and the hose to vacuum cleaner.
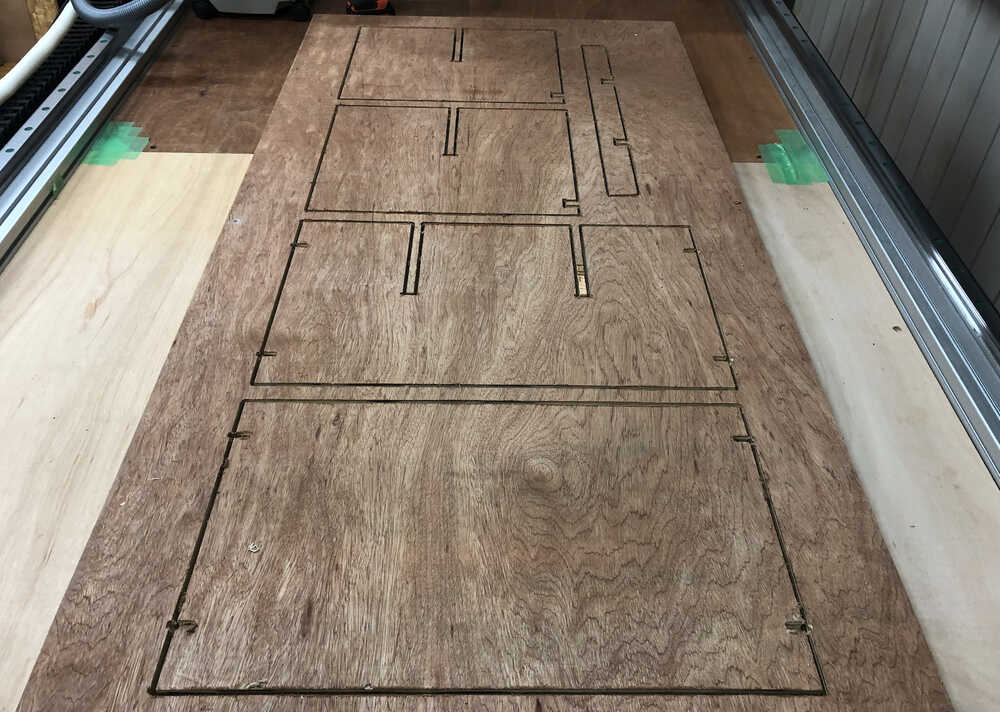
9. Load G-code
- If the G-code file is in USB, move the file to Desktop.
- Load G-code.
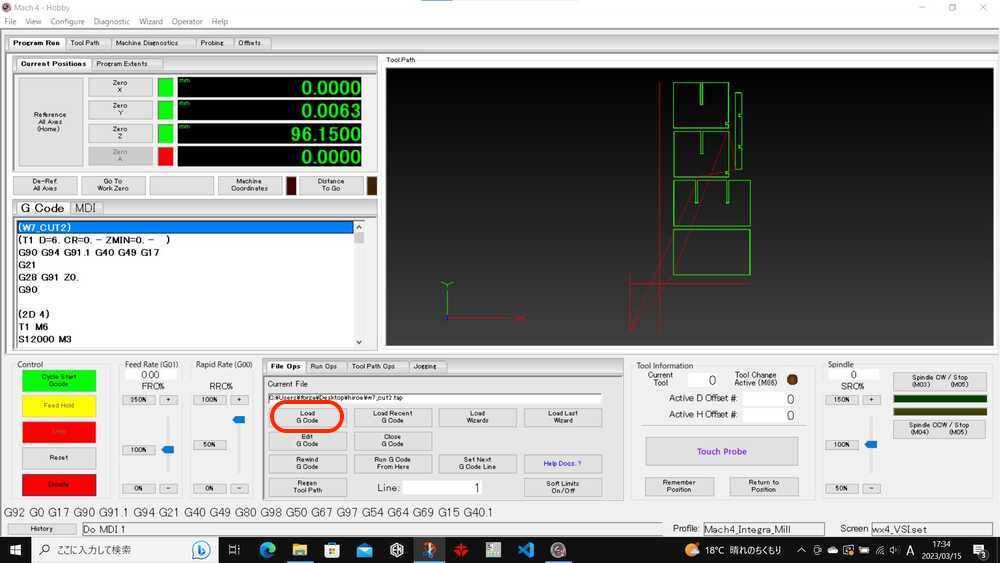
- To be safe, move the XY axes with Keyboard, and check where the place to tool path, and check the fastening will not hit with mill.
10. Cycle Start G-code
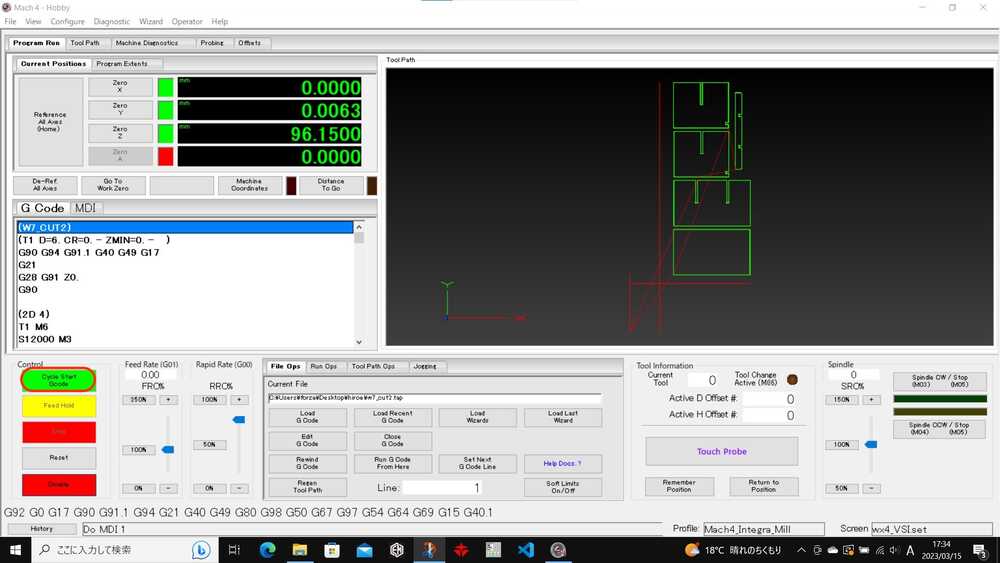 After Cycle Start G-code, Pay attention and watch the cut.
NOTE: In case of emergency, if machine action has any strange behavior, press the emergency stop button to stop.
During the first cut, there was an accident in which the mill hit the fixing screw and the mill was damaged, but in the second cut, the mill was successfully cut to the end.
 I was seriously watching how the cut was going and was told later that I looked like a master.

2D cut and 2D pocket looks fine.
 Done!
Done!