- Programming, using output device to XIAO ESP32C3 board, by Arduino IDE
This page is programming process for this week individual assignment. I turn on the standlight (AC100V) using Solid State Module (SSR-40DA) to Seeed Studio XIAO ESP32C3 board, which I designed. Below is the process to the result.
1. Programming, using output device to XIAO ESP32C3 board, by Arduino IDE
1-1) Setup
I refer to Adrian: fab-Xiao for set up for Seeed Studio XIAO ESP32C3, and the site helps me a lot.
- Open Arduino IDE
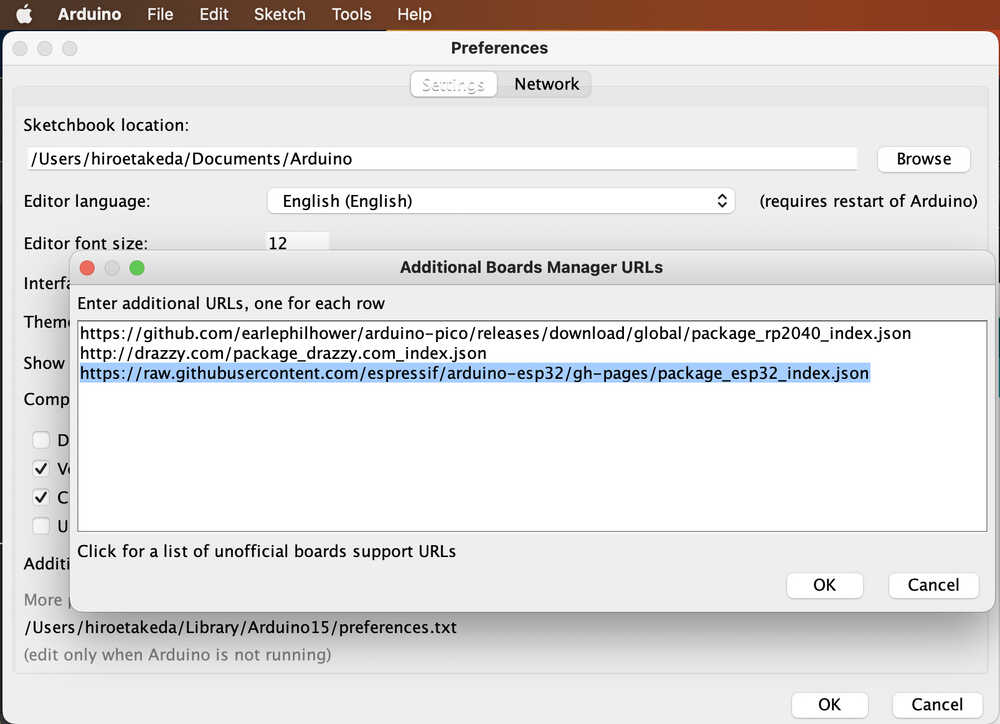
- In Preferences, add the URL of the additional boards that you can find here. We need the Arduino ESP32 by Espressif.
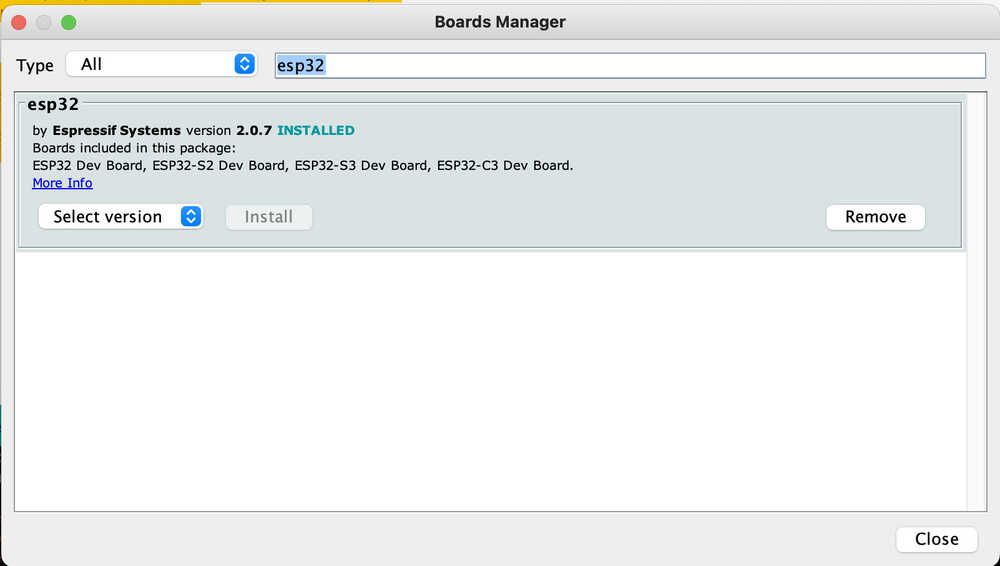
- The next step is to download ESP32 in the boards manager.
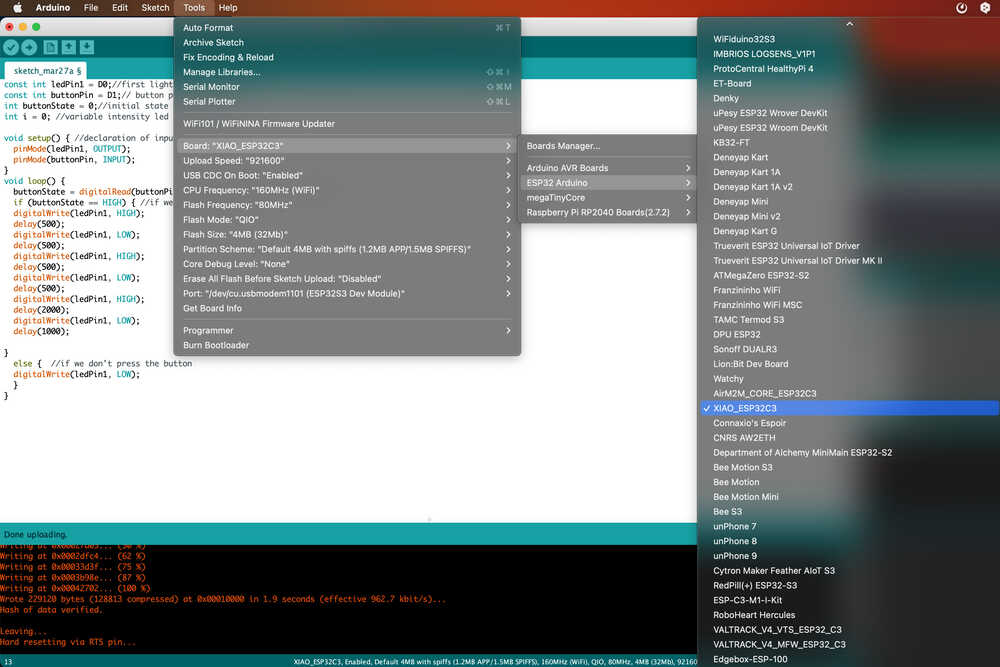
- Configure the Arduino IDE for the Seeed Studio XIAO ESP32-C3. The Seeed Studio XIAO ESP32-C3 will appear in the COM port. In my case, Port is "/dev/cu.usbmodem1101(ESP32S3 Dev Module)".
Now, time to program. I refer to Adrian: fab-Xiao and I used ChatGPT to understand Adrian's programming code.
1-2) LED blink
At first, I test the board is working, or not. Now load the Blink program so that the LED on pin D0 blinks, as check board working.
Programming code
const int ledPin1 = D0;//first light ESP32-C3 pin D0

void setup() { //declaration of inputs and outputs
  pinMode(ledPin1, OUTPUT);

}
void loop() {
  digitalWrite(ledPin1, HIGH);
  delay(5000);
  digitalWrite(ledPin1, LOW);
  delay(5000);
  }
Program upload complete
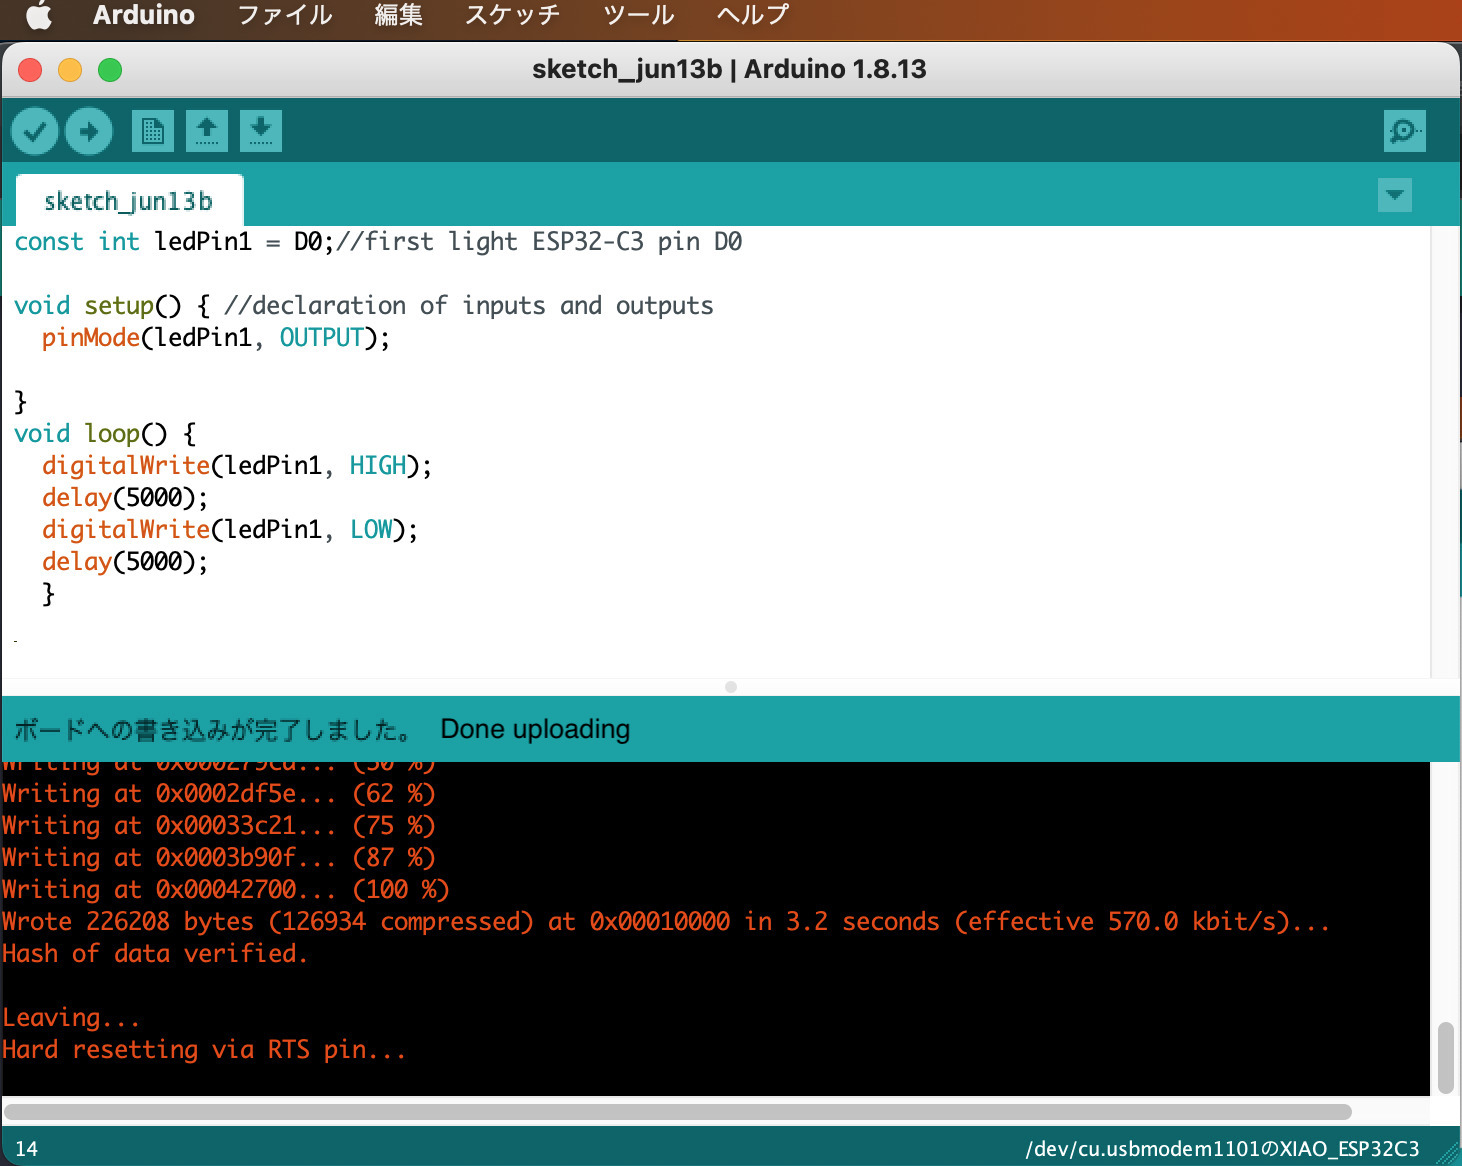
And I confirmed the LED blink. Now start other programming.
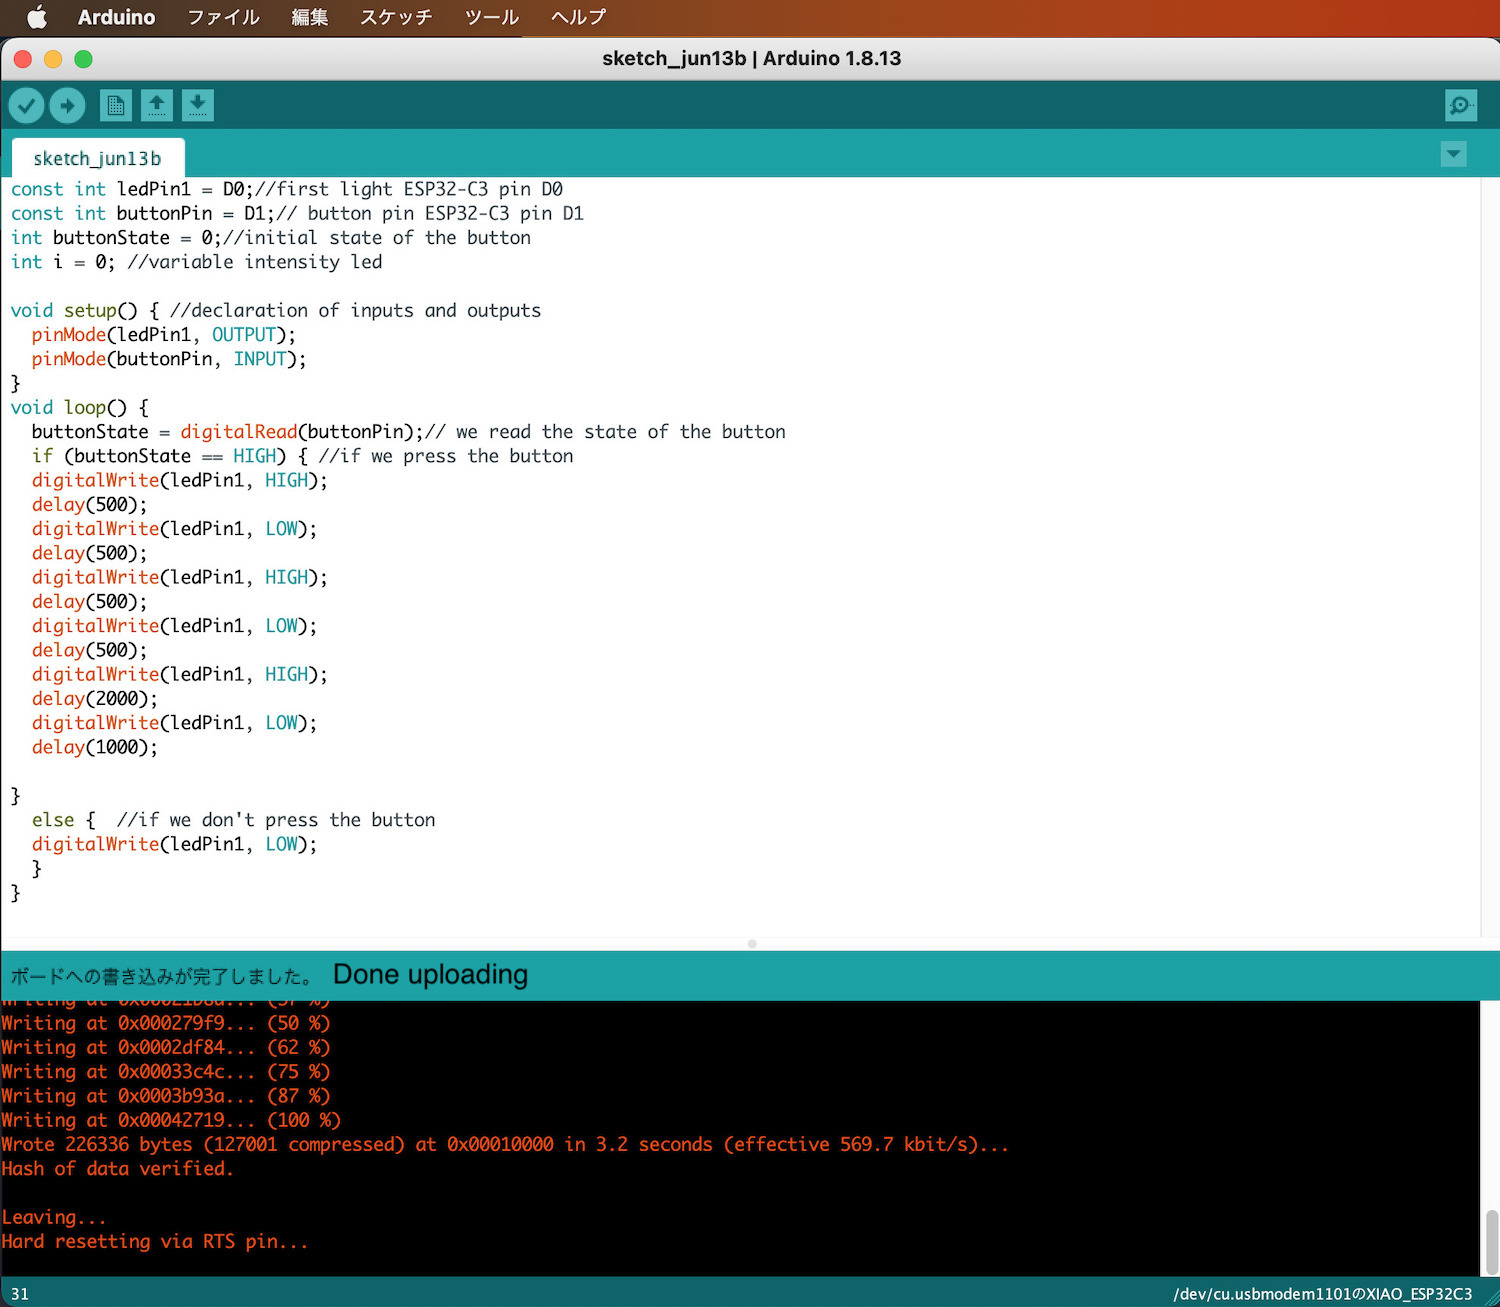
1-3) LED blink by Switch
Now load the LED Blink program on pin D0 blinks with Switch D1.
Programming code
const int ledPin1 = D0;//first light ESP32-C3 pin D0
const int buttonPin = D1;// button pin ESP32-C3 pin D1
int buttonState = 0;//initial state of the button
int i = 0; //variable intensity led

void setup() { //declaration of inputs and outputs
  pinMode(ledPin1, OUTPUT);
  pinMode(buttonPin, INPUT);
}
void loop() {
  buttonState = digitalRead(buttonPin);// we read the state of the button
  if (buttonState == HIGH) { //if we press the button
  digitalWrite(ledPin1, HIGH);
  delay(500);
  digitalWrite(ledPin1, LOW);
  delay(500);
  digitalWrite(ledPin1, HIGH);
  delay(500);
  digitalWrite(ledPin1, LOW);
  delay(500);
  digitalWrite(ledPin1, HIGH);
  delay(2000);
  digitalWrite(ledPin1, LOW);
  delay(1000);

}
  else {  //if we don't press the button
  digitalWrite(ledPin1, LOW);
  }
}
Program upload complete
1-4) Turn on Heat gun (AC100V), using Solid State Module (SSR-40DA)
Now load the Solid state Module (outpin D8) working program, so that Heat gun turn on and off.
Programming code
const int SSRPin1 = D8;//Solid State Module outpin
const int buttonPin = D1;// button pin  ESP32C3 pin D1
int buttonState = 0;//initial state of the button
int i = 0; //variable intensity led

void setup() { //declaration of inputs and outputs
  pinMode(SSRPin1, OUTPUT);
  pinMode(buttonPin, INPUT);
}
void loop() {
  buttonState = digitalRead(buttonPin);// we read the state of the button
  if (buttonState == HIGH) { //if we press the button
  digitalWrite(SSRPin1, HIGH);
  delay(4000);
  digitalWrite(SSRPin1, LOW);
  delay(4000);

}
  else {  //if we don't press the button
  digitalWrite(SSRPin1, LOW);
  }
}
Program upload complete
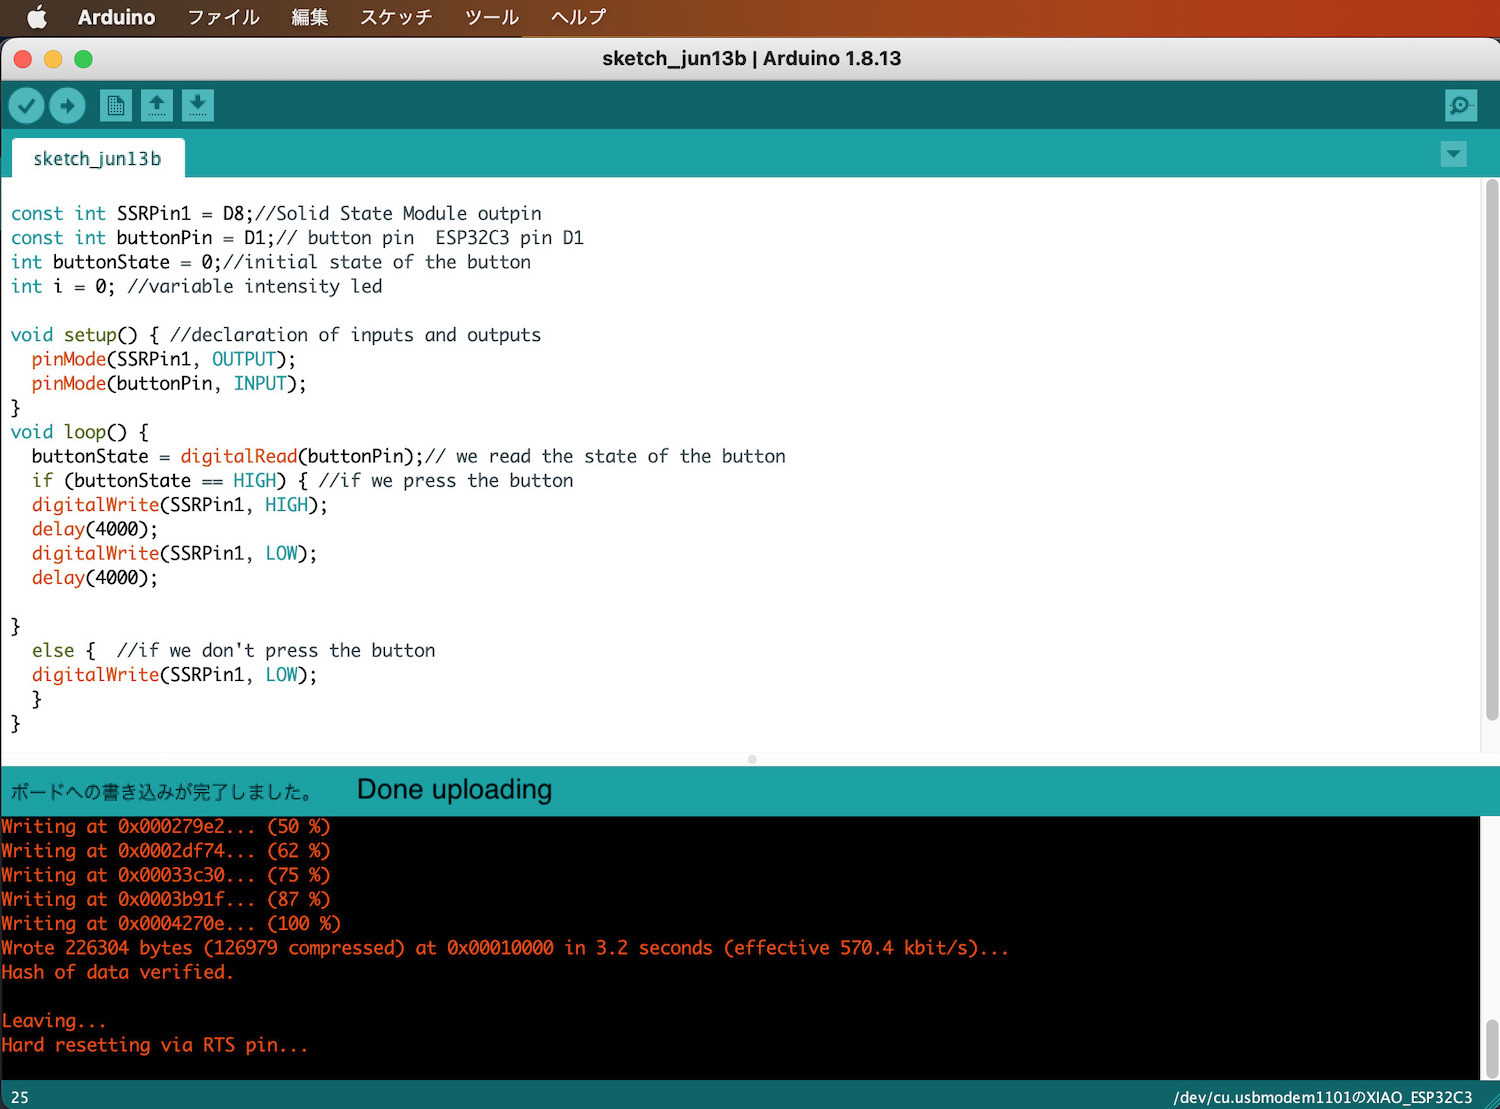
And it works