- Create Toolpath
This page is the process for Creating tool path, in week 12 Molding and Casting. I made the tool path by Fusion360. The Process is below.
1. Create Toolpath
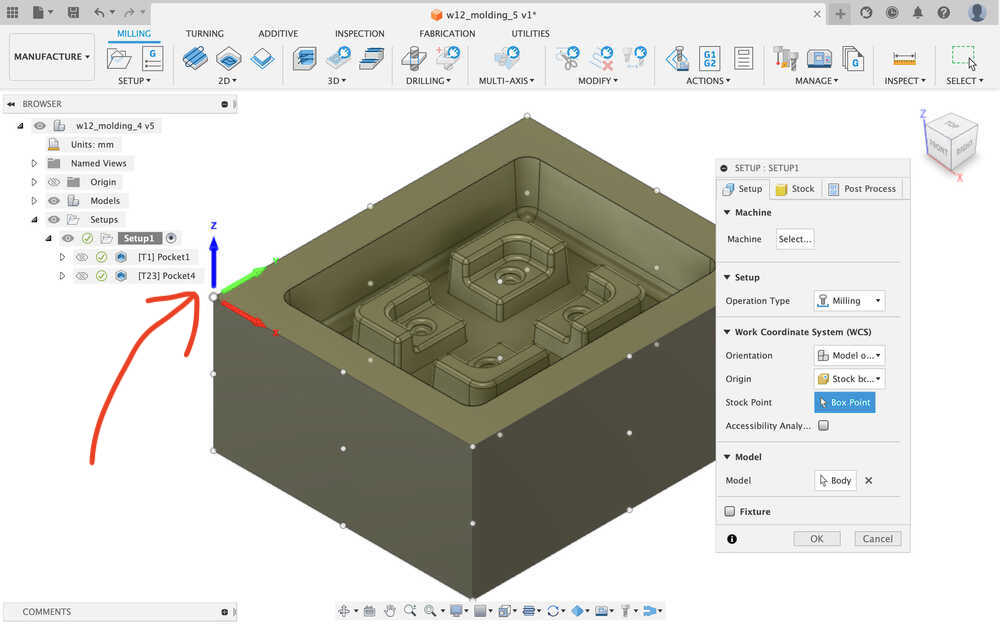
1-1) Setup
- Setup
This time, the origin is selected as the material top left corner.
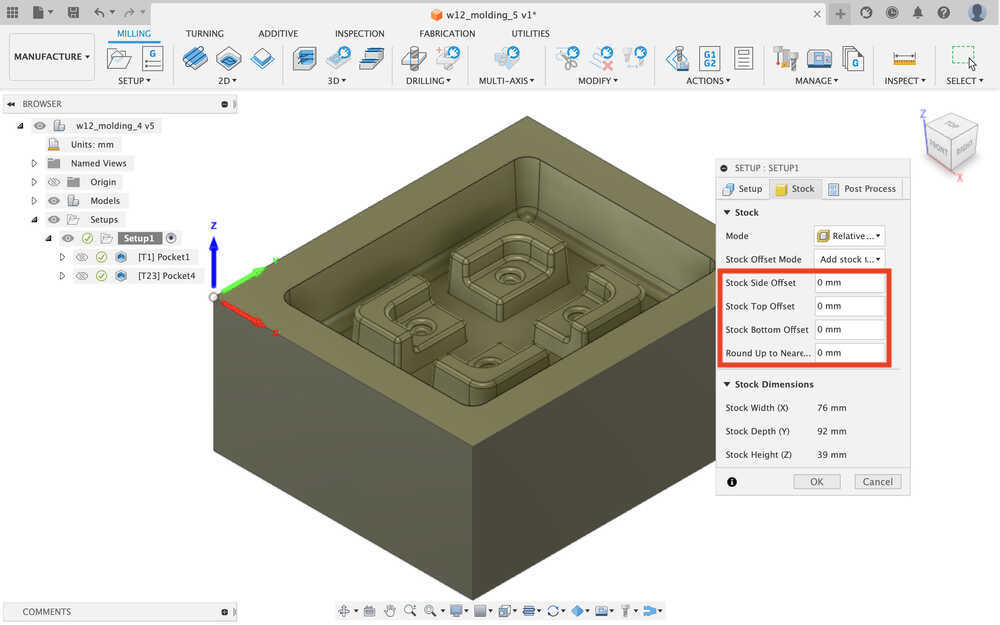
- Stock setting
I revise the all number to 0 and confirm the material size is same as mold model size 92(W)x76(D)x39(H) mm.
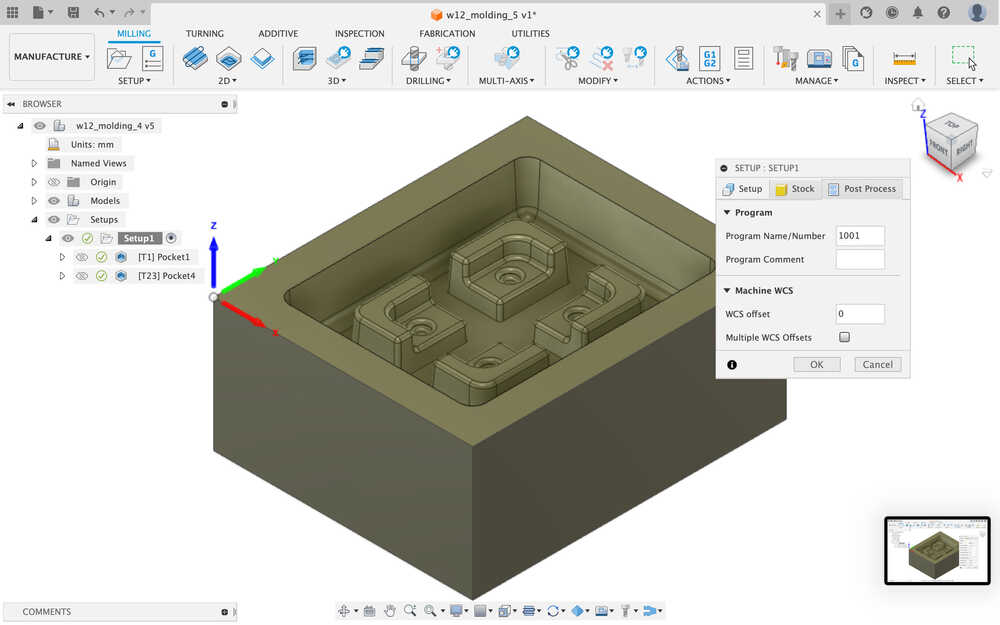
- Post Process (default) and Click OK.
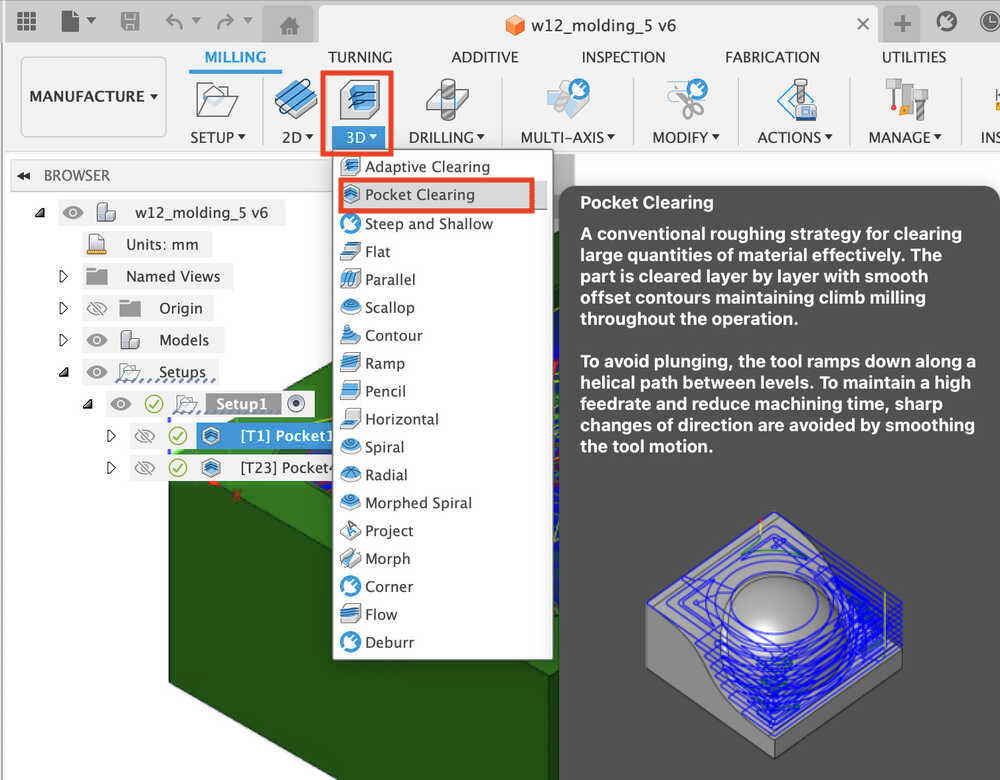
1-2) Creat my rough toolpath
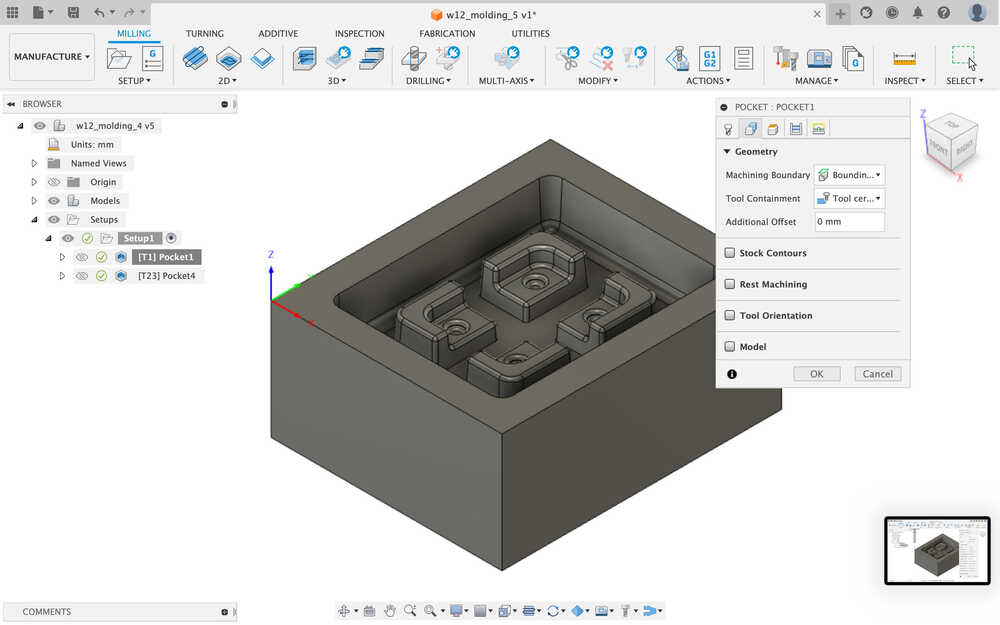
- Choose 3D Pocket Clearing
- Set tool / Feed & Speed
- Tool: Select 6mm Flat end mill
- Coolant: Disabled
- Spindle Speed: 15000 rpm
- Ramp Spindle Speed: 15000 rpm
- Cutting Feedrate: 1200 mm/min
- Feed per Tooth: 0.04 mm
- Lead-in Feedrate: 1200 mm/min
- Lead-out Feedrate: 1200 mm/min
- Ramp Feedrate: 200 mm/min
- Plunge Feedrate: 200 mm/min

- Tool & edit
I measure the mill and edit.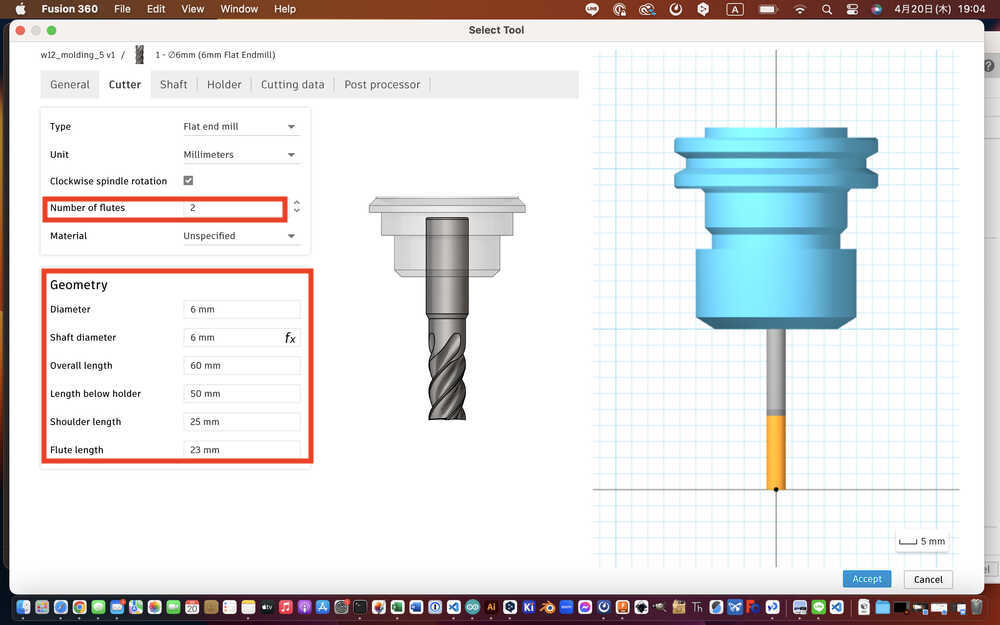
- Geometry (Default)
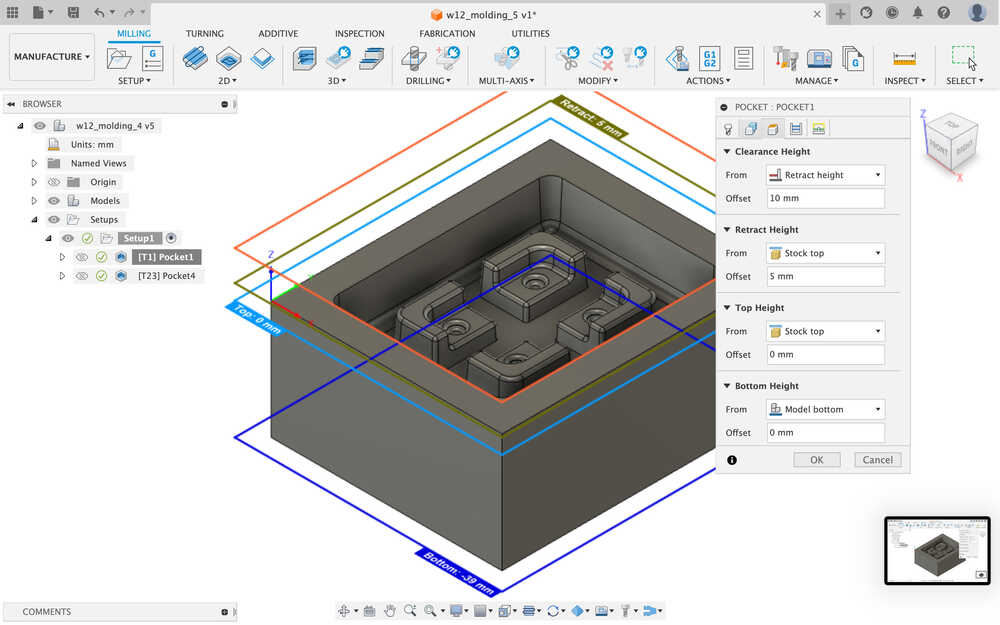
- Height (Default)
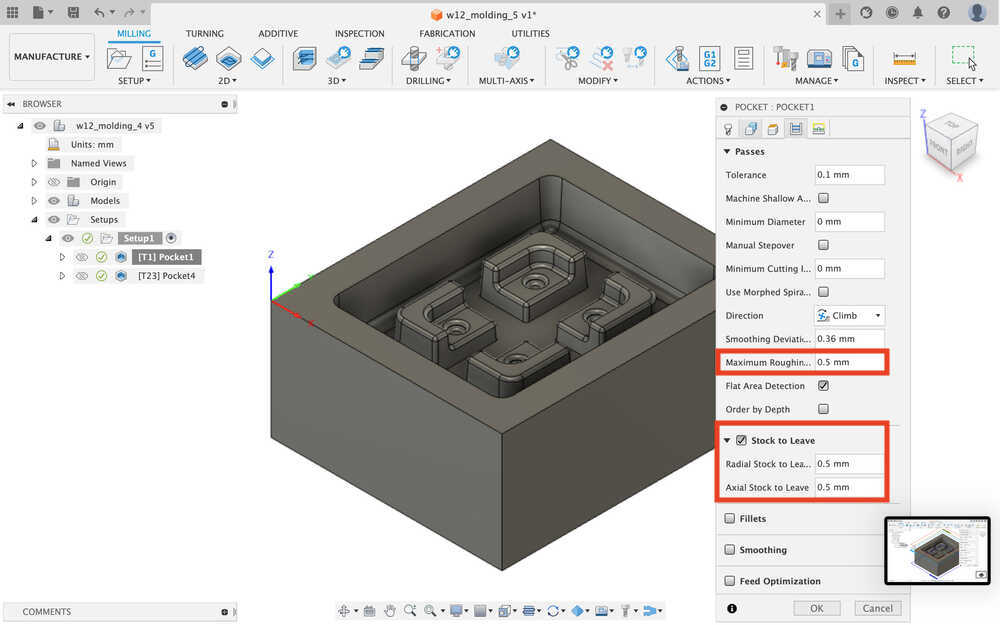
- Set Passes and Stock to leave
- Maximum Roughing : 0.5mm
- Stock to Leave (Radial Stock to Leave: 0.5mm, Axial Stock to Leave: 0.5mm)
- others (Default)
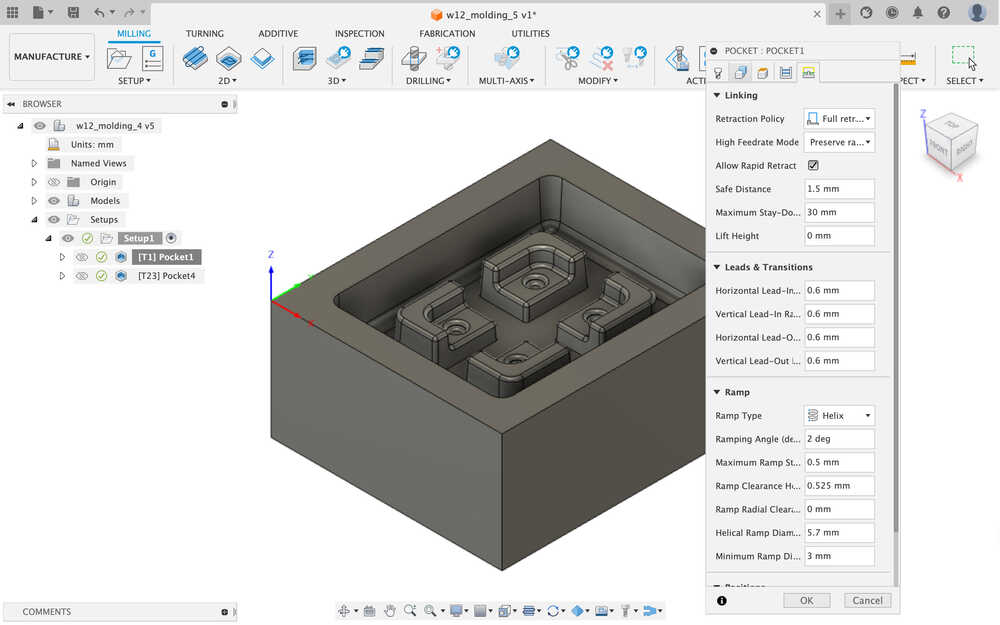
- Linking / Leads & Transitions / Ramp (Default)
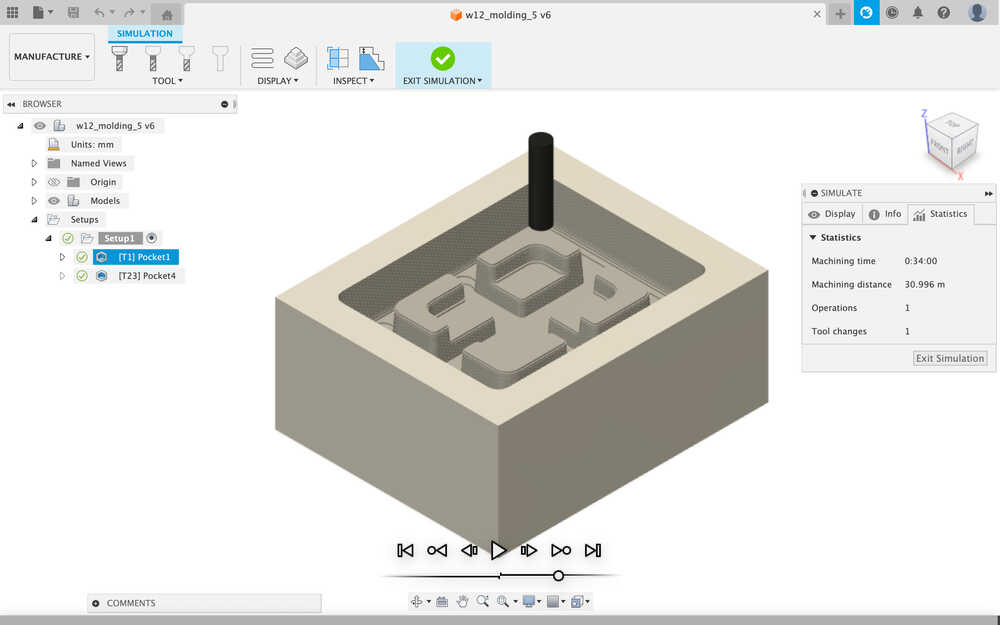
- Actions > Simulation (Machining time : 34min)
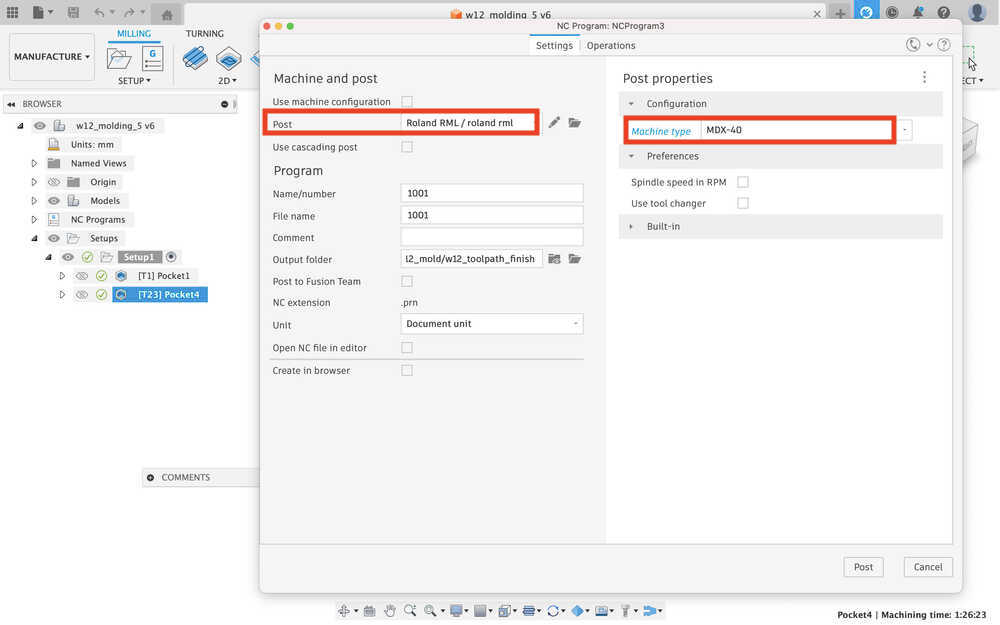
- Actions > Post Process
- Post: Roland RML/ roland rml
- Machine type: MDX-40

1-3) Creat finish toolpath
- Choose 3D Pocket Clearing
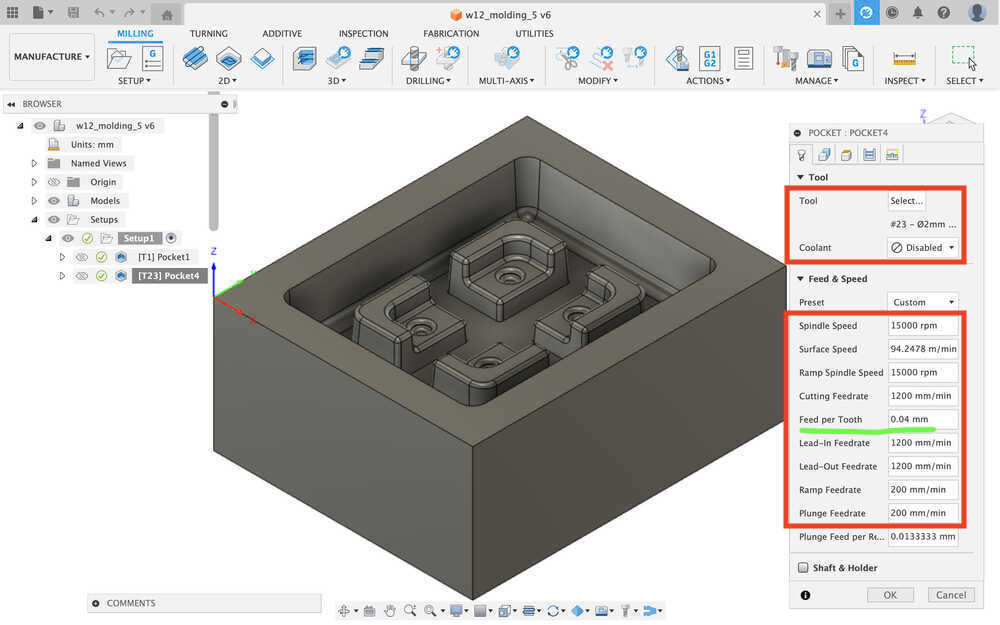
- Set tool / Feed & Speed
- Tool: Select 2mm Ball end mill
- Coolant: Disabled
- Spindle Speed: 15000 rpm
- Ramp Spindle Speed: 15000 rpm
- Cutting Feedrate: 1200 mm/min
- Feed per Tooth: 0.04 mm
- Lead-in Feedrate: 1200 mm/min
- Lead-out Feedrate: 1200 mm/min
- Ramp Feedrate: 200 mm/min
- Plunge Feedrate: 200 mm/min
- Tool & edit
I measure the mill and edit.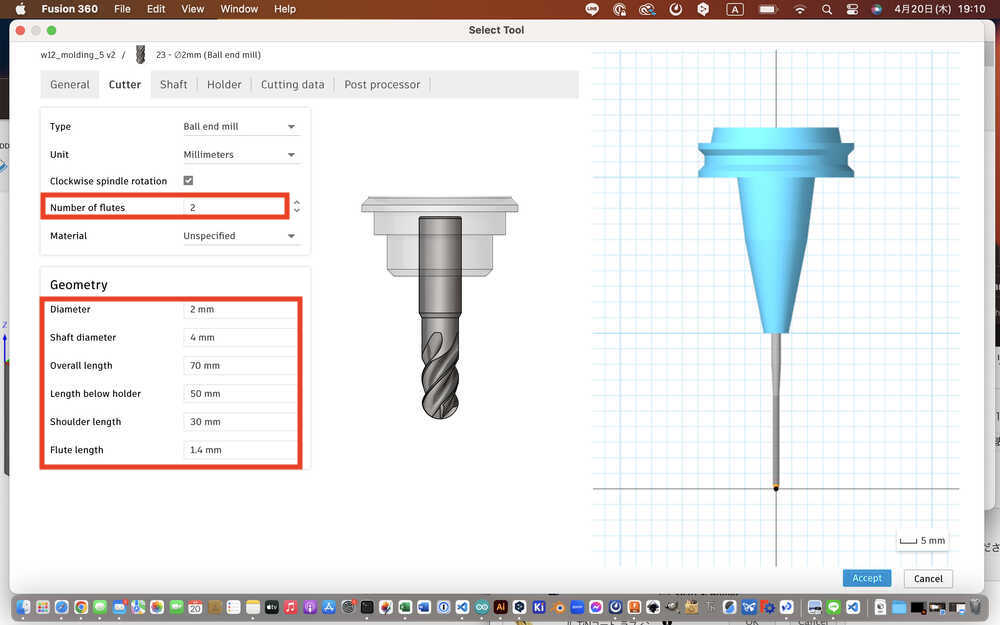
- Set Geometry
- Rest machining
- Source:From Previous operation
- Adjustment: Machine cups
- Adjustment Offset: 0mm
- Others (Default)
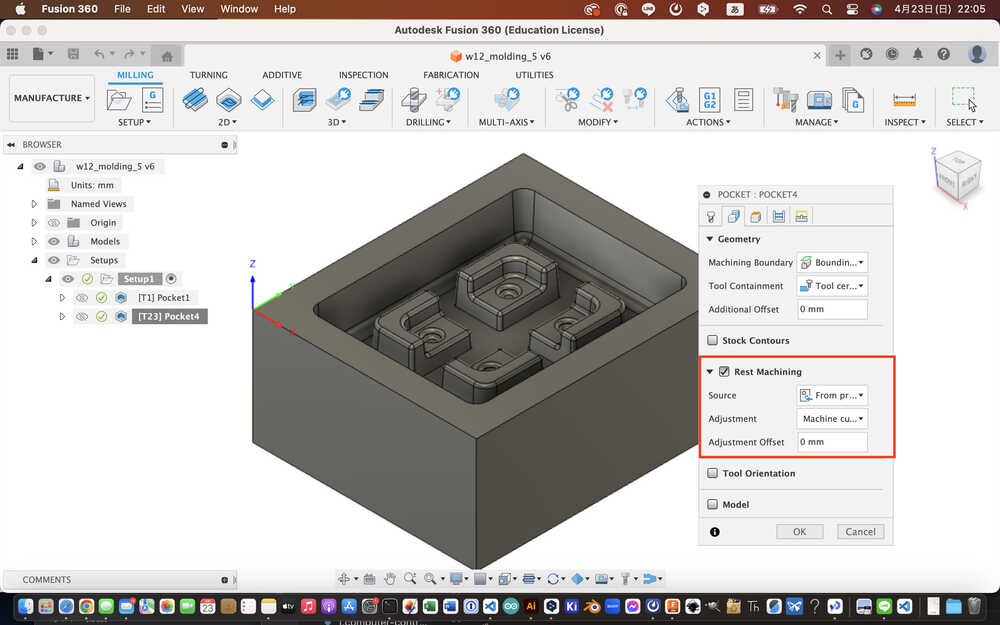
- Rest machining
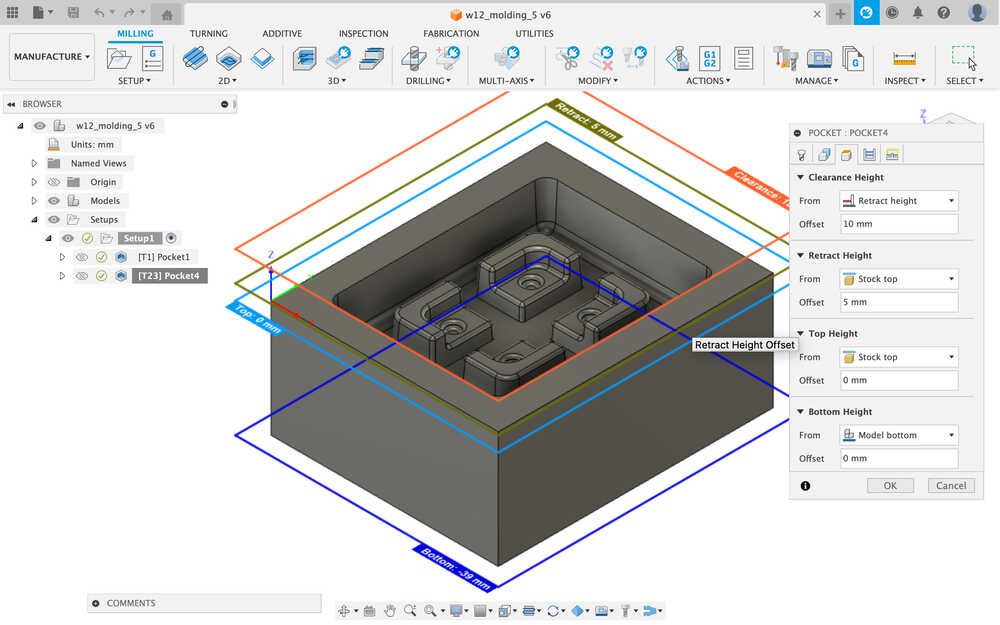
- Height (Default)
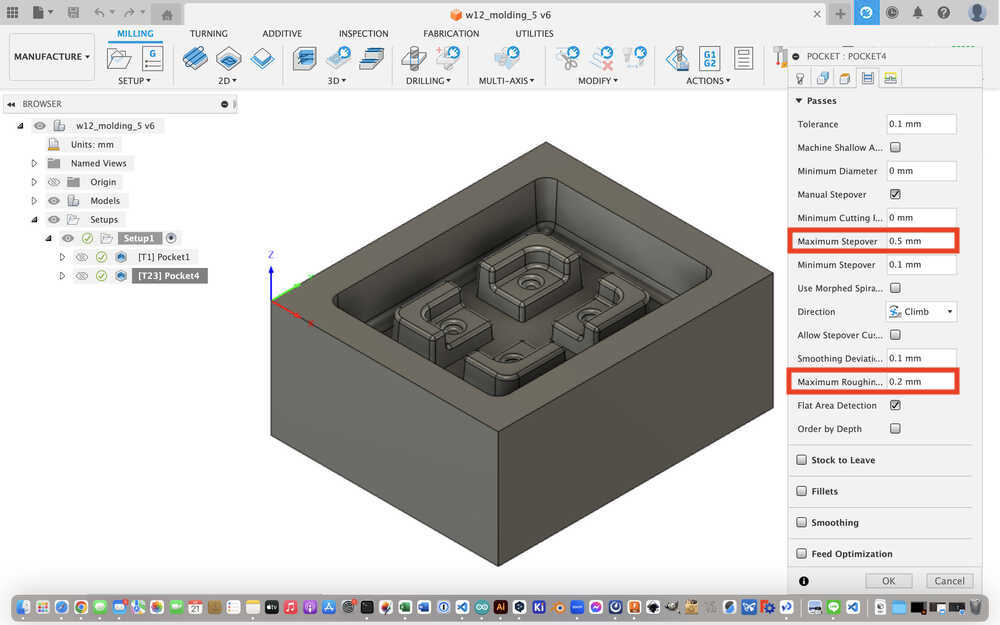
- Set Passes and Stock to leave
- Maximum Step over : 0.5mm
- Maximum Roughing : 0.2mm
- others (Default)
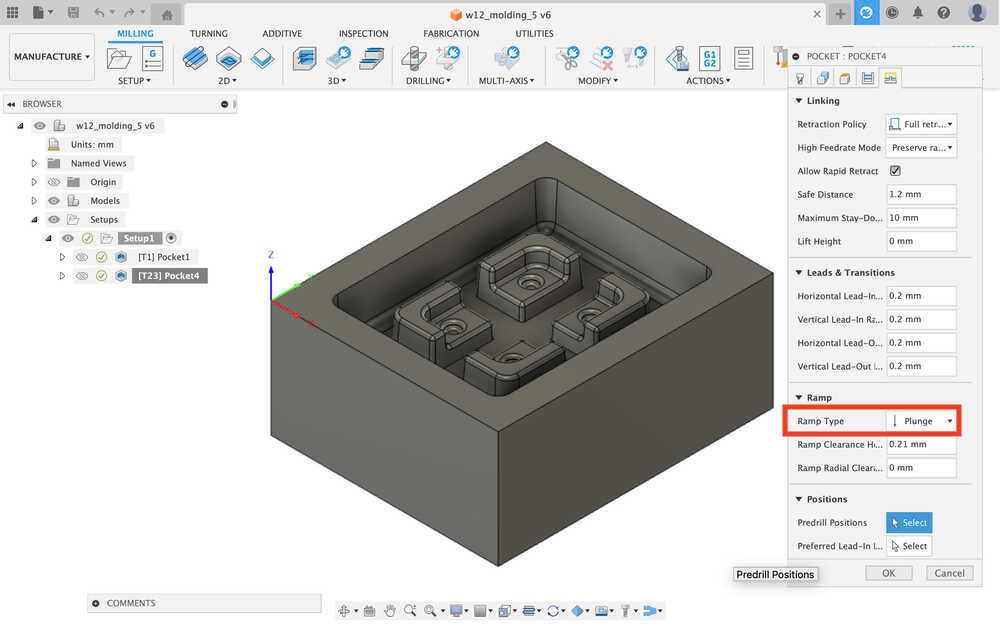
- Set Linking / Leads & Transitions / Ramp
- Ramp type: Plunge
- Others (Default)
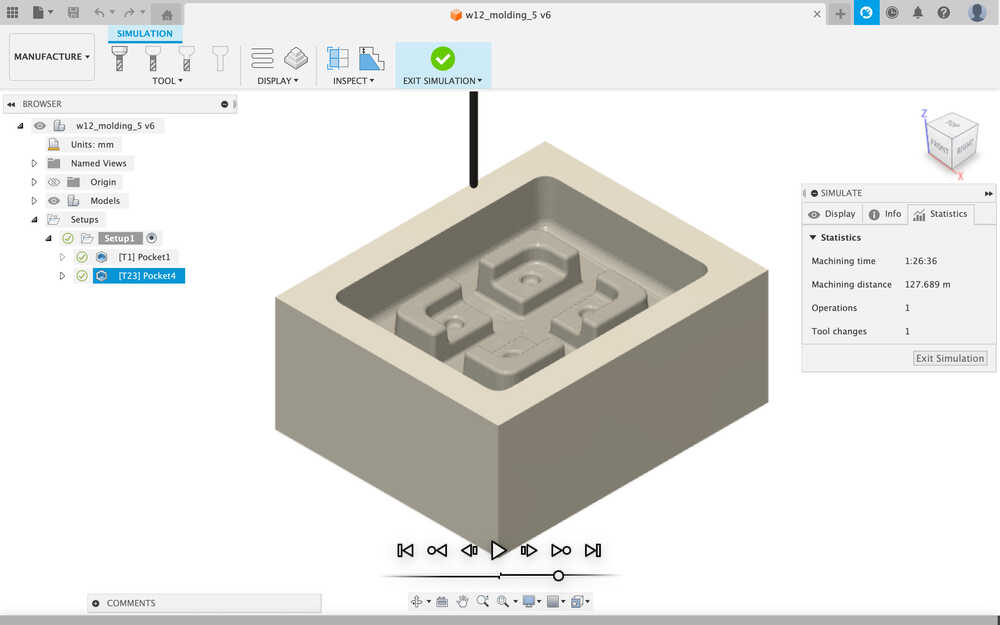
- Actions > Simulation (Simulation Machining time: about 1 hour and half)
- Actions > Post Process
- Post: Roland RML/ roland rml
- Machine type: MDX-40
2. Important point I learned.
-
It it important to consider Chip Load, Plunge Feedrate and WSC (Stock point). -> The details in Week7.
-
Tool edit:
In Fusion, you can check tool paths for collisions. It is important to edit the size of the tools you use correctly, because if the tool settings are incorrect, interference checking will not work correctly. - Rest Machining in finish tool path:
- It is important to create the Finishing tool path with "rest machining", otherwise you should lost your time.
- In my case, as the mill was moved in the air (not reached the body), I noticed something wrong, and I stopped and discontinued the tool path. I edit the finish tool path with adding "the rest machining", then mill restart, then the mill is reach to body. The finishing milling is success and the simulation time has been reduced by 3.5 hours.
3. Trouble & How I solved
3-1) Warning by Stepover
Durning create finish tool path, I got warning of Step over.
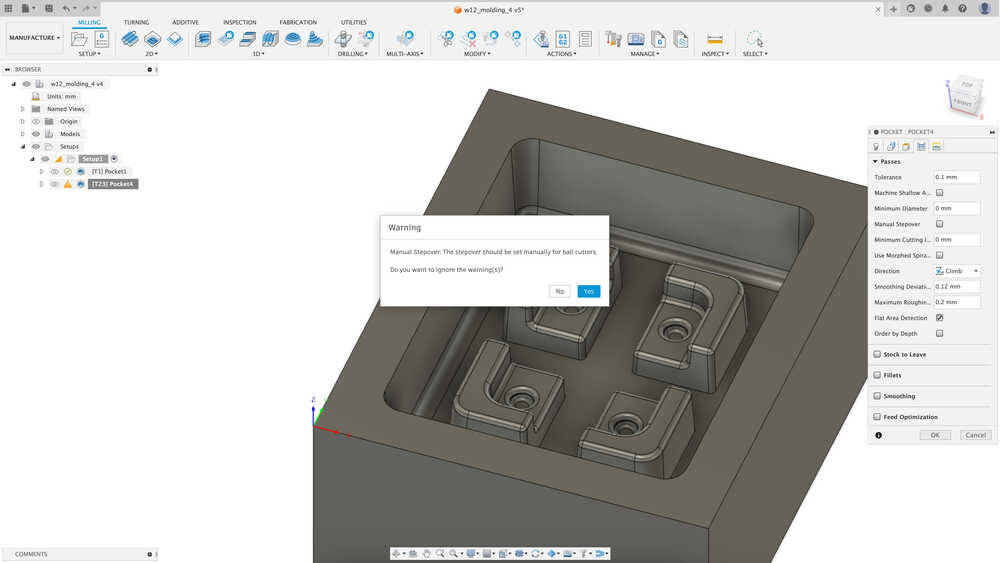
I refer to Fusion360 community and I learned "It appears that the step over settings are limited to the radius of the tool or less.
Refer to cad cam lessons.com, and set the step over under the half of the radius of the tool, in "Set Passes and Stock to leave ". Then I could create path without warning.