- Welding
This page is the process for TRY "Welding".
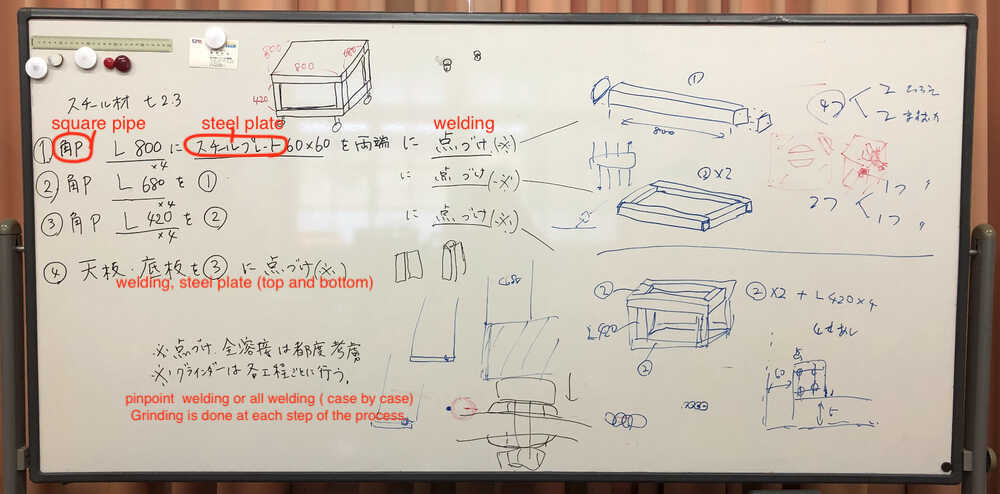
In FabLab West-Harima, there is 2 welding machine (TIG and MIG). So, I plan to build a sturdy frame trestle out of steel material and welding for the flame base for MDX-40A (machine weight 66kg).
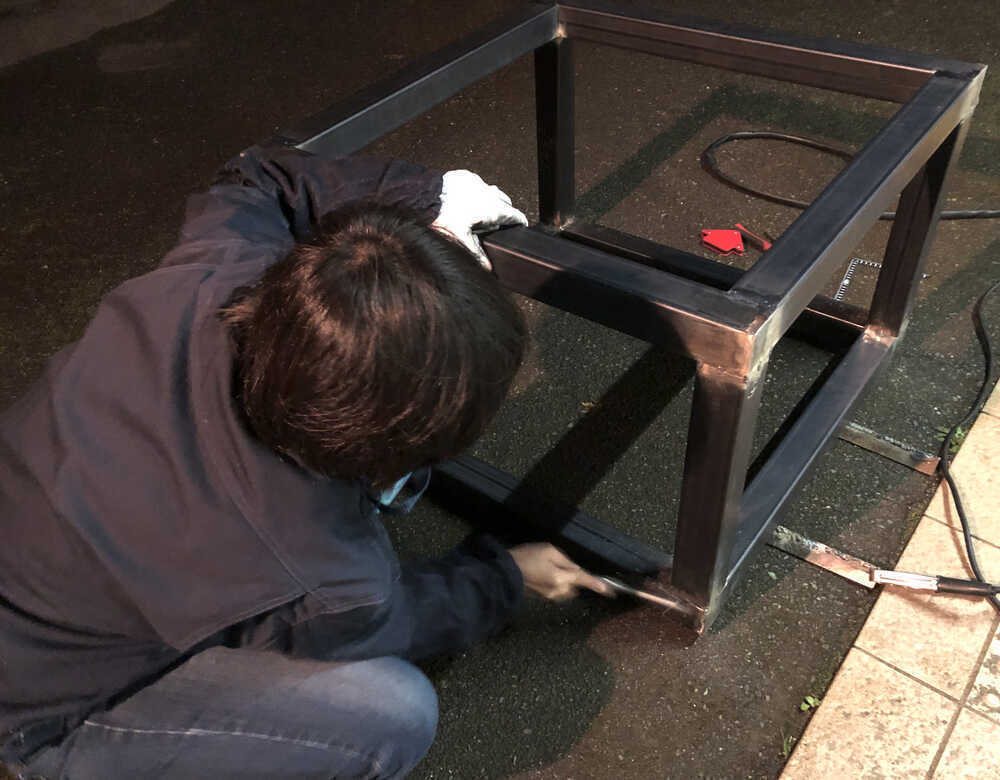
I designed the model, and Masuoka-san and I shared the role of welding.(Top side: Masuoka san, Bottom side: me)
1. Safety training
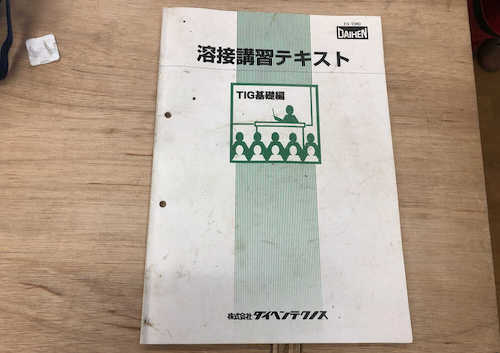
The founder of Fab Lab West-Harima has completed general welding training conducted by DAIHEN Corporation, I received safety training from the founder based on the safety training instruction manual.
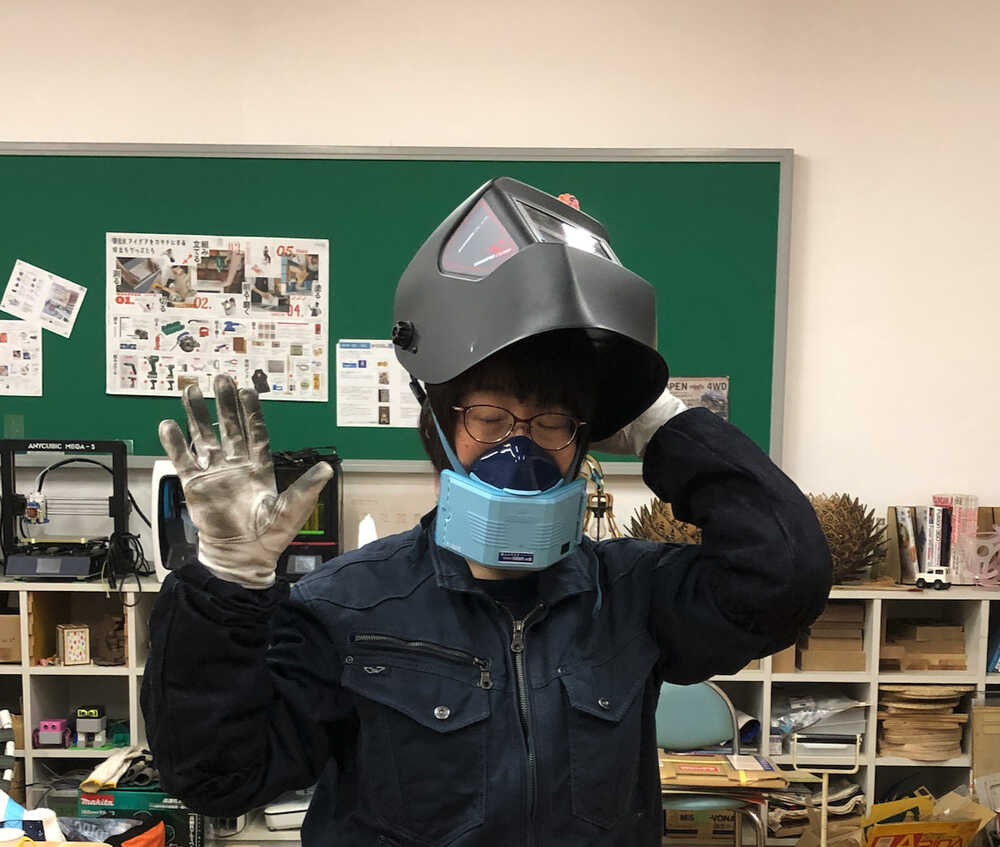
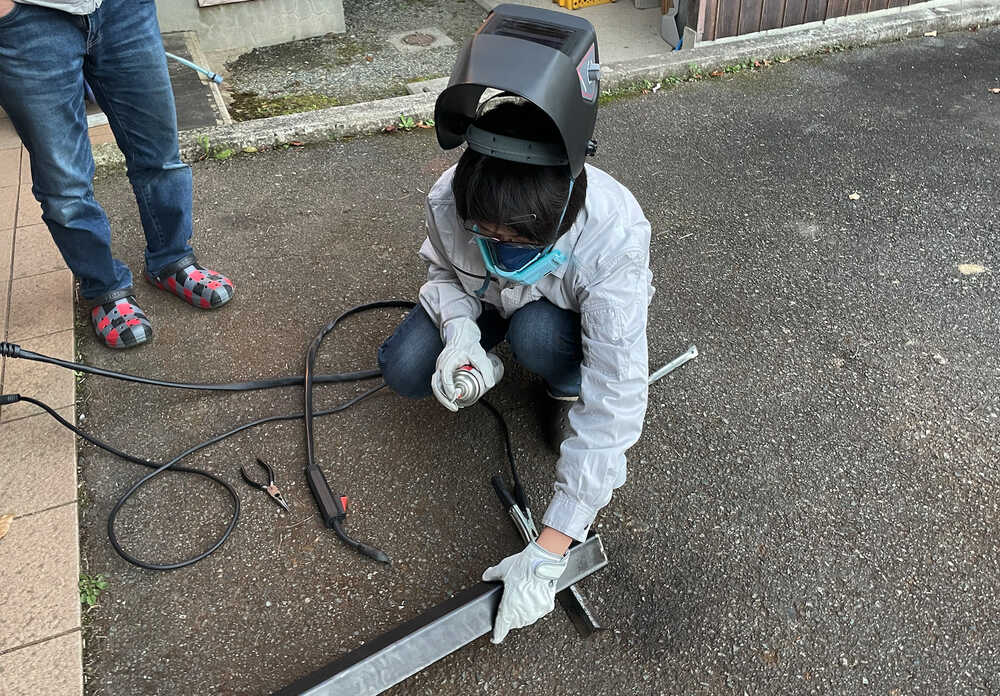
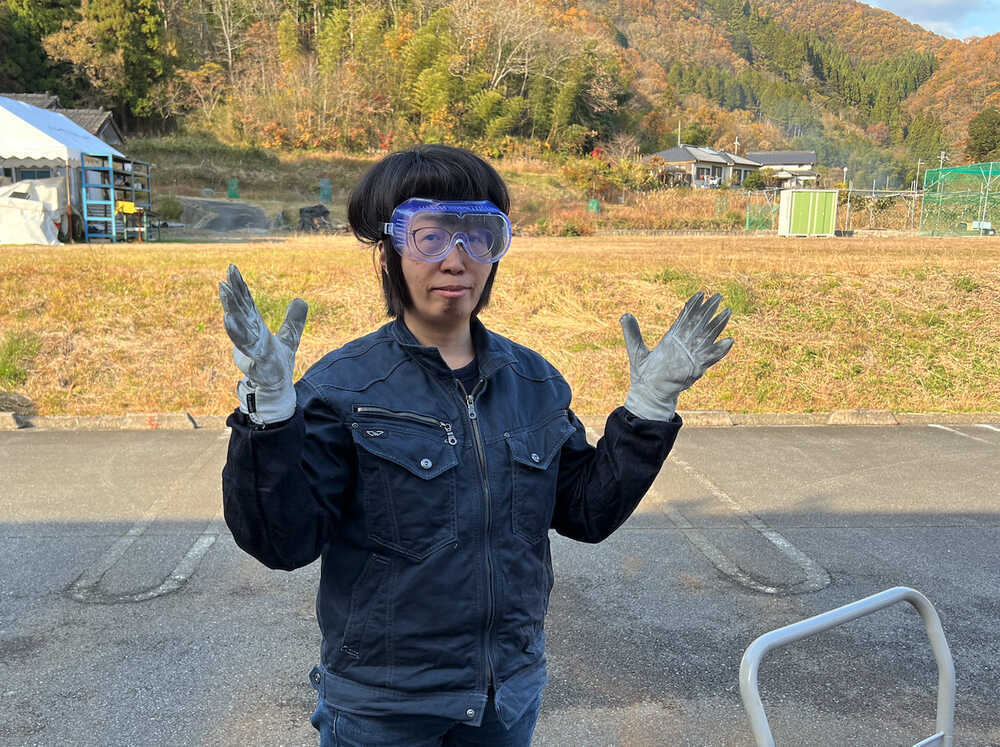
2. Protection
The following protection is required for welding.
- Welding Helmet
- Welding Work Mask
- Welding gloves (Cow Leather)
- Work clothes 100% cotton (long sleeves and long pants)
3. Plan
4. Create model
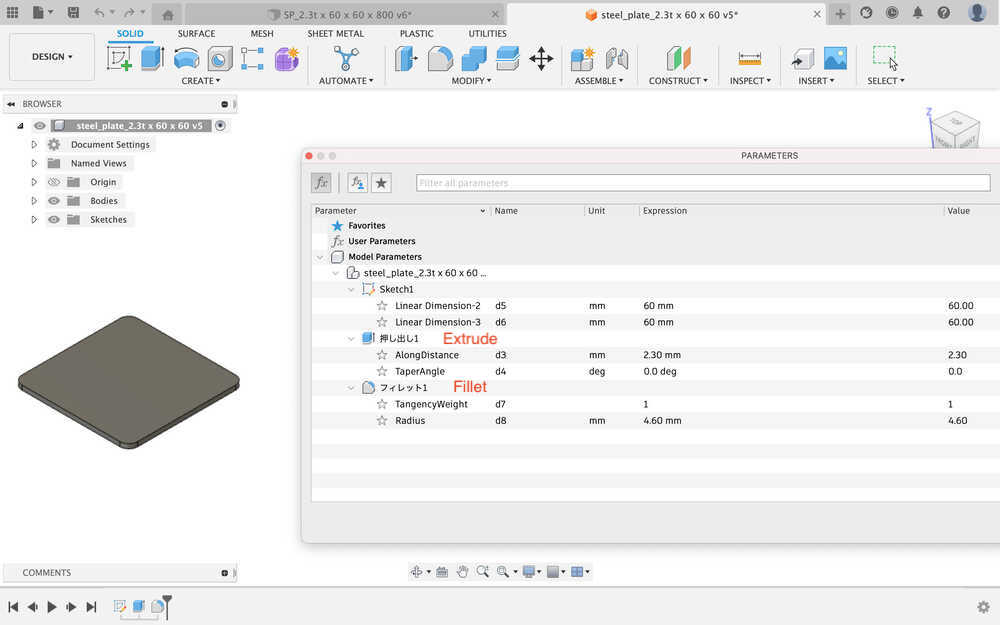
Design by Fusion 360. The complete assembly is below.
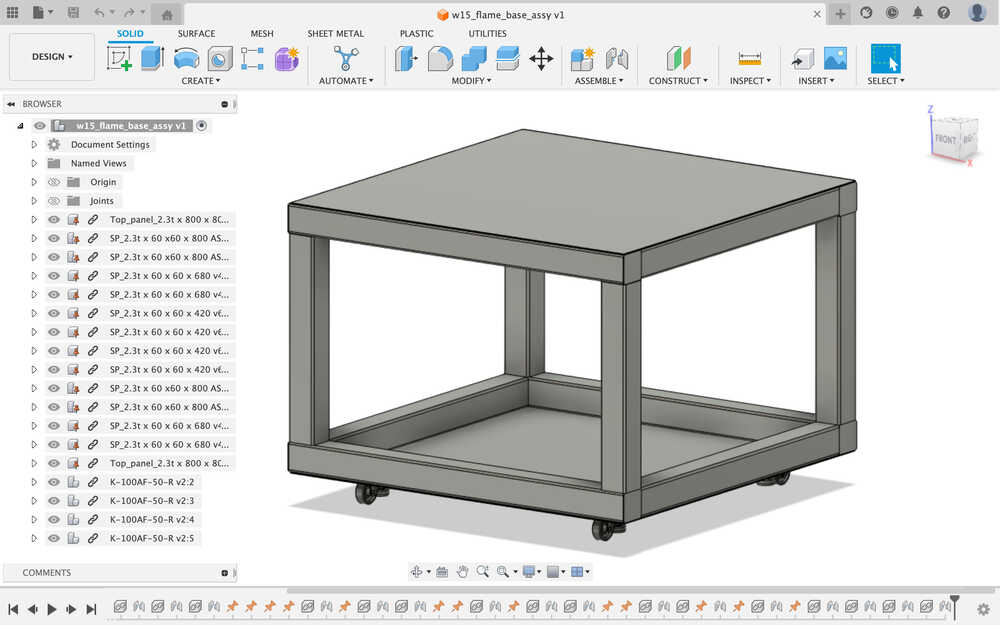 Details of the part design are below.
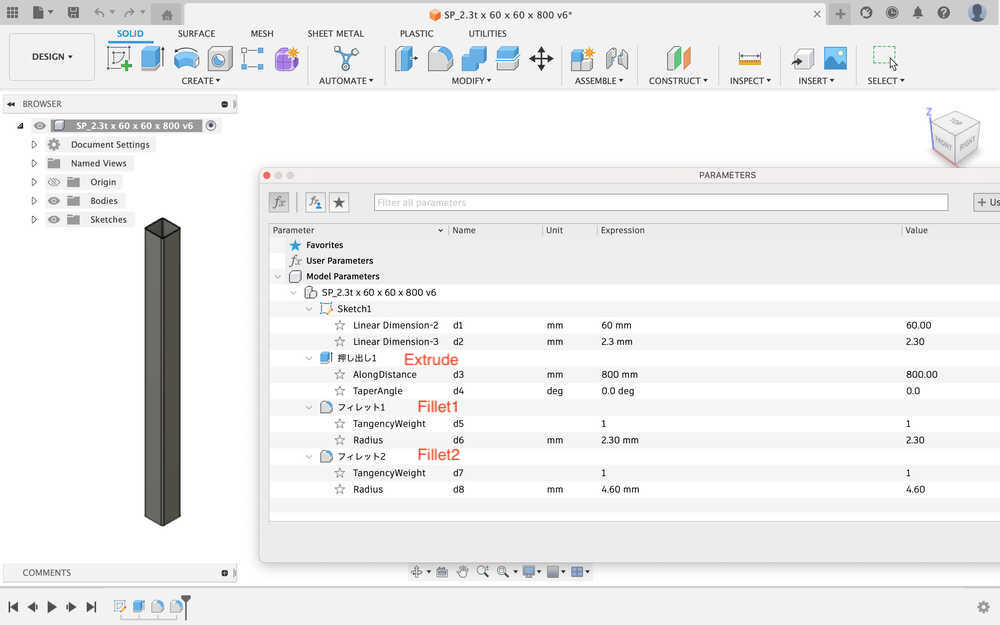
Flame L: 2.3t x 60 x 60 x 800
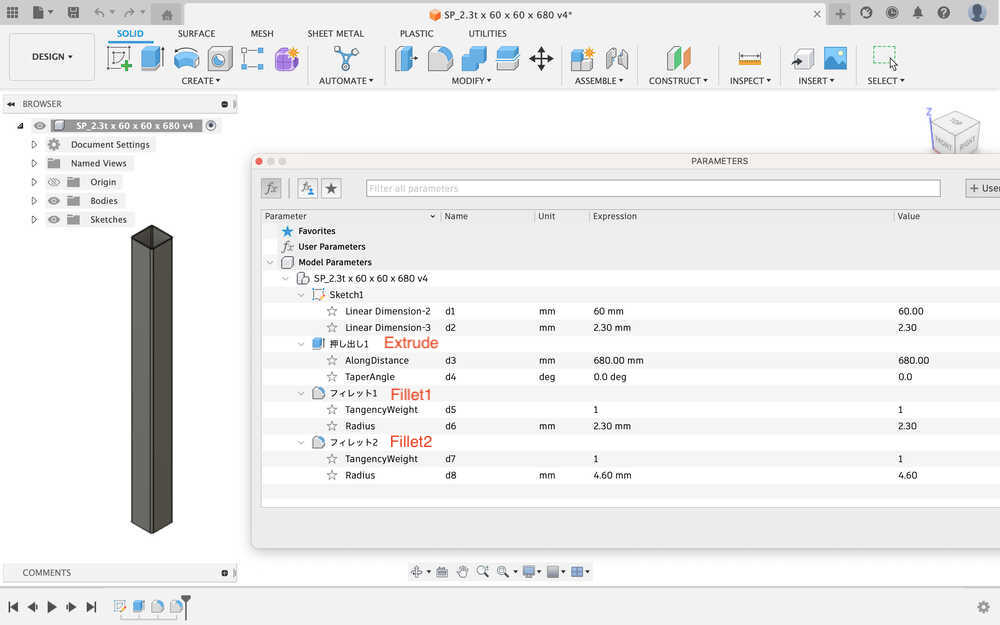
 Flame M: 2.3t x 60 x 60 x 680
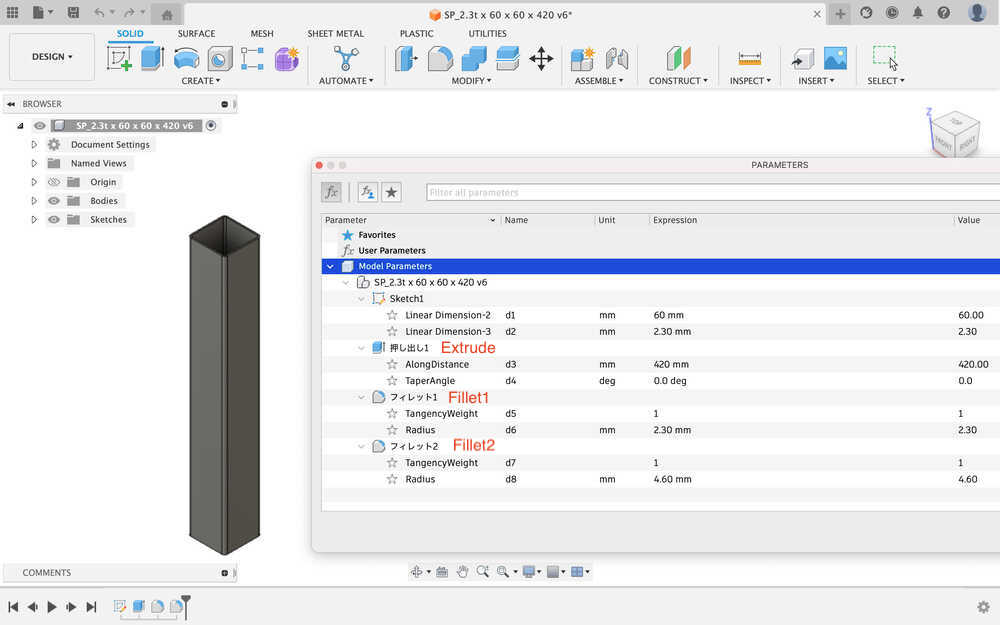
 Flame S: 2.3t x 60 x 60 x 420
 Steel Plate : 2.3t×60×60 R (Fillet 4.6)
Confirmation of standard size of corner R of 2.3t thickness
Steel Plate : 2.3t×60×60 R (Fillet 4.6)
Confirmation of standard size of corner R of 2.3t thickness
 3D model of Casters with adjuster (K-100AF) is got from MiSUMi.

5. Data file
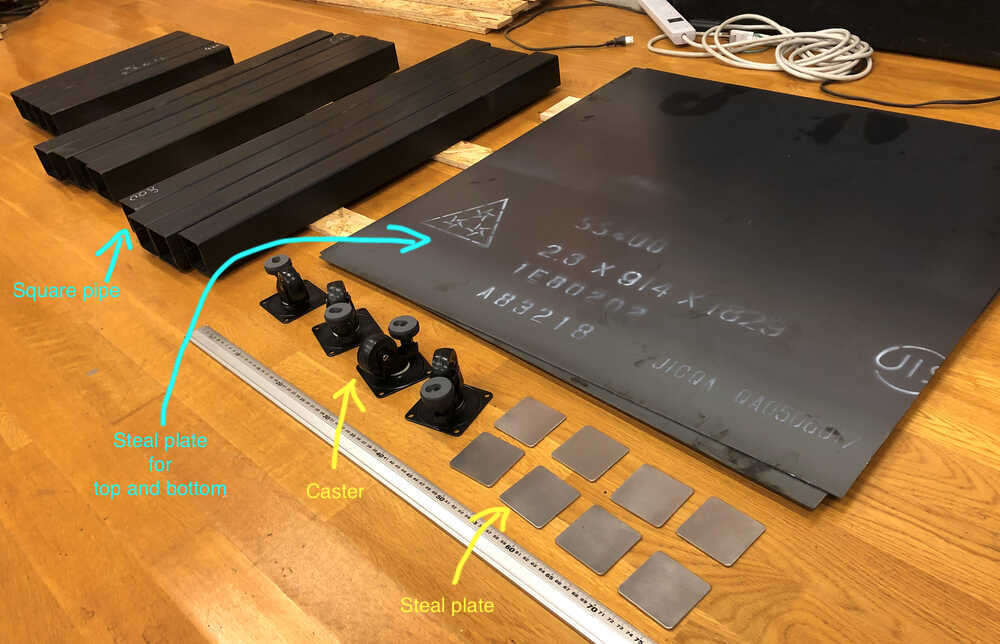
6. Prepare material
| Title | Shape | Size (mm) | Quantity | Where to purchase |
|---|---|---|---|---|
| Panel (Top & Bottom) | Steel Plate | 2.3t x 800 x 800 | 2 | MIKIKO steal |
| Flame L | Square pipe | 2.3t x 60 x 60 x 800 | 4 | MIKIKO steal |
| Flame M | Square pipe | 2.3t x 60 x 60 x 680 | 4 | MIKIKO steal |
| Flame S | Square pipe | 2.3t x 60 x 60 x 420 | 4 | MIKIKO steal |
| Steel Plate | Steel Plate | 2.3t×60×60 R (Fillet 4.6) | 8 | meviy(MiSUMi Service) |
| Casters with adjuster (K-100AF) | - | 4 | MiSUMi |
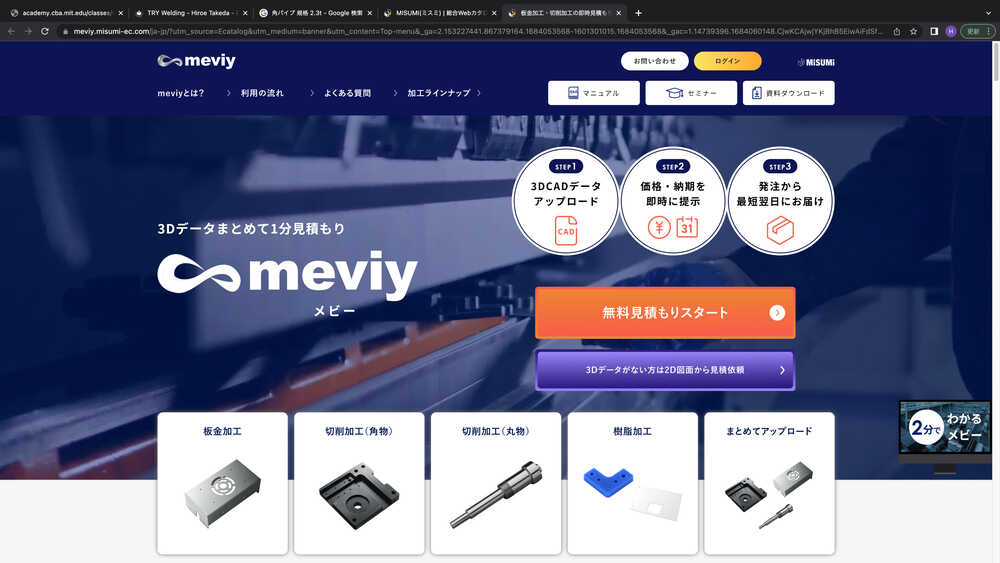
NOTE: "Steel Plate 2.3t×60×60 mm (R: Fillet 4.6)", I purchased it by meviy.
meviy is MiSUMi's -service that allows users to quote and purchase sheet metal and cutting operations by uploading 3D data files.
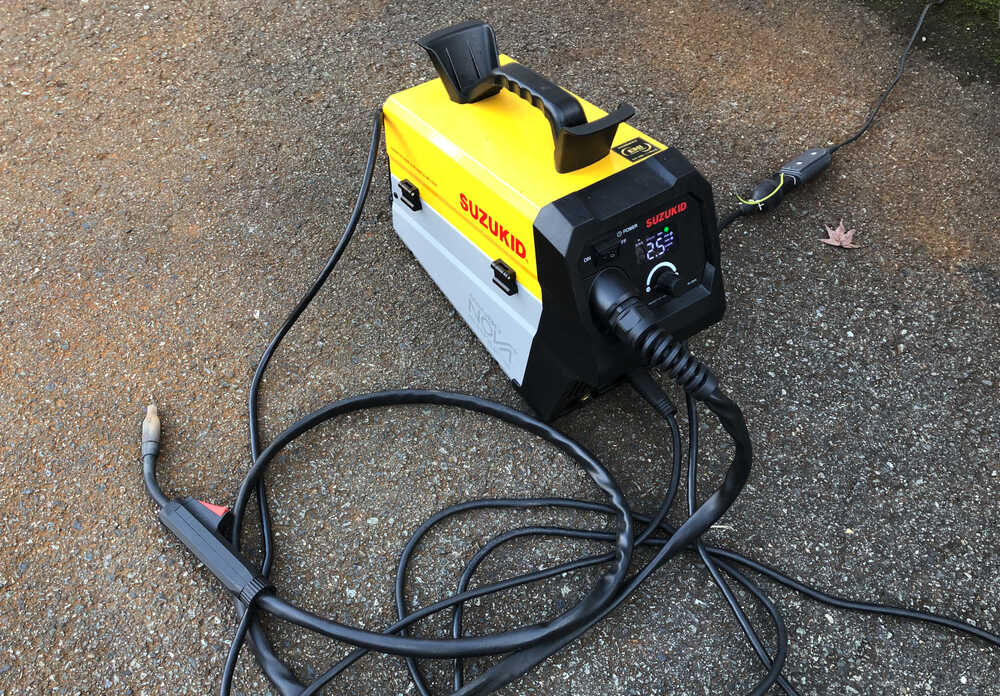
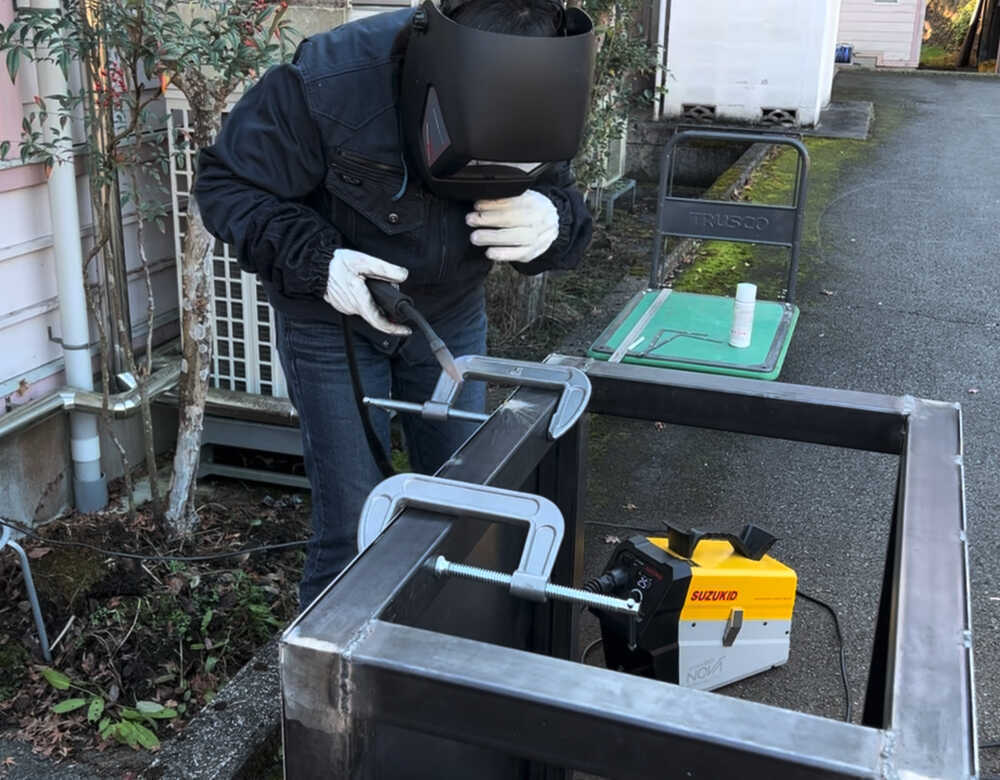
7. MIG
Machines I used
- SUZUKID ARCURY80 NOVA (100V, NO GAS)
The items I used
- Welding wire
- Anti-spatter (Spa Block)
- Anti Spatter Spray
- Wire Brush
MAIN FROW
- Spray the material to be welded with an anti-spatter spray.
- Apply anti-spatter adhesive to the tip of the torch
-
Welder menu settings (set according to the prepared wire)
In this time set below.
- 3-1)Select material, SYN(Fe)
- 3-2)Set welding wire diameter
- 3-3)Set the material thickness in 2.5 mm.
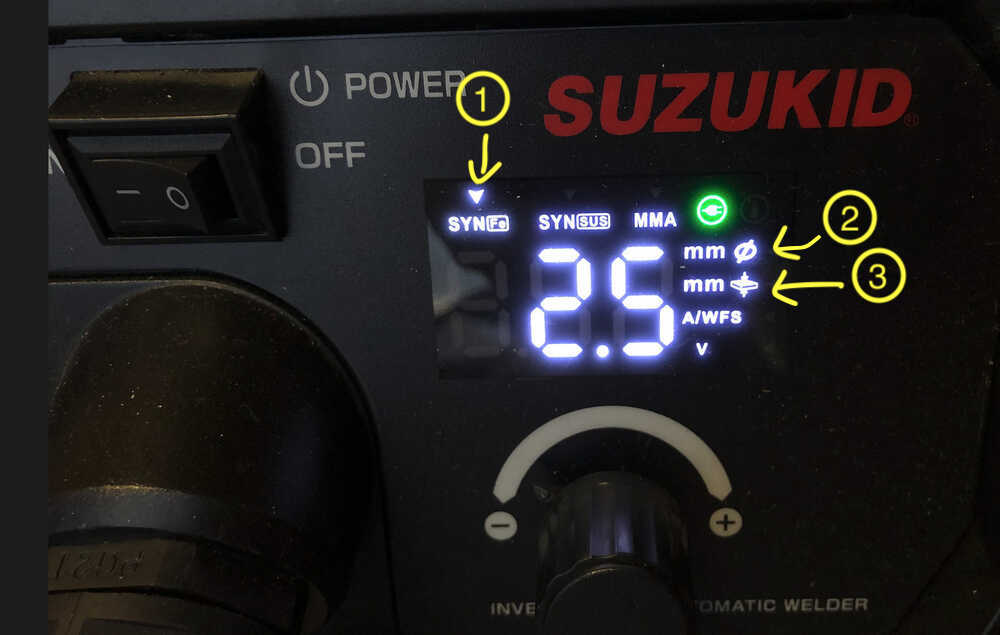 NOTE: After setting the material, wire diameter, and material thickness, the best welding voltage and welding current are automatically set.
 -
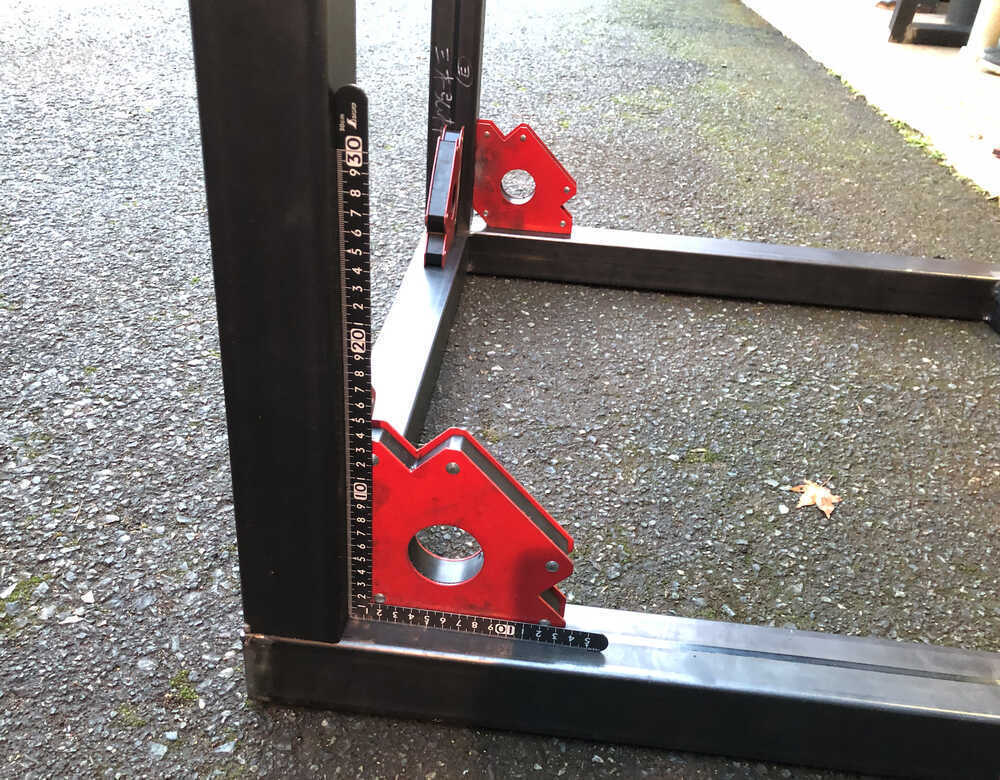
Attach grounding terminal (earth) of machine to material, then Welding.
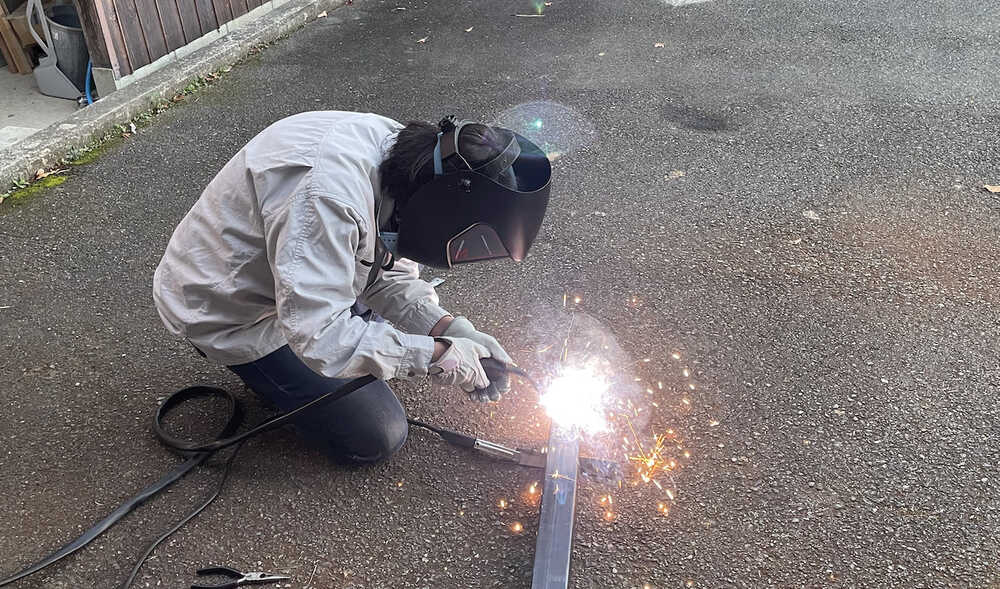
NOTE:
- Do not touch the material with bare hands after welding because the material is hot.
*After welding, scrape off excess dirt with a wire brush.
- Exposure of skin during welding is a cause of burns. The photo shows a bad example with the wrist is out. As pointed out from instructor, arm covers were worn to prevent arms from sticking out.
8. TIG
I learned The flow of TIG by weldtool.jp.
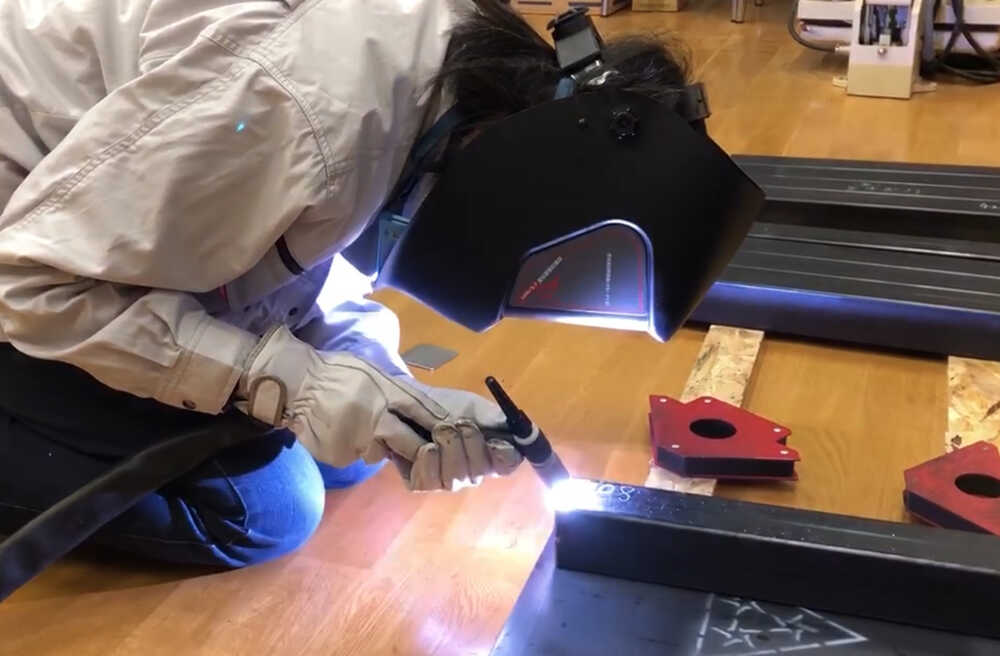
I practiced TIG welding, before the actual welding. It seems difficult, but just try.
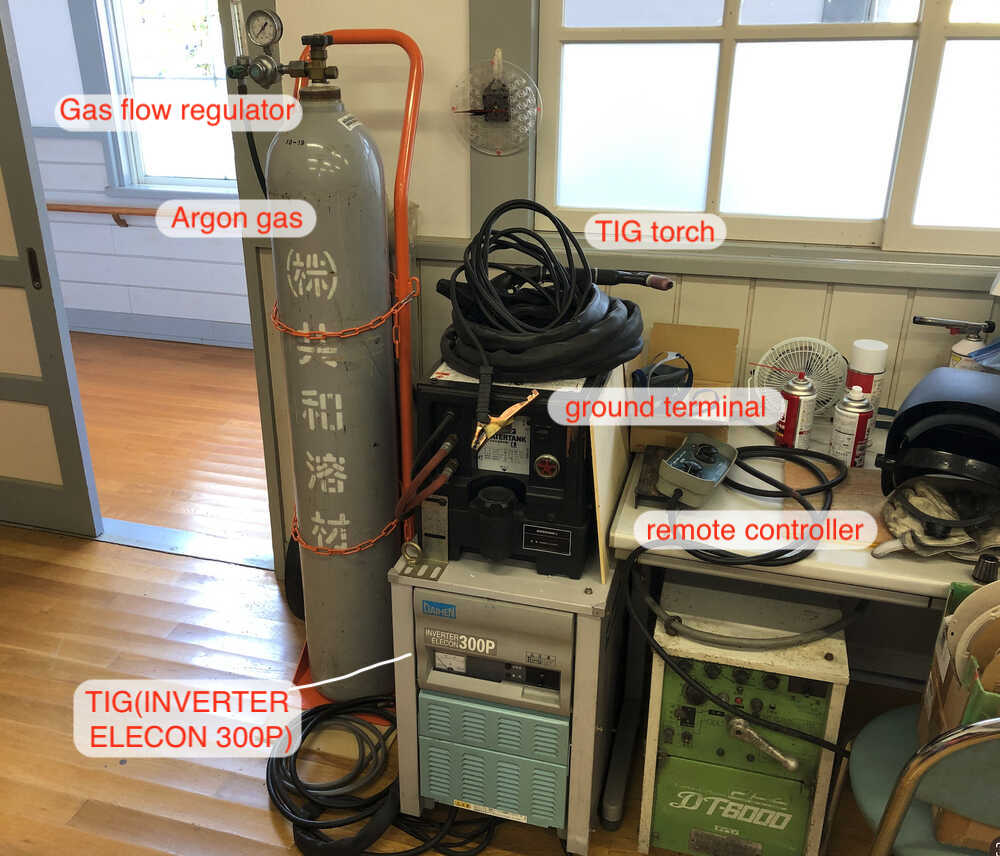
Machines I used:
- DAIHEN, INVERTER ELECON 300P
- Prepare
1-1) Prepare machines, materials and welding rods
1-2) Torch Preparation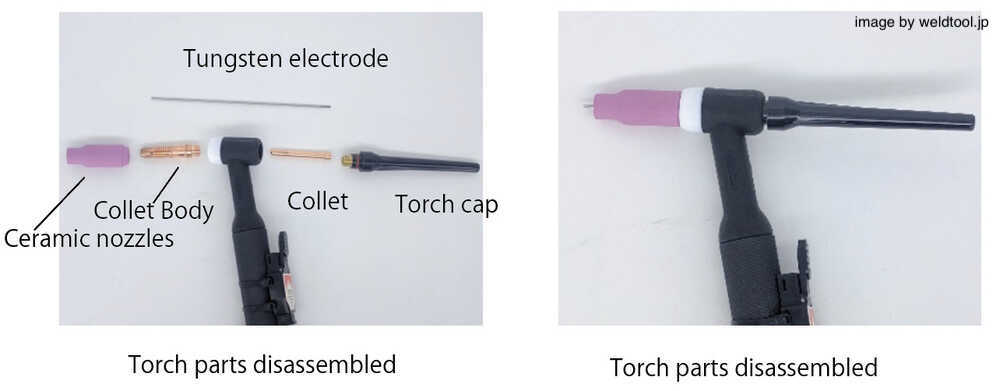 1-3) Attach grounding terminal (earth) of machine to material.
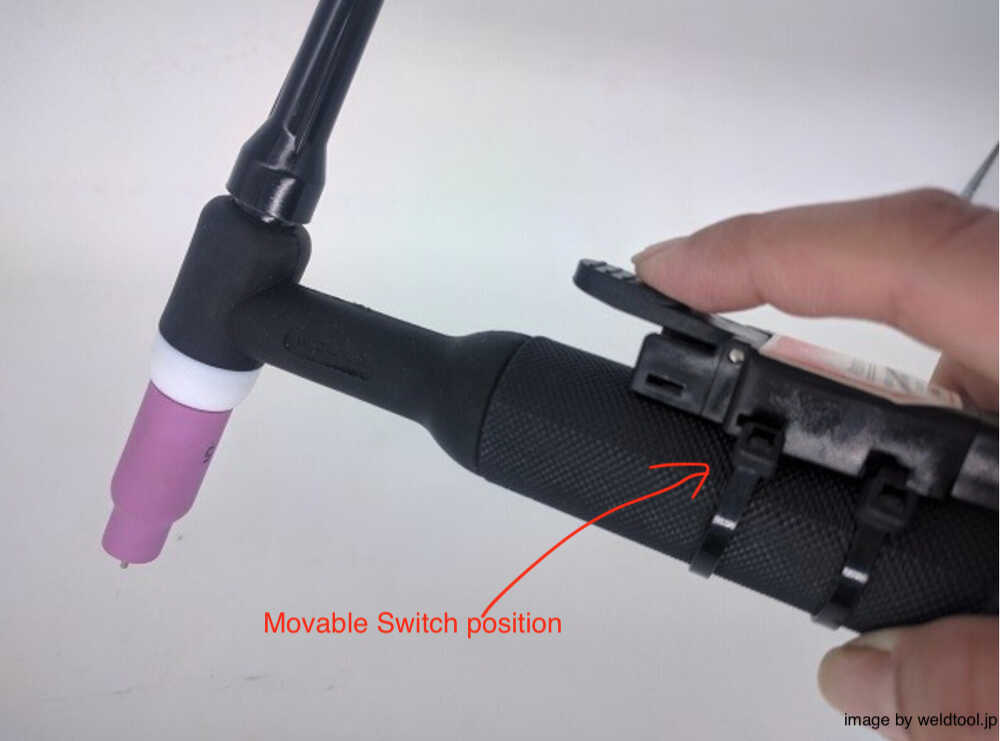
1-4) Fix the threaded hose of the torch and put it on your shoulder.
1-5) Ensure that the torch tip is at an angle that is easy to see while welding.
1-6) Adjust the position of the switch (with the torch held naturally, the switch should be in a position where it can be pressed naturally)
-
Simulate before welding (image training)
2-1)Direction of torch tip movement
2-2) Where to melt to create a pond and spread that pond at the appropriate speed.
2-3)Conscious to include welding rods if necessary
2-4)It is also important to melt the pool by TIG welding from the hard-to-melt material.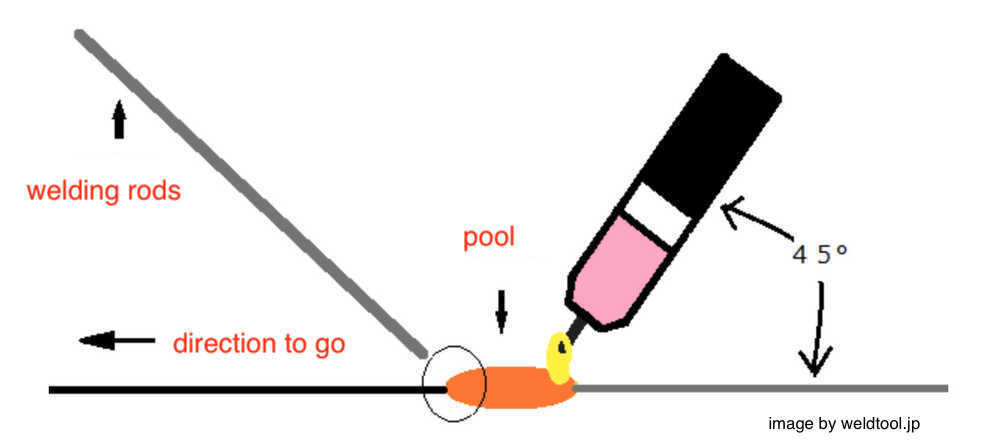
-
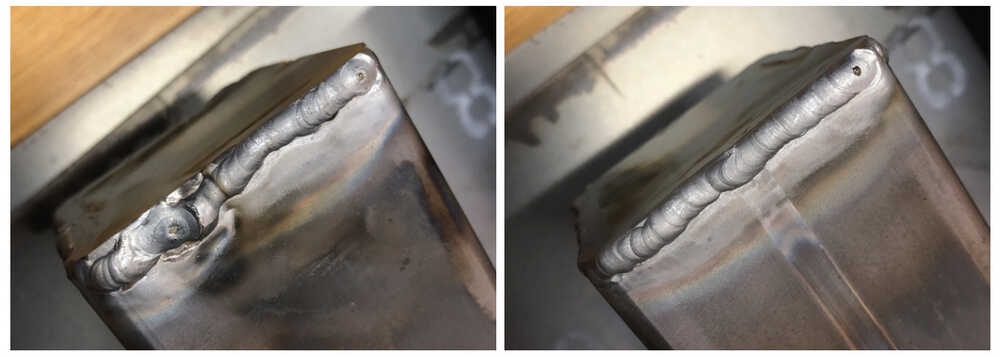
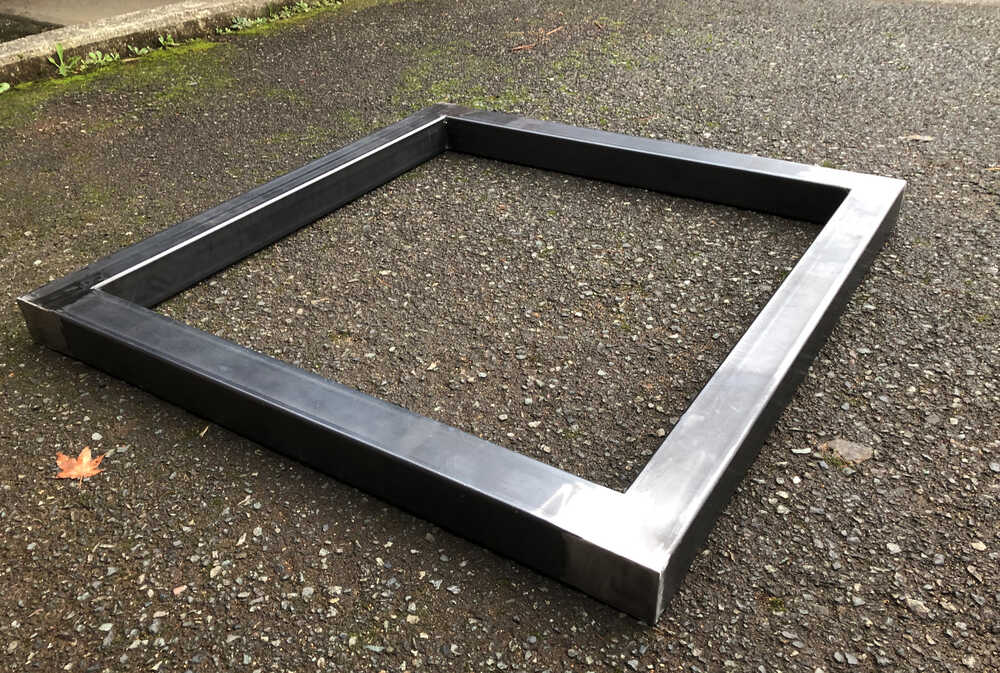
Welding: The torch tip and the material should be separated by approximately 2-3 mm. In this time, I weld 2.3mmt steel plate to square pipe.
 3-1) Left image:1st try. Not smooth. It's hard to just weld a straight line.
3-2) Right image: The most successful in this time.
 NOTE:
NOTE:
-Tungsten electrode contact with pool or welding rod is NG
-The shape of the tip of the tungsten electrode is rounded at the tip or snagged, which makes welding difficult. If the tip of the tungsten electrode touches the welding material or is rolled into the pool during welding, the shape of the tungsten electrode tip will change, so the work should be stopped once and the electrode tip should be reshaped with a grinder or the like for the best welding. -
After flow:
As prevention of oxidation of welds and electrodes, continuously injecting argon gas into the welding point until the argon gas stops injecting.
9. MIG vs TIG
- Image after Welding (left:MIG, right:TIG)
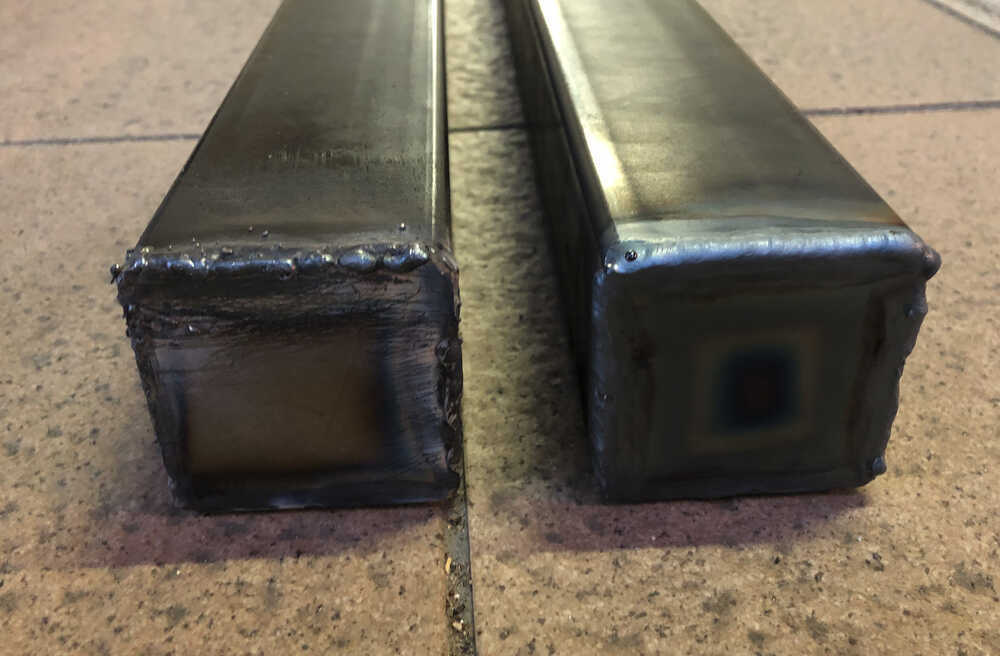
- MIG: Automatic wire supply and high speed make welding work easy. On the other hand, there is a lot of spatter and the weld surface is more raised, so more grinder work is required than TIG.
- TIG: Beautiful finish. Almost no spatter. On the other hand, welding speed is slow and is affected by wind.
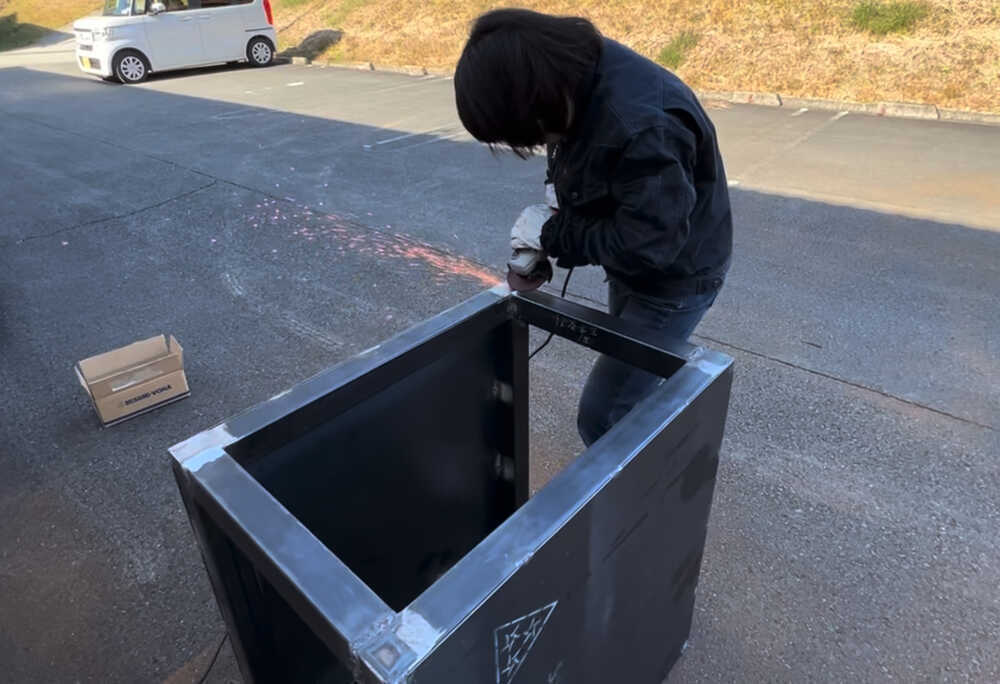
10.Grinder
Finish the weld area with a grinder to create a smooth surface.
I use the Disc Grinder for finish.
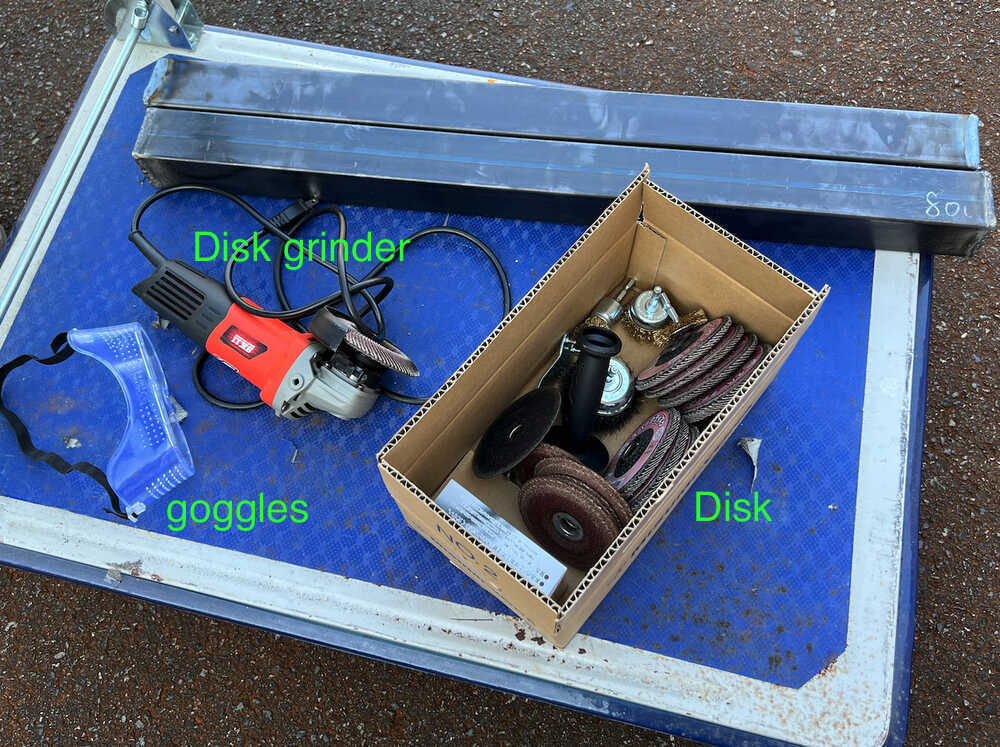 The disc I used
I wear Protection, goggles and cow glove, safety shoes and work clothes (cotton 100%).
I got advice that It is important to sharpen the disc grinder while pulling and to hold the grinder down with your hand from above. By doing so, it became possible to scrape off smoothly.
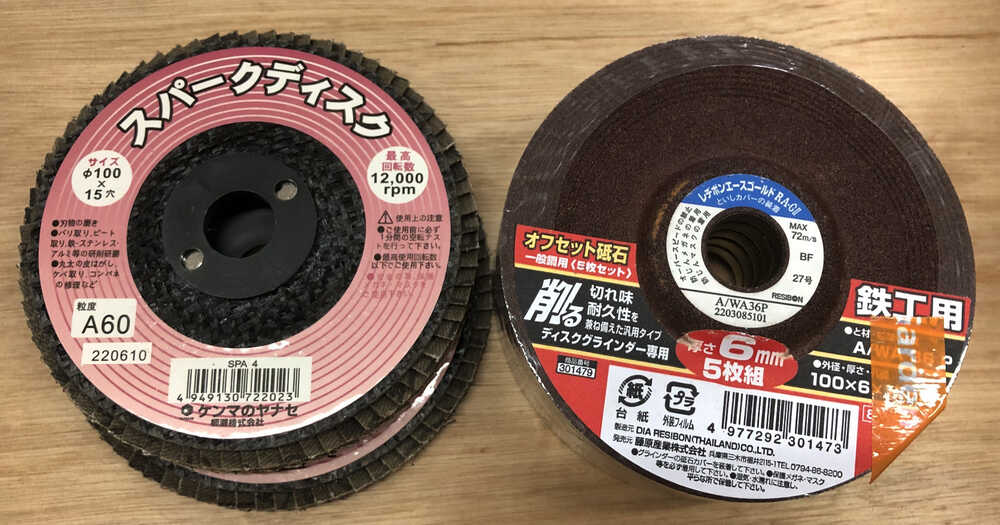
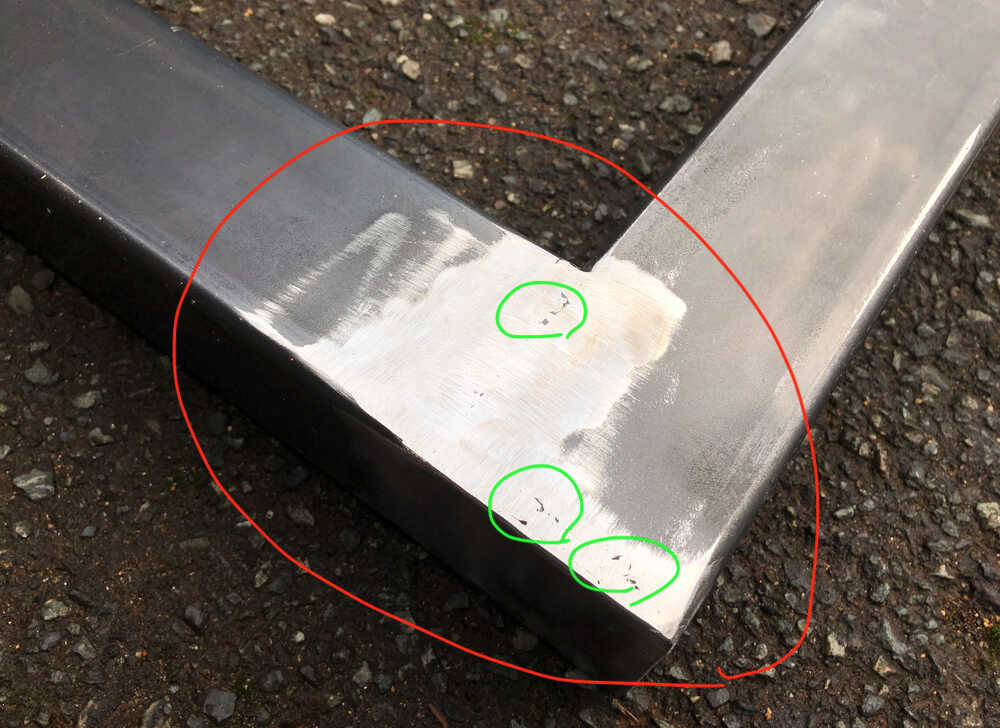
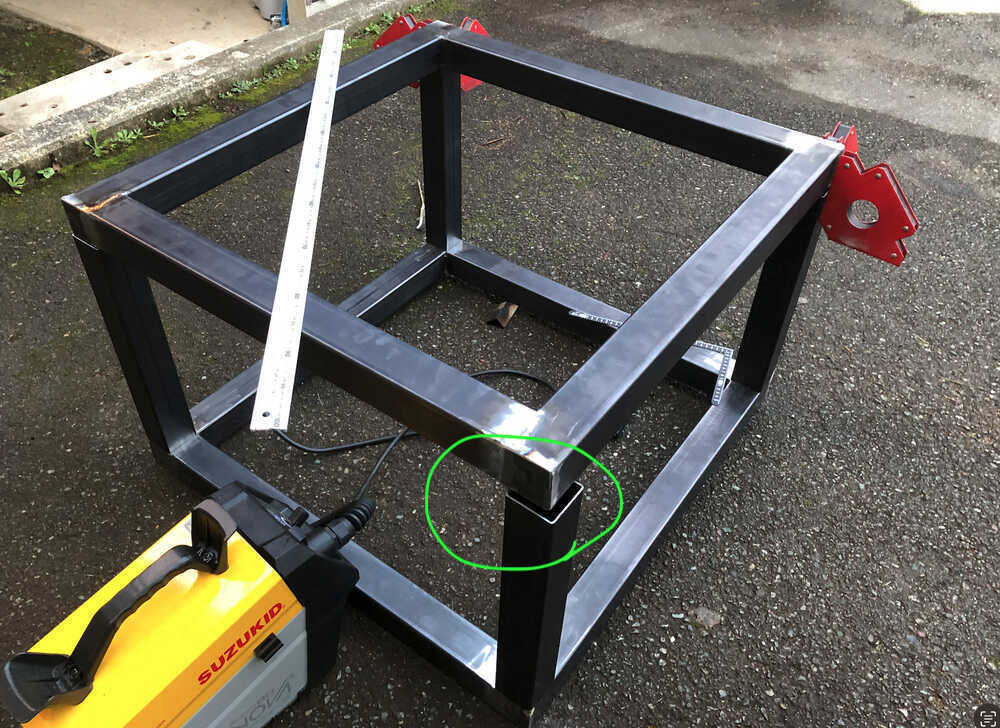
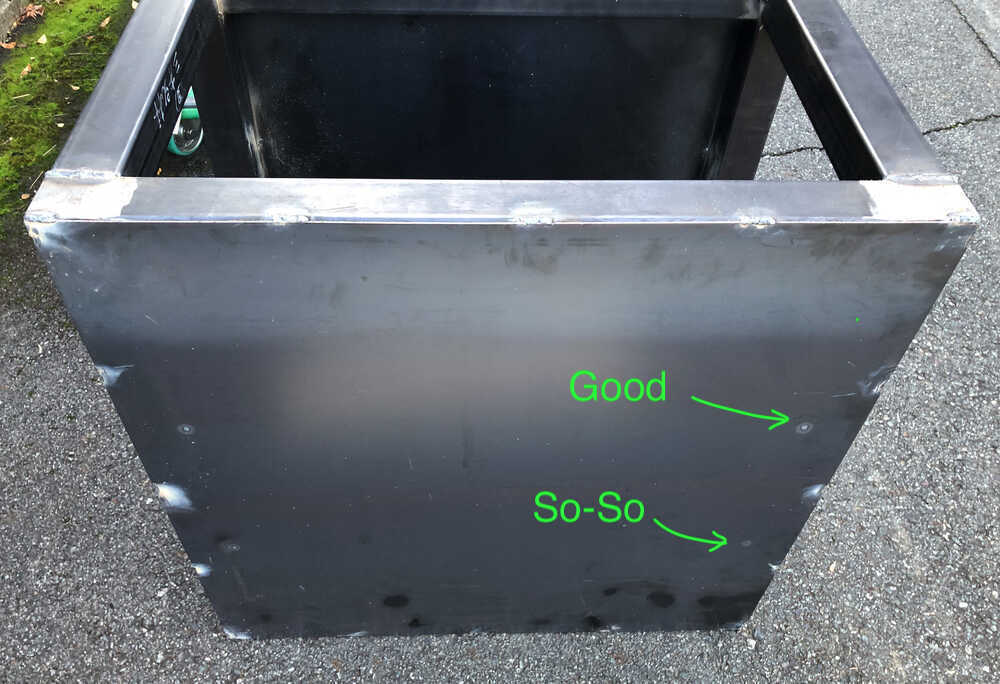
Rough Grinder:(Disc: Offset grinding wheel).
Finish Grinder: (Disc: Yanase Spark Disc A#40, A#60). The welds are not good (areas marked in green) were found after finishing. Forging during welding is important.
NOTE:
1. Do not leave flammable materials around the grinder.
2. Do not leave grinder while working.
3. Fix the material to be grind.
4. Install the disc with the plug unplugged from the outlet.
5. When the motor has rotated sufficiently, the grinding wheel is lightly placed on the material to be ground.
6. After the work, spatter and iron powder will be on my clothes and body. To prevent the risk of iron powder getting on the computer and causing a short circuit, I took the following measures: washing work clothes and taking a shower as soon as I got home.
Useful links: https://electrictoolboy.com/media/14837/ https://act-kougu.com/column/how-to-use_disk-grinder/
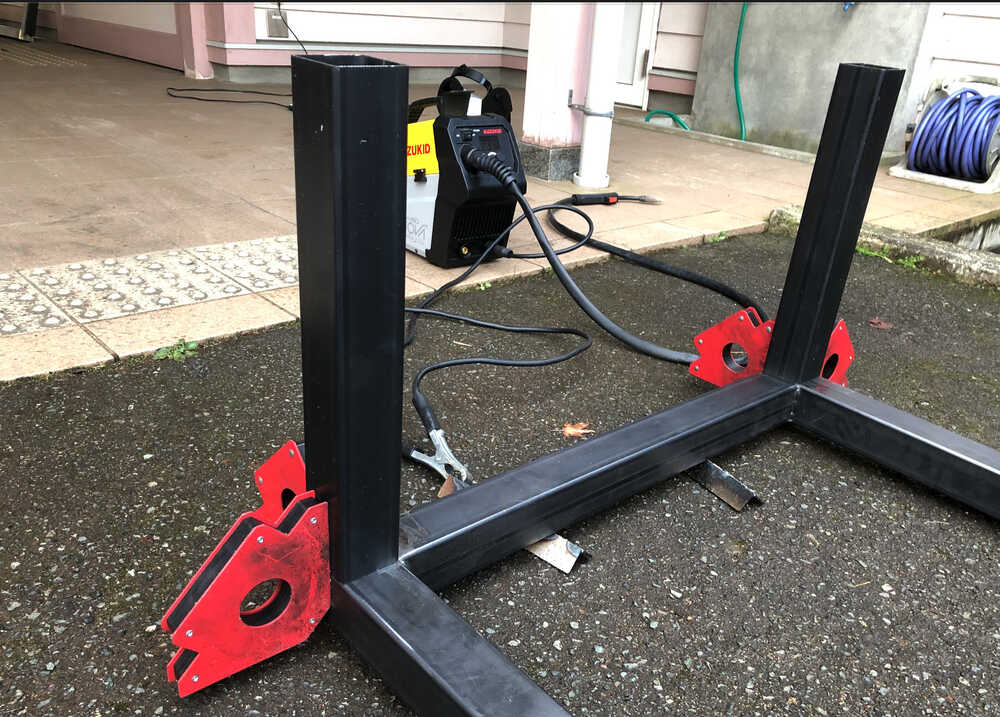
11. Assembly
Assembly by Welding
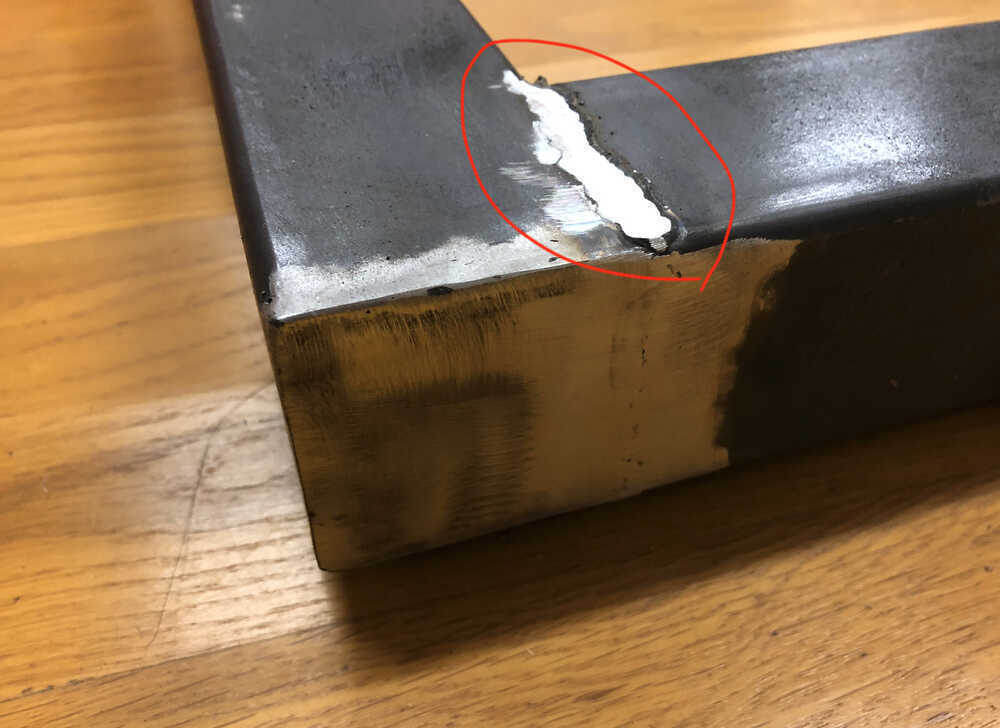
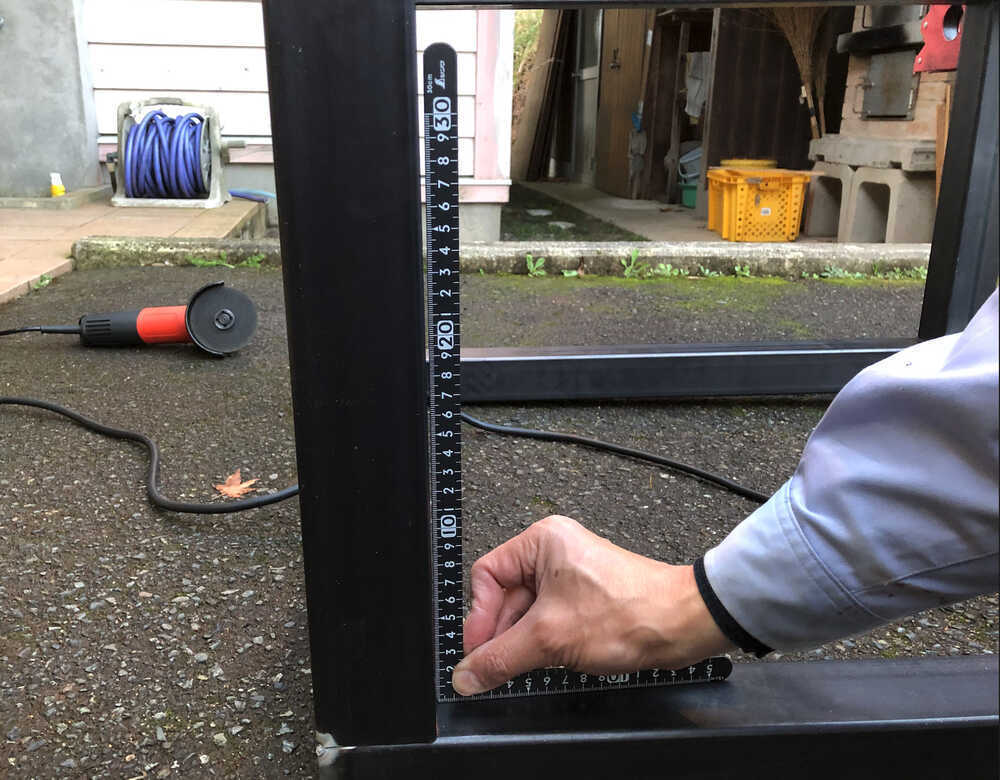
 Trouble! 1cm gap!
 It is assumed that the misalignment occurred because the surface of the square pipe was tilted outward due to the slanting surface caused by the grinder operation.
 Cut off the point welding we just made.
 Check the angle of the inside as well as the outside, and re-point it.
 Welding and grinder again.
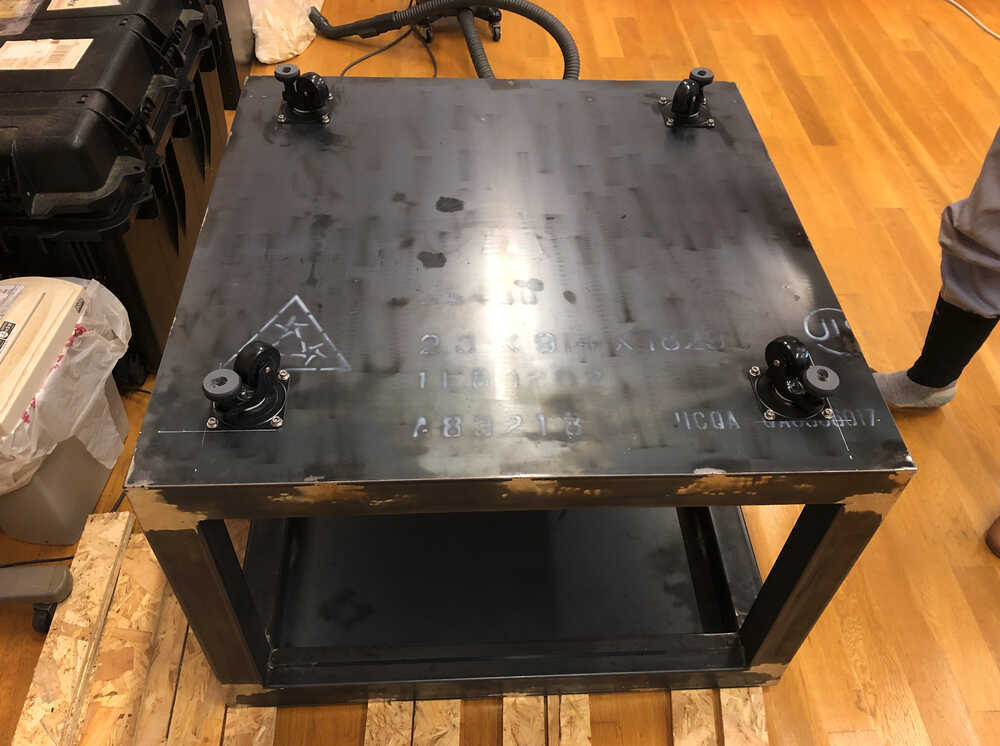
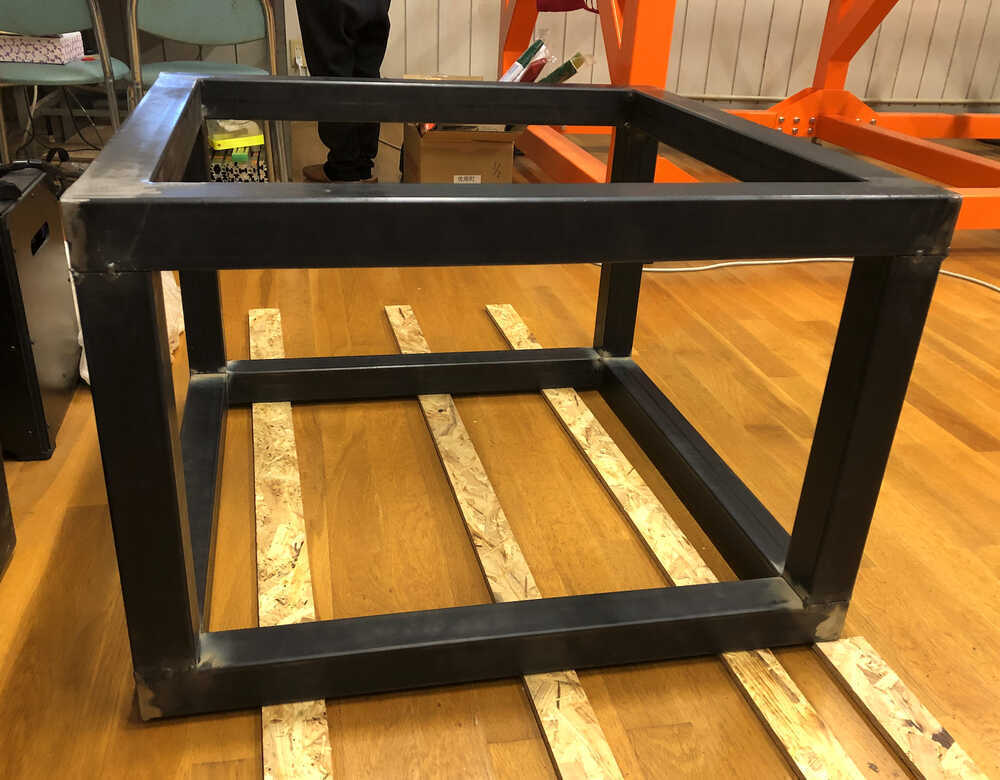
With re-welding, No gap!
 The other day, I weld the bottom plate.
 Heat from welding is best delivered to the surface.
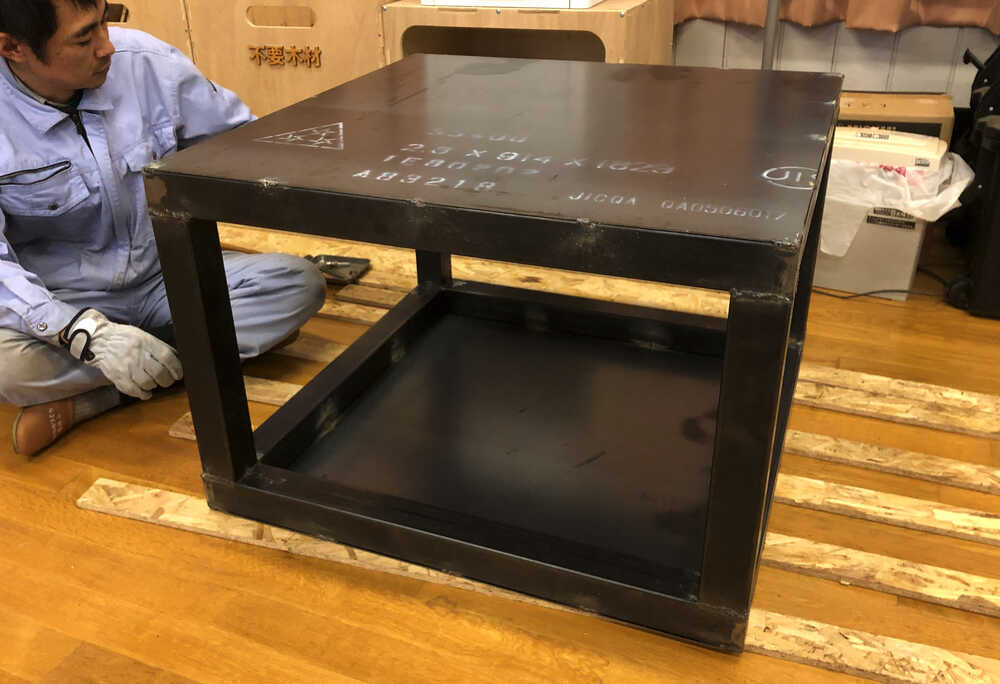
 Masuoka san's welding is complete too! We done good welding.
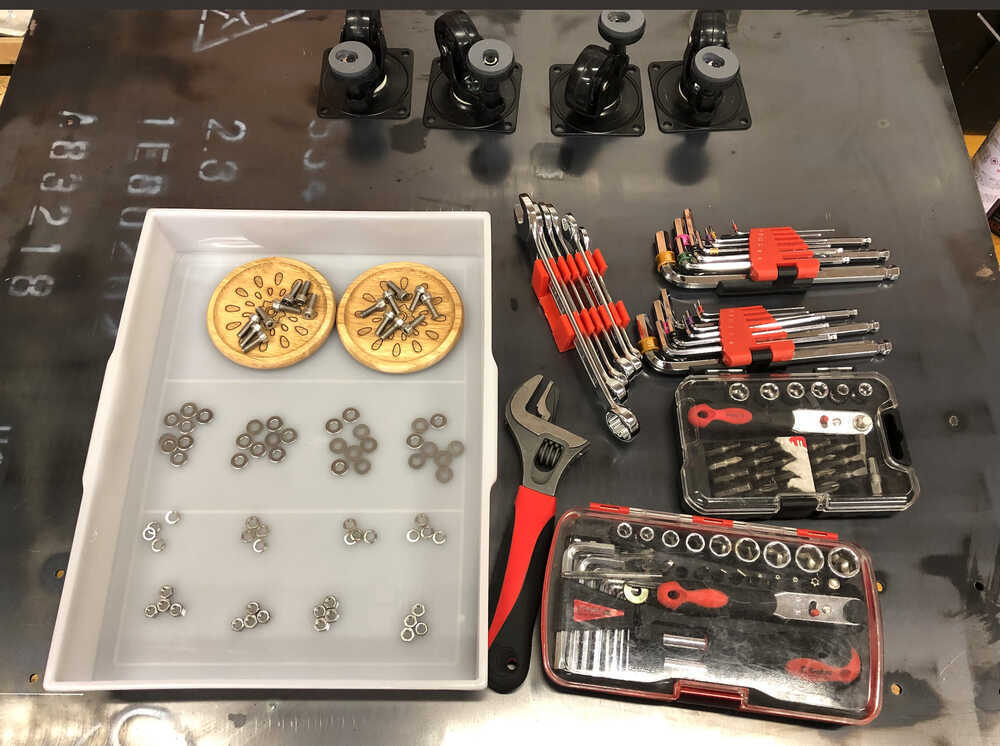
12. Add Casters
Prepare casters, bolts, washers, nuts and tools.
 Mark1
Mark1
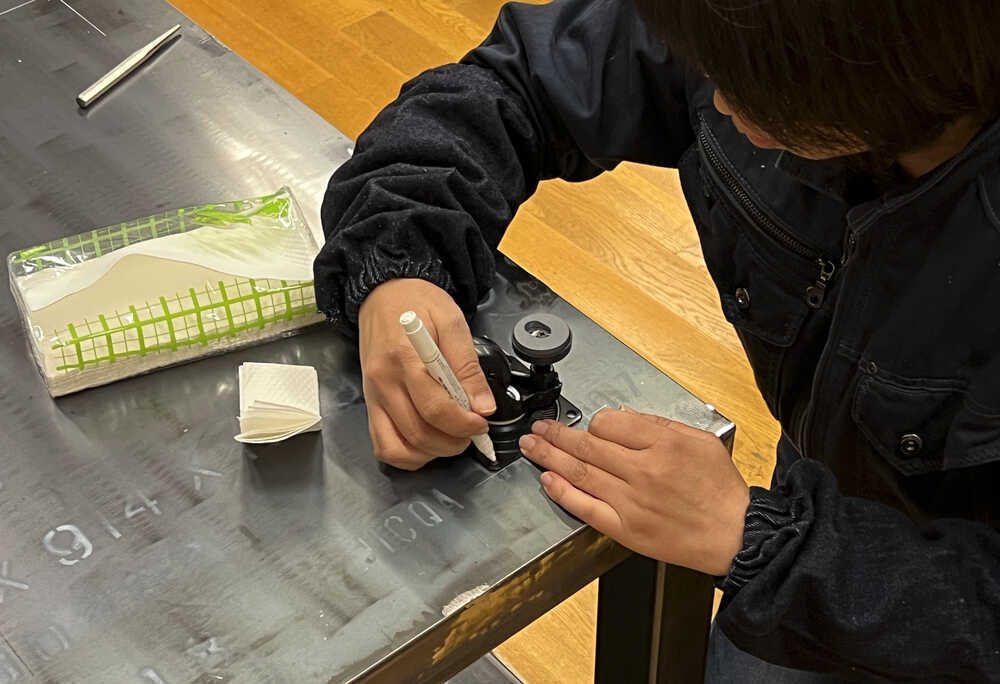 Mark2
Mark2
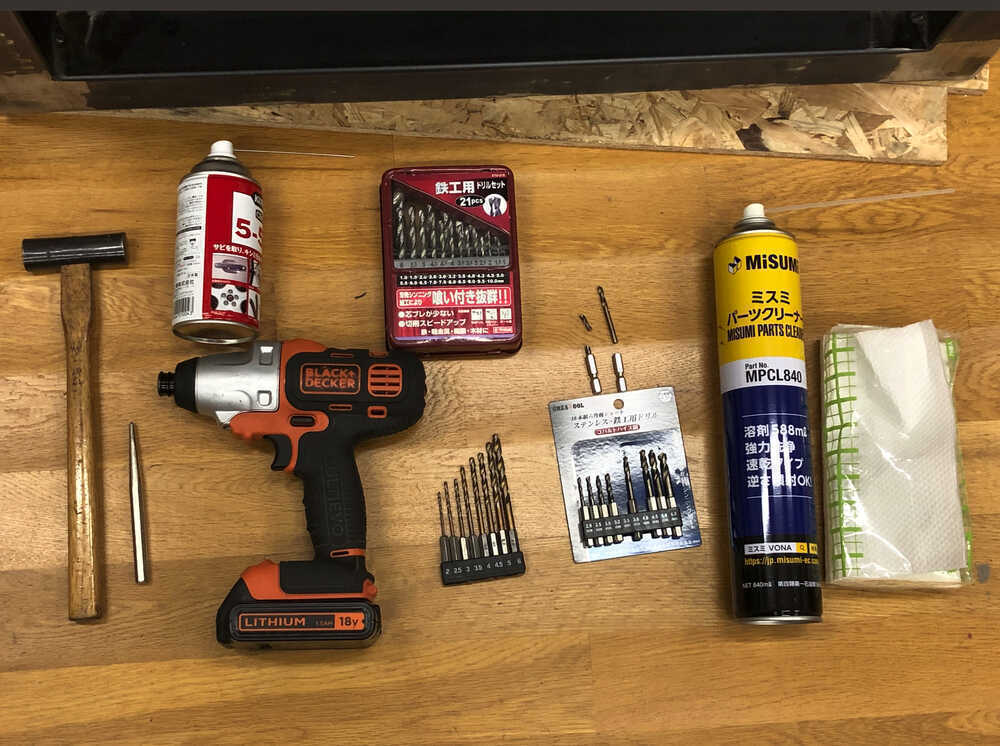
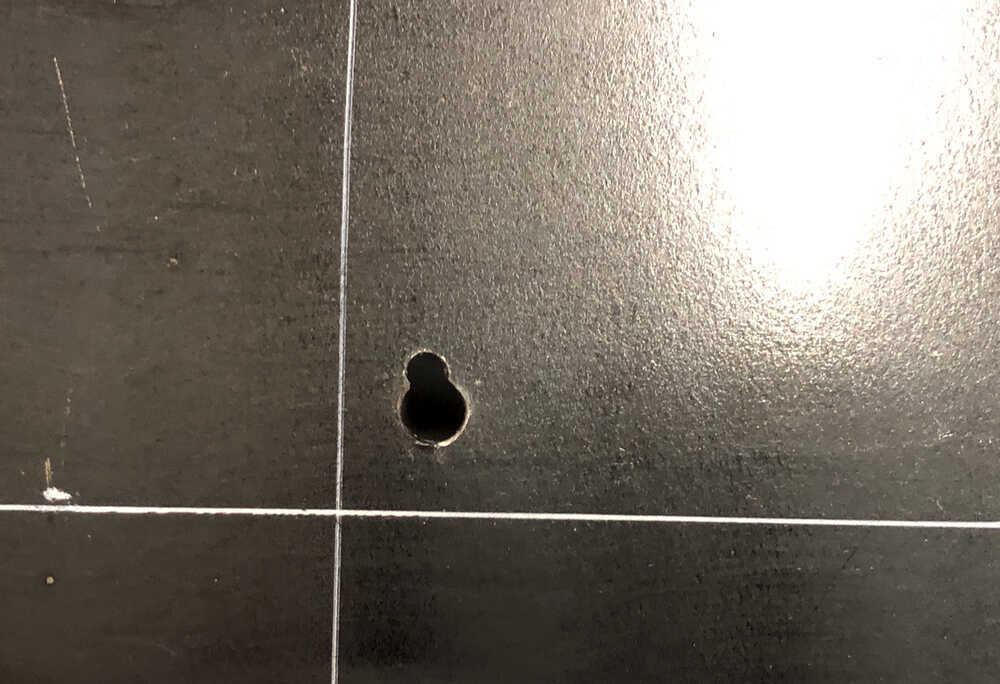
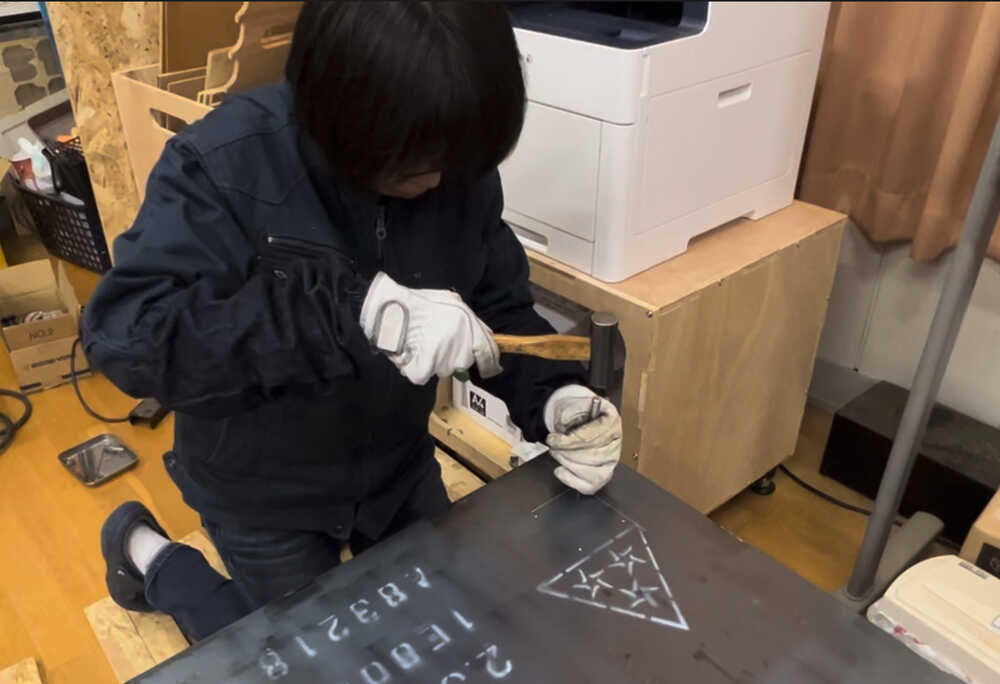 Drill holes
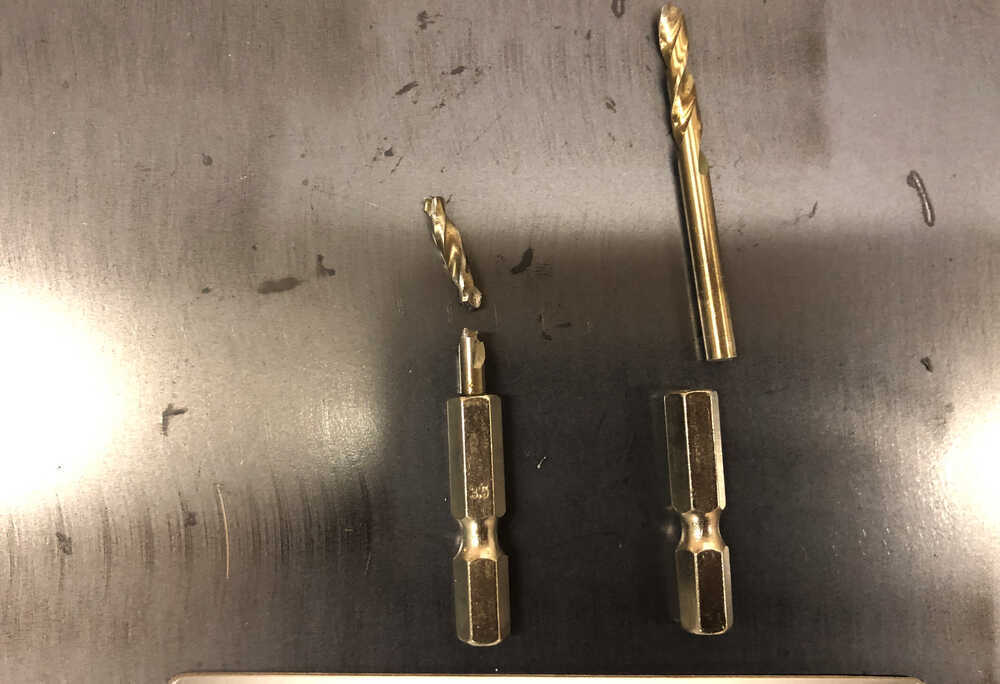
 Drill failure... and recovery
 Happening! Two drills I just bought were damaged. I learned Cheap tools are no good.
 Done!
Done!