- 3D printing (Process)
For individual assignment, I used VORON 2.4 R2 for FDM and Form 3 for SLA in Fab Lab West-harima. For the design, I incorporated the design rule limit in the group assignment.
1. What is VORON2.4 R2 ?
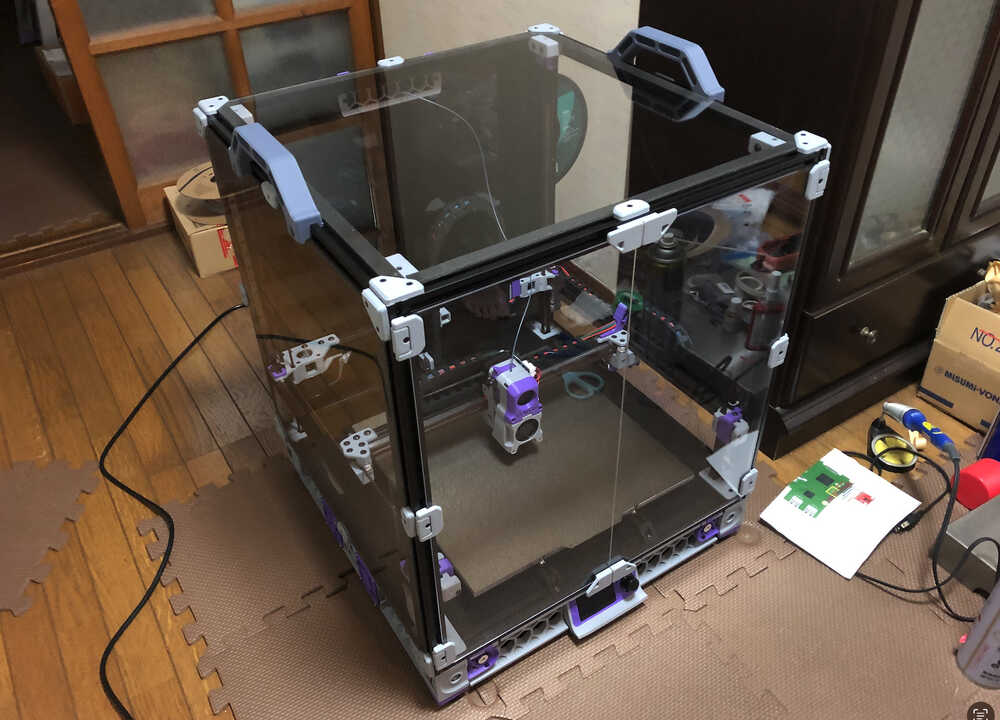
- The VORON is the open-source FDM 3d printer, and user need to build up, so the user must have somewhat capability in fabrication, and calibration of the machine.
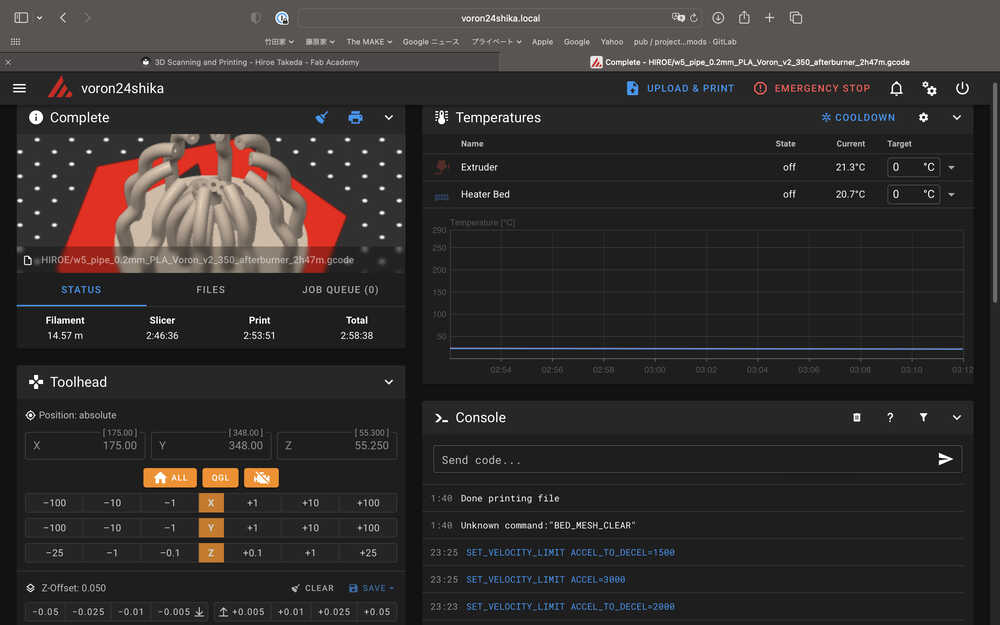
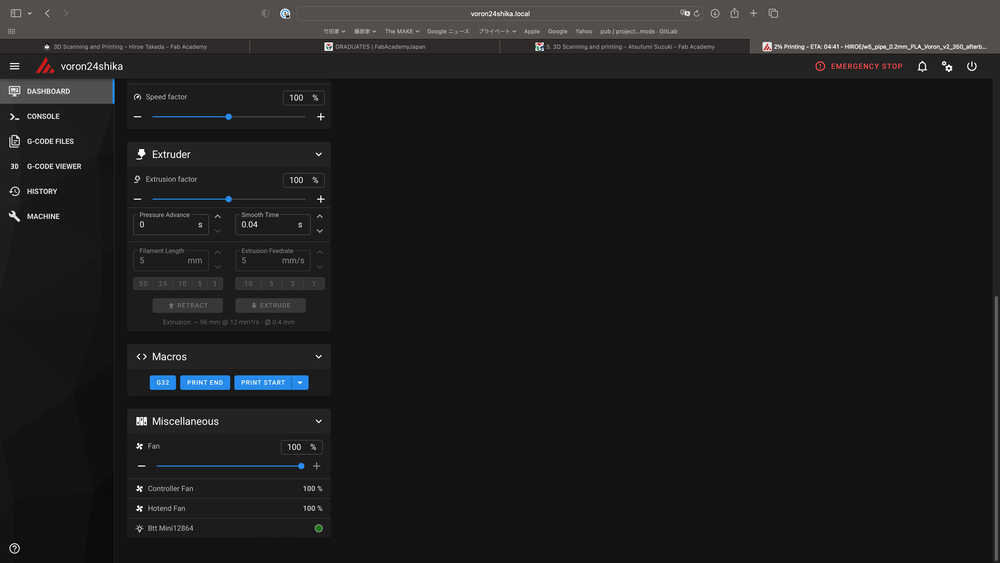
- The VORON2.4 R2 in our Lab is build by the founder of Fab Lab West Harima, and operate it by responsive web user interface of Mainsail.
The Photo
responsive web user interface
-Technical data
The Technical data of VORON 2.4 R2
| Name | Description |
|---|---|
| Build size | 350(X) x 350(Y) x 350 (Z) mm |
| Printing technology | FDM(Fused Deposition Modeling) |
| Extruder | Single |
| Layer solution | 0.1 - 0.4 mm |
| Travel Speed | XY: 300 mm/s |
| Print Speed | 100 mm/s for based speed |
| Nozzle | 0.4 mm diameter |
| Supported print materials | PLA, ABS, PETG, TPU, PC, Nylon |
| Build material price | About 2000 USD |
| Firmware | Klipper (default) |
| Official site | https://vorondesign.com |
2. PROCESS of VORON2.4 R2
2-1) Design & 3D Print (Test)
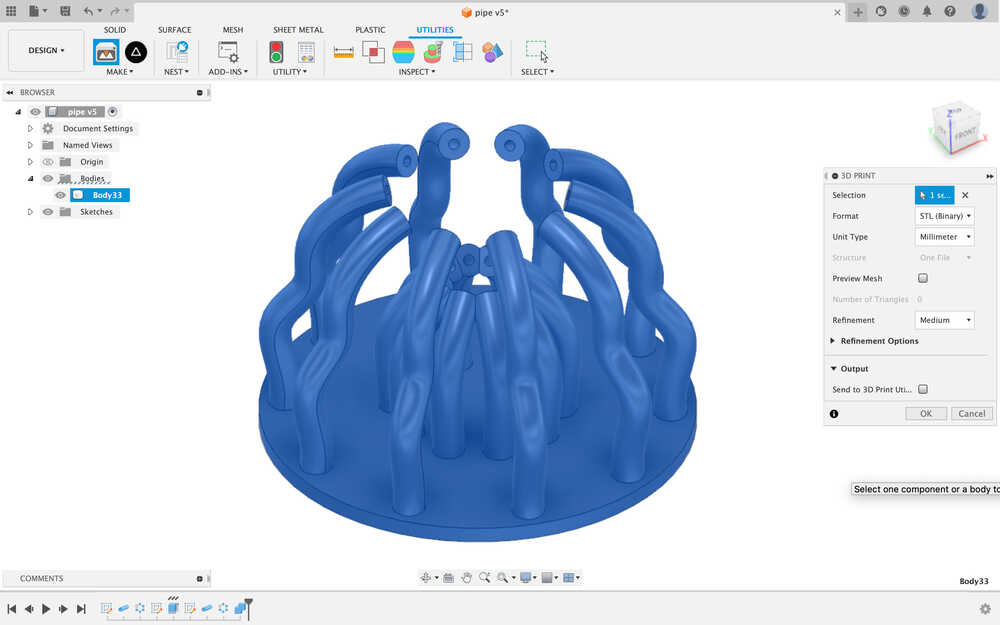
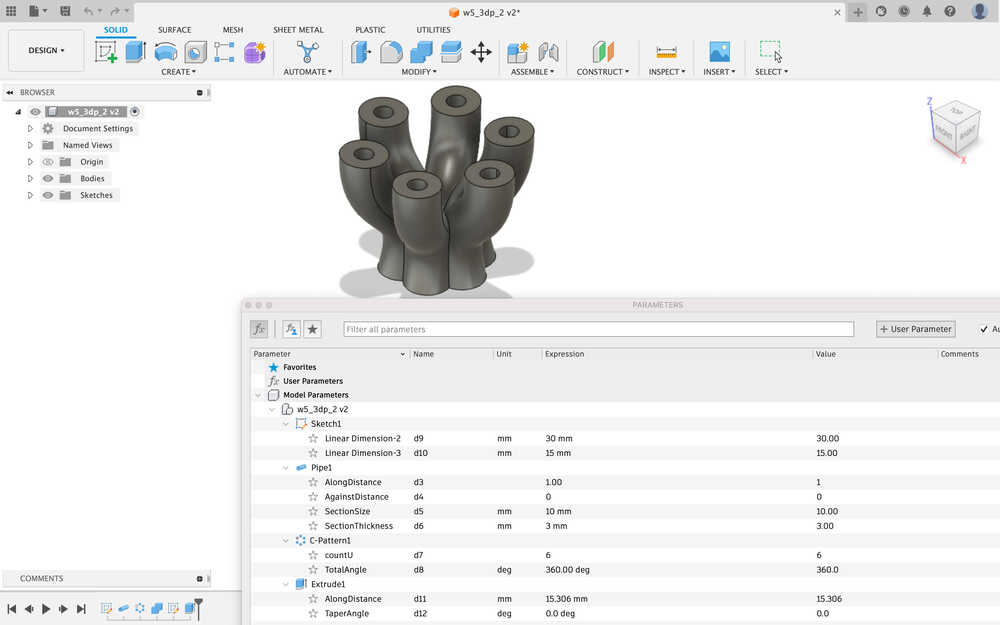
- Open Fusion360 and make file with parametric design.
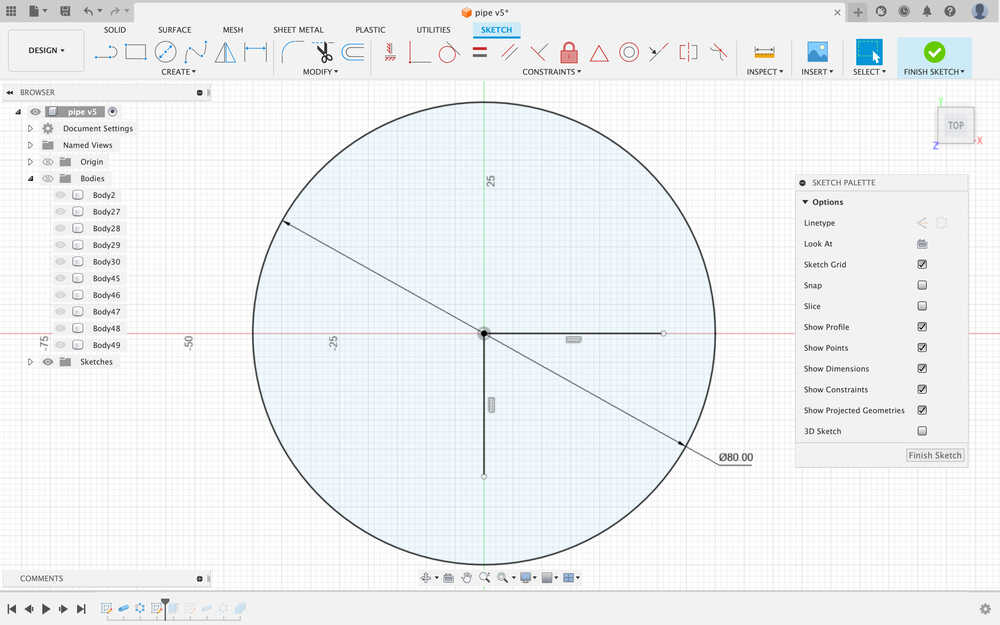
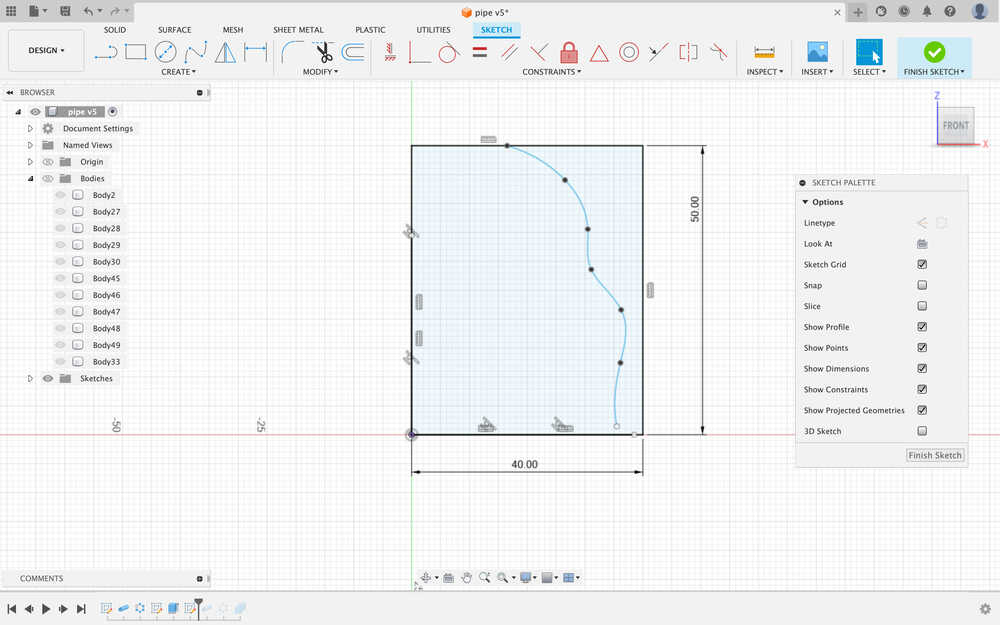
- Sketch
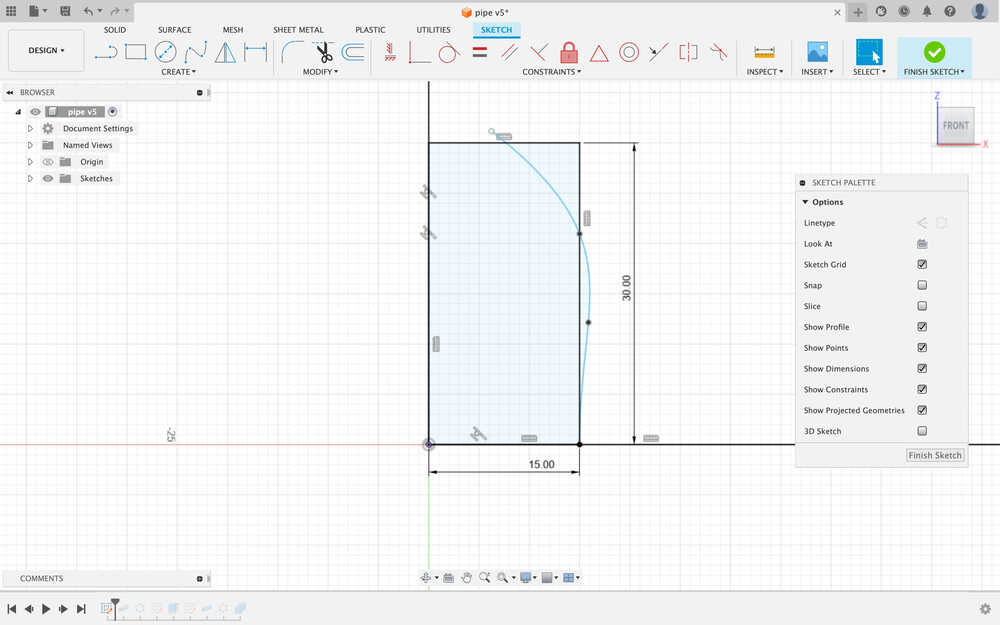
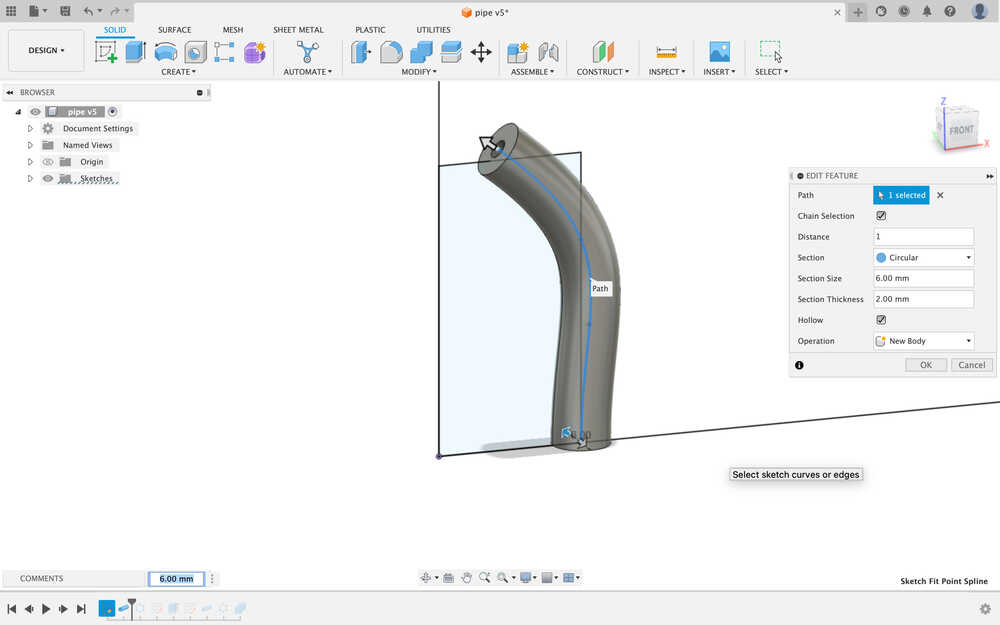
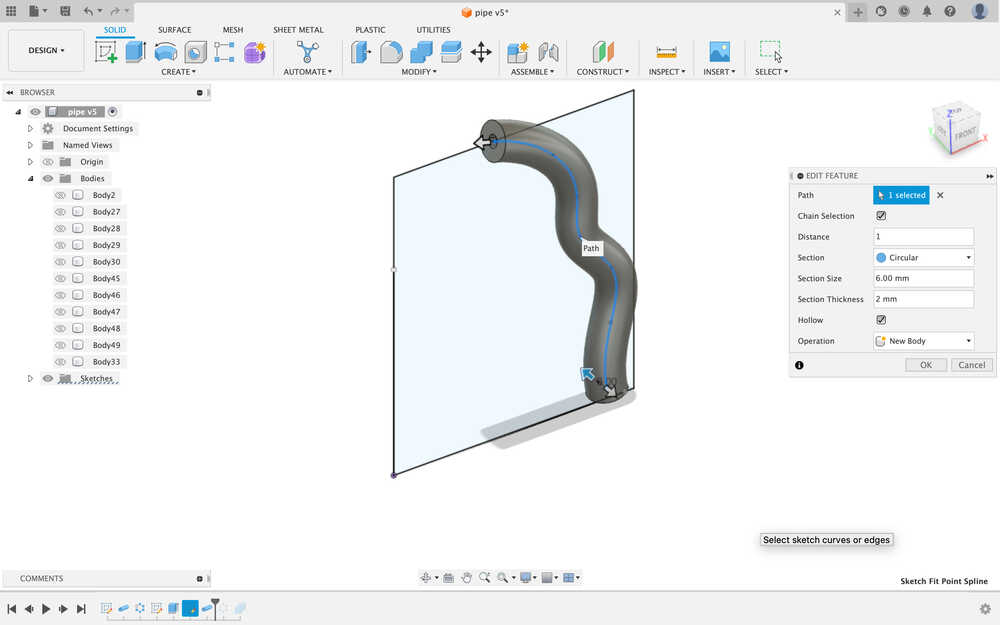
- Create Pipe
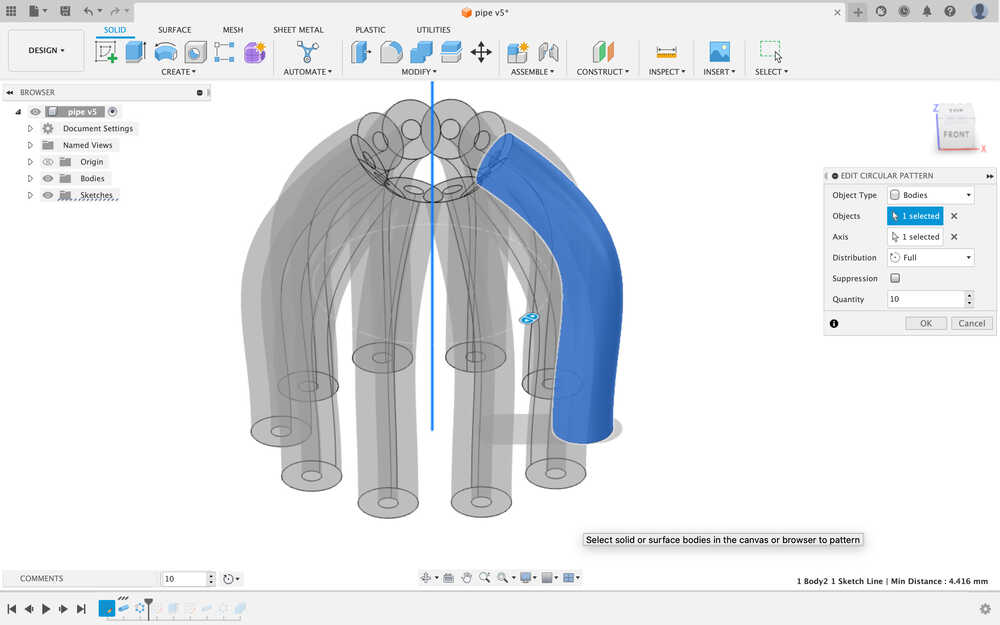
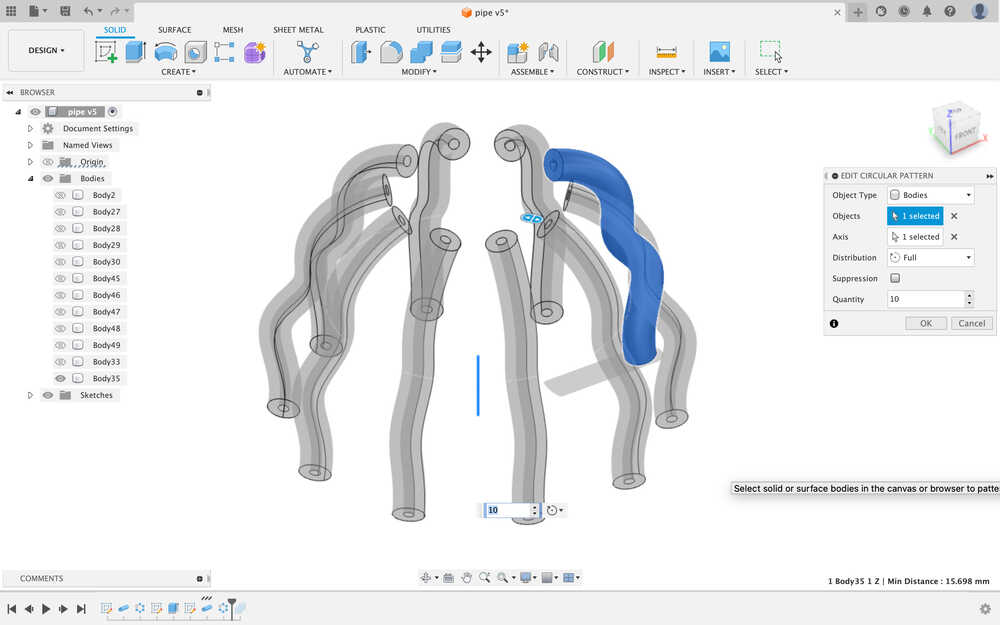
- Create Circular pattern
- Sketch
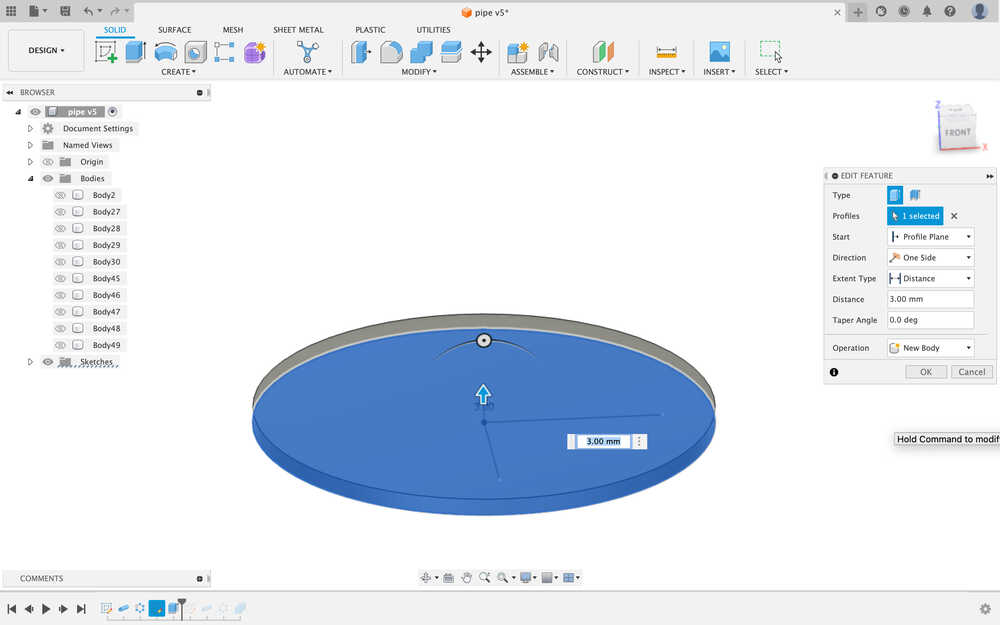
- Extrude
- Sketch
- Create Pipe
- Create Circular pattern
- Combine
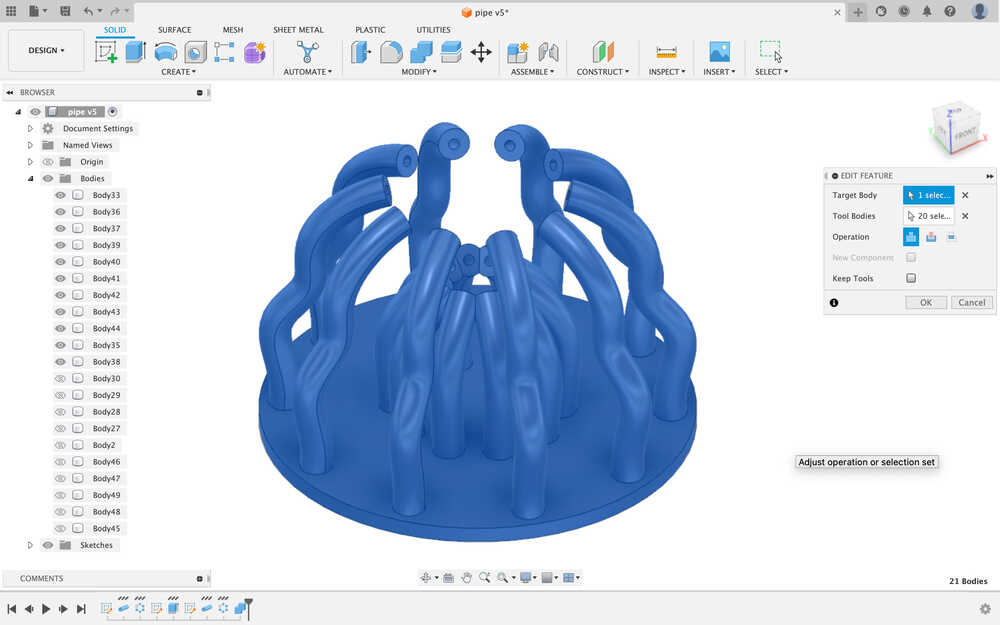
-
Export the STL file (Utility > Make > 3D Print )
-
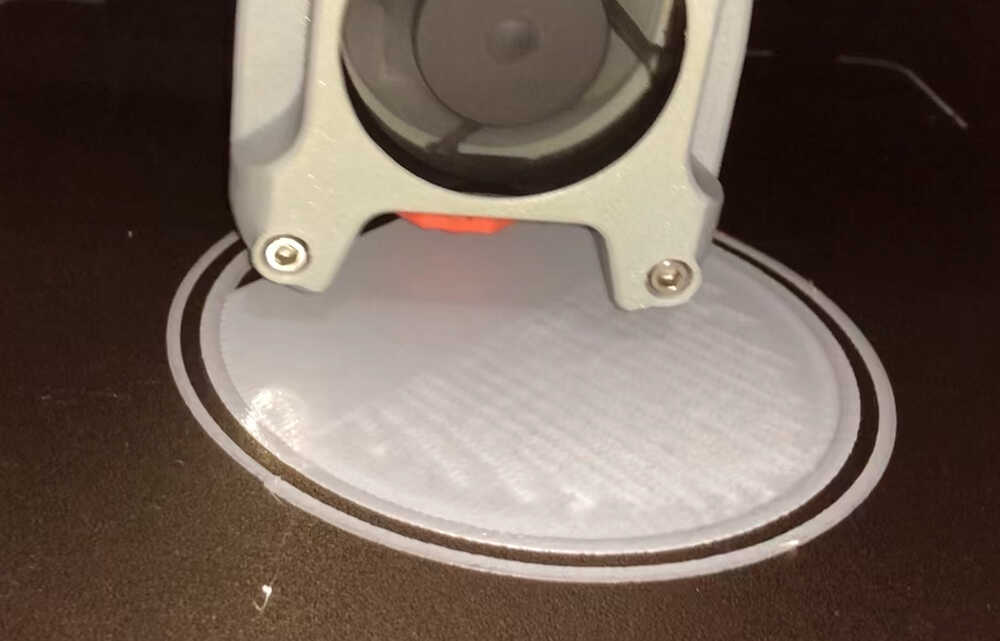
Test Print
-
1st layer Z height change try: As the surface is rough, so I think the nozzle and bed surface is too close, so I did the Z height +0.05 through Mainsail, and it's success.
-
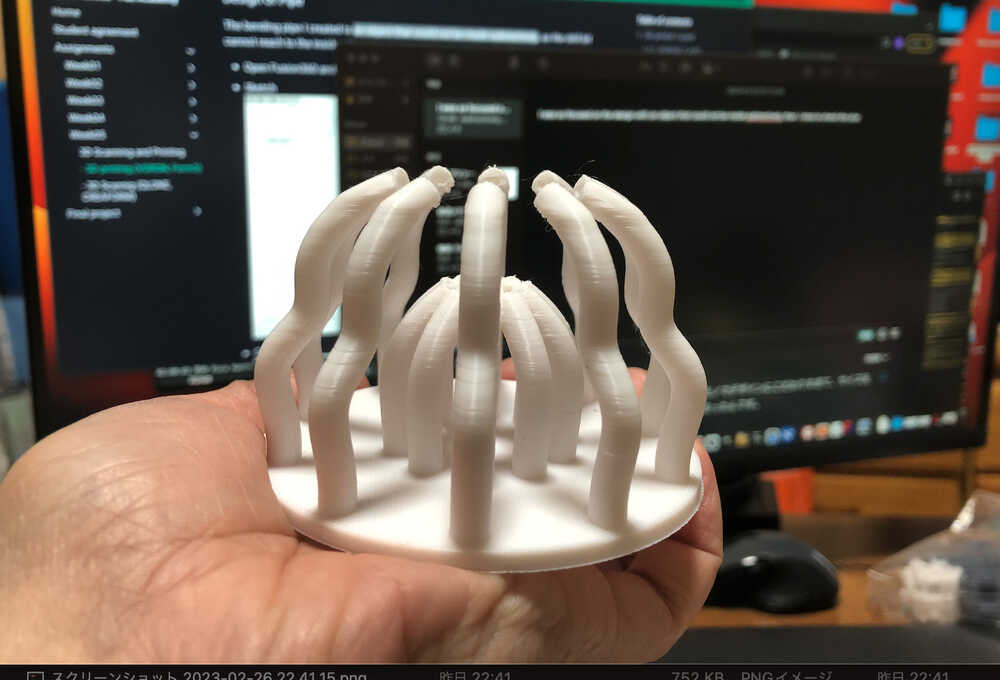
Fail point!: The size is big!! Also, the output is even more unpleasant looking.
-
The result and What I found:
- In my desperation to create the design, I overlooked the size. - Took 3 hours to output because of the large size. Also the design The design has to keep moving before VORON can achieve its high-speed capabilities. Lost time and materials. - The above of pipe has little spaghetti.
- During 3D print output, the angle of the top pipe hit the nozzle during output, which seemed to exceed the design of the overhang limit.
-
-
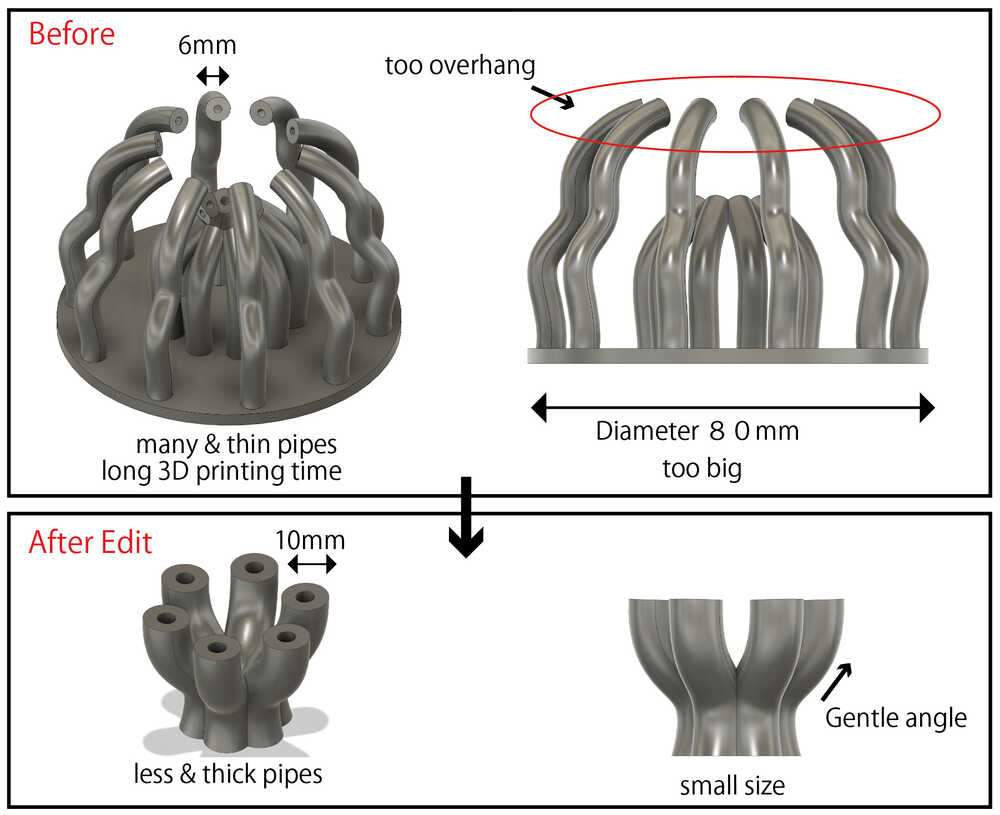
Correct the model with below point.
- re-size: smaller
- angle change gentle
- less pipes
- Output STL data (Go to Utilities > MAKE > 3dprint)
2-2) Slicer
Conversion to data format for output to 3D printer, using slicer software.
The Slicer setting is very important to reflect the output a lot.
- Open SuperSlicer, and upload the STL data.
-
Do Slicer Setting, is suitable for Material "SUNLU PLA PLUS Filament 1.75mm white" And try unsupported.
Print Settings
Setting Perimeters 2 Solid layers Top :4, Bottom:3 Infill 15%, Gyroid Default speed 100 mm/s Filament Settings
Setting Temperature Extruder 215 °C Temperature Bed 60 °C -
Slicer execution

- Export G-code
2-3) Filament change
-
NOTE: Below Manual is When nozzle temperature is low.
-
In interface, Move the Toolhead to a position where it is easy to replace it.
- click "ALL" of Toolhead
- click "Z +25""" several time o move to the middle of the body
- click "Y-100" several times to move it to the front.
- In interface, Nozzle temperature input suitable temperature with each materials.
- Once the specified temperature is reached, raise the lever (to unlock the filament).
- Push the filament in slightly and then pull it out.
- Push filament you use.
- down the lever (to lock the filament)
- In interface, press Cool Down.
2-4) 3D Printing
Machine Calibration and Filament Calibration are already done at FabLab West-Harima.
(If I have time, I'll do the Filament Calibration by myself later.)
-
NOTE: Below Manual *When nozzle temperature is low
-
In the interface, Preheat "Heater Bed' with suitable temperature for each materials.
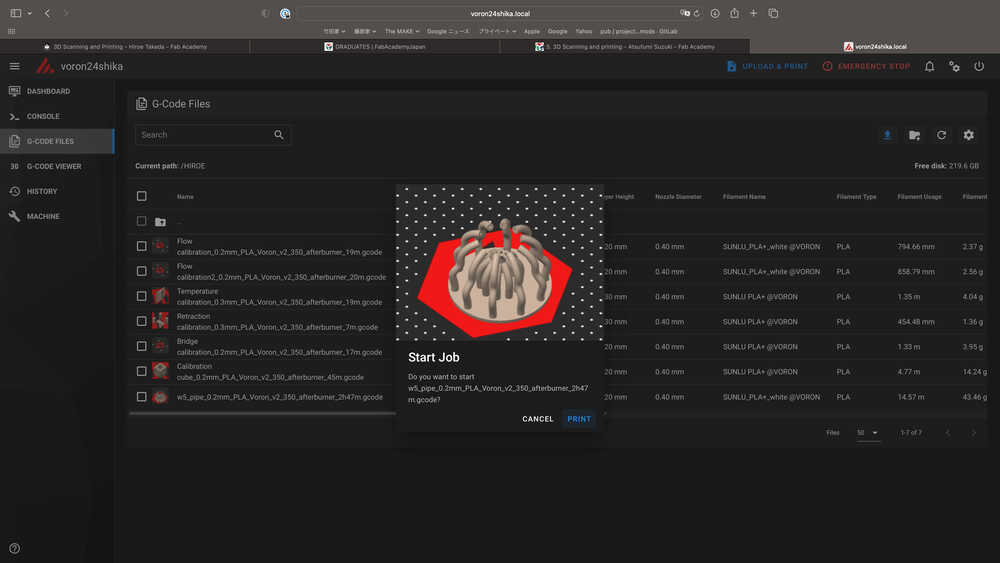
(as the base is thick, need pre-heat. And wait about 15 minutes. As official site, wait about 1 hour.) - Upload G-code files and start job.
| the Nozzle temperature | the auto operation |
|---|---|
| reach 150 °C | start Leveling automatically |
| reach target | start output automatically |
-
Output Check first layer status. Depends on the status move the Z height "+0.05" or "-0.05".
-
After finish printout, wait until the temperature become low around 30 °C, then remove the object.
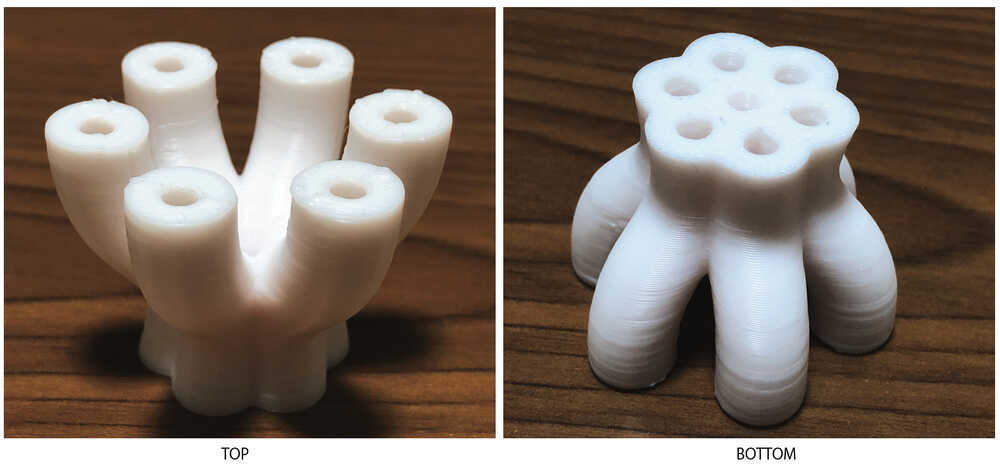
- Done! It is unsupported, and the result is well.
2-5) Data file
3. What is Form3 ?
- Form3 is produce functional level and high-quality prototypes, an affordable, industrial-quality resin 3D printer that reliably delivers.
- The Features of Form3 is LFS(Low Force Stereolithography), galvano-style, Flexible tank with the bottom of the resin tank changed to a flexible material.
- After 3D printing with Form3, a machine for curing (Form cure) and a machine for cleaning (ultrasonic cleaner) are required.
- The Form3 in Fab Lab West harima is purchased second used in good condition with only a little use.
- The model need cure with Form Cure
-Technical data
Below Technical data is from Formlabs official site.
| Name | Description |
|---|---|
| Printing technology | SLA, LFS(Low Force Stereolithography) |
| Supported print materials | 30+ Functional Resins: |
| Layer pitch | 25- 300 micron |
| Support material | Automatic Generation |
| Build material price | About 2000 USD |
| Software | Preform |
| Work size | 145 x 145 x 185 mm |
| Cartridge | 1 |
| Printer dimensions | 405(W) x 375(D) x 530 (H) mm |
| Official site | formlabs |
4. PROCESS of Form3
4-1) Make STL data
In this time, The STL Data create with 3D scanning by CREAFROM.
process -> link.
4-2) Slicer
- Download Preform (only first time)
- Open Preform for slice, and upload the STL file.
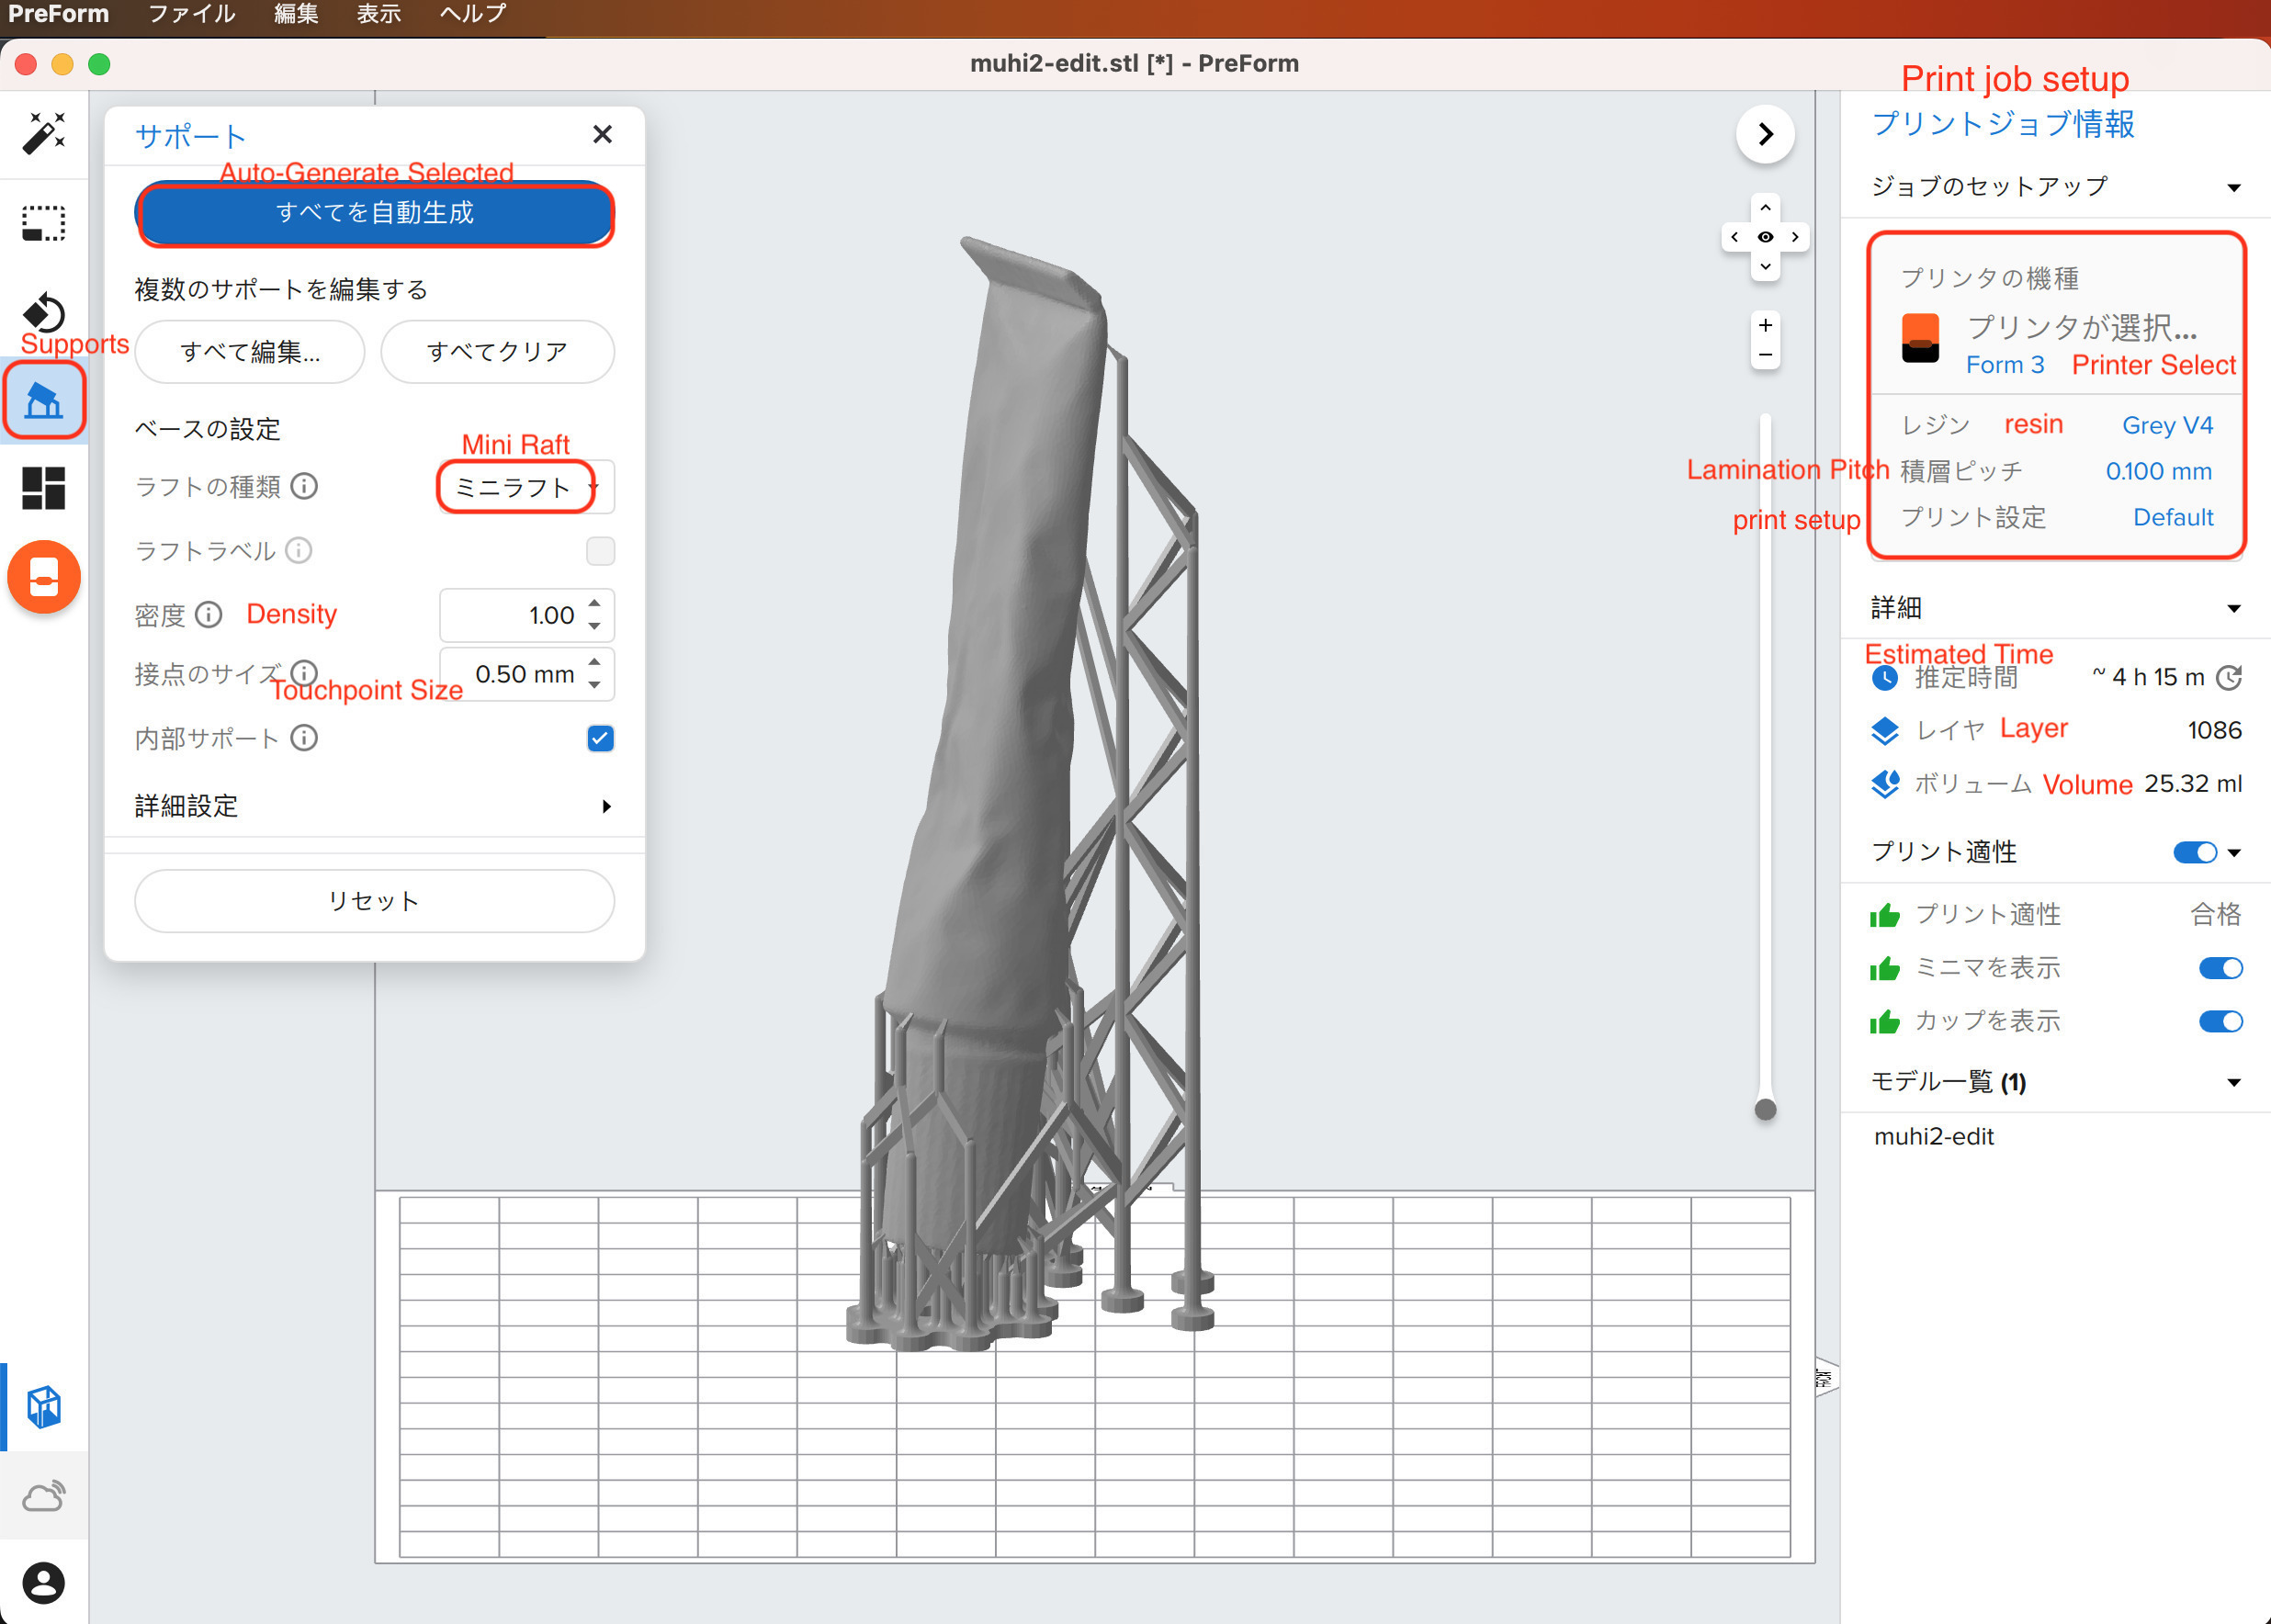
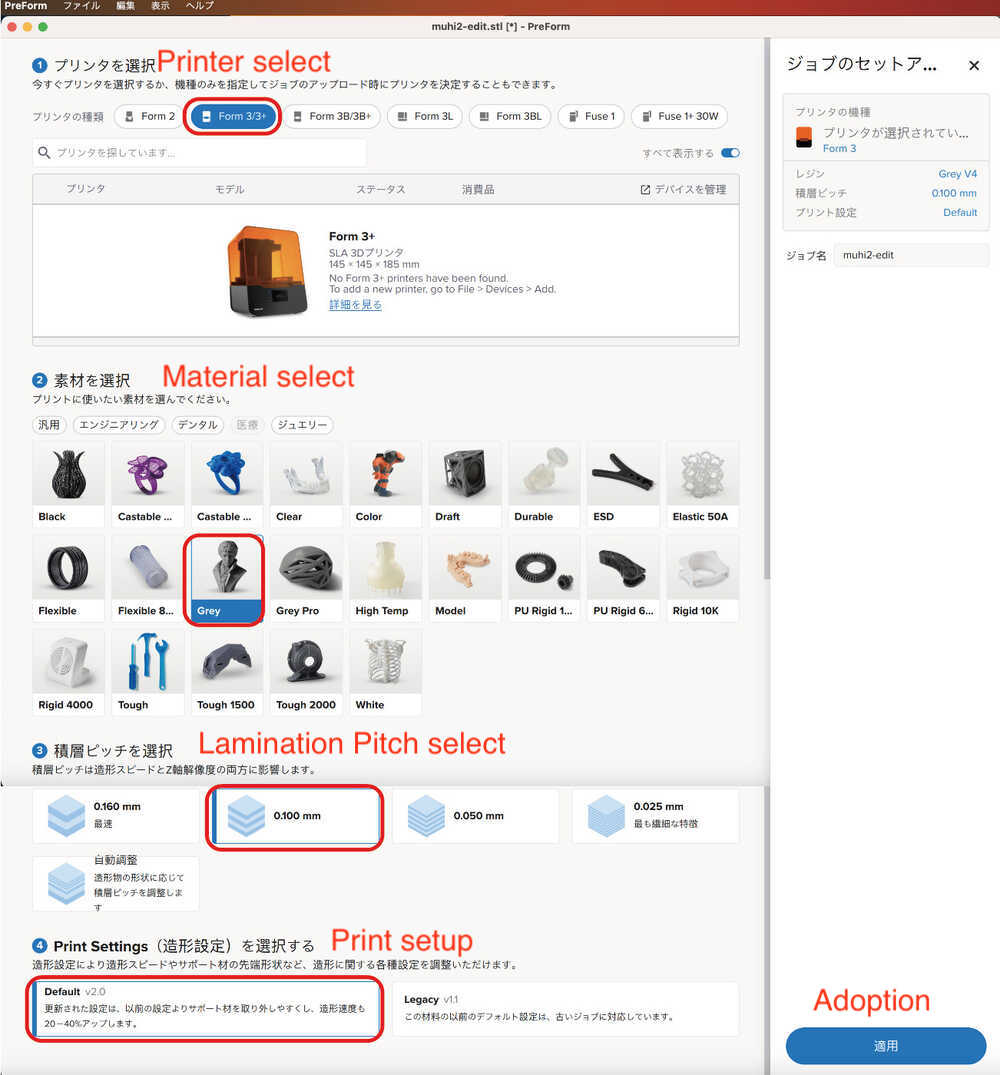
In the slice setting, I just change below 2 points, and click 1 button ”Auto-Generate Selected”- Support: Full Raft → Mini-Raft
- From Printer Setup → Material: Grey v4
4-3) 3D printing
-
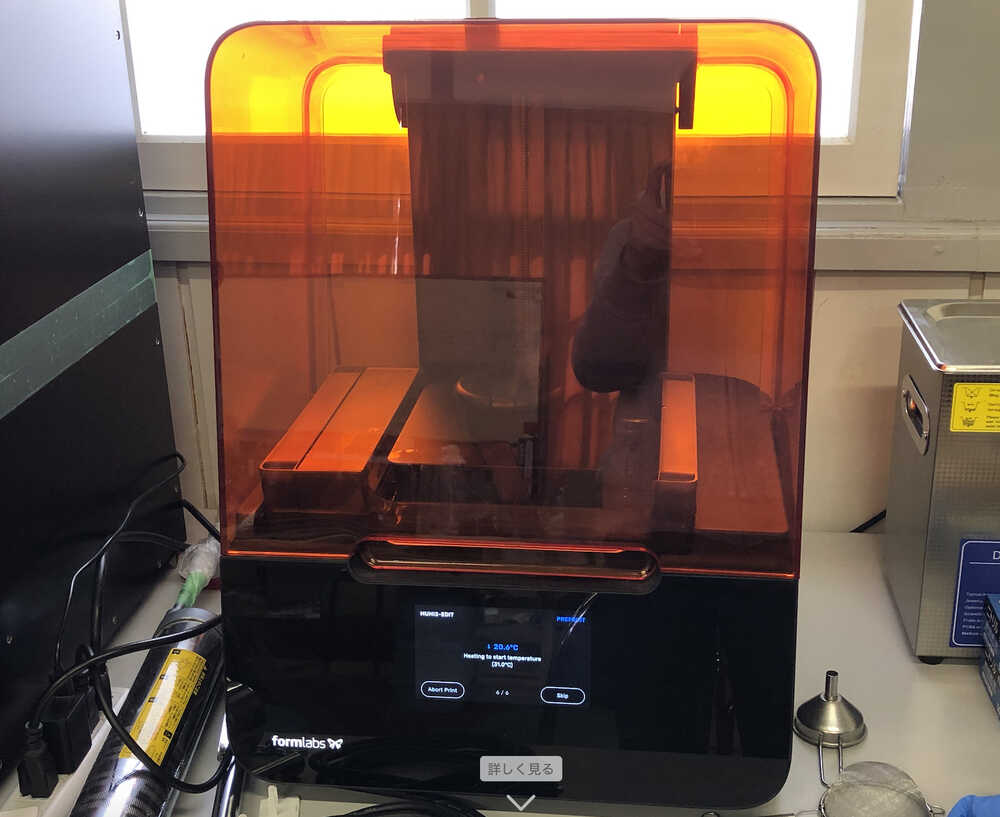
Output Process is Just follow Quick start guide of Folmlabs.
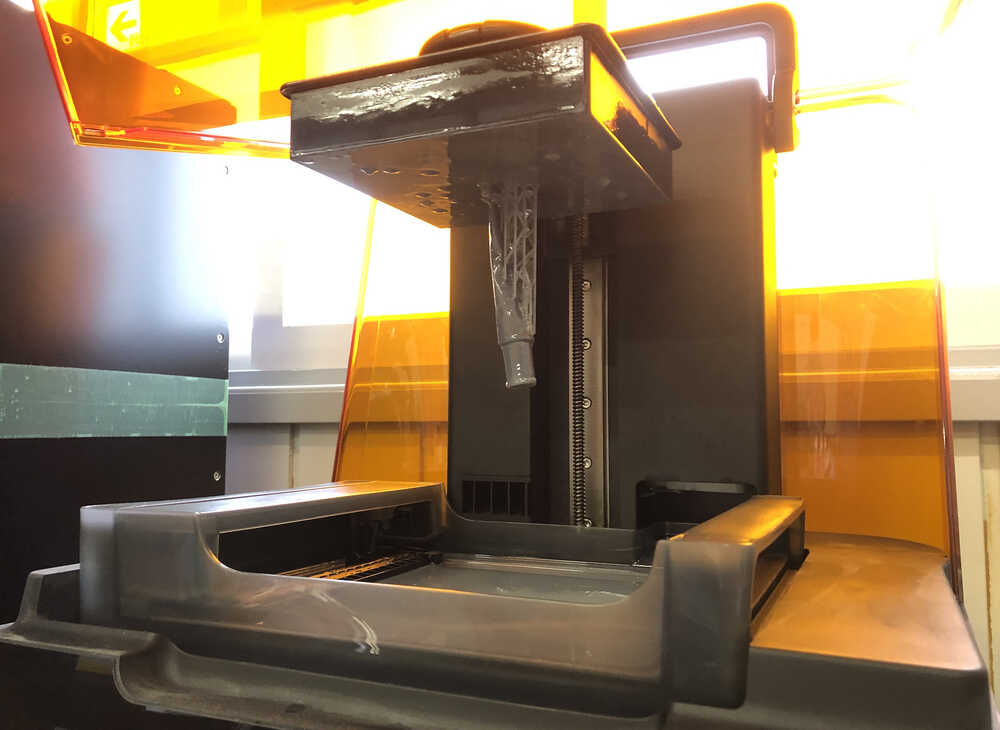
- When the resin is heat with enough temperature, automatically start 3D print. In case of the start temperature is 31°C. The resin was 11°C, so it takes 1 hour to heat.
-
Output is Done! (Time: About 4 hour 10 mins, Lamination Pitch:0.100 mm )
- Remove the Bed
- Remove the output from the Bed with Dedicated spatula.
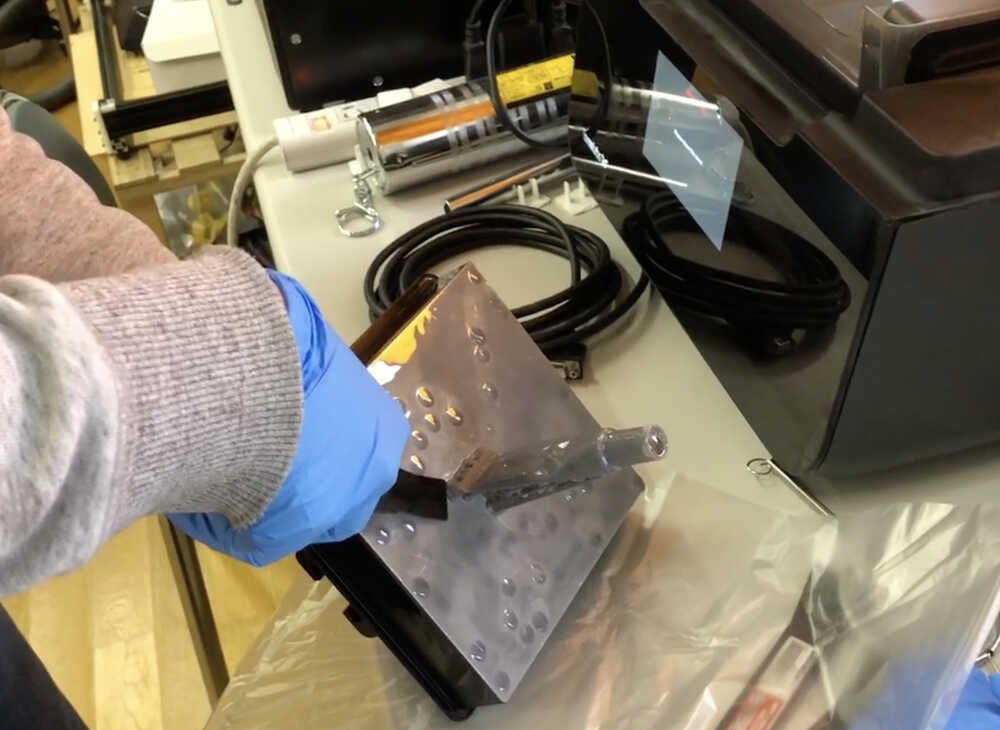
- The plan was to take the support after curing, but the support was also removed during peeling from the bed.
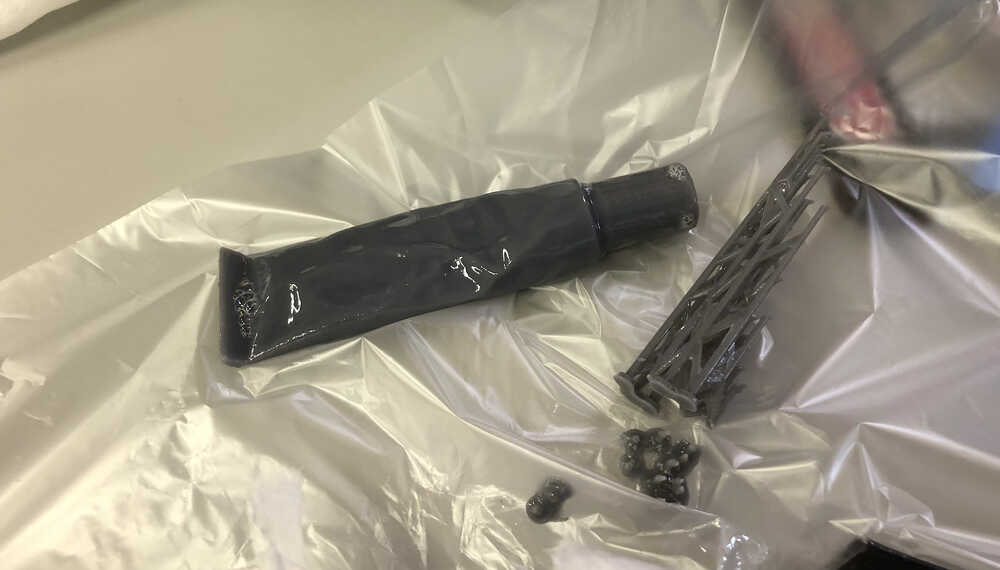
- Clean output, with he ultrasonic cleaner and IPA
- After clean. (The resin status: soft)

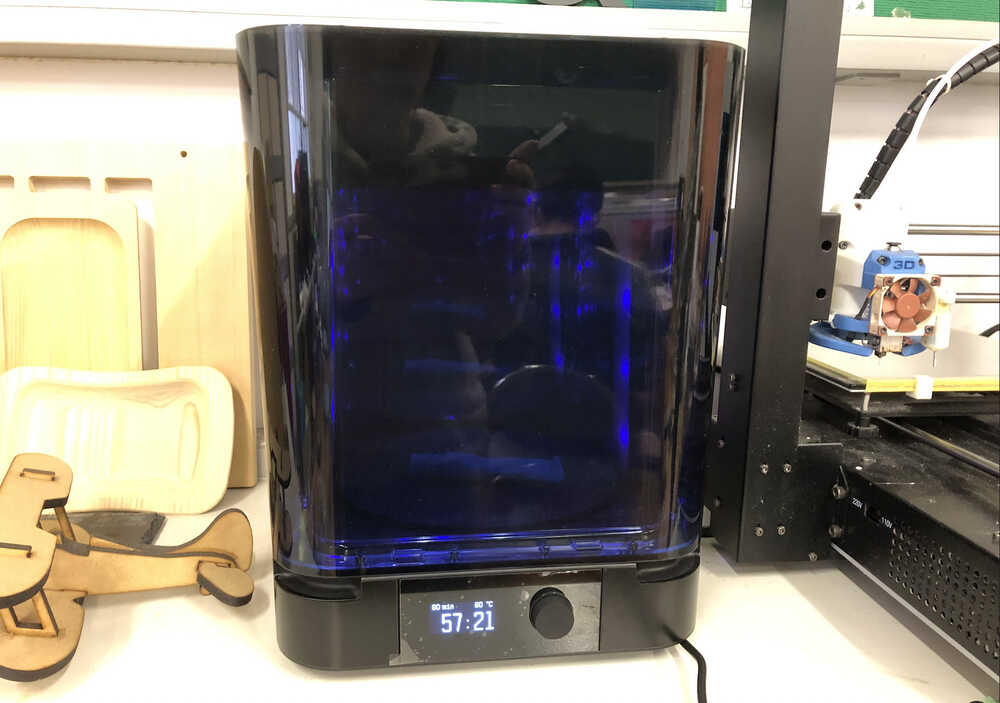
4-4) Cure
For the Cure, I use Form Cure
- Turn on.
- Set Cure time and temperature, and start. Cure time and temperature are different depends on material.
 - After clean. (The resin status: soft)
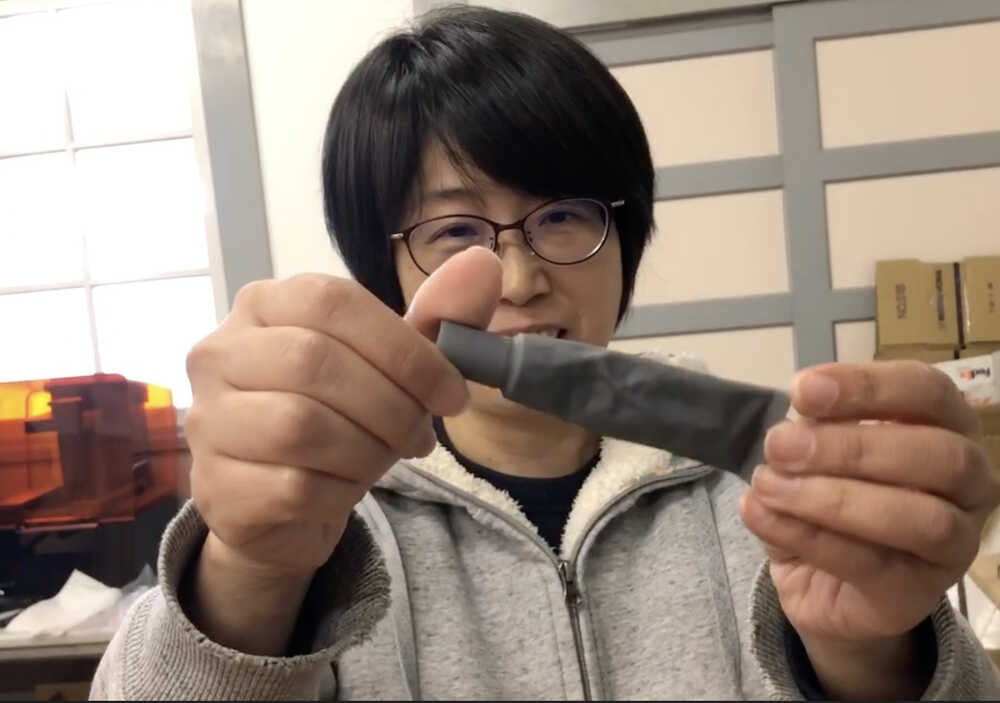 - Done! It is good status!
NOTE
- The effective temperature and time required for curing vary depending on the type of resin.
- I refer the below site, as I can see the recommended settings for Form Cure time and temperature are displayed.
- Useful link :Support.formlabs.com (Japanese)