- Making Control system
This page is my work process for week 10 machine building. We plan to make Vacuum Forming.
1. The Parts I used
Below is the required parts which I picked up.
- Board
- Raspberry Pi Pico x1
- SPAEKFUN Logic Level Converter: x2
- Photocoupler TLP293 x2
- Pin Header1x2 P2.54 x10
- Pin Header1x4 P2.54 x2
- Output
- Solid State Relay: SSR-40DA x2
- Motor driver_Quimat 4A TB6600 x2
- Bipolar Stepper Motor 17HD48002H-22B x2
- Input
- Power Supply
- CURE Switching Power (12V 10A 120W) x1
- Terminal Block (T20C03)
- Power code (KB-D3247A) x1
- DC-DC converter kit (AE-OKL-T/6-W12N-C) x1
- AC inletx1
- Wall outlet x1
- F cable (VVF 2.0x2) x 1m
2. Power Line (Plan)
Below is Plan for Power Line, Vacuum Forming.

3. Datasheet
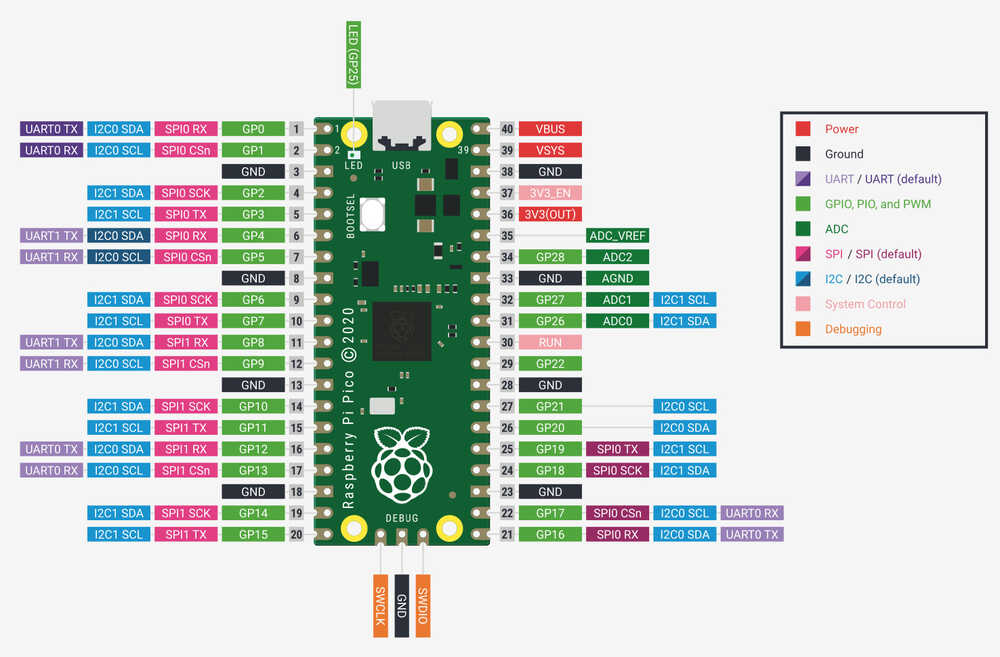
- Raspberry Pi Pico (Pinout)
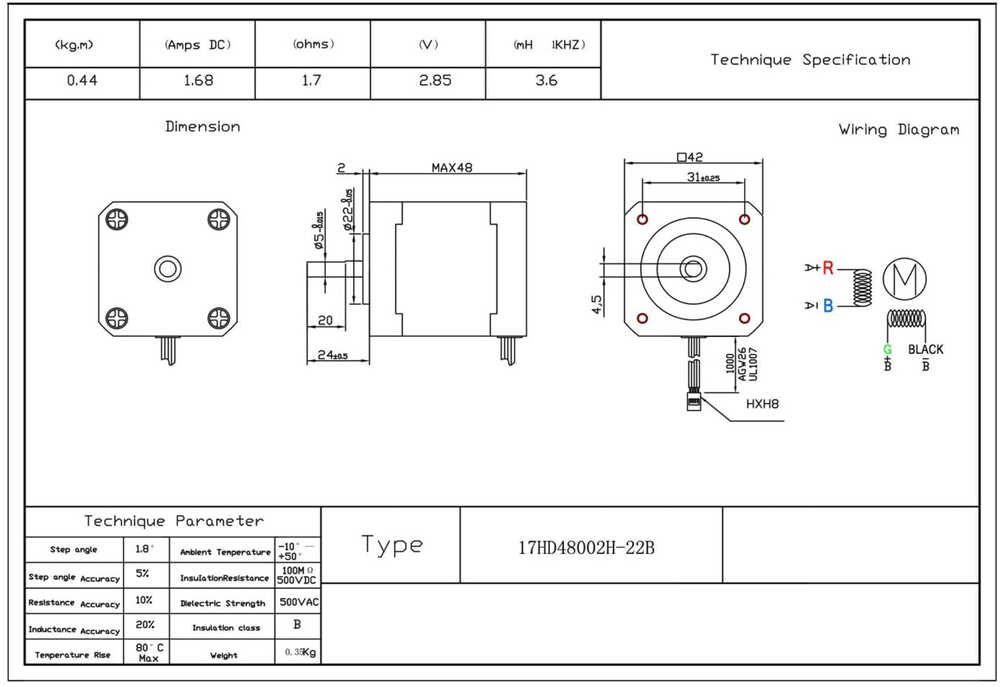
- Stepper 17HD48002H-22B
- 1 Step angle =1.8° (200 pulse(step) for 360°)
- Motor Driver TB6600
- Input Current: 0-5.0A
- Output Current: 0.5-4.0A
- Power (MAX): 160W
-
Micro Step 1,2/A, 2/B, 4, 8, 16,32
-
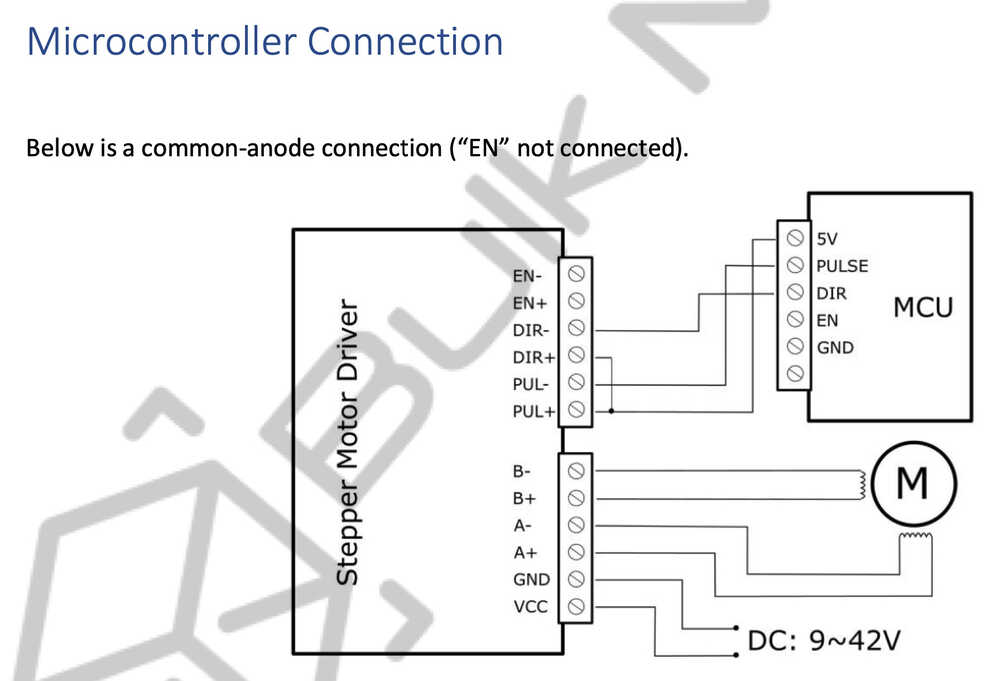
Microcontroller Connection is below in datasheet.
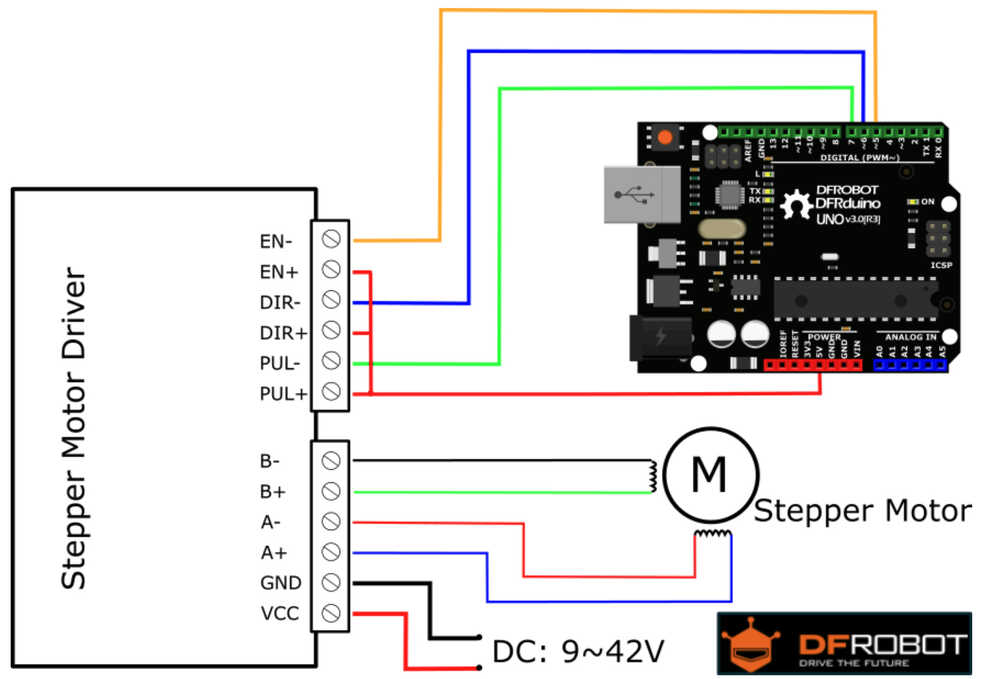
- Microcontroller Connection is below in DFROBOT.
-Solid State Relay: SSR-40DA
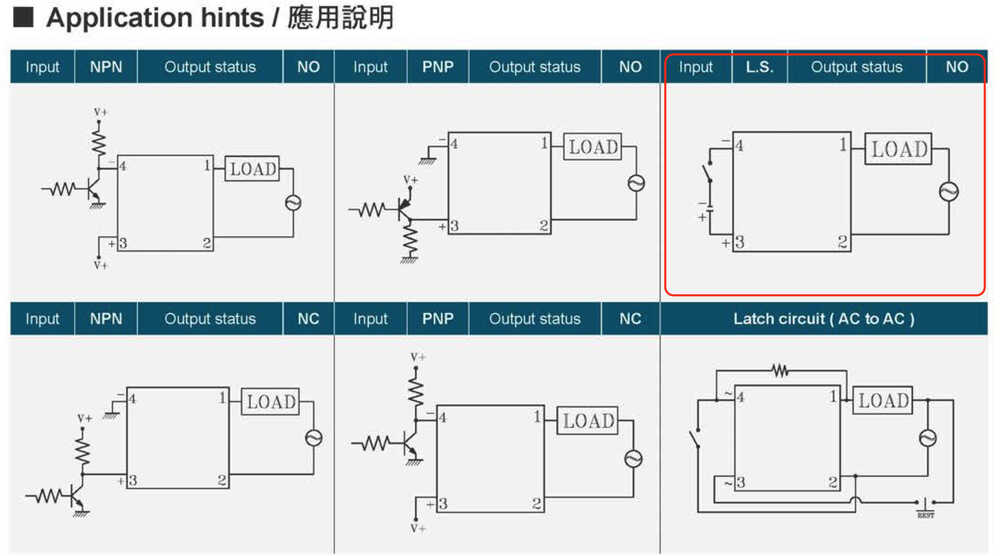
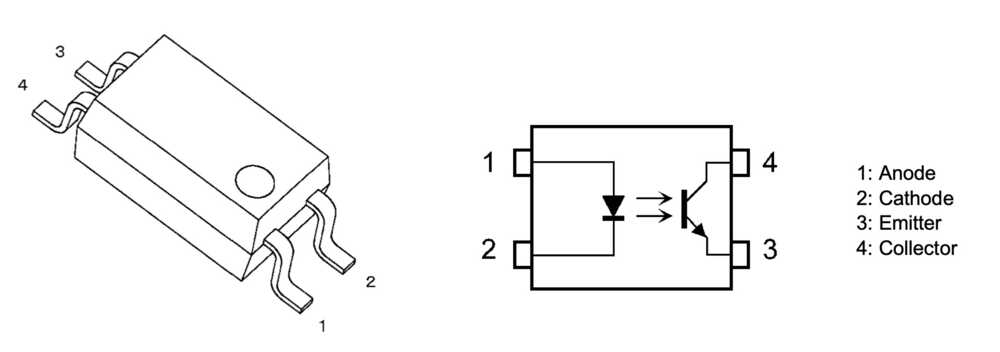
- Photocoupler TLP293
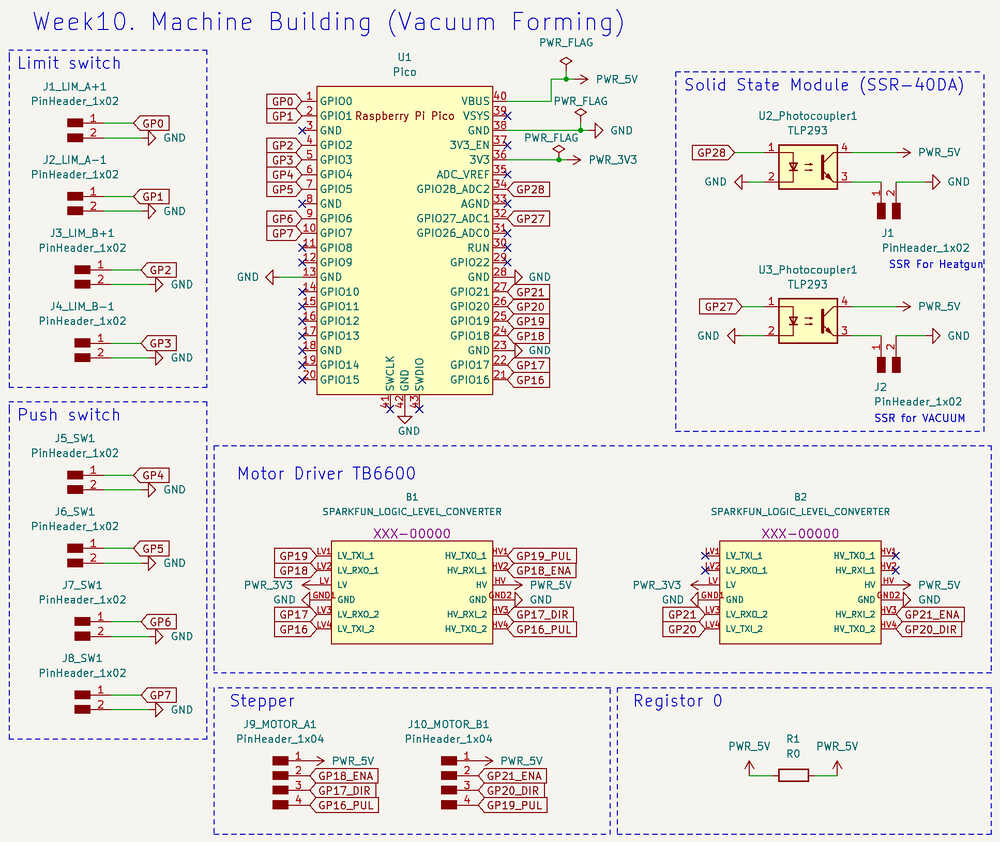
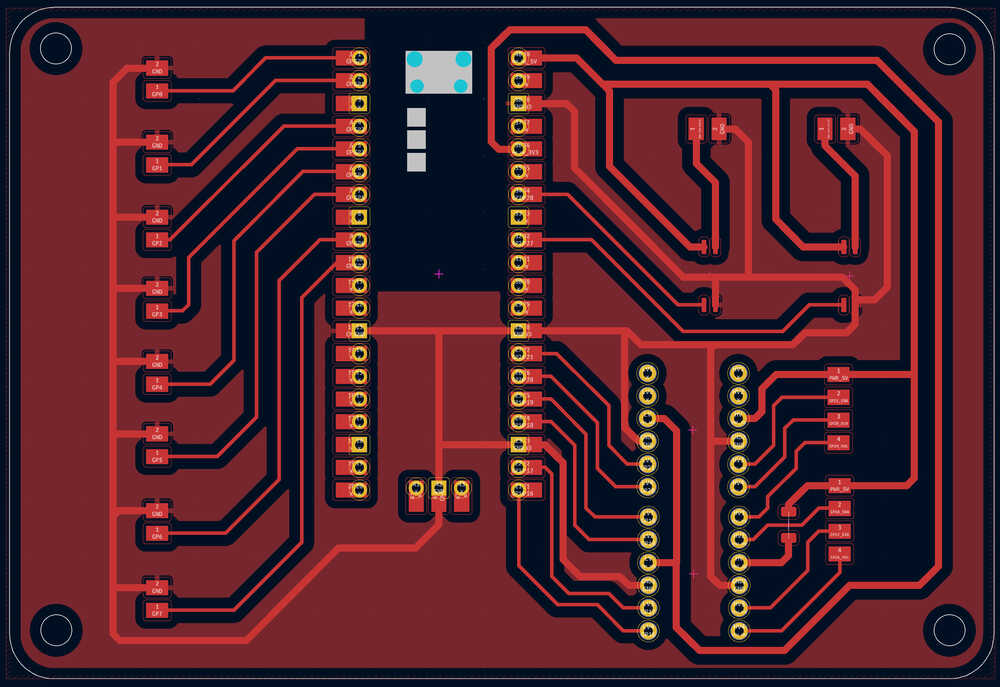
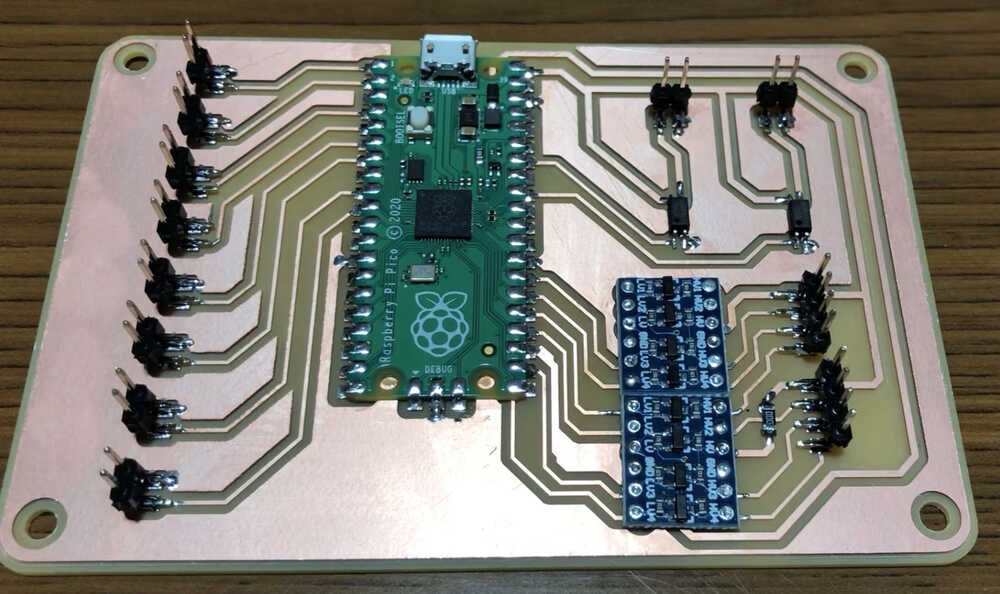
4. Board Making
I made board design for the assignment of week10 as below. For chip, I choose Raspberry Pi Pico as it has many GPIOasse.
- Schematic by Kicad.
- PCB by Kicad
- Milling
Milling details same as Week08.
- Soldering & tester check
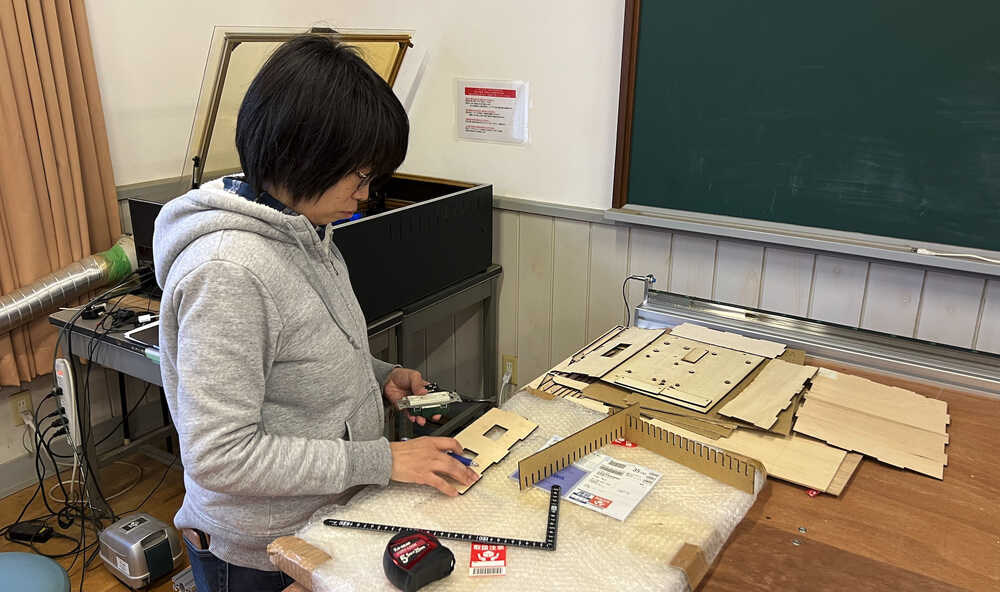
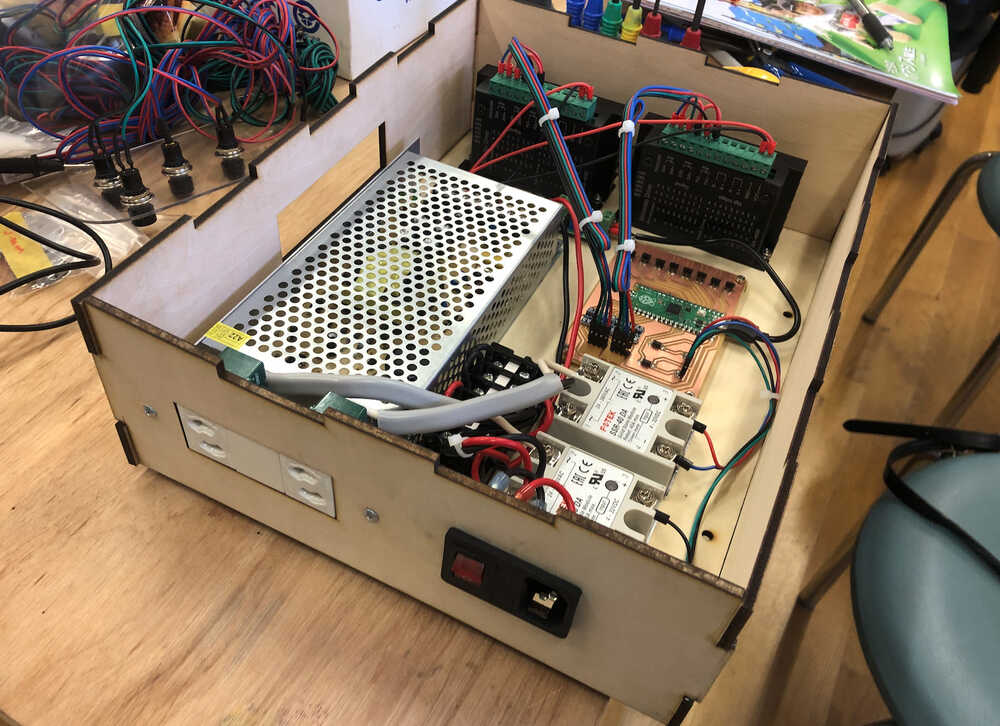
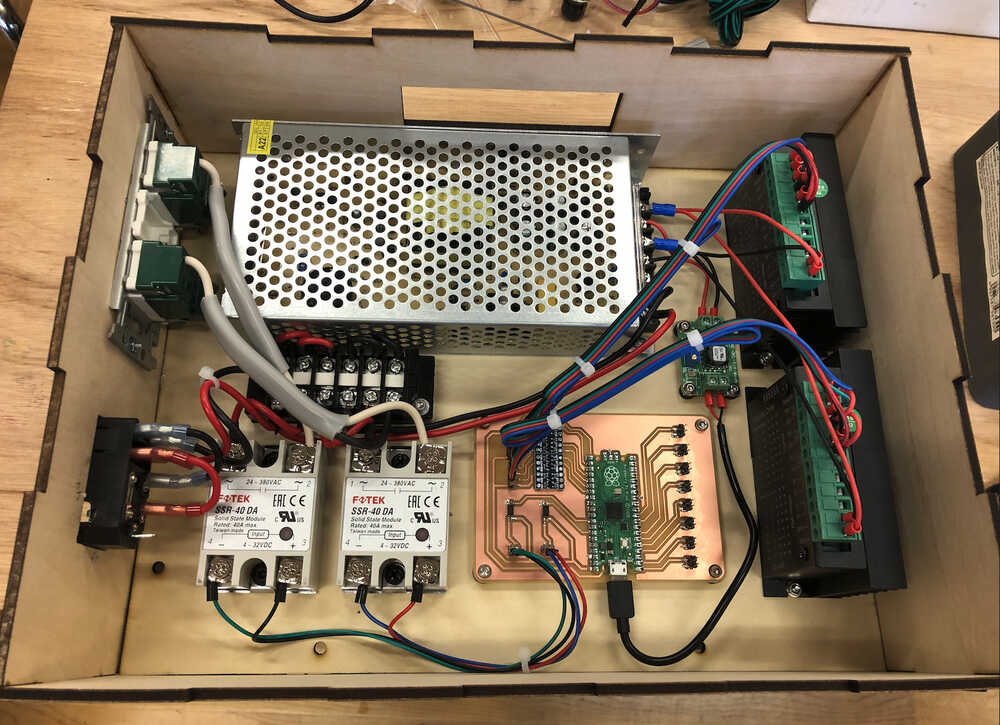
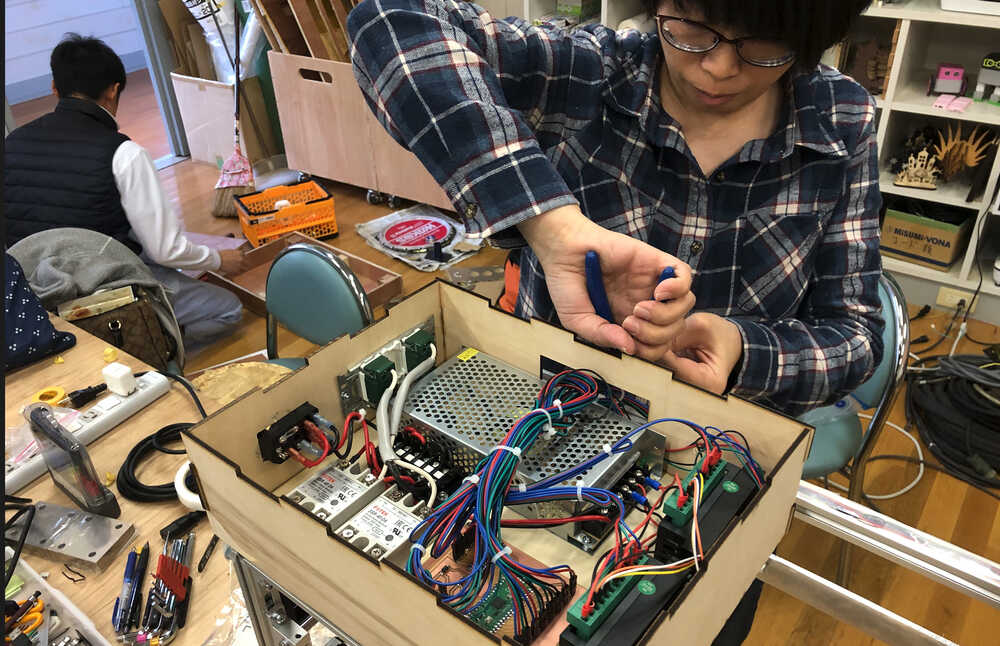
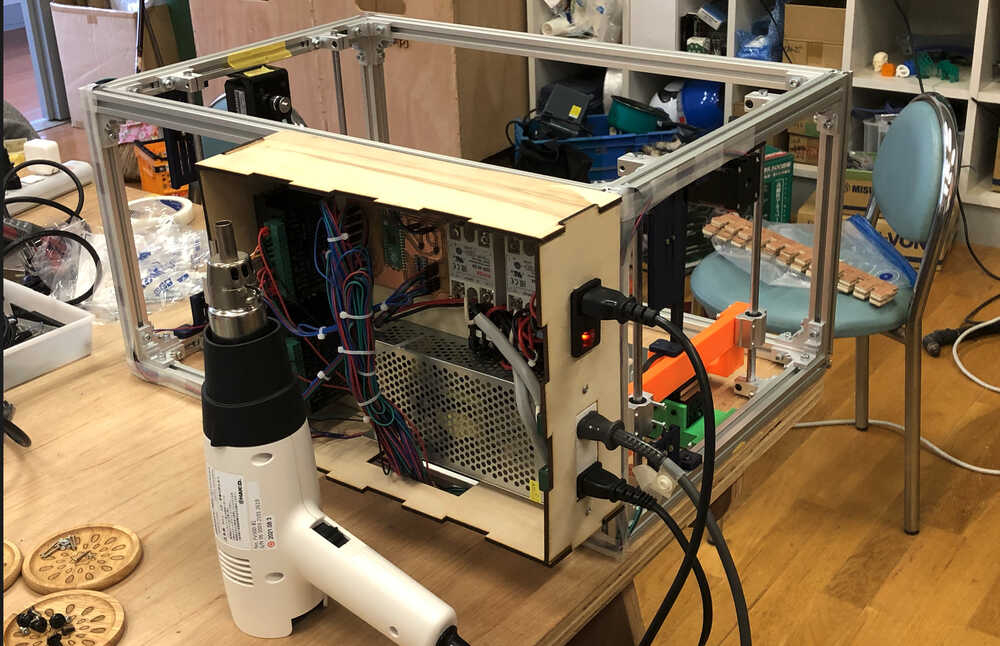
5. Making Control Box & Panel, by laser cutting
5-1) Control BOX
- Consider the position of parts and size of control box size.
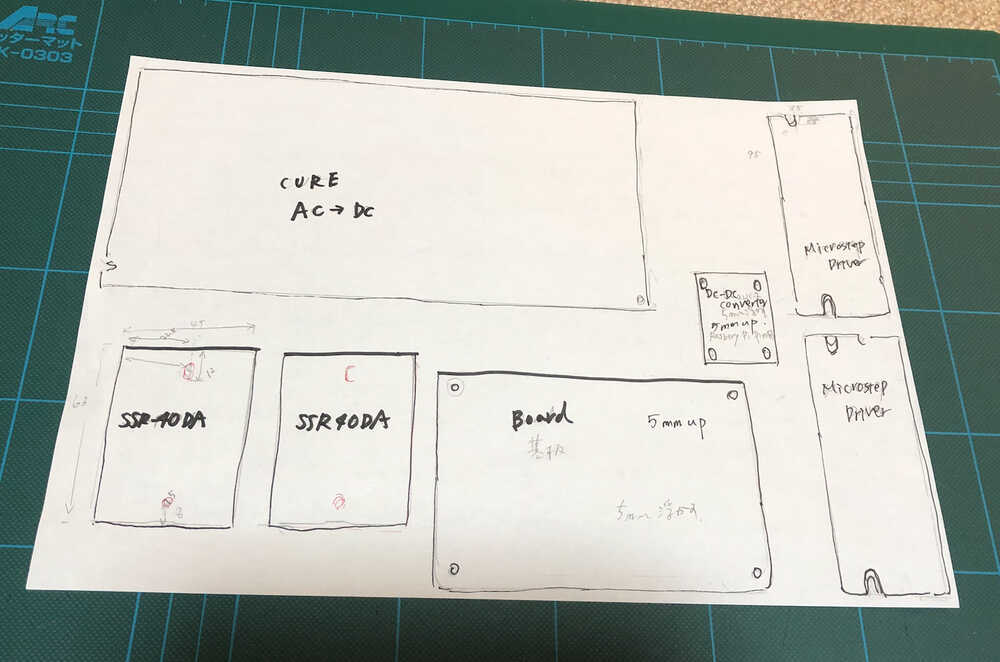
- I made Control BOX, using laser cutting machine.
- Make Model
- by Fusion360 and exported in SVG format about top face.
- and Makecase
- Laser cutting
- Machine: FABOOL Laser CO2
- Materials: veneer t=4mm
- Software: SmartDIYsCreator
- Parameter: Speed 1500, Power 40, Times 3
- Make Model
- Attach the necessary parts to the base of the Control Box.
- Install the outer frame of the control box
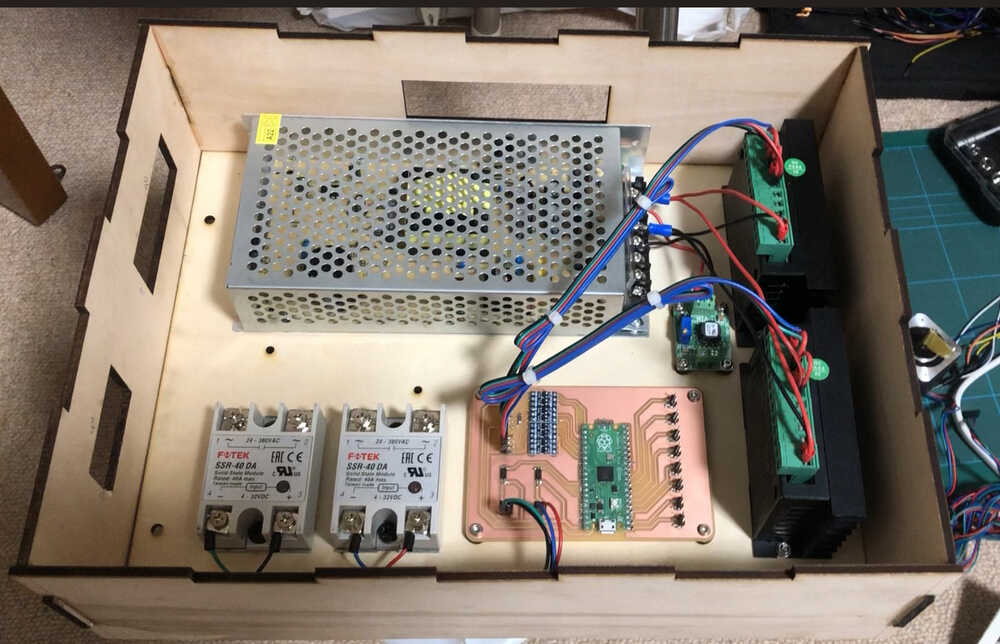
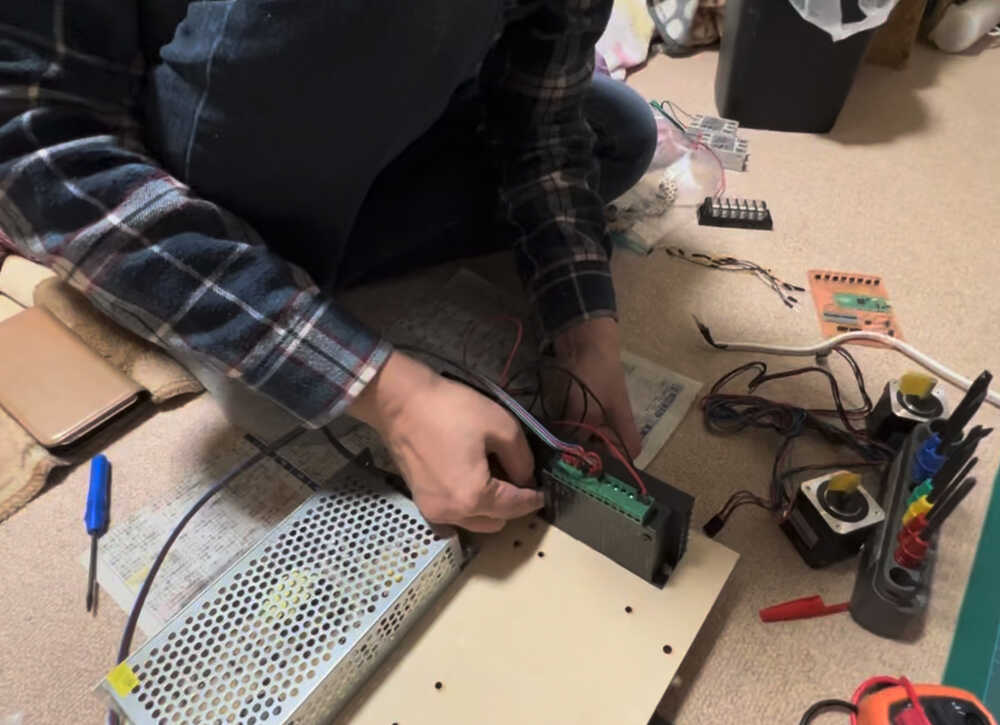
Then, It's time to wire for the prototype.
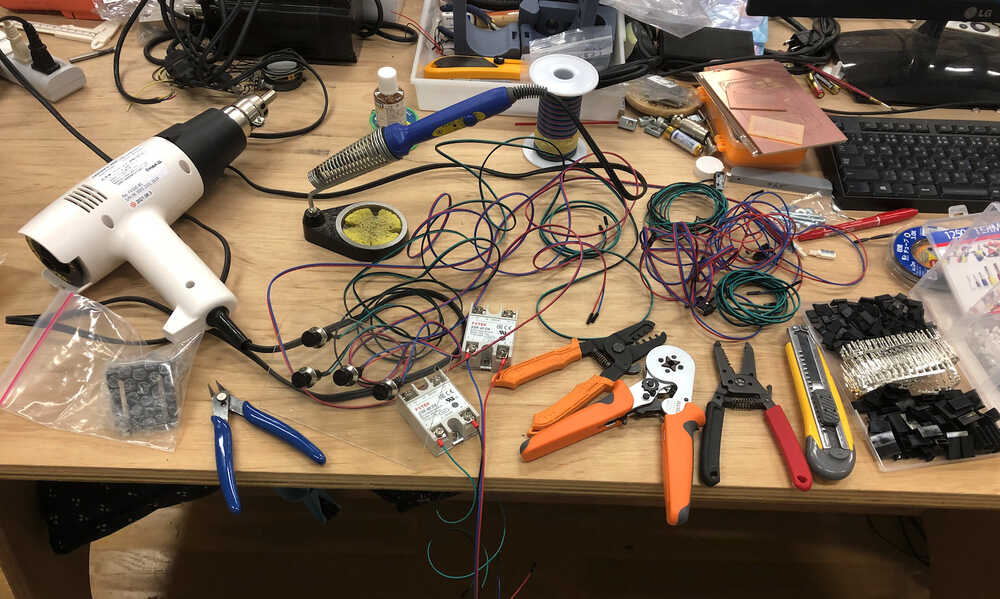
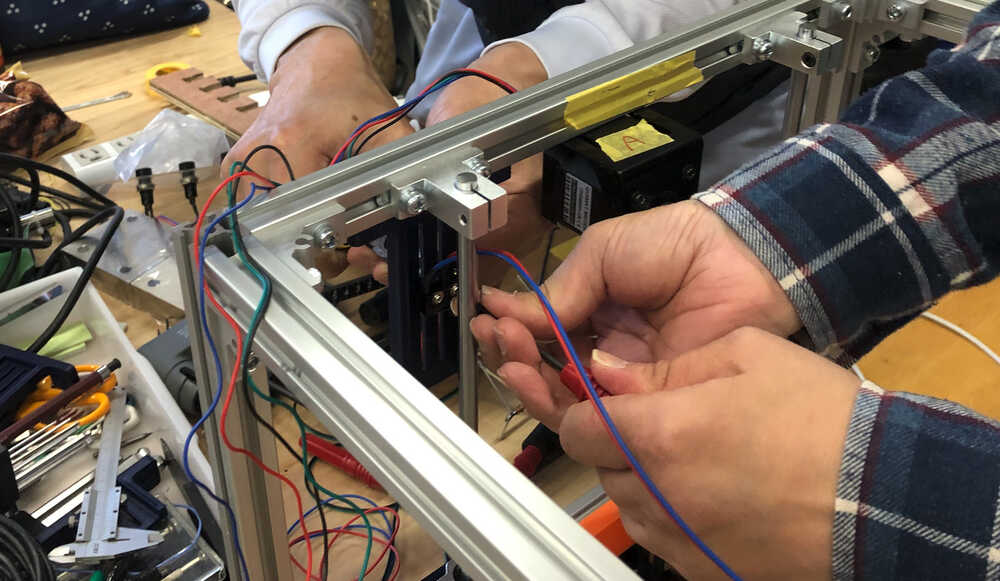
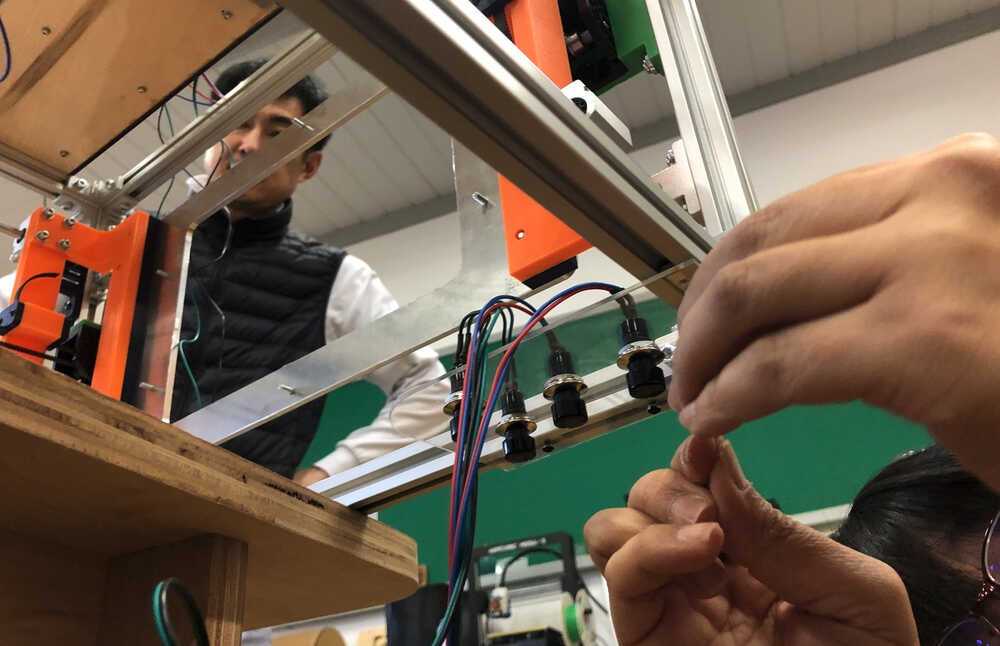
5-2) Wiring
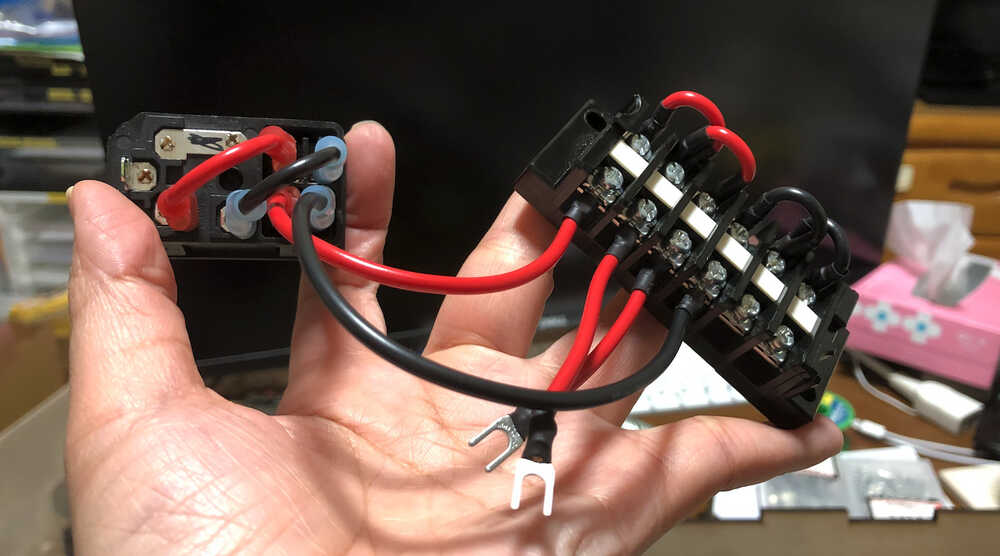
Wiring is done using many tools and terminal assortment.
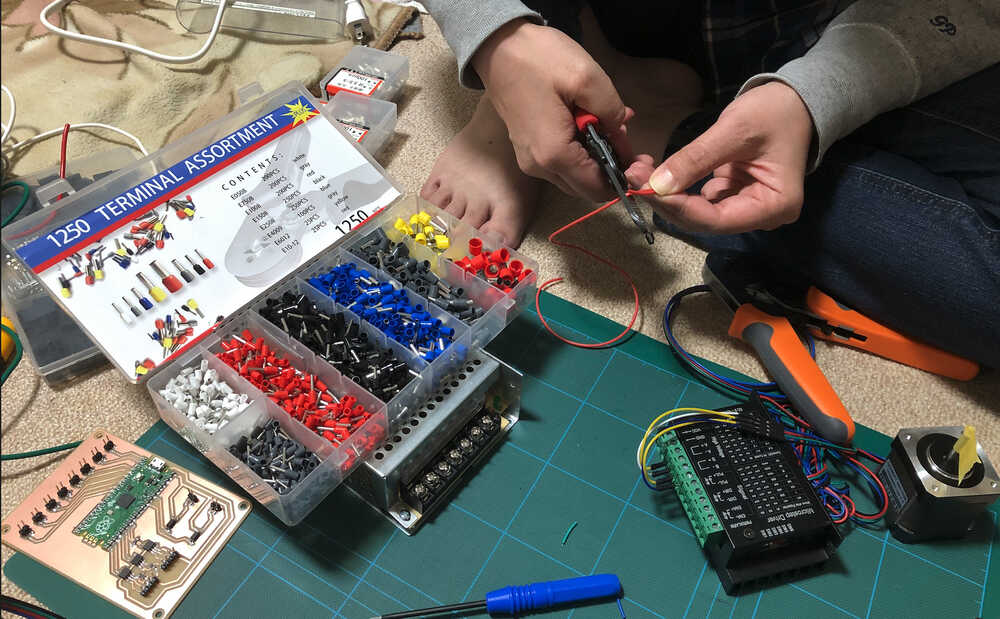
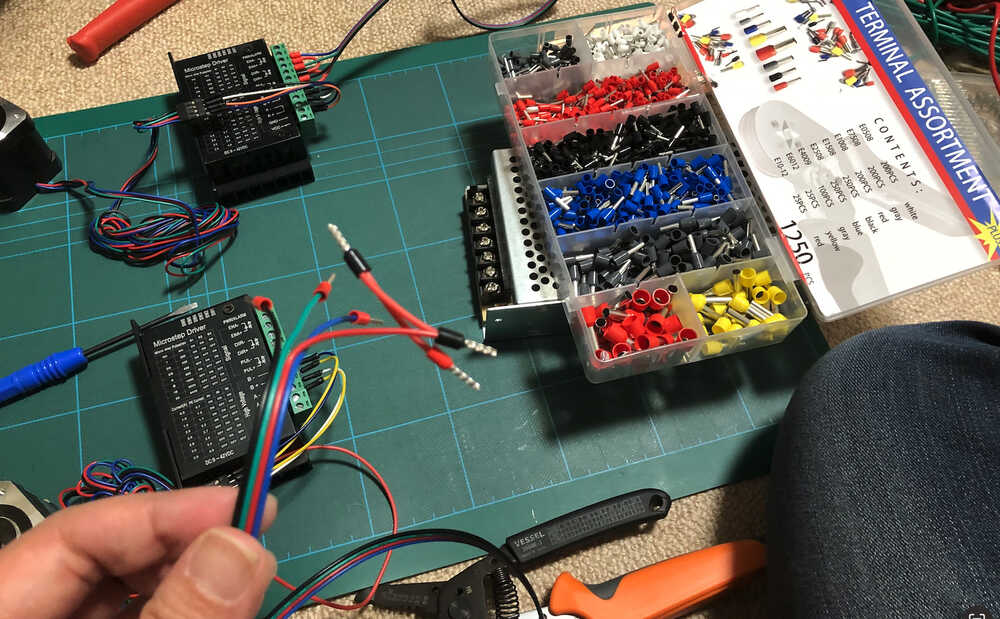 During wiring work.
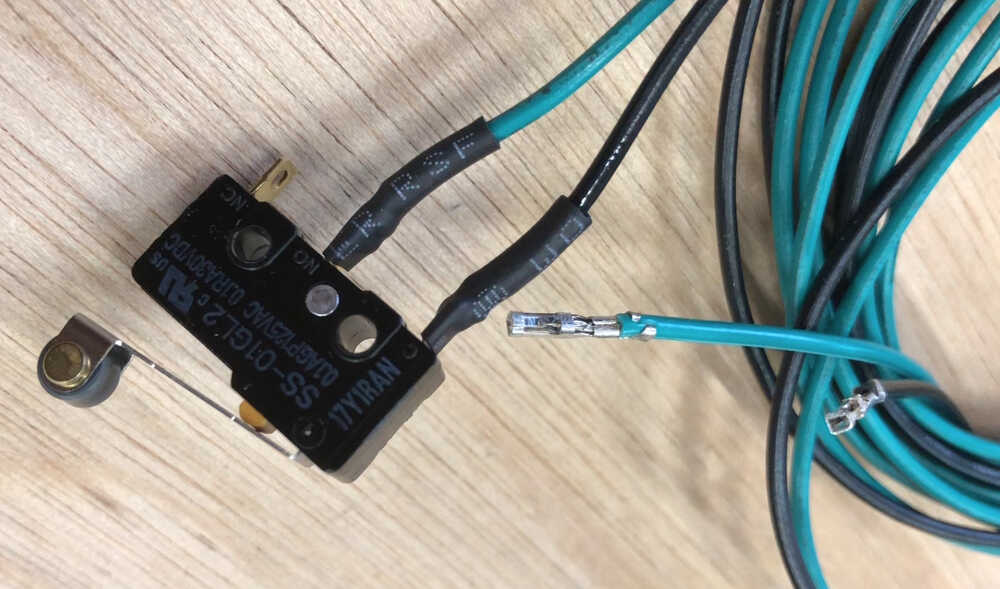
- Limit Switch
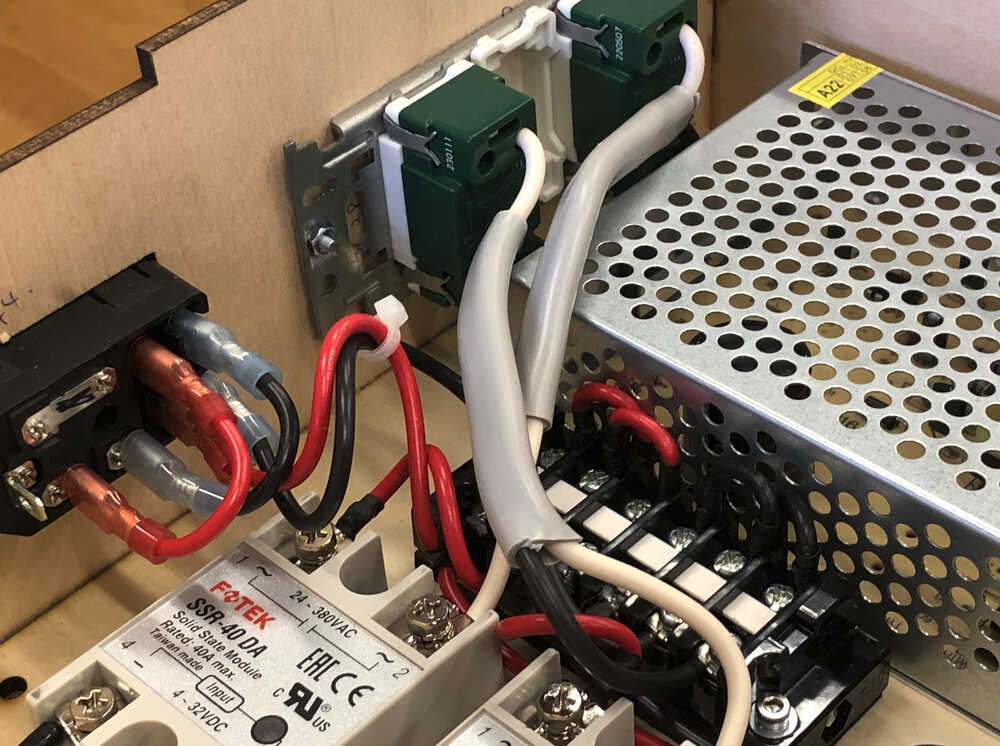
- Power line (AC inlet) and Terminal block.
- Wall outlet:
peel the cover of code about the length of guide on the outlet.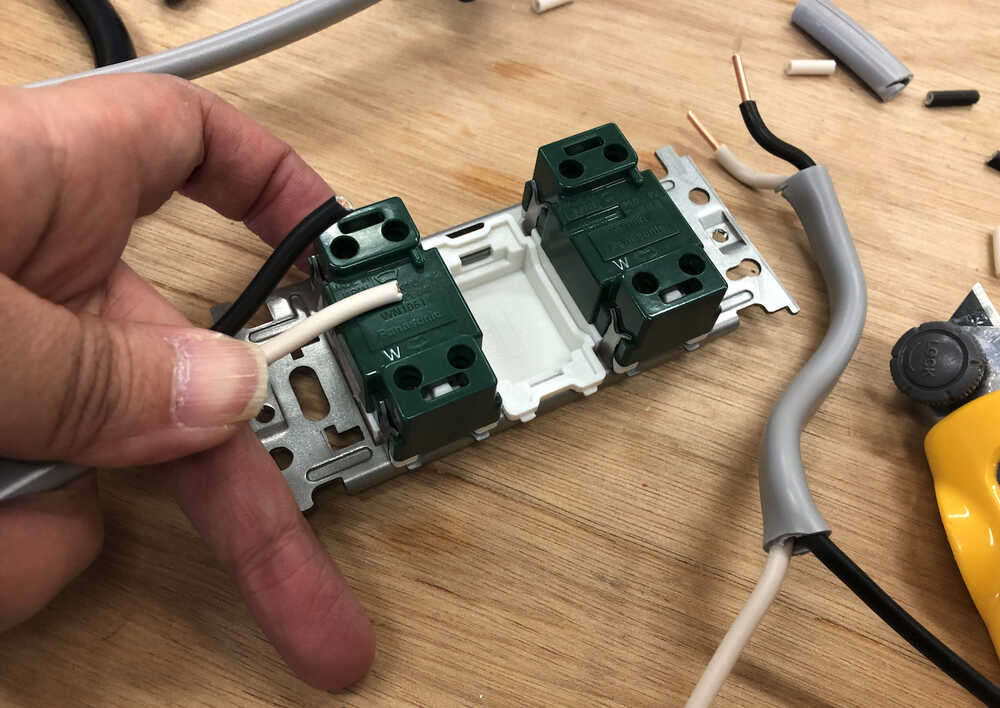
5-3) Panel
I made Push-button switch panel, using laser cutting machine.
- Make Model
- by Fusion360
- exported in SVG format about top face.
- Laser cutting
- Machine: FABOOL Laser CO2
- Materials: acrylic board
- Software: SmartDIYsCreator
- Parameter: Speed 900, Power 60, Times 2
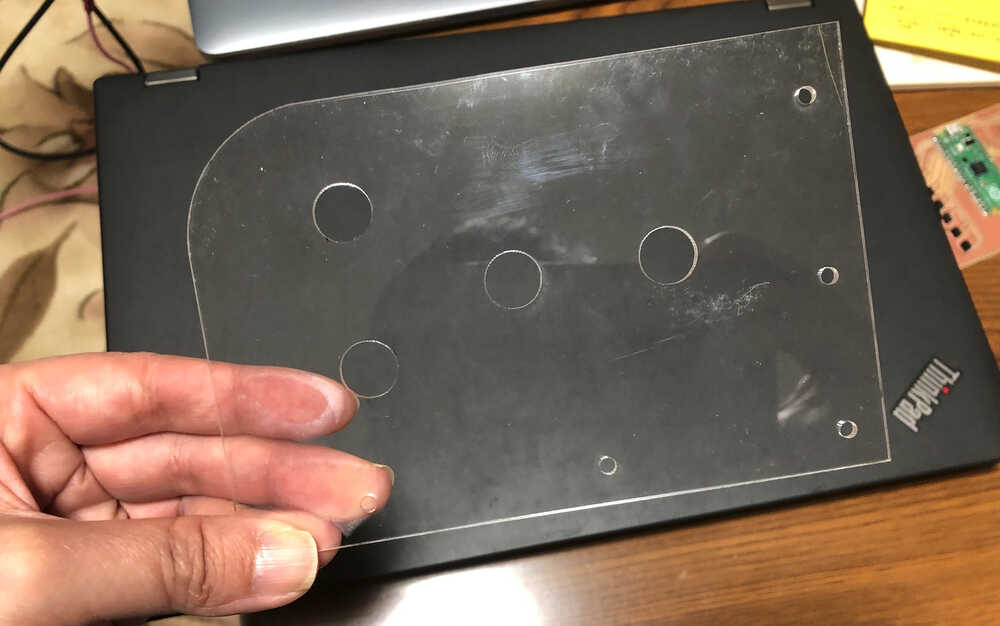 Then I install Push-button switch to panel.

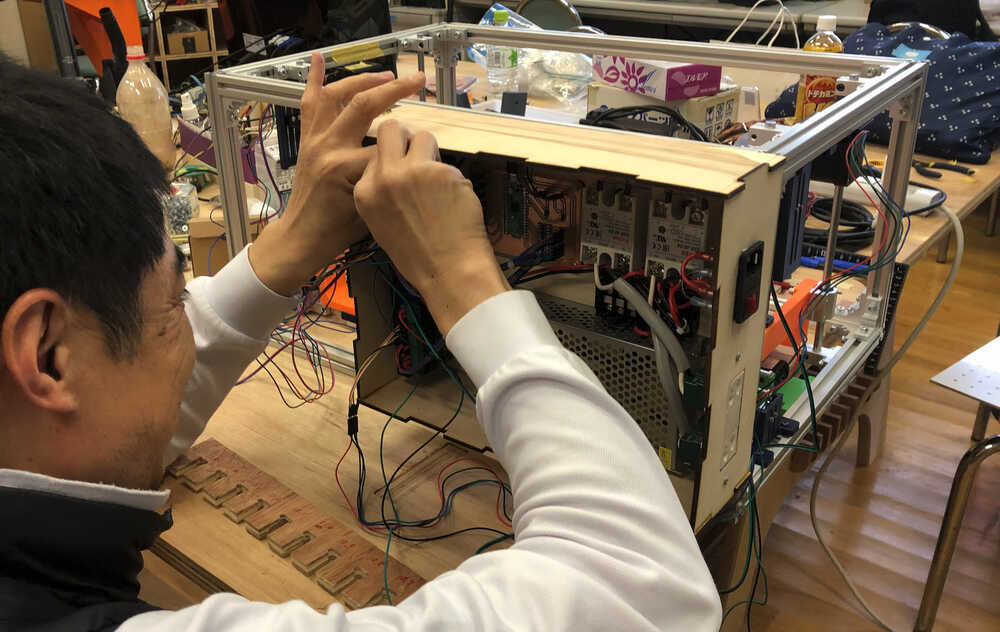
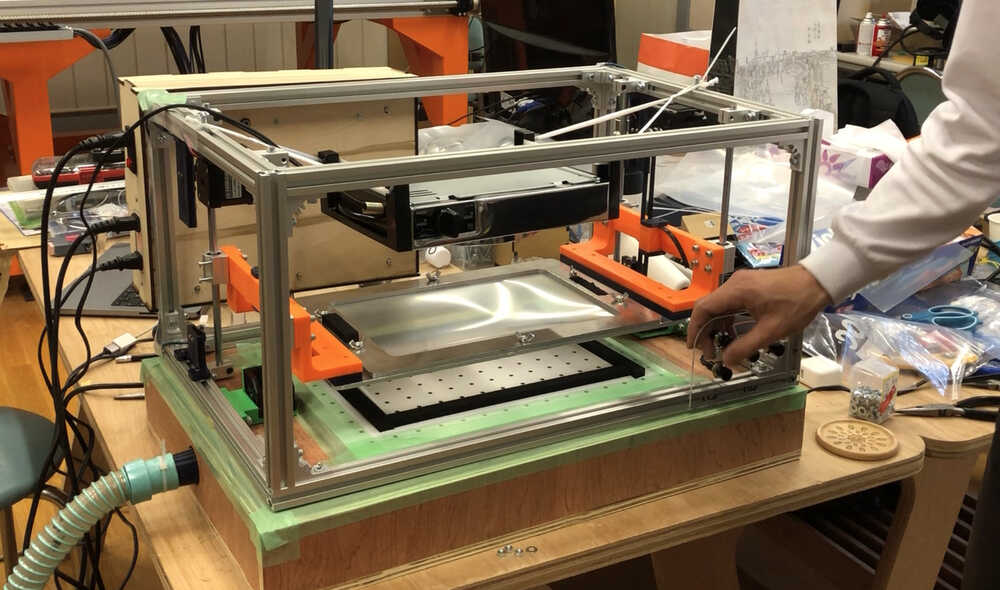
6. Assembly
It's time to assemble. Masuoka-san and I work for assemble together.

Install Motor
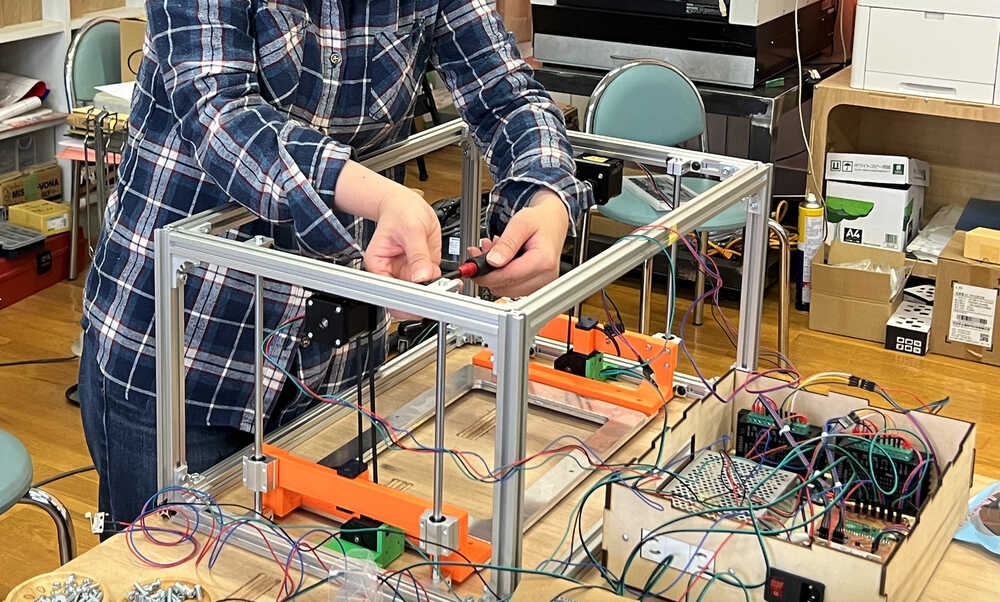
Install Limit Switch
Install Control box
Install Panel
Bundle the wires
Prototype1 assembly is Done.
After test ON 11-April, We choose electric heating stove to heat.
Install electric heating stove (Work on Progress)
7. Programming code
The completion code is as follows
// Pin definitions for stepper motors A and B
const int motorA_PUL = 16;
const int motorA_DIR = 17;
const int motorA_ENA = 18;

const int motorB_PUL = 19;
const int motorB_DIR = 20;
const int motorB_ENA = 21;

// Pin definitions for sStart button and limit switch
const int limitSwitchAPin_up = 0;
const int limitSwitchBPin_up = 1;
const int limitSwitchAPin_down = 2;
const int limitSwitchBPin_down = 3;
const int upButtonPin = 4;
const int downButtonPin = 5;
const int heatButtonPin = 6;
const int startButtonPin = 7;

// Pin Definition for Relay
const int heater_relay = 27;
const int vacuum_relay = 28;

// Stepping motor step count and delay time
const int stepsPerRevolution = 200;
const int stepDelay = 200000 / stepsPerRevolution; // MicroSec

void setup() {
  // Setting of Pin
  pinMode(motorA_DIR, OUTPUT);
  pinMode(motorA_PUL, OUTPUT);
  pinMode(motorA_ENA, OUTPUT);

  pinMode(motorB_DIR, OUTPUT);
  pinMode(motorB_PUL, OUTPUT);
  pinMode(motorB_ENA, OUTPUT);

  pinMode(upButtonPin, INPUT_PULLUP);
  pinMode(downButtonPin, INPUT_PULLUP);
  pinMode(startButtonPin, INPUT_PULLUP);
  pinMode(heatButtonPin, INPUT_PULLUP);
  pinMode(limitSwitchAPin_up, INPUT_PULLUP);
  pinMode(limitSwitchBPin_up, INPUT_PULLUP);
  pinMode(limitSwitchAPin_down, INPUT_PULLUP);
  pinMode(limitSwitchBPin_down, INPUT_PULLUP);

  // Setting of Relay pin
  pinMode(heater_relay, OUTPUT);
  pinMode(vacuum_relay, OUTPUT);
}

void loop() {

 // (1)When the up button is pressed
 if (digitalRead(upButtonPin) == LOW) {

     // Enable stepper motors
         digitalWrite(motorA_ENA, HIGH);
         digitalWrite(motorB_ENA, HIGH);

     //Rotate both stepper motors
      if (digitalRead(limitSwitchAPin_up) == HIGH) {
        rotateMotor_cw(motorA_DIR, motorA_PUL);
      }

      if (digitalRead(limitSwitchBPin_up) == HIGH) {
        rotateMotor_cw(motorB_DIR, motorB_PUL);
      }
    }

 // (2)When the down button is pressed
 if (digitalRead(downButtonPin) == LOW) {

     // Enable stepper motors
         digitalWrite(motorA_ENA, HIGH);
         digitalWrite(motorB_ENA, HIGH);

     //Rotate both stepper motors
      if (digitalRead(limitSwitchAPin_down) == HIGH) {
        rotateMotor_ccw(motorA_DIR, motorA_PUL);
      }

      if (digitalRead(limitSwitchBPin_down) == HIGH) {
        rotateMotor_ccw(motorB_DIR, motorB_PUL);
      }
    }

 // (3)When the heating button is pressed
 if (digitalRead(heatButtonPin) == LOW) {
     // Enable stepper motors
         digitalWrite(motorA_ENA, HIGH);
         digitalWrite(motorB_ENA, HIGH);

     // Rotate both stepping motors until both limit switches A and B are pressed
      while (digitalRead(limitSwitchAPin_up) == HIGH || digitalRead(limitSwitchBPin_up) == HIGH) {
       if (digitalRead(limitSwitchAPin_up) == HIGH) {
         rotateMotor_cw(motorA_DIR, motorA_PUL);
        }

       if (digitalRead(limitSwitchBPin_up) == HIGH) {
         rotateMotor_cw(motorB_DIR, motorB_PUL);
        }
     }
     // Heater relay ON when both limit switches A and B are pressed
        digitalWrite(heater_relay, HIGH);

     //Heating OFF when start button is pressed
      if (digitalRead(startButtonPin) == LOW) {
       digitalWrite(heater_relay, LOW);
     }
 }

 // (4)When the start button is pressed
 if (digitalRead(startButtonPin) == LOW) {
     // Enable stepper motors
      digitalWrite(motorA_ENA, HIGH);
      digitalWrite(motorB_ENA, HIGH);

     // Rotate both stepping motors until both limit switches A and B are pressed
      while (digitalRead(limitSwitchAPin_down) == HIGH || digitalRead(limitSwitchBPin_down) == HIGH) {
       if (digitalRead(limitSwitchAPin_down) == HIGH) {
         rotateMotor_ccw(motorA_DIR, motorA_PUL);
        }

       if (digitalRead(limitSwitchBPin_down) == HIGH) {
         rotateMotor_ccw(motorB_DIR, motorB_PUL);
        }
     }

     // Vacuum relay ON for 10 seconds when both limit switches A and B are pressed
         digitalWrite(vacuum_relay, HIGH);
         delay(10000);
         digitalWrite(vacuum_relay, LOW);
         delay(1000);
    }

}


// function definition

void rotateMotor_cw(int motor_DIR_cw, int motor_PUL_cw) {
  digitalWrite(motor_DIR_cw, HIGH); // Rotate in clockwise direction
  digitalWrite(motor_PUL_cw, HIGH);
  delayMicroseconds(stepDelay);
  digitalWrite(motor_PUL_cw, LOW);
  delayMicroseconds(stepDelay);
}

void rotateMotor_ccw(int motor_DIR_ccw, int motor_PUL_ccw) {
  digitalWrite(motor_DIR_ccw, LOW); // Rotate in counterclockwise direction
  digitalWrite(motor_PUL_ccw, HIGH);
  delayMicroseconds(stepDelay);
  digitalWrite(motor_PUL_ccw, LOW);
  delayMicroseconds(stepDelay);
}
Reference code
In my case, I had a very hard time with the program code. The following sites and others helped me.
-
TB6600 Stepper Motor Driver
-
"INPUT_PULLUP" of arduino IDE
- OttoBlockly Sample code
- Arduino IDE Sample code
- ChatGPT
8. My Thought
- I am in charge of Making Control system for Machine building. It was very wonderful experience for me.
- There was so much to do for machine building that there was no time at all. (connections, programming, and wiring work, etc)
- Space for installing Control Box components is small. For future work, I leaned the outbox size should made it wider.
- Wires are disconnected and debugging is frequent, so I changed to caulking terminals that are difficult to disconnect.
- I've also learned that wiring with long length can result become inconvenience.