Week07. Computer-Controlled Machining
1. Assignment and Result
About the process, I made new page and made links are below, because the long page makes me confuse.
| GROUP ASSIGNMENT | THE RESULT |
|---|---|
| - do your lab's safety training - test runout, alignment, fixturing, speeds, feeds, materials, and tool path for your machine |
Process -> Kitakagaya: Week7 Computer-Controlled Machining |
| INDIVIDUAL ASSIGNMENT | THE RESULT |
|---|---|
| make (design+mill+assemble) something big (~meter-scale) | PROCESS -> Create model & tool path -> machine operation - I made a movable tool cart that it is also can place PC operating the CNC in Fab Lab West-harima. |
| extra credit: don't use fasteners or glue | - I made the divider, no fasteners and no glue |
| extra credit: include curved surfaces | - |
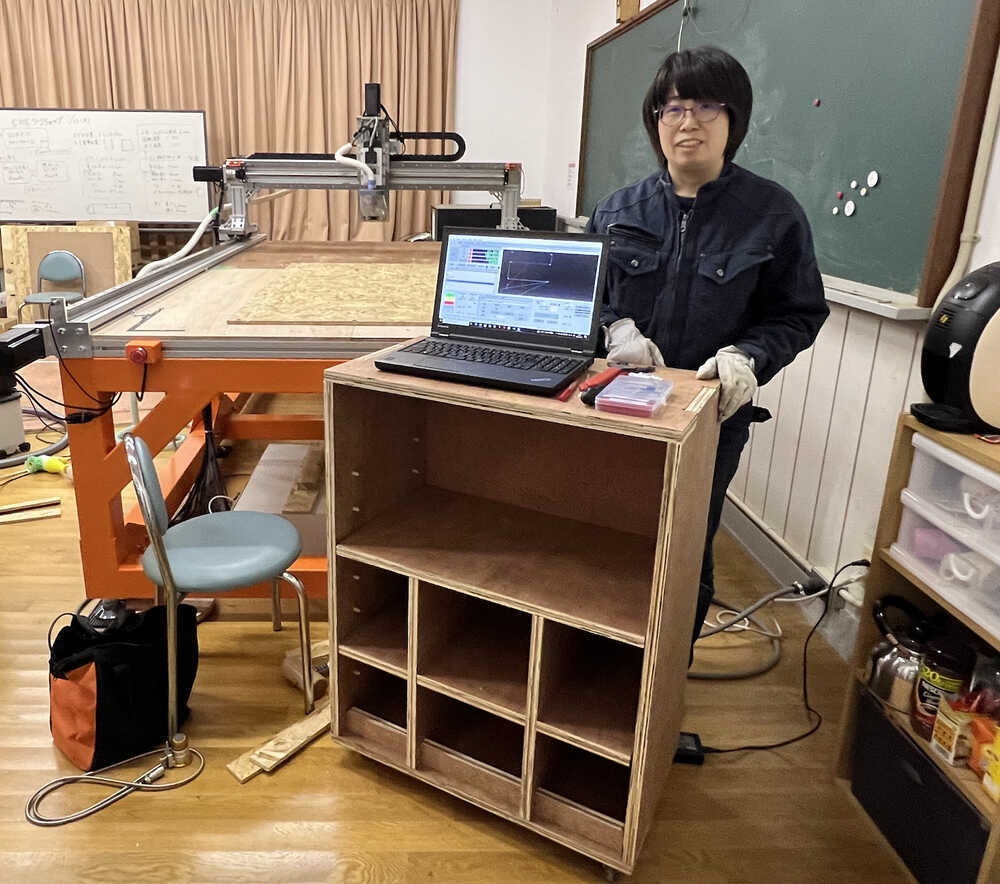
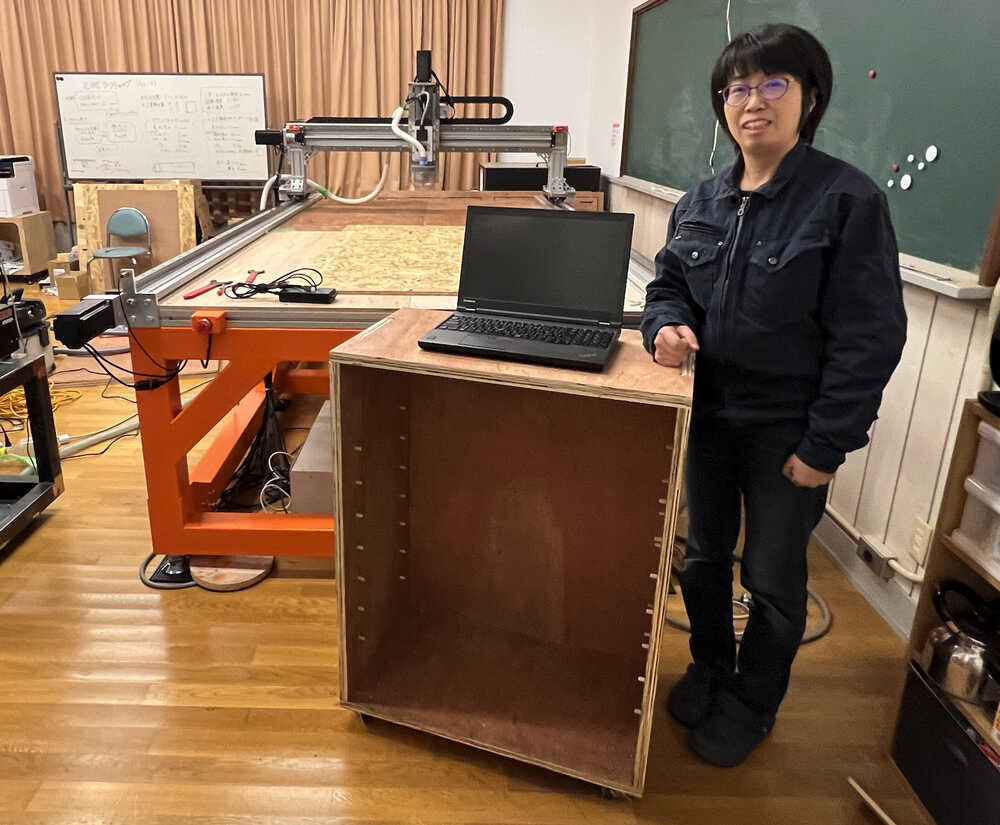
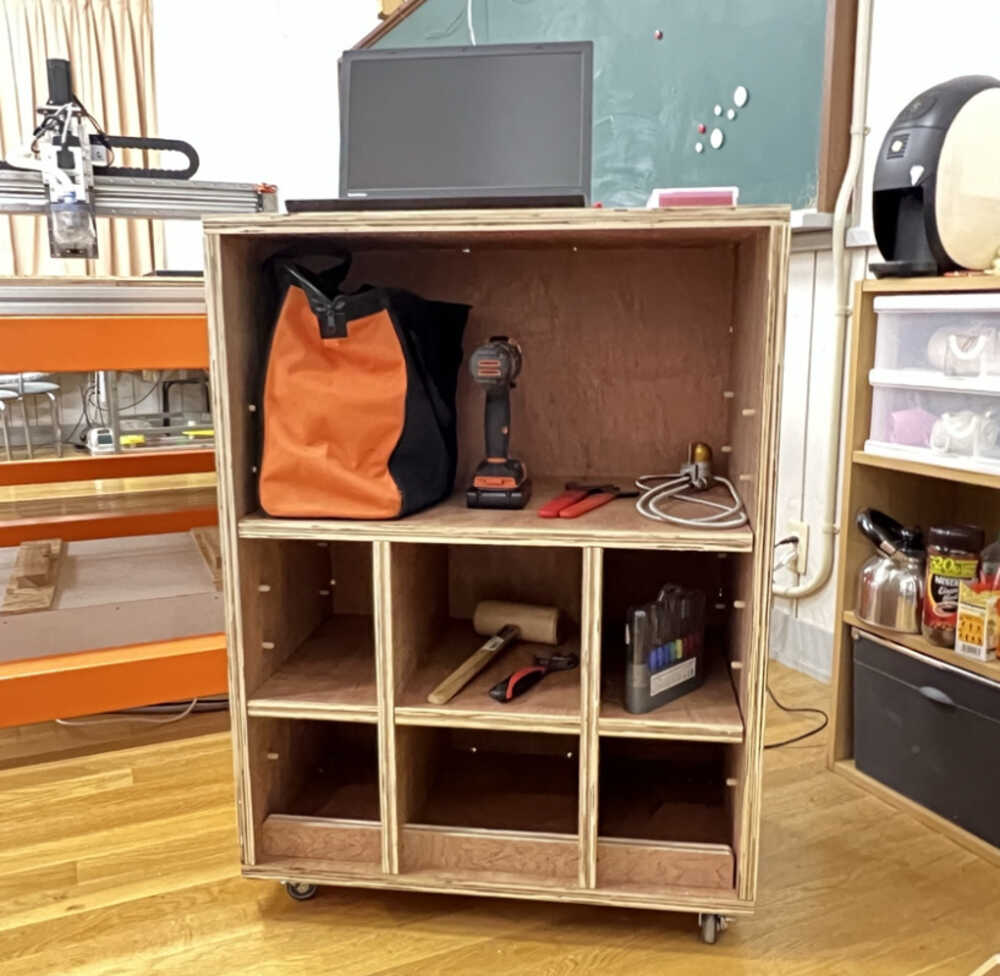
2. HEROSHOT
I made a movable tool cart that it is also can place PC operating the CNC in Fab Lab West-harima.
3. The Plan
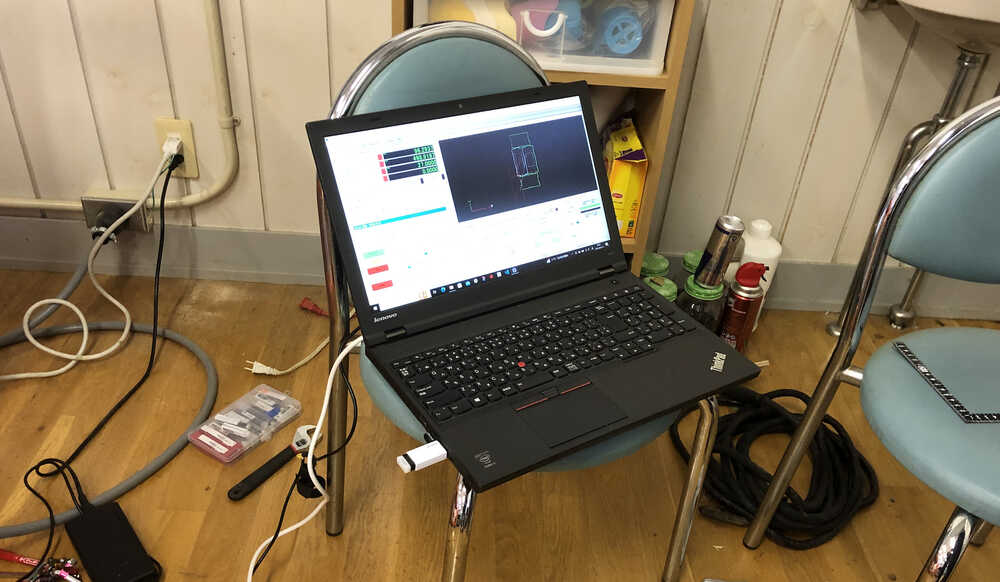
PC operating the CNC in Fab Lab West-harima was always on the chair. It isn't good.
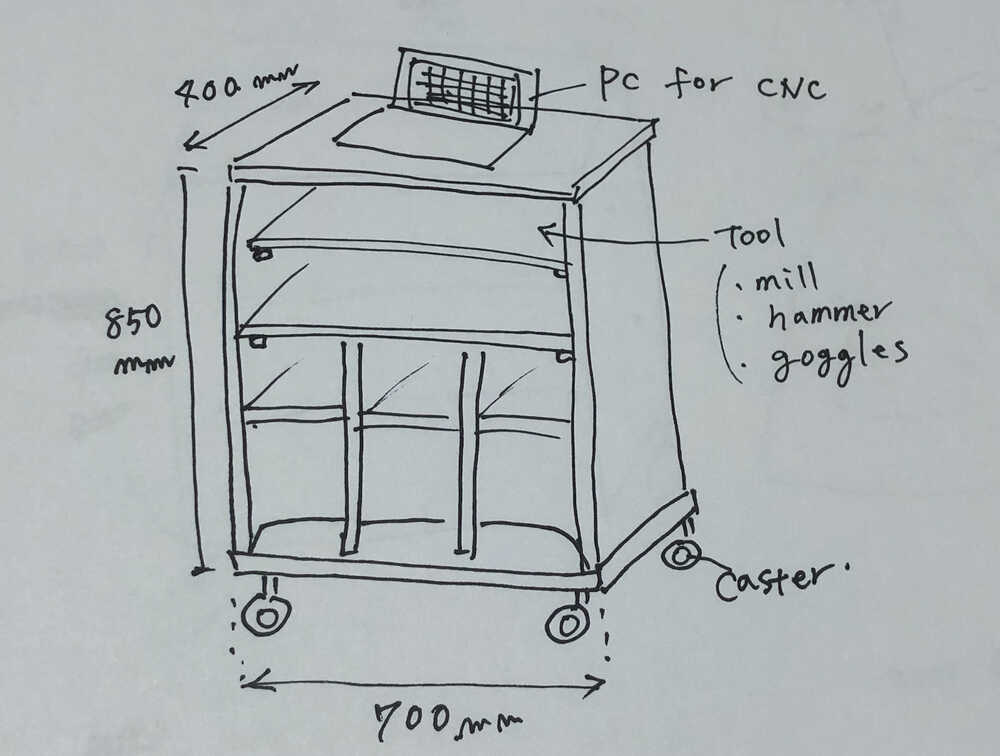
The Plan
- PC can operate with standing.
- With caster to move.
- To be shaped like a shelf for storing tools.
Then, I decide to make a Movable tool cart that it is also can place PC operating the CNC in Fab Lab West-harima, by using Fusion360 (design and assemble and tool path), the materials is Plywood 22mm.
4. Assemble
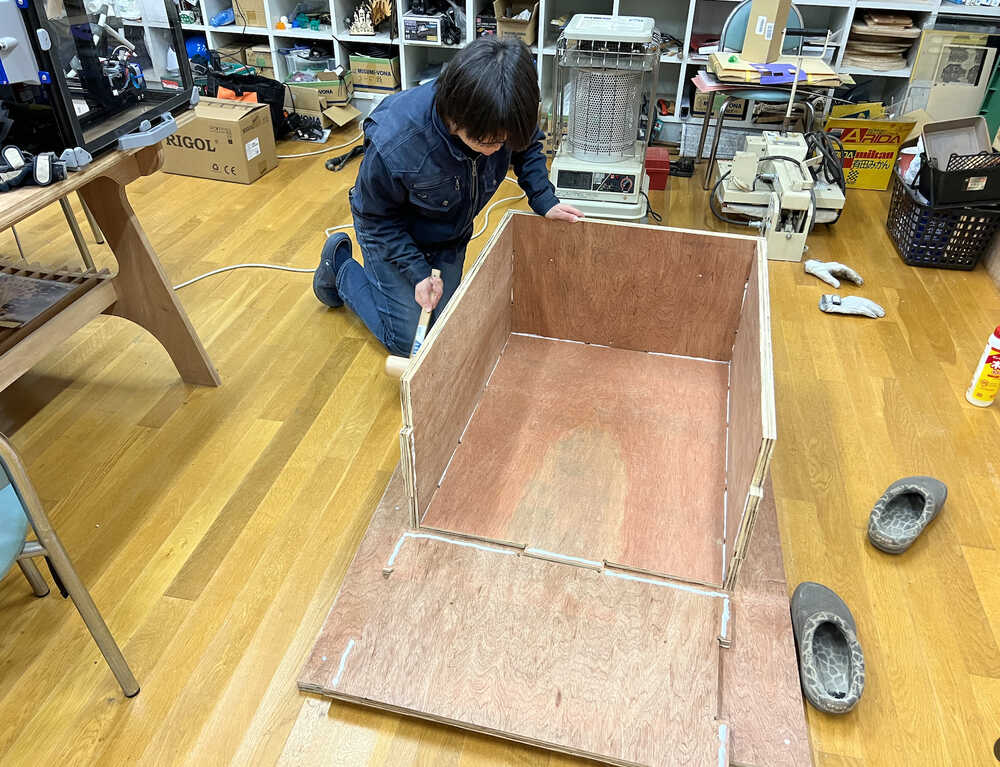
On 14-March, I assembled the outbox of the cart(Board of Top, Bottom, Left and Right). For the outbox, I added wood glue to the joints.
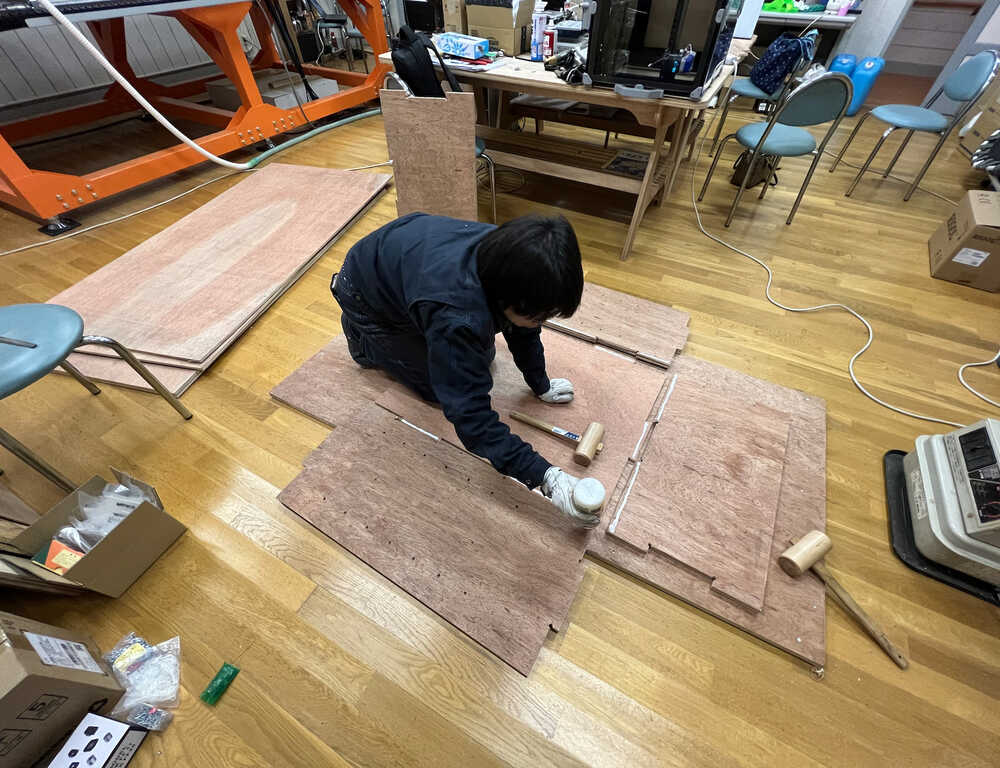
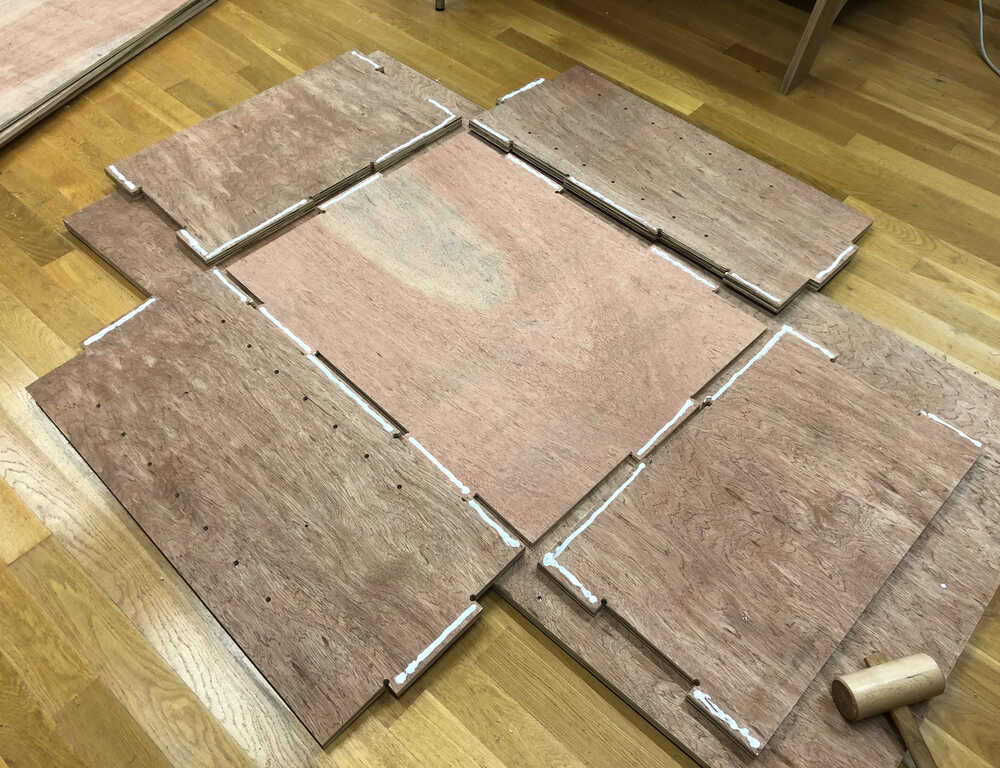
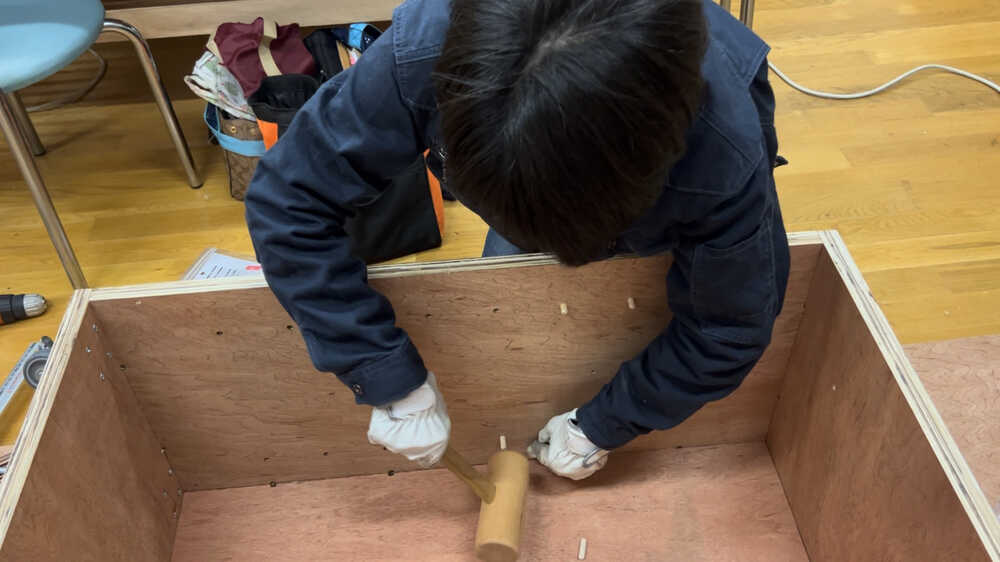
Assemble with a wooden mallet.
I prepare additional parts.
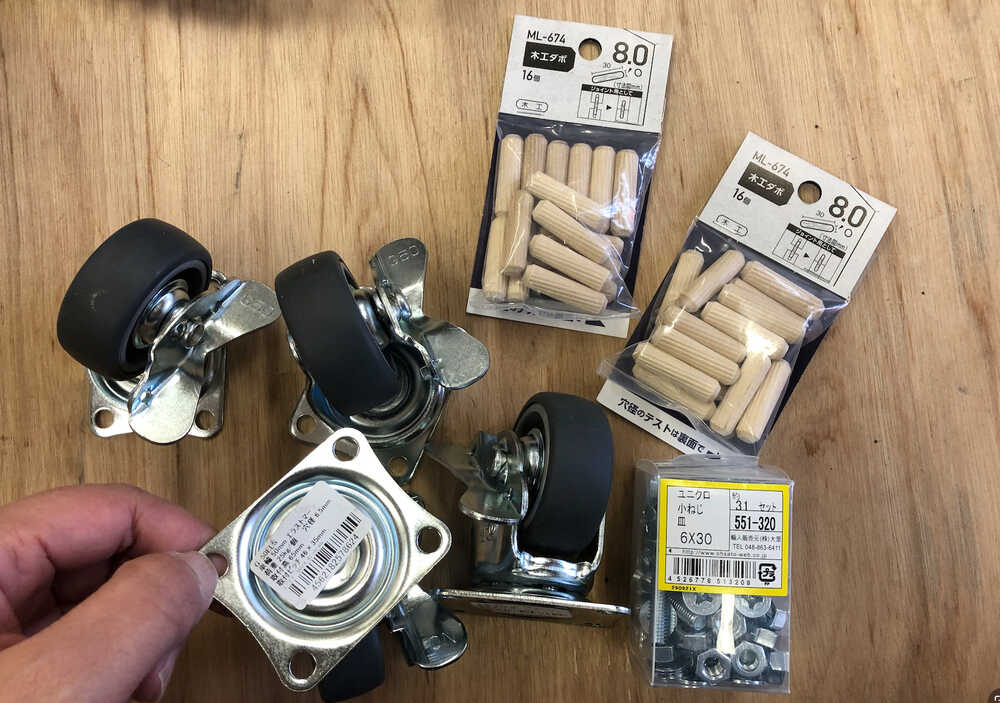
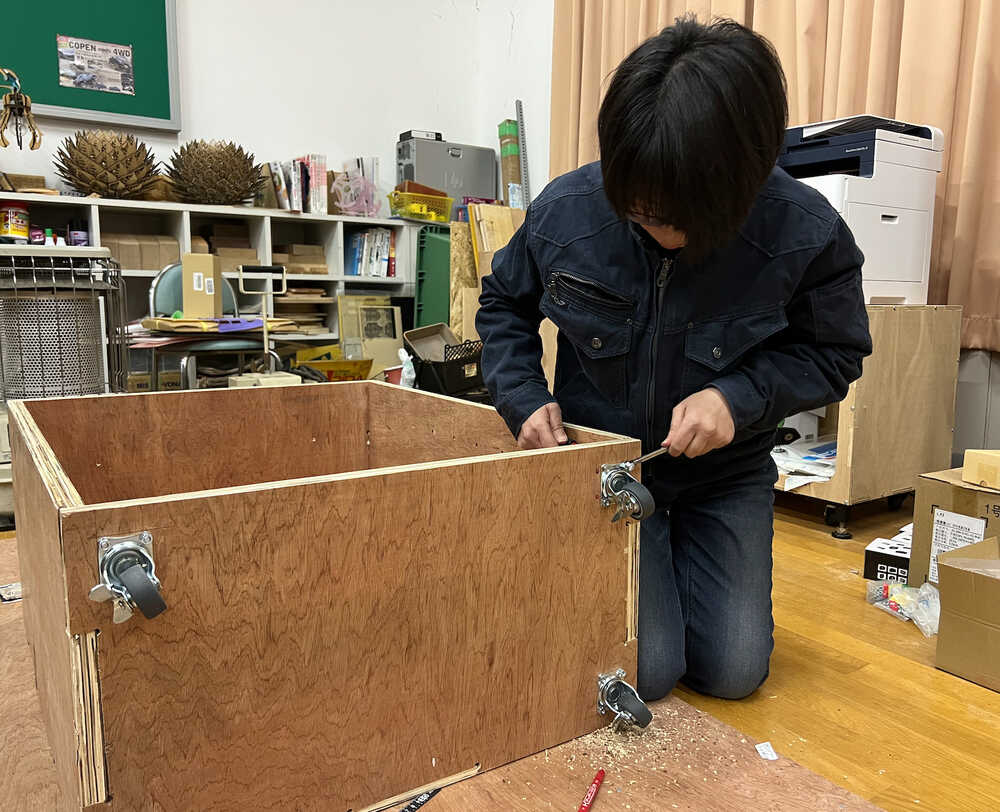
Before add the caster, I made a rough hole with drill to bottom board.
Add the casters (G 50ELS) x4 to bottom board, with screw(6x30) and Nut.
Embed the wooden dowel (D 8.0 x L30mm) with a mallet to left and right board.
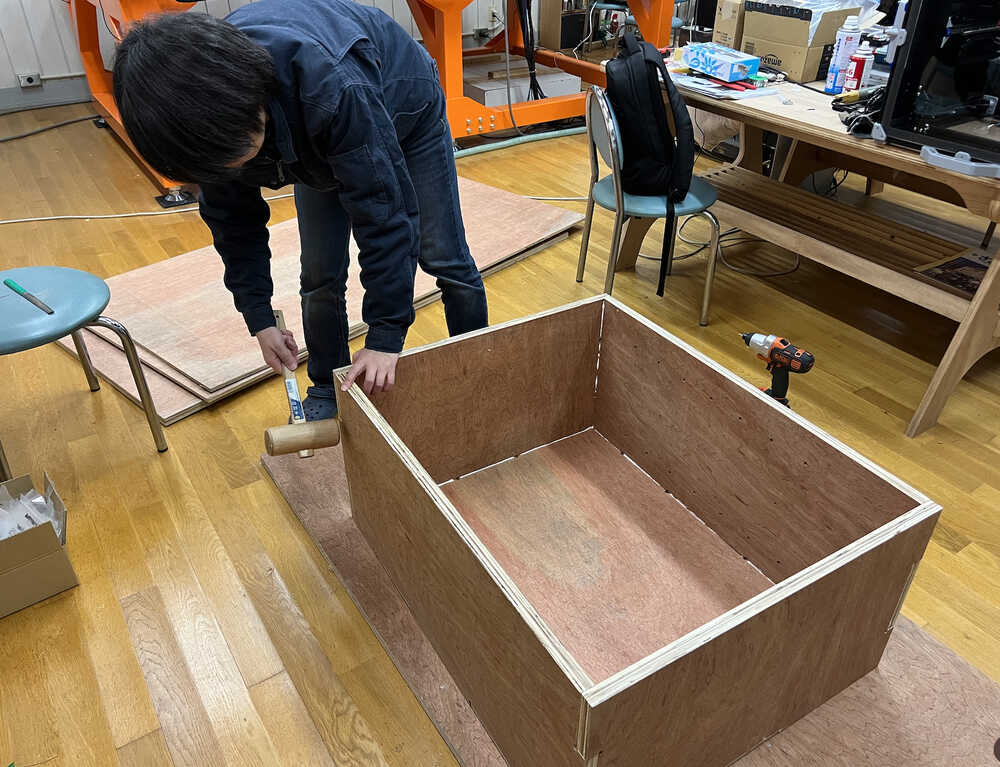
The outbox of cart is complete.
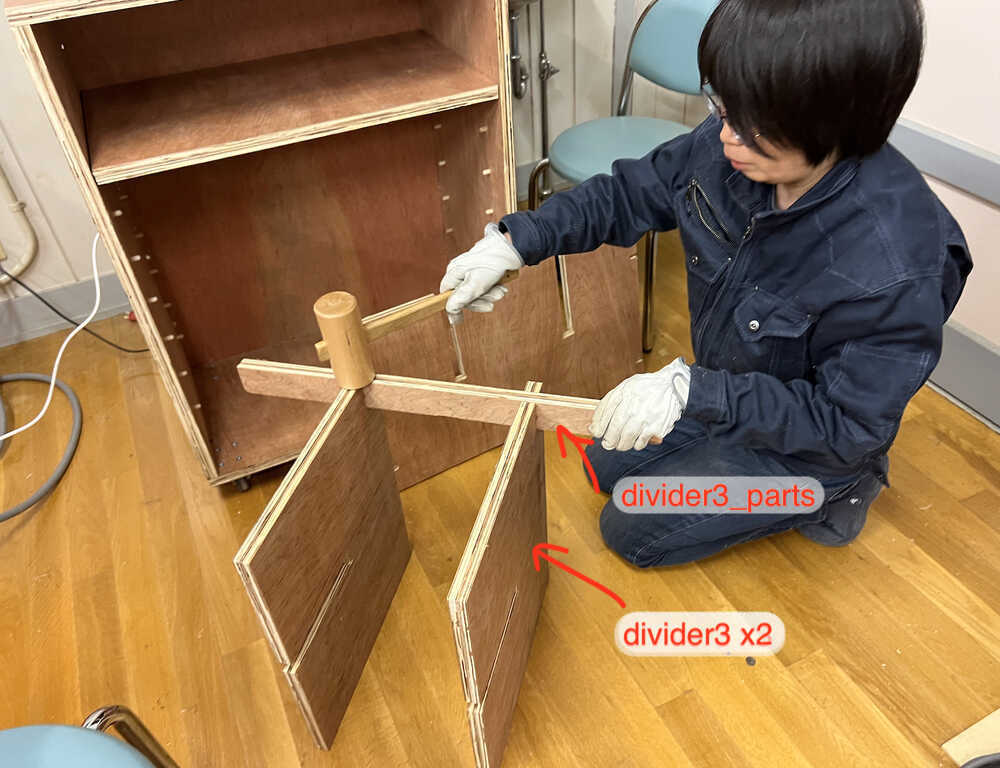
On 15-March, I assembled the dividers, no fasteners and no glue.
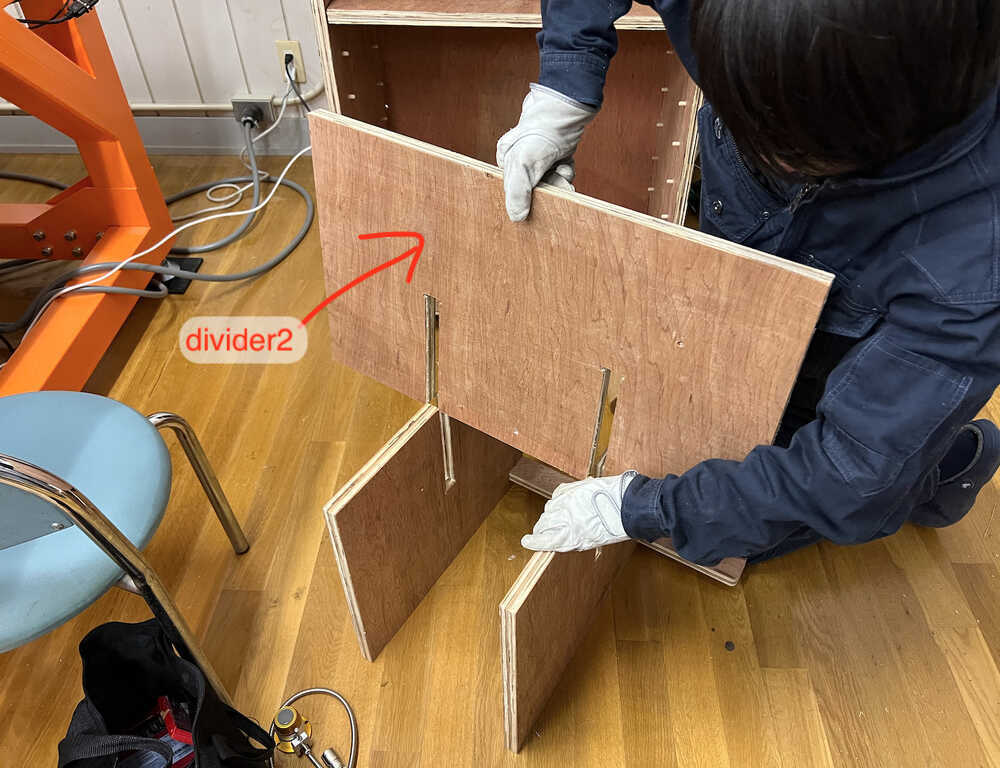
Video
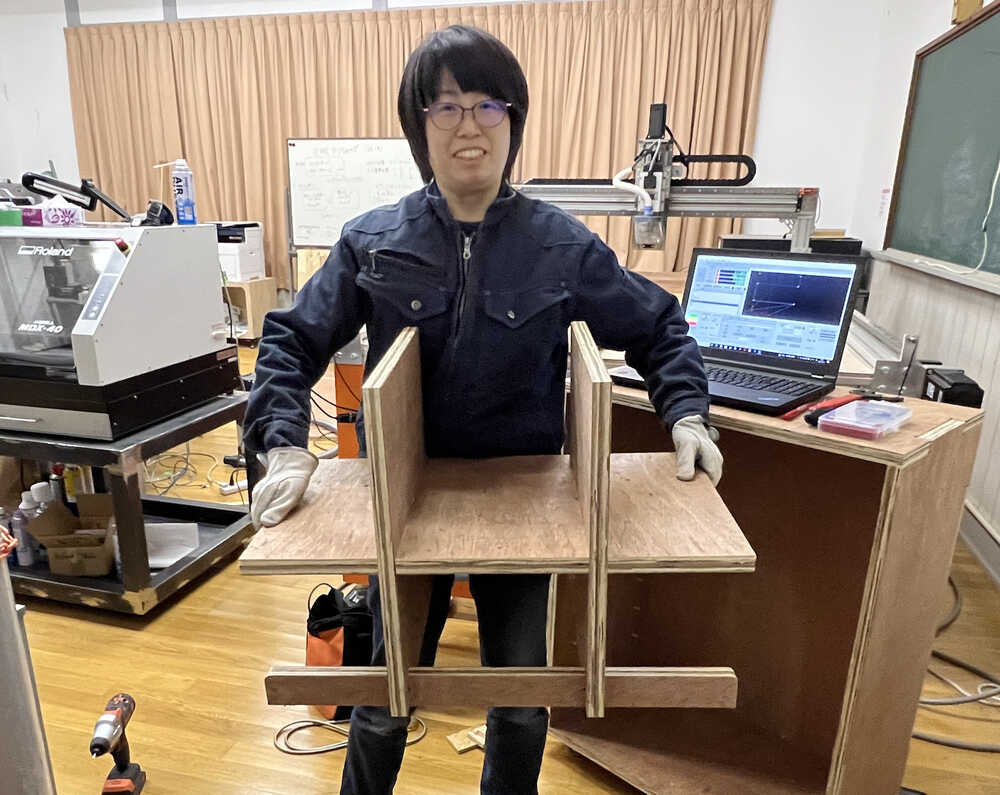
Set the assembled dividers.
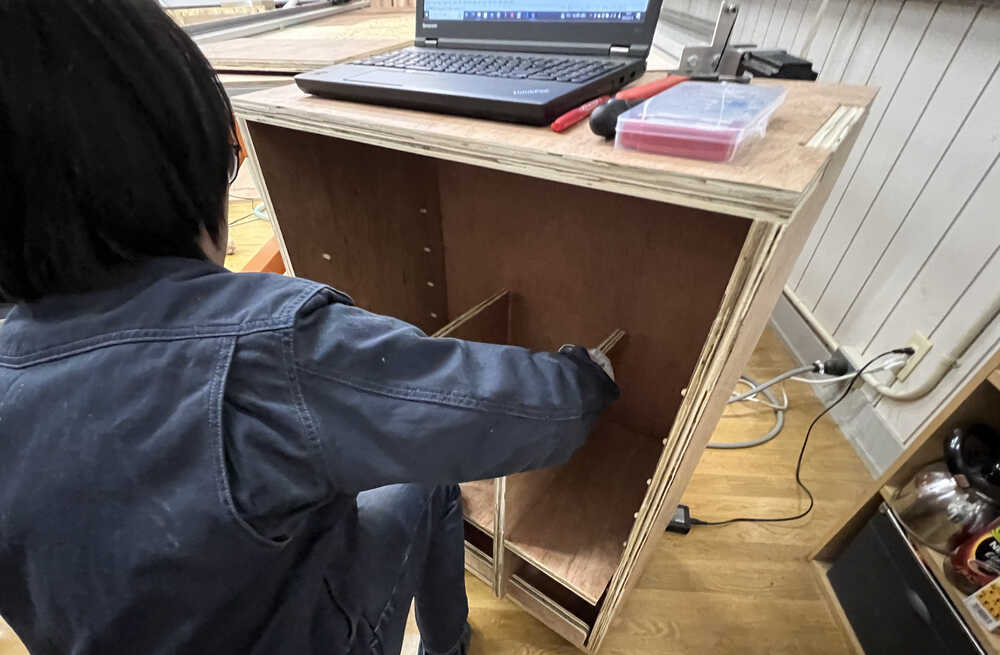
Set the divider.

Done! It is nice to use, so I am happy now.
3. CNC Machine I used
- I use CNC Version 5 (100x100 Steel Flame model), is completely original machine, was produced from planning, designing, manufacturing to installation, with the founder of Fab Lab West-harima and his friends. It took on the challenge of a 100mm square steel frame, and the team did all the welding and assembly of the frame by themselves, and it is recently build on 8- March, 2023.
- Masuoka san and I joined with assistant to build it.
- In my case, I was involved in assembly and import procedures as an assistant. During assistant, I had many experience to watch the every single part, and assemble it, wire it, etc.
- I do assemble some of the parts as assistant, I thought the parts made of metal and steel could not be assembled easily, even with the slightest inclination of screw tightening, and I had to redo the process many times, and when it went in, I was very impressed. I have good memories of visiting the customs office to do the import procedures ourselves.
- There is nice making video in Youtube by Fab Lab West-harima, Please allow me to share them with links, due to long video and the large size.
Making CNC Version 1, 2020, 29 JAN to 15-OCT
Making CNC Version 5 (100x100 Steel Flame model), 2022-AUG 23 to 2023-MAR-12
4. The Machine spec I used.
Digico-MILL48 Version 5 (100x100 Steel Flame model)
| machine spec | Description |
|---|---|
| Processable materials | Wood, Processable materials (Acrylic, Polycarbonate, PVC, etc), aluminum |
| Work area | About 1300 mm(w) x 2500 mm (L) x 150 mm (H) |
| Feed rate | 1-3000 mm/min |
| Spindle speed | max 18000 r/min |
| Software | Mach4 Integra Mill |
5. Main flow
First, let's confirm the main flow of the Computer-Controlled Machining.
| flow | Description | Tools that can be used |
|---|---|---|
| 1.Design(Create model) | Design (*No information to control CNC is included here.) | Illustrator, Inkscape, Fusion360, Freecad, Solidworks, etc |
| 2.Create Toll paths (CAM) | Make information to control CNC based on design data (*Creating data to instruct specific movements to the machine) |
Fusion360, Vcarve Pro |
| 3.Machine Operation | Set XYZ origin, and operate with CAM paths automatically | CNC Version 5, Mach4 |
NOTE: Be careful, because misconfiguration can lead to accidents.
6. Important points
Below points are very important Key points for CAM path. Mistakes in setting the machining origin cause injury, blindness, or death. Set with care. I should keep in mind these points for CAM as follows, because incorrect settings can lead to accidents. Be careful.
-Safety training
Keep in mind the safety training described in Group work.
-Chip Load
- chip load (inches per minute): ~ 0.001-0.010" = (feed rate / Spindle Speed / number of flutes)
- -> chip load (mm per minute): 0.0254 - 0.254
- In case of Fablab West Harima**
- Basically refer to tool datasheet
- recommend chip load (mm per minute)(0.05) (on the advice of the user's fitter or chair craftsman)
- feed rate (standard 8000, 10000-12000 when you want to clean the skin of wood, upper limit 15000) Machine limit 18000
- Depend on material is soft or hard, the chip load is different. Need experience.
-Plunge Feedrate
- Plunge Feedrate is "Speed of Z descent".
- In case of Fablab West Harima**
- Plunge Feedrate:100mm/min -200mm/min _
- NOTE: After machining starts, set the speed fast enough to stop with the emergency button even if a home position error is detected.
-Cut Pitch (Cut Depth)
- In case of Fablab West Harima
- Basically refer to tool datasheet
- When using an end mill larger than 3 mm, Cutting Pitch (Cutting Depth) should be half the diameter of the end mill (1/2D)***.
- Strictly prohibit cutting at reckless depth of cut just because it takes time
-WSC (stock point) and machine user origin
- Pay attention to the machining origin, and WSC(stock point), especially the Z-axis origin.
- If you do mistake, it may source of an accident to your body and machine.
- Test if possible. Move the machine with no material
- Machine user origin (XYZ 0 point) and stock point of WSC should be same point.
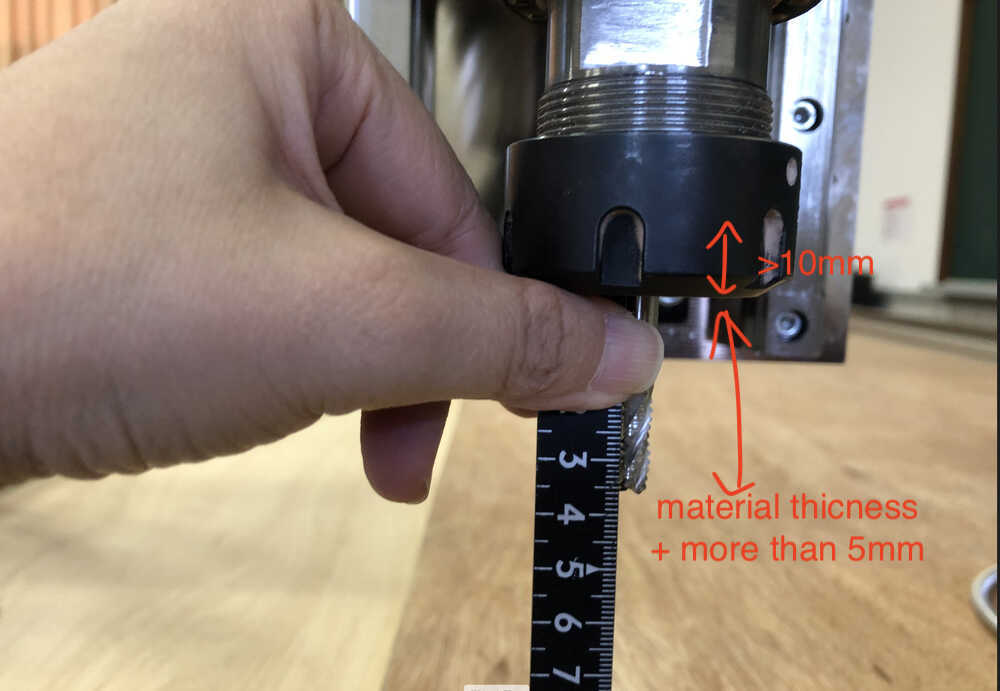
-Mill setting
- Place the mill 10 mm or more into the collet chat and pinch it
- Length end mill after attached = "Material thickness + more than 5mm".
7. Accidents and Mistakes
In this week assignment, I have a accident and few mistakes.
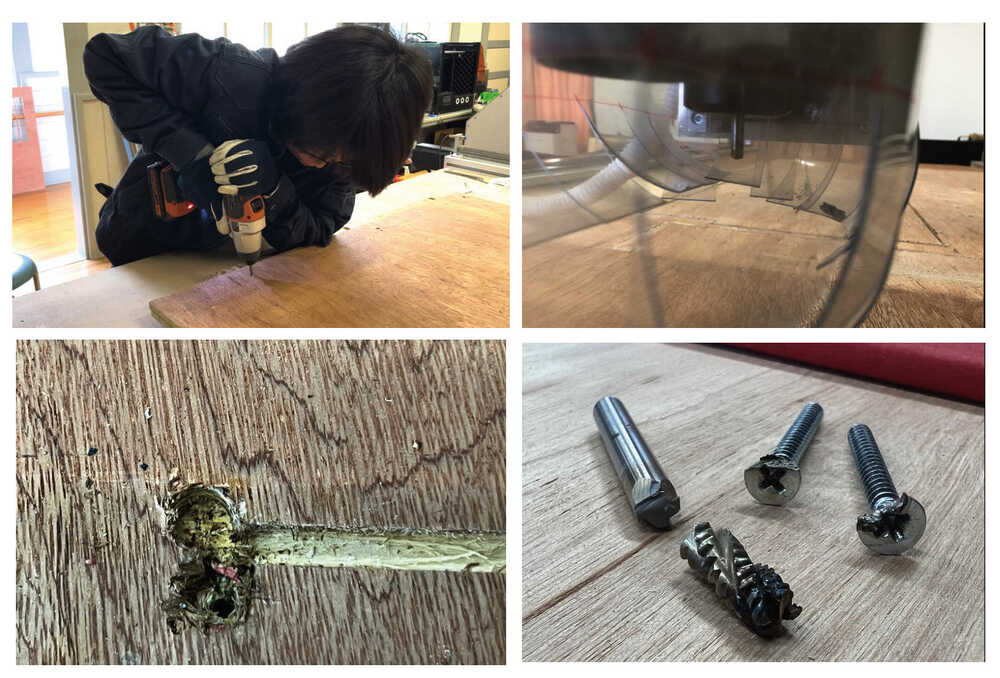
7-1) Accident
Mill contacts a fixed nail in the path pathway, damaged the mill, so the emergency stop button was used to stop the mill. The cause was overfilling the model with material. I think I overlooked many things that the width and the size of nail head and the width of mill. Lack of visibility of pathways.
We are fortunate that no one was injured and the machine itself was not damaged.
 To prevent accidents from occurring in the future, it is important to clarify the area of the fixing and the area of the part layout, and not to put the fixture in the area of the part layout.
7-2) dogbone
I designed the dogbone, forgot the Instructor's advice and designed it incorrectly. The dogbone entrance width was narrower than the end mill diameter, and when I generated the path, the dogbone shape was excluded from the cutting point. It is important to make dogbone correctly.
The details is refer to 4.6 Dogbone
8 My thought
- After Safety training, I tried to pay attention, but I got so many mistake, and I felt stressed.
- I want to use
- This week, Original CNC ( Digico-MILL48 Version 5) at Fab Lab West-harima was build by founder in Fab Lab West-harima, when this week started, it doesn't have the wood base yet. So, at first, should make the wood base and spoil board, and I joint it as assistant. So less time to do this week assignment.