Week10. Mechanical Design / Machine Design
1. Assignment and Result
We made Vacuum forming machine.
About the process, I made new page and made links are below, because the long page makes me confuse.
| Mechanical Design | THE RESULT |
|---|---|
| - design a machine that includes mechanism+actuation+automation+application - build the mechanical parts and operate it manually - document the group project and your individual contribution |
Process -> machine building, Kitakagaya page. |
| Machine Design | THE RESULT |
|---|---|
| - actuate and automate your machine - document the group project and your individual contribution |
My individual contribution -> Making Control system. |
2. HERO SHOT
Below is a HERO SHOT of vacuum forming machine, and Molding result.
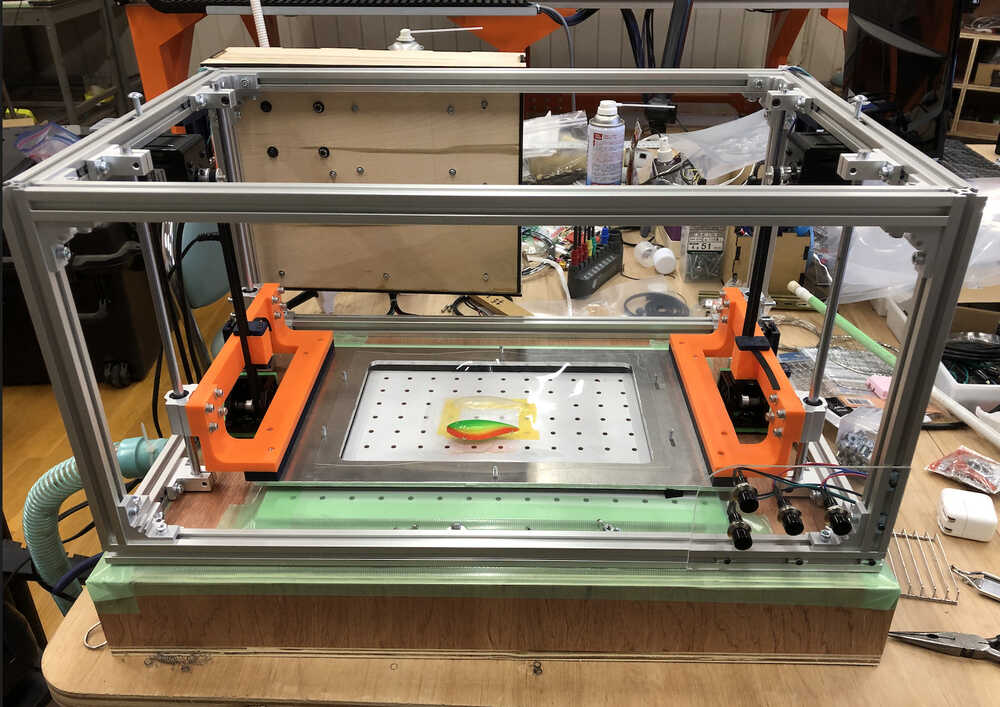
Below is a photo of Molding result (Materials: PP t0.3mm).

3. HERO VIDEO
Below is HERO VIDEO No.1. The vacuum forming is success!
Below is HERO VIDEO No.2 when control system is doing. In the Video, button push for Heating and Vacuum forming start.
4. PLAN
-
I make rough sketch.

-
Learn about the DIY vacuum forming system with Youtube.
- Plan of movement
- Identifying necessary parts
- Check Datasheet
- Making Board (Prototype)
- Making Control Box & Panel (Prototype)
- Assembly
- Programming
- Debugging
5. Plan of movement flow
- SW1: STAGE UP
- When the up button is pressed: Both stepping motors are turned to raise the stage. The stage will continue to rise until both limit switches are pressed.
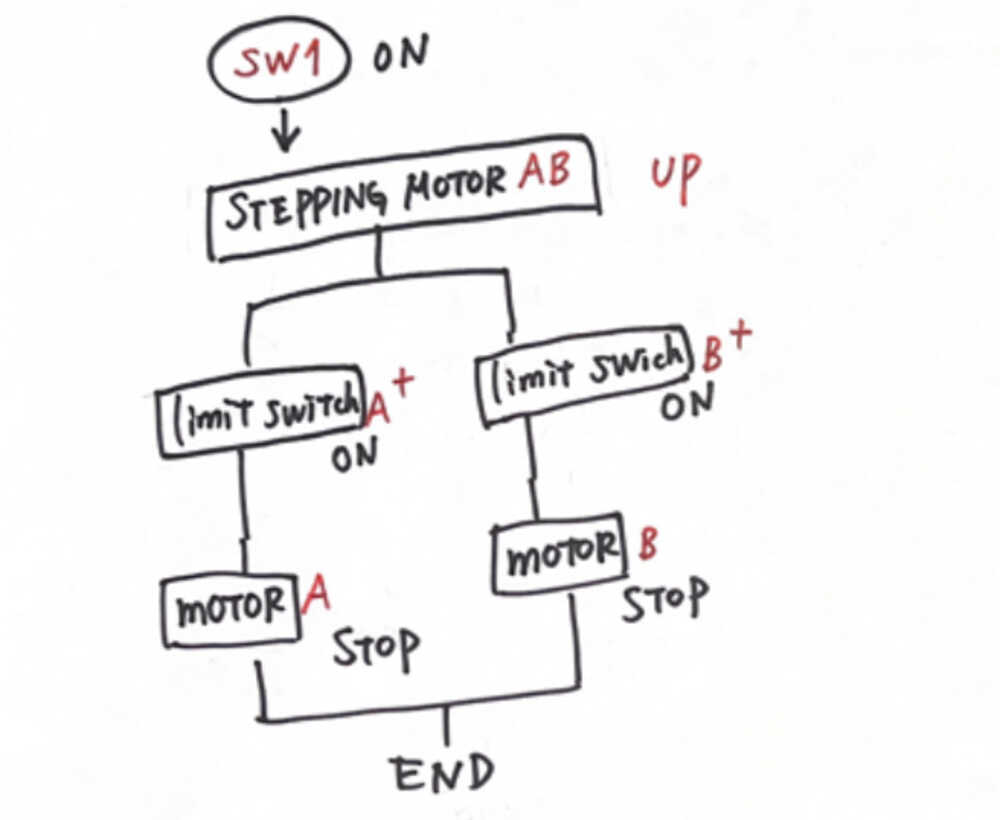
- When the up button is pressed: Both stepping motors are turned to raise the stage. The stage will continue to rise until both limit switches are pressed.
- SW2: STAGE DOWN
- When the down button is pressed: Both stepping motors are turned to goes down the stage. The stage will continue to goes down until both limit switches are pressed.
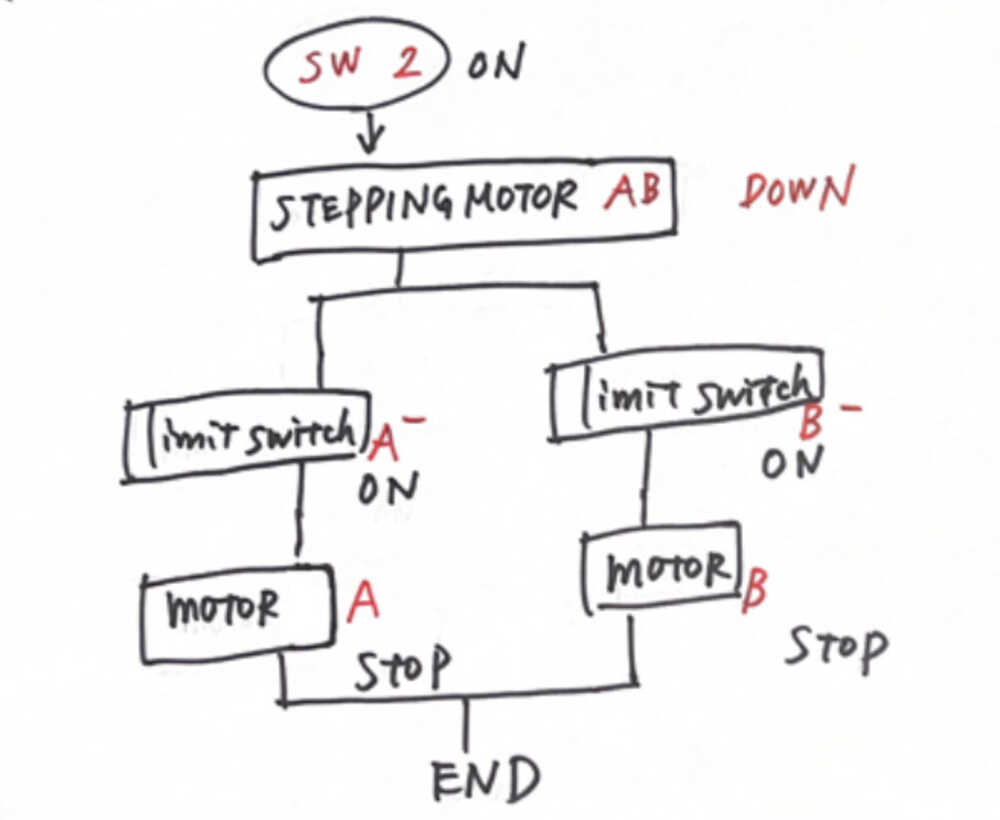
- When the down button is pressed: Both stepping motors are turned to goes down the stage. The stage will continue to goes down until both limit switches are pressed.
- SW3: HEATING
- Turn both stepping motors to raise the stage. The stage will rise until both limit switches are pressed.
Then turn on the heater relay until the vacuum forming start button is pressed.
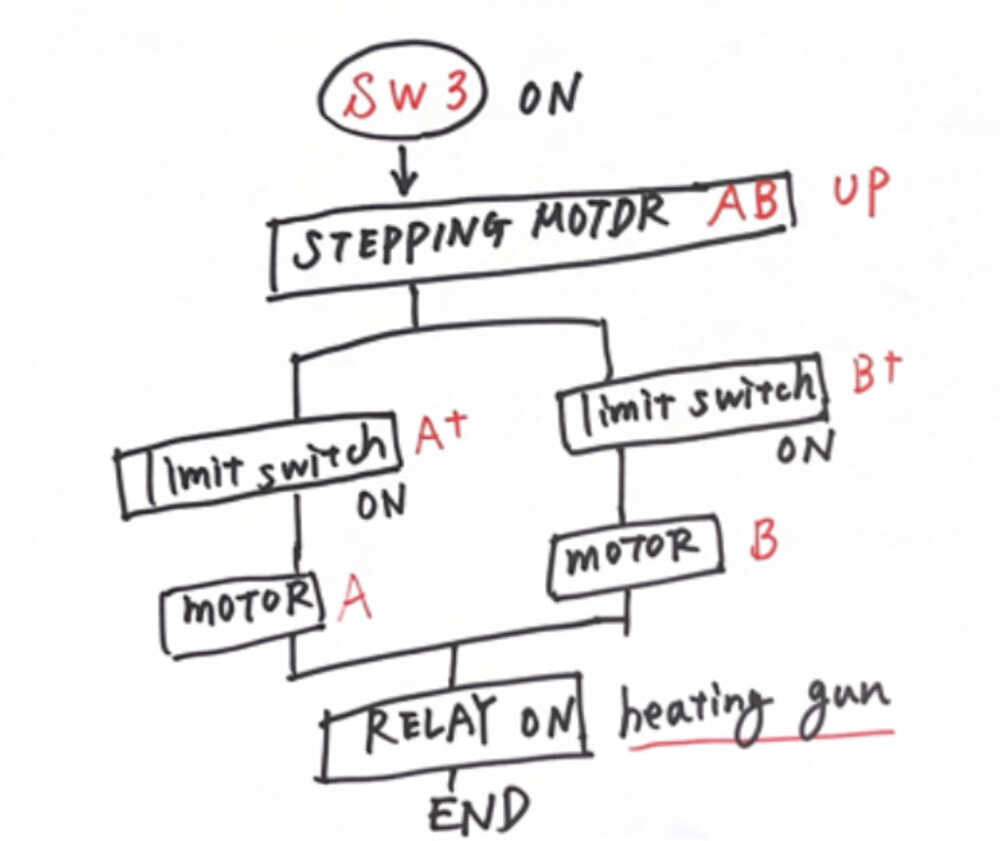
- Turn both stepping motors to raise the stage. The stage will rise until both limit switches are pressed.
Then turn on the heater relay until the vacuum forming start button is pressed.
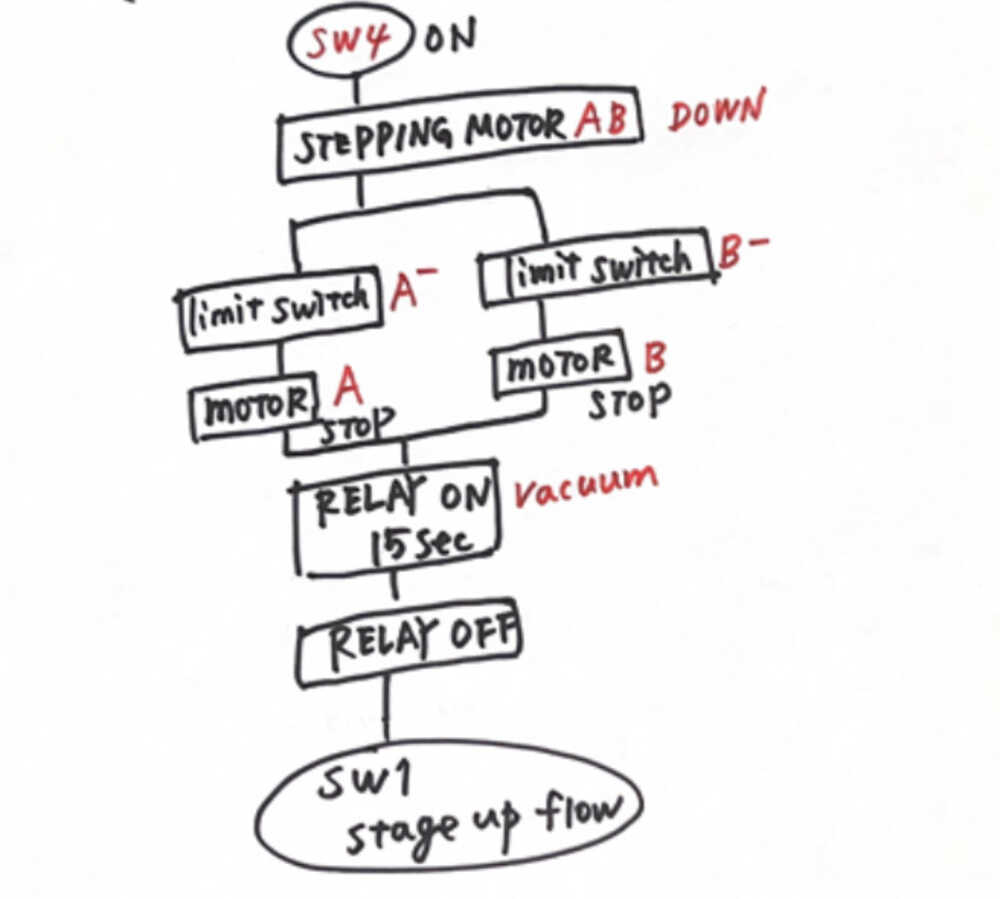
- SW4: VACUUM FORMING START
- When the Vacuum forming start button is pressed:
Turn both stepping motors to move the stage down. The stage is lowered until both limit switches are pressed.
Then, turn on the vacuum relay, wait for a certain period of time, and turn it off.
- When the Vacuum forming start button is pressed:
Turn both stepping motors to move the stage down. The stage is lowered until both limit switches are pressed.
Then, turn on the vacuum relay, wait for a certain period of time, and turn it off.
6. Required input and output devices and motion
| Device | Motion |
|---|---|
| Stepper motor x2 | Rotation (clockwise/counterclockwise) |
| limit switch x4 | Stop detection and relay on/off timing control at stage ascent and descent limits |
| relay x2 | Heater and vacuum cleaner on/off |
| Push-button switches x4 | Perform each movement flow action described in 4. |
Based on the above, the control board was designed, electrical wiring was performed, and programming was done. Details are given on a separate page -> link.