Week 10 - Group / Mechanical Design, Machine Design
This is group assignment page of Mechanical Design and Machine Design (Kitakagaya students):
- Shin Masuoka
- Hiroe Takeda
Group assignment
-
Mechanical Design (part 1 of 2)
- Design a machine that includes mechanism + actuation + automation + application
- Build the mechanical parts and operate it manually.
- Document the group project
-
Machine Design (part 2 of 2)
- Actuate and automate your machine.
- Document the group project
VIDEO
SLIDE
HERO SHOT
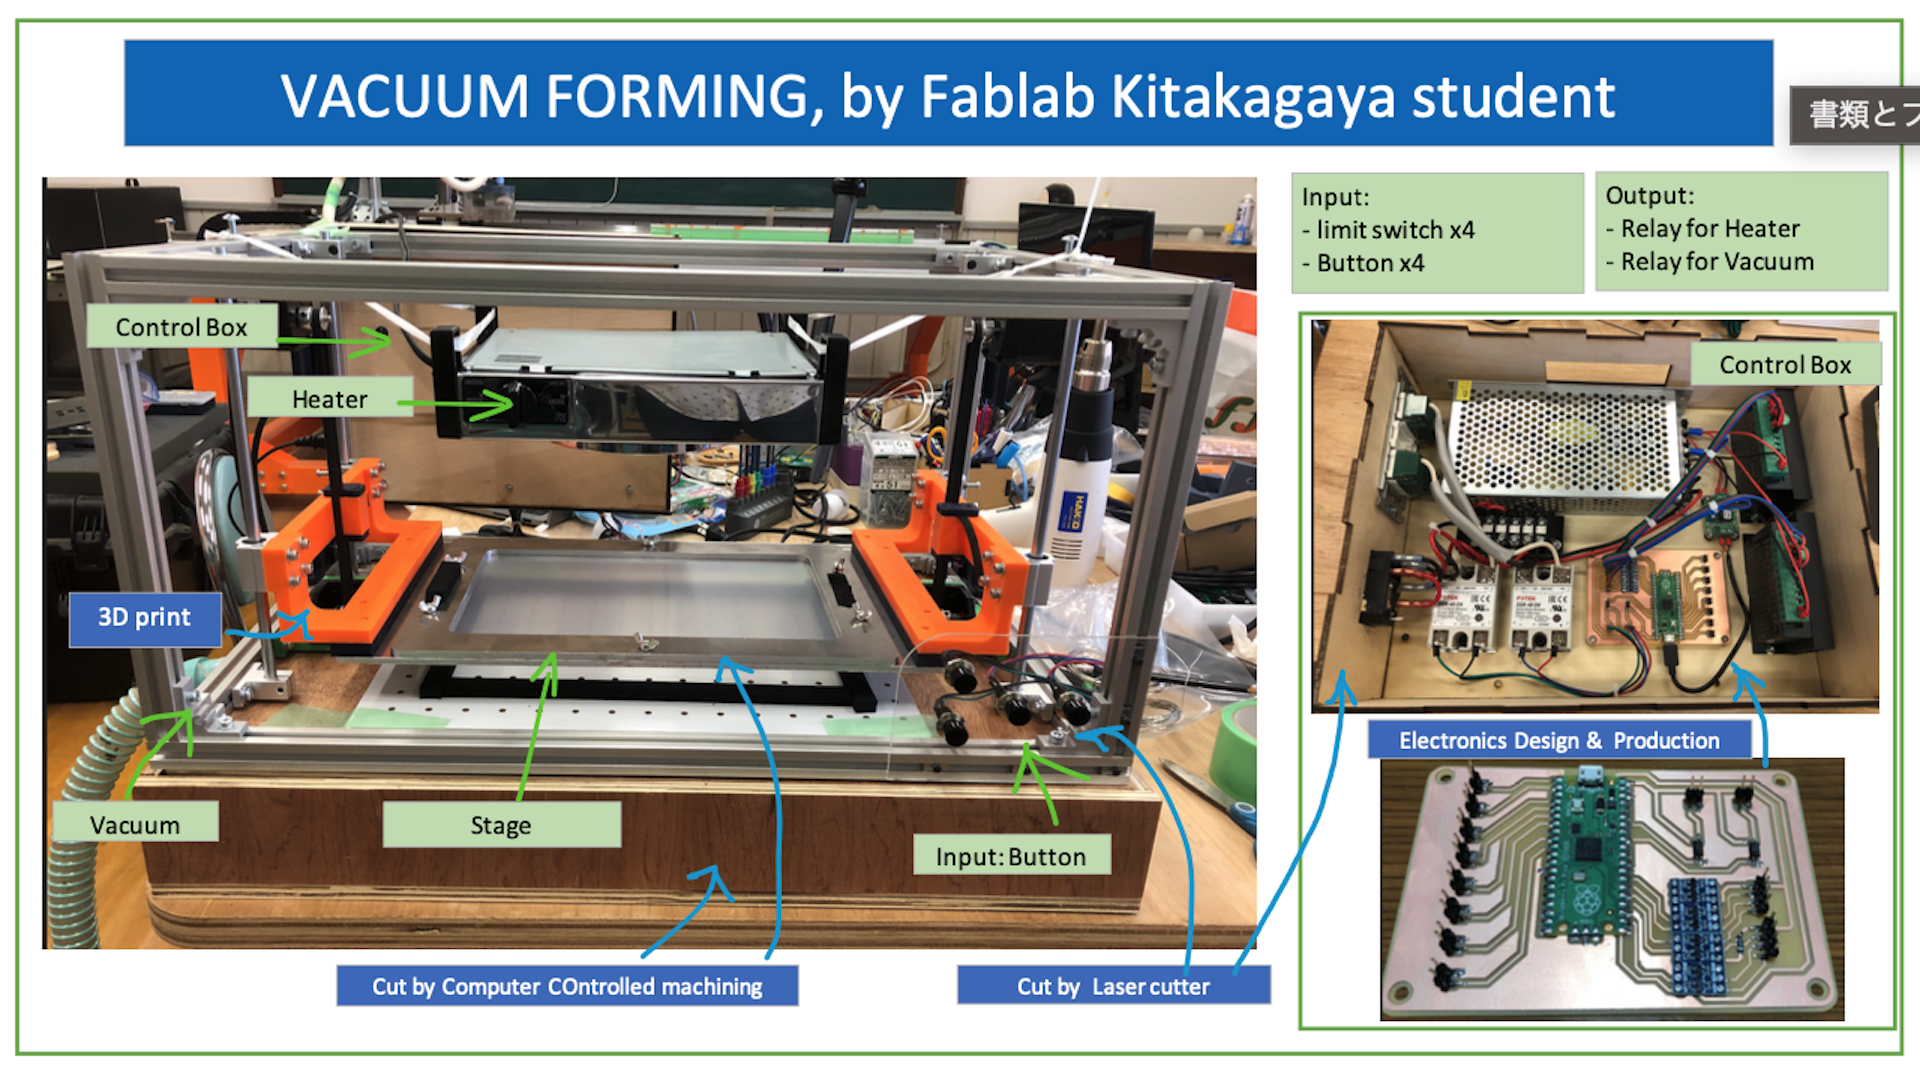
The Vacuum forming machine we made
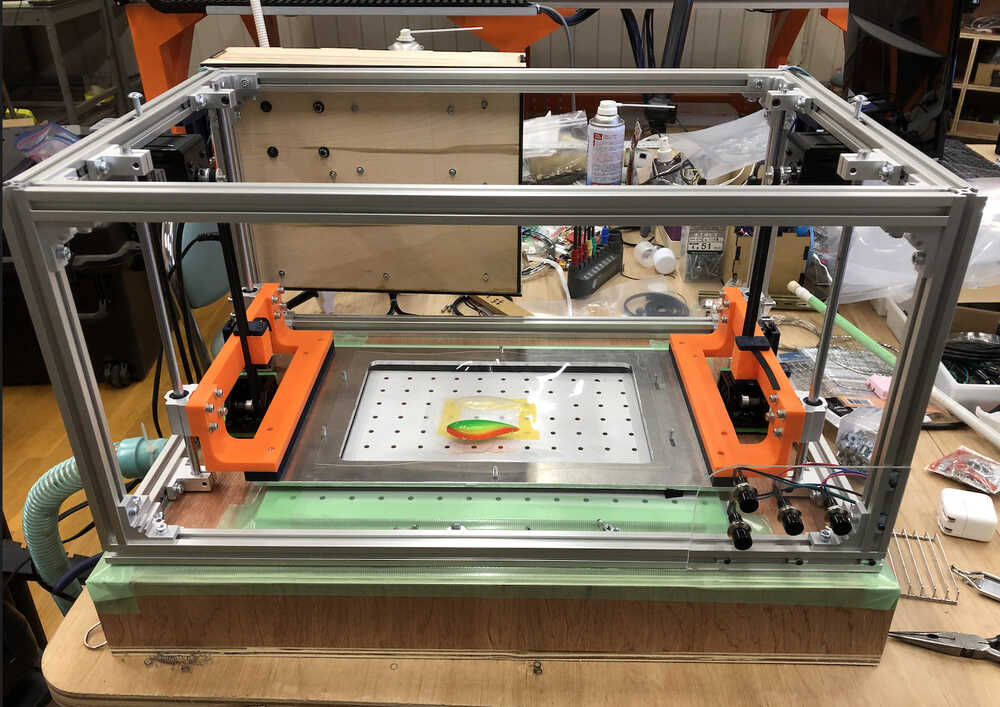
The result of vacuum forming

with painted

Planned and executed the project
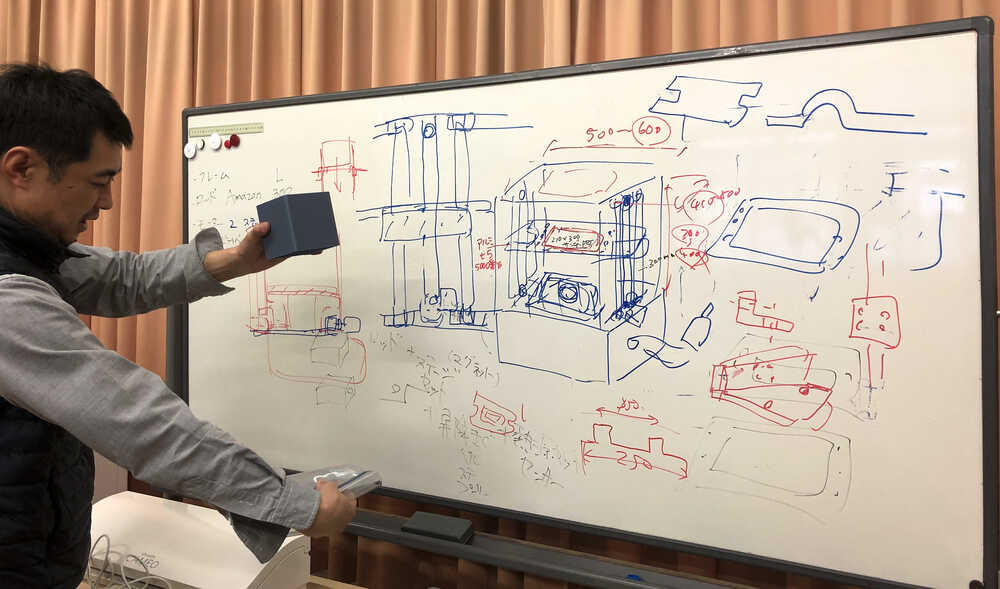
- We make rough sketch
-
Learn about the DIY vacuum forming system with Youtube.
-
Plan of movement
- Identifying necessary parts
- Check Datasheet
- Making Board (Prototype)
- Making Control Box & Panel (Prototype)
- Assembly
- Programming
- Debugging
Machine Building Process
3D modeling
-
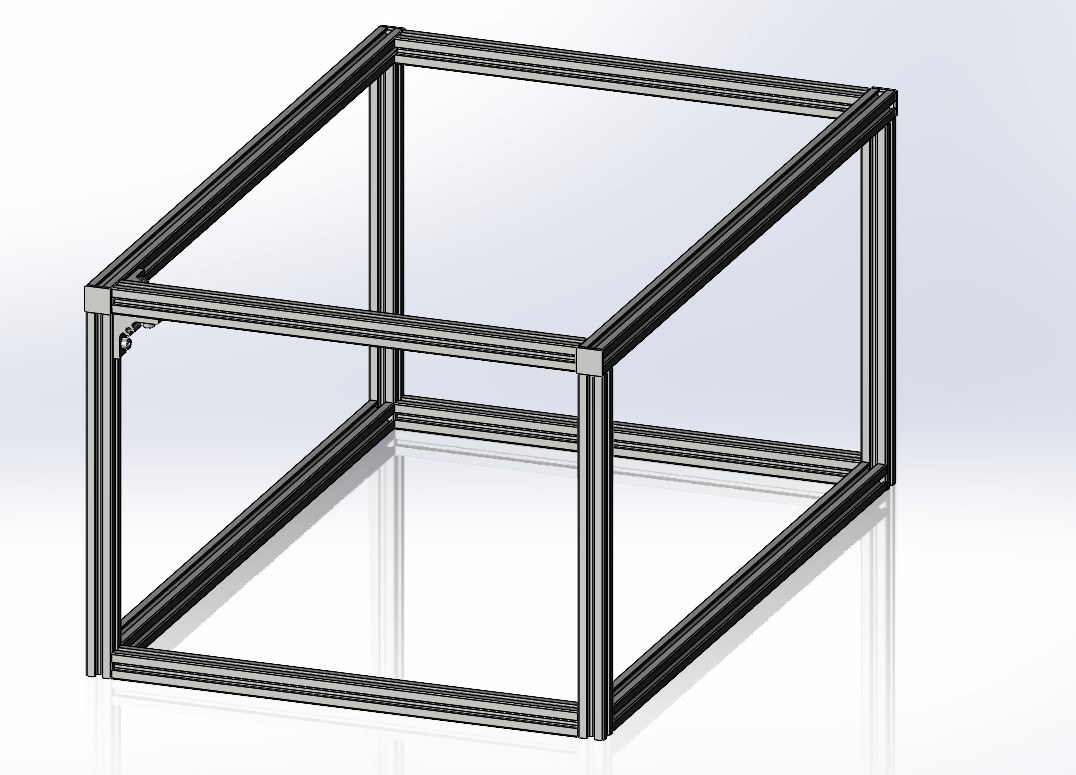
Frame
- I bought frame parts from Misumi, and its web site shares 3D model of their product. I just downloaded and opened with SolidWorks.
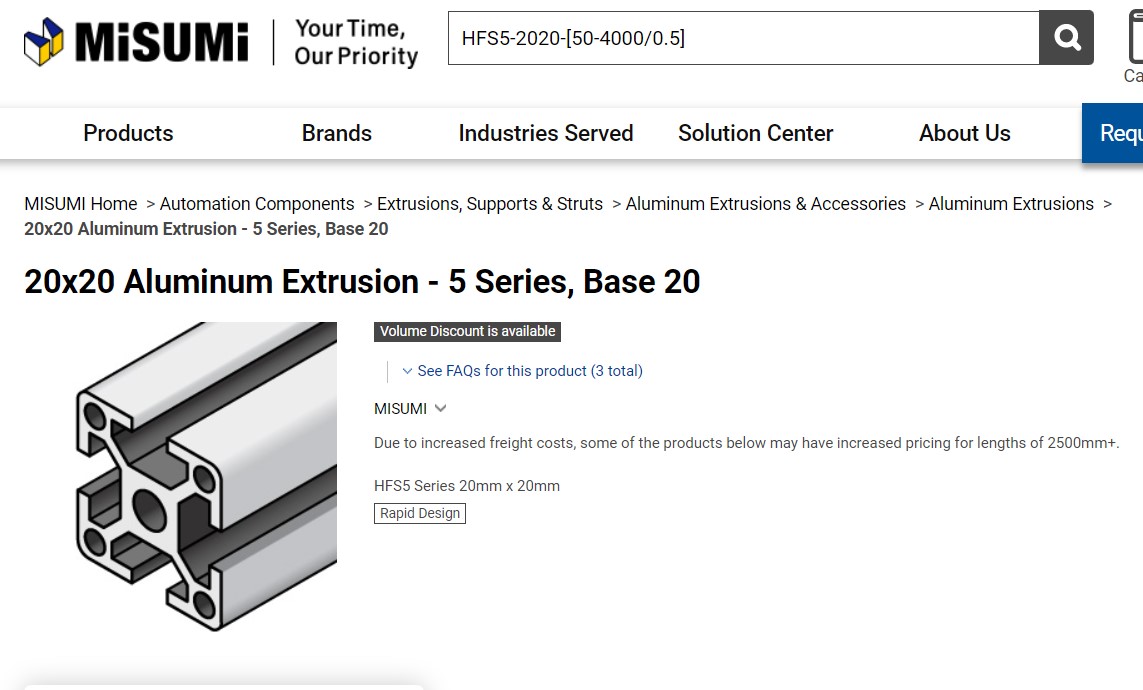
- Downloaded 3D model
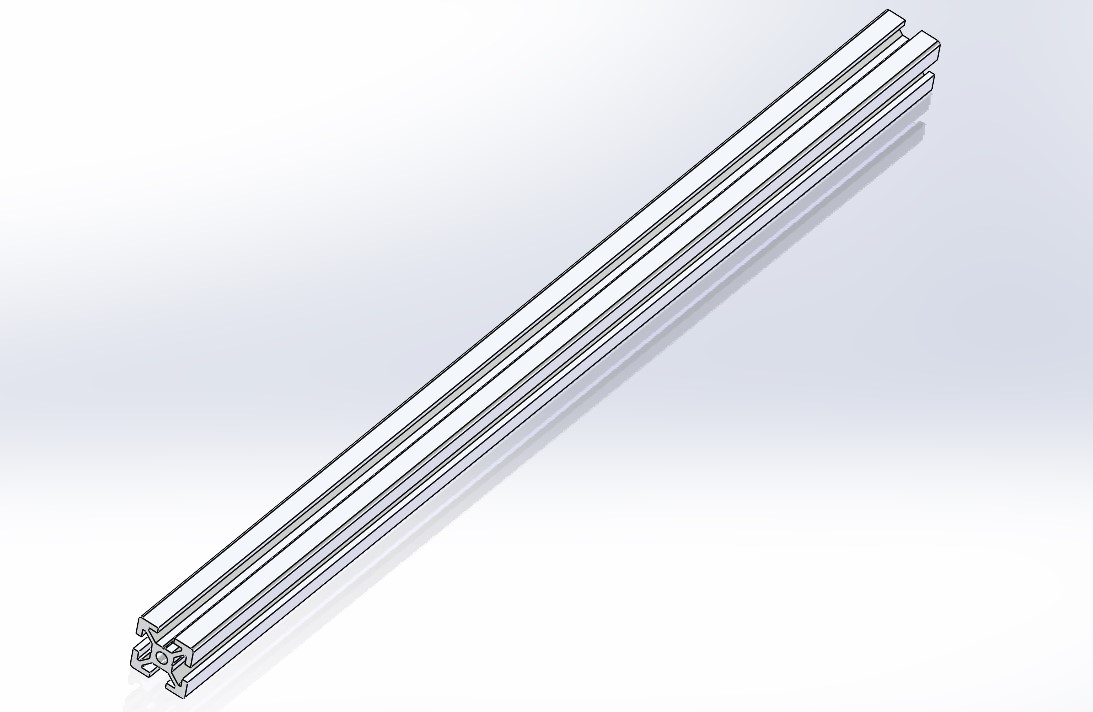
- 3D model of assembled frame is also available
- I bought frame parts from Misumi, and its web site shares 3D model of their product. I just downloaded and opened with SolidWorks.
-
Vertical shaft and bushing
- I bought shaft and bushing unit for vertical actuation from Amazon.
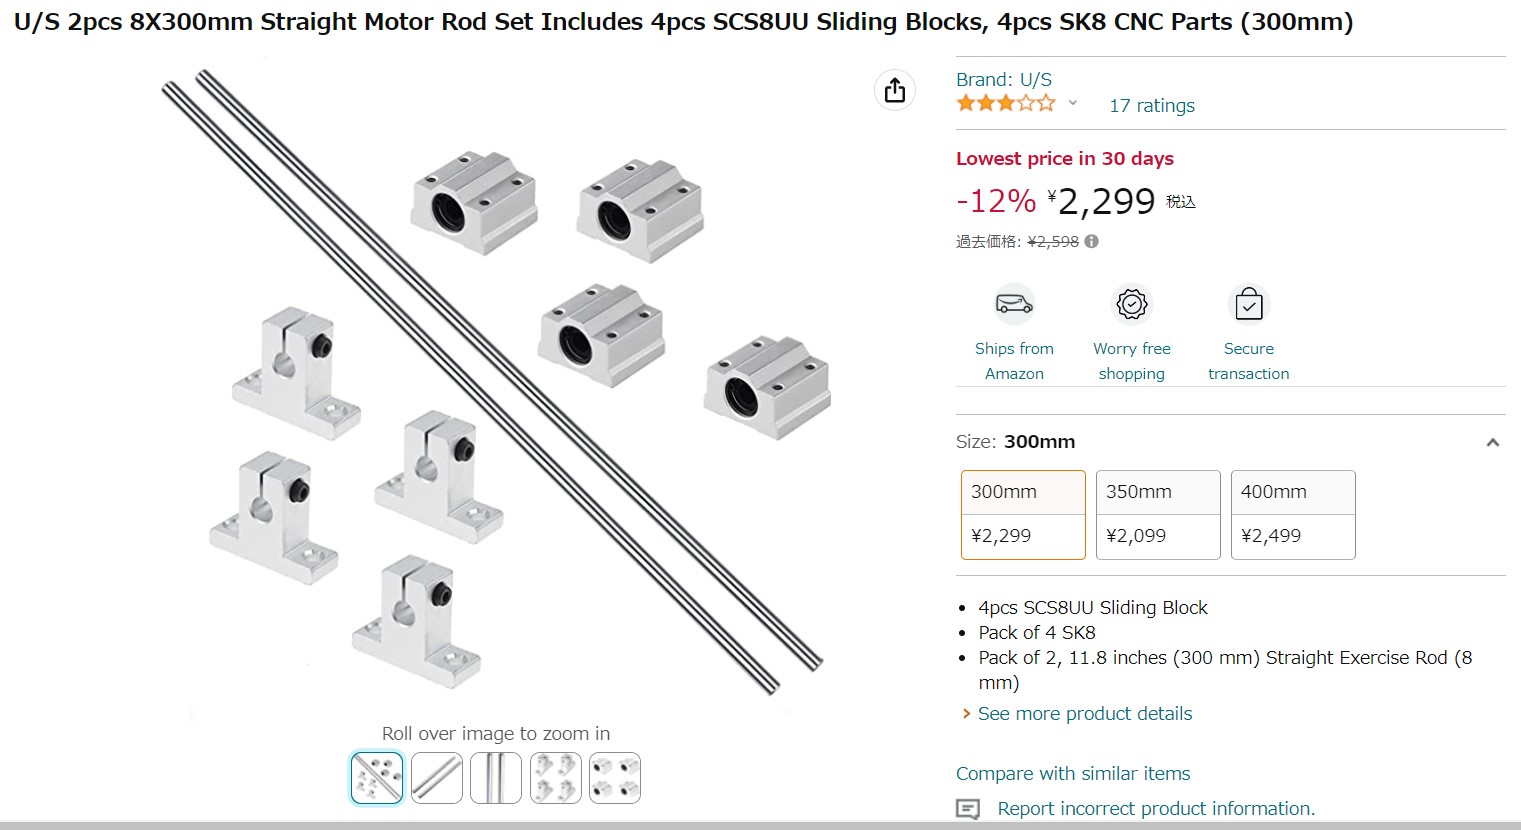
- Amazon does not offer 3D model for its products. I measured actual size once I received the parts, then created 3D model.
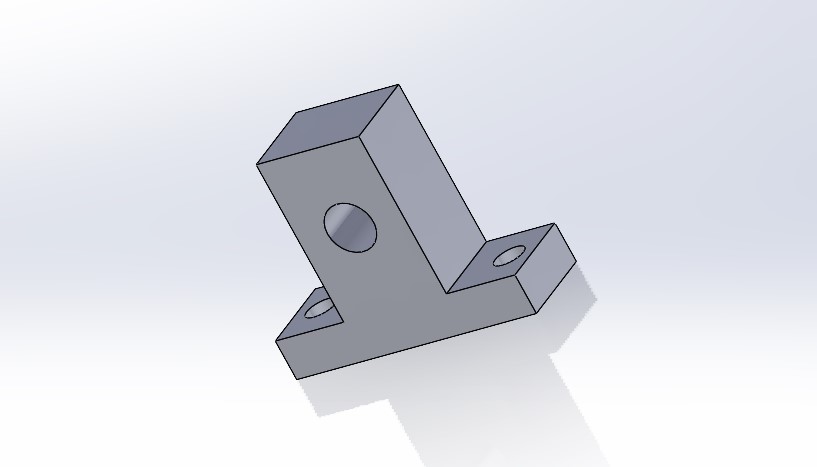
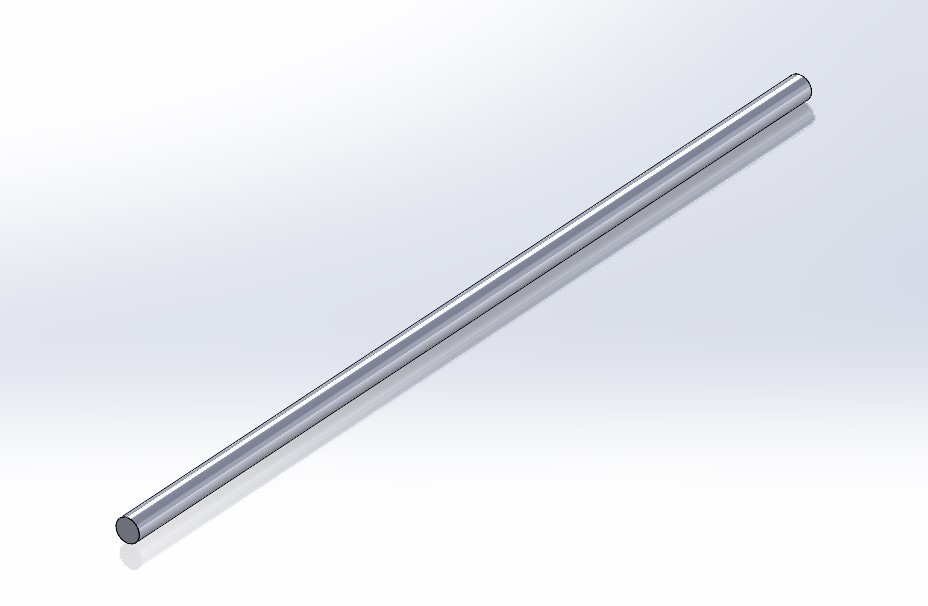
- Assembled on Solidworks
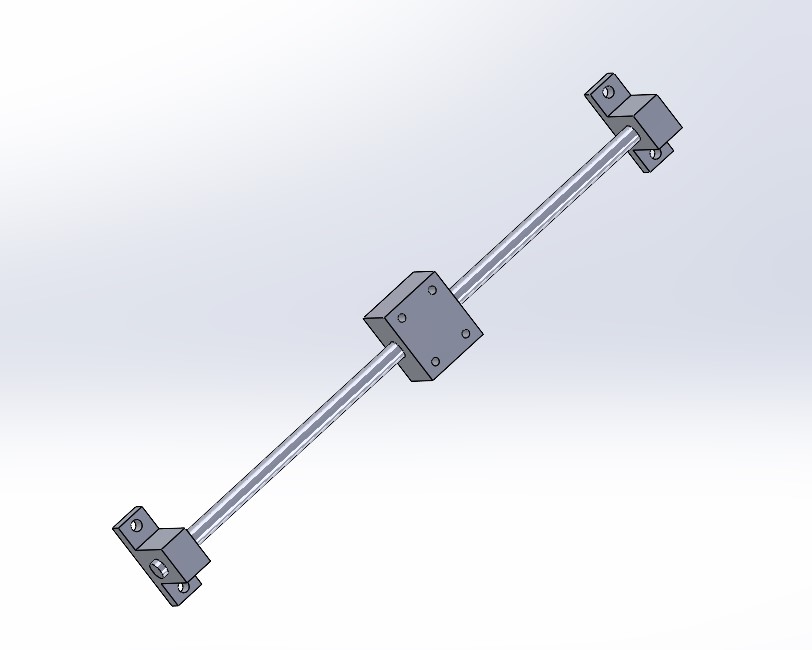
- I bought shaft and bushing unit for vertical actuation from Amazon.
-
Motor
- We utilize existing motor, I measured actual size and 3D modeled.
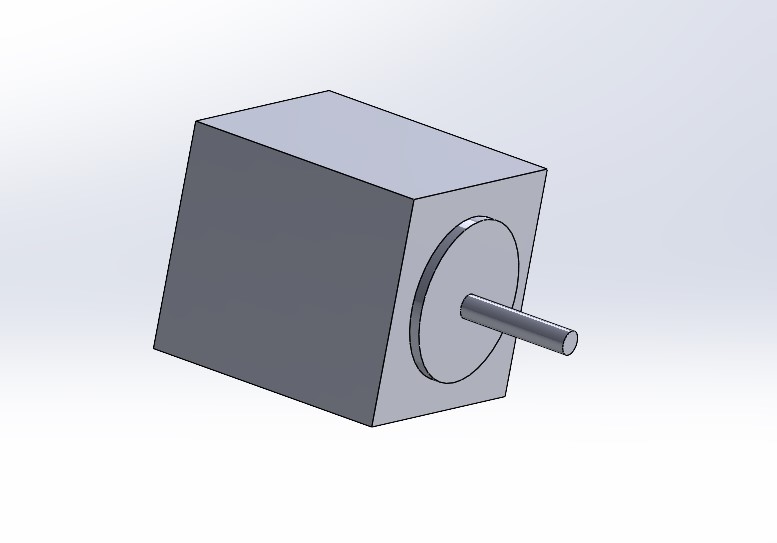
- I also created 3D model of motor holder.
- We utilize existing motor, I measured actual size and 3D modeled.
-
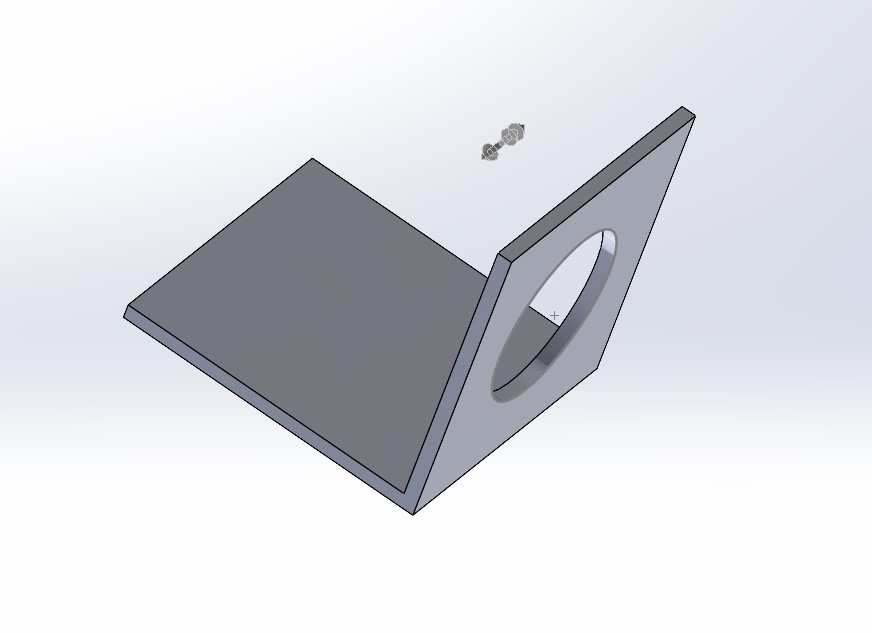
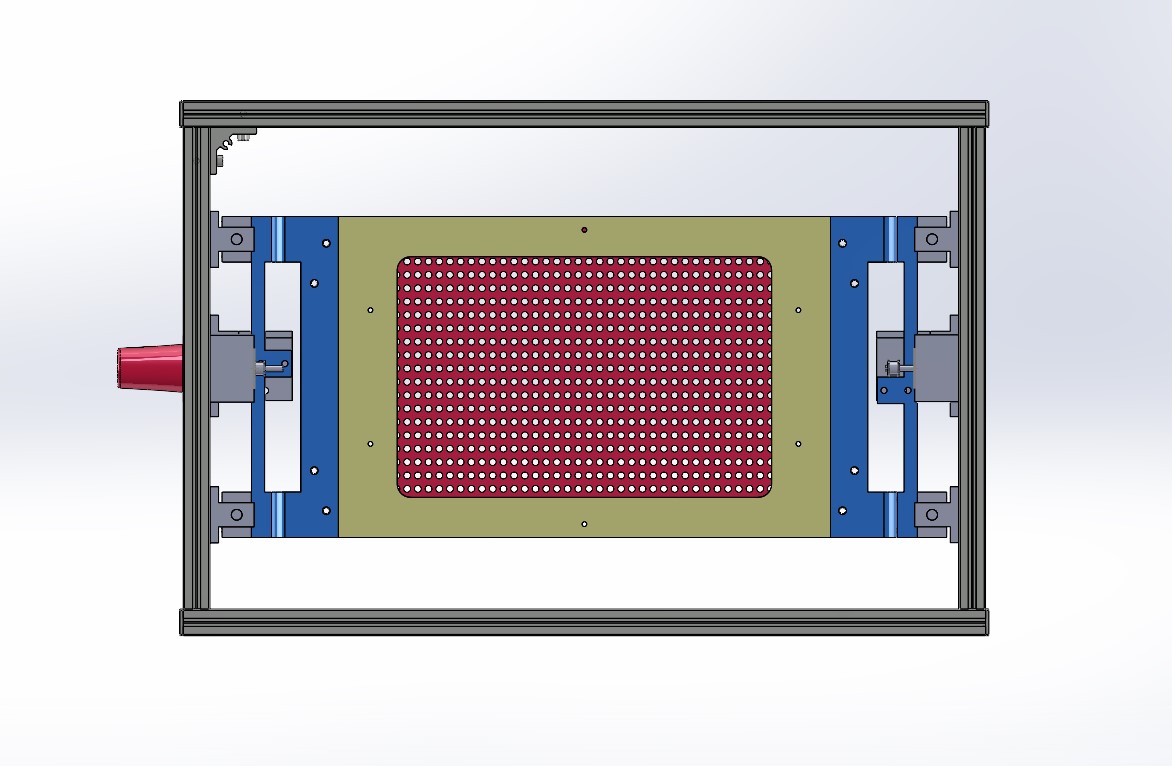
Stage and film holder
- Our plan was to make it with 5mm thick Aluminum as designed below.
- Stage
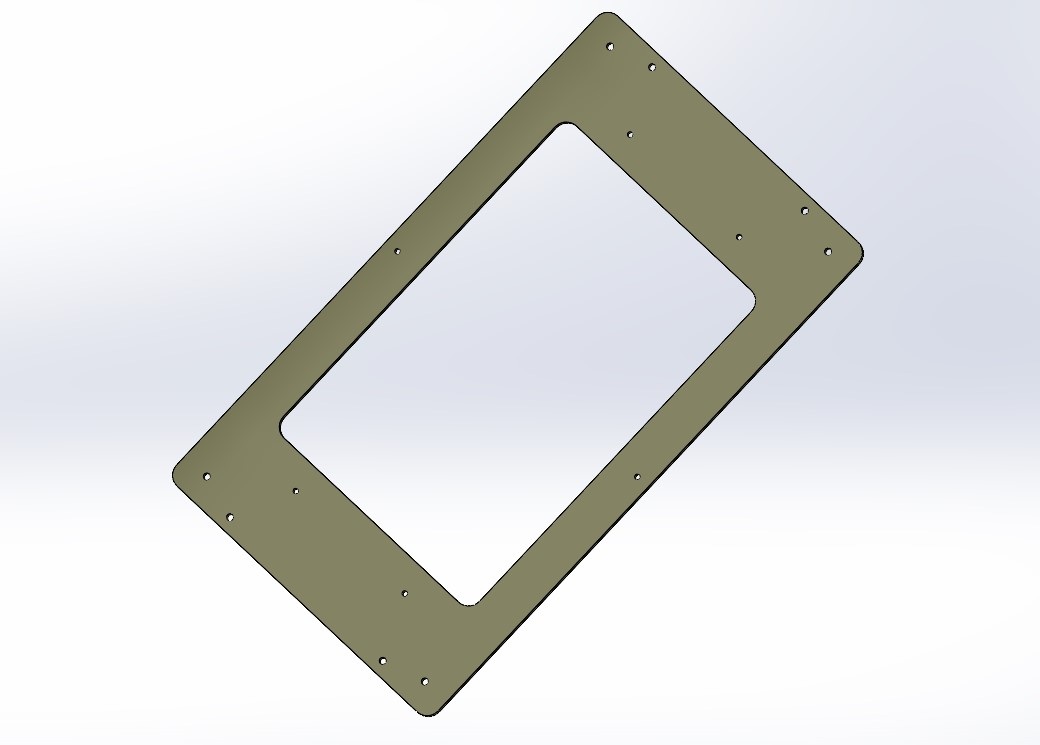
- Film holder

-
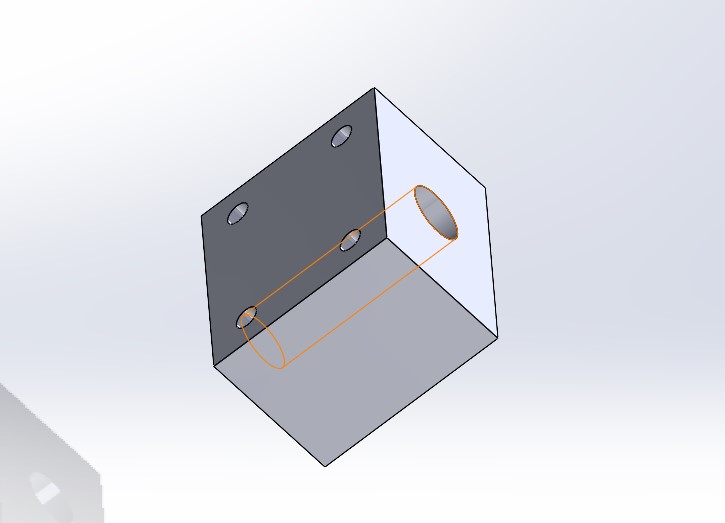
Pulley holder
- We utilize pulley from an old 3D printer. I measured the pulley box and created 3D model to attach it to the frame.
- For left and right parts, I prepared mirror copy.
- We utilize pulley from an old 3D printer. I measured the pulley box and created 3D model to attach it to the frame.
-
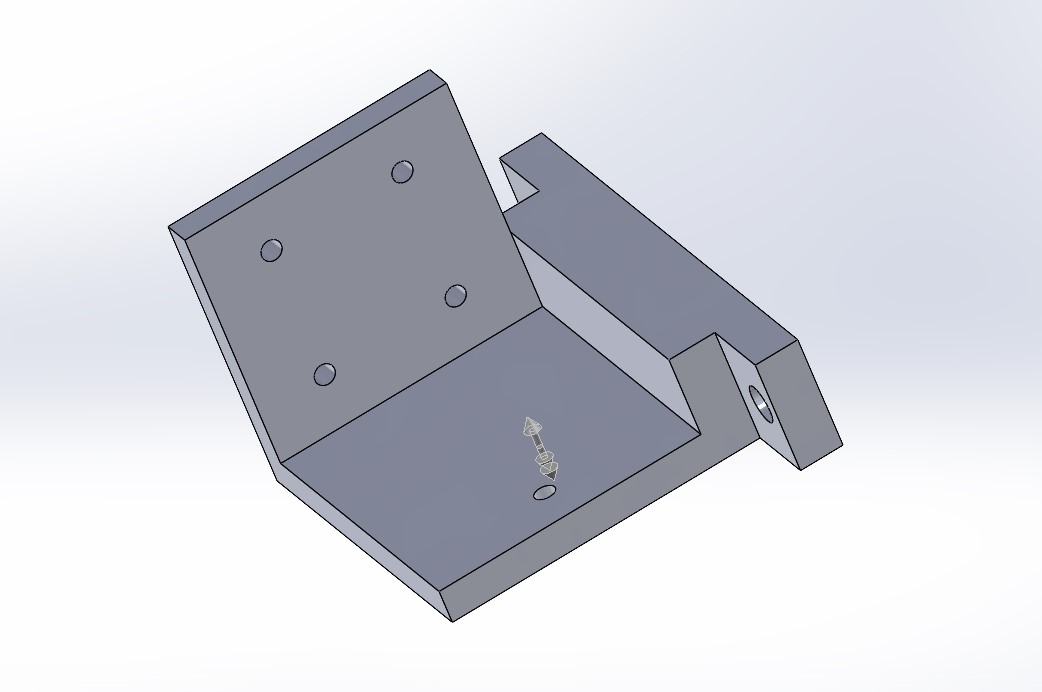
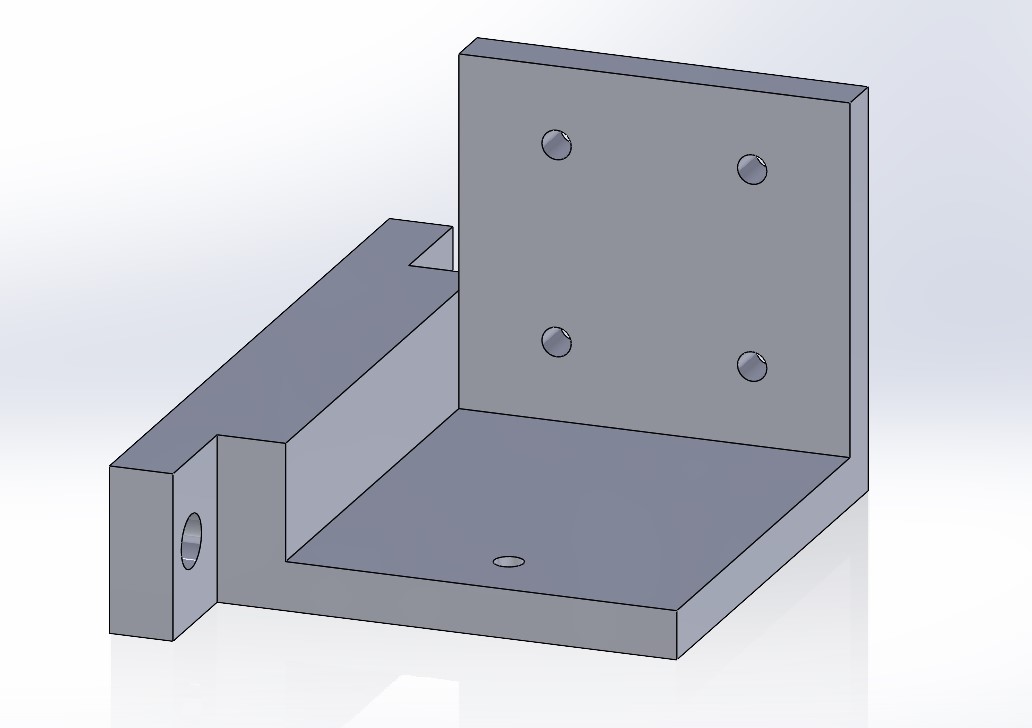
Stage holder
- This part is to connect linear bushings and the stage.
- I carefully designed of clearance from other parts, motor and pulley at top and bottom end.
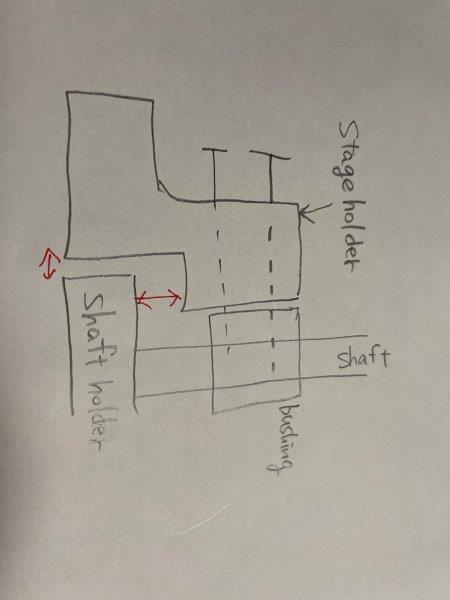
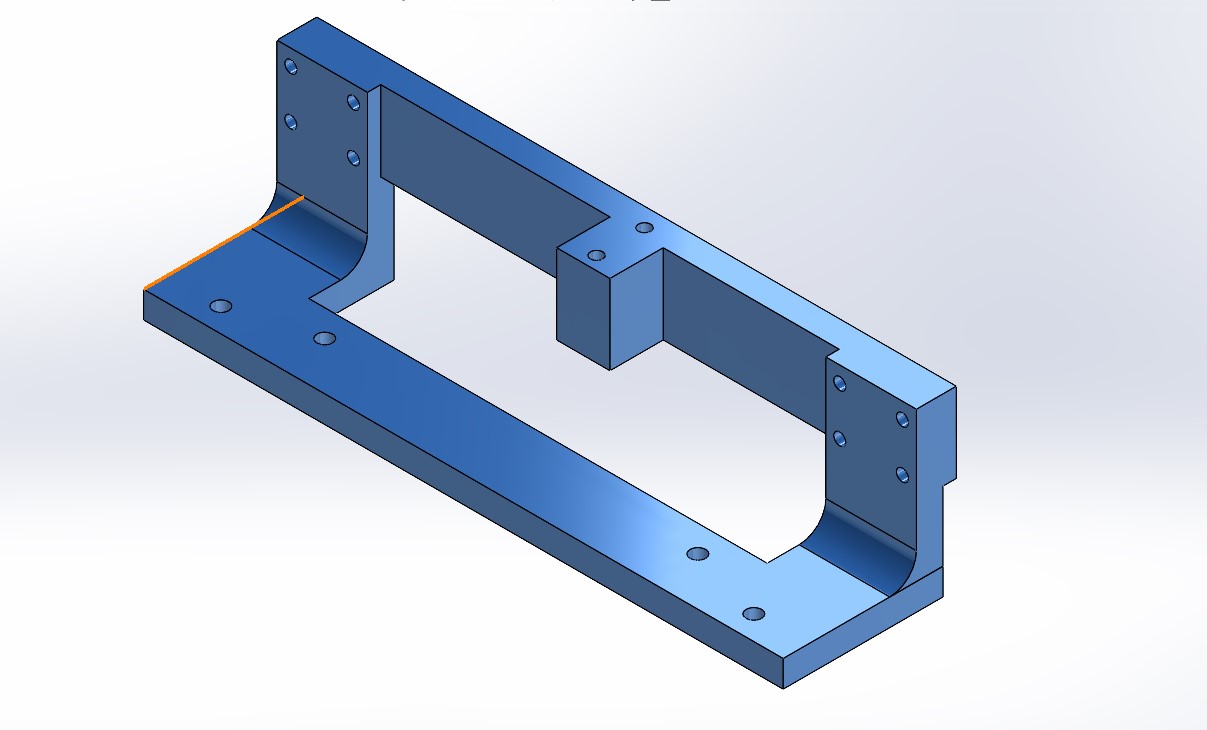
- This part needs to be connected actuating belt.
- Vacuum box and coupler
- Vacuum box as the base of the machine. We planned to connect a vacuum machine to this box.
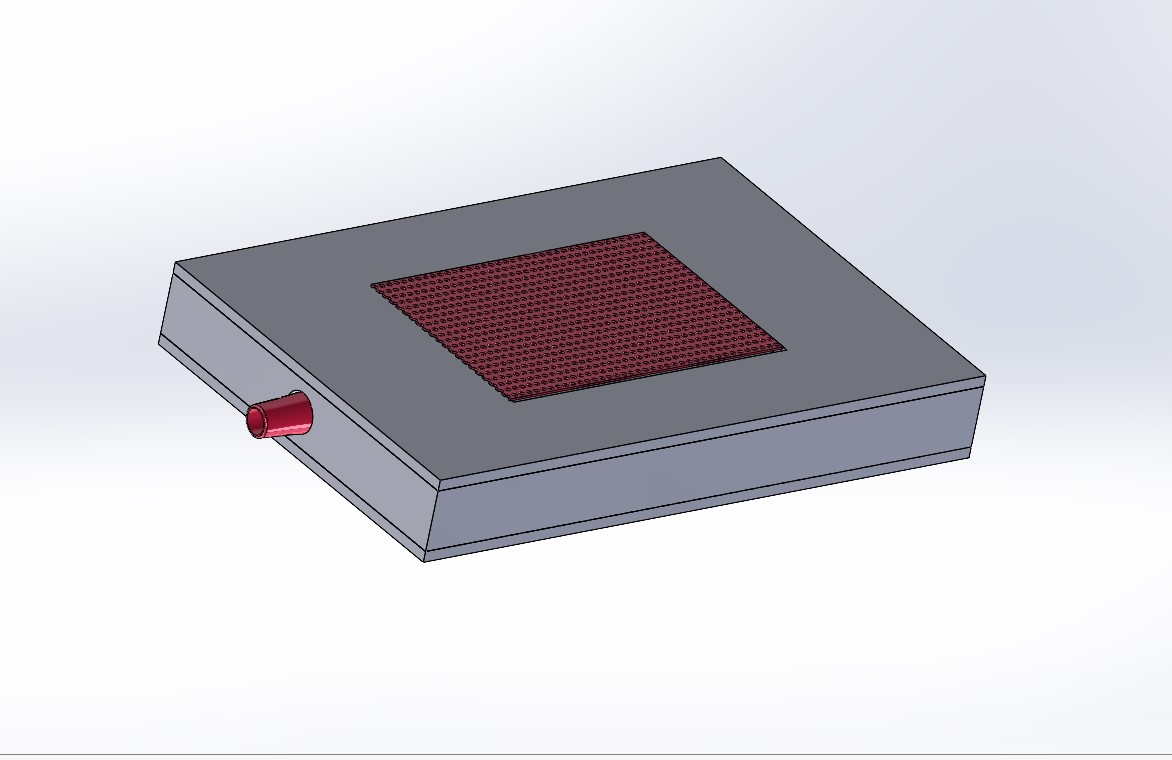
- Vacuum box as the base of the machine. We planned to connect a vacuum machine to this box.
- Complete 3D model
- Assembled 3D model and confirmed each size are fine (No friction, no interferance)
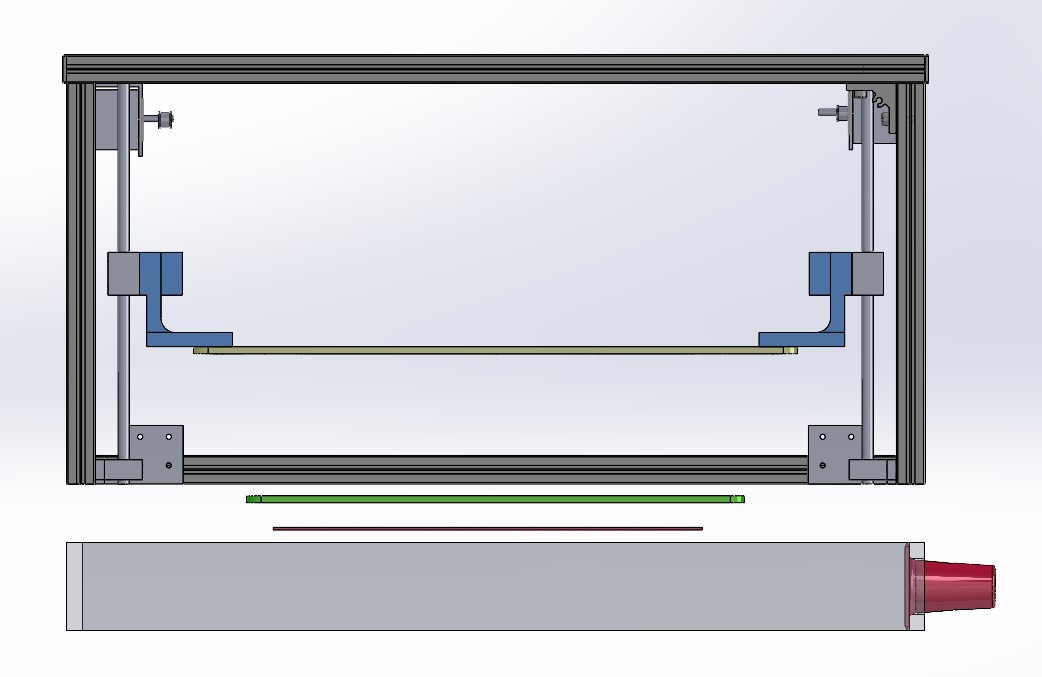
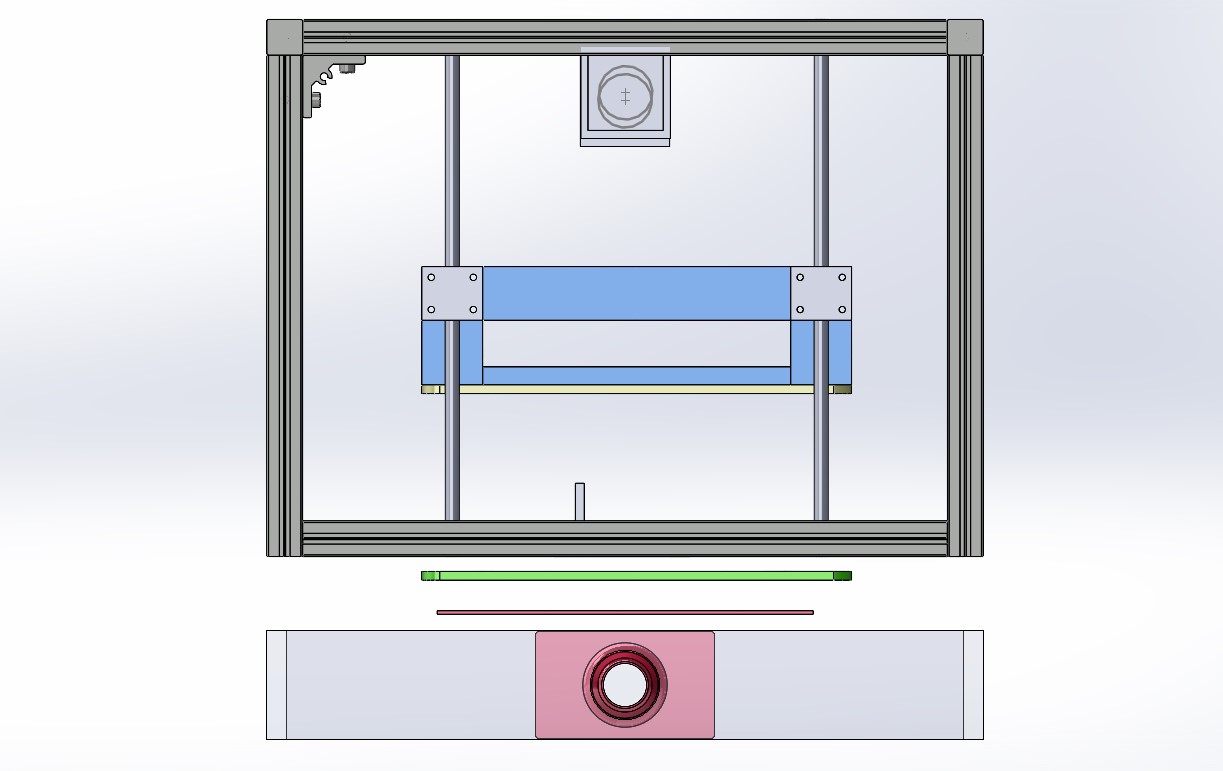
- Assembled 3D model and confirmed each size are fine (No friction, no interferance)
Making of the parts
-
Frame
- Easily built up, but must confirm each parts connected right angle.
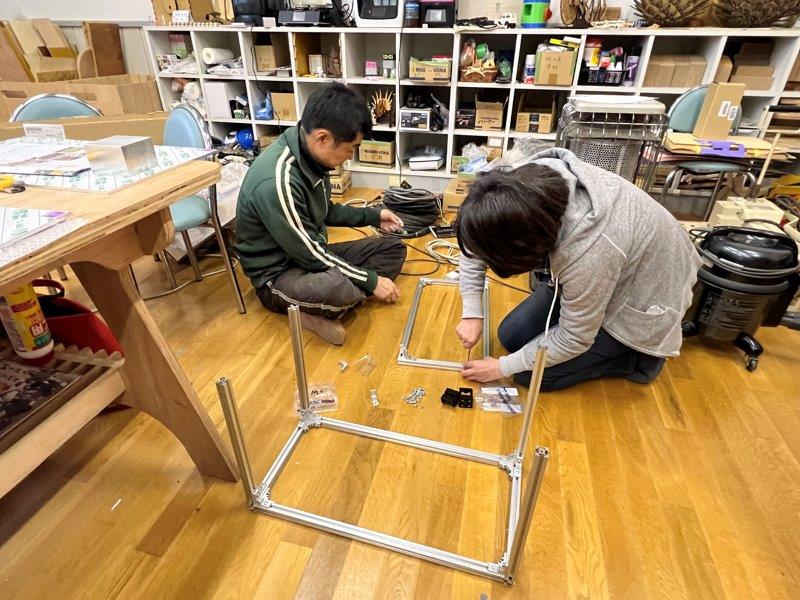
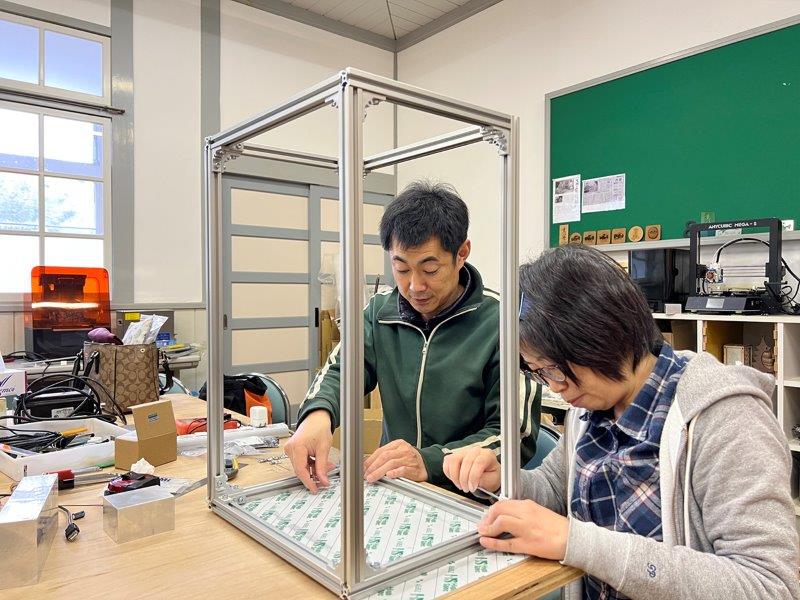
- Easily built up, but must confirm each parts connected right angle.
-
3D printing parts (Pulley holder, Stage holder, Vacuum box coupler)

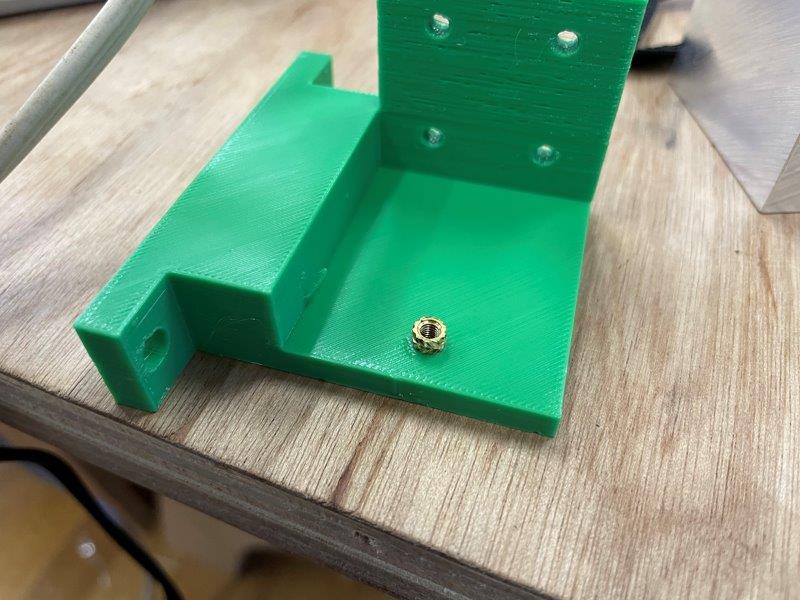
- Then put insert nuts into the parts with a soldering iron.

- Then put insert nuts into the parts with a soldering iron.
-
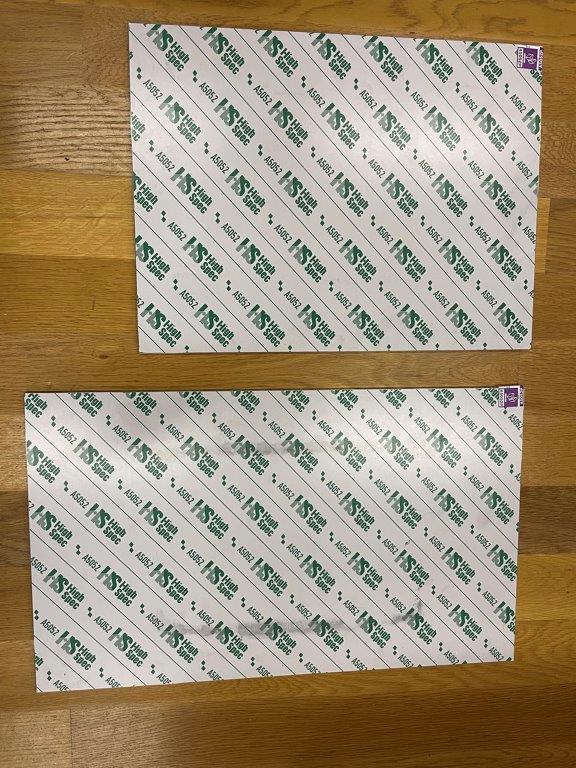
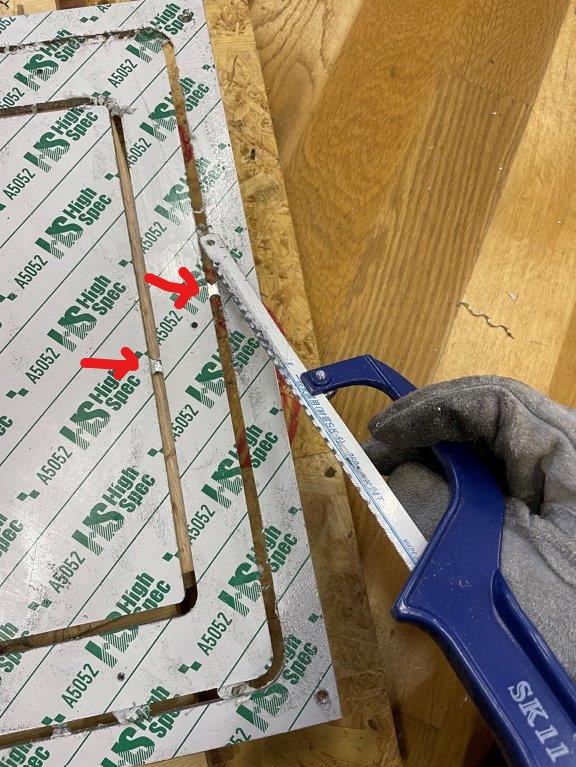
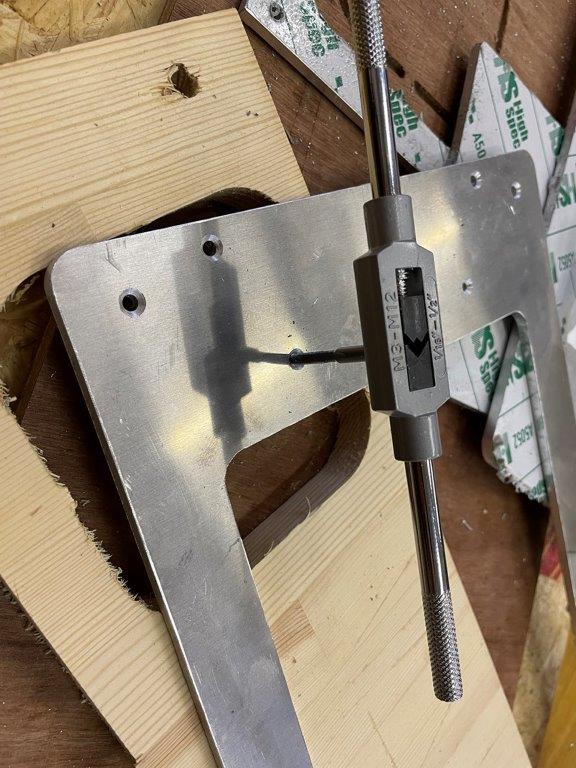
Stage and film holder
- Aluminum plate before cutting
- Cutting 5mm thick aluminum plate with our lab’s original CNC.
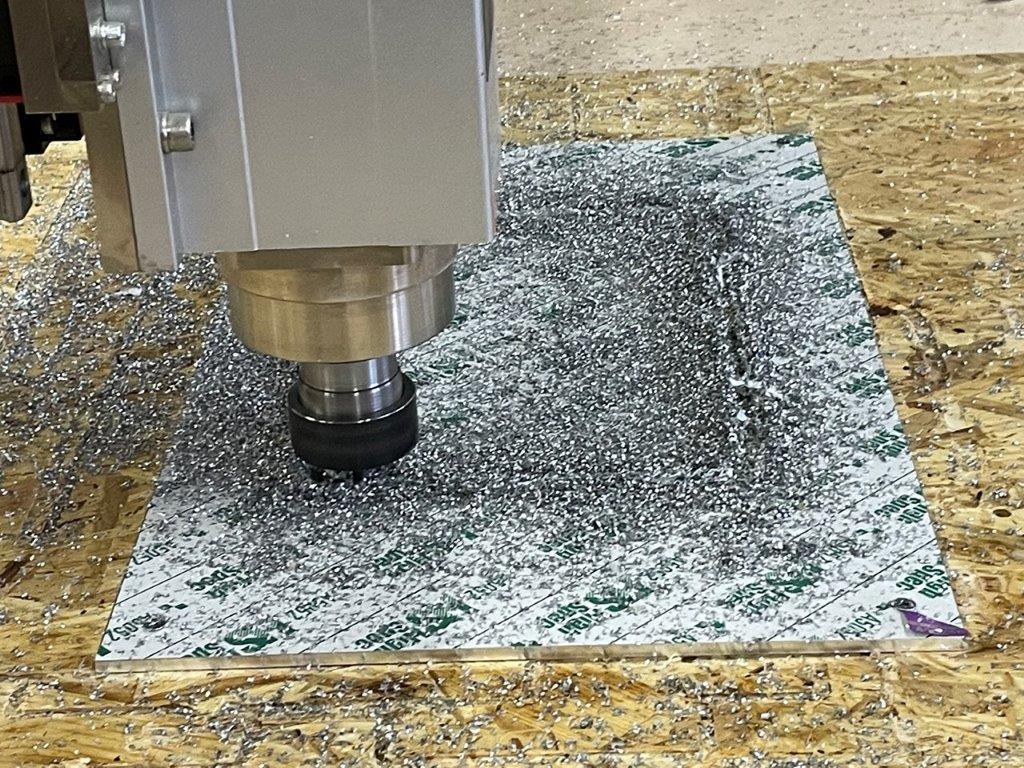
- Need to lubricate cutting oil so that the cutting friction heat not going high. Otherwise the tip of aluminum melt and you cannot cut.
-
Once cutting completed, remove the tabs.
-
Made screw holes with a screw tap
- Vacuum box
- I cut a plywood with our CNC.
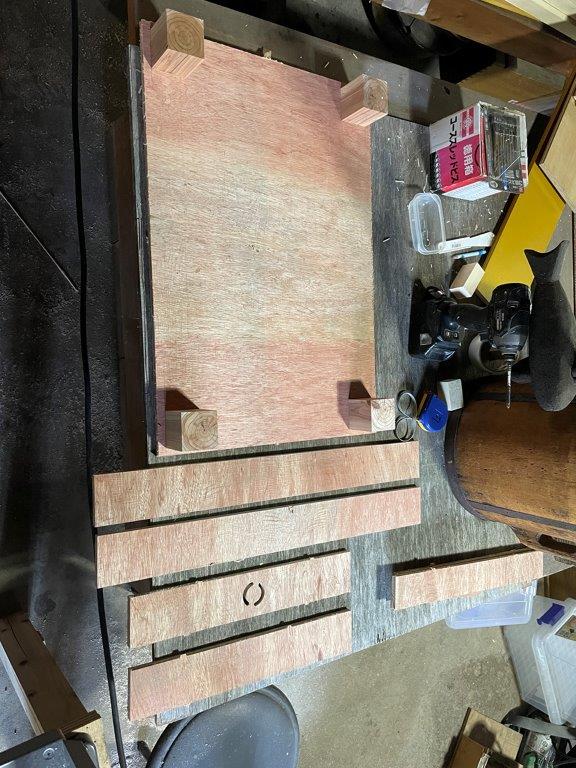
- Then build up a box

- Aluminum plate before cutting
-
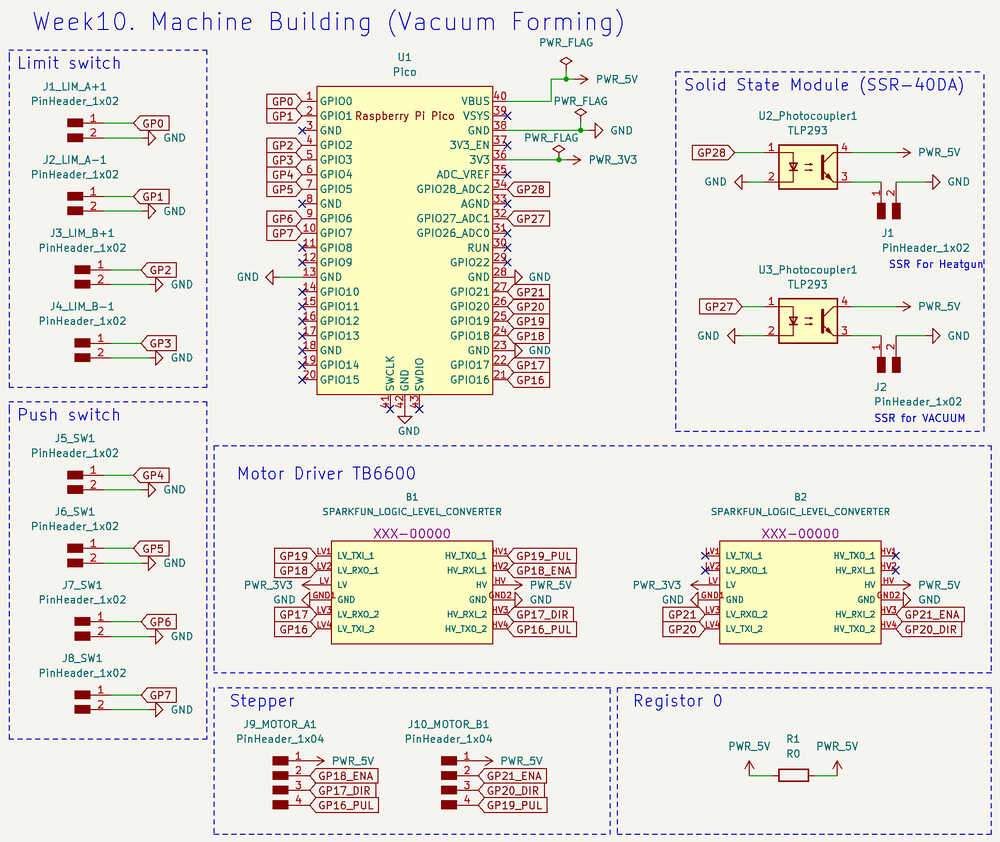
Making Original Board
Schematic by Kicad
PCB by Kicad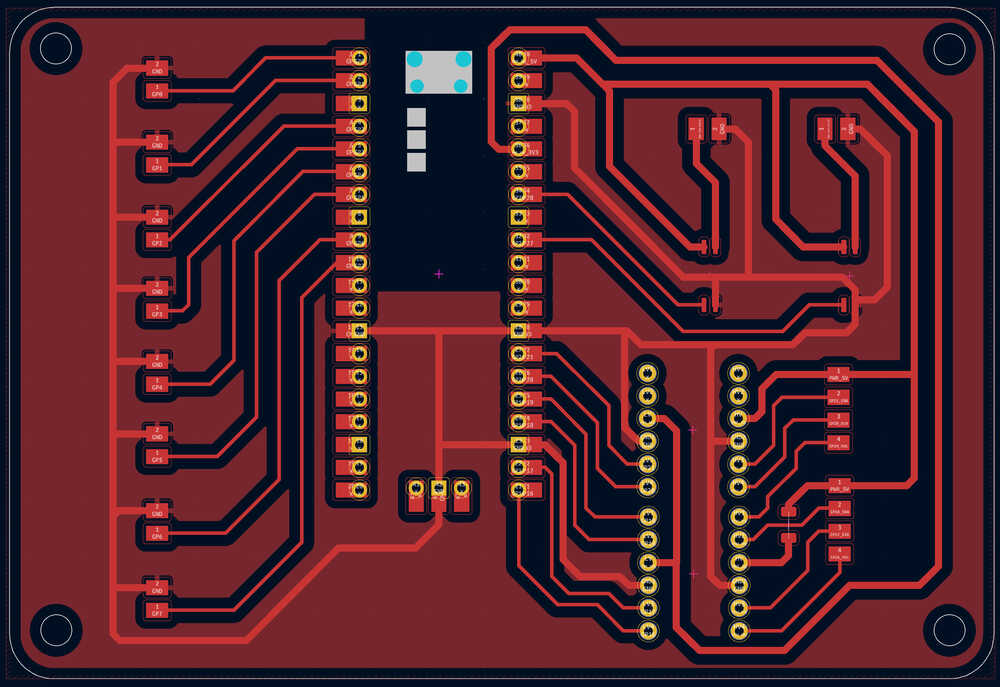
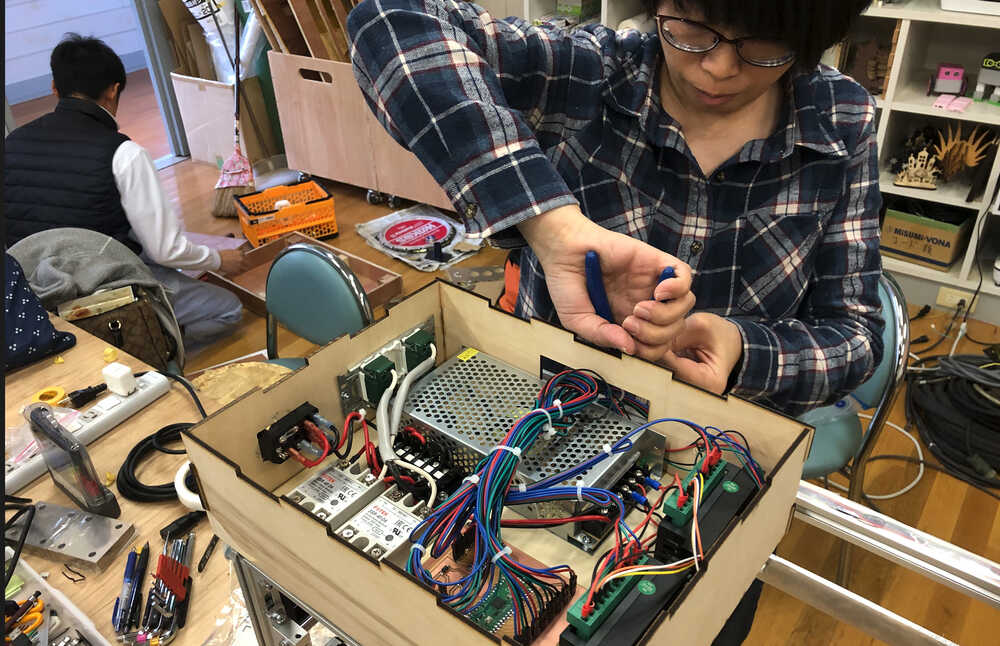
Soldering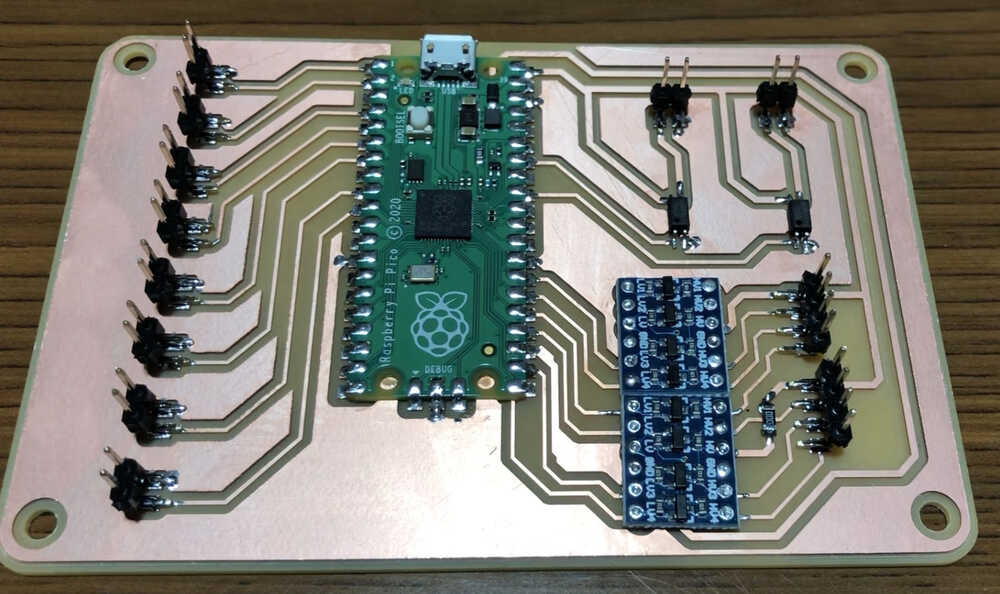
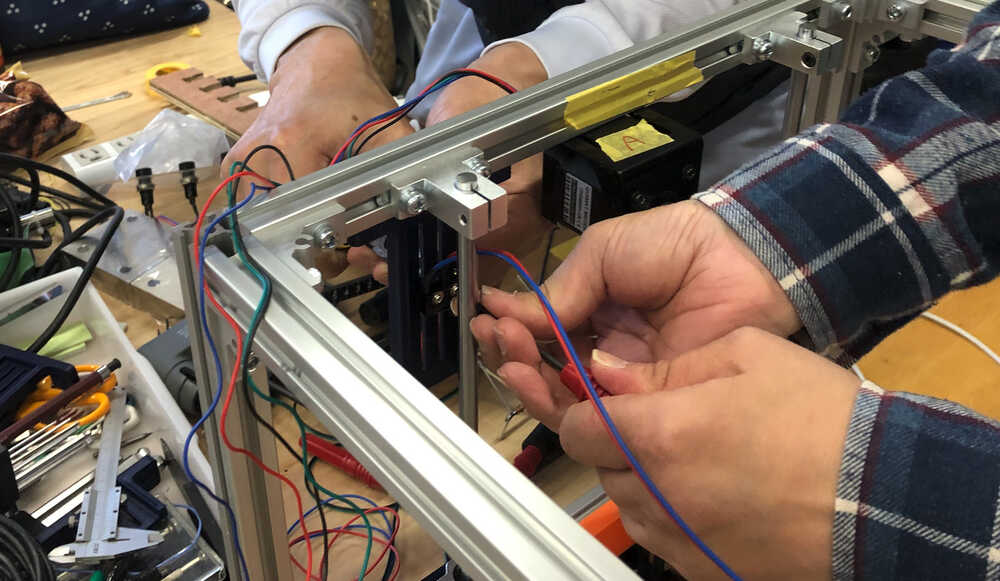
- Wiring
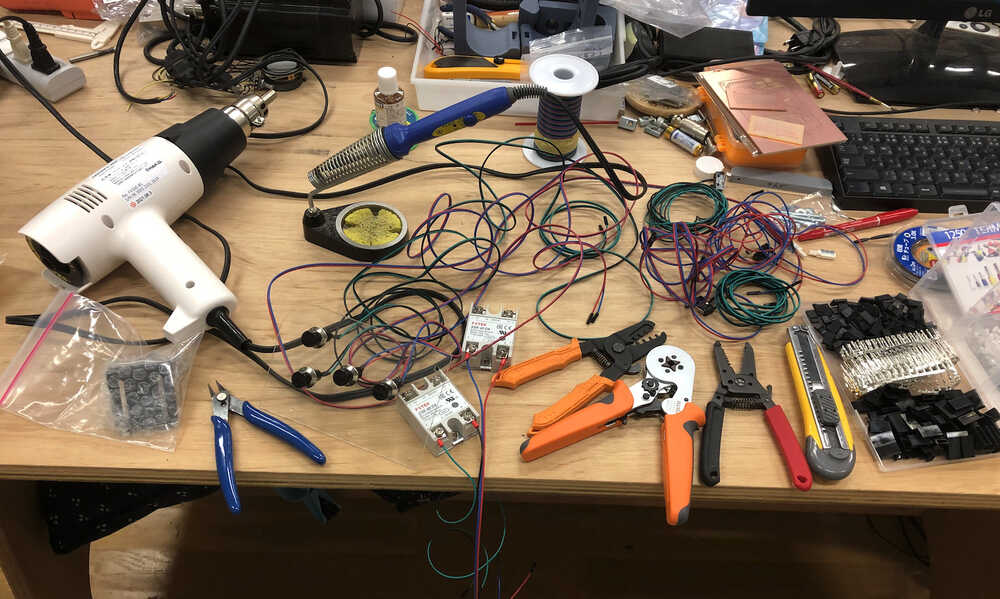
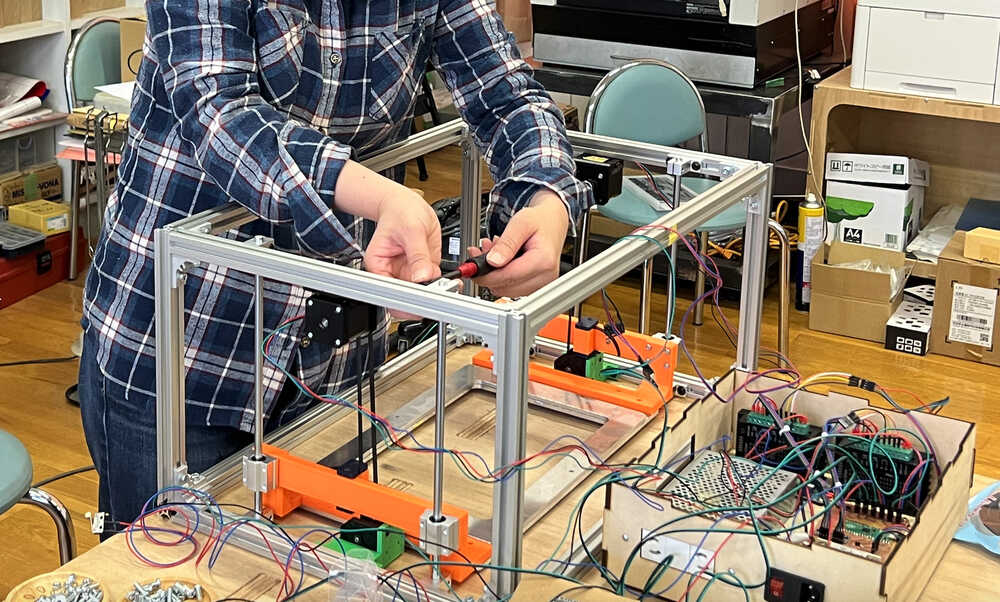
- Making Control Box
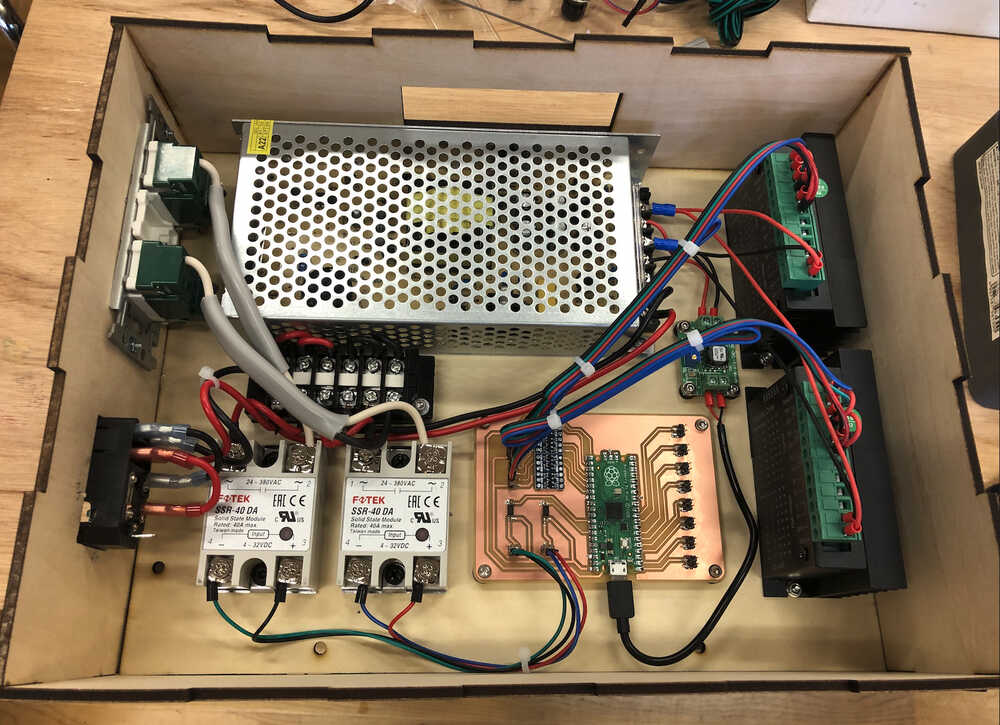
- Assembly
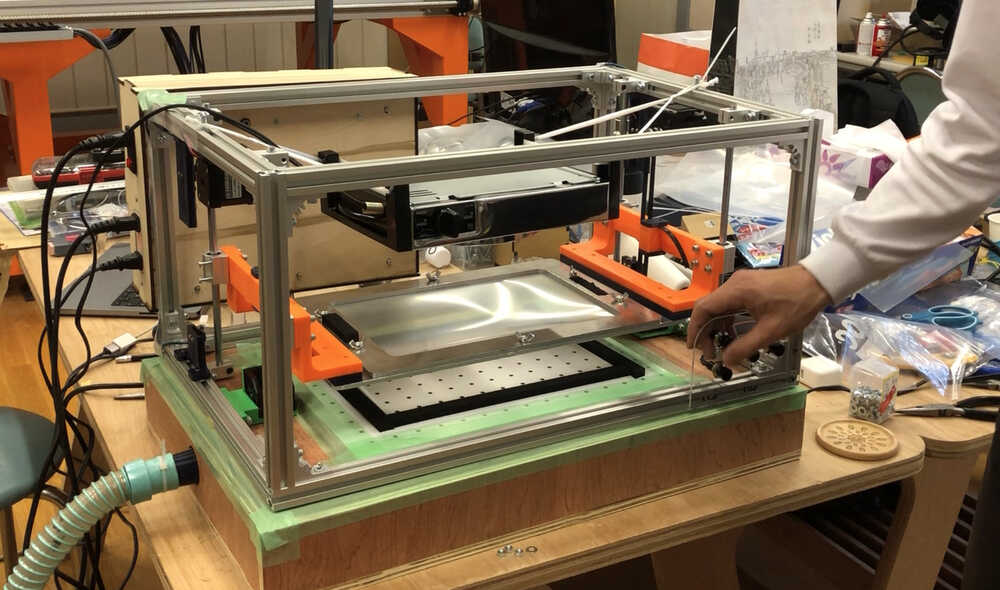
- It’s time to assemble
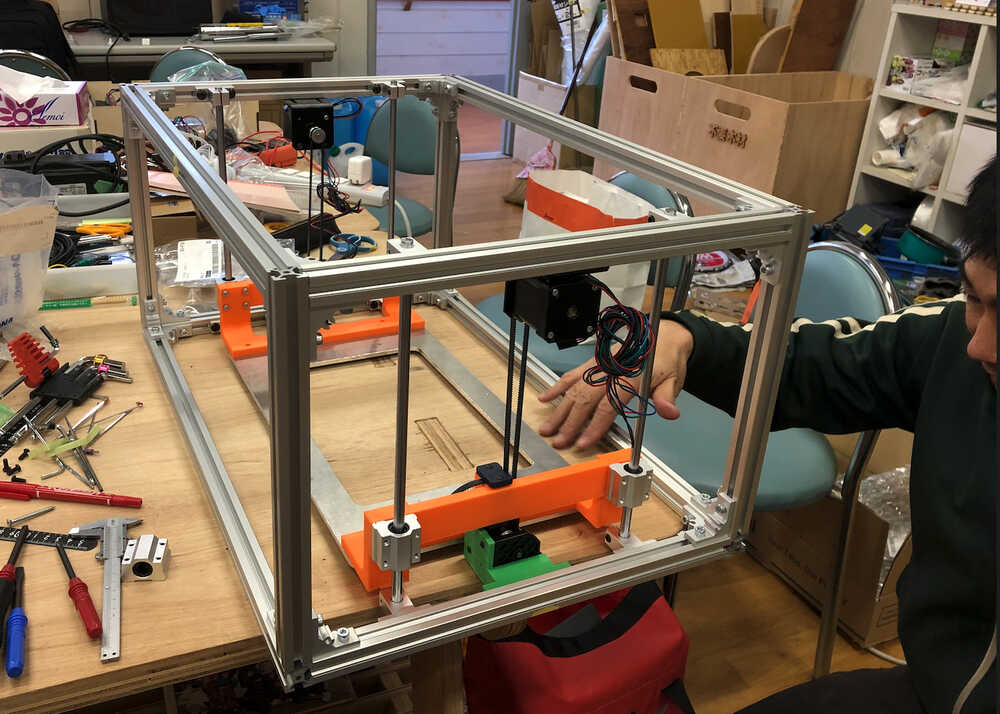
- Install Motor
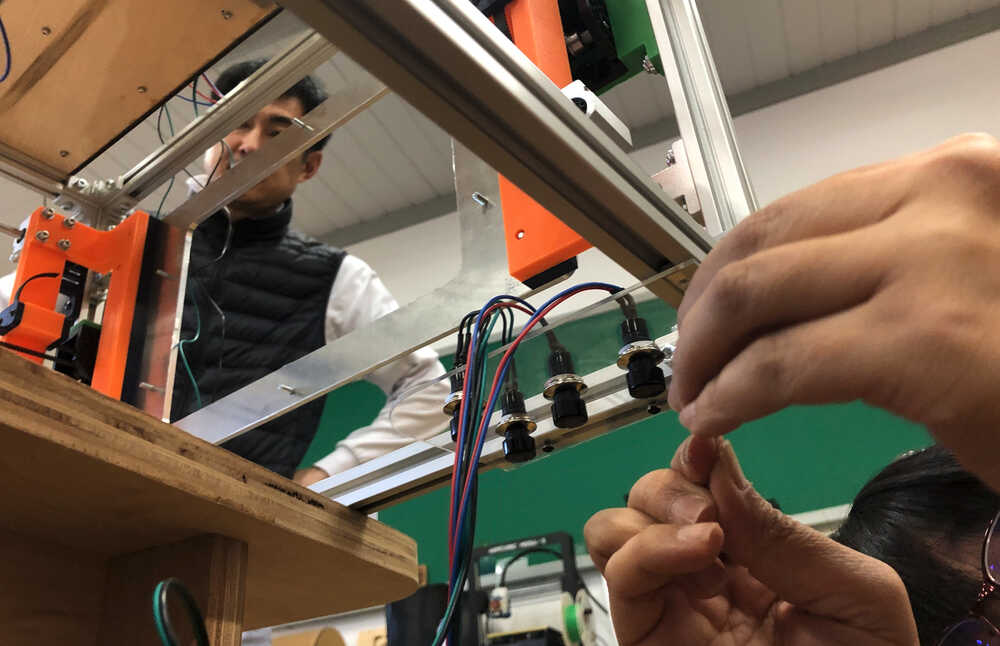
- Install Limit Switch
- Install Control box
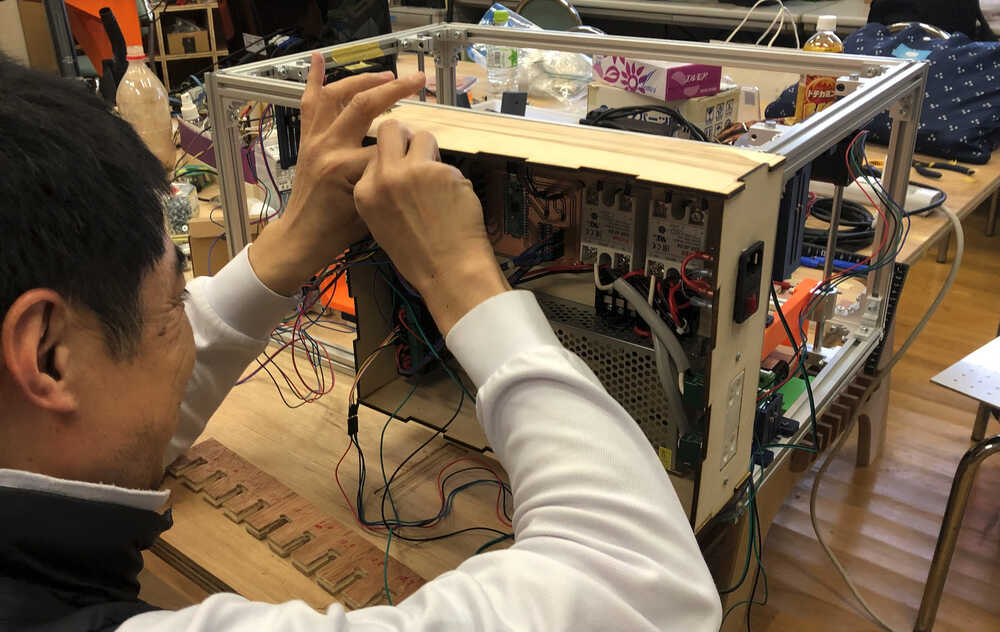
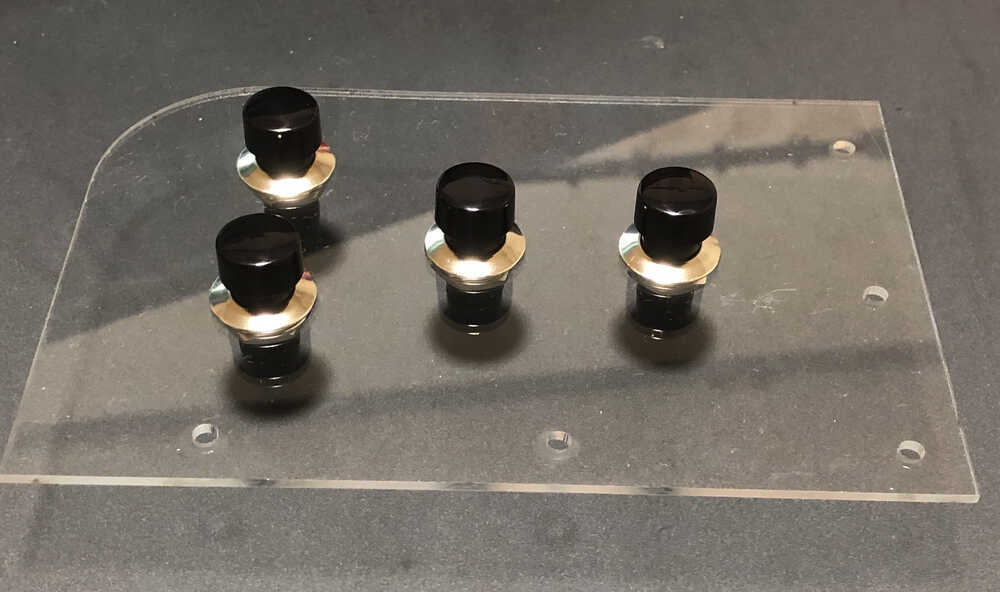
- Install Panel
- Bundle the wires
- Prototype1 assembly is Done.
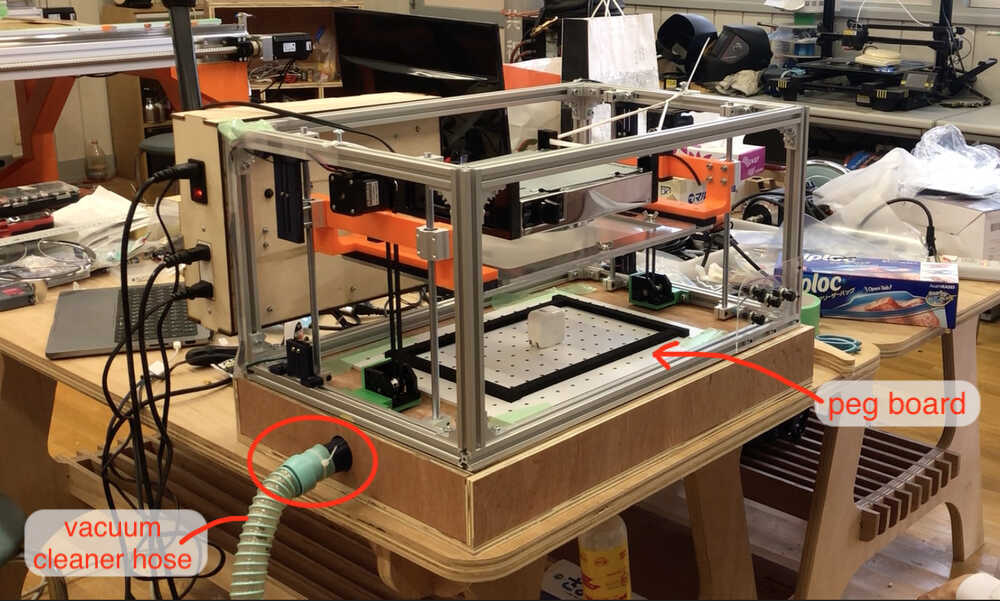
- Vacuum parts are installed under the frame.
- The peg board was bought at a store.
- The vacuum cleaner hose was fixed with straps.
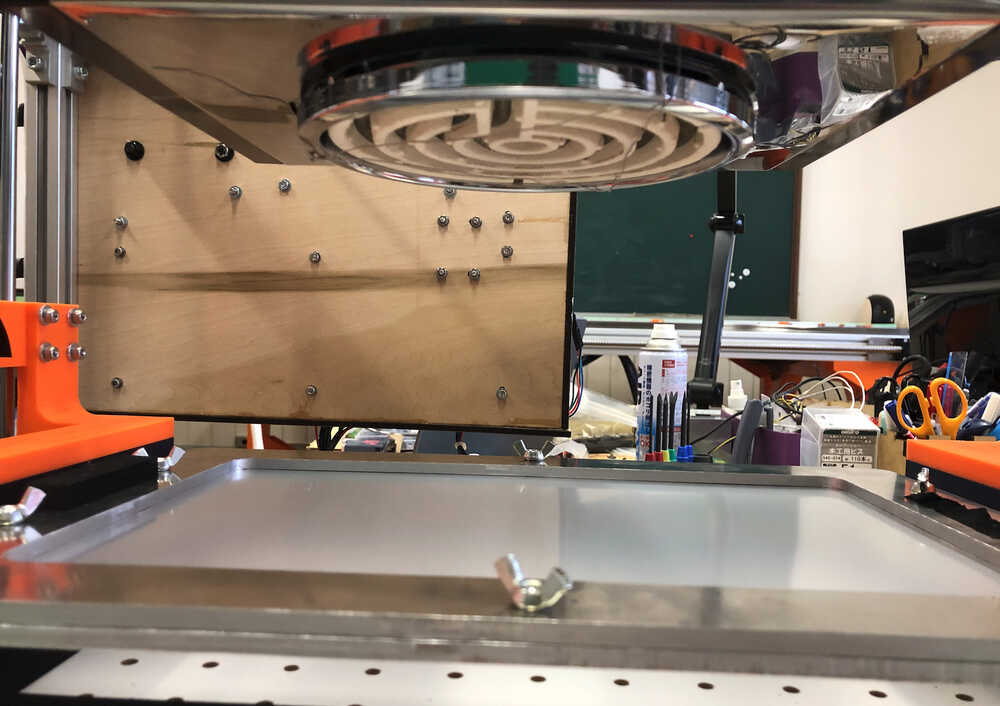
- After test ON 11-April, We choose electric heating stove to heat.
- Install electric heating stove (Work on Progress)
- It’s time to assemble
Problems and how the team solved them
| Problems | how the team solved them |
|---|---|
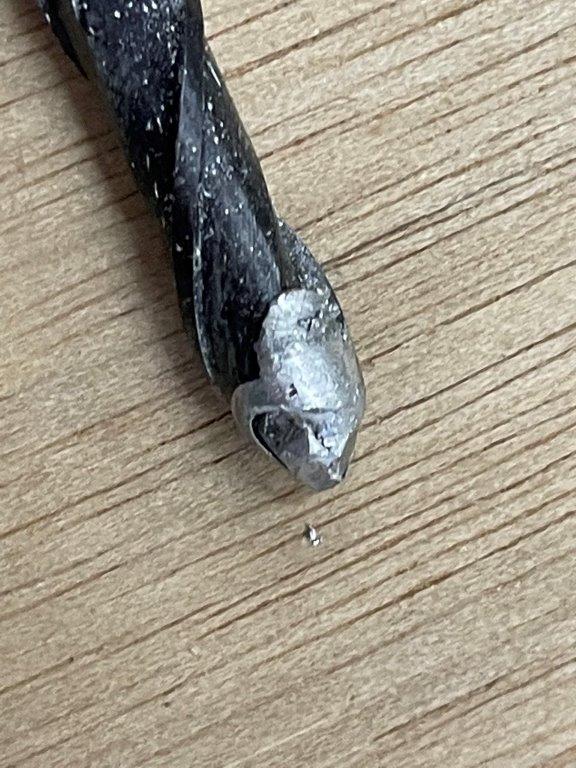
| Aluminum plate, mill breaks when cutting with CNC machining | - The break caused that the lubricant ran out in the middle of the cutting. - We purchased lubricant and aluminum cutting again. We learned the lubricant is important. |
| vacuum suction is low | - We change narrow space for box connected with vacuum. Then Caccum suction become high. |
| Wires are pull out a lot of time, and need debugging. | - Change to 2226TX terminal that not pull out easily. |
| Heating Problem | - Heating is function is not decided yet. We continue to work it with for future development opportunities for this project. |
Design software
| Titles | Software |
|---|---|
| Machine Hardware | Solid works |
| Control box | Fusion360 |
| Board | Kicad |
Design file
-
Electronic Design file - Hiroe Takeda
-
Mechanical Design file - Shin Masuoka
Programming Code for Arduino IDE
The completion code is as follows.
// Pin definitions for stepper motors A and B
const int motorA_PUL = 16;
const int motorA_DIR = 17;
const int motorA_ENA = 18;

const int motorB_PUL = 19;
const int motorB_DIR = 20;
const int motorB_ENA = 21;

// Pin definitions for sStart button and limit switch
const int limitSwitchAPin_up = 0;
const int limitSwitchBPin_up = 1;
const int limitSwitchAPin_down = 2;
const int limitSwitchBPin_down = 3;
const int upButtonPin = 4;
const int downButtonPin = 5;
const int heatButtonPin = 6;
const int startButtonPin = 7;

// Pin Definition for Relay
const int heater_relay = 27;
const int vacuum_relay = 28;

// Stepping motor step count and delay time
const int stepsPerRevolution = 200;
const int stepDelay = 200000 / stepsPerRevolution; // MicroSec

void setup() {
  // Setting of Pin
  pinMode(motorA_DIR, OUTPUT);
  pinMode(motorA_PUL, OUTPUT);
  pinMode(motorA_ENA, OUTPUT);

  pinMode(motorB_DIR, OUTPUT);
  pinMode(motorB_PUL, OUTPUT);
  pinMode(motorB_ENA, OUTPUT);

  pinMode(upButtonPin, INPUT_PULLUP);
  pinMode(downButtonPin, INPUT_PULLUP);
  pinMode(startButtonPin, INPUT_PULLUP);
  pinMode(heatButtonPin, INPUT_PULLUP);
  pinMode(limitSwitchAPin_up, INPUT_PULLUP);
  pinMode(limitSwitchBPin_up, INPUT_PULLUP);
  pinMode(limitSwitchAPin_down, INPUT_PULLUP);
  pinMode(limitSwitchBPin_down, INPUT_PULLUP);

  // Setting of Relay pin
  pinMode(heater_relay, OUTPUT);
  pinMode(vacuum_relay, OUTPUT);
}

void loop() {

 // (1)When the up button is pressed
 if (digitalRead(upButtonPin) == LOW) {

     // Enable stepper motors
         digitalWrite(motorA_ENA, HIGH);
         digitalWrite(motorB_ENA, HIGH);

     //Rotate both stepper motors
      if (digitalRead(limitSwitchAPin_up) == HIGH) {
        rotateMotor_cw(motorA_DIR, motorA_PUL);
      }

      if (digitalRead(limitSwitchBPin_up) == HIGH) {
        rotateMotor_cw(motorB_DIR, motorB_PUL);
      }
    }

 // (2)When the down button is pressed
 if (digitalRead(downButtonPin) == LOW) {

     // Enable stepper motors
         digitalWrite(motorA_ENA, HIGH);
         digitalWrite(motorB_ENA, HIGH);

     //Rotate both stepper motors
      if (digitalRead(limitSwitchAPin_down) == HIGH) {
        rotateMotor_ccw(motorA_DIR, motorA_PUL);
      }

      if (digitalRead(limitSwitchBPin_down) == HIGH) {
        rotateMotor_ccw(motorB_DIR, motorB_PUL);
      }
    }

 // (3)When the heating button is pressed
 if (digitalRead(heatButtonPin) == LOW) {
     // Enable stepper motors
         digitalWrite(motorA_ENA, HIGH);
         digitalWrite(motorB_ENA, HIGH);

     // Rotate both stepping motors until both limit switches A and B are pressed
      while (digitalRead(limitSwitchAPin_up) == HIGH || digitalRead(limitSwitchBPin_up) == HIGH) {
       if (digitalRead(limitSwitchAPin_up) == HIGH) {
         rotateMotor_cw(motorA_DIR, motorA_PUL);
        }

       if (digitalRead(limitSwitchBPin_up) == HIGH) {
         rotateMotor_cw(motorB_DIR, motorB_PUL);
        }
     }
     // Heater relay ON when both limit switches A and B are pressed
        digitalWrite(heater_relay, HIGH);

     //Heating OFF when start button is pressed
      if (digitalRead(startButtonPin) == LOW) {
       digitalWrite(heater_relay, LOW);
     }
 }

 // (4)When the start button is pressed
 if (digitalRead(startButtonPin) == LOW) {
     // Enable stepper motors
      digitalWrite(motorA_ENA, HIGH);
      digitalWrite(motorB_ENA, HIGH);

     // Rotate both stepping motors until both limit switches A and B are pressed
      while (digitalRead(limitSwitchAPin_down) == HIGH || digitalRead(limitSwitchBPin_down) == HIGH) {
       if (digitalRead(limitSwitchAPin_down) == HIGH) {
         rotateMotor_ccw(motorA_DIR, motorA_PUL);
        }

       if (digitalRead(limitSwitchBPin_down) == HIGH) {
         rotateMotor_ccw(motorB_DIR, motorB_PUL);
        }
     }

     // Vacuum relay ON for 10 seconds when both limit switches A and B are pressed
         digitalWrite(vacuum_relay, HIGH);
         delay(10000);
         digitalWrite(vacuum_relay, LOW);
         delay(1000);
    }

}


// function definition

void rotateMotor_cw(int motor_DIR_cw, int motor_PUL_cw) {
  digitalWrite(motor_DIR_cw, HIGH); // Rotate in clockwise direction
  digitalWrite(motor_PUL_cw, HIGH);
  delayMicroseconds(stepDelay);
  digitalWrite(motor_PUL_cw, LOW);
  delayMicroseconds(stepDelay);
}

void rotateMotor_ccw(int motor_DIR_ccw, int motor_PUL_ccw) {
  digitalWrite(motor_DIR_ccw, LOW); // Rotate in counterclockwise direction
  digitalWrite(motor_PUL_ccw, HIGH);
  delayMicroseconds(stepDelay);
  digitalWrite(motor_PUL_ccw, LOW);
  delayMicroseconds(stepDelay);
}
Reference code
A very hard time with the program code. The following sites and others helped me.
-
TB6600 Stepper Motor Driver
-
“INPUT_PULLUP” of arduino IDE
- OttoBlockly Sample code
- Arduino IDE Sample code
- ChatGPT
Listed future development opportunities for this project
Heating is function is not decided yet. We continue to work it with for future development opportunities for this project.
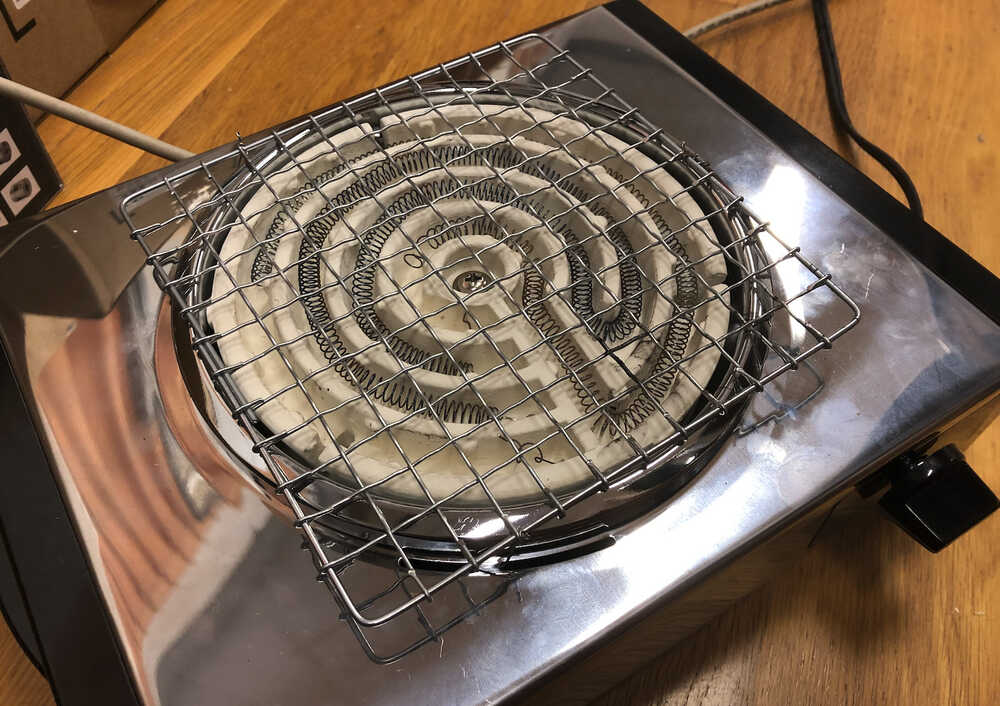
Test: Electric Stove
Turn the electric stove upside down and fix it to the top of the machine.
The electric heating wire was sagging, so I fixed it in several places with wire.
 After a few tries, the electric heating wire broke.
The electric stove with electric heating wire was given up.
After a few tries, the electric heating wire broke.
The electric stove with electric heating wire was given up.
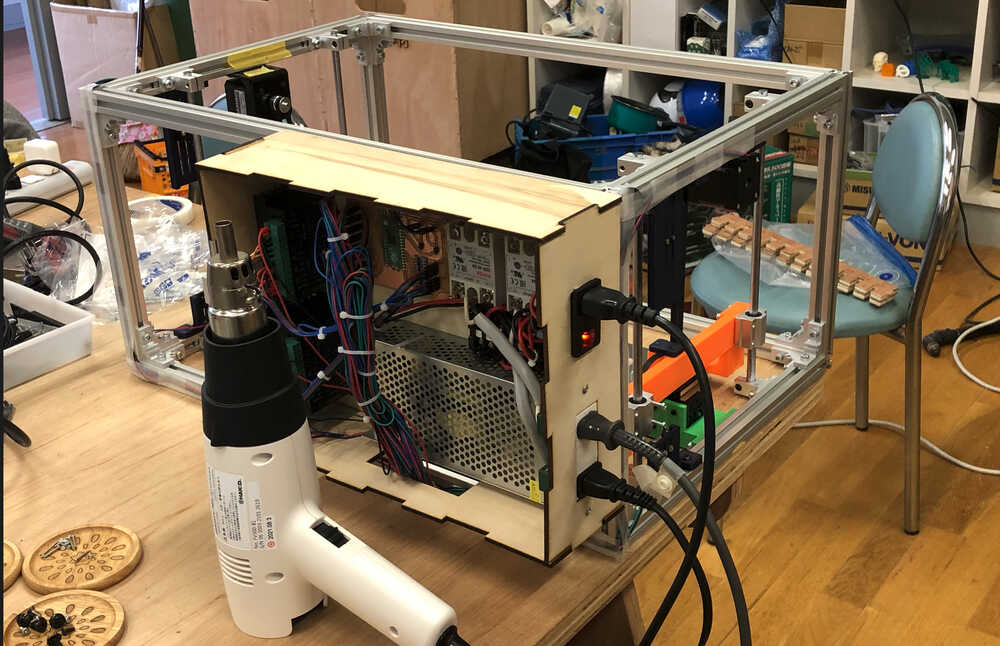
Test: Heat gun:
- Currently, there are no moving parts to move the heat gun.
- The heat gun is manually moved and heated, as fixing the heat gun is not suitable due to the extremely low heating.