Week 13 - Group / Networking and Communications
This is group assignment page of Molding and Casting (Kitakagaya students):
- Shin Masuoka
- Hiroe Takeda
Group assignment
- Send a message between two projects
What is ESP-NOW ?
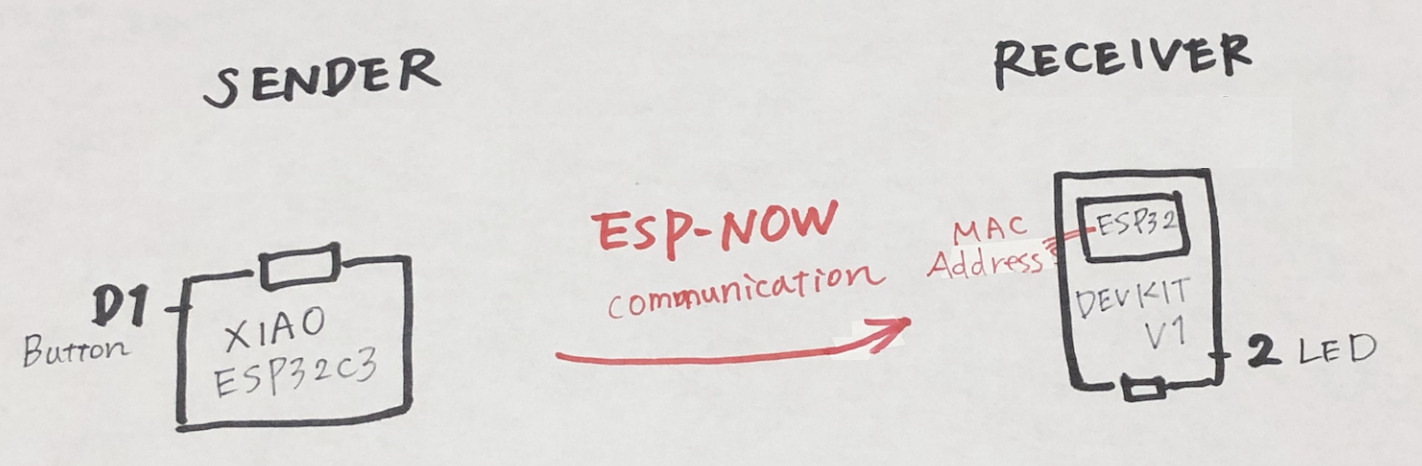
- For this week assignment, we tried to use esp-now and send a message from one device to another device.
- (quote from ESPRESSIF’s site) ESP-NOW is a wireless communication protocol defined by Espressif, which enables the direct, quick and low-power control of smart devices, without the need of a router. ESP-NOW can work with Wi-Fi and Bluetooth LE, and supports the ESP8266, ESP32, ESP32-S and ESP32-C series of SoCs. It’s widely used in smart-home appliances, remote controlling, sensors, etc.
How to identify the communication target?
- Each network device has “MAC address” (Media Access Control address) to identify it.
- MAC address consists of 12 letters (0-9 and A-F).
- For confirming MAC address of the device used for this assignment, we used below program from Arduino forum
#include <WiFi.h> void setup(){ Serial.begin(115200); Serial.println(); Serial.print("ESP Board MAC Address: "); Serial.println(WiFi.macAddress()); } void loop(){} - We picked up esp32 dev kit as a receiver
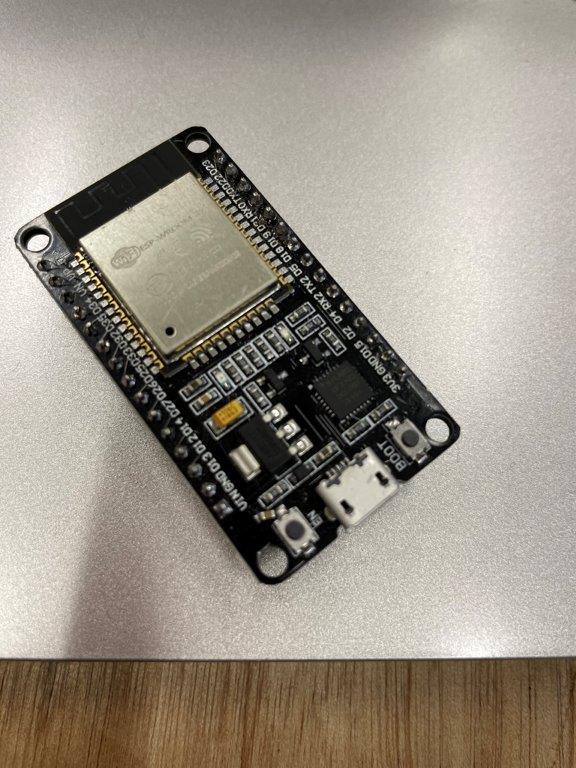
-
Once upload above program, we got below in serial monitor. This MAC address should be used in Sender’s program.
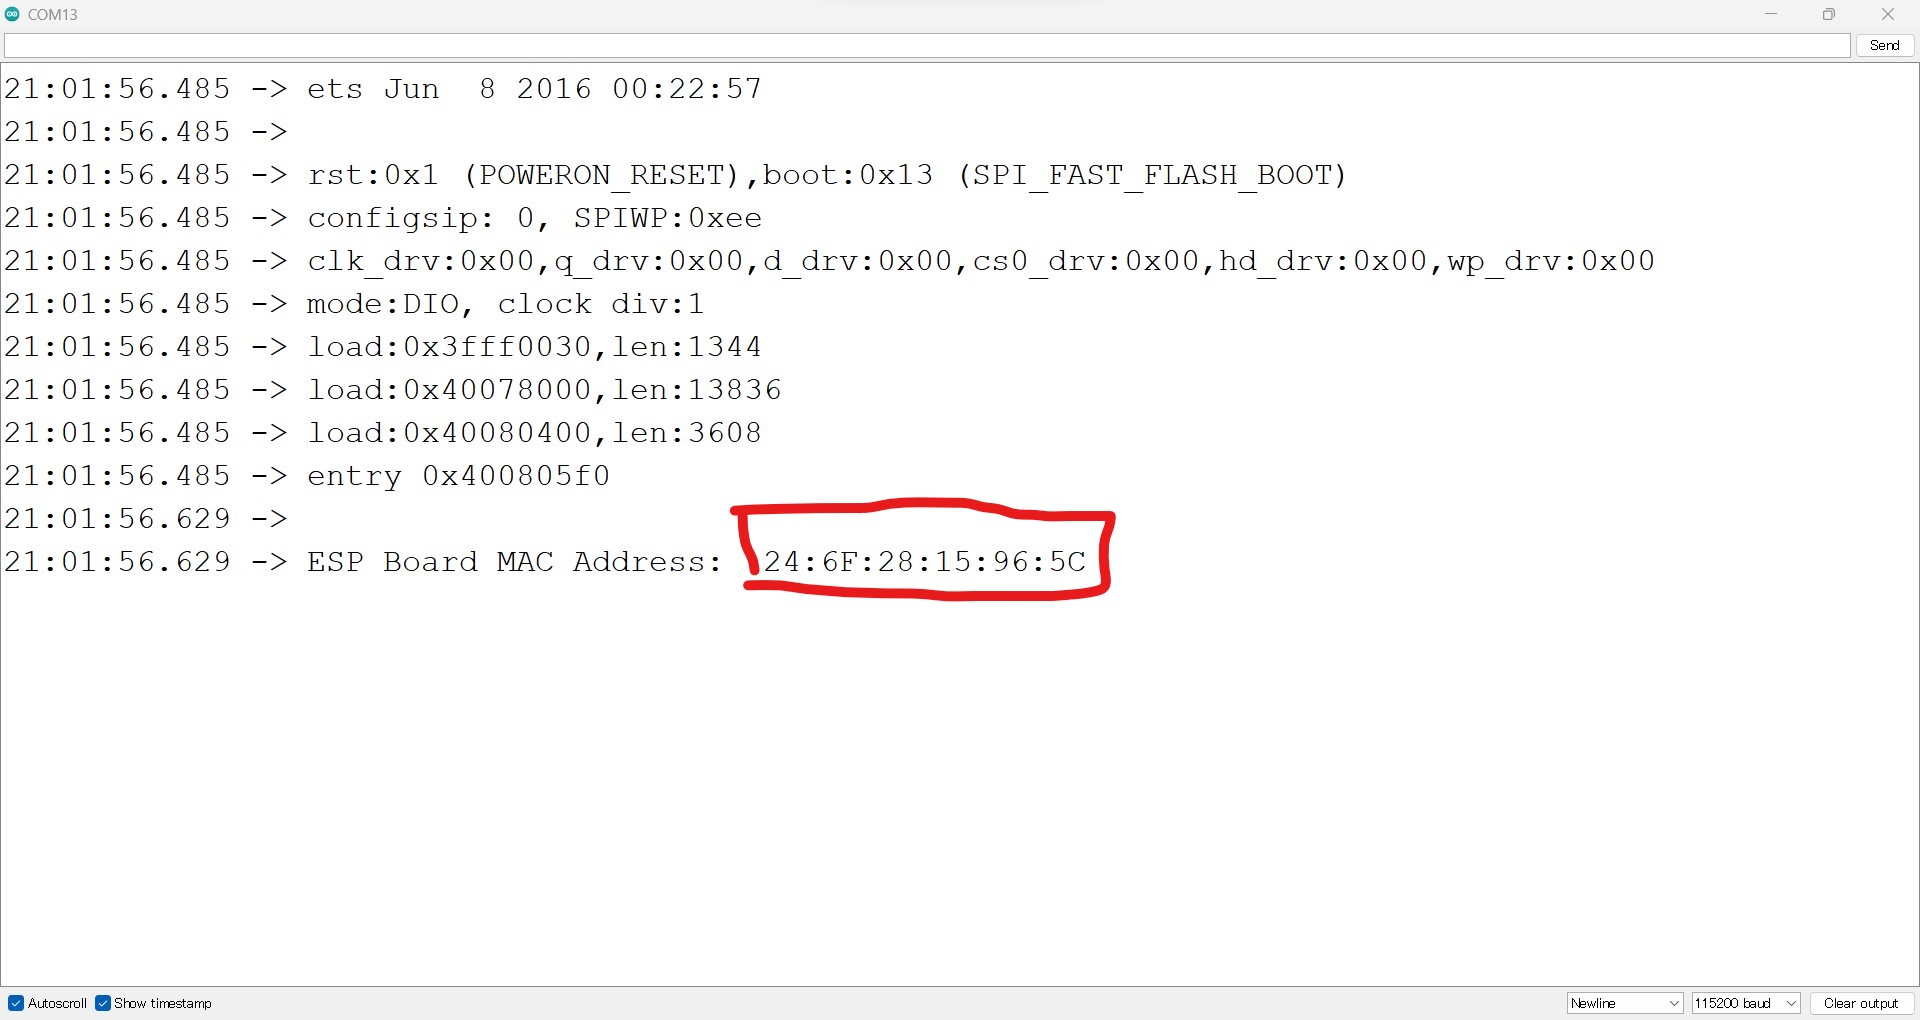
-
We picked up XIAO ESP32C3 board made week09 as a Sender.
Programming
We generated the programming code using ChatGPT (GPT-4).
Main instruction to ChatGPT (GPT-4)
- Sender: XIAO ESP32C3
- Receiver: ESP32 DEVKITV1
- Connect a button to pin 1 on the sender, and an LED to pin 2 on the receiver, and generate a code to light up the LED when the button is pressed in ESPNOW. The MAC address of the receiver is “0x24, 0x6F, 0x28, 0x15, 0x96, 0x5C”.
Below codes were generated by ChatGPT. Then We rewrote the Receiver’s MAC address of ESP32 DEVKITV1(receiver) in sender’s code, then uploaded the code by Arduino IDE.
Sender’s code (XIAO ESP32C3)
#include <esp_now.h>
#include <WiFi.h>

#define BUTTON_PIN 1

// Receiver's MAC address
uint8_t receiverAddress[] = {0x24, 0x6F, 0x28, 0x15, 0x96, 0x5C};

void OnDataSent(const uint8_t *mac_addr, esp_now_send_status_t status) {
  Serial.print("Sending status: ");
  Serial.println(status == ESP_NOW_SEND_SUCCESS ? "Success" : "Failure");
}

void setup() {
  Serial.begin(115200);
//  pinMode(BUTTON_PIN, INPUT_PULLUP);
  pinMode(BUTTON_PIN, INPUT_PULLUP);


  // Set Wi-Fi mode
  WiFi.mode(WIFI_STA);
  WiFi.disconnect();

  // Started ESP-NOW
  if (esp_now_init() != ESP_OK) {
    Serial.println("Failed to initialize ESP-NOW. Please reset.");
    return;
  }

  esp_now_register_send_cb(OnDataSent);

  // Add pairing device
  esp_now_peer_info_t peerInfo;
  memcpy(peerInfo.peer_addr, receiverAddress, 6);
  peerInfo.channel = 0;
  peerInfo.encrypt = false;

  if (esp_now_add_peer(&peerInfo) != ESP_OK) {
    Serial.println("Failed to add pairing device");
  }
}

void loop() {
  if (digitalRead(BUTTON_PIN) == LOW) {
    uint8_t dataToSend = 1;
    esp_err_t result = esp_now_send(receiverAddress, &dataToSend, sizeof(dataToSend));

    if (result == ESP_OK) {
      Serial.println("Started to send data");
    } else {
      Serial.println("Failed to send data");
    }

    delay(1000);
  }
}
Receiver’s code (ESP32 DEVKITV1)
#include <esp_now.h>
#include <WiFi.h>

#define LED_PIN 2

unsigned long ledTurnOffTime = 0;
const unsigned long ledOnDuration = 2000; // Time (in milliseconds) that the LED is on

void OnDataRecv(const uint8_t *mac_addr, const uint8_t *incomingData, int len) {
  Serial.print("received data: ");
  Serial.println(*incomingData);
  if (*incomingData == 1) {
    digitalWrite(LED_PIN, HIGH);
    ledTurnOffTime = millis() + ledOnDuration; // Update LED off time
  }
}

void setup() {
  Serial.begin(115200);
  pinMode(LED_PIN, OUTPUT);

  // Set Wi-Fi mode
  WiFi.mode(WIFI_STA);
  WiFi.disconnect();

  // Start ESP-NOW
  if (esp_now_init() != ESP_OK) {
    Serial.println("Failed to initialize ESP-NOW. Please reset.");
    return;
  }

  esp_now_register_recv_cb(OnDataRecv);
}

void loop() {
  if (millis() >= ledTurnOffTime) {
    digitalWrite(LED_PIN, LOW);
  }
}
VIDEO
As a result, we confirmed the communication status with Serial monitor.
Impressions
Controlling ESP-NOW was our first challenge. We were amazed at the ability to control ESP by itself directly, without the need for a router. It is very easy to transmit data without spending extra time because there is no need to set up the connection establishment between the station and the access point of ordinary WiFi. We would like to make use of ESP-NOW in the future, if we have a project that can incorporate it.