- RFID2
This page is my work process for week 11 Input device, RFID2. I refer to Tutorial in switch-science. I add RFID2 to a microcontroller board that I have designed and read the Mifare card.
Notes: When installing "Board Manager esp32" in the Arduino IDE, selecting version 2.0.8 caused an RFID-related compile error, so Please install "Board Manager esp32" version 2.0.7 or lower. (As of 2-May-2023)
1. Input device and IDE, I used
- RFID2
-
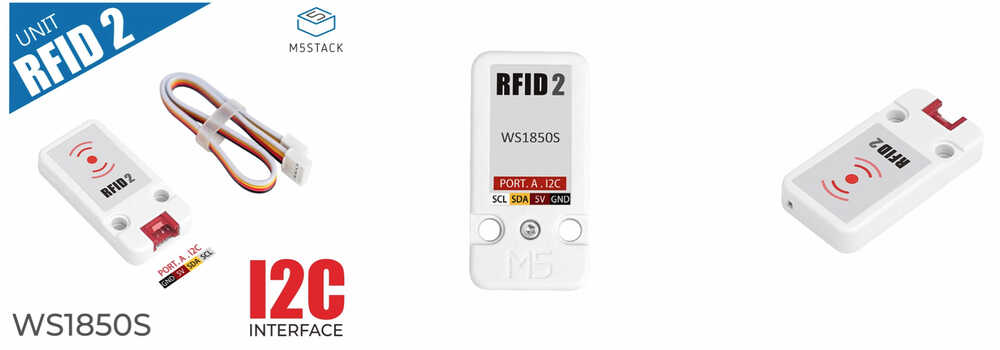
RFID2 is a radio frequency identification unit. Built-in WS1850S chip, working frequency is 13.56MHz. Supports reading card, writing card, recognition, recording, and encoding RF card Multiple functions such as authorization and authorization. Use magnetic field induction technology to realize non-contact two-way information interaction, read and verify the information of proximity cards.
-
Product Features
- Operating frequency: 13.56 MHz
- I2C data rate: Fast mode: up to 400 Kbit/s; High-speed mode: up to 3400 Kbit/s
- Transceiver buffer: 64 bytes
- Supported protocols: ISO14443A, MIFARE and NTAG
- Working temperature: -20℃-85℃
- Data storage:> 10 years
- Reading distance: <20 mm
- Development platform: Arduino, UIFlow(Blockly, Python)
- 2x LEGO compatible holes
- IDE
-
I use Arduino IDE that I use in Week09.
-
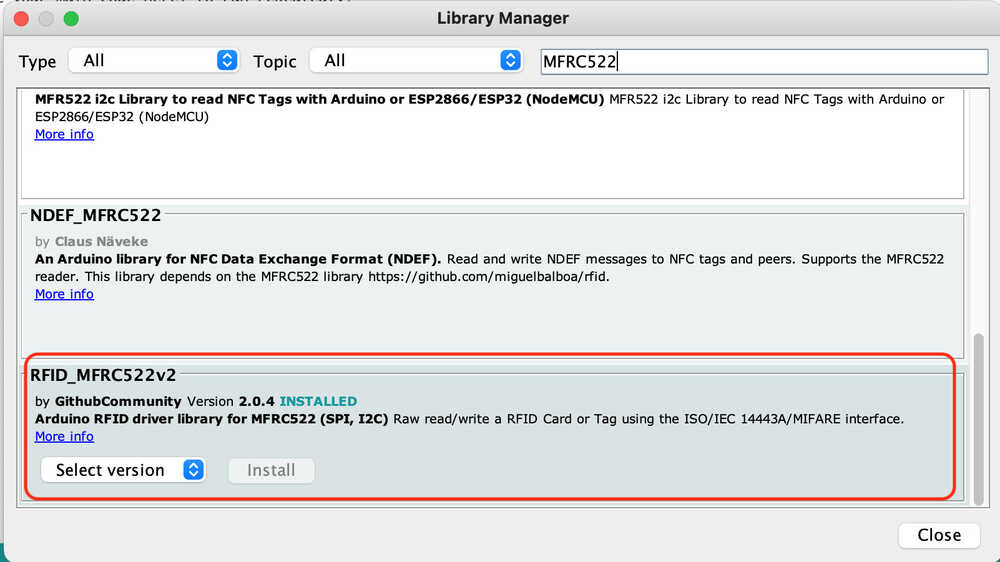
Library:
I install Library "RFID_MFRC522v2" that can Raw read/write a RFID Card or Tag using the ISO/IEC 14443A/MIFARE interface.
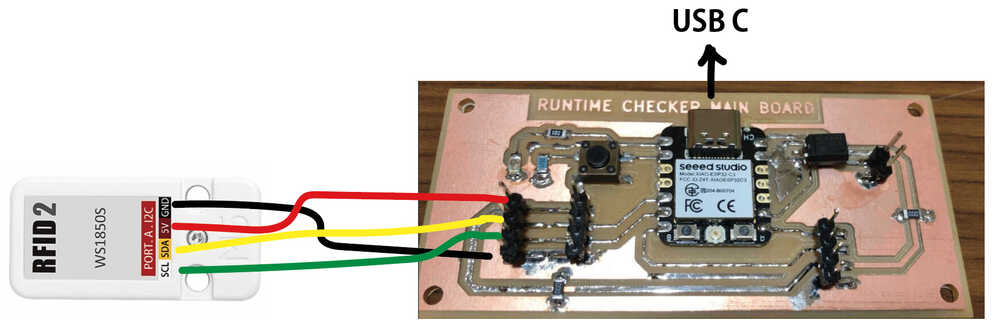
2. Board
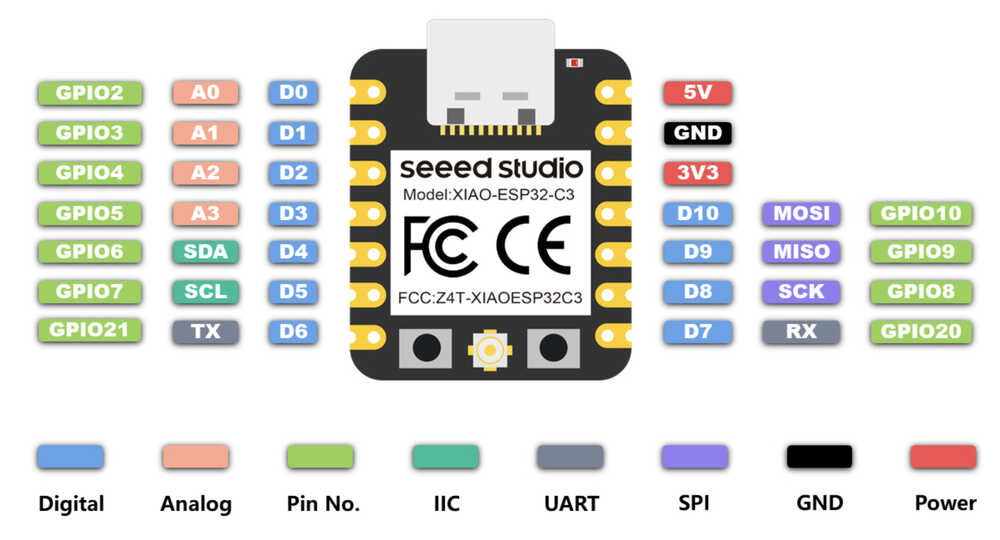
I use board that I designed Week09 Output device with Seeed Xiao ESP32C3.
Pinout for Seeed Xiao ESP32C3
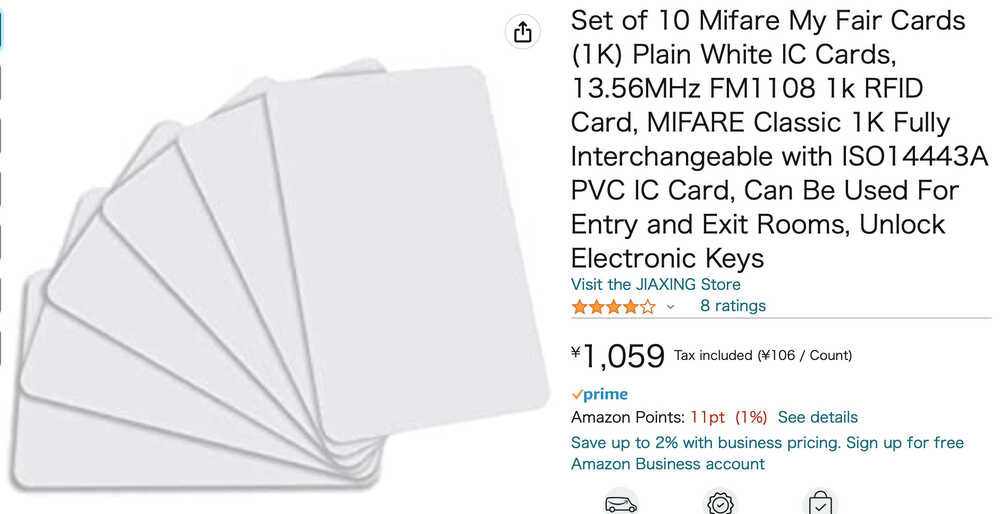
3. Mifare Card
I prepare Mifare Card (with IC chip) for the test programming.
4. Programming
- I generated a code in ChatGPT that reads the card and displays the UID of the card.
- Instruction to ChatGPT: Attach Example code (RFID_MFRC522v2 > CustomI2C) in Arduino IDE, and ask to rewrite it for Xiao ESP32C and generate code.
- Programming code
#include <Wire.h>
#include <MFRC522v2.h>
#include <MFRC522DriverI2C.h>
#include <MFRC522Debug.h>

const uint8_t customAddress = 0x28;

MFRC522DriverI2C driver{customAddress, Wire}; // Use the standard Wire object for I2C driver.

MFRC522 mfrc522{driver}; // Create MFRC522 instance.

void setup() {
  Serial.begin(115200); // Initialize serial communications with the PC for debugging.
  while (!Serial);      // Do nothing if no serial port is opened (added for Arduinos based on ATMEGA32U4).

  Wire.begin(); // Initialize I2C with default SDA and SCL pins.

  mfrc522.PCD_Init();   // Init MFRC522 board.
  MFRC522Debug::PCD_DumpVersionToSerial(mfrc522, Serial); // Show details of PCD - MFRC522 Card Reader details.
  Serial.println(F("Scan PICC to see UID, SAK, type, and data blocks..."));
}

void loop() {
  if ( !mfrc522.PICC_IsNewCardPresent() || !mfrc522.PICC_ReadCardSerial()) {
    return;
  }

  MFRC522Debug::PICC_DumpToSerial(mfrc522, Serial, &(mfrc522.uid));
}
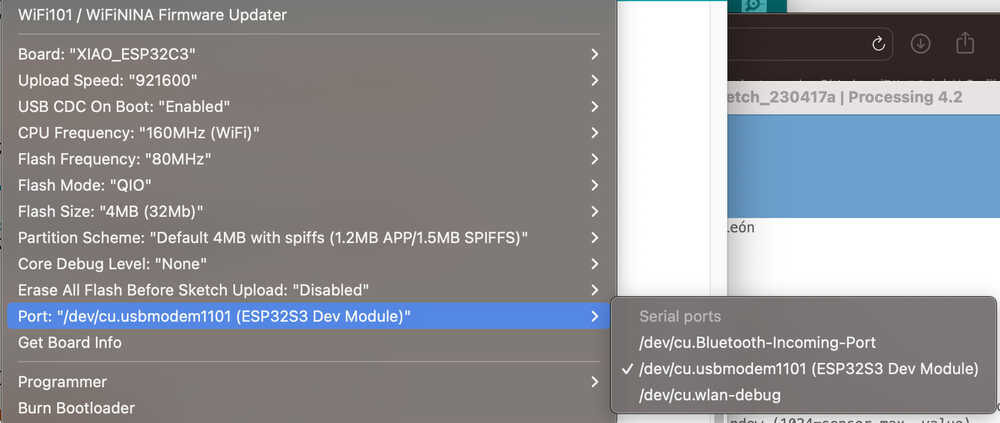
- I open Arduino IDE and choose board ESP32C3. (Tools > Board > ESP32 Arduino > XIAO_ESP32C3)
-
In this time Port is "/dev/cu.usbmodem1101".
-
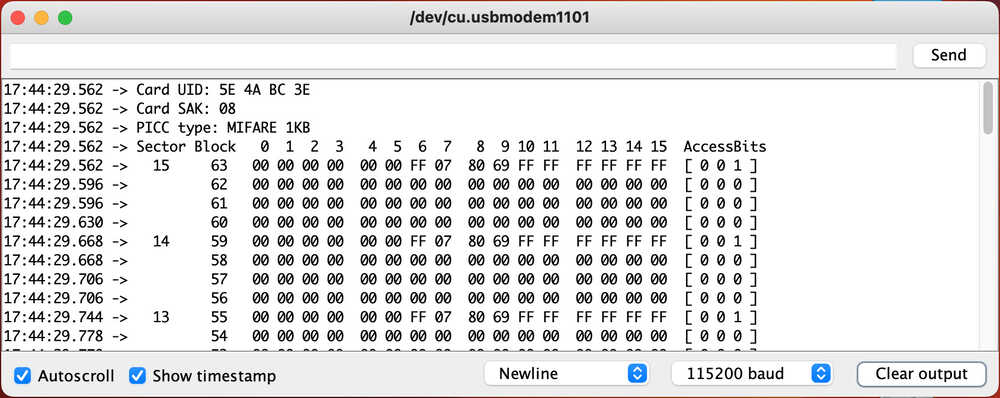
Input programming code and upload, and I put the Mifare card on RFID2.

- Serial monitor in Arduino IDE show the card UID.
Card A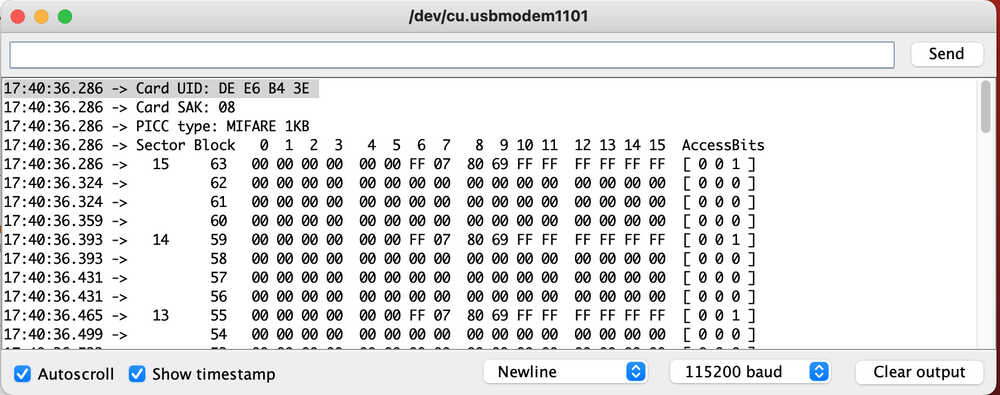 Card B
 The photo of card with UID that I know with the programming.

The programming test is success!
5. Decode I2C serial data on the Rigol 1054Z oscilloscope
I refer to Tutorial by learnelectronics: How to decode I2C serial data on the Rigol 1054Z oscilloscope in Youtube.
I connected as below photo and start I2C analysis with oscilloscope.
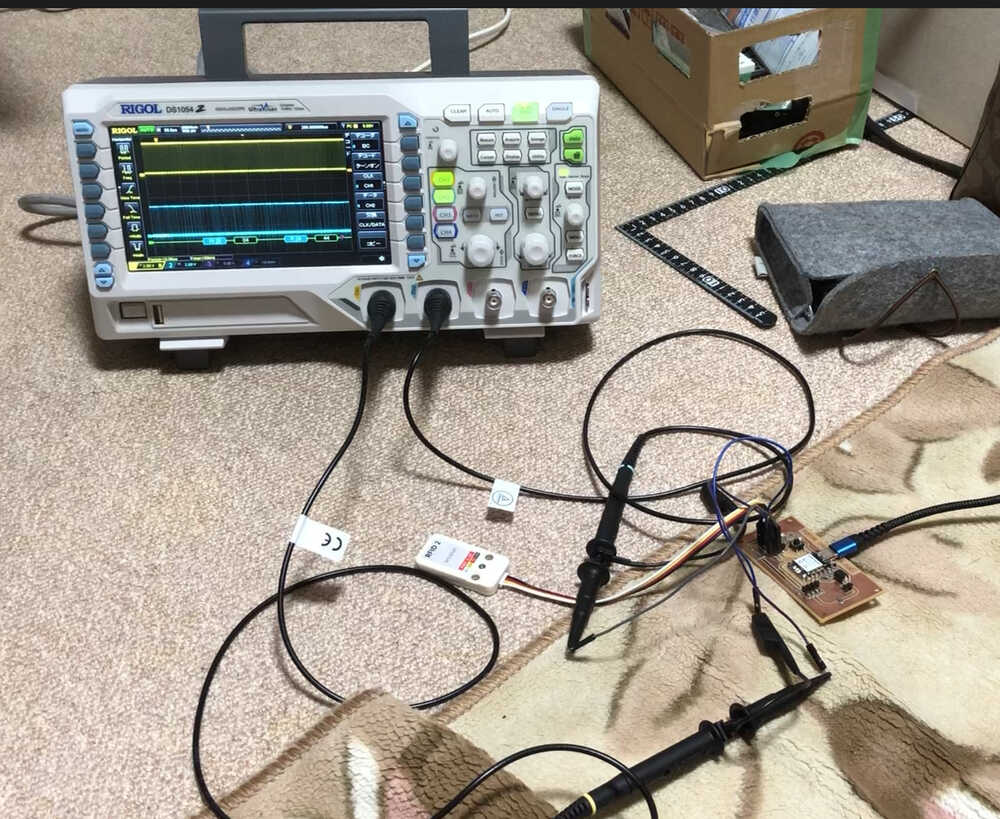
As below Video show, I got the I2C data. But I couldn't understand what the number mean...
6. My Thought
-
RFID2
- I will use RFID2 for my final Project. It was good to see the UID of the card in the programming.
-
ChatGPT
- Free version: long time I couldn't login.
- Paid version: Chat GPT3.5 generates code about 70 points, Chat GPT4 is clever, but sometimes I think they make mistakes on purpose to make it look like a chat room. When I used Chat GPT4 in a row, it was unusable for about 2 hours. If I could specify the conditions properly, it was like creating a usable code with about 90 points.