10a. Molding and casting Group Project
Week 9 - 3/23/22
This week we worked on molding and casting. For the group project, we looked over the MSDS of each of the materials we used, and made test samples of each material we used.
Shopping Trip
Adam, Cori and Garrett went to Reynolds’s Advanced Materials, located near the Charlotte Airport. The salesman was incredibly helpful and provided some information about which product to use, some helpful tips, as well as some information on using 3d printing molds along with the parts (even though our projects are machined, the ability to 3d print molds can’t be ignored.)
We picked out a few different materials that we thought would be best to mold and cast with. Adam picked up a sample token of each and every type of silicone, plastic and resin that the store offered. It was awesome.
The material’s we picked up included:
- Mold-Star 16 FAST - platinum silicone rubber
- Dragon Skin 20 - platinum silicone rubber
- Smooth-Cast 300 - Resin two part plastic
- Ease Release 200 - mold release
- Silc Pig Electric Flourescent Pigments variety pack
- some mixing sticks
- Acrylic Sealer
We also had on hand the following:
- Plastic cups
- lots of paper towels
- plastic knives for stirring and mixing
- rubber gloves
Things we discovered we needed or needed more of:
- Bigger mixing cups
- better stirrers
- silicone spatulas
- funnels
- more paper towels nearby
- trashcans nearby
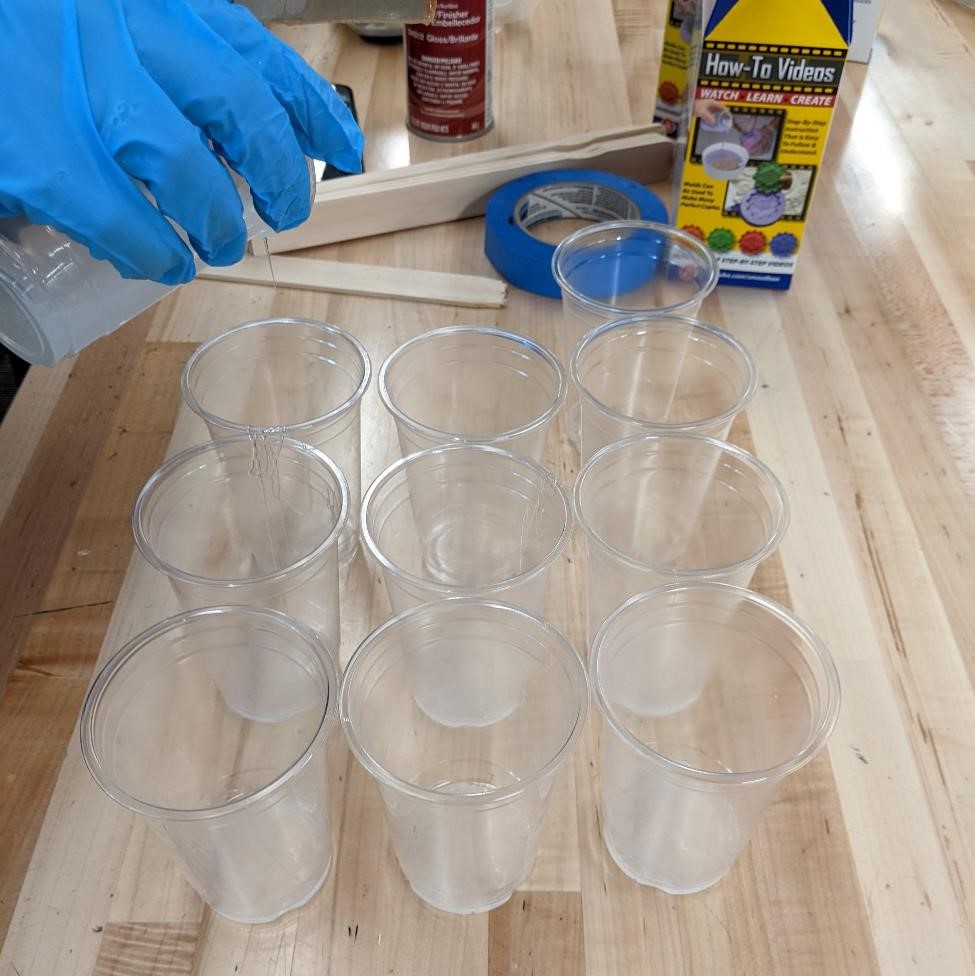
And here was our setup:
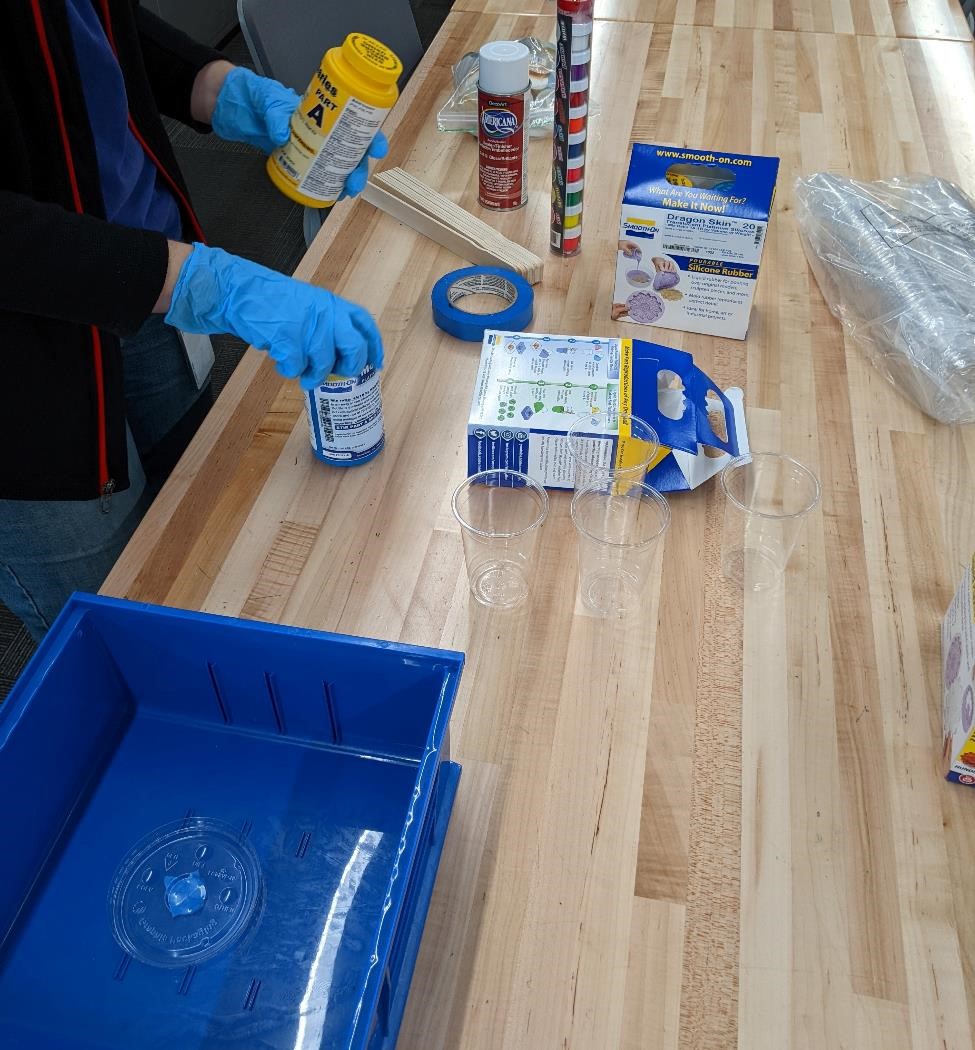
Starting to pour.
Garrett was incredibly impatient, and on the drive back to CPCC kept bouncing up and down in his seat, clapping his hands, sooo excited about this entire project. It was embarassing. We did stop at Michael’s to pick up some Acrylic Sealer spray paint that could be used on resin 3d printed parts, as in the future we plan on utlizing this technique more often.
We set up our area and started preparing.
First we donned non-latex rubber gloves.
Then we started opening up the the silicone rubber we would try first, Mold-Star 16 fast.
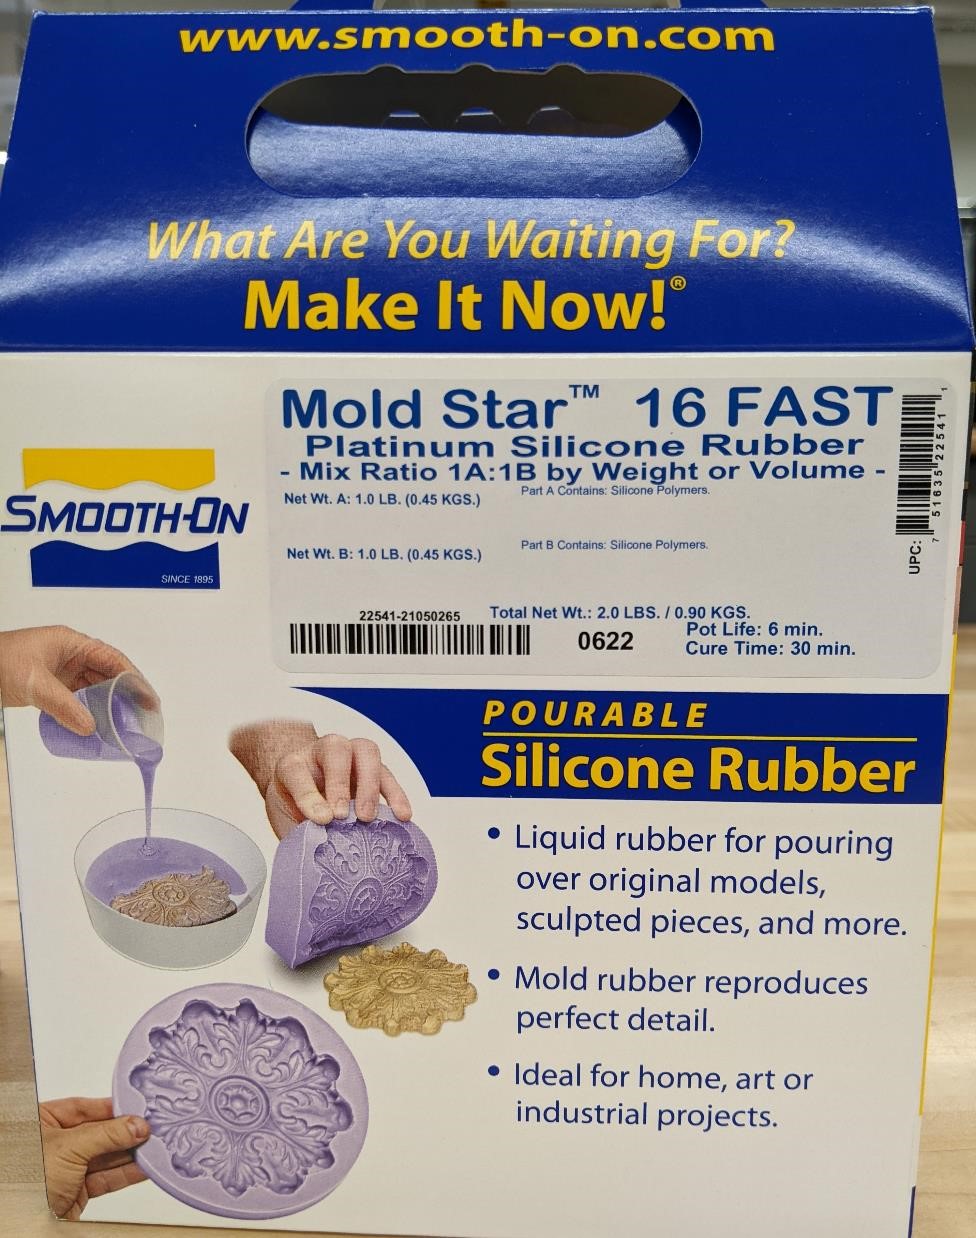
The SDS for this material can be found here: https://www.smooth-on.com/msds/files/BD_DS_Eco_Equ_EZB_EZS_Psy_MS_OOMOO_Reb_ST_SS_Soma_Sol_Sorta.pdf
This is a two part system. It is a 1 to 1 by Volume mixture, that has a pot life of 6 minutes, and a cure time of about 30 minutes. It has a fairly low viscosity and poured easily.
It’s a mixture that appears blueish in color.
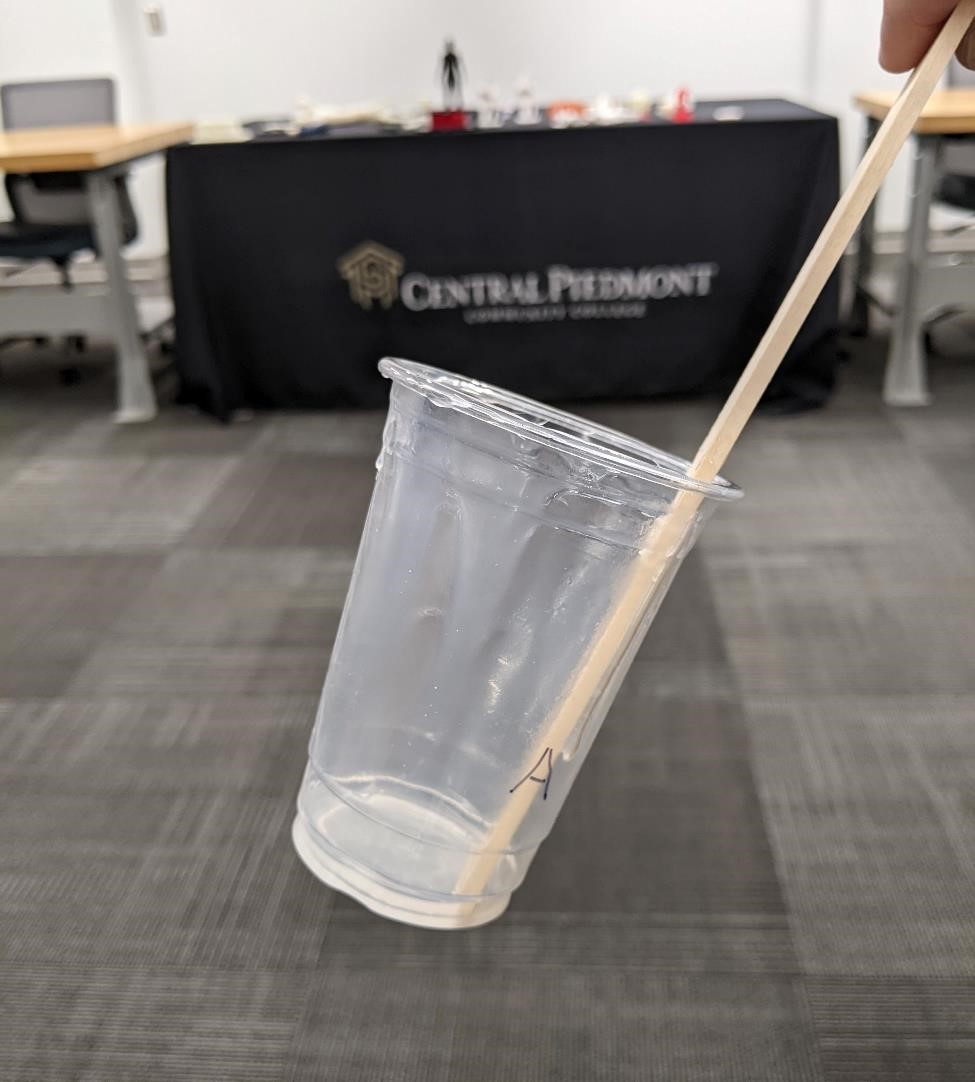
We then grabbed a plastic cup lid, and prepared it to be one of our molds.
We sprayed it with the mold release agent and let it sit for a minute. After a couple of minutes, we sprayed it again with mold release and let it sit for 5 minutes. We did this with each of the cups we used later on as molds.
The mold released we used was the Ease Release 200 and the SDS for this material can be found here: https://www.smooth-on.com/msds/files/ER200.pdf
Next, we started preparing the silicone mixture. It is a a two part silicone rubber system. This system comes in two bottles. Part A and Part B.
Again it was a 1 to 1 mixture, by volume. We eyeballed the measurement by level, and poured as close to an equal amount of part A and part B in two different cups.
While it probably was not necessary, we pre-mixed both the A and the B liquid. This pre-mixing was designed to make sure that there was no seperation of the chemicals in each set. It was recommended to do this if necessary by the Reynolds salesman, especially if these bottles sit for a long amount of time. (and by the way, keep these stored in a dry, moderate temperature location.)
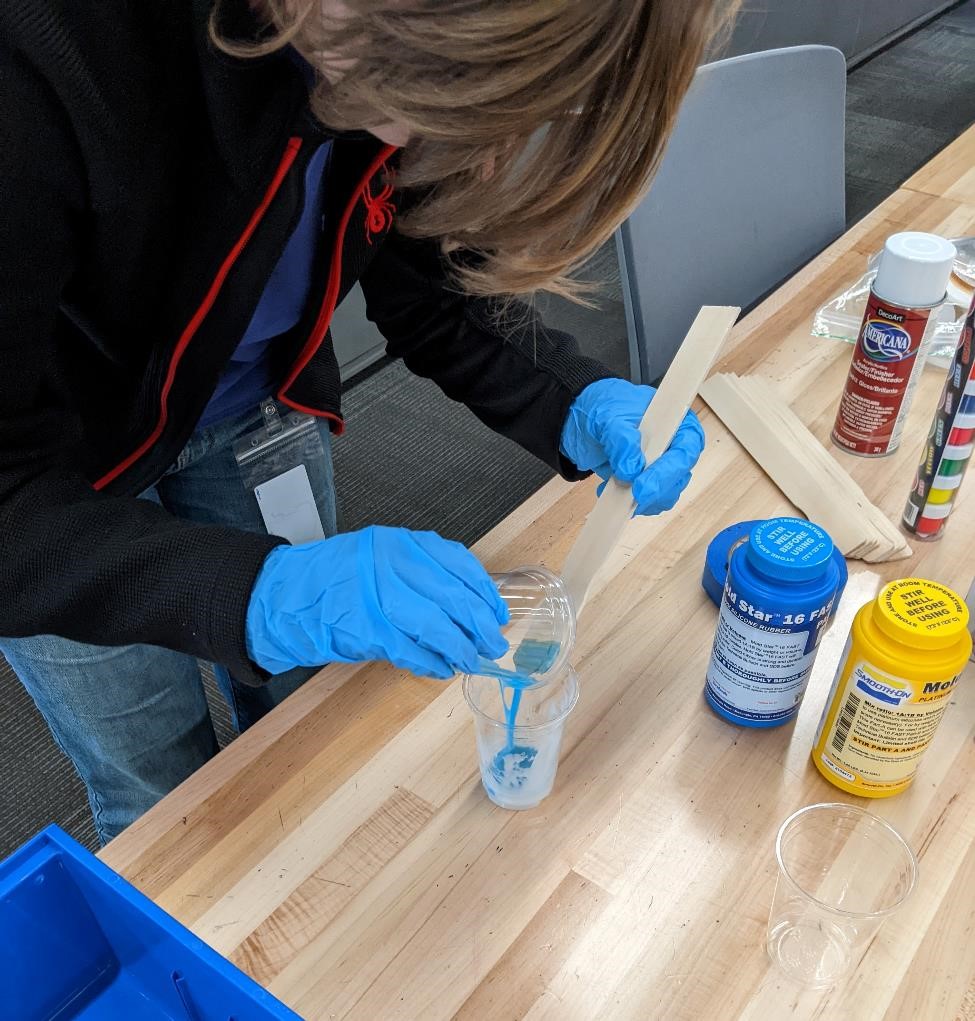
After the pre-mixing, we then poured the two mixtures together, making VERY sure to mix the Liquid A to Liquid B, and not vice versa, but rather to follow the Alphabet. A, B, C, D, Etc. This is a good lesson to teach pre-schoolers.
It’s important to stir horizontally, to try and limit the amount of air mixed into the material, so we won’t have many air bubbles in our finished part. It’s also important to make sure to mix the two materials thoroughly. At the same time, there is a limited pot life (the time it takes for this material to start curing) and as such, you need to be quick, but smooth and even with your mixing.
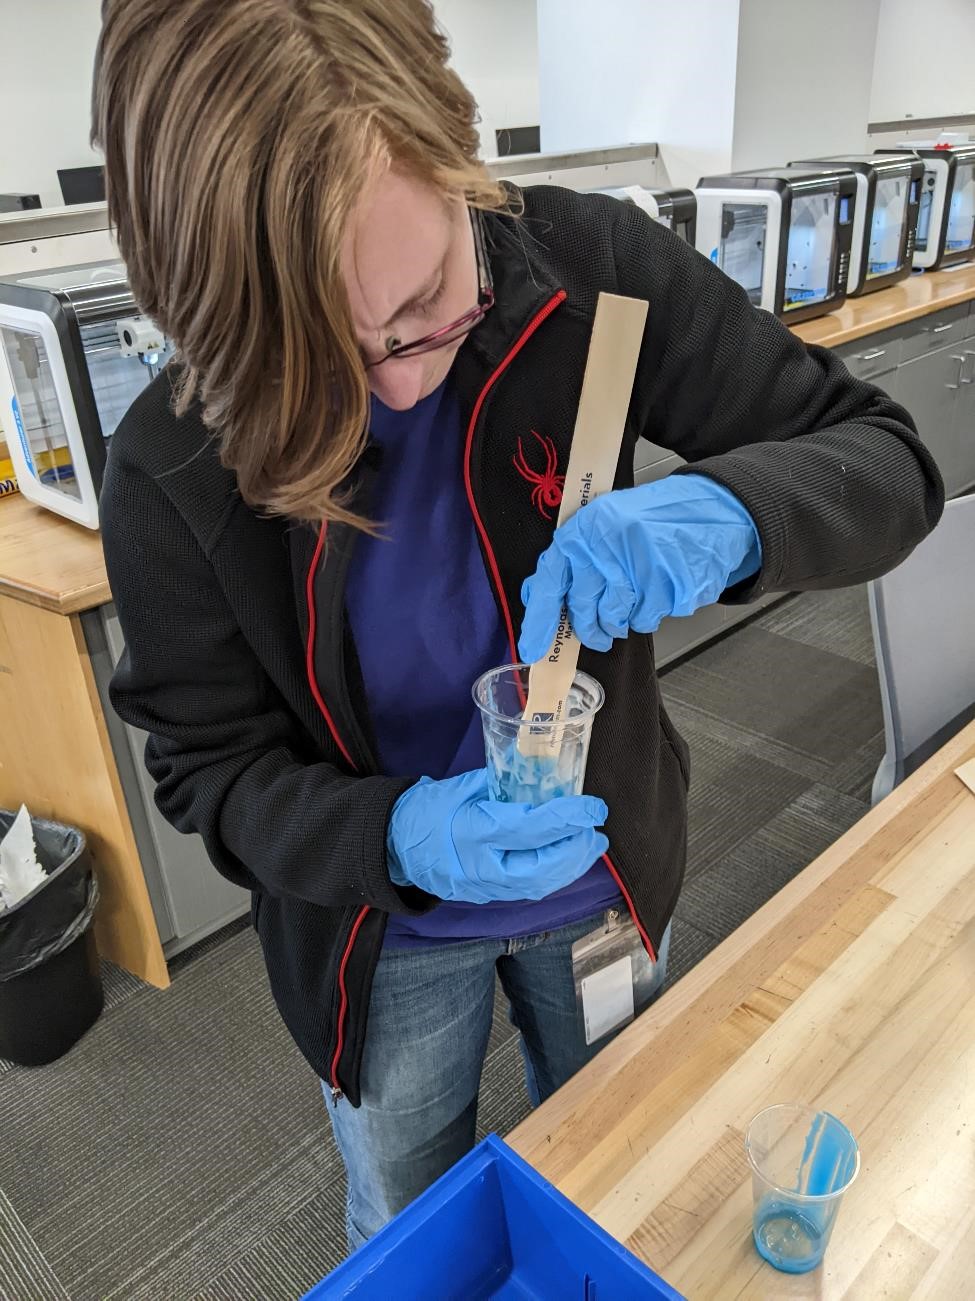
It’s also important to have a mixing cup, and not use your final mold as the mixing cup, and we’ll discuss why later.
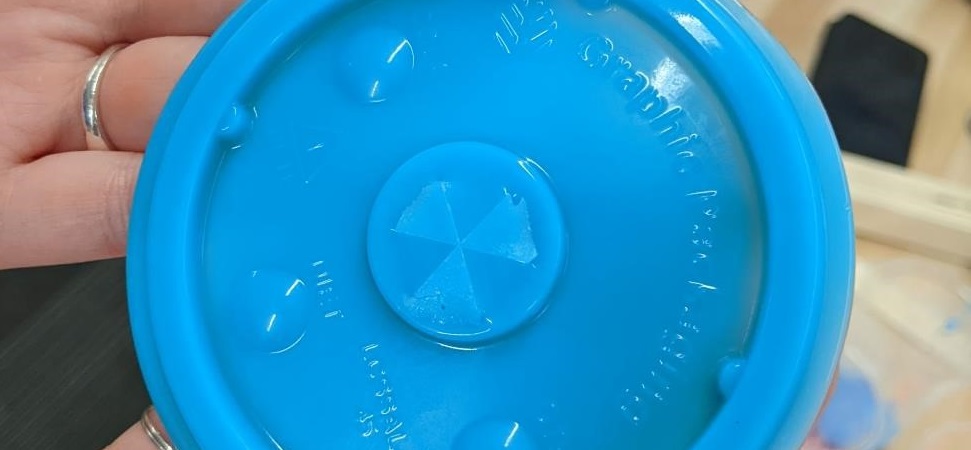
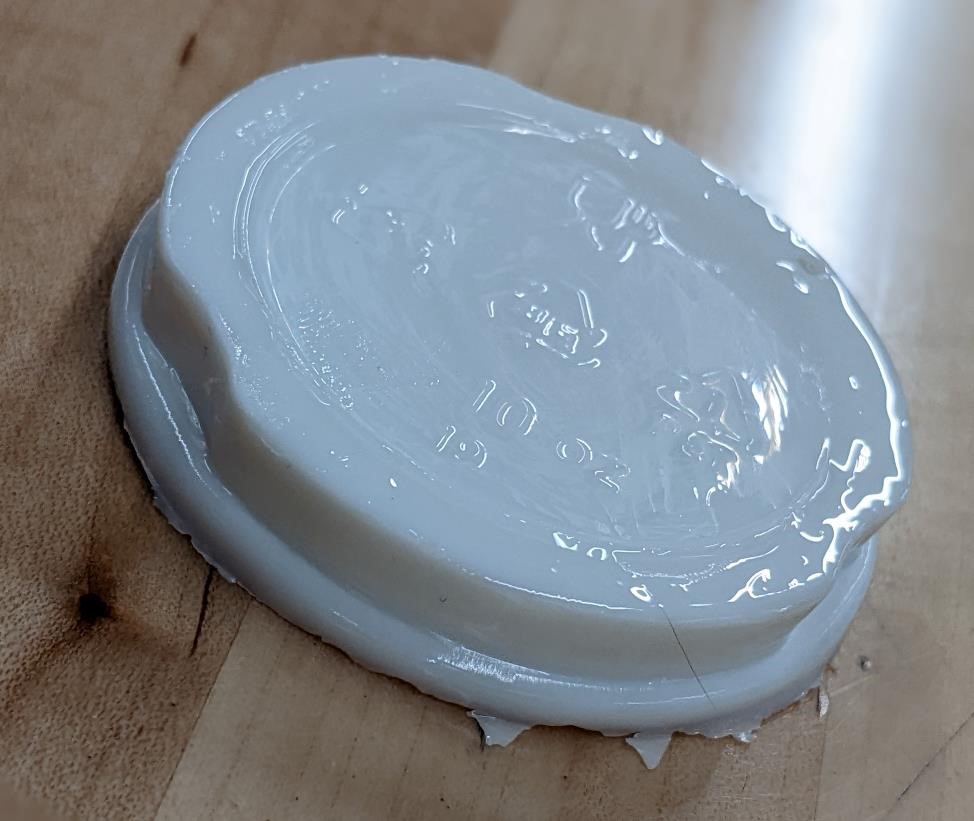
After this, using her tiny little, but steady hands, Cori started to pour the mixed silicone into our test mold, a plastic drink cup lid.
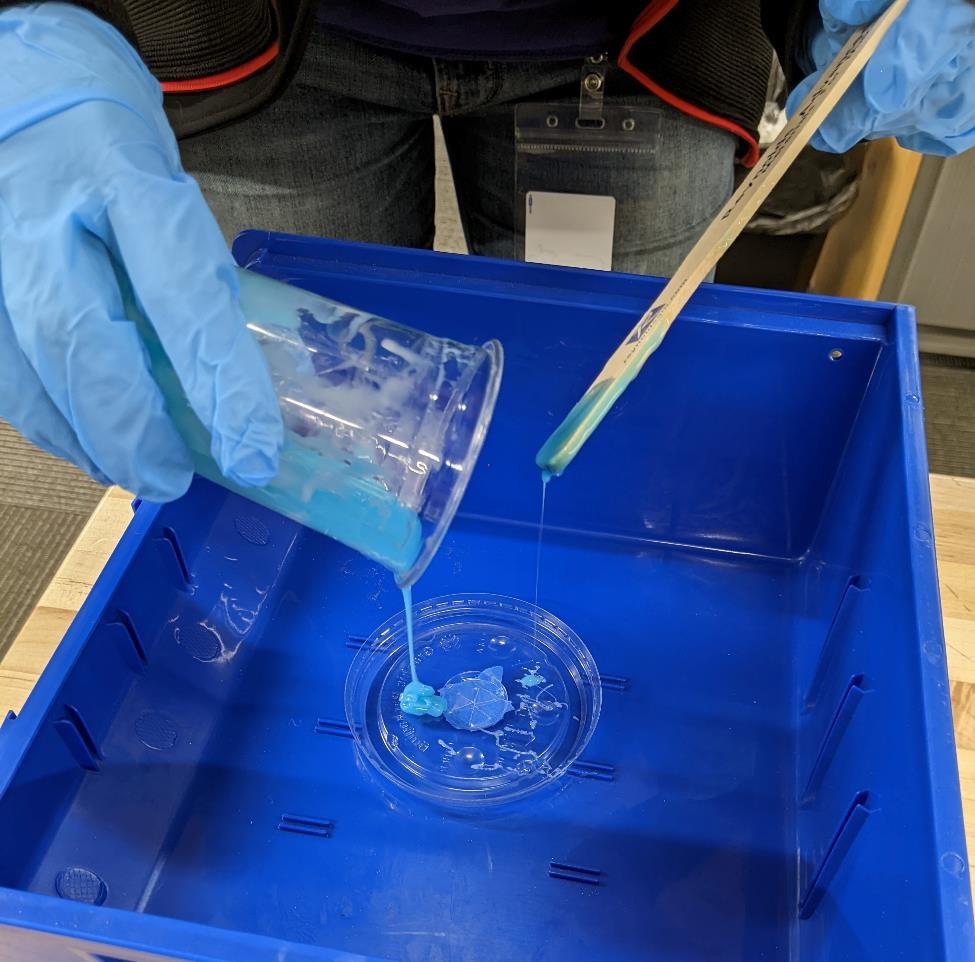
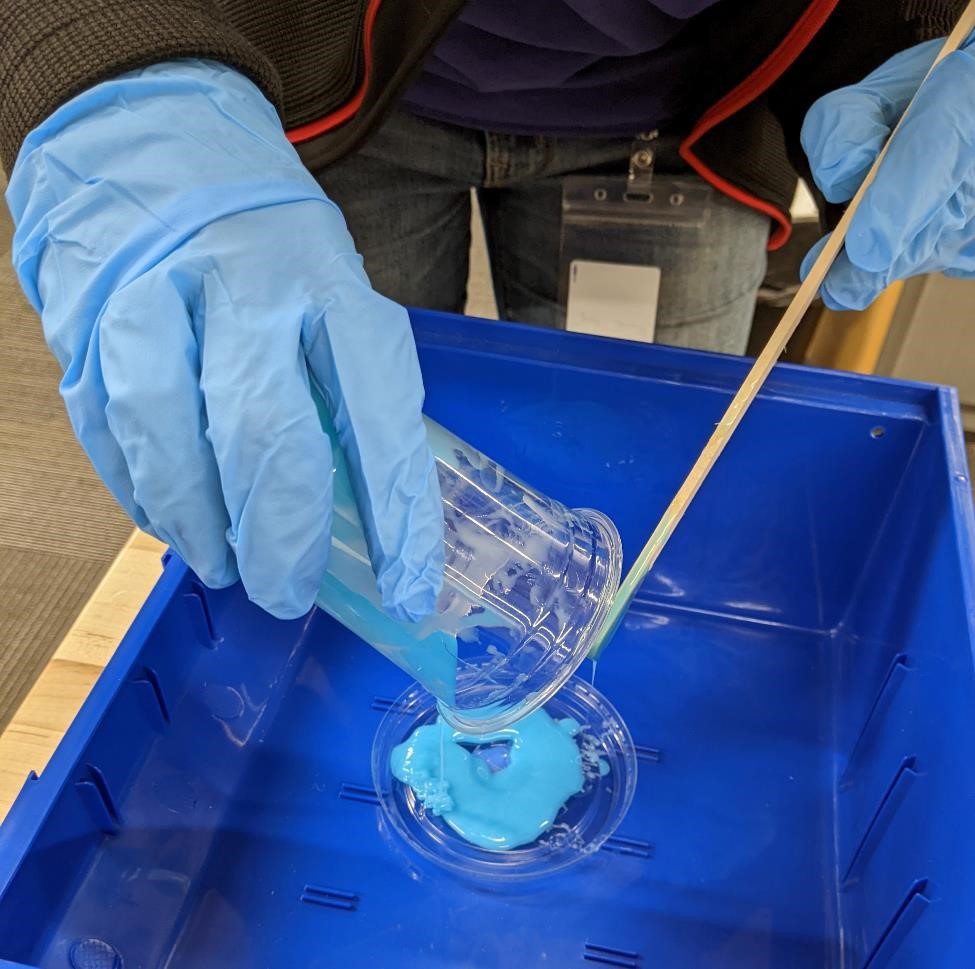
And when finished pouring, this was our product. It’s difficult to see, because Garrett’s a horrible photographer, but you can see where air bubbles are coming to the surface, where they will pop and dissipate. As time passed, the air bubbles took longer to get to the surface, and they became much smaller.
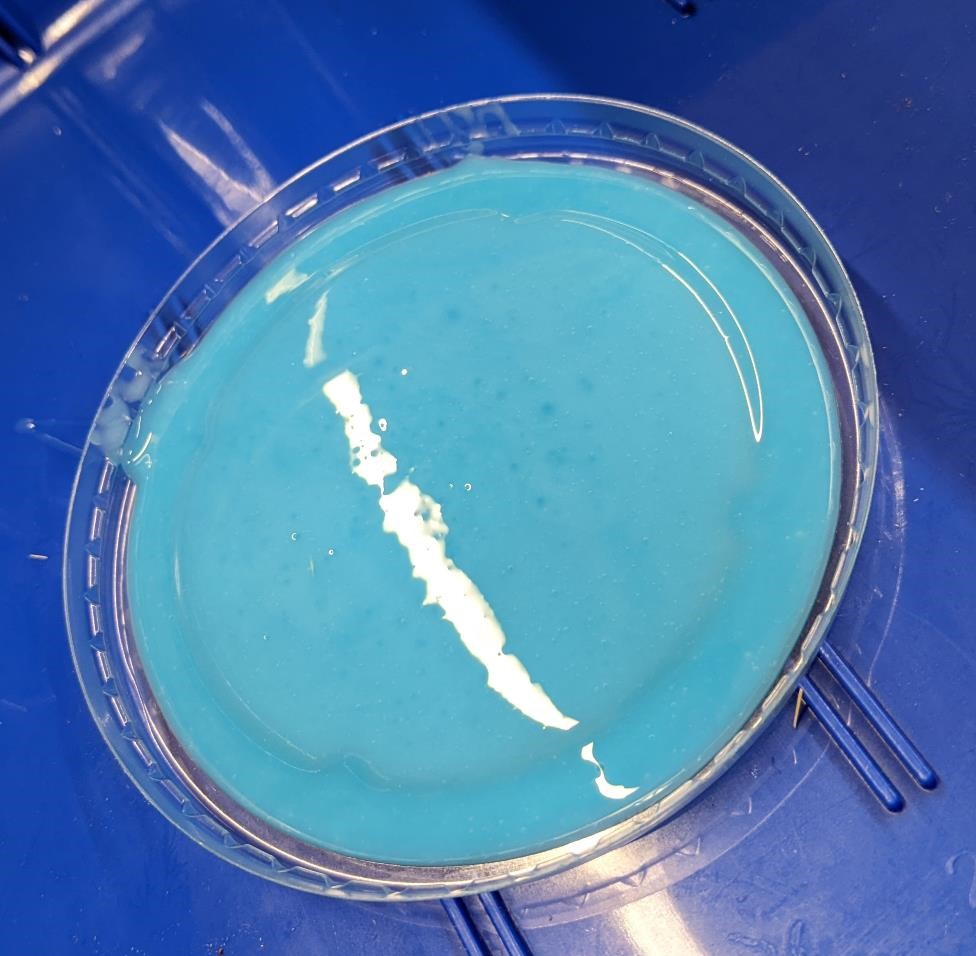
We waited for about 45 minutes, and the silicone had cured. We were able to easily pull it out of the mold.
Voila!
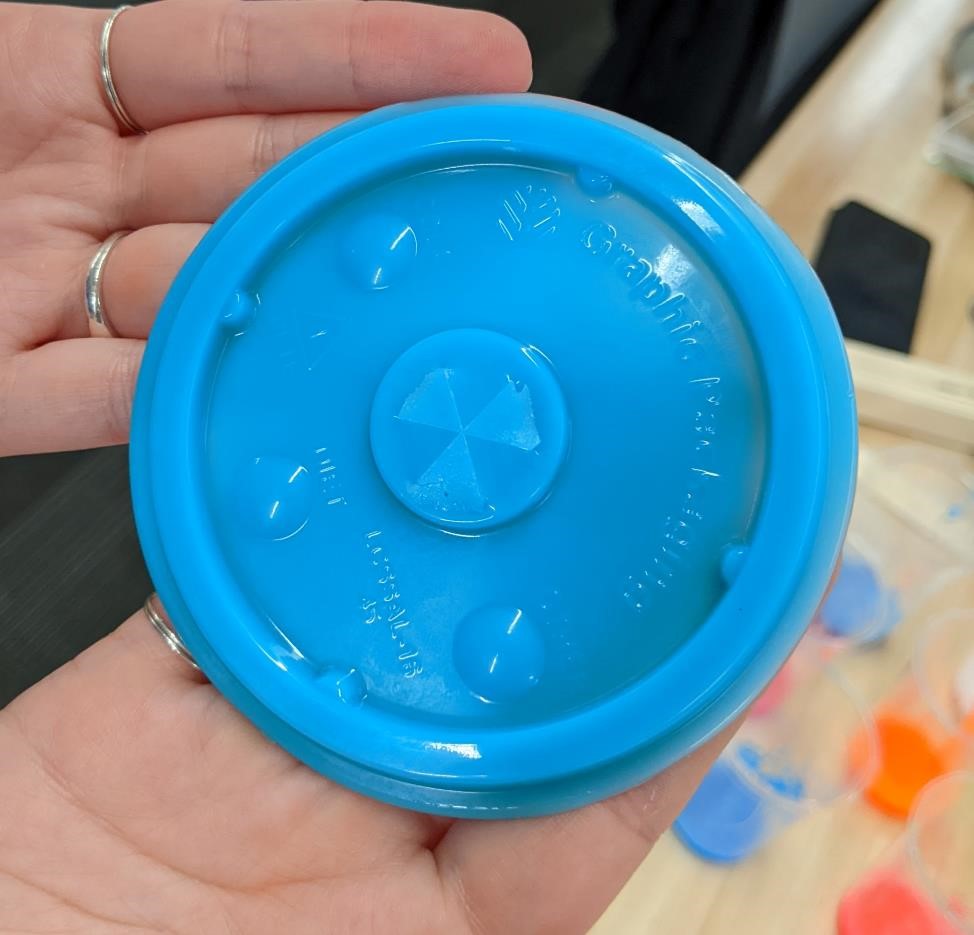
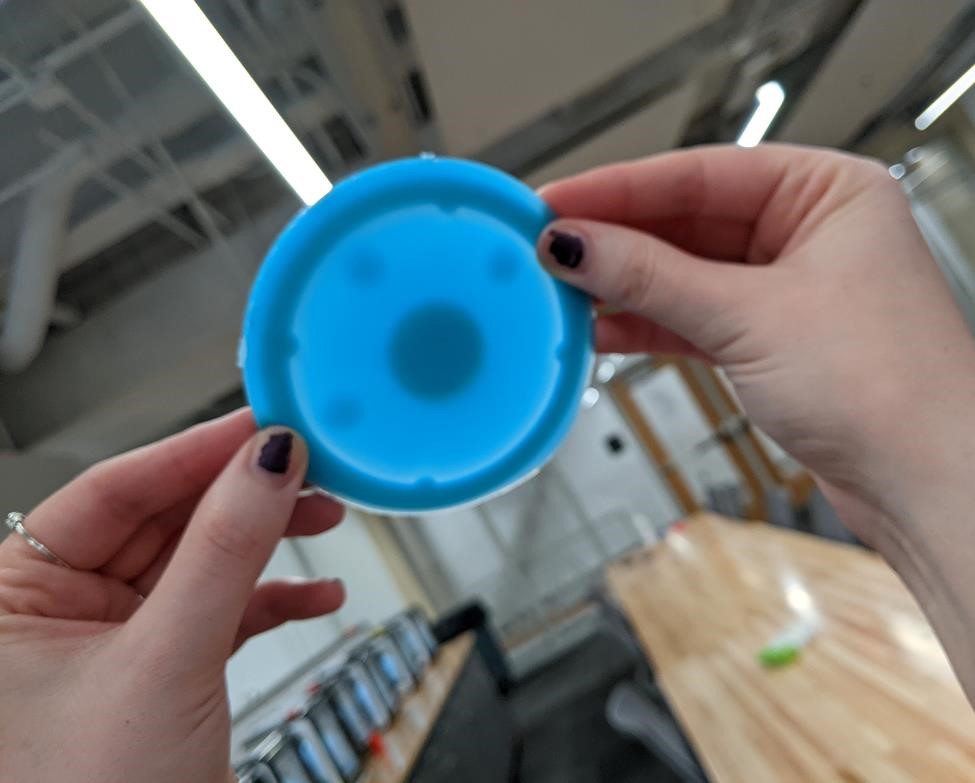
The detail was exceptional, and the finish was absolutely amazing. Very smooth. This looked like a direct copy of the inside of the cup lid (which it was, but we were impressed.)And there were no air bubbles to be seen.
Cori was way too happy with the results. No one should be this excited by a silicone rubber cup lid.
Good Dragon.
We had tested the first silicone product, Mold-Star 16 with excellent results, so next we tested out the Dragon Skin 20 silicone product.
This product has a Shore 20A “hardness” and a pot life of 30 minutes and a 6 hour cure time. Like the above Mold-Star, it has a 1 to 1 by volume mixing ratio.
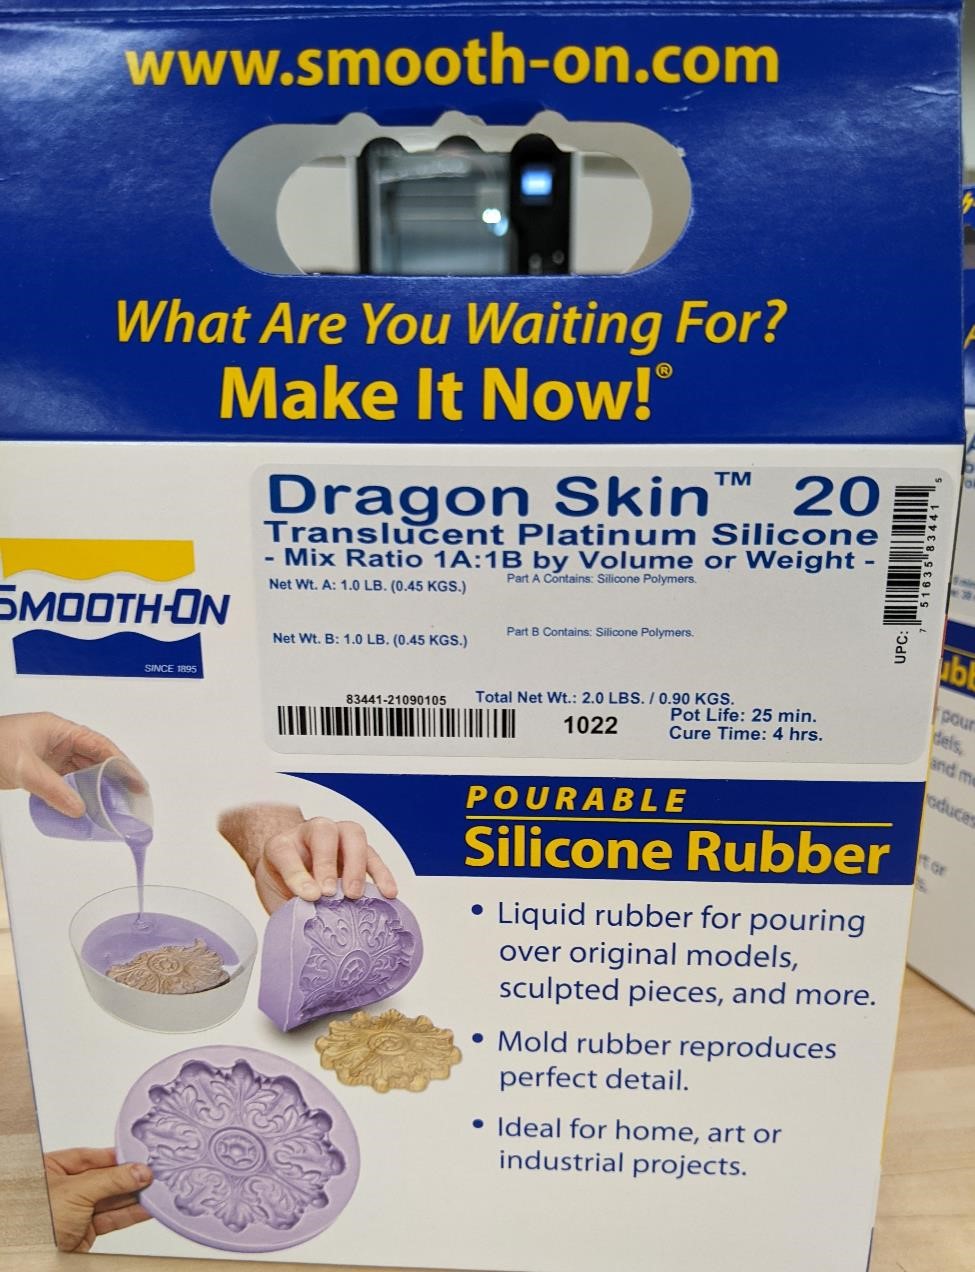
The SDS of this material can be found here: https://www.smooth-on.com/msds/files/BD_DS_Eco_Equ_EZB_EZS_Psy_MS_OOMOO_Reb_ST_SS_Soma_Sol_Sorta.pdf
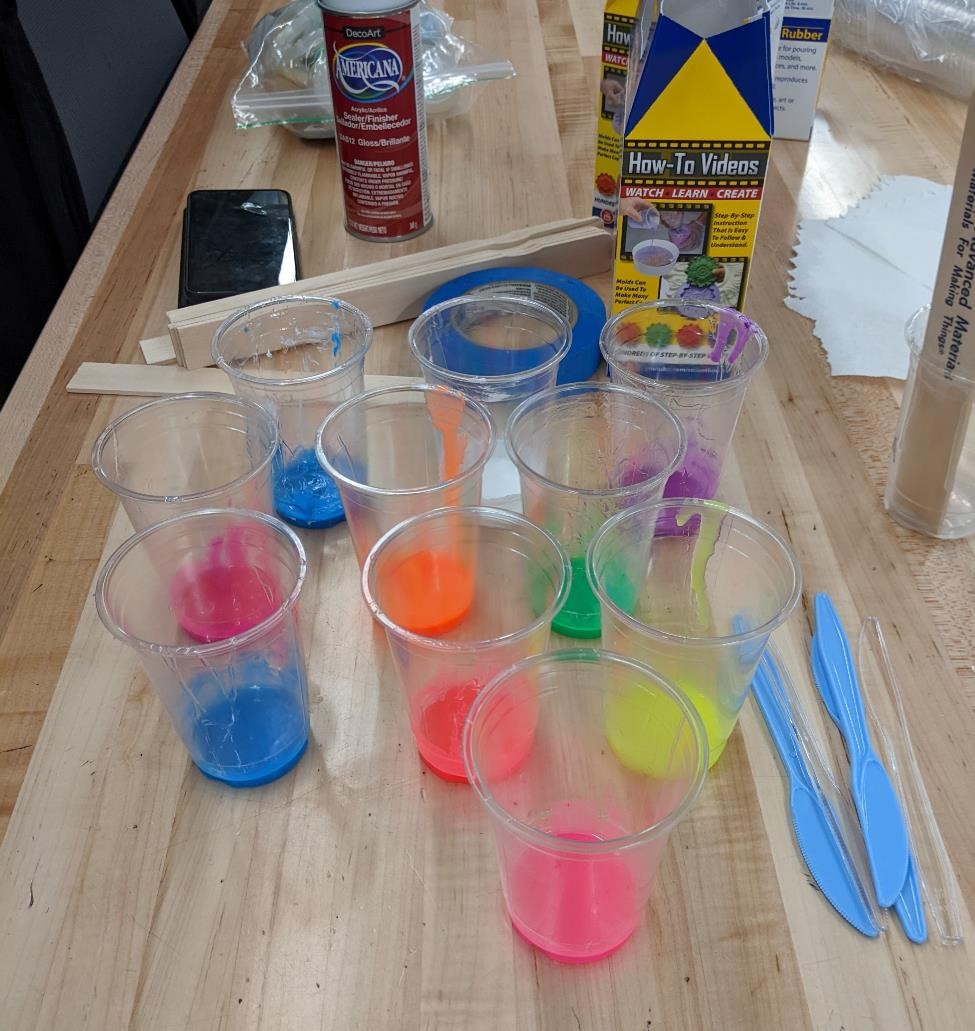
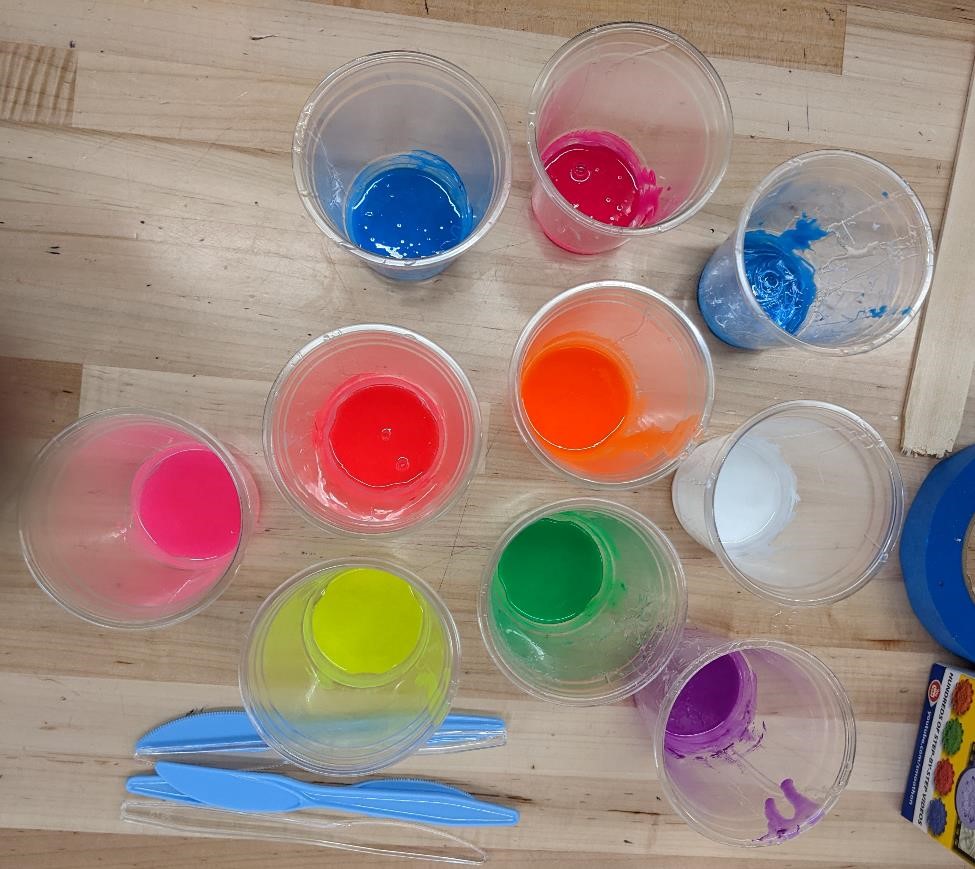
One of the nice things about Dragon Skin 20 is that it has a high transparent appearance, making it ideal for coloration. We had picked up a sample pack of high visibility, UV reactive inks at Reynolds and wanted to test them all out, so we made a large sample of Dragon Skin 20, and poured a small amount into 10 cups (each was sprayed with Mold Release before hand.)
Cori mixed and poured this material in the same manner as the mold-star. This product’s pot life is longer, so time is not as valuable as a commodity as mold-star’s short pot life.
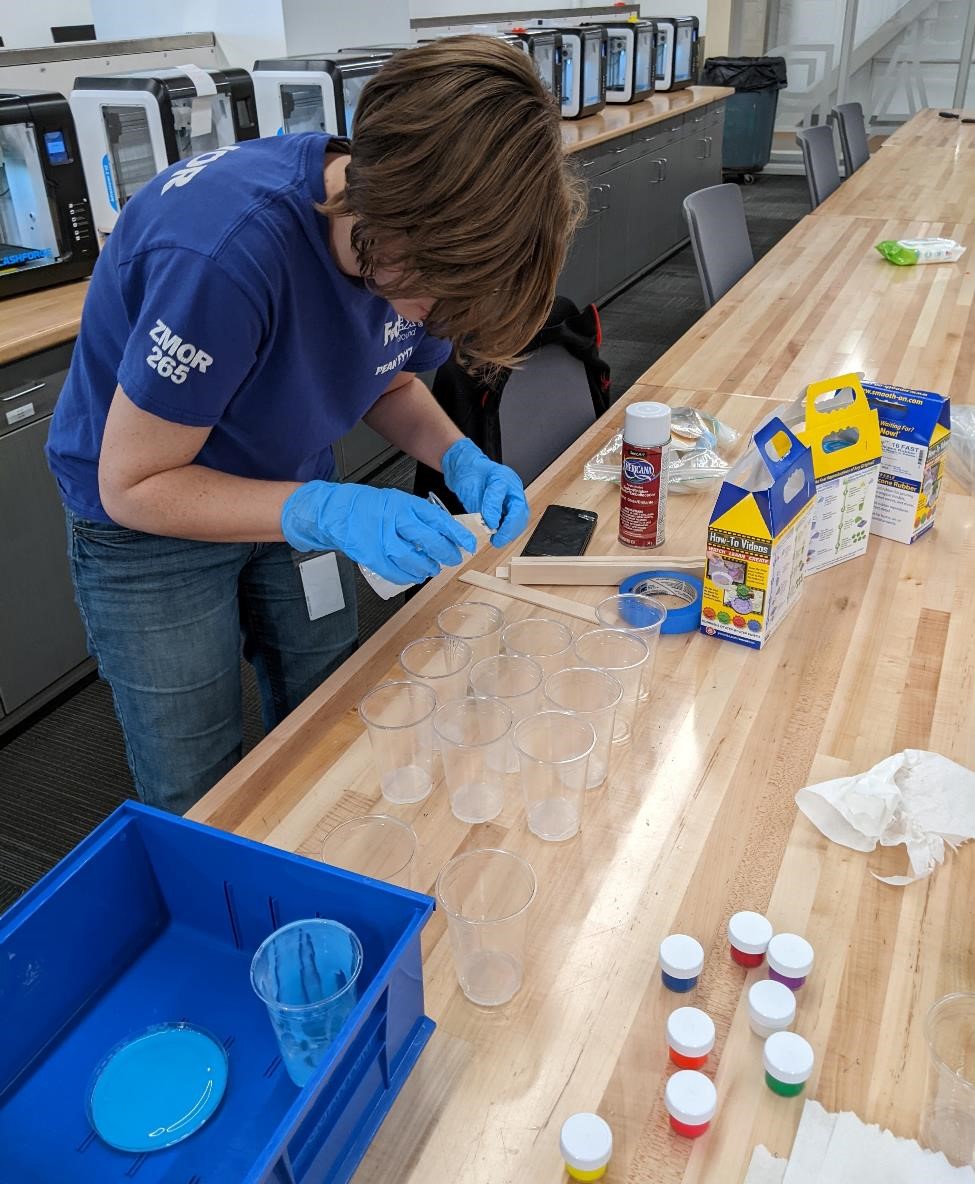
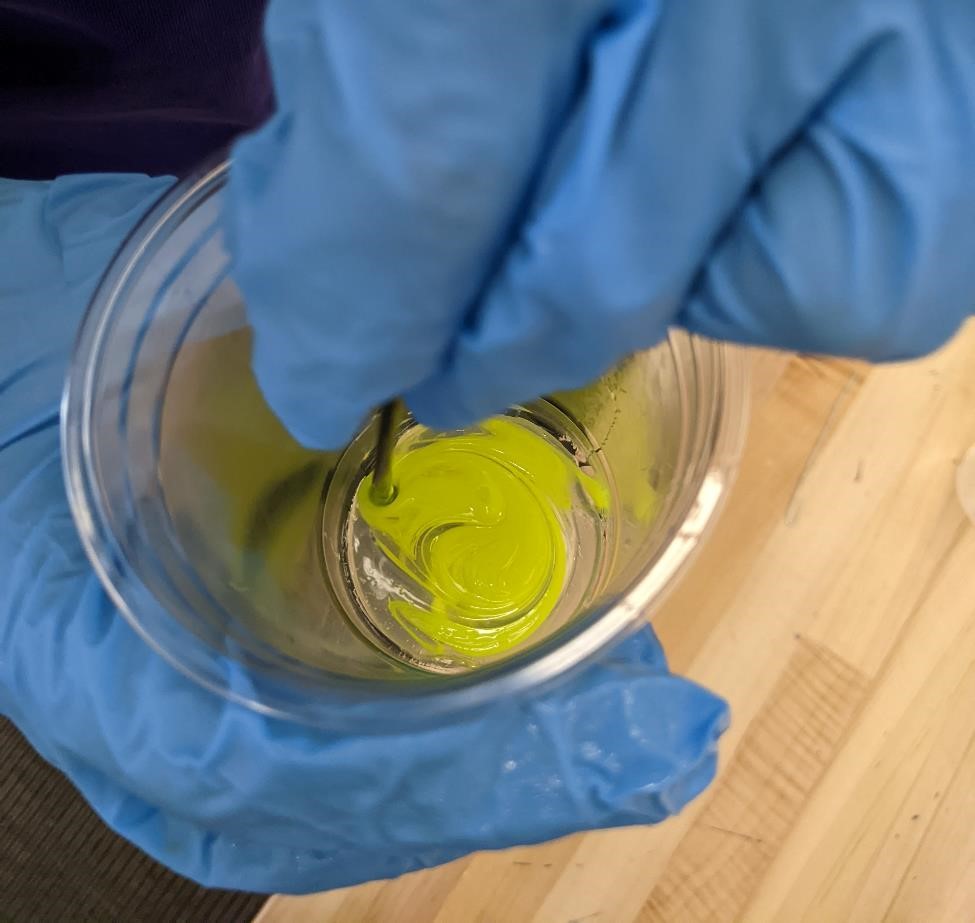
We then prepared the colors. This was difficult because each color had some pigment separation. Some of them were easy to mix, and some of them were incredibly difficult to mix, like trying to stir a hard compacted mud in water. But we only had too add a small amount of each of the colors to the silicone, and mixed it in. Tt had a large impact on the overall color.
Cori also experimented with some colored swirls, mixing in a blue colored pigment into a cup, and then taking a small amount of white and just dabbing and twirling it in to get a nifty effect. We’ll see how it turns out!
You can find the SDS references for the colors on this page under Technical Documents: https://www.reynoldsam.com/product/silc-pig-electric-fluorescent-pigments/
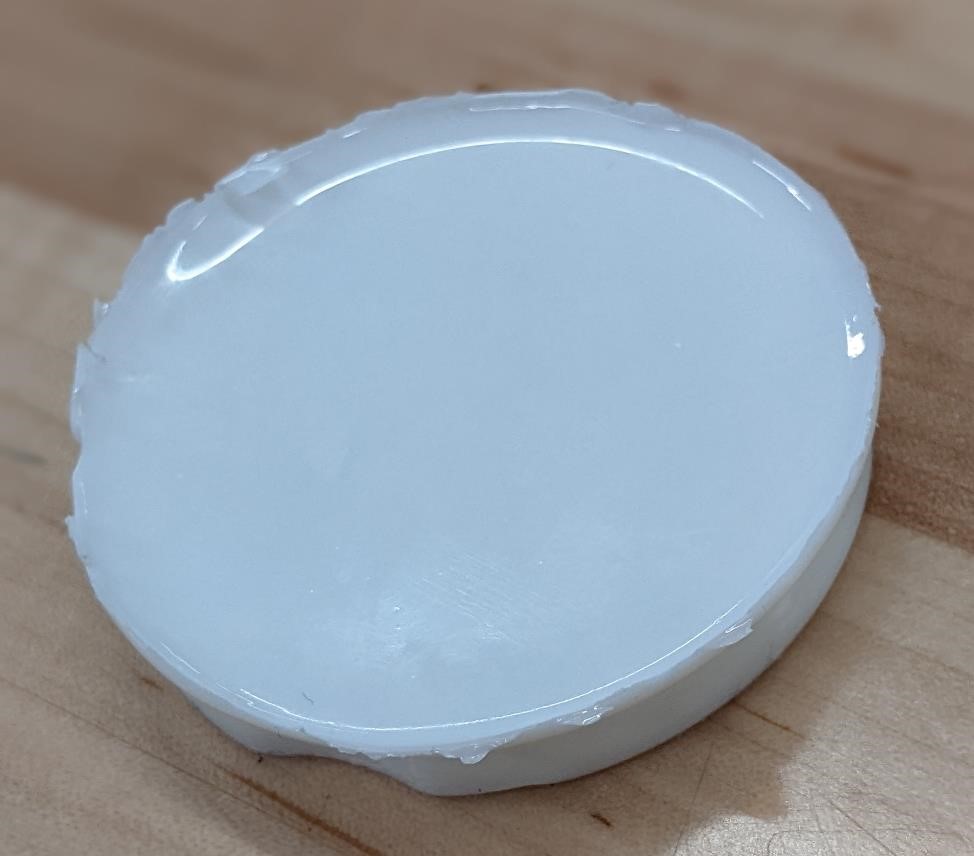
And the results as they sat in their cups curing:
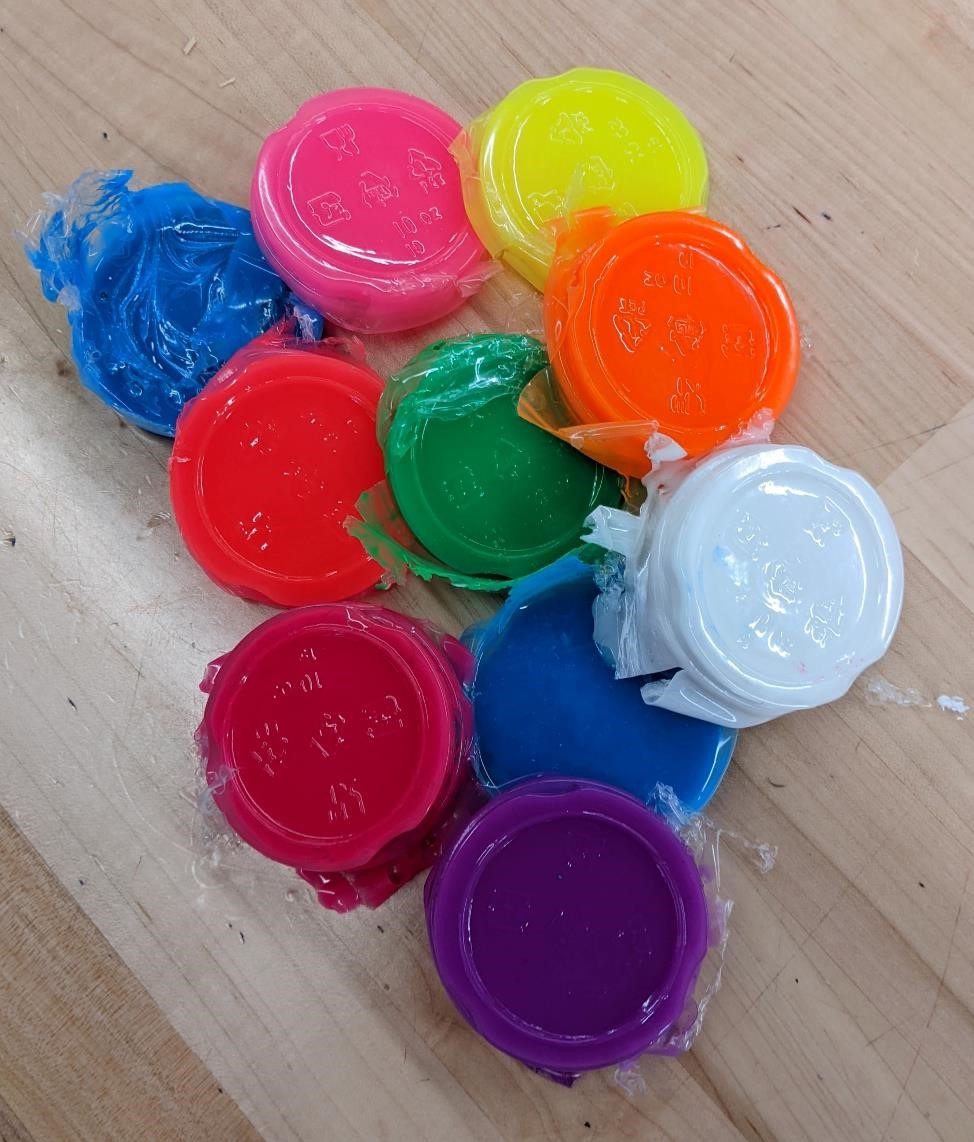
And then removed from their “mold”
The difference between the DragonSkin 20 and Mold Star 16
other than the obvious with the potlife, and the ability to add colors to DragonSkin, and not so to the Moldstar, is that the MoldStar was a much less viscous material, and even though it had a shorter pot life, it seemed it was easier to get air bubbles out of the final parts.
The Dragon Skin (especially in the molds we used) had a higher viscosity, and seemed to trap more air bubbles. Granted, there are many other causes for the air getting trapped in the molds, and things would have been better with a vaccuum chamber or even some type of vibratory assistance.
It did seem like the Mold Star 16 picked up more details from the molds than the DragonSkin did. The DragonSkin also had a noticeably harder Shore hardness too (a stiffer, less flexible silicone), though we weren’t able to actually measure what their individual hardnesses were.
Resin Casting Cups
By this time, we were ready to try and test the urethane plastic two part resin that would be the final product for one of Cori’s molds.
We also figured that Adam needed a few more resin and silicone pucks to add to his collection.
Smooth-Cast 300 was a resin with a 1 to 1 by volume mixture ratio, or a 100A:90B by weight mixture, and very low viscosity.
But you have to be quick, it has a 3 minute pot life, and a 10 minute cure time.
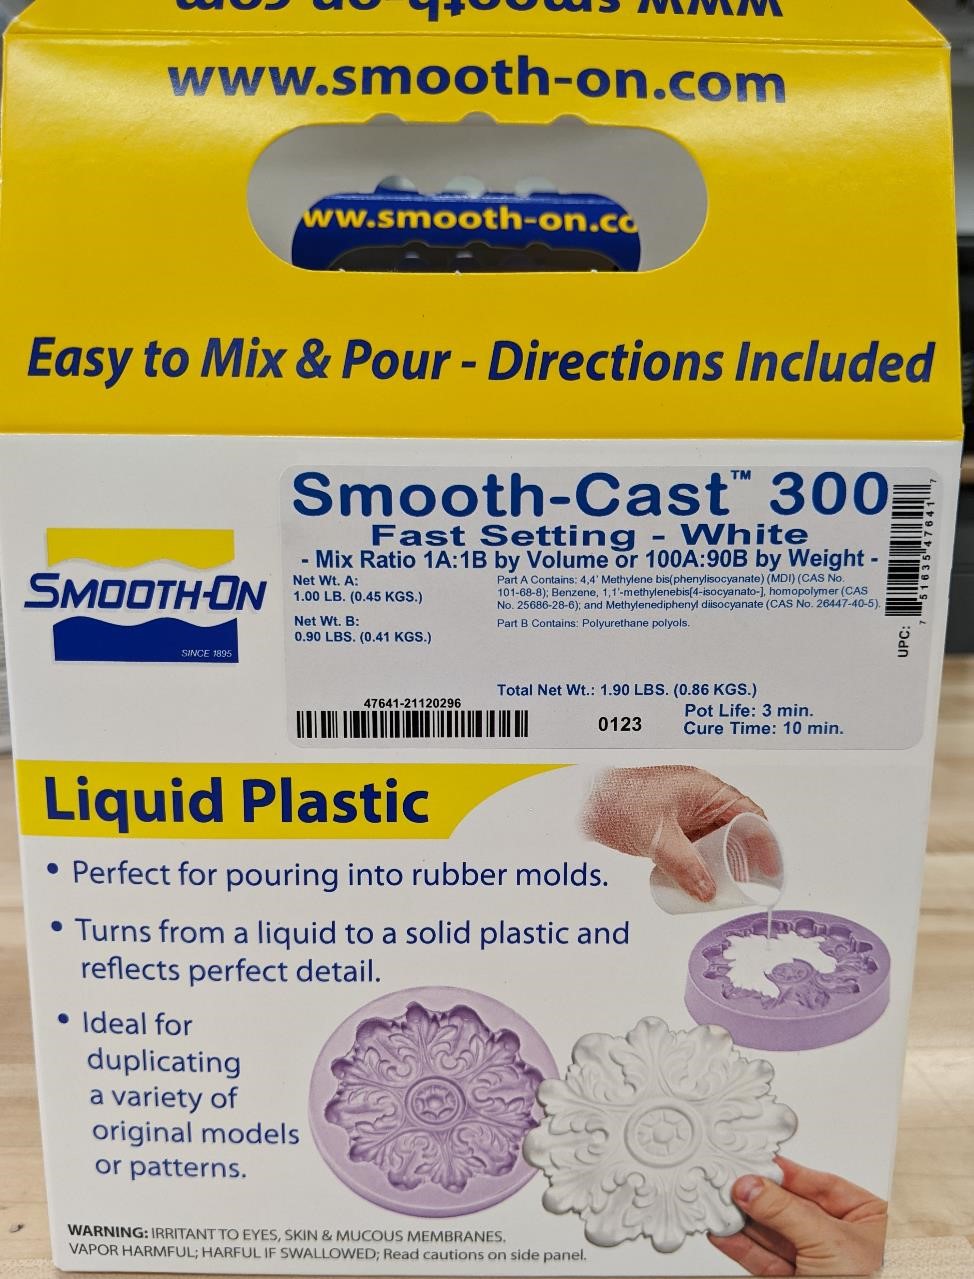
The SDS for this material can be found here: https://www.smooth-on.com/msds/files/SC_300_300Q_320_380_45D_60D_61D_65D_66D_ONYX.pdf
When we poured out part A, we discovered it was very thin, with a very low viscosity. A funnel would have made it easier to not make a mess everywhere, but Cori did an excellent job with what she had on hand.
Cori then mixed part A into Part B (and that was a close one, she almost did the opposite! No telling what would have happened if she did!)
But she made a small mistake that definitely would be a lesson learned for everyone. She forgot to mix the two in a seperate cup and then pour it into a cup prepped with Mold Release. Instead she mixed it in one cup and left it there to cure.
Watching this thing cure was pretty darn snoopy. In just a few minutes it started turning from a slight yellow tinge, but very clear liquid into a white substance that slowly moved from the top to the bottom of the cup.
When it was done, we had a nice white puck in the bottom of the cup.
However, because somebody forgot the mold release, it was difficult to get out of the cup.
And when we did get it out, we discovered that there was some un-cured resin on the bottom, where it was very difficult to stir and mix the entire cup of material. This is a good example of why to mix in one vessel, and always pour into whatever the final part will be.
But the results were still very good, with very little air bubbles, an amazingly smooth top finish, great details on the bottom and a nice finish all over. It was also neat to pick it up and feel the latent heat from the curing process.
On Cori’s say so, we also had a bunch of extra silicon and resin after one pour, so Cori decided to make a mold and casting from it.
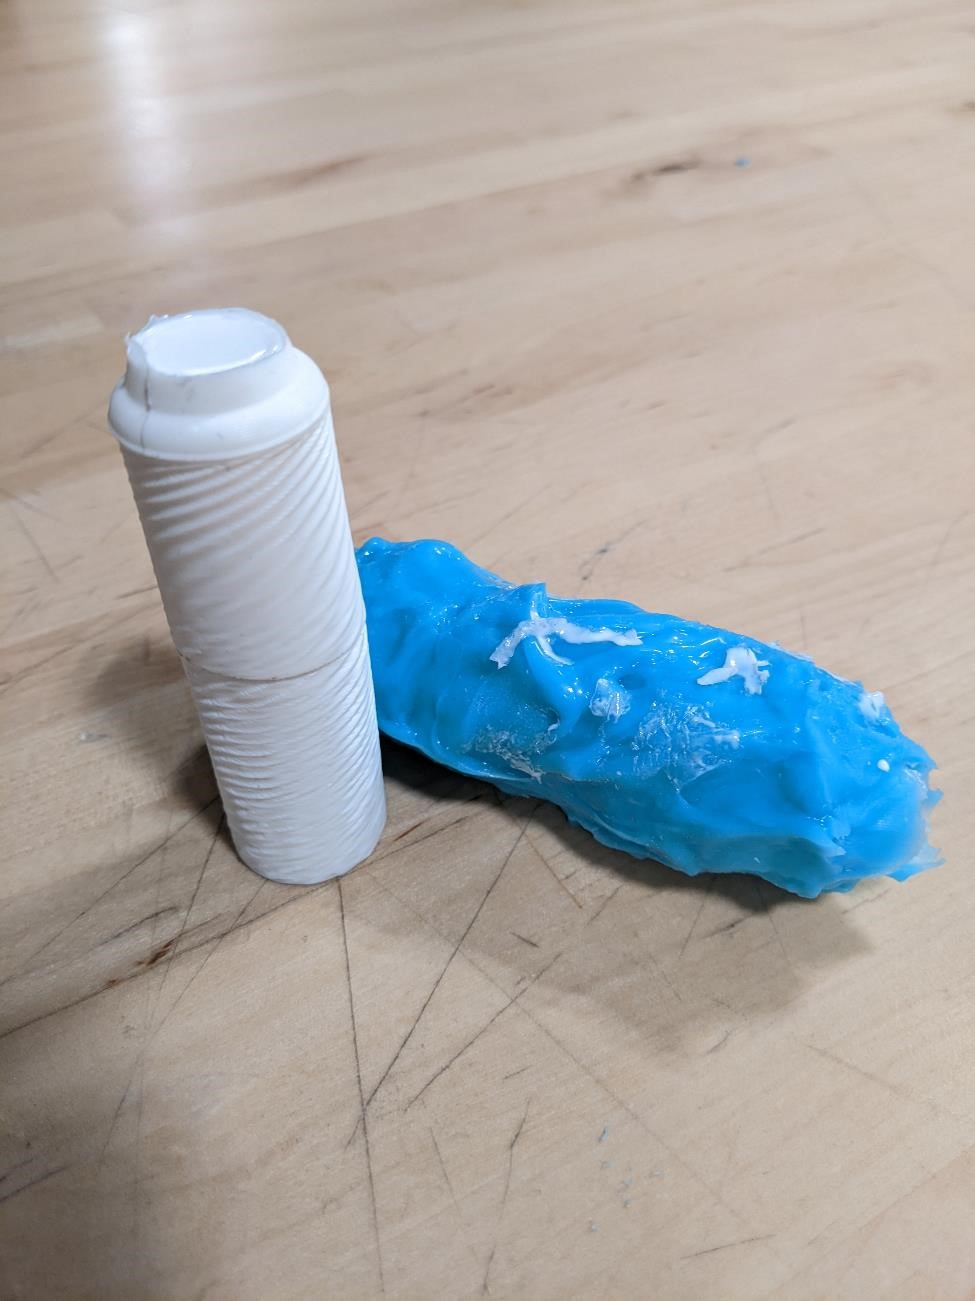
These parts came out well. The resolutiona and quality was as good as the mold, which was held by Garrett, and was a bit mishappen because of this. There was also a noticeable exothermic reaction, and a decent amount of heat was created by the Smooth Cast. It came out very warm, and very hard, with a noticeable amount of white leakage around the top.
What we learned.
When we were finished for the day, the mess wasn’t that bad. We managed to only get the uncured resin’s on half the floor. Hopefully somebody will come in over the weekend to clean it all up before it cures.
Also, Cori was nice enough to let Garrett lick the spatula after she was done mixing. The blue stuff tasted like blueberries. Yummy!
But we also learned the importance of mixing the materials together, the importance of not getting it all over your skin and eyes, and the importance of having a well ventilated place to spray the mold release.
The first few parts came out excellent, and as this has been written before the Dragon Skin colored pucks have finished curing, they had looked pretty good so far.
But we made some parts and they turned out awesome. Now who wants custom made silicone cup lids?
References and Resources
An excellent website on using CNC mills to make molds and cast resins: https://lcamtuf.coredump.cx/gcnc/
We learned a lot from this site: https://blog.honzamrazek.cz/2021/08/a-better-way-of-making-silicone-components-using-a-resin-printer-injection-molding-for-less-than-50-usd/
Yeah, we know what we’re doing.