Group Assignment Requirements
- Test the design rules for your 3D printer(s).
- Characterize dimensional accuracy, tolerances, and mechanical limits.
- Document the results on the group page.
- Reflect individually on the characteristics of the printer(s).
Learning Outcomes
- Understand additive manufacturing constraints.
- Evaluate overhang, bridging, and support limitations.
- Measure dimensional accuracy and tolerance behavior.
- Interpret how slicing parameters influence print quality.
Progress Status
Summary of completed tasks for Week 05 – Group Assignment.
Verified dimensional accuracy and shrinkage.
Tested maximum unsupported angles and bridge spans.
Measured clearance fits and press-fit tolerances.
Evaluated layer adhesion and print consistency.
1. Identification of the 3D Printers
For this group assignment, two FDM 3D printers were used to evaluate and test design rules. The primary technical difference between them was the nozzle diameter (0.8 mm vs 0.4 mm), which directly influences dimensional accuracy, detail resolution, and extrusion behavior.
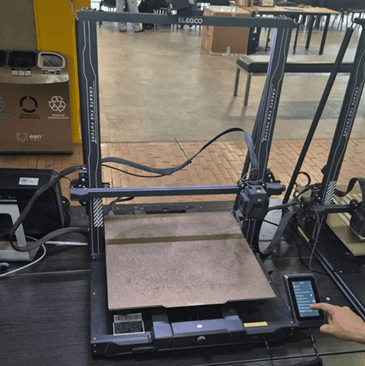
Printer 1 – Elegoo Neptune 4 Max
- Nozzle: 0.8 mm
- Filament: PLA 1.75 mm
- Leveling: Automatic mesh leveling
- Build Surface: Magnetic removable plate
The 0.8 mm nozzle allows greater material flow and faster printing, but reduces fine detail resolution. This configuration favors large structural components.
Printer 2 – Creality Hi (Multicolor)
- Nozzle: 0.4 mm
- Filament: PLA 1.75 mm
- Multicolor System: 4-in-1 extrusion input
- Leveling: Automatic leveling
The 0.4 mm nozzle provides higher detail resolution, making it more suitable for tolerance testing and fine features.
OrcaSlicer Configuration – Elegoo Neptune 4 Max
OrcaSlicer was used to configure and prepare prints for the Elegoo printer. The official profile was imported to ensure accurate machine parameters.
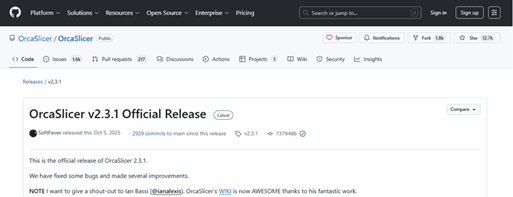
Step 1 — GitHub Repository
Accessing the official OrcaSlicer repository.
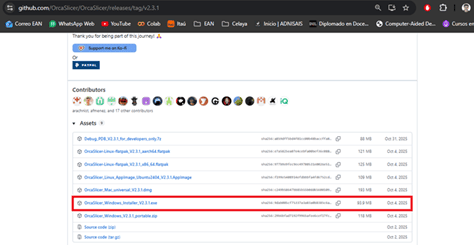
Step 2 — Download for Windows
Downloading the correct version.

Step 3 — Main Interface
Initial software configuration.
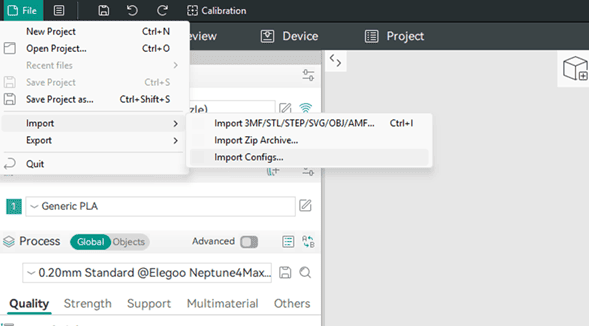
Step 4 — Importing Configuration
Loading FabLab-specific parameters.
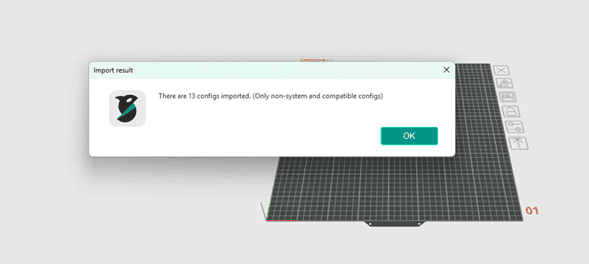
Step 5 — Configuration Successful
Machine ready for slicing.
Creality Print Configuration – Creality Hi
Creality Print was used to prepare slicing files for the multicolor Creality printer.
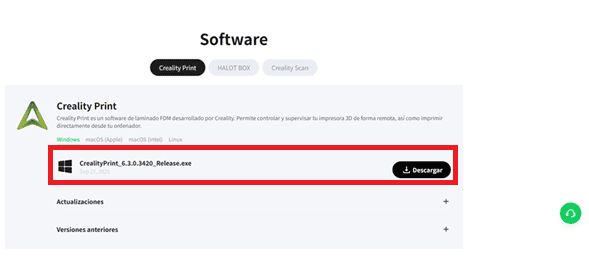
Step 1 — Download Page
Accessing Creality Print software.
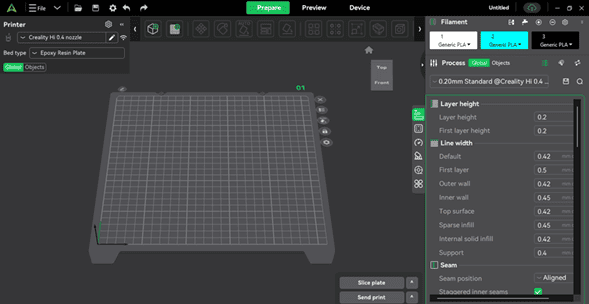
Step 2 — Main Interface
Printer configuration and slicing preview.
2. Preparing the Printer – Elegoo Neptune 4 Max
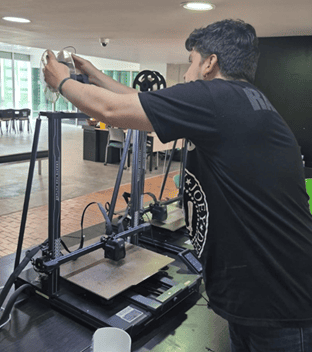
Step 1 – Feeding the Filament Through the Sensor
The preparation process began by loading the PLA filament into the material detection system. The filament was passed through the filament sensor to ensure material presence detection during printing.
This step is important because the sensor prevents failed prints caused by filament depletion or breakage during long jobs.

Step 2 – Inserting PLA into the Extruder
After passing through the sensor, the filament was inserted into the direct-drive extruder system.
Proper insertion ensures consistent extrusion and avoids under-extrusion issues during the first layers.
At this stage, the extruder motor engages and feeds the filament into the hotend once the target temperature is reached.
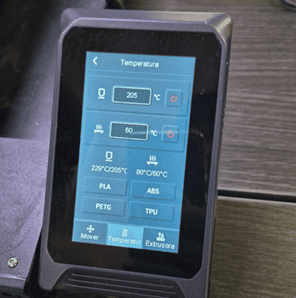
Step 3 – Preheating Configuration
Using the printer’s control panel, the bed and nozzle were preheated according to PLA printing requirements.
Typical PLA settings:
- Nozzle temperature: ~200–220°C
- Bed temperature: ~50–60°C
Preheating stabilizes extrusion flow and improves first-layer adhesion, which is critical for dimensional accuracy in test models.
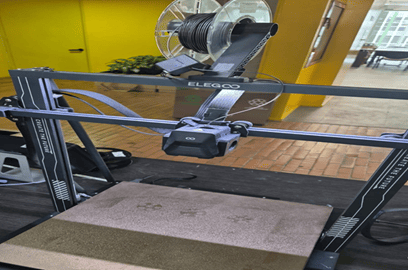
Step 4 – Printer Ready for Operation
Once temperatures stabilized and filament flow was verified, the machine was ready to begin the design rule test prints.
Ensuring proper mechanical preparation before printing reduces variability in experimental results and increases repeatability when evaluating dimensional accuracy and tolerances.
Printing Parameters & Technical Configuration
| Parameter | 🖨️ Creality Hi (0.4 mm – Multicolor) | 🖨️ Elegoo Neptune 4 Max (0.8 mm) |
|---|---|---|
| 🧵 Material |
PLA 1.75 mm |
PLA 1.75 mm Smooth High Temp Plate |
| 🌡 Temperature |
Calibration: 230°C – 190°C (5°C steps) Bed: 50°C |
Standard PLA configuration Bed heated |
| 📏 Layer Height |
0.2 mm First layer: 0.2 mm Profile: 0.20mm Standard |
0.2 mm First layer: 0.2 mm ⚠ Same height used for comparison |
| 📐 Line Width | 0.4 mm nozzle (standard extrusion width) |
Default: 0.8 mm Outer wall: 0.8 mm Inner wall: 0.85 mm Top: 0.85 mm |
| 🧱 Infill |
Standard density Balanced for detail resolution |
5% density Adaptive Cubic 45° direction |
| 🚀 Print Speeds |
First layer: 60 mm/s Outer wall: 150 mm/s Inner wall: 300 mm/s Infill: 270 mm/s Top: 200 mm/s |
First layer: 50 mm/s Outer wall: 120 mm/s Inner wall: 160 mm/s Infill: 200 mm/s Supports: 60 mm/s |
| 🏗 Supports | Standard support strategy |
Enabled Tree supports 30° threshold |
| 🔎 Technical Impact |
✔ Better fine detail ✔ Better small text quality ✔ Higher tolerance precision ⚠ Sensitive to high speed settings |
✔ Higher material flow ✔ Stronger walls ✔ Faster printing ⚠ Reduced small-detail resolution ⚠ Larger minimum wall thickness |
The comparison highlights how nozzle diameter directly influences extrusion width, minimum wall thickness, tolerance testing capability, and fine-detail reproduction. Even when maintaining identical layer heights, the 0.8 mm configuration imposes geometric constraints that affect design rule validation.
3. Design Rule Tests – Elegoo Neptune 4 Max (0.8 mm)
For this printer, four different tests were performed:
- Temperature calibration tower
- Geometric tolerance test (print-in-place hinges)
- Detail resolution test (“Millennium Falcon” model)
- Large-format functional print
Due to the large build volume of the Neptune 4 Max, most models were arranged in a single print job. However, before combining them, it was necessary to determine the optimal printing temperature using a temperature tower test.
1️⃣ Temperature Tower (190°C – 230°C, 5°C steps)
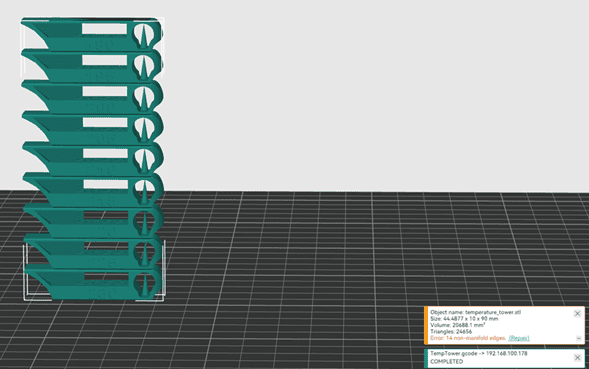
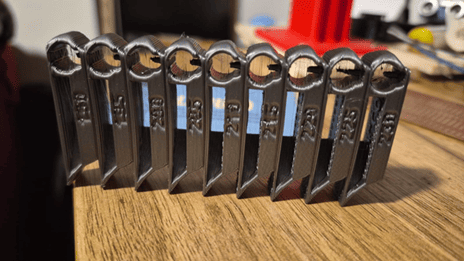
A temperature tower ranging from 190°C to 230°C in 5°C increments was printed to identify the optimal extrusion temperature for PLA.
Observed Results:
- Low temperatures (190–200°C): noticeable stringing and weaker layer adhesion.
- High temperatures (220–230°C): increased material flow and slight deformation in fine details.
- Optimal range: approximately 210–215°C, balancing adhesion and geometric stability.
This test demonstrated the trade-off between material fluidity and dimensional accuracy. The optimal performance was achieved at an intermediate temperature.
2️⃣ Tolerance Test – Print-in-Place Hinges
A hinge test model was printed with tolerances ranging from 0.1 mm to 0.45 mm in 0.05 mm increments.
Results:
- 0.1–0.25 mm: hinges completely fused.
- 0.3–0.35 mm: movement possible but with high friction.
- 0.4–0.45 mm: free movement and functional behavior.
With a 0.8 mm nozzle, the minimum functional tolerance was approximately 0.4 mm. This confirms that nozzle diameter directly influences mechanical clearances in print-in-place components.
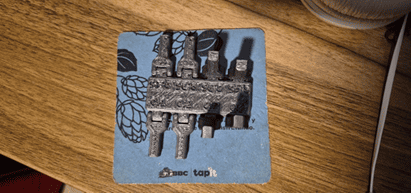
3️⃣ Detail Test – “Millennium Falcon” Model
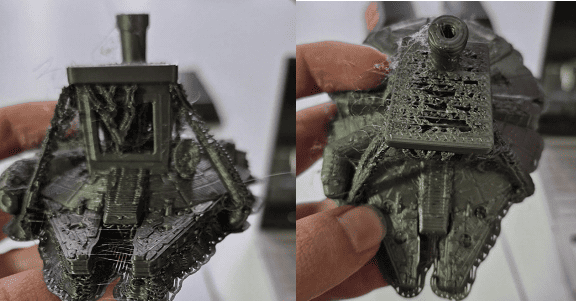
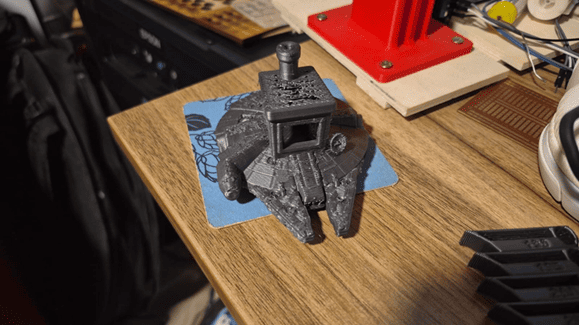
A detailed model similar to the traditional “benchy” was printed, but using a Millennium Falcon geometry to evaluate fine features.
Results:
- Supports were difficult to remove.
- Small details appeared coarse.
- Fine geometries lacked precision.
The 0.8 mm nozzle prioritizes structural strength and speed but reduces small-detail resolution.
4️⃣ Functional Print – “Rock Hand” Drumstick Holder

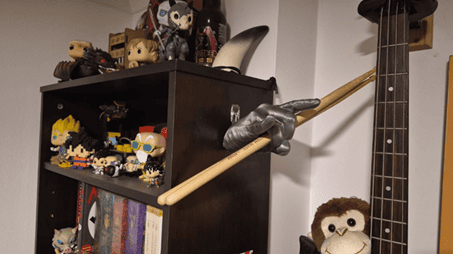
A large-format functional piece was printed to evaluate structural integrity and support behavior.
Results:
- Strong structural performance.
- Tree supports were easy to remove.
- Minor difficulty in narrow regions (between fingers).
- Good mechanical resistance.
The printer demonstrated superior performance for large functional components compared to small-detail models.
🐋 4. Test – Creality Hi (0.4 mm, Multicolor)
A multicolor whale model was printed using the Creality Hi printer. The objective was to evaluate detail resolution, surface finish, and color transition accuracy.
The model was printed using three filaments:
- White (lower section)
- Blue (main body)
- Black (eyes)
Printing time: approximately 3 hours.
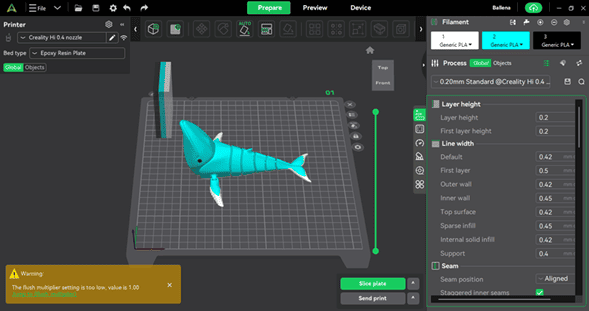
Step 1 — Print Bed Preview
Model positioned in Creality Print before slicing.
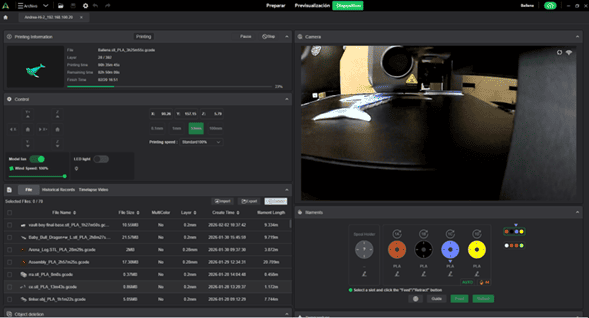
Step 2 — Remote Monitoring
Live camera monitoring during printing.
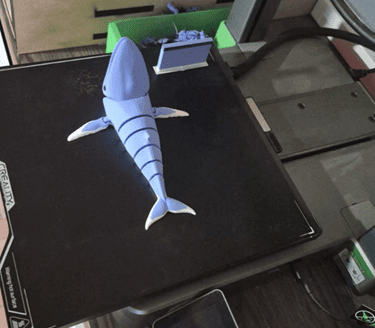
Step 3 — Final Print (Top View)
Surface finish and detail resolution.
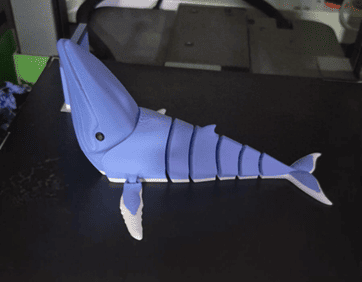
Step 4 — Final Print (Side View)
Clean color transitions and refined geometry.
Observed Results
- Improved surface finish.
- Higher detail definition.
- Well-defined color transitions.
- Overall better aesthetic quality compared to the 0.8 mm printer.
The 0.4 mm nozzle provided superior precision, especially in small features and curved geometries. The multicolor system also demonstrated stable material switching without significant artifacts.
5. General Group Conclusion
Through the design rule tests performed on both printers, we were able to identify how hardware configuration and slicing parameters directly influence the final printed result.
- The 0.8 mm nozzle is better suited for large, structural, and functional parts.
- The 0.4 mm nozzle provides better detail resolution and improved surface finish.
- Minimum functional tolerance depends directly on nozzle diameter.
- Optimal temperature requires balancing material flow and geometric stability.
- Tree supports are effective for organic shapes but difficult in confined spaces.
What We Learned About the Characteristics of Our 3D Printers
1. Influence of Nozzle Diameter
The most significant difference between both printers was the nozzle diameter: 0.8 mm (Elegoo Neptune 4 Max) versus 0.4 mm (Creality Hi).
The 0.8 mm nozzle required larger clearances (approximately 0.4 mm minimum functional tolerance), produced thicker walls, and resulted in stronger structural components. However, it reduced fine-detail resolution and limited small tolerance testing.
In contrast, the 0.4 mm nozzle allowed higher geometric precision, better surface quality, and tighter tolerance performance, making it more suitable for detailed or aesthetic models.
2. Temperature and Material Behavior
The temperature tower demonstrated that low extrusion temperatures increase stringing and reduce interlayer adhesion, while high temperatures improve flow but may introduce slight geometric deformation. An intermediate range provided the best balance between adhesion and dimensional stability.
3. Tolerances and Moving Parts
The hinge test confirmed that print-in-place mechanisms are highly dependent on extrusion width. With a 0.8 mm nozzle, tolerances below 0.3 mm fused, while approximately 0.4 mm allowed functional movement.
This reinforces that mechanical design must adapt to real machine limitations rather than relying solely on theoretical CAD dimensions.
4. Supports and Complex Geometries
Tree supports performed well in organic geometries but were more difficult to remove in narrow or enclosed areas. Larger nozzle diameters further reduced the definition of supported small features.
5. Functional vs Aesthetic Printing
The Elegoo printer demonstrated stronger performance in large and structural parts, while the Creality printer delivered superior surface finish and detail resolution in aesthetic models. Selecting a printer configuration therefore depends on the functional objective of the printed part.
6. Downloads and Online Resources
3D Models Used for Design Rule Testing
- Millennium Benchy (Detail Test Model)
- Temperature Tower (PLA Calibration)
- Print-in-Place Tolerance Test
- Flexi Humpback Whale (Multicolor Test)
📁 Local Project Files
To improve the loading performance of this documentation website, all project files for this assignment have been moved to a shared Google Drive folder.
The repository contains the sliced models, printing configurations, project files, and supporting resources used during the development of this assignment.
📂 Browse Week 05 Files on Google Drive