Assignment Requirements
Principles and Practices
- Plan and sketch a potential final project
Project Management
- Read, sign (add your name to) the student agreement and commit it to your repo
- Work through a git tutorial.
- Build a personal website in the class archive describing yourself and your final project. Refer to the lecture material for examples.
- Upload parts 1 and 2, to the class archive.
Learning Outcomes
- Communicate an initial project proposal
- Identify and utilise version control protocol(s)
- Explore and use website development tool(s)
Progress Status
Week 01 completion checklist.
Concept defined and sketches created.
Personal website created and structured.
Git workflow implemented using GitLab.
Signed and uploaded to repository.
All sections properly documented.
Content reviewed and ready for submission.
Final Project Overview
GameLab Controller
An Interactive Embedded Systems Learning Platform
This project explores a new way of learning embedded systems and IoT through interactive and game-based experiences. The goal is to design and fabricate a handheld controller inspired by video game consoles, capable of interacting with a physical system in real time.
The controller will include buttons, a joystick, and a display, allowing users to send commands and receive feedback while controlling a small robotic car wirelessly. This approach transforms traditional learning into a more engaging, hands-on experience.
Additionally, the system is designed to integrate both analog and digital sensors, enabling users to expand the platform and explore more advanced embedded concepts. A key component of this project is the use of an IMU sensor (MPU6050), which allows motion-based interaction, orientation tracking, and the development of more dynamic control strategies.
Project Objectives
- Design a custom embedded system (gamepad)
- Implement wireless communication (BLE/WiFi)
- Control a physical robotic system in real time
- Create an interactive and educational user experience
Target Users
- Undergraduate engineering students
- Educators in embedded systems and IoT
- Makers interested in interactive learning tools
Project Sketches
The following sketches represent the conceptual design of the system. The project is composed of two main subsystems: a handheld controller and a robotic car, both connected wirelessly. Each component has been designed to demonstrate key concepts in embedded systems, interaction, and real-time control.
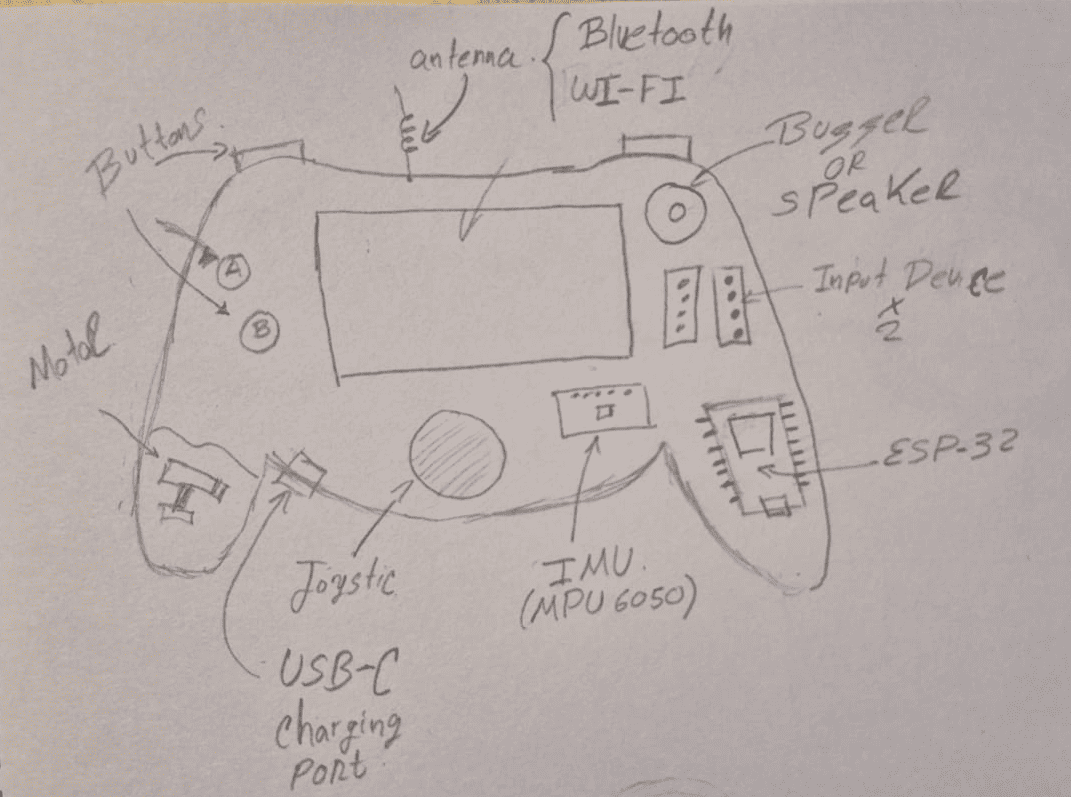
Handheld Controller Design
The controller is the main user interface of the system. It is designed as a gamepad-style device that allows intuitive interaction through physical inputs and real-time visual feedback.
- ESP32: Main microcontroller handling processing and wireless communication
- Joystick (2-axis): Enables directional control of the robotic car
- Push buttons: Used for commands, mode selection, and interaction
- Color display: Provides user feedback and simple graphical interface
- MPU6050 (IMU): Allows motion-based interaction and gesture control
Power and Charging System
- Li-ion battery (cell type): Portable power source for standalone operation
- Charging circuit: Integrated charging module via USB-C
- Power management: Regulation and protection for safe operation
Feedback and Interaction
- Buzzer / Speaker: Provides audio feedback for user interaction
- Vibration motor (optional): Enables haptic feedback for immersive experience
Expandable Input Interface
- GPIO expansion pins: Allow connection of external peripherals
- Analog and digital inputs: Support for sensors, buttons, and custom modules
- Modular design: Enables experimentation with different input devices
This controller is designed not only as an interface device but also as a modular educational platform, allowing users to experiment with different sensors, inputs, and interaction methods.
Robotic Car System
The robotic car acts as the physical output of the system, translating user inputs into real-world motion. Additionally, it functions as a mobile sensing platform capable of collecting and transmitting environmental data in real time.
- ESP32: Receives commands and manages data communication
- Motor driver (H-Bridge): Controls direction and speed of the motors
- DC motors: Enable movement of the vehicle
- Battery system: Provides portable power for autonomous operation
Sensor System
- Gas sensor: Detects environmental air quality conditions
- Temperature sensor: Measures ambient temperature
- Humidity sensor: Monitors environmental humidity levels
Communication and Data Transmission
- Wireless communication (BLE/WiFi): Enables real-time data exchange
- Bidirectional communication: Receives control commands and sends sensor data
- Data streaming: Allows visualization and analysis of environmental data
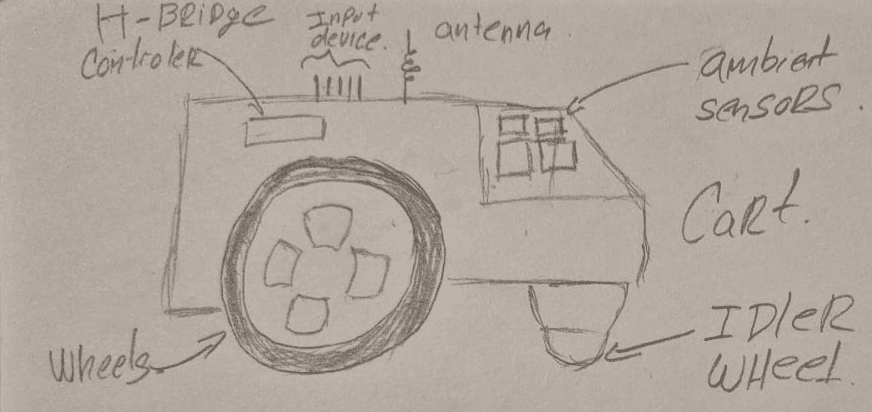
This subsystem plays a key role in demonstrating one of the fundamental concepts in embedded systems: the acquisition, processing, and transmission of real-world data through interconnected devices.
Website Development
The website for this project was developed using a template provided by my local instructor, Jhonatan Cortes, from the Fab Academy node at Universidad EAN (Colombia). This template is designed to simplify the documentation process and focus on clearly presenting each stage of development.
From my role as a programming professor at the university, I already have experience working with development tools and coding environments. This background allowed me to quickly adapt to the workflow required for Fab Academy, especially in terms of version control and structured documentation.
Development Environment – Visual Studio Code
Visual Studio Code was selected as the main development environment due to my prior experience using this tool. Its flexibility, performance, and integration with Git make it ideal for managing web-based projects and maintaining organized workflows.
One of its key advantages is the built-in Source Control panel, which allows staging, committing, and pushing changes directly from the editor. This significantly improves workflow efficiency when managing project updates.
Additionally, Visual Studio Code includes AI-assisted tools in the form of chat-based assistants, which allow quick queries, code suggestions, and real-time corrections. This feature was particularly useful for resolving syntax issues, improving code structure, and accelerating the development process.

Visual Studio Code logo. Source: Wikipedia.
Use of Template
Although I have experience in programming, frontend web development is not my main area of expertise. For this reason, I decided to use the provided template, which offers a well-structured and reusable layout.
The template provides a modular structure where each section represents a specific type of content (text, images, tables, videos, etc.), allowing flexible and organized documentation of each weekly assignment. This approach made it possible to focus on the technical content rather than spending time building the interface from scratch.
Template Structure
The template is distributed as a compressed file and must be extracted. The contents are copied directly into the "public" folder of the repository, ensuring compatibility with the Fab Academy publishing system.
Weekly Workflow
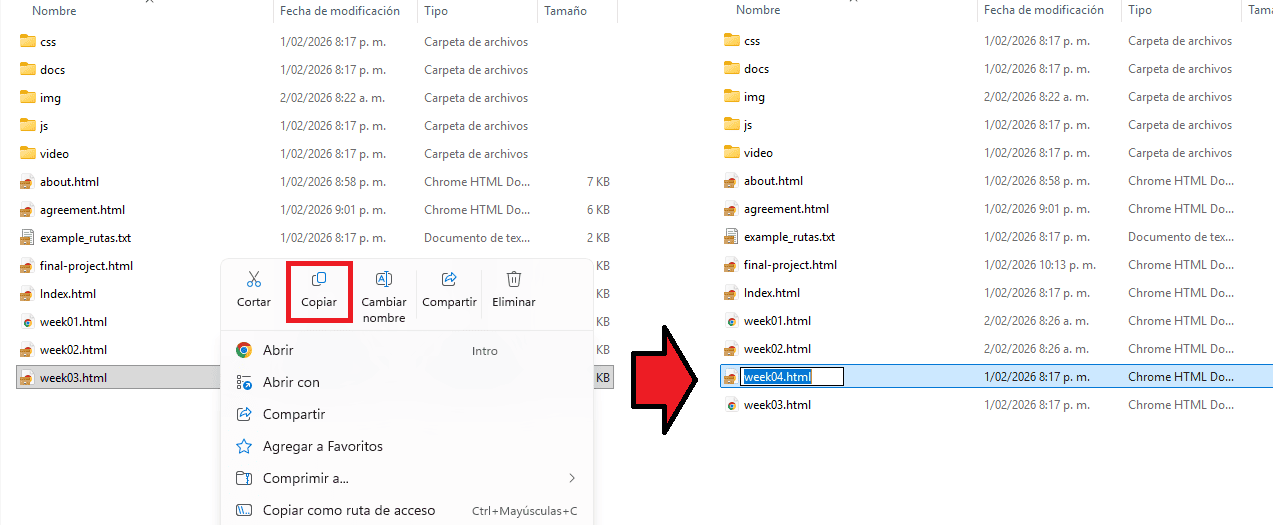
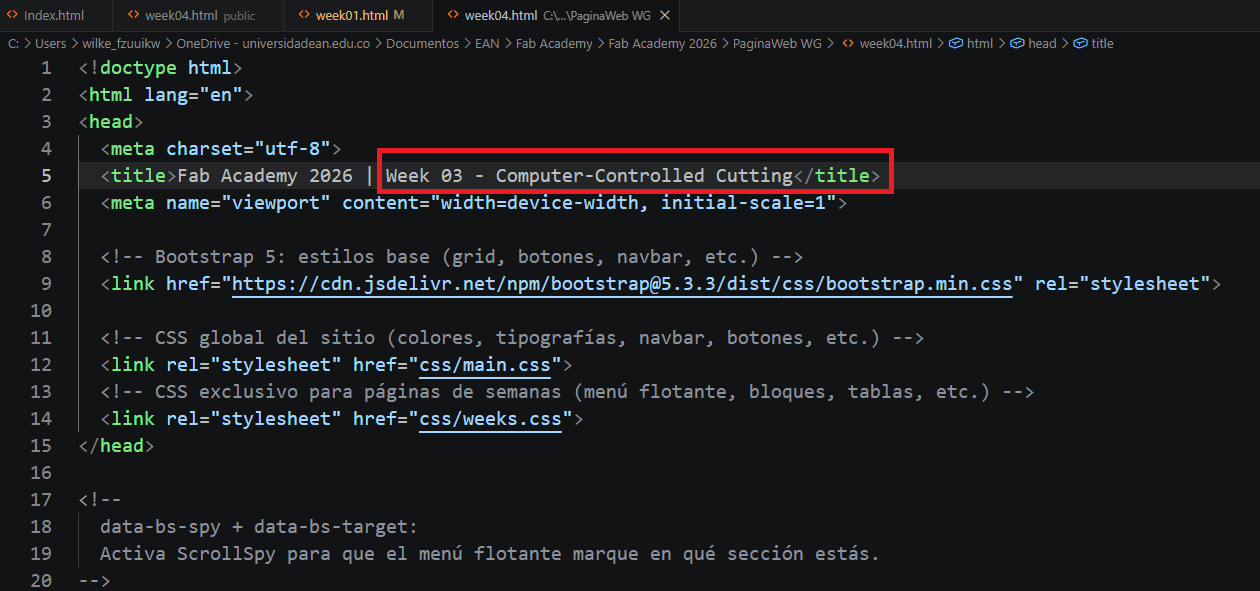
Each week is documented by duplicating a base file (week03.html) and adapting it to the current assignment. This includes updating titles, images, and content while maintaining a consistent structure across all weeks.
Project Structure
The website follows a structured directory organization to separate content, styles, scripts, and assets. This improves scalability, readability, and maintainability of the project.
/ (root)
│── index.html
│── about.html
│── agreement.html
│── final-project.html
│
├── css/
│   ├── main.css
│   └── weeks.css
│
├── js/
│   └── main.js
│
├── img/
│   ├── main/
│   │   └── hero.jpg
│   │
│   ├── week01/
│   │   ├── img_01.jpg
│   │   ├── img_02.jpg
│   │   └── img_03.jpg
│   │
│   ├── week02/
│   │   ├── img_01.jpg
│   │   └── img_02.jpg
│   │
│   └── week03/
│       └── ...
│
├── doc/
│   ├── files/
│   │   └── pp.pdf
│   └── README.txt
Structure Explanation
- HTML files: Main pages and weekly assignments
- CSS: Global and weekly-specific styles
- JavaScript: Basic scripts and interactions
- Images: Organized by week for clarity
- Documentation: Downloadable files and resources
This structure ensures that all project assets are clearly organized, making it easier to manage content and scale the website throughout the Fab Academy program.
Development Tools
- Visual Studio Code: Used as the main development environment
- Git: Version control system
- GitLab: Repository hosting and website deployment
- Bootstrap: Responsive layout and UI components
Visual Studio Code allows direct interaction with Git, enabling commits and pushes without leaving the editor. This streamlines the workflow and ensures continuous documentation.
AI-Assisted Workflow
Artificial Intelligence tools were used throughout different stages of the documentation and website development process. Rather than replacing the technical work, AI was used as a support tool for translation, HTML generation, code refinement, and documentation formatting.
AI-assisted tools integrated into Visual Studio Code were mainly used to support HTML structure generation, Bootstrap layout refinement, syntax correction, and translation of technical content into English during the documentation process.
These tools helped accelerate repetitive coding tasks and improve documentation clarity while maintaining a structured workflow. However, all project concepts, engineering decisions, architecture, project planning, and technical development were created manually.
In addition to programming assistance, generative AI tools were also used to create visual assets for the website. Cover images for weekly assignments were generated using Gemini in order to create a consistent visual identity inspired by vintage cartoon illustration styles.
Generated Cover Example
Example of a cover image generated using Gemini with a vintage cartoon illustration style. The objective was to create a distinctive visual identity for the Fab Academy documentation while maintaining a technical and educational context.
Different prompts were adapted for each weekly assignment in order to generate visuals aligned with digital fabrication, embedded systems, and engineering-related topics.
Example Prompt
Create a cover image for my Fab Academy website. My name is Wilken Rodriguez,
and I am a mechatronics engineering professor at Universidad EAN. The image should
visually represent this context, combining elements related to engineering,
digital fabrication, and education. Use a vintage cartoon illustration style
(old animated drawing style) to give the image a distinctive and creative look.
AI tools were mainly used as technical assistants for translation, HTML generation, visual asset creation, and documentation support, while the conceptual development and engineering implementation remained fully manual.
Website Sections
The website is structured into different sections that provide information about the author, the final project, and the Fab Academy requirements. Each section is accessible through the navigation menu.
About Me
This section introduces my background as a mechatronics engineering professor, my interests, and my experience in digital fabrication and embedded systems.
Final Project
This section presents the concept, development, and progress of the final project, including sketches, system design, and implementation stages.
Student Agreement
This section contains the signed Fab Academy Student Agreement, ensuring compliance with the academic and collaboration policies of the program.
Version Control (Git & GitLab)
Version control was implemented using Git and GitLab as part of the Fab Academy workflow. The repository is hosted on GitLab, which is also used to deploy the personal website.
From my role as a programming professor, I already have prior experience using Git as a version control system. Therefore, Git was already installed and configured on my computer, allowing a smooth transition into the Fab Academy workflow.
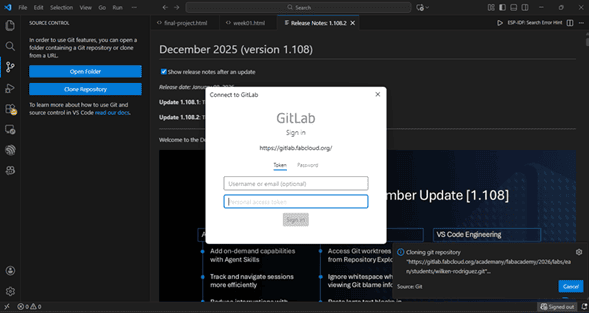
To enable secure communication between the local machine and the GitLab repository, a Personal Access Token (PAT) was used. This authentication method replaces traditional password-based access and is required when working with modern GitLab environments.
GitLab Personal Access Token (Authentication)
A Personal Access Token (PAT) was generated in GitLab to authenticate the connection between the local development environment and the remote repository. This token is used as a secure credential when performing operations such as push and pull over HTTPS.
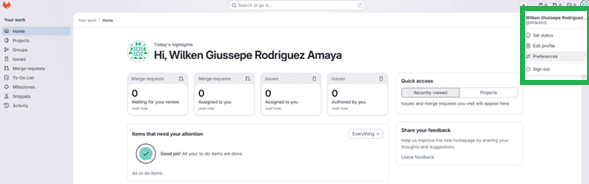
Step 1 — Access User Settings
From the GitLab dashboard, the user settings panel is accessed. This section centralizes account configuration, including security, access control, and authentication methods.
Step 2 — Open Preferences
Within the settings menu, the preferences and access configuration sections are explored to locate the authentication tools required for repository access.


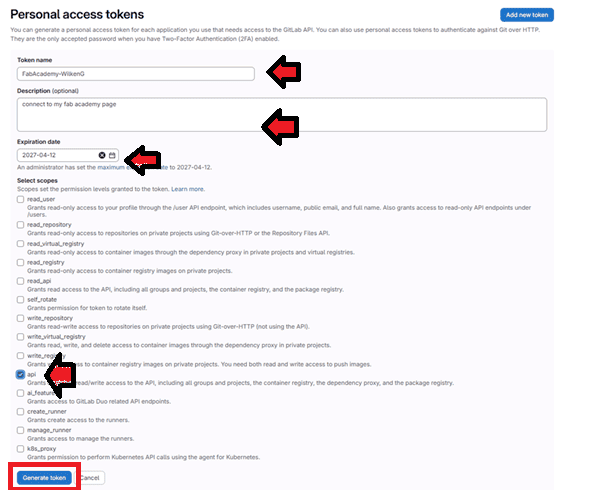
Step 3 — Create Personal Access Token
The "Personal Access Tokens" section is used to generate a new authentication token. This token will later be used as a secure replacement for a password when connecting to the repository from external tools such as Visual Studio Code.
Step 4 — Configure Token
During token creation, parameters such as name, expiration date, and access scopes are defined. For this workflow, permissions like read_repository and write_repository were enabled to allow full interaction with the project.
Once generated, the token must be stored securely, as it will not be displayed again.
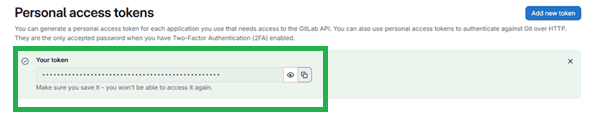
Step 5 — Token Usage
The generated token is used as a password when Git requests authentication. This allows secure communication between the local machine and GitLab when performing operations such as cloning, pulling, and pushing changes.
This authentication method ensures secure access to the repository, aligning with modern GitLab security practices and enabling reliable interaction between local and remote environments.
Note: Personal Access Tokens are now the standard authentication method in GitLab, replacing password-based authentication for improved security.
Development Environment – Visual Studio Code
Visual Studio Code was used as the main development environment. This tool provides native integration with Git through its Source Control panel, allowing commits, staging, and push operations directly from the graphical interface without the need to use the Git terminal.
This significantly simplifies the workflow, especially for managing frequent updates during the documentation process.
Step 6 — GitLab Integration
After generating the Personal Access Token, Visual Studio Code is connected to the GitLab repository. During authentication, the token is used instead of a password, allowing secure access to the remote repository.
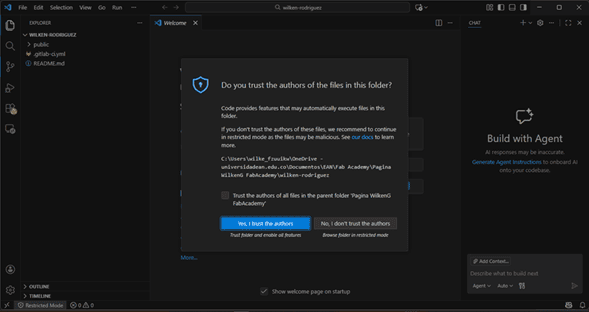
Step 7 — Project Initialization
The project folder is opened in Visual Studio Code. At this stage, the repository structure is recognized, and local files are prepared to be tracked and synchronized with the remote repository.
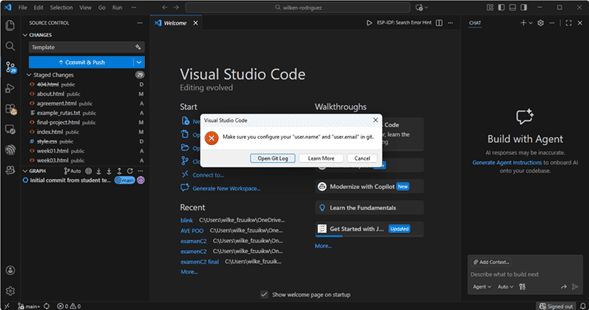
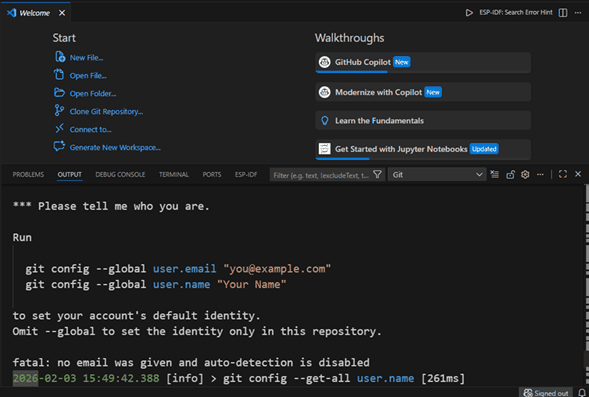
Step 8 — Git Configuration
Git user configuration ensures that all commits are properly identified. This step defines the author of the changes and maintains a clear history of contributions within the repository.
Step 9 — Commit and Push
Changes are tracked using the Source Control panel in Visual Studio Code. Files are staged and committed locally, then pushed to GitLab using the integrated interface. This eliminates the need for manual terminal commands while maintaining full version control functionality.
This workflow integrates local development, secure authentication using Personal Access Tokens, and remote version control through GitLab. It ensures continuous synchronization between the local machine and the repository, enabling reliable documentation and automatic deployment of the Fab Academy website.
External Repository for Downloadable Files
Throughout Fab Academy, each weekly assignment generates a considerable number of downloadable resources, including CAD models, PCB designs, STL files, firmware, source code, simulation projects, and additional documentation. As the repository continued to grow, storing every downloadable asset directly inside GitLab significantly increased its size, making synchronization slower and reducing the efficiency of the development workflow.
Following a recommendation from my local instructor, Jonathan Cortés, I implemented a hybrid repository strategy. GitLab remains the official platform for version control, website deployment, and documentation, while a dedicated Google Drive repository is used to store all downloadable project files. This separation keeps the Git repository lightweight while ensuring that every resource remains publicly available and organized for future reference.
Repository Organization
The Google Drive repository mirrors the same structure used throughout the Fab Academy documentation. Each weekly assignment contains its own folder with all associated downloadable resources, providing a consistent and intuitive organization for evaluators and future users.
- Weekly folder organization following the Fab Academy schedule.
- PCB designs, CAD models, firmware, source code, simulations, and documentation.
- Public access through a shared read-only repository.
- GitLab remains dedicated to documentation and website version control.
Organization of the external Google Drive repository containing all downloadable files associated with each Fab Academy assignment.
Repository Management Strategy
This workflow separates version-controlled source files from large downloadable assets, following a common practice in professional software and hardware development projects.
- GitLab: HTML, CSS, JavaScript, documentation, images, and website deployment.
- Google Drive: CAD files, PCB manufacturing files, STL models, firmware, simulation projects, and other downloadable resources.
This approach keeps the Git repository efficient, improves synchronization, and ensures long-term accessibility to all project resources without affecting the documentation workflow.
Reflection
This first week of Fab Academy was focused on understanding the importance of documentation, project planning, and version control. One of the most valuable lessons was realizing that the process is as important as the final result.
Developing the website required not only technical skills in HTML, CSS, and Git, but also the ability to organize information clearly and communicate ideas effectively. Using a structured template significantly improved the workflow and allowed me to focus on documenting each step properly.
Additionally, integrating tools such as Visual Studio Code, GitLab, and AI-generated content helped streamline the development process. This combination of tools enabled a more efficient and professional approach to building and maintaining the project.
Overall, this week established a strong foundation for the rest of the Fab Academy, highlighting the importance of consistency, clarity, and continuous documentation.
Errors & Fixes
-
Error: Initial confusion with Bootstrap layout (columns not aligning correctly).
Fix: Proper use of
rowandcolstructure. Result: Responsive layout working correctly. - Error: Issues with image paths not displaying correctly. Fix: Organized images into structured folders and verified relative paths. Result: All images loaded properly in the website.
- Error: Difficulty understanding Git workflow at the beginning. Fix: Practiced commits and pushes using Visual Studio Code integration. Result: Stable version control workflow established.
- Error: Overloading the project idea with too many features. Fix: Defined a clear MVP (Minimum Viable Product). Result: More realistic and achievable project scope.
Downloads & References
Resource Attribution
Some of the downloadable resources included in this section, such as the website template and setup guide, were originally provided by Jhonatan Cortes from Fab Lab EAN (Colombia) as part of the local Fab Academy support material. These resources were later adapted and extended during the development of this personal documentation website. All additional modifications, documentation, content organization, and implementation workflows were developed during this assignment.
🔗 References & Tools
The following software and online resources were used throughout the development of this week's assignment, including website creation, version control, responsive design, and AI-assisted documentation.
📁 Downloadable Files
To improve the loading performance of this documentation website, all downloadable resources have been moved to a shared Google Drive folder.
The folder contains the original website template, setup guide, HTML source files, project assets, and supporting documents used during the completion of Week 01.
Additional files may be added over time as the documentation evolves.