Individual Assignment
- Design a mold around the process being used.
- Produce a mold with a smooth surface finish that does not show manufacturing toolpaths or fabrication artifacts.
- Use the mold to cast final parts and evaluate the results.
Learning Outcomes
- Understand molding and casting workflows.
- Select appropriate materials for positive models, molds, and casting media.
- Design reusable mold systems using CAD tools.
- Produce high-quality cast parts with accurate detail reproduction and surface finish.
Progress Status – Chess Piece Molding and Casting
Development of a complete molding and casting workflow using resin printed masters, silicone molds, and plaster casts.
Chess pieces were prepared as master models using high-resolution resin 3D printing to obtain smooth surfaces and fine details.
Custom cylindrical mold containers were designed and 3D printed to create reusable silicone molds around the resin masters.
The silicone molds were used to cast multiple plaster chess pieces, successfully reproducing the geometry and surface quality of the original models.
Context & System Overview
The objective of this week's assignment was to explore the complete workflow of mold making and casting, starting from a digital 3D model and ending with the production of multiple replicated physical parts. Unlike additive manufacturing, where every piece must be individually printed, molding and casting allow a single master model to be reproduced efficiently using reusable molds.
For this project, I selected several pieces from the Dogs vs Cats Chess Set available on MakerWorld. The design was chosen because of its detailed and organic geometries, making it an excellent candidate for evaluating the ability of silicone molds to capture and reproduce fine surface features.
The workflow was divided into four main stages:
- Resin 3D printing of the positive masters
- Design and fabrication of reusable counter-molds
- Silicone mold production using platinum-cure silicone
- Casting of final pieces using an acrylic gypsum compound
Fabrication Workflow
The process began by preparing and printing the chess pieces using stereolithography (SLA) resin printing. This technology was selected because it produces significantly smoother surfaces and finer details than standard FDM printing, reducing the visibility of layer lines that could otherwise be transferred to the mold.
Once the master models were completed, custom counter-molds were designed in SolidWorks and fabricated using FDM printing. These external structures were used to contain the liquid silicone during mold production while maintaining the correct alignment of the positive models.
After the silicone cured, the resulting flexible molds were used to cast multiple replicas using ECOCRYL acrylic gypsum. The final pieces reproduced the geometry and details of the original models while demonstrating the advantages of mold-based manufacturing for low-volume production.
Manufacturing Process Summary
| Stage | Technology | Material | Output |
|---|---|---|---|
| Master Production | Resin 3D Printing | 405 nm UV Resin | Positive Chess Pieces |
| Counter-Mold Fabrication | FDM 3D Printing | PLA | Rigid Mold Containers |
| Mold Production | Casting | Platinum Silicone | Flexible Negative Molds |
| Final Casting | Casting | ECOCRYL Acrylic Gypsum | Replicated Chess Pieces |
Design Approach
One of the key concepts explored during this assignment was the transition from digital fabrication to replication manufacturing. Instead of producing every part directly from a machine, the fabrication effort was concentrated on creating a high-quality master model and a reusable mold system capable of generating multiple identical copies.
This workflow highlights an important manufacturing strategy frequently used in industry, where the initial investment in mold production allows parts to be reproduced efficiently while maintaining consistent geometry and surface quality.
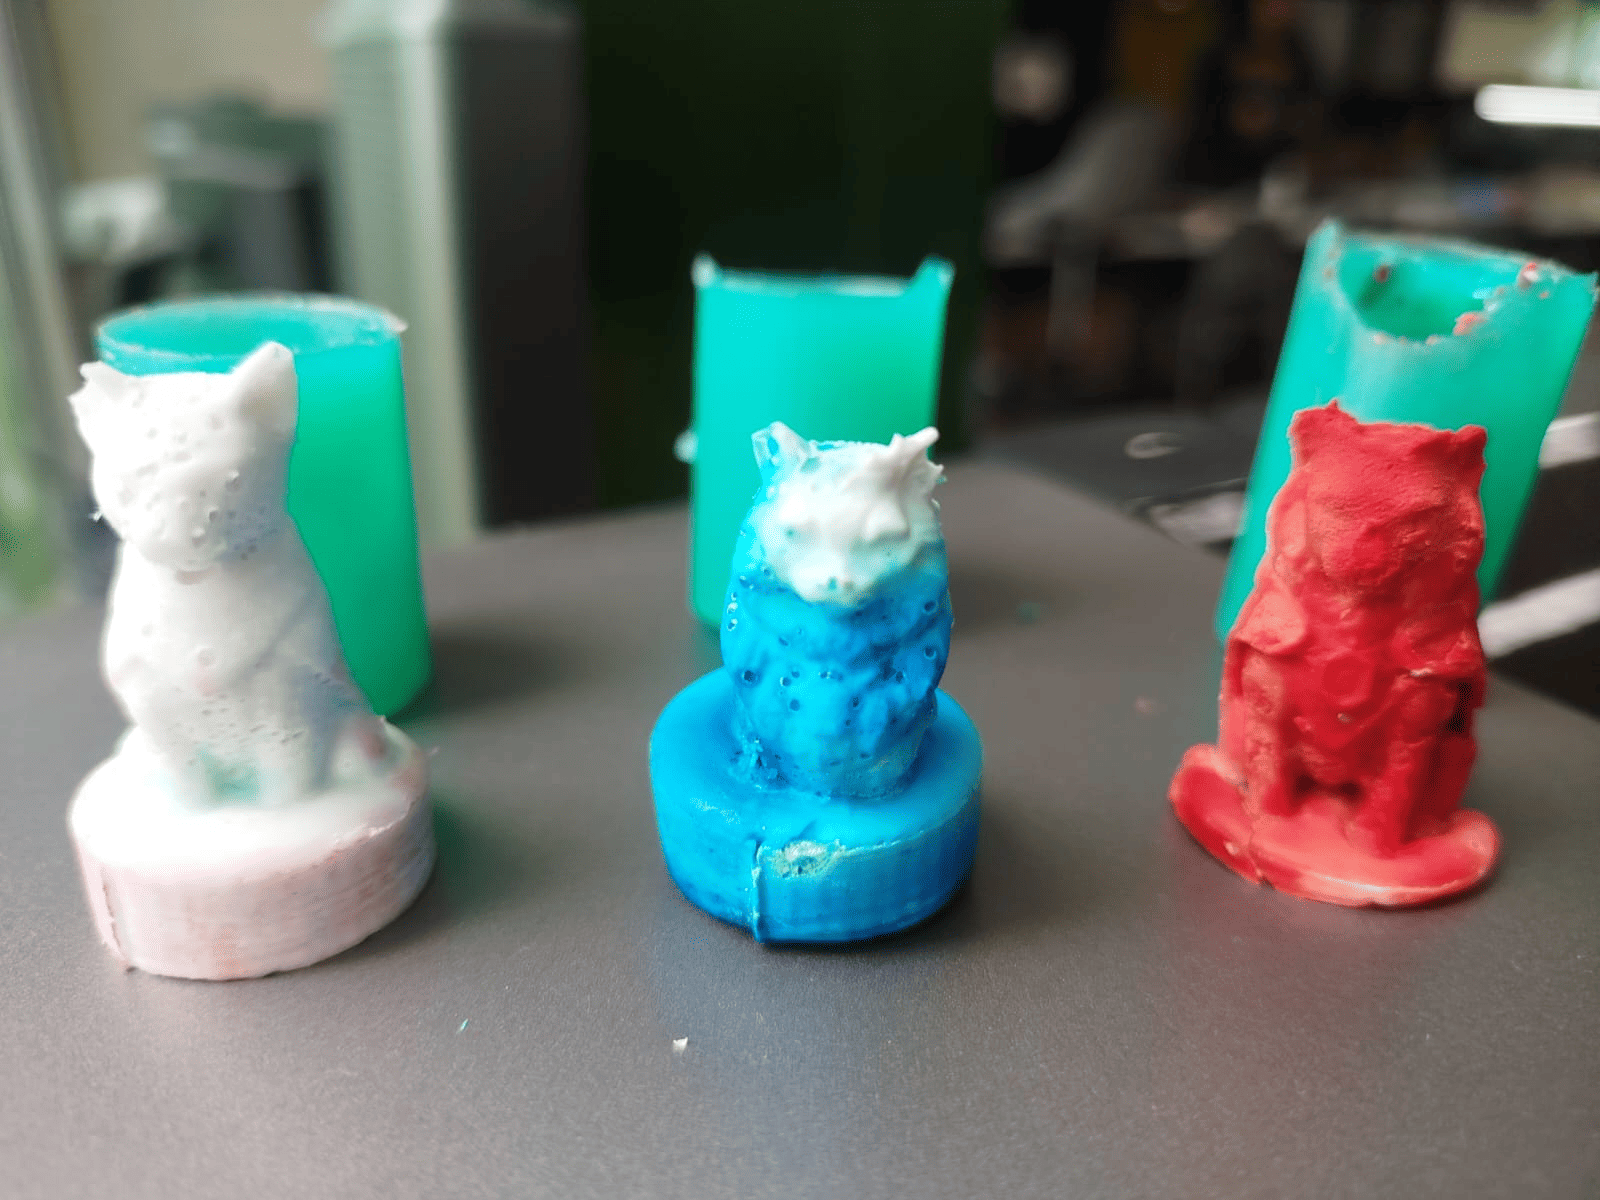
Final chess pieces produced through the complete molding and casting workflow.
3D Model Preparation
After selecting the chess set that would be used for the assignment, the next step was preparing the digital files for fabrication. Since the final objective was to create silicone molds and cast plaster replicas, obtaining high-quality master models was a critical part of the workflow. Any imperfection present on the original master would later be transferred to the silicone mold and eventually reproduced in every casted piece.
The chess set files were downloaded from MakerWorld and prepared using ChituBox, a slicing software commonly used for resin 3D printers. This software allows STL and 3MF models to be imported, arranged on the build platform, oriented for optimal printing, and exported into machine-readable files.
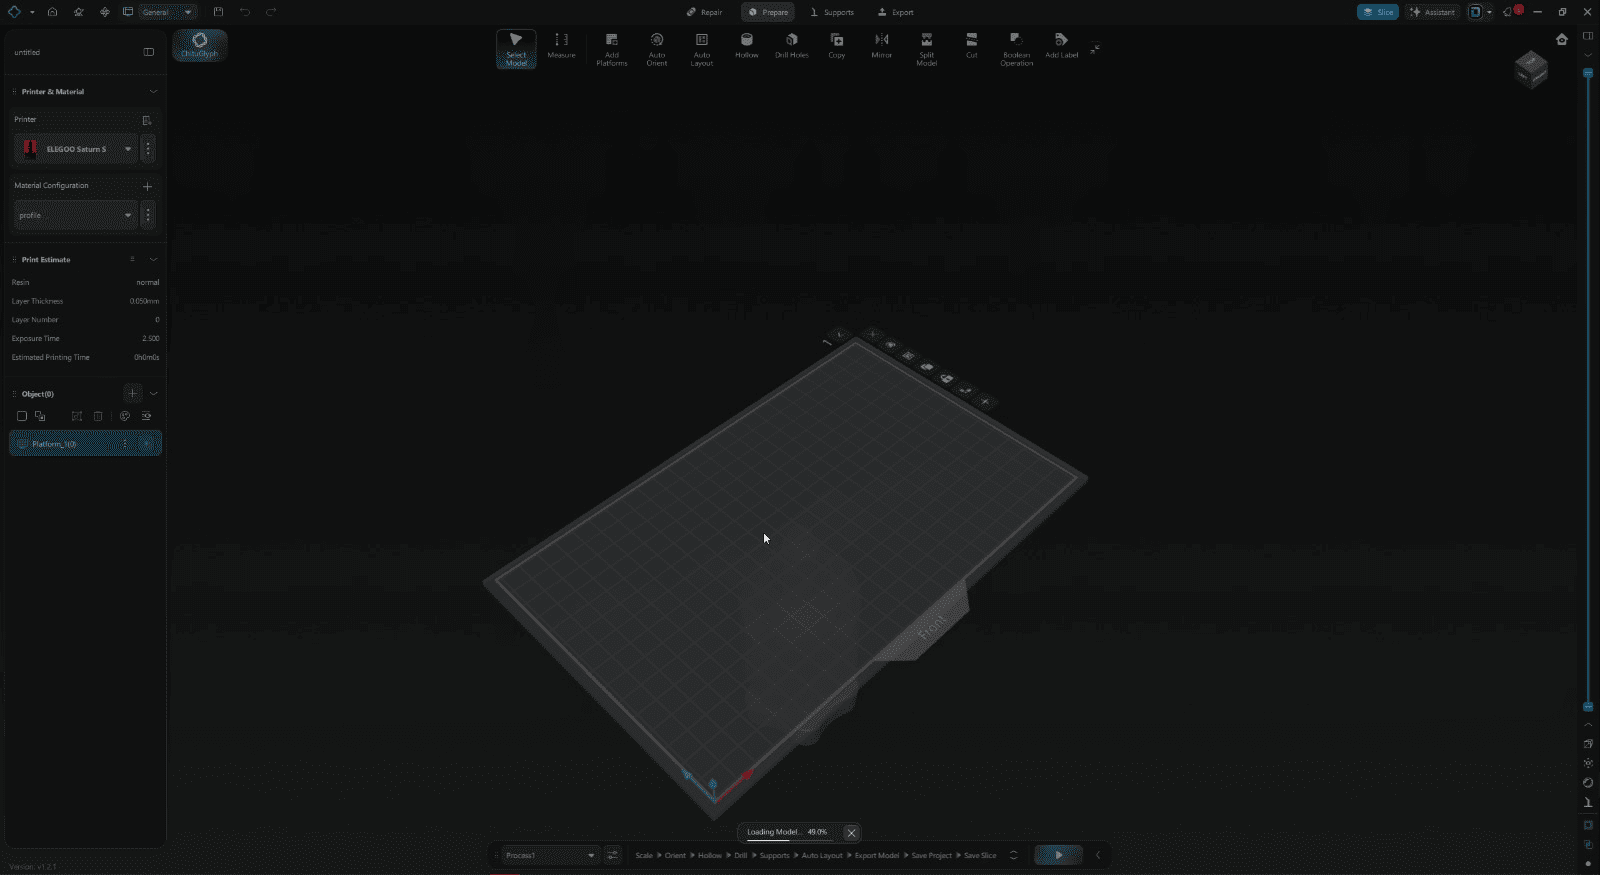
Initial ChituBox workspace configured for the ELEGOO Saturn S resin printer.
Preparing the Resin Printing Environment
The workflow started by creating a new project inside ChituBox and selecting the target machine configuration. For this project, an ELEGOO Saturn S resin printer was used due to its large build volume and ability to reproduce fine details with high dimensional accuracy.
Before importing the models, the software automatically generated the virtual build platform corresponding to the selected printer. This environment serves as the workspace where all subsequent preparation steps are performed, including model placement, orientation, support generation, and slicing.
Importing the Chess Set Models
After configuring the printing environment, the downloaded chess set files were imported into ChituBox. The collection was provided as a 3MF project containing all the chess pieces already organized within the workspace.
Importing the complete set allowed all models to be reviewed before fabrication. This step was useful for evaluating the geometry of each piece, checking dimensions, and identifying the parts that would be used as positive masters for the molding process.
The detailed geometry of the pieces, including facial features, decorative elements, and organic shapes, made them particularly suitable for evaluating the accuracy of the molding and casting workflow.
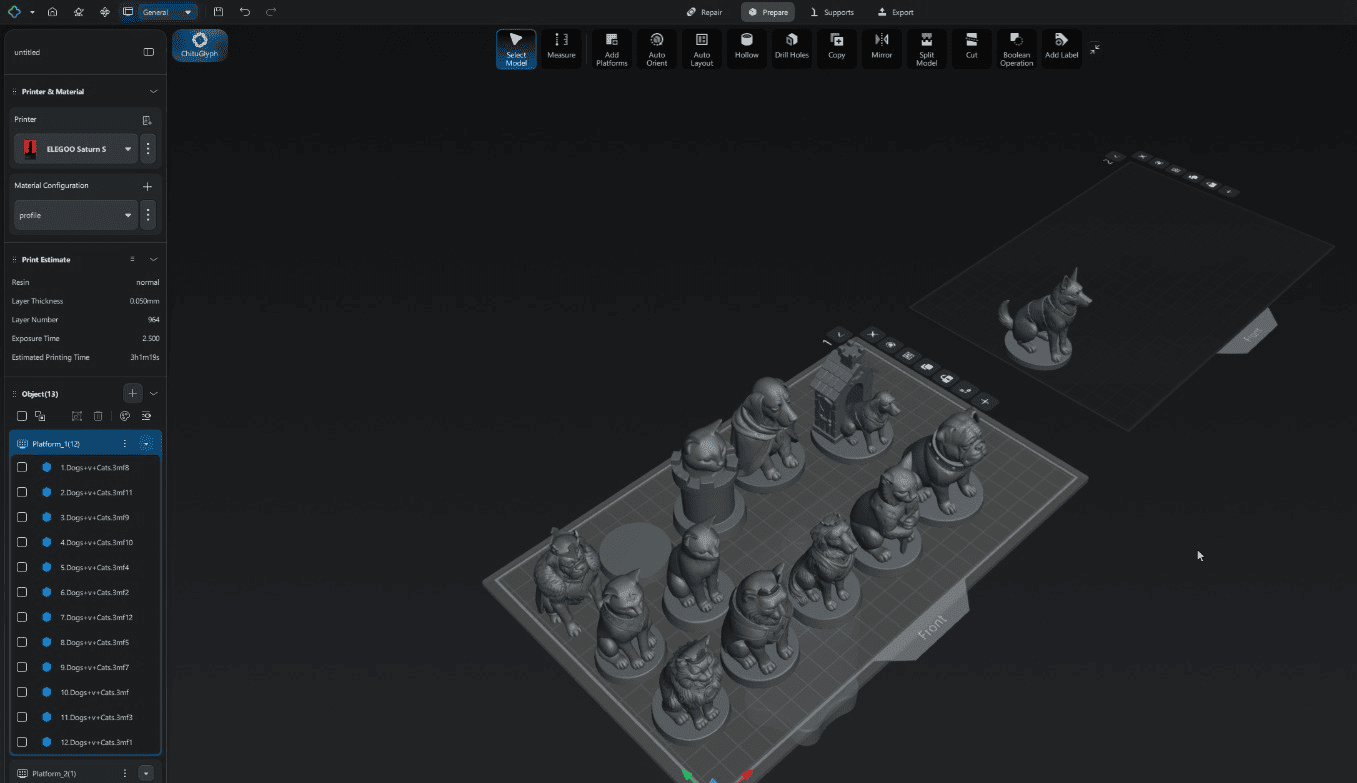
Dogs vs Cats Chess Set imported as a 3MF project inside ChituBox.
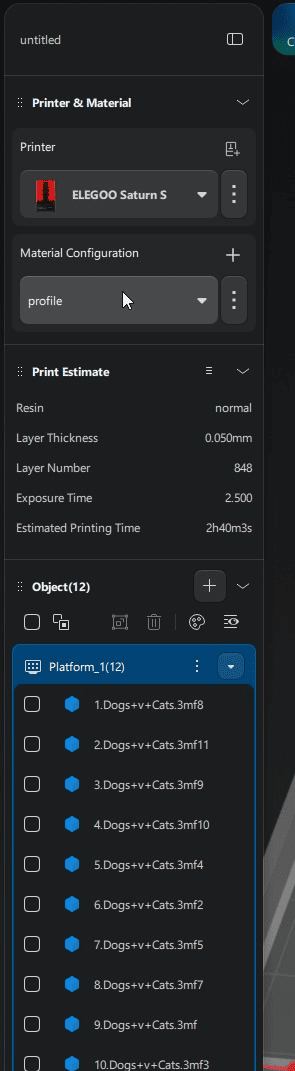
Resin printing configuration used for fabrication of the master models.
Printing Configuration
Once the models were imported, the printing parameters were reviewed and configured according to the resin and printer specifications. Since the printed pieces would become the positive masters for mold fabrication, surface quality was prioritized over printing speed.
The configuration used a layer height of 0.05 mm and an exposure time of 2.5 seconds per layer. These parameters provide a good balance between detail reproduction and printing efficiency, making them suitable for highly detailed figurines such as the chess pieces used in this project.
The software estimated a total printing time of approximately 2 hours and 40 minutes for the selected build. Once all settings were verified, the project was ready for slicing and transfer to the resin printer.
Manufacturing the Positive Molds by Resin 3D Printing
Once the chess pieces were selected and prepared inside the slicer software, the next step was to manufacture the positive masters that would later be used to create the silicone molds.
Since the objective of this assignment was to obtain cast parts with a smooth surface finish and high geometric detail, a resin-based additive manufacturing process was selected instead of conventional FDM printing. Resin printing offers significantly higher resolution, allowing the reproduction of small features, textures, and curved surfaces that would be difficult to achieve using filament-based technologies.
These printed parts would serve as the positive molds around which the silicone negative molds would later be produced.
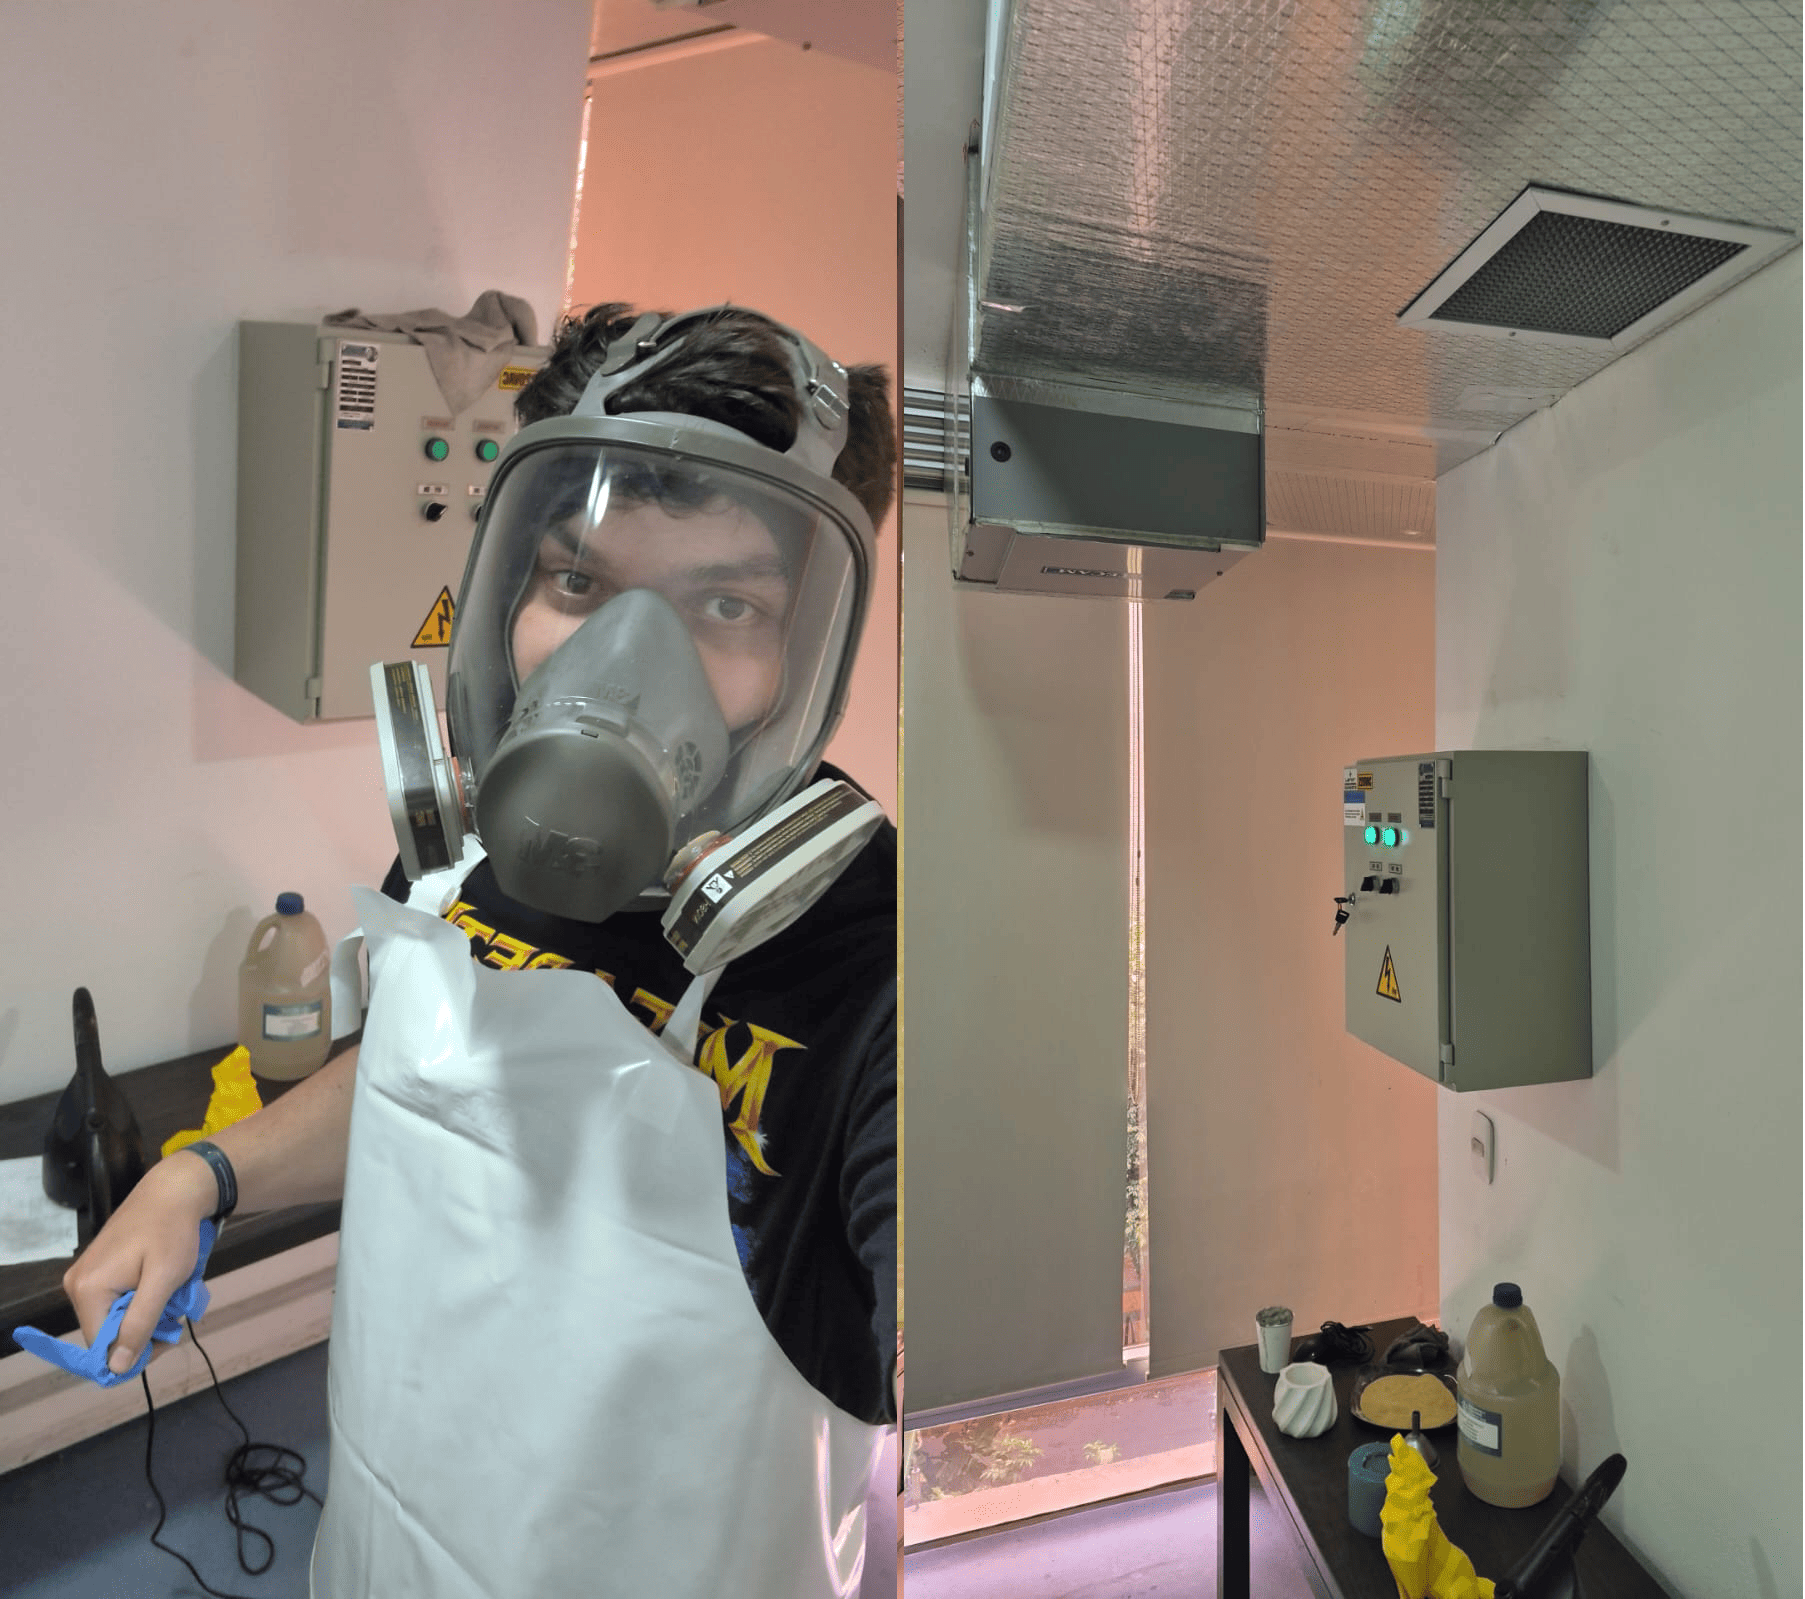
Personal protective equipment and air extraction system used during resin handling.
Safety Measures and Work Environment
Before handling any resin materials, the appropriate personal protective equipment (PPE) was used. This included a plastic protective apron, nitrile gloves, and a vapor filtration mask designed to reduce exposure to volatile organic compounds generated during resin manipulation.
Unlike filament printing, photopolymer resins remain in a liquid chemical state before curing and may cause skin irritation or respiratory discomfort if handled improperly. For this reason, direct skin contact with uncured resin should always be avoided.
Additionally, the resin printing room is equipped with an air extraction and recirculation system. The ventilation system was activated before starting the process to maintain a safe working environment and minimize the accumulation of resin vapors during printing and post-processing.
Resin Material and Printing Equipment
For the fabrication of the positive molds, a standard 405 nm UV-curing photopolymer resin was used. This type of resin is specifically formulated for LCD and masked stereolithography (MSLA) printers and solidifies when exposed to ultraviolet light at a wavelength of approximately 405 nanometers.
One of the main advantages of this material is its ability to reproduce extremely fine details while maintaining smooth surfaces and sharp edges. These characteristics make it particularly suitable for mold making, where the quality of the master directly affects the quality of the final cast.
The printing process was performed using an ELEGOO Saturn S, a large-format MSLA resin printer equipped with a monochrome LCD masking screen. This machine combines high dimensional accuracy with relatively fast curing times, making it ideal for producing detailed prototypes and master patterns.
The Saturn S offers a large build volume and high-resolution printing, allowing multiple chess pieces to be manufactured simultaneously while preserving the fine details required for the subsequent molding process.
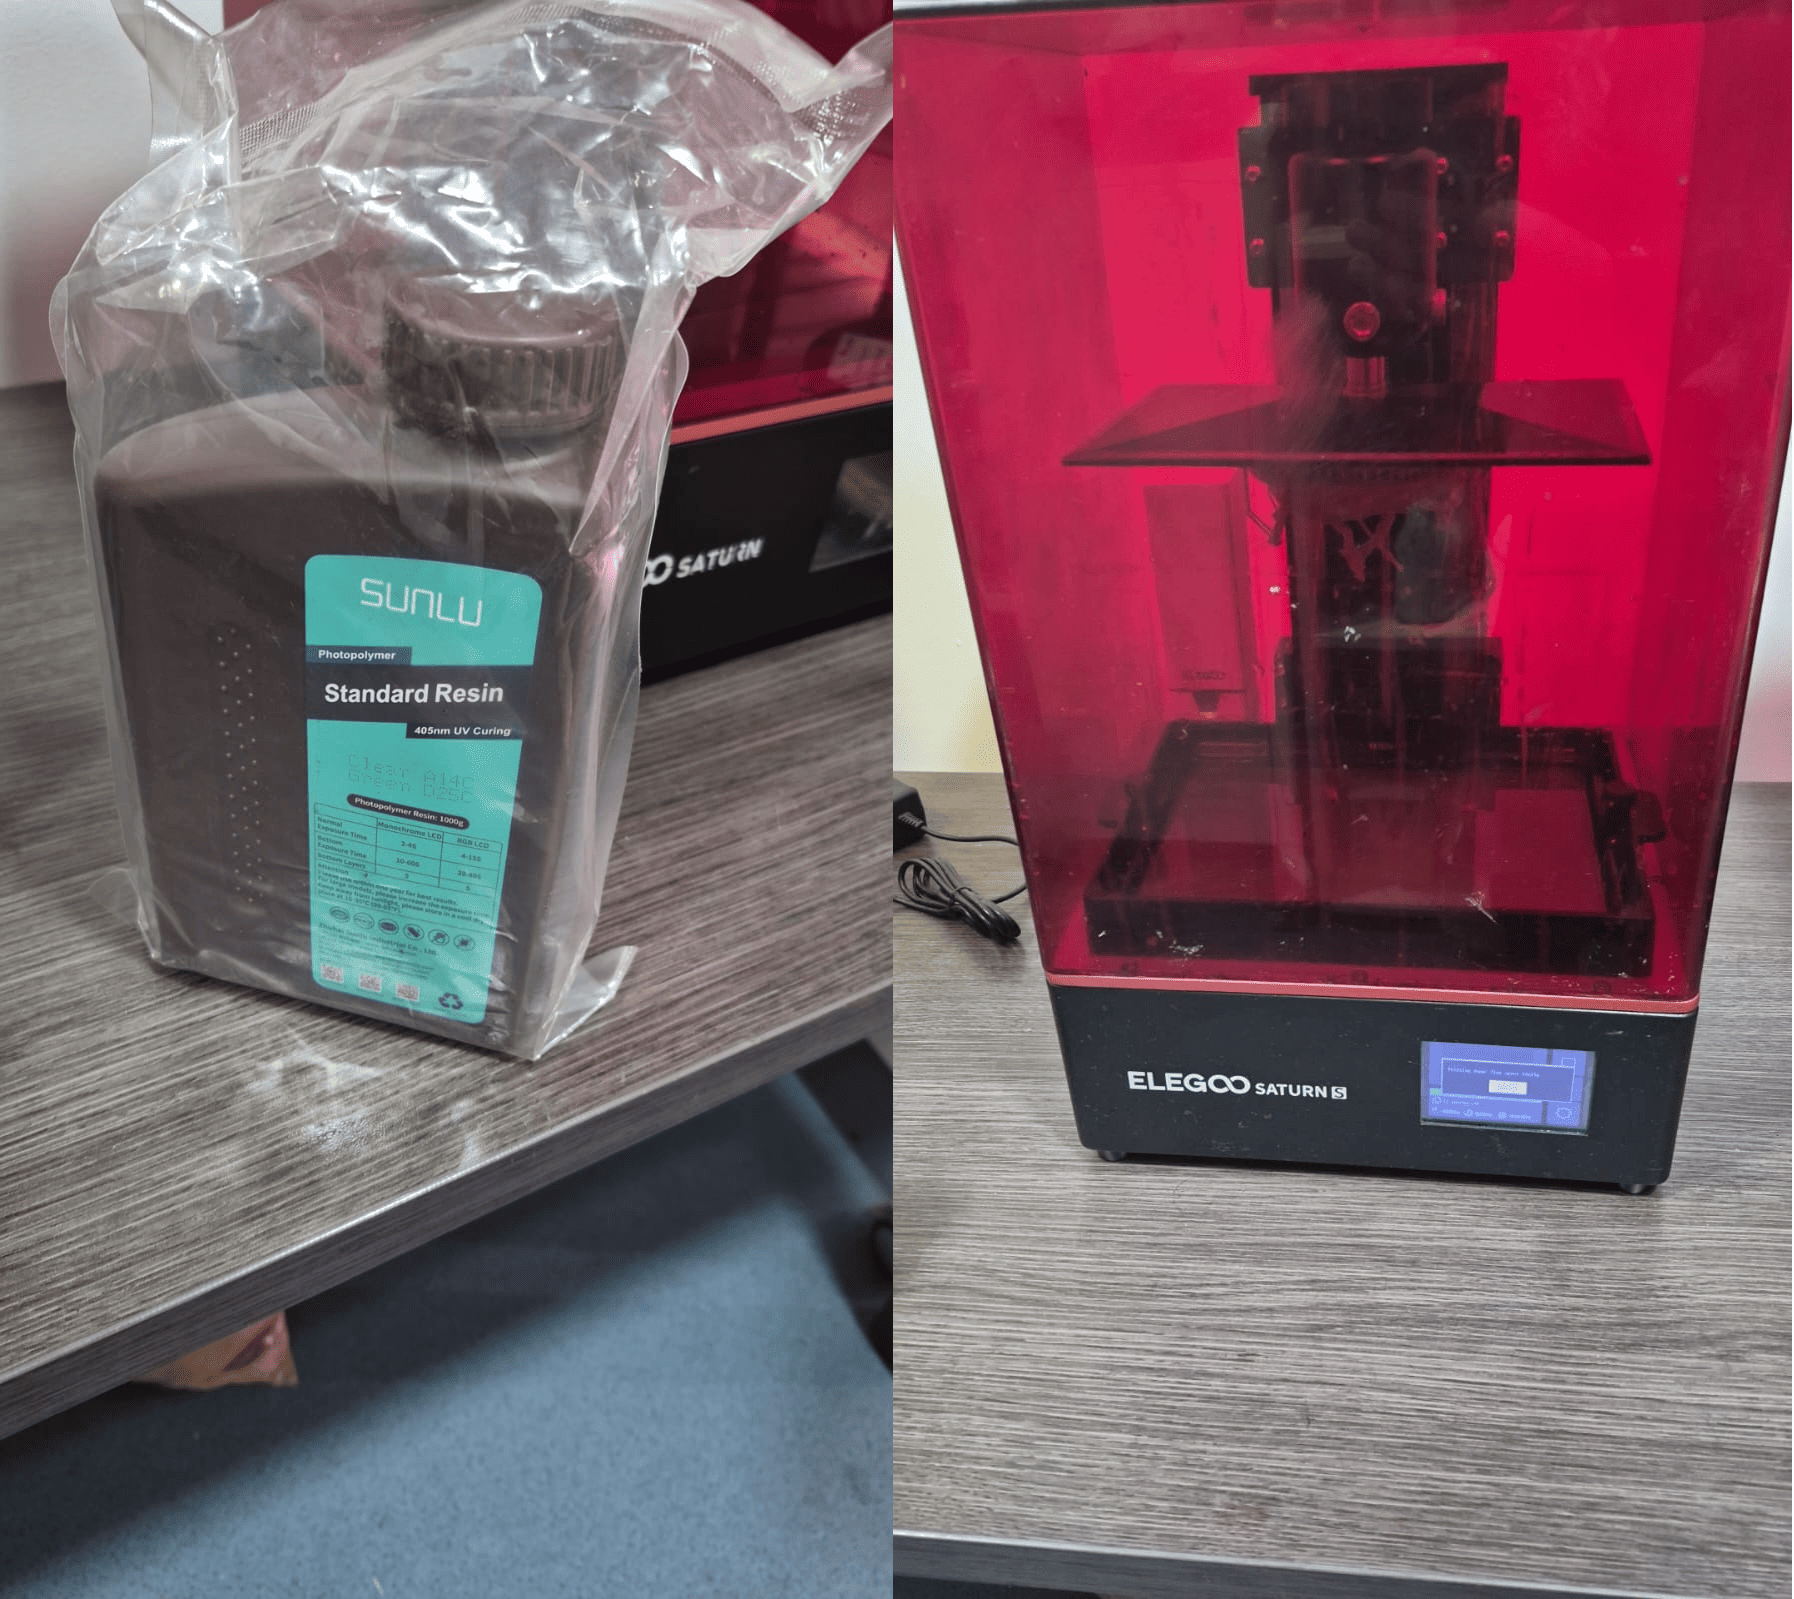
ELEGOO Saturn S printer and 405 nm UV-curing resin used for fabrication.
Printing Process
After verifying the slicing parameters, the print file was transferred to the printer and the fabrication process was started. During printing, the machine selectively exposed each layer of resin to ultraviolet light, gradually building the geometry layer by layer until all chess pieces were completed.
Because all pieces were printed in a single job, the process required several hours of continuous operation. The resulting parts exhibited excellent detail reproduction and a surface finish suitable for mold production without requiring extensive post-processing.
Resin printing process executed on the ELEGOO Saturn S.
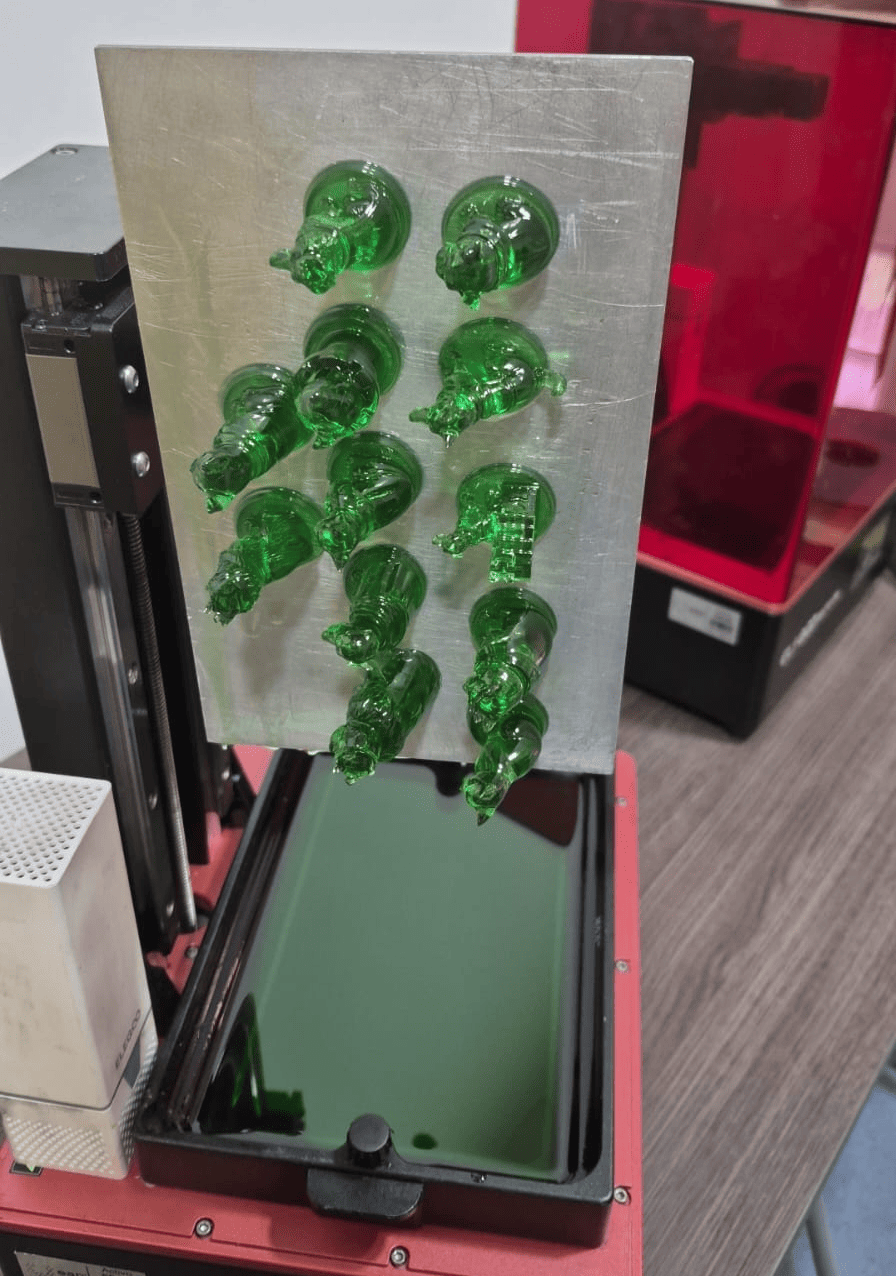
Chess pieces immediately after printing and before post-processing.
Print Removal and Initial Drying
Once the print was completed, the build platform was removed from the printer and allowed to drain for several minutes. This waiting period helps excess liquid resin return to the resin tank and reduces material waste.
Afterward, the printed parts were carefully separated from the aluminum build plate using a metal spatula. Special care was taken during this step to avoid damaging the small details present on the chess pieces.
At this stage the resin had only undergone partial curing during the printing process, making a final post-curing procedure necessary.
Final UV Curing
To complete the polymerization process, all printed parts were placed inside a Wash & Cure Plus curing station.
The parts were exposed to controlled ultraviolet light for approximately 15 minutes. This additional curing step ensures that the material reaches its final mechanical properties, increasing dimensional stability and improving the durability of the printed masters.
Proper curing is especially important for mold-making applications because uncured resin can interfere with silicone curing reactions and negatively affect mold quality.
Final curing process using the Wash & Cure Plus station.
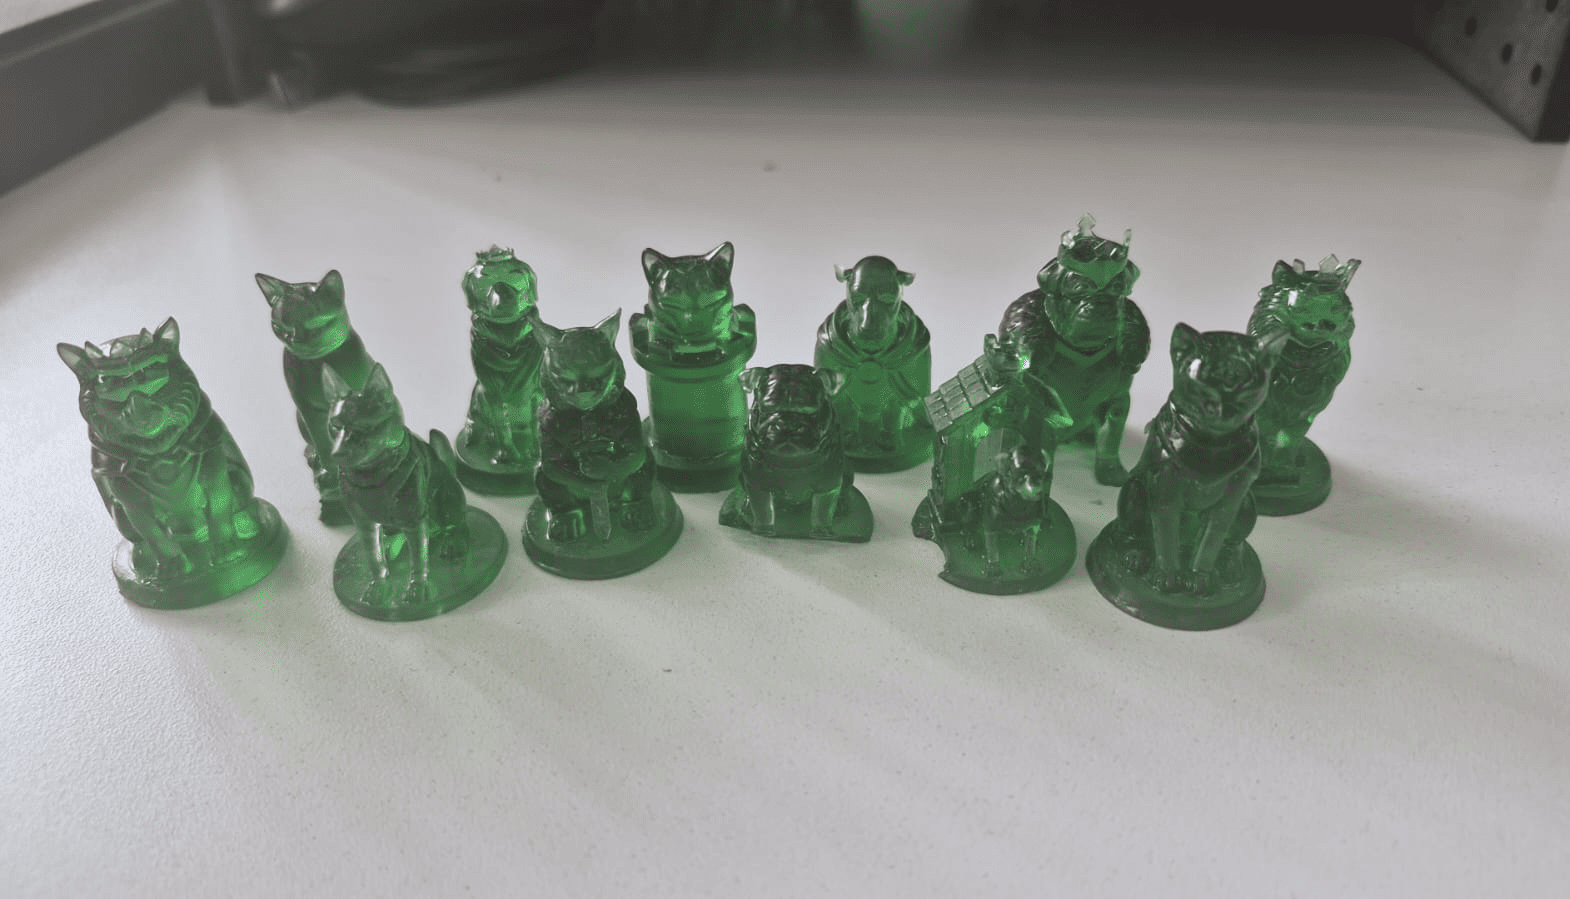
Fully cured chess pieces ready to be used as positive masters for silicone mold fabrication.
After the curing process was completed, the chess pieces exhibited the required dimensional accuracy, surface quality, and mechanical stability to function as positive masters. These parts would be used in the next stage of the project, where a silicone negative mold would be created to enable the casting of multiple replicas in plaster.
Design and Fabrication of the Silicone Mold Container
After producing the positive masters, the next step was to design a reusable container capable of holding the liquid silicone during the mold-making process. Since each chess piece presents different geometries and fine details, it was necessary to create a mold enclosure that could securely contain the silicone while maintaining the printed master centered and stable throughout the curing process.
Instead of using disposable containers, I decided to design a dedicated mold housing that could be fabricated quickly and reused multiple times. This approach reduced material waste and provided better dimensional control over the final silicone molds.
Parametric Design in SolidWorks
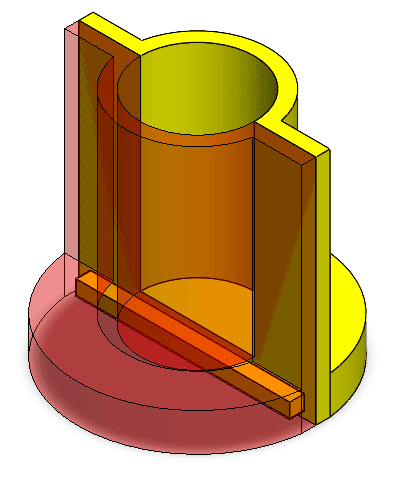
The mold container was designed in SolidWorks as a two-part assembly composed of complementary half-cylinders. When assembled together, both components create a cylindrical cavity surrounding the positive model, allowing the silicone to completely encapsulate the chess piece.
A cylindrical geometry was selected because it minimizes the amount of silicone required while maintaining a uniform wall thickness around the printed master. This helps reduce material consumption and improves mold stability.
Additional lateral tabs were incorporated into the design to facilitate assembly and provide a simple method for securing both halves during the silicone casting process.
Mold container models prepared for fabrication and arranged in the slicer software.
Assembly process of the two-part mold container.
Alignment and Sealing Features
One of the main design challenges was preventing silicone leakage through the joint between both halves of the container. To solve this problem, an alignment and locking system was incorporated directly into the geometry.
The yellow component includes a protruding key feature, while the red component contains a matching keyway. When assembled together, both elements mechanically interlock, improving alignment and reducing the possibility of material escaping through the lower section of the mold.
This solution also simplifies assembly because the two halves naturally self-align before being secured with the lateral tabs.
By integrating these features directly into the CAD model, the mold container becomes easier to use and more reliable during silicone pouring.
Fabrication of the Mold Containers
Once the design was completed, the components were exported from SolidWorks in STL format and prepared for fabrication using FDM 3D printing.
The mold containers were manufactured using a Creality printer previously documented during Week 05. Since the objective of these parts was simply to contain the silicone, high dimensional accuracy was not as critical as it was for the resin-printed chess pieces, making FDM printing a practical and cost-effective solution.
To optimize fabrication time, only three mold containers were printed. These could then be reused sequentially for the different chess pieces instead of producing a dedicated container for every model.
Each print bed required approximately 45 minutes to complete, allowing the complete set of mold containers to be produced in a relatively short time.
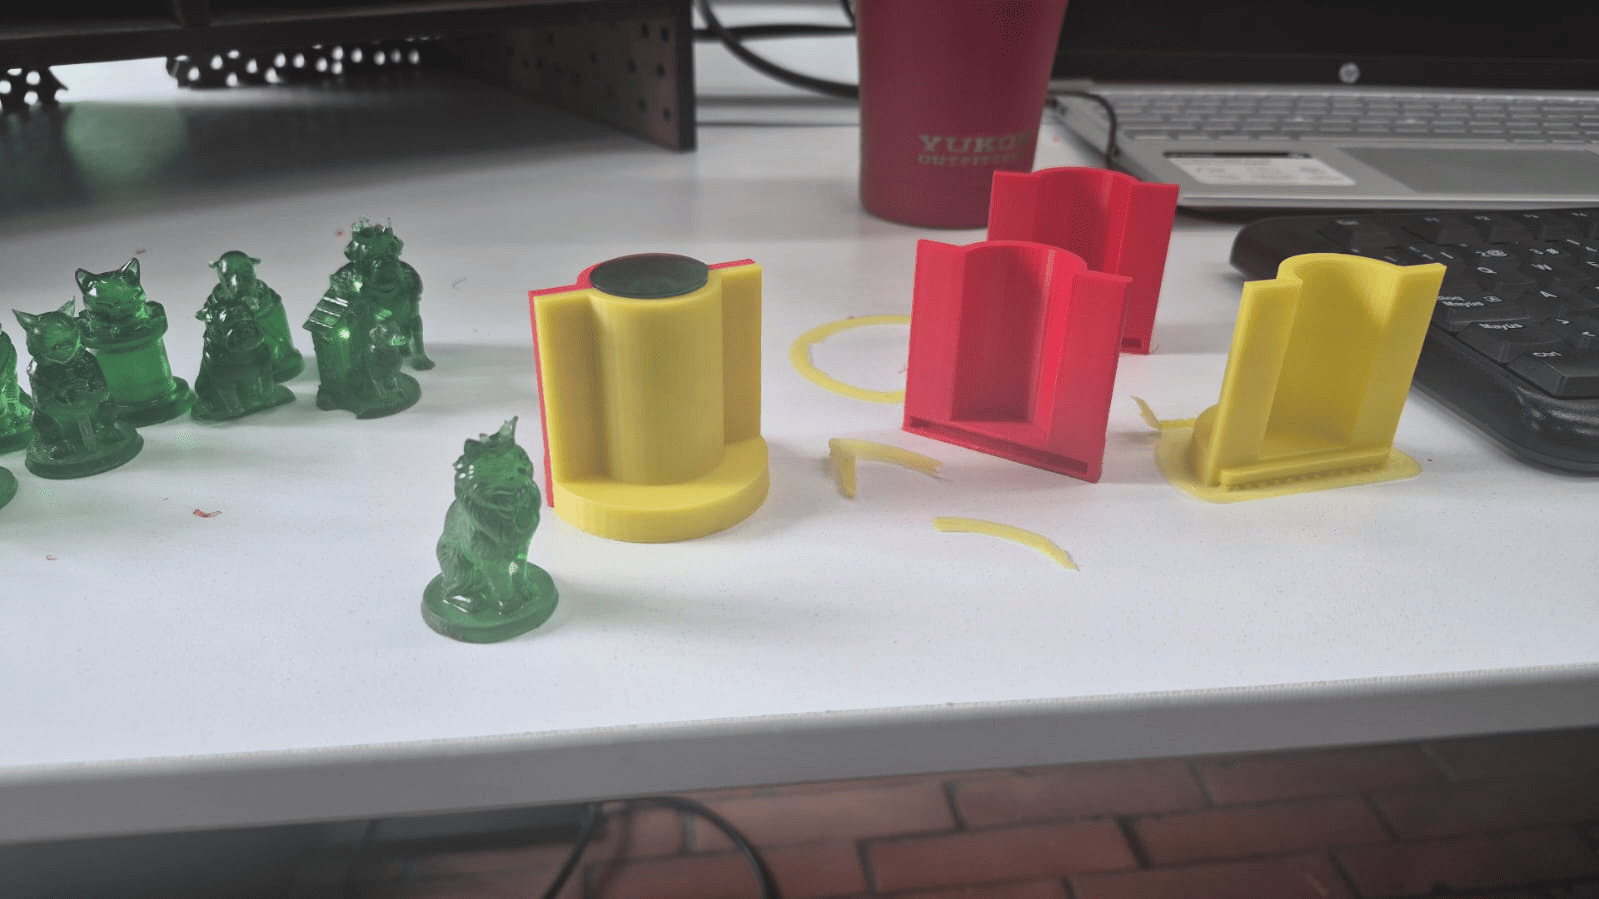
Finished mold containers ready to receive the positive masters and silicone.
With the positive masters completed and the reusable mold containers fabricated, the system was ready for the next stage of the assignment: producing the silicone negative molds that would later be used for plaster casting.
Fabrication of the Silicone Negative Molds
With the positive masters and reusable mold containers completed, the next step was to produce the flexible negative molds that would later be used for casting the final chess pieces in plaster.
The quality of the silicone mold directly determines the quality of the final casted parts. For this reason, selecting an appropriate molding material was critical to accurately reproduce the fine details present in the resin-printed chess pieces.
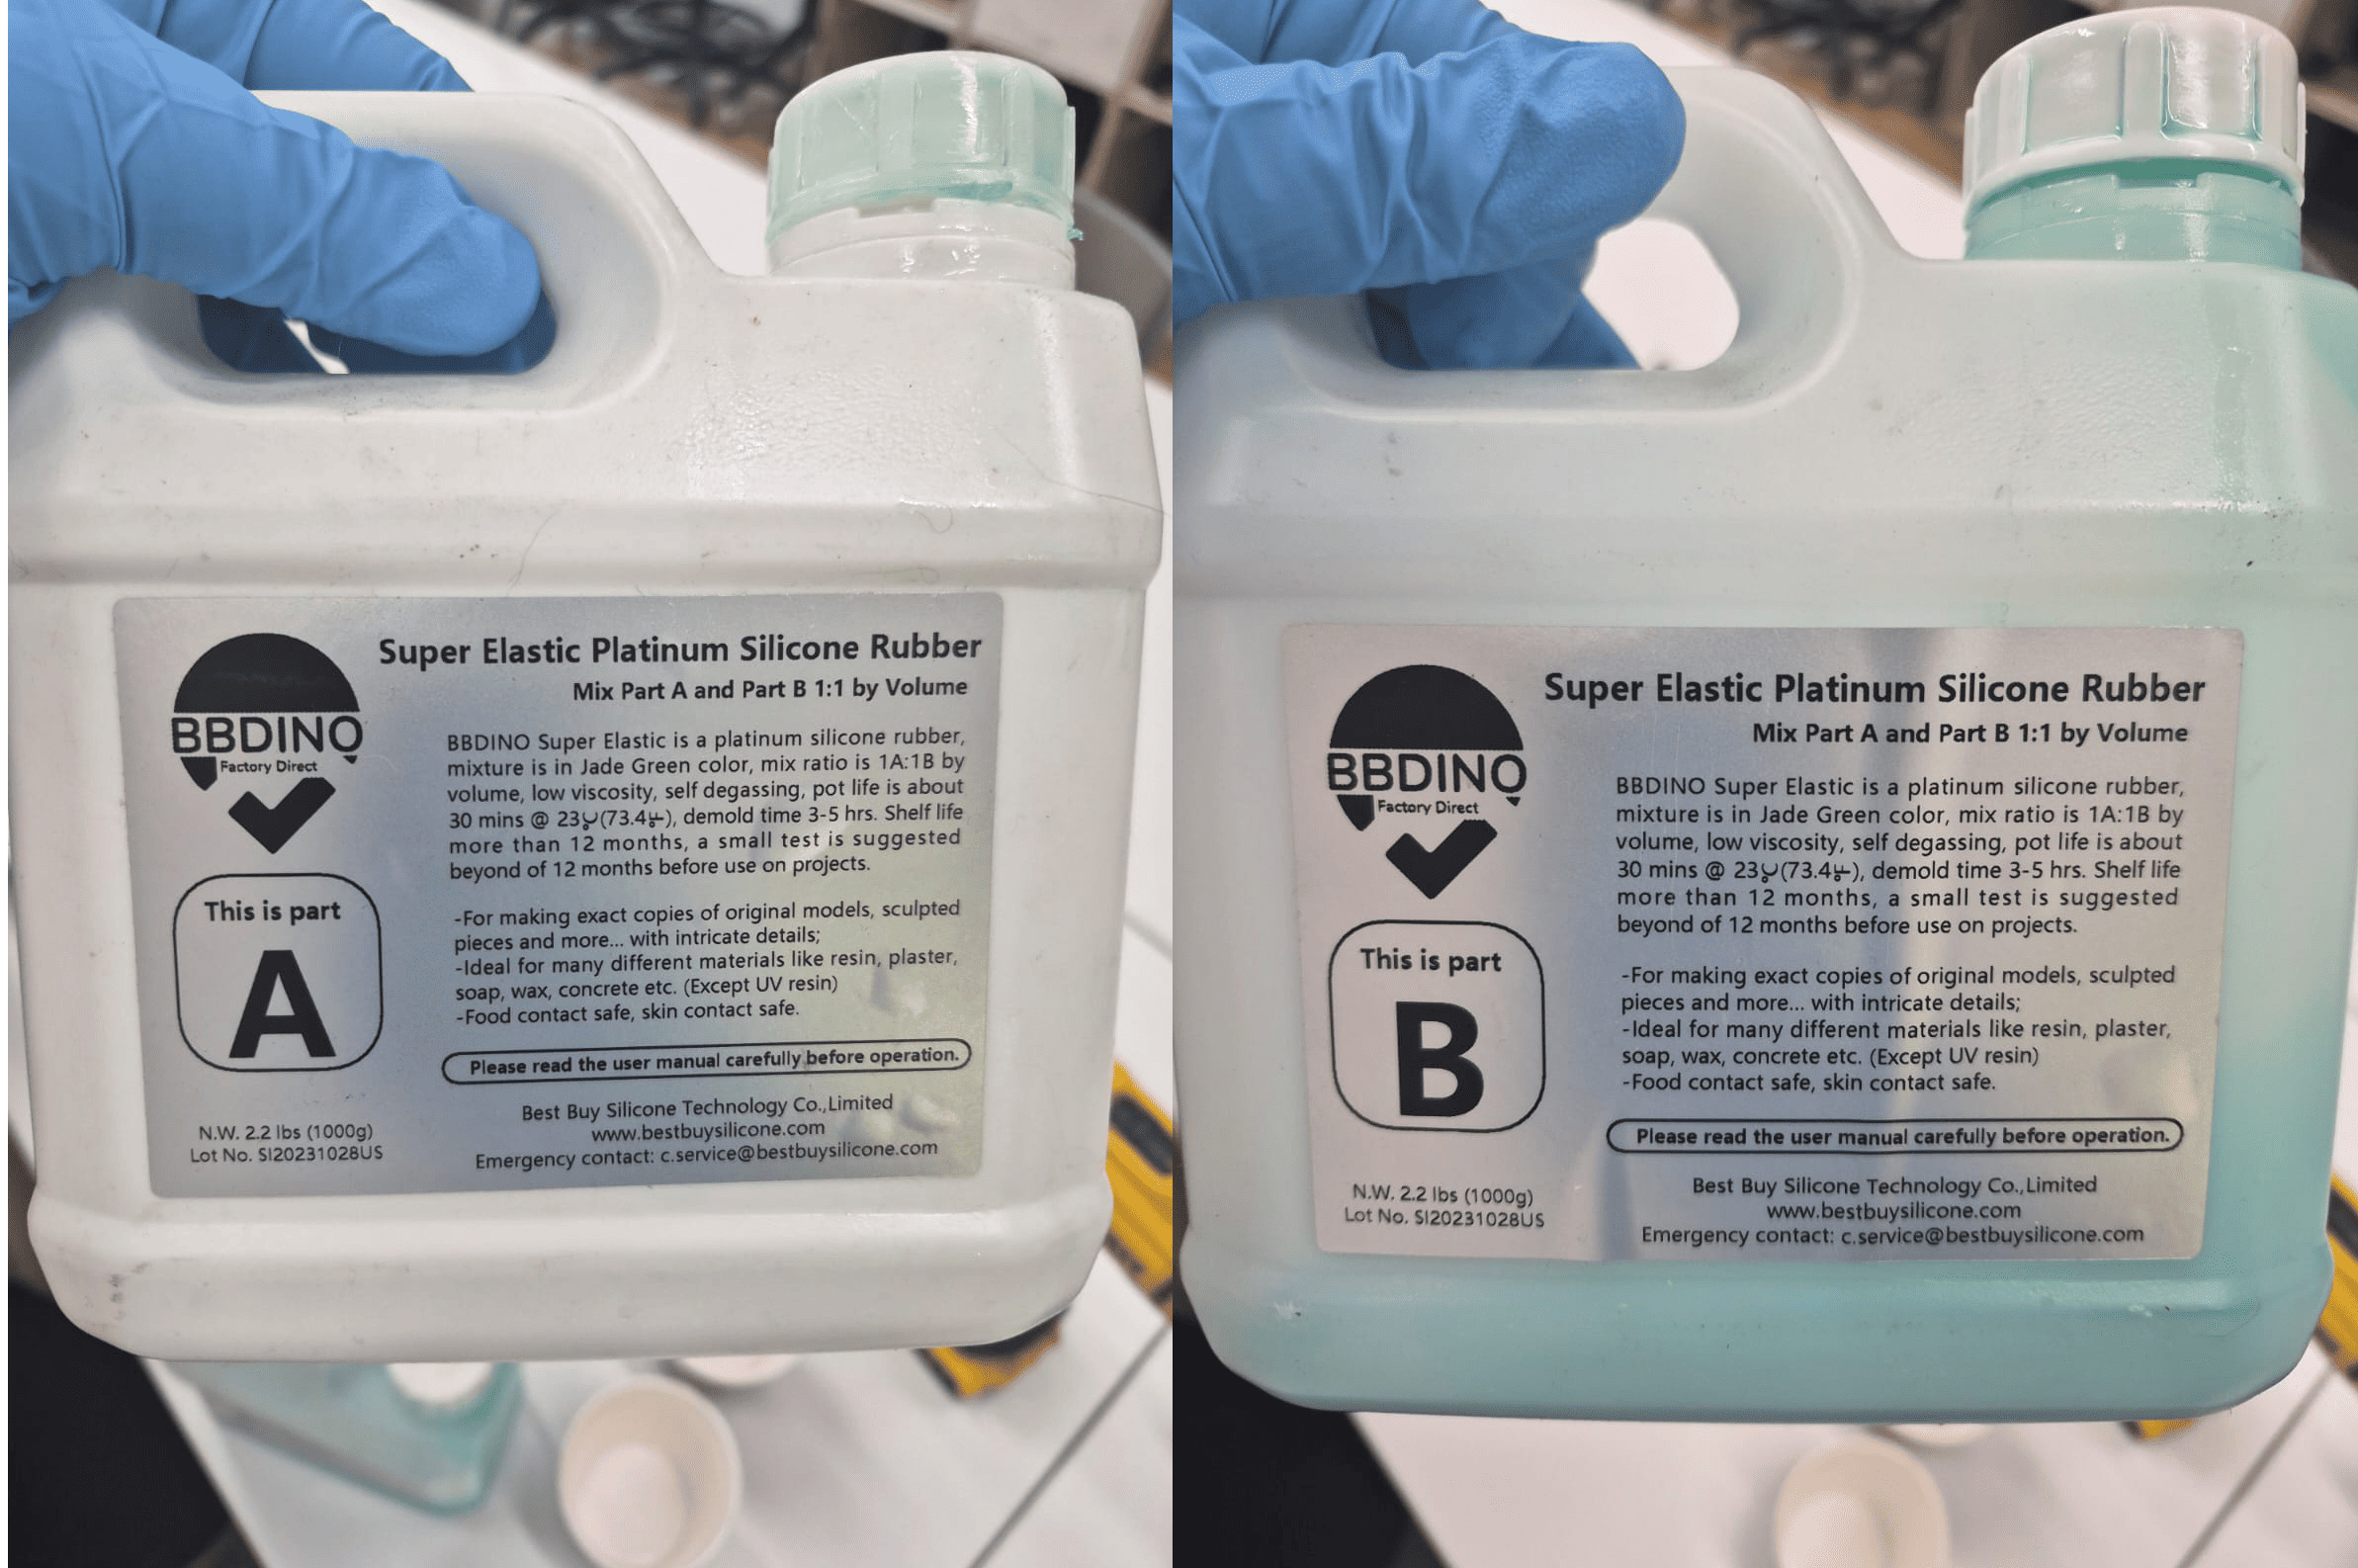
Part A and Part B components of the BBDINO Super Elastic Platinum Silicone Rubber.
Platinum-Cure Silicone Rubber
To manufacture the molds, a BBDINO Super Elastic Platinum Silicone Rubber was used. This material is supplied as a two-part system consisting of Part A and Part B, which begin a chemical curing reaction when mixed together in the proper proportions.
Platinum-cure silicones are widely used in mold-making applications because they offer excellent dimensional stability, high tear resistance, low shrinkage, and the ability to reproduce very small surface details. These characteristics make them particularly suitable for replicating complex geometries such as the decorative features found on the chess pieces.
Another important advantage of this material is its flexibility after curing. The resulting mold can deform during demolding and then return to its original shape without permanent damage, allowing multiple castings to be produced from a single mold.
Measuring the Components
The silicone was prepared using disposable mixing containers. Following the manufacturer's specifications, equal amounts of Part A and Part B were measured before mixing.
For each mold, approximately 37 grams of Part A and 37 grams of Part B were used. Since the mold containers were relatively small, with an average height close to one inch, only a limited quantity of silicone was required to fully encapsulate each positive master.
The components were measured by weight rather than volume. Measuring by mass provides greater accuracy because the density of each component may differ slightly. Using a digital scale ensures the correct mixing ratio and helps achieve a complete and uniform curing reaction.
In mold-making applications, even small deviations from the recommended ratio can affect curing time, elasticity, and dimensional stability of the finished mold.
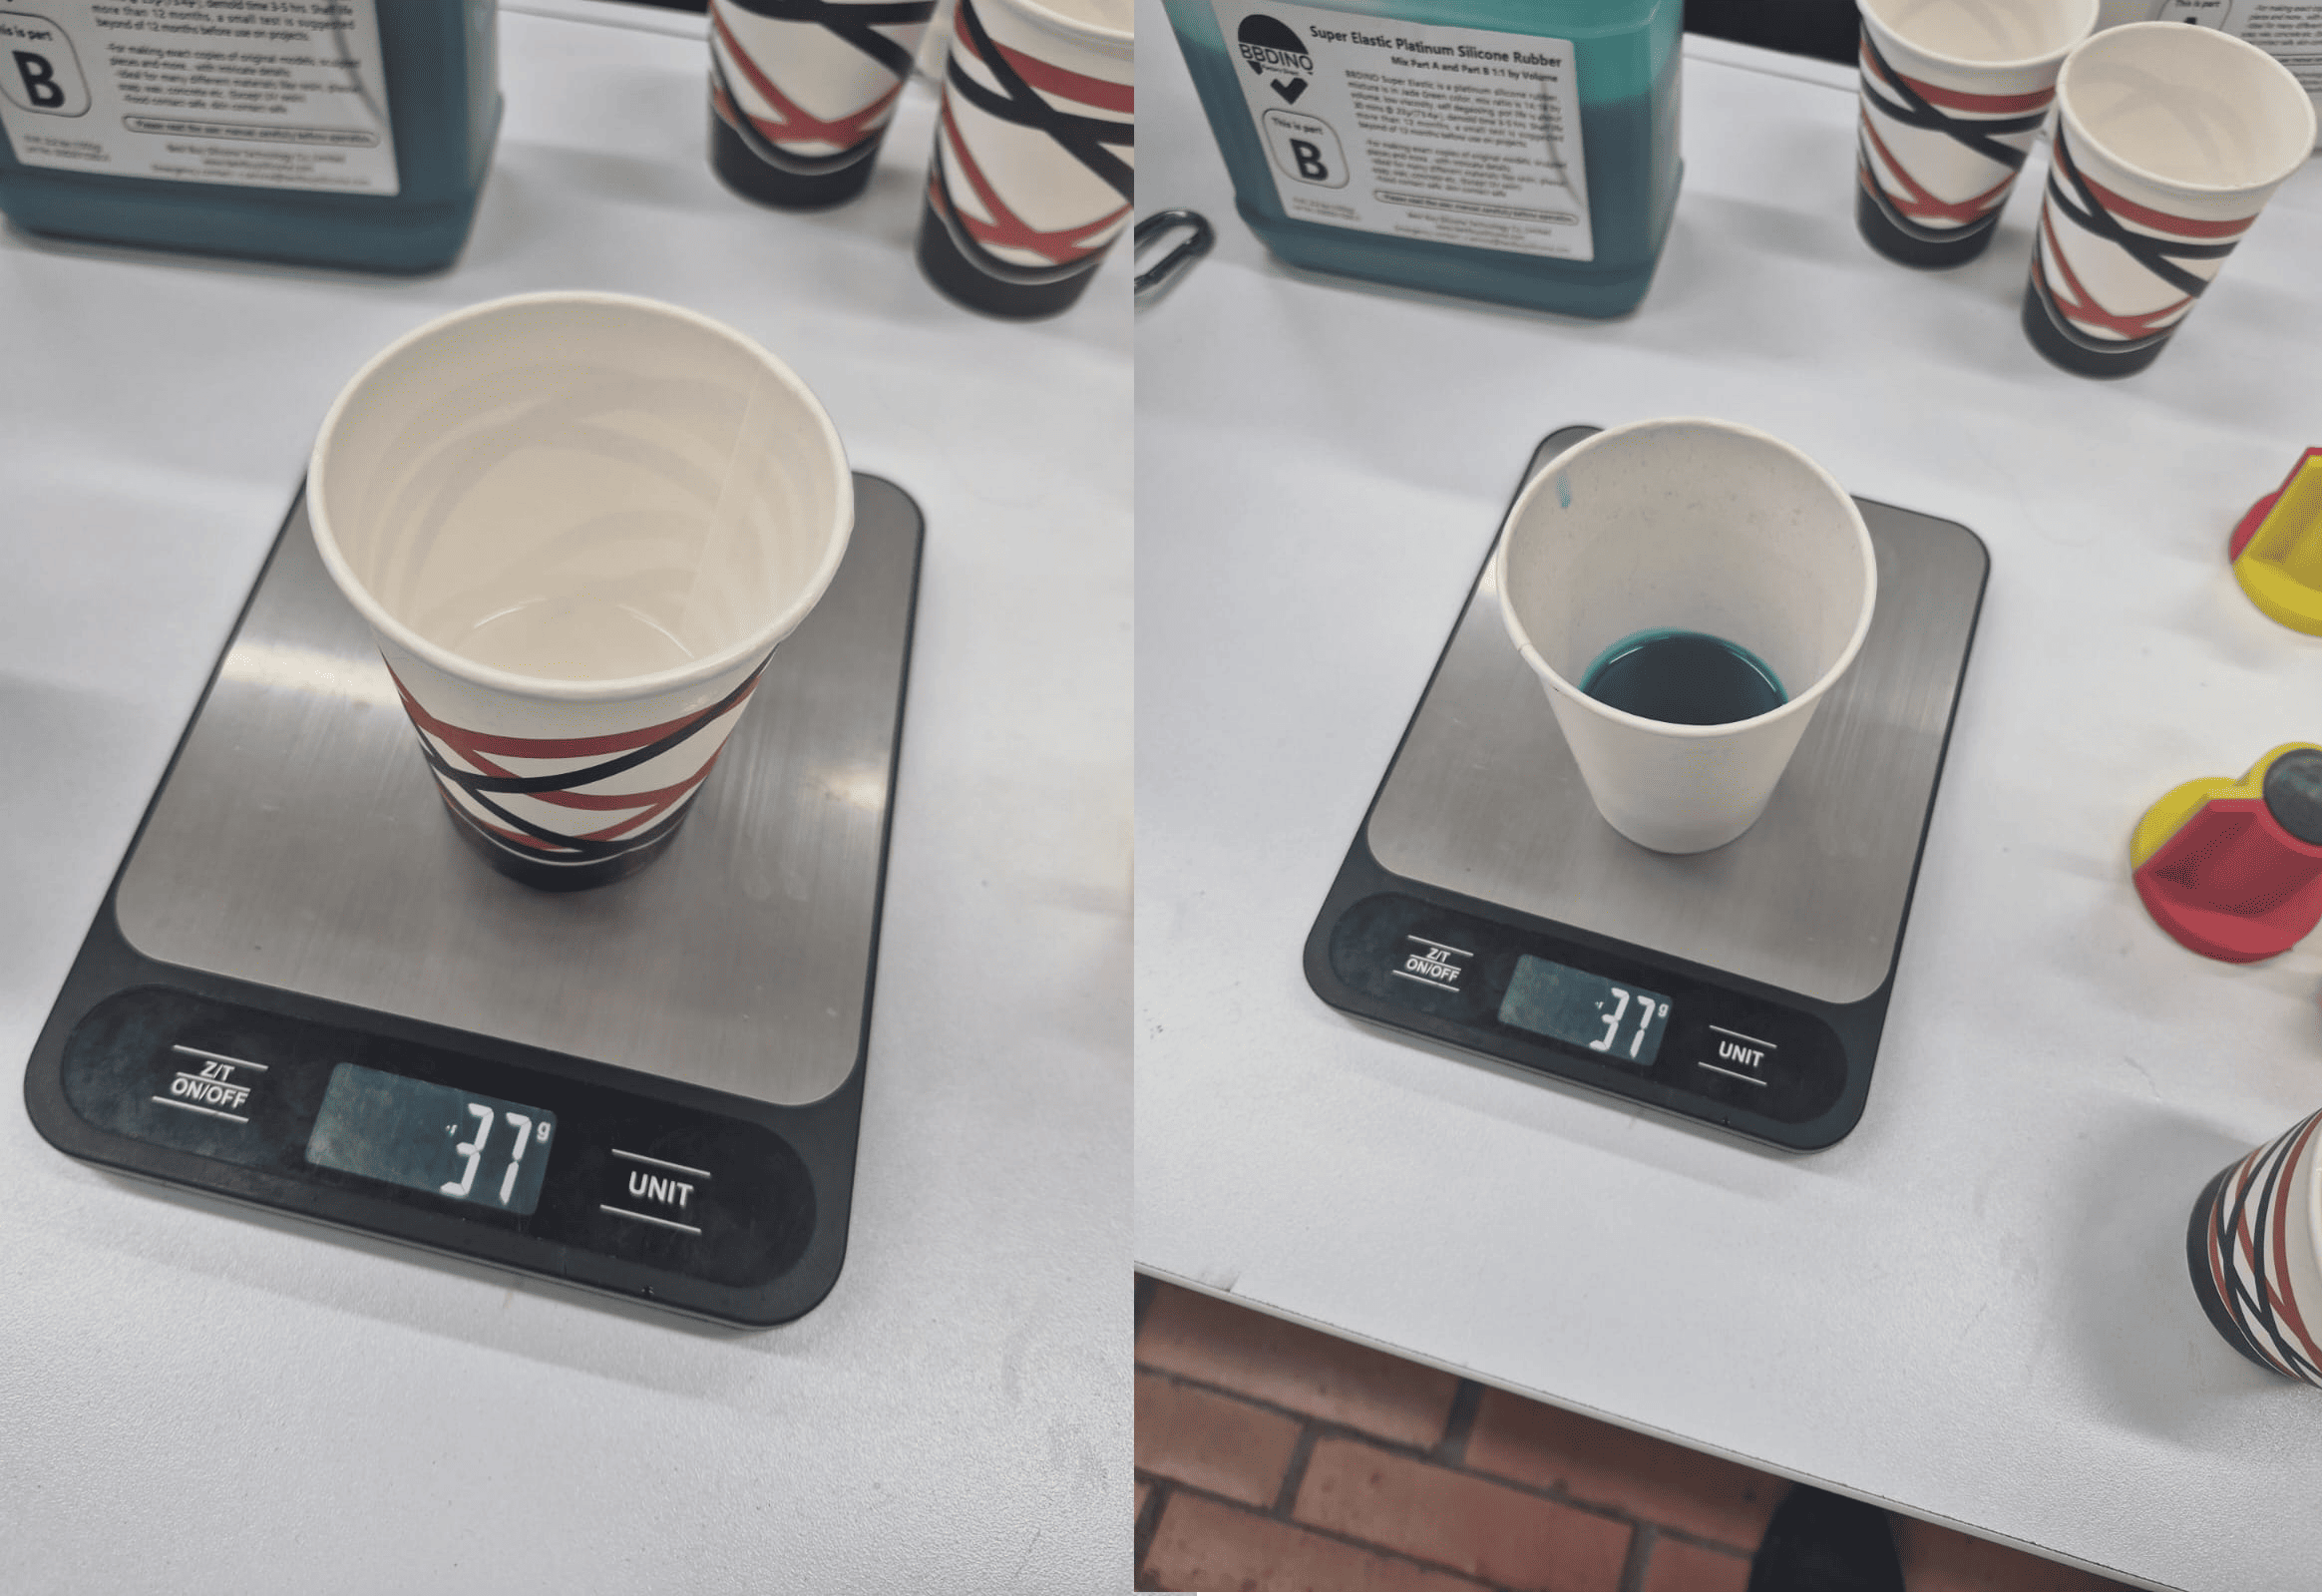
Equal masses of Part A and Part B measured before mixing.
Mixing process used to obtain a homogeneous silicone solution.
Mixing the Silicone
After measuring both components, they were combined in a single container and mixed until a completely homogeneous solution was obtained.
Instead of mixing manually, a drill equipped with a mixing attachment was used. The drill was operated at low speed and low torque to simplify the process while minimizing the introduction of air bubbles into the mixture.
Achieving a uniform mixture is essential because any unmixed material may remain uncured, creating weak regions within the mold and negatively affecting the quality of future castings.
The mixing process continued until the silicone presented a consistent appearance with no visible streaks between the two components.
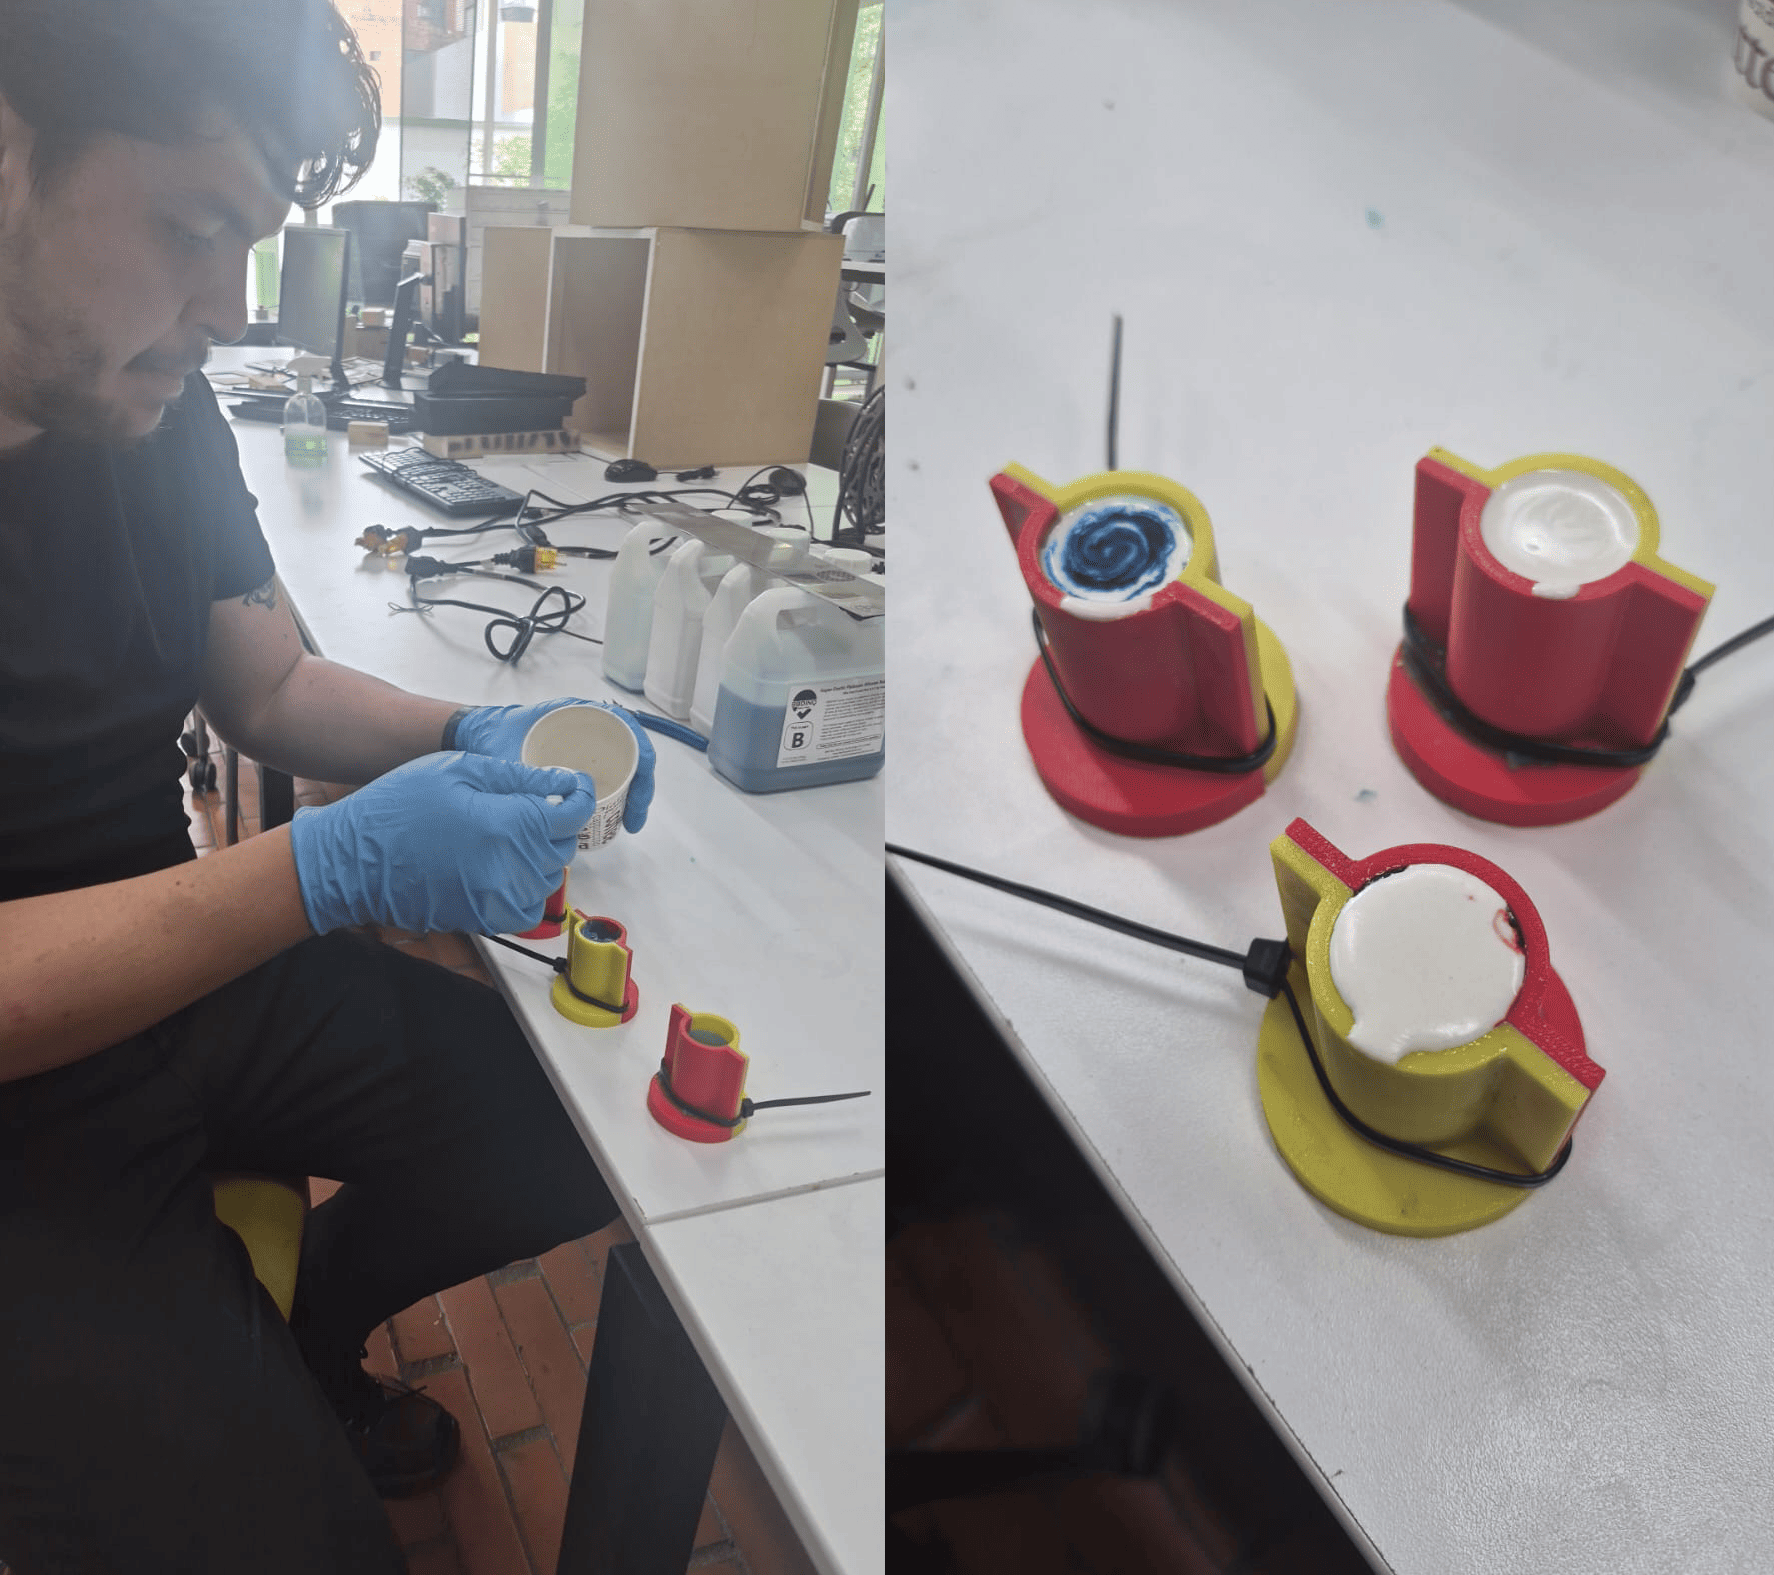
Mold Assembly and Silicone Pouring
Before pouring the silicone, the two halves of each mold container were assembled around the positive master and secured using plastic cable ties.
Additional masking tape was applied around the external joints to reinforce the assembly and further reduce the possibility of leakage during the curing process.
Once secured, the liquid silicone was slowly poured into the mold container until approximately three-quarters of its volume had been filled.
The resin-printed chess piece was then carefully inserted into the silicone, allowing the material to flow around all surfaces and capture the geometric details required for the final mold.
Slow pouring helps reduce trapped air and improves the reproduction of fine details present on the surface of the positive master.
Mold assembly and silicone pouring process prior to curing.
Finished silicone molds after curing and demolding.
Demolding and Inspection
The molds were left undisturbed for approximately 24 hours to ensure complete curing of the platinum silicone. During this period the material gradually transitioned from a liquid state to a flexible elastomer capable of retaining the shape of the original master.
After curing, the mold containers were disassembled and the positive masters were carefully removed. The resulting silicone molds accurately reproduced the geometry and surface details of the original chess pieces, confirming that the molding process had been successful.
The completed molds were flexible, dimensionally stable, and free from major defects, making them suitable for the final casting stage where multiple replicas would be produced in plaster.
Casting the Final Chess Pieces
After successfully producing the silicone molds, the final stage of the assignment consisted of casting the chess pieces using an acrylic gypsum compound. The objective of this step was to validate the complete molding and casting workflow, transforming a digital model into a reproducible physical object through mold-based manufacturing.
This final stage demonstrates the primary advantage of mold-making processes: once a mold has been fabricated, multiple identical copies can be produced without repeating the original manufacturing process.
ECOCRYL casting system composed of liquid acrylic resin (Part A) and reactive mineral powder (Part B).
ECOCRYL Acrylic Gypsum Compound
For the casting process, an ECOCRYL acrylic gypsum system was used. This material is supplied as a two-component solution consisting of a liquid acrylic resin (Part A) and a reactive mineral powder (Part B).
Once mixed, both components initiate a chemical reaction that gradually transforms the liquid mixture into a rigid material capable of reproducing fine geometric details. Materials of this type are commonly used for decorative objects, artistic reproductions, architectural models, and prototype fabrication.
One of the main advantages of ECOCRYL is its ability to capture surface details while maintaining good dimensional stability and relatively short curing times.
Preparing the Casting Mixture
Following the manufacturer's recommendations, the casting material was prepared using a ratio of four parts reactive powder to one part acrylic resin.
Maintaining this proportion is important because it directly influences the viscosity of the mixture, curing behavior, dimensional stability, and final mechanical strength of the cast pieces.
The components were measured individually before mixing to ensure consistency between all castings produced during the process.
Four-to-one mixing ratio between reactive powder and acrylic resin.
Mechanical mixing process used to obtain a homogeneous ECOCRYL solution.
Homogenization of the Mixture
After measuring the components, the mixture was homogenized using the same low-speed mixing technique previously used for the silicone mold fabrication.
A drill equipped with a mixing attachment was operated at low speed and low torque to simplify the process while minimizing air entrapment.
To improve the consistency of the mixture, a small amount of isopropyl alcohol was added. The alcohol helped break down remaining powder agglomerations and reduced the formation of lumps, producing a smoother and more homogeneous casting material.
This additional step improved the fluidity of the solution and facilitated the reproduction of small details inside the molds.
Filling the Silicone Molds
Before pouring the casting material, the silicone molds were reinserted into the 3D-printed counter-molds. Since silicone is highly flexible, the rigid external structure provided additional support and helped preserve the intended geometry during casting.
Once assembled, the ECOCRYL mixture was carefully poured into each mold cavity. The material was allowed to flow naturally into the detailed regions of the mold, minimizing the possibility of trapped air pockets.
Reusing the rigid counter-molds proved particularly useful during this stage, as they prevented unwanted deformation of the silicone molds while the casting material was still in its liquid state.
ECOCRYL mixture poured into the silicone molds supported by the rigid counter-molds.
Curing and Demolding
After filling the molds, the pieces were left undisturbed for approximately six hours to ensure complete curing of the casting compound.
During this period, the material progressively hardened and developed the mechanical properties necessary for safe removal from the mold.
Once curing was completed, the silicone molds were carefully opened and the cast pieces were extracted for inspection. The flexibility of the platinum-cure silicone greatly simplified the demolding process and reduced the risk of damaging delicate features on the chess figures.
Final Cast Pieces
After curing and demolding, the final ECOCRYL replicas successfully reproduced the geometry and surface details of the original resin-printed masters. Each mold generated a clean cast with good dimensional stability and accurate reproduction of the characteristic features present in the chess pieces.

Cast Piece 01 produced using the ECOCRYL casting compound and platinum-cure silicone mold.
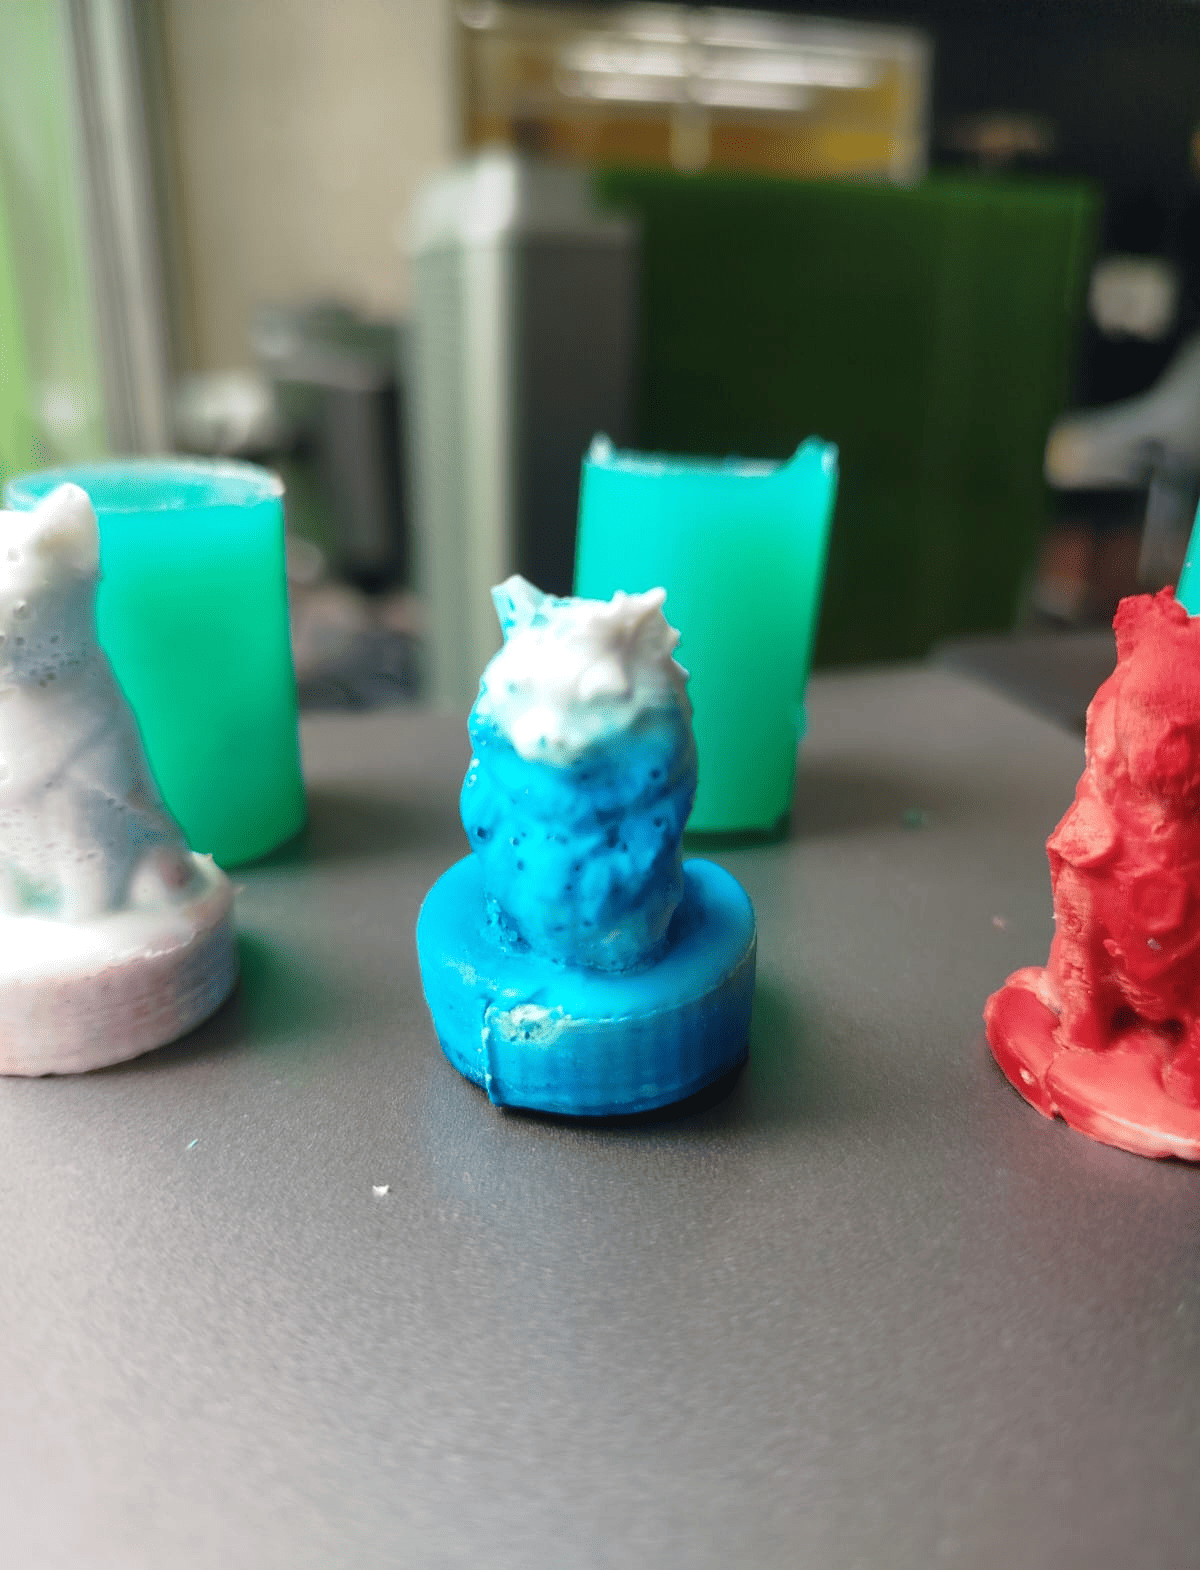
Cast Piece 02 showing accurate reproduction of the original master geometry.
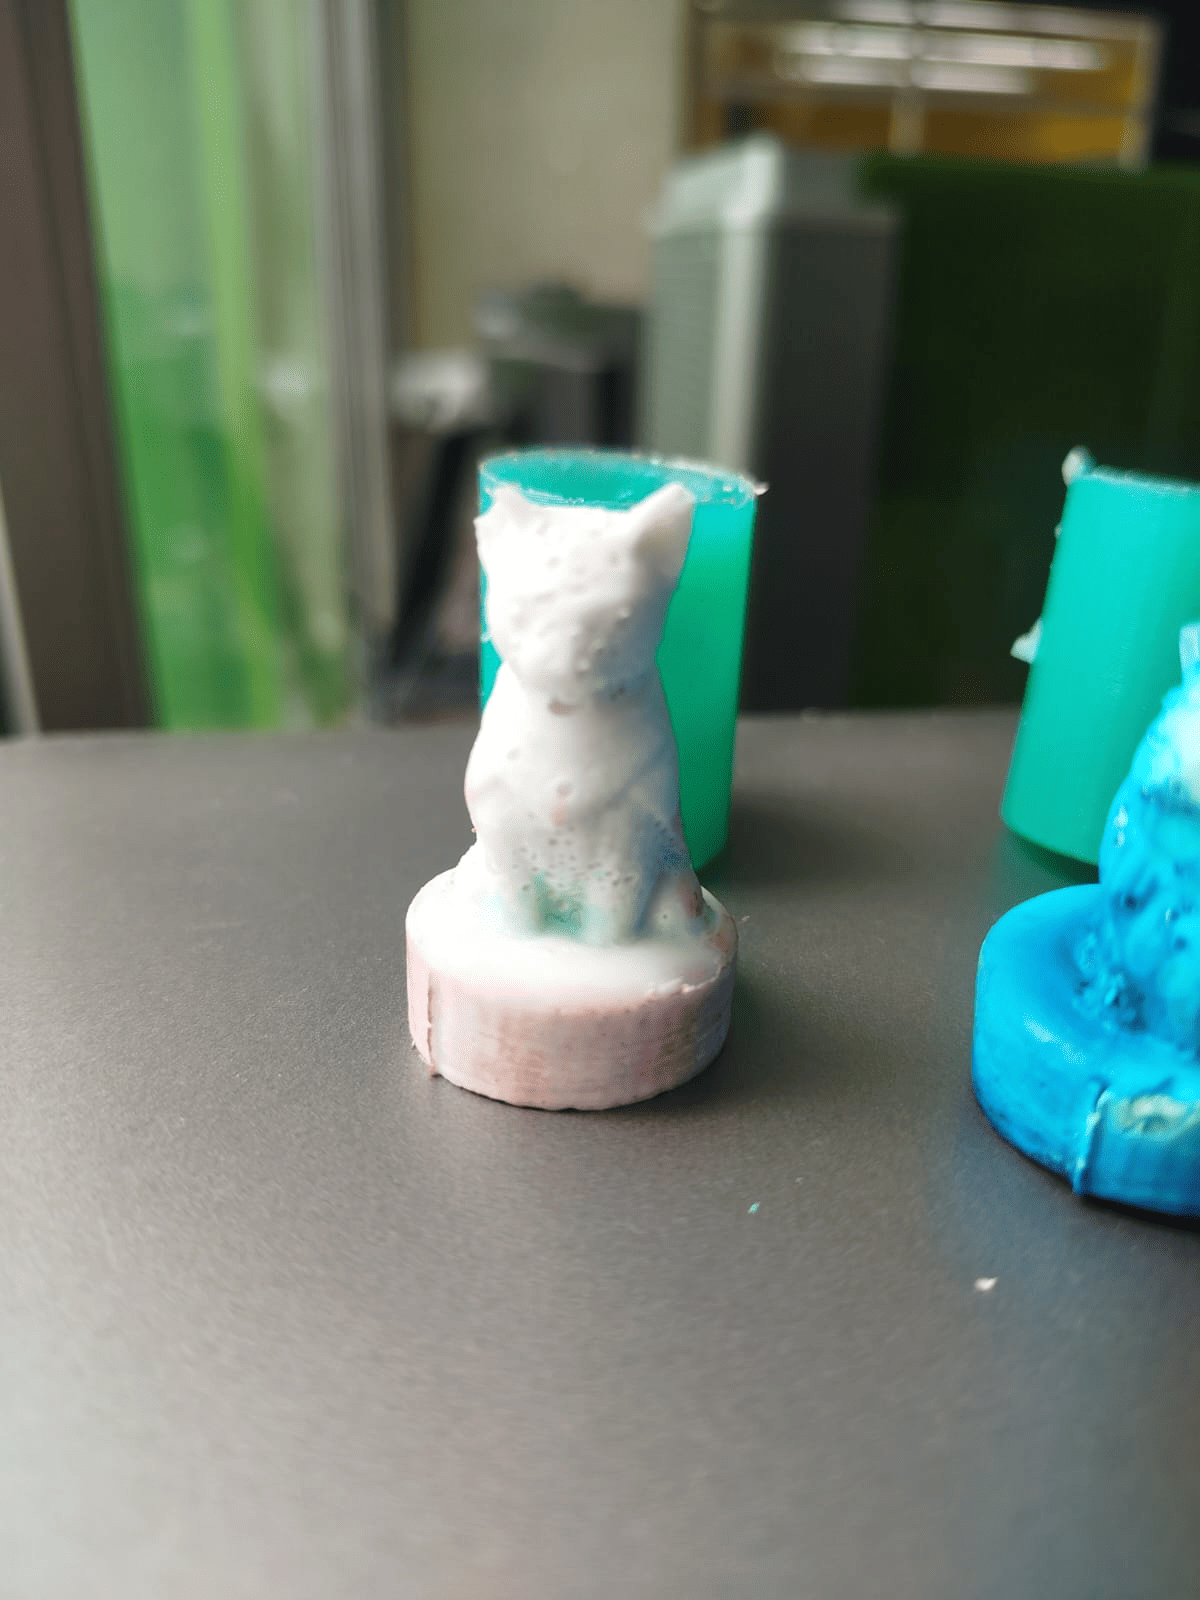
Cast Piece 03 demonstrating successful detail transfer through the molding process.
Final collection of ECOCRYL chess pieces produced through the complete molding and casting workflow.
Results and Evaluation
The final pieces successfully reproduced the geometry and surface details of the original resin-printed masters. Features such as facial details, ears, crowns, collars, and other decorative elements were accurately transferred through the complete molding and casting workflow.
The flexibility of the platinum-cure silicone molds enabled easy demolding, while the ECOCRYL casting compound provided sufficient rigidity and dimensional stability to preserve the shape of the original designs.
This assignment demonstrated a complete manufacturing chain consisting of:
- Digital model acquisition
- Resin 3D printing of positive masters
- Design and fabrication of reusable counter-molds
- Silicone mold production
- Casting using an acrylic gypsum compound
The resulting chess pieces validated the effectiveness of the selected materials and fabrication strategy, successfully meeting the objectives of the Moulding and Casting assignment. The workflow demonstrated how a single digitally fabricated master can be transformed into multiple physical replicas through mold-based manufacturing techniques.
Final Reflection
This week's assignment provided a comprehensive introduction to molding and casting workflows, demonstrating how a single digitally fabricated master can be transformed into multiple identical replicas through the use of reusable molds. Unlike additive manufacturing, where every object must be printed individually, mold-based fabrication allows the reproduction of complex geometries with significantly reduced production time once the mold has been created.
For this project, I decided to reproduce several pieces from the Dogs vs Cats Chess Set. Although the models were originally designed for 3D printing, I considered them an excellent candidate for this assignment because of their intricate details and organic shapes. Features such as ears, facial expressions, collars, crowns, and decorative elements provided a good opportunity to evaluate the capability of silicone molds to capture fine details and transfer them accurately to the final cast pieces.
One of the most valuable lessons learned during this assignment was the importance of designing the complete manufacturing process rather than focusing only on the final object. The success of the casting stage depended heavily on the quality of the positive masters, the design of the counter-molds, the proper selection of molding materials, and the correct preparation of the casting compound. Each stage directly influenced the next, making the workflow highly interconnected.
The use of resin 3D printing proved especially beneficial for producing the positive masters. Compared to FDM printing, the resin process generated much smoother surfaces and finer details, reducing visible layer lines and improving the overall quality of the silicone molds. Since any imperfection present in the master is replicated throughout the entire molding process, achieving a high-quality positive model was essential for obtaining satisfactory final results.
Another important aspect of the assignment was learning how different materials behave during the molding and casting processes. The platinum-cure silicone offered excellent flexibility and detail reproduction, making the demolding process straightforward while minimizing the risk of damaging the cast parts. Similarly, the ECOCRYL acrylic gypsum compound provided good dimensional stability and surface quality, allowing the final pieces to accurately reproduce the geometry of the original models.
During fabrication, several practical considerations became evident. Proper mixing ratios, homogeneous material preparation, air bubble management, mold alignment, and curing times all played a significant role in the final outcome. Small variations in these parameters could easily affect the quality of the mold or generate defects in the cast pieces. This reinforced the importance of following material specifications and maintaining a controlled fabrication workflow.
If this project were to be repeated, several improvements could be implemented. A vacuum degassing system could be used to further reduce air bubbles in the silicone, dedicated pouring channels could be integrated into the mold design, and a larger batch of molds could be produced to increase production efficiency. Additionally, experimenting with pigmented casting materials or alternative resins could provide new aesthetic possibilities for the final chess pieces.
Overall, this assignment successfully demonstrated the complete workflow of mold making and casting, from digital model selection and master production to mold fabrication and final part replication. The project highlighted how digital fabrication can be combined with traditional manufacturing techniques to create repeatable production processes, transforming a single digital design into multiple physical objects with high fidelity and consistent quality.
Individual Reflection
This group assignment provided a valuable opportunity to better understand the importance of material selection in molding and casting processes. Although the fabrication workflow itself may appear relatively simple, the final quality, safety, and reliability of the results depend heavily on understanding the physical and chemical properties of each material involved.
Reviewing the Safety Data Sheets (SDS) was particularly useful because it highlighted aspects that are often overlooked during fabrication activities, such as personal protective equipment requirements, ventilation conditions, storage recommendations, and potential health hazards associated with uncured materials. Before this assignment I tended to focus mainly on the fabrication process itself, but this exercise reinforced the importance of understanding materials before using them.
Another important takeaway was observing how different casting materials behave during mixing, curing, and demolding. Even when following similar procedures, each material presents unique characteristics regarding viscosity, curing time, flexibility, surface finish, and dimensional stability. Understanding these differences helps in selecting the most appropriate material depending on the intended application.
The theoretical comparison between 3D printed molds and CNC machined molds also provided a broader perspective on mold fabrication strategies. While additive manufacturing offers accessibility, speed, and geometric freedom, subtractive manufacturing can provide superior dimensional accuracy and surface quality. Evaluating the advantages and limitations of both approaches emphasized that there is no universally superior method; instead, the best solution depends on the design requirements, available equipment, production volume, and desired finish quality.
Overall, this group assignment complemented the individual molding and casting project by providing a deeper understanding of material properties, fabrication safety, and manufacturing decision-making. These considerations are essential not only for successful mold production but also for designing more reliable and reproducible digital fabrication workflows in future projects.
Downloads & Resources
This section provides access to the reference model and downloadable resources developed during the Molding and Casting assignment. The repository includes the complete mold design, printable files, and supporting documentation required to reproduce the fabrication process.
🔗 References & Source Models
The original chess set used in this assignment was obtained from MakerWorld and served as the master model for the resin printing, silicone molding, and casting workflow documented in this project.
📁 Downloadable Files
To improve the loading performance of this documentation website, all project files have been moved to a shared Google Drive folder.
The repository contains the complete SolidWorks counter-mold design, printable STL files, manufacturing resources, and supporting documentation developed during the molding and casting workflow.
Additional mold revisions, printable files, and future improvements may be added as the project evolves.