Photogrammetry with Polycam
Polycam is a comprehensive 3D scanning application for your smartphone. It is capable of utilizing the LiDAR sensor in Pro iOS devices or using photogrammetry on all devices, including through the web. In addition to scanning, the platform can also generate 360° photos, view 3D models in AR, and even generate 3D scans of large structures utilizing imagery from drones.
Scanning Procedure
Photogrammetry, in the context of 3D scanning, is a method used to create a 3D model by capturing and analyzing many overlapping photographs of objects or scenes. One advantage of photogrammetry is that, unlike other more precise methods, it doesn't require specialized equipment, making it accessible to more people. However, it does require taking many photographs, and processing them can be computationally taxing, so the process may take some time. Fortunately, Polycam handles the processing in the cloud, so all your smartphone needs to do is capture decent images.
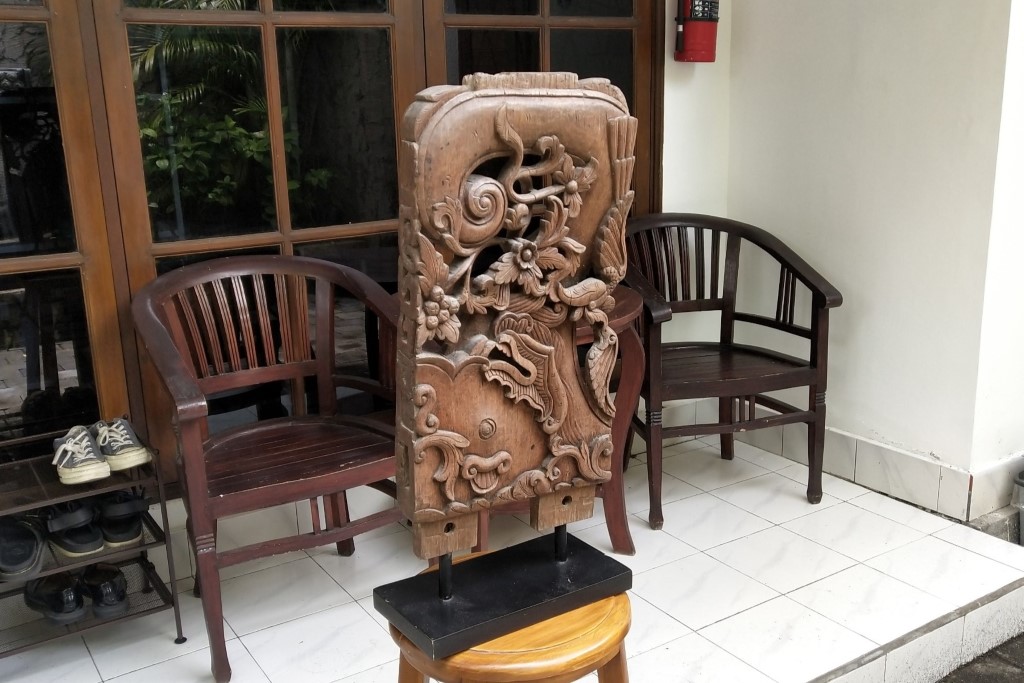
That being said, there are limitations in terms of the objects that you can scan with it. Photogrammetry can't scan objects that are reflective, transparent, thin, or have lots of blank surfaces. It works best with objects that have a lot of surface details and textures. Additionally, it's important to note that to achieve the best results, you should have even and diffused lighting.
You could exclusively use Polycam with their web platform, but their smartphone application makes the process of capturing images much faster and easier. It is available for both Android and iOS devices. Once downloaded, open the app, and you can start scanning by following these steps:
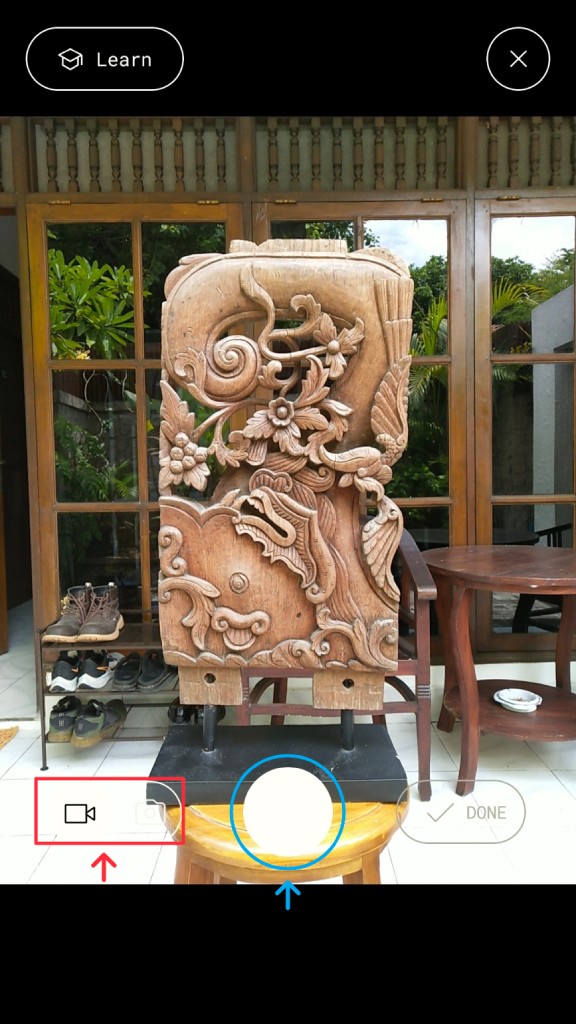
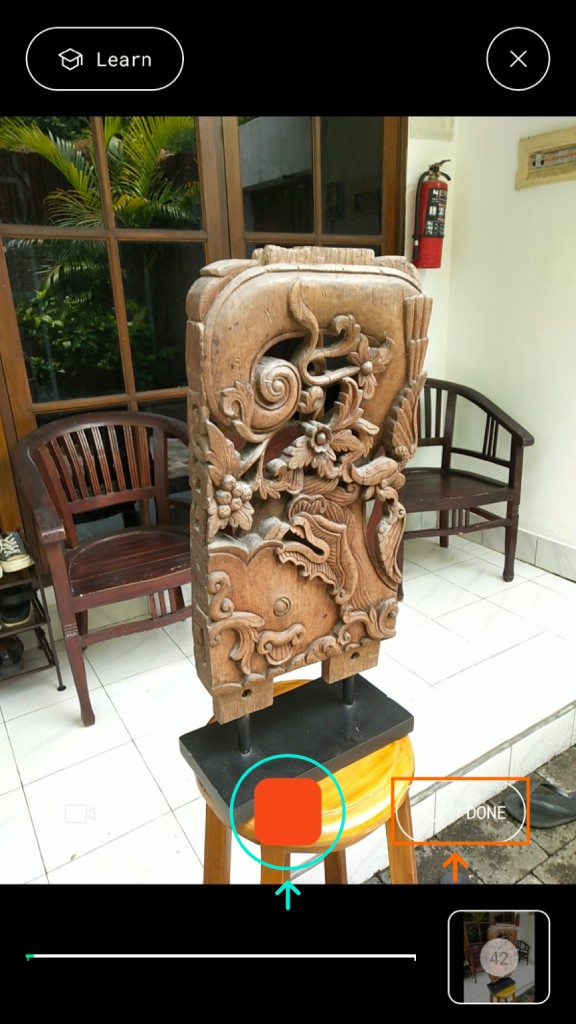
- Choose auto shutter, where it will automatically take photos while you are moving and decide when to take them based on your motion. You can read about the difference between auto and manual here.
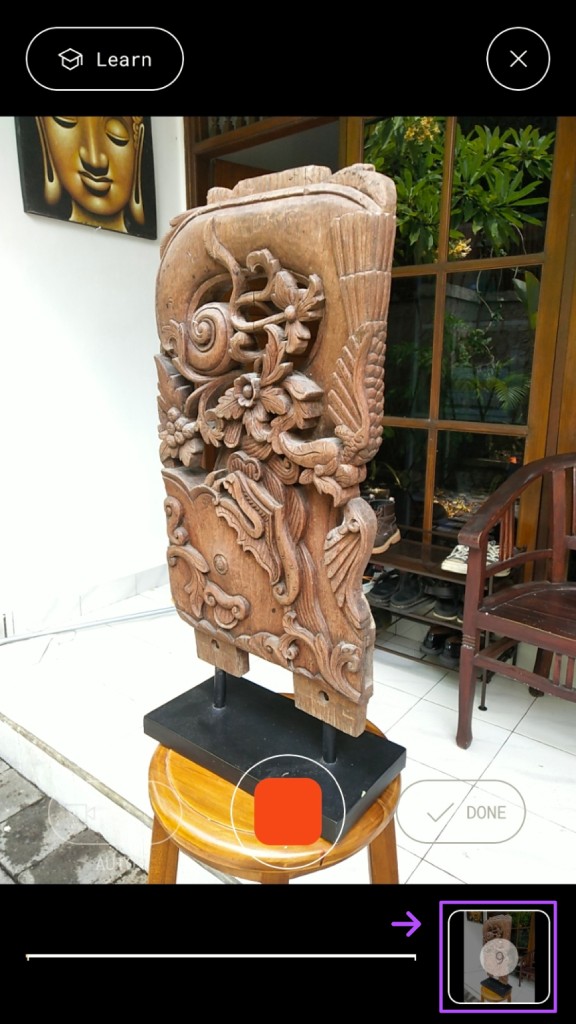
- Press the record button and start moving slowly around the object. Try to capture from all angles and fill the camera's field of view with the object. The number of photos that have been taken will be shown on the lower right corner. You will need a minimum of 20 photos. The more photos you take, the more accurate the result will be, but the longer the processing will take.
- You can stop the capture by pressing the stop button. You can add additional photos by starting another recording or press done if you feel you have enough images.
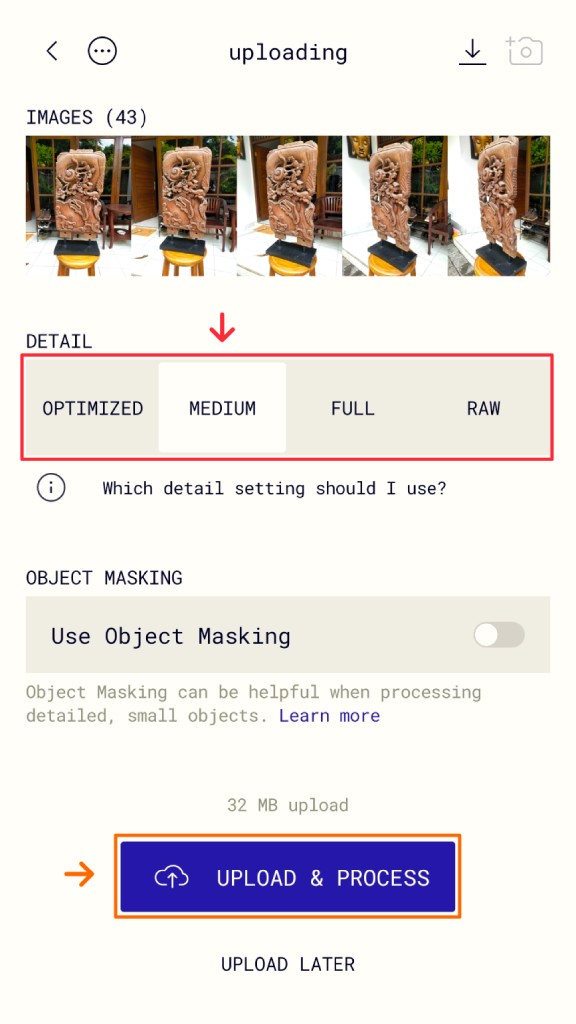
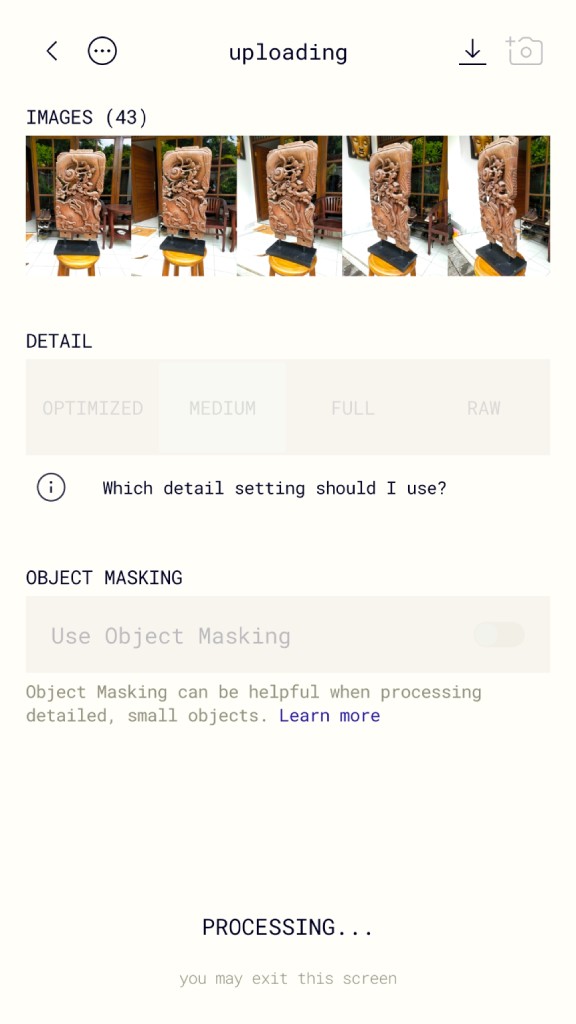
After that, the app will give you a preview of all the images taken, and you can choose the level of detail you want Polycam to generate for this object. The higher you choose, the longer the process will take, and the larger the end result will be. You can start the process by clicking the upload and process button. Make sure you don't close the app while it is uploading, but you can do so once the processing has started.

Post Processing and Exporting
When the processing is finished, you can see a 3D model of your scan inside the app. Most likely, the 3D model will include other surrounding objects that you might want to omit, and the object will be slightly slanted. Polycam includes simple but intuitive editing tools to address these issues. You can do this in the smartphone app, but I find that the web platform works better for this purpose.
All the operations shown in the video use simple clicks, and the navigation works similarly to any other 3D software:
- Left click → Orbit.
- Scroll wheel → Zoom in / Zoom out.
- Right click → Pan.
File