2D Graphic
2D graphics can be divided into two categories: raster and vector. Each has its own use case, with distinct advantages and disadvantages.
Raster
Raster graphics are made up of pixels arranged in a grid-like pattern, with each pixel containing a specific color. The higher the resolution, the more detail the images have. They are resolution-dependent, meaning they lose quality or appear pixelated when scaled up. Raster graphics are best suited for complex and detailed images.
Samsung Notes
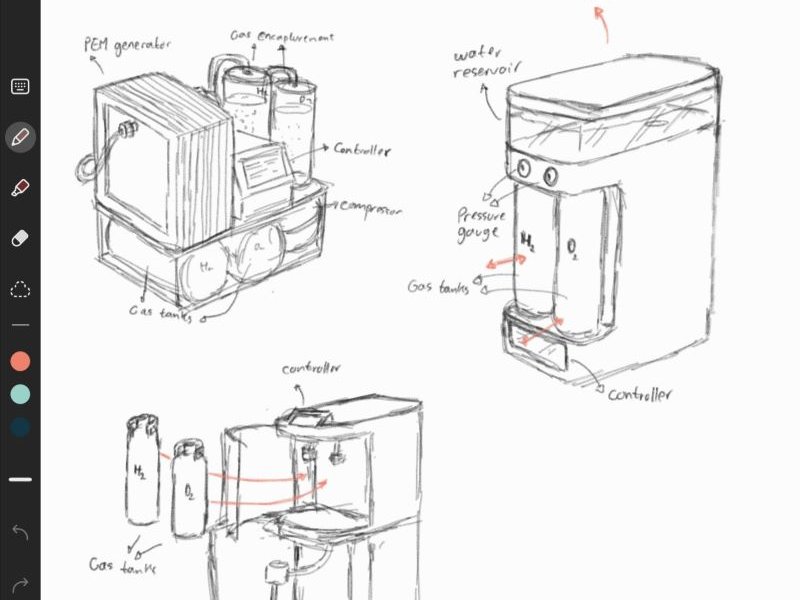

Nowadays, I do most of my sketching on my Samsung Galaxy Tab using its native drawing app Samsung Notes. It lacks many professional tools like layers, rotate selection, etc., but it is enough for what I need. It has a nice selection of brushes, it syncs to my cloud account, and the Wacom pen - with its pressure sensitivity and tilt function - is exceptional. I sketched my final project ideas from last week's assignment using it.
Photopea
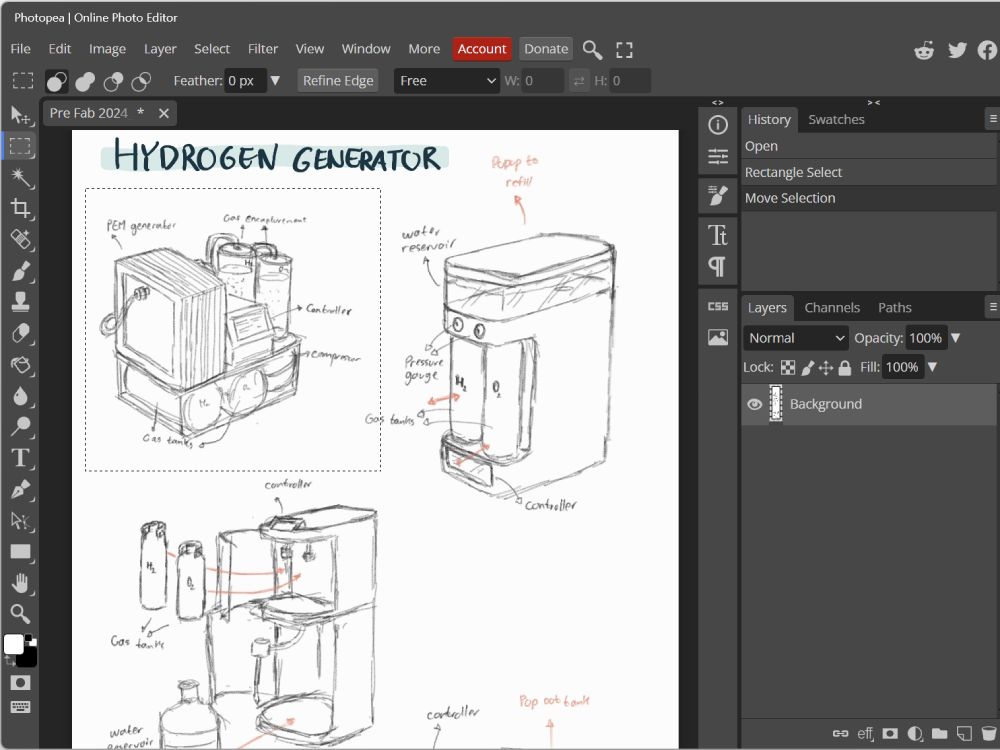
Photopea is a web application that works very similarly to Photoshop. No installation is required; you only need an internet connection and a browser. It is free to use with ads but has a subscription model to remove the ads and add little features. It lacks some advanced functionality compared to Photoshop but covers all the basics that most people will need from an image editing application.
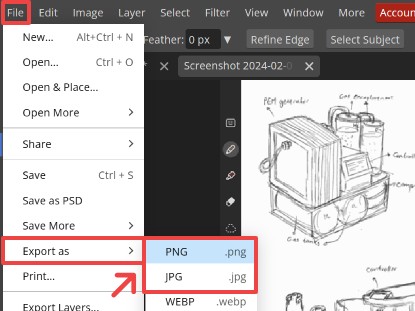
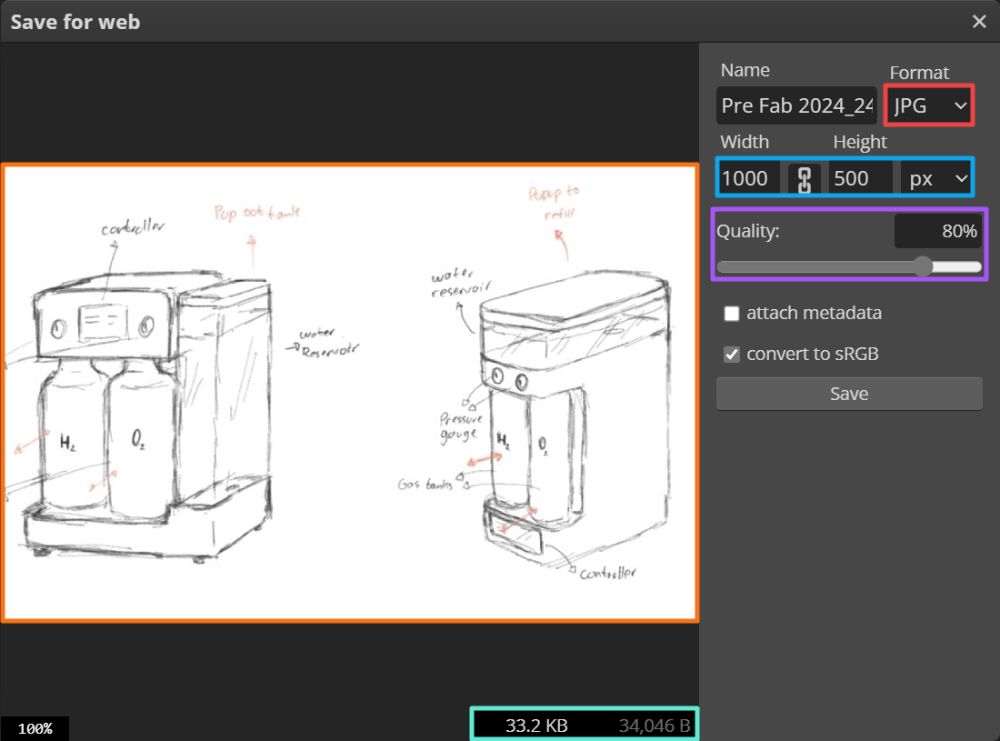
You can work with and save files as PSD files, and then export them as JPG or PNG. This opens a dialog that gives you interactive controls, allowing you to:
- Easily change the format, dimension, and quality.
- See the preview of the exported image.
- Estimate the exported file size.
Vector
Vector graphics are based on mathematical equations and coordinates. Instead of defining pixels, they use math formulas to represent shapes, lines, and curves. They are resolution-independent, meaning they can be scaled up or down without losing quality. They are ideal for logos, icons, and other geometric illustrations.
Inkscape
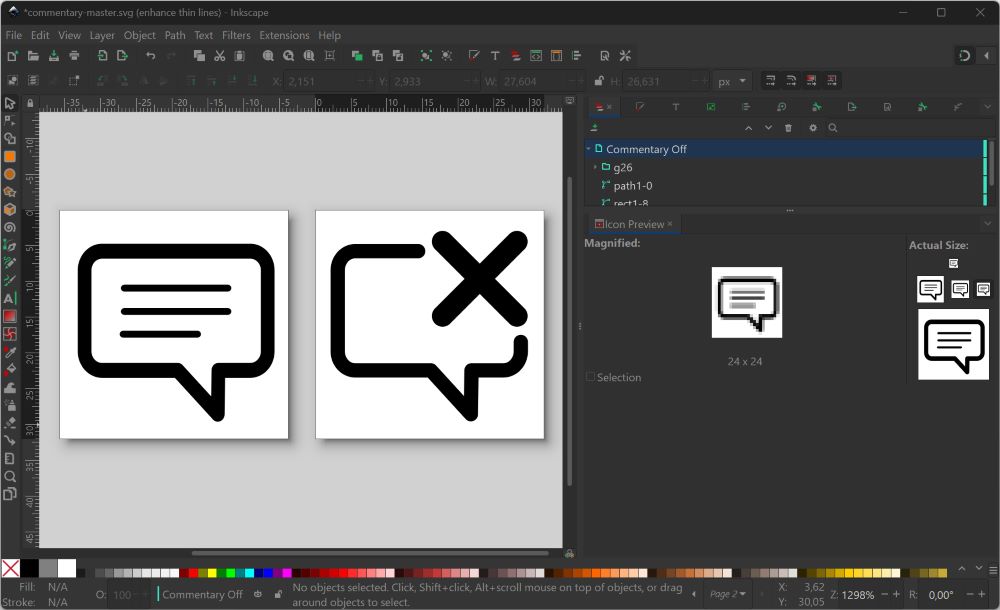
Inkscape is an open-source 2D vector software that was recommended to us. Compared to Adobe Illustrator, it may look a little unpolished and not as user-friendly. However, after playing around a little bit with live path effect, it blew my mind. It's like having a non-destructive workflow akin to Fusion 360 or Blender geometry node but for simple 2D vector graphics. For this week, I created a commentary toggle icon that is used on my website header.
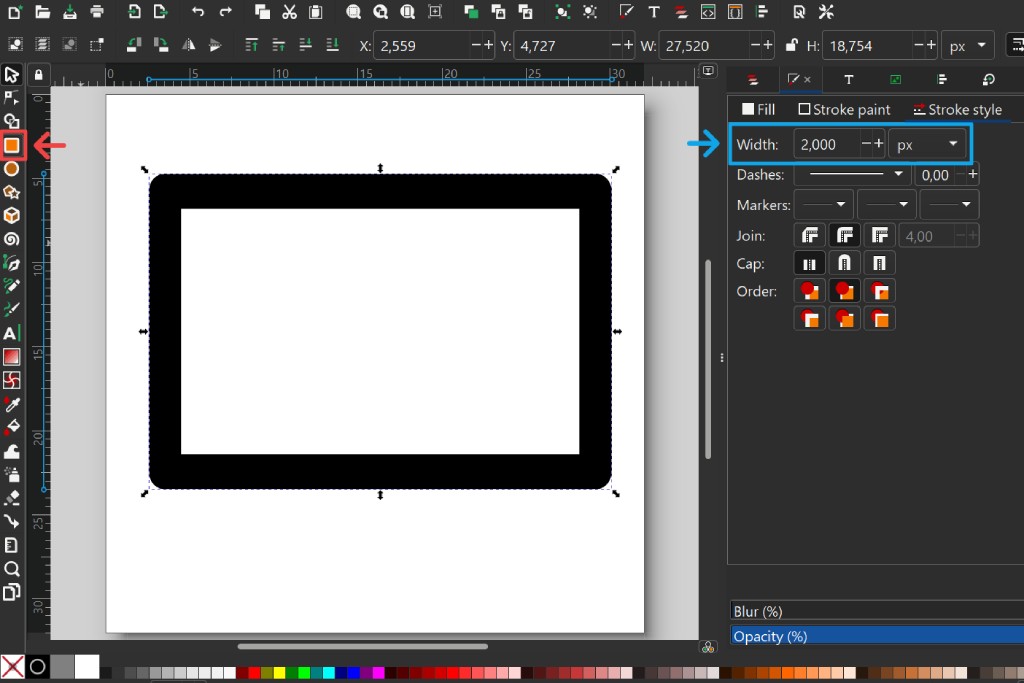
To demonstrate the path effect, let's recreate the speech bubble. First, let's create a rectangle (shortcut r) without fill and give a 2 px black stroke. Open the path effect panel from the dropdown. While the rectangle is selected, look for corners in the search bar, then apply 2 px as the radius value.

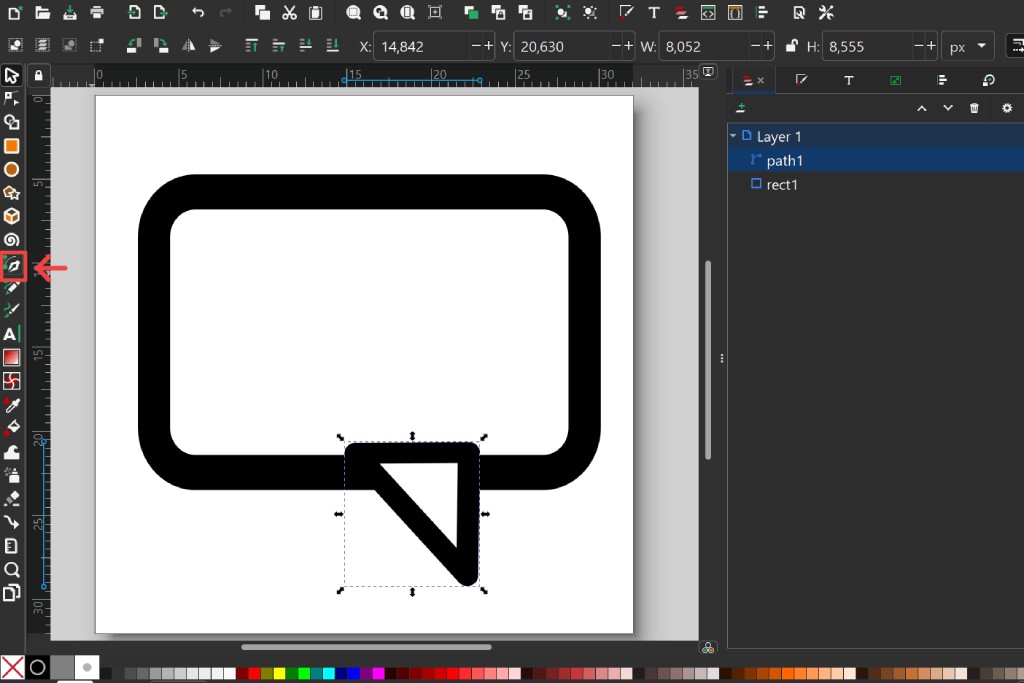
Next, let's draw the triangle using the pen tool (shortcut Shift + F6). The next part is a little bit tricky at first and needs to be performed in specific order.
- Copy the triangle without pasting it, simply press
Ctrl + C. - Open the path effect panel, select the rectangle, and you should see the corners effect options we applied before.
- While the rectangle is selected, search for boolean operation. Make sure the operation is set to union.
- Press the link button. This will create a link to the path you have in the clipboard you copied in the first step. This will not work if you copy and paste something else between the first step to now.
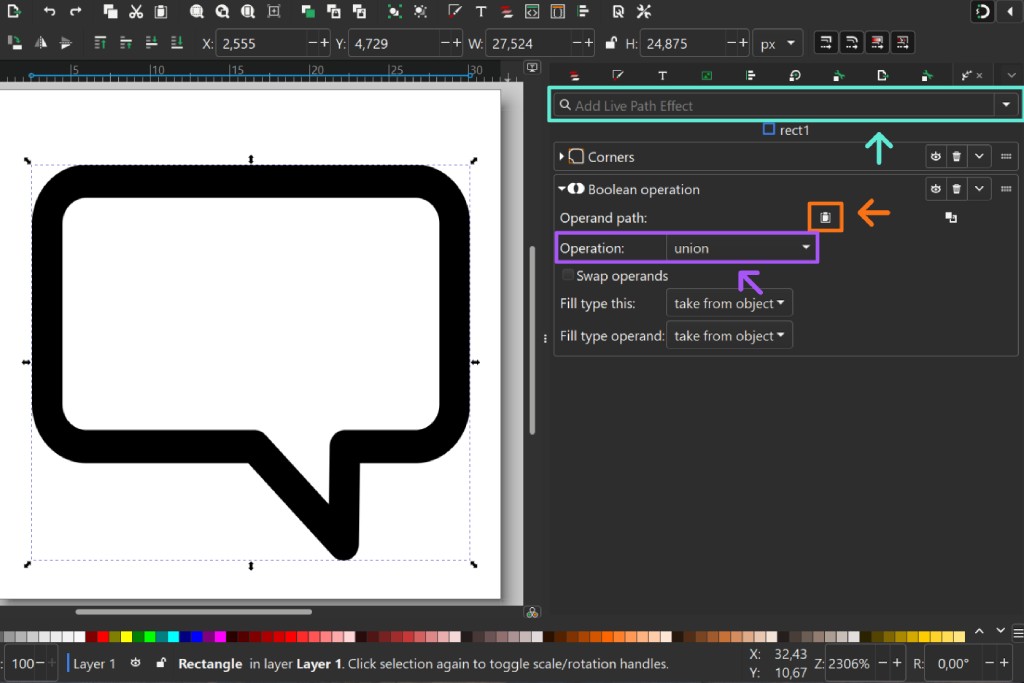
Now that you have set up the path effect, you have flexibility when you want to make some changes. Instead of doing undo or redo, you can go to the path effect panel and make changes to the value, order, visibility, etc., and see the path updated live.
Compression
In this program, we were given a limited amount of storage space. This means it is necessary to compress all of our images, videos, and files to be as small as possible while still retaining good enough quality.
Windows Photo Viewer
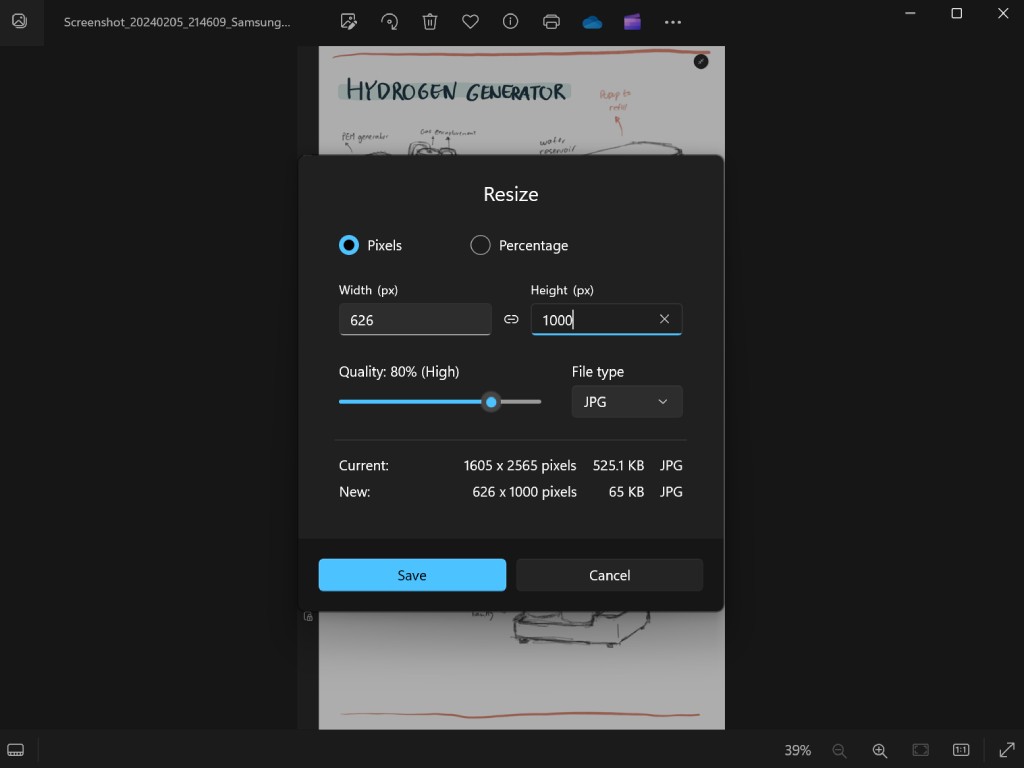
Besides using Photopea, I found myself using the native Windows Photo Viewer more and more when I simply need to crop, resize, or convert an image. It's very simple and straightforward.
FFmpeg
FFmpeg is a free and open-source command-line tool that allows you to do many things with audio and video. You can watch this 100 seconds video to get a glimpse of all sorts of things it is capable of. The most common thing we will use FFmpeg for in this program would be to compress and resize our videos. Below is an example of how to resize a video:
ffmpeg -i file_name.mp4 -s 1280x720 -crf 28 output_file_name.mp4
-i file_name.mp4specifies the video file to be compressed.-s 1280x720resizes the video resolution to 1280x720 pixels.-crf 28CRF refers to the Constant Rate Factor; the lower the number, the higher the quality and the larger the file size; recommended value is between 18 to 28.- Lastly, specify your output file name.