Vinyl Cutting with Roland CAMM-1 GX-24

Loading Material
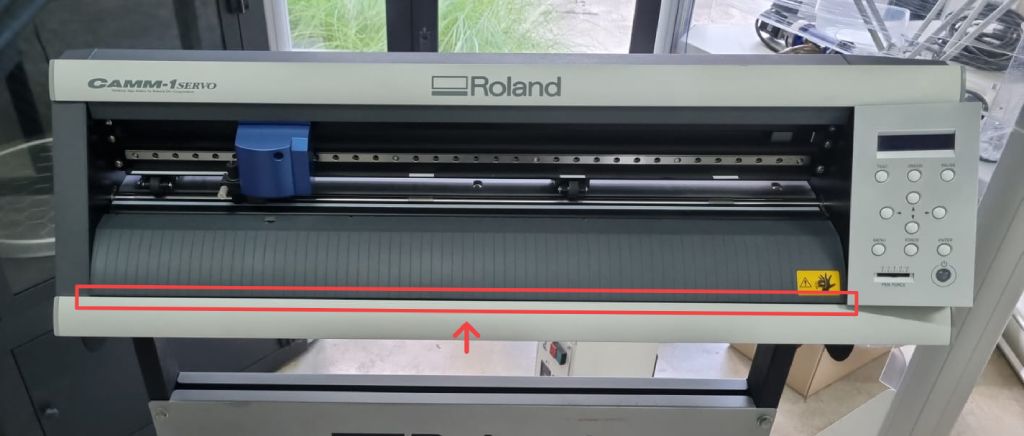
Before loading the material, first notice the roller wheels have 4 areas where it can grip and roll the material indicated by the white label.
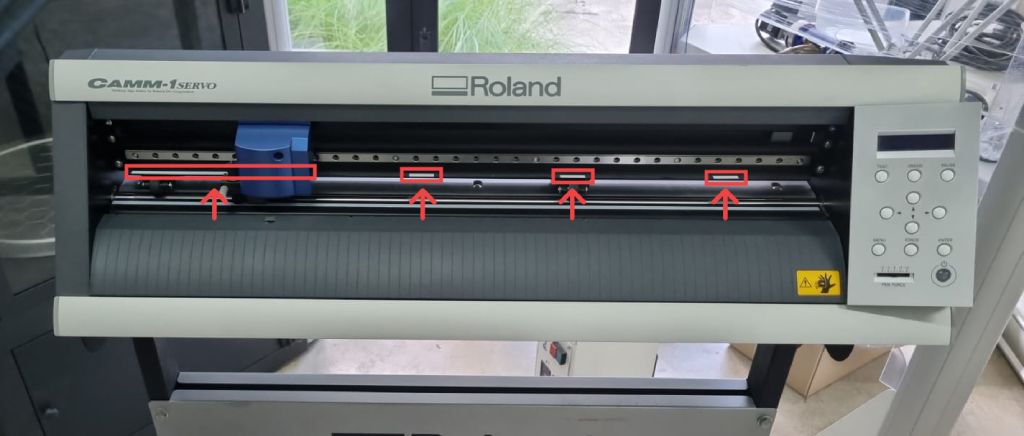
Put the vinyl roll on the back of the machine and feed the material through the opening. Next you need to align the material with the wheels. The left roller need to be within the first wide white label and the right roller should be within the other 3 small sections. Don't align the wheels right at the edge of the material, make sure it has substantial area to grip and avoid any slipping, skewing, folding, etc.
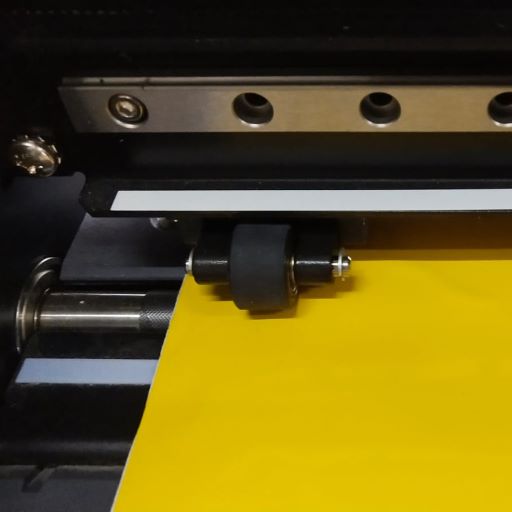
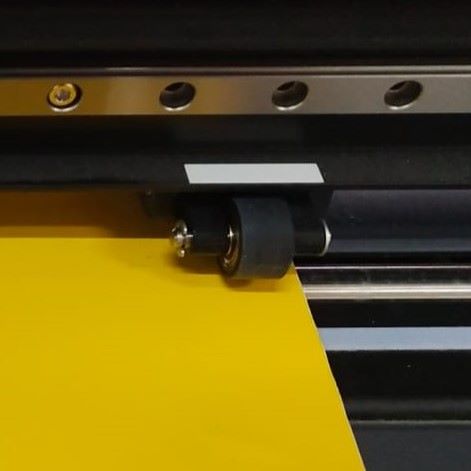
Once the wheels are set in place, align the material as perpendicular as possible. Smaller jobs might not impacted much but for larger jobs, even a small misalignment will be amplified. Once aligned, pull the lever up to lock it in place, press and hold the power button, and choose sheet roll option by pressing enter. The machine will use the position of the wheels to determine the width of our working area.
Adjusting Blade and Machine Settings
Detach the blade from the tool head by loosening the knob. You can turn the blade cap to adjust the amount of blade extension.
To know if the blade extension is adequate, test the blade by scorching it (normally, without excessive force) on the same material you load. We want the blade to cut the material cleanly and leave some mark on the paper backing but not cutting through it.
Make sure to support the toolhead from below, install the blade back to the tool head until the flanges flush with the holder, then tighten the screw. Move the tool head using the arrow keys. Press and hold the test button and the machine will cut a test piece similar like:
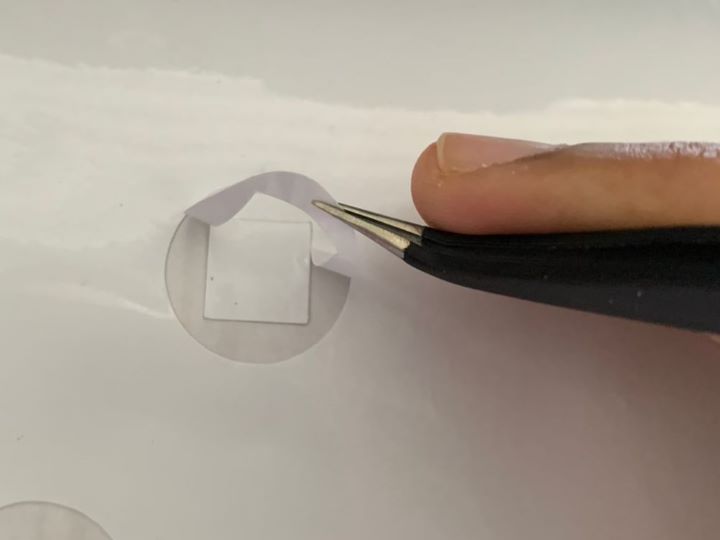
Use vinyl weeder or needle tweezer, peel the outer circle, then the square. Inspect the test result, you want the paper backing to be cut about half way through. More than that, you'll risk cutting the whole thing off of the paper backing all together. Less than that and you might risk not cutting off some of the path.
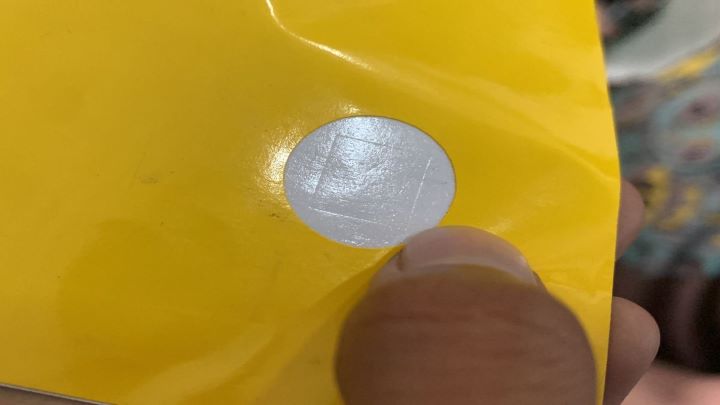
If you struggle to peel the circle or the square got peeled of at the same time with the circle, then you'll need to increase the force. If the cut mark on the paper back almost or even cut all the way through, then you'll need to decrease the force. You can adjust it by going to the machine menu.
Another setting that you most likely will need to adjust is the speed setting. Generally it will fall between 18-20cm/s, but if your design has many fine details, you will want to crank it down a little bit. Otherwise you'll risk the tool head accidentally dragged off some of those finer details.
After you find the desired settings, move the tool head all the way to the left, and up a little bit. Press and hold origin & you have set a new 0 position for the machine.
CutStudio
CutStudio is Roland's proprietary software for this machine. You can do basic vector designing here, but most likely you will be working on other software, like Inkscape, then import it here.
Unfortunately the CutStudio can only process a very small number of file type, and for Inkscape, we need to install a plugin to be able to export .eps file that is readable by CutStudio.
Configuration
First thing first, we need to connect CutStudio with the machine and sync the canvas size property.
- Connect the machine to your computer through a USB cable
- Go to File → Cut Setting
- Select the machine and click on Property button
- Press Get from machine
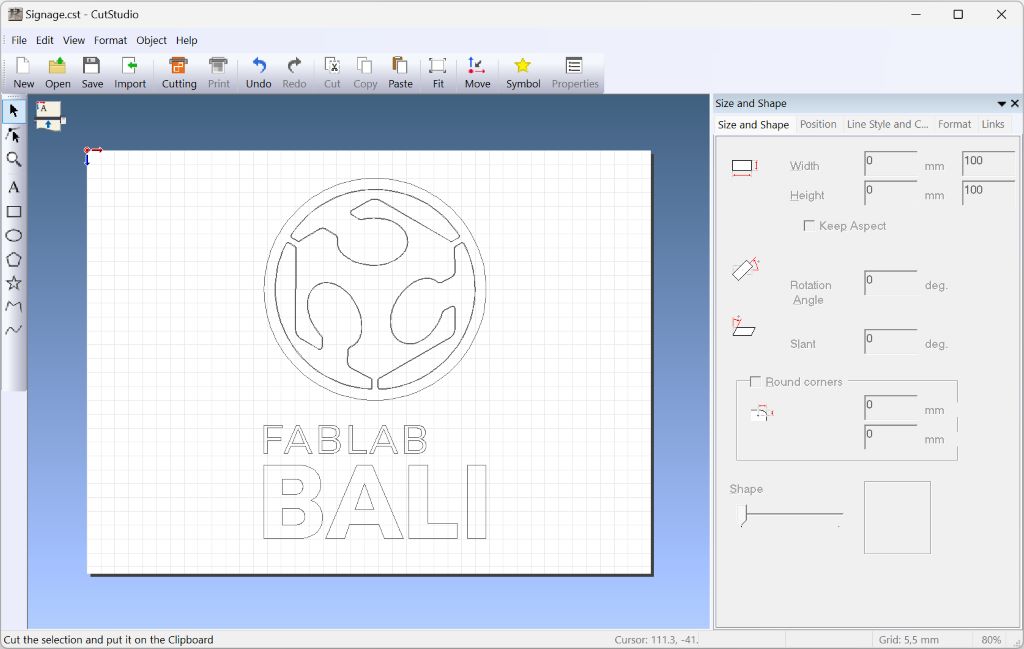
Adding Your Own Design
Click import and select vector file to be loaded, then place it somewhere close to the bottom left of the canvas (our origin point).
If your vector file did not have outer boundary yet, you can add them quickly use the tools available here. You can also change the size of the path using the transform control, or the Size and Shape panel if specific size is required.
Proceed to cut the design by pressing the cutting button, press ok, then the machine will starts.
Post Processing
Once the cutting is finished, pull the lever down and align the material with the slot in from of the machine. You can use the slot as a cutter blade guide to cut the material.
Start weed off the excess part. For fine details, take your time in this process because small part could easily got peeled off accidentally. Generally it's easier to peel off sideway rather than upwards.
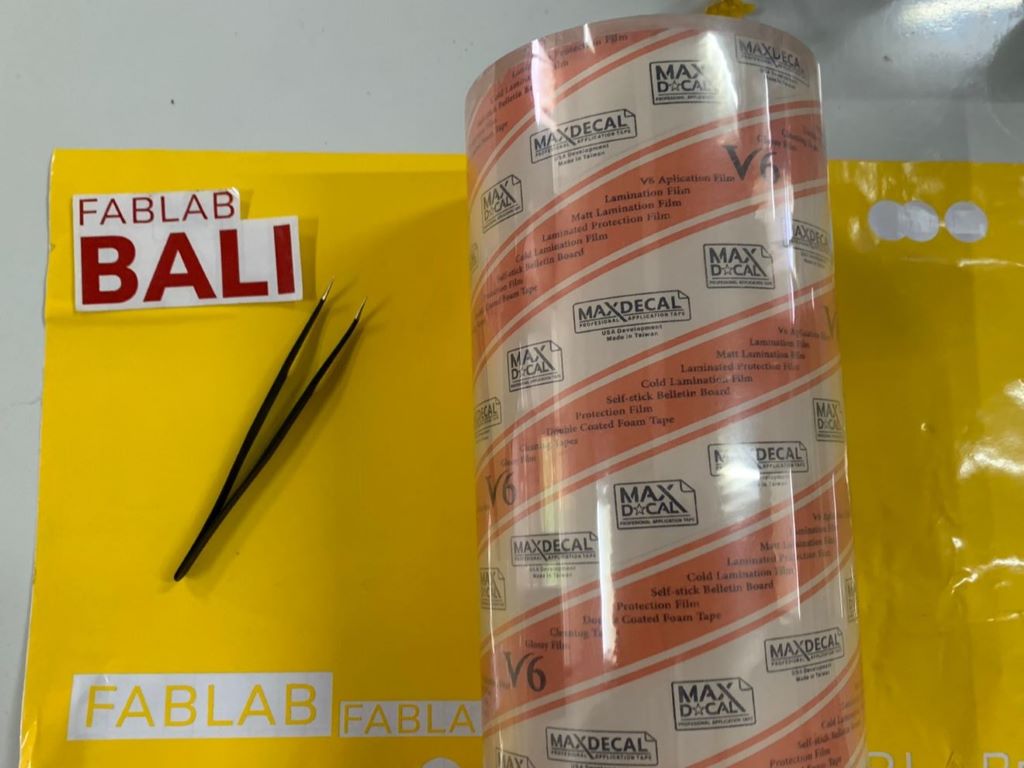
Once completed, paste a transfer tape on top of your vinyl and backing paper. Use squeegee to rub and press the transfer tape on top of the vinyl, take your time and make sure all your vinyl sticks to the tape.
Peel off the transfer tape along with the vinyl and you stick it to where you want to paste your vinyl. Use squeegee again to rub and press the vinyl, then peel off the transfer tape. Same like before, if you have finer details, take your time.
