IV. little html walk through
At this point I have to thank Lana Sattelmaier. She teaches me, how to use html and here I’ll show you, how you can setup an own website.
Okay, here we go! For coding and writing this documentation I use brackets.io
Brackets is a lightweight, yet powerful, modern text editor.
With its HTML live-preview feature, we can see all made modifications, on our website, on-the-fly.
At w3schools.com we can get ALL information needed for creating an HTML project.
Like in many other coding languages, HTML is split into two parts.
- The Header - with main information like page title, charset or language
- The Body - with the main content (e.g., readable text, pictures/videos, clickable buttons and navigation bars)
In practice it looks like this test.html :
<!DOCTYPE html>
<html>
  <head>
    <title>My FabAcademy 2021</title>
  </head>
  <body>
    <h1>My FabAcademy 2021 Page</h1>
    <h2>This is my HTML documentation</h2>
    <p>It's not so difficult as I expected</p>
    <p>Hopefully</p>
  </body>
</html>
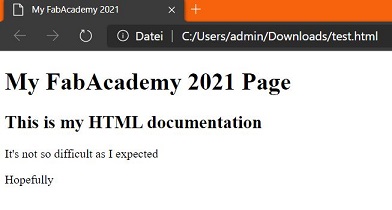
When you now open a Text Editor and Copy&Paste this code and save the document as e.g., “test.html”,
you can open it with your browser, and it should look like this :
At the very first line we have to write <!DOCTYPE html>
With that, our browser knows, how to interpret this document file.
As you can see, every HTML element begins with <tagename>, followed by some content and ends with </tagname>
The endtag is mandatory, otherwise the HTML code runs into errors and the page doesn’t work correctly.
Here is a short explanation about the tags used in this example:
 <html>...content...</html>  --> This is the root element, and it defines the whole HTML document.
 <head>...content...</head>  --> is a container for metadata like title, character set,
                                 styles, scripts and is placed between the <html> and <body> tag.
 <body>...content...</body>  --> The <body> element defines the document's body.

<title>...content...</title> --> is shown in the browser's title bar or in the page's tab.
   <h1>...content...</h1>    --> are (sub-)titles defined with the <h1> to <h6> tags.
                                 <h1> most important (biggest character) to <h6> least important
    <p>...content...</p>     --> paragraph always starts on a new line, and browsers automatically add
                                 some white space (a margin) before and after a paragraph.
           <br>              --> defines a line break. If necessary, this is placed between <p> and </p>
                                 - Not shown in the example above
There are MANY other and additional tags which are all explained at w3schools.com
To get more freshness into my webpage, I used also an external Cascading Style Sheet (CSS document)
with, so called, “classes”
In this separate file, it is possible to define the layout, colors, borders and many many more.
With the “classes”, we can define different styles, for different parts of our webpage
e.g., a class for the title and another class for the main content.
Here is an example, how to use it:
So, we need two files now. A HTML document, let’s call it test_w_css.html :
<div class="copy"><pre><code>
<!DOCTYPE html>

<html>

  <head>
    <title>My FabAcademy 2021</title>
    <link rel="stylesheet" href="test_style.css">
  </head>

  <body>

    <div class="title">
      <h1>My FabAcademy 2021 Page</h1>
    </div>

    <div class="content">
      <h2>This is my HTML documentation</h2>
      <p>It's not so difficult as I expected</p>
      <p>Hopefully</p>
    </div>

  </body>

</html>
and the corresponding CSS file test_style.css
body {
    background-color: darkorange;
}

.title {
    font-family: fantasy;
    color: #573B3A;
    text-align: center;
    font-size: 2em;
}

.content {
    color: black;
    text-align: center;
    font-size: 2em;
}
First, I explain the HTML document.
<link rel="stylesheet" href="test_style.css">
The defined classes have to be called with a <div> tag and, as described above, ends with </div> :
    <div class="title">
      <h1>My FabAcademy 2021 Page</h1>
    </div>
Now the CSS File.
In the CSS File, I started with a “body” section.
Here you can place the styles, which should be relevant for the hole web page like e.g., the background color
It is mandatory, that the content of a section starts with “{” and ends with “}”
body {
    background-color: darkorange;
}
Then I continued to define my classes. To define a class, the section name has to start with a “dot”
.title {
    font-family: fantasy;
    color: #573B3A;
    text-align: center;
    font-size: 2em;
}
As you can see, there are different ways to define a color.
You can define it by the color name and/or
also, with the HEX code
Here is my html site template, which can be explore a little.
You can find the complete template for my site here.