II. My Environment Setup
Here I’ll show you, how I setup my Windows 10 documentation environment for the FabAcademy.
Maybe there are some helpful hints for somebody.
This list is not complete yet, but I’ll plan to update this during the assignments complete now.
okay let’s start with
Greenshot
For taking screenshots I prefer Greenshot.
With this open-source tool, it is also possible to add Arrows, Lines, Text and so on.
- just download latest version and install
In settings - output I changed the Image format to “png”. I got a better compression / quality ratio then “jpg”
Microsoft PowerToys
I needed an explorer addon, to show svg files as thumbnails. A quick search gave me a nice Microsoft tool called Powertoys
After downloading and installing, I saw, that this is also nice for quick image resizing.
Cool B-) I hit two flies with one clap !

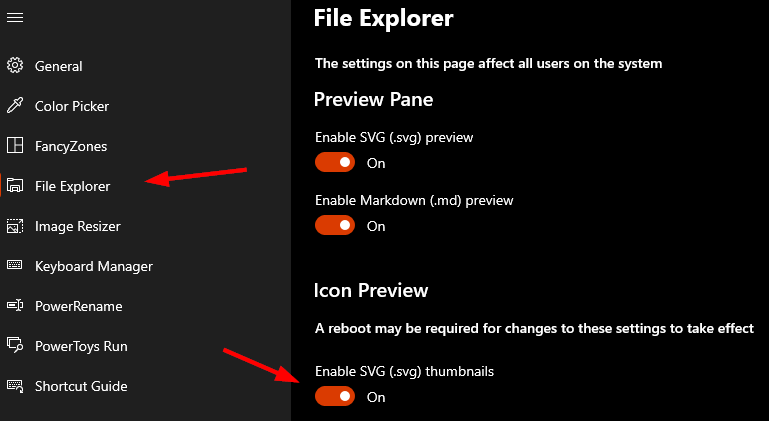
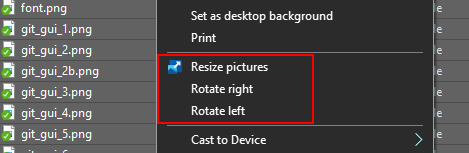
Just mark the files in the file-explorer and make a right click
Notepad++
- just download the latest version and install
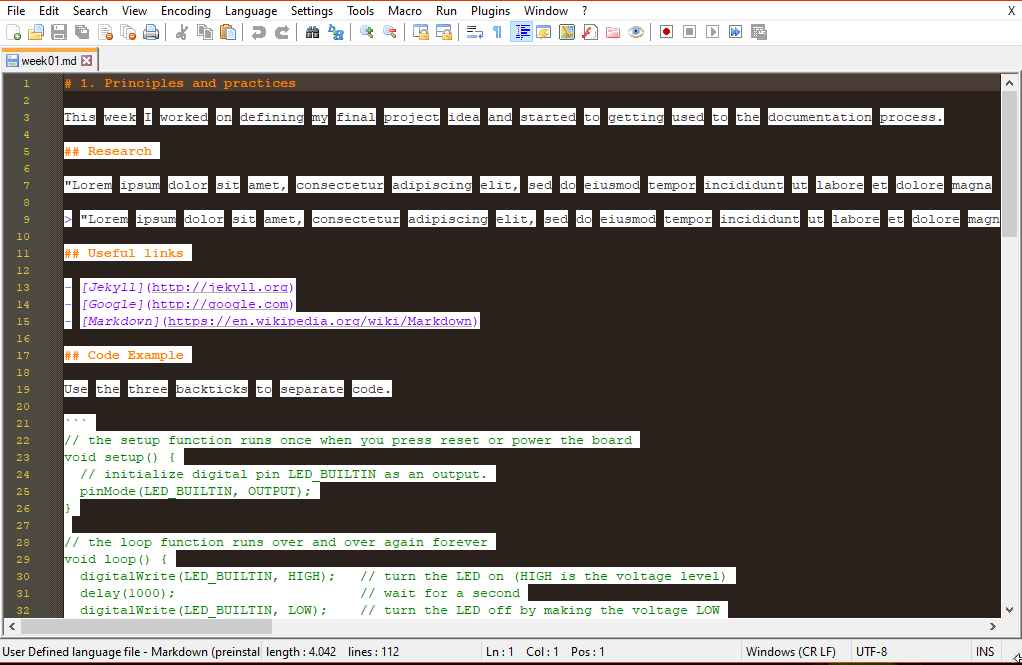
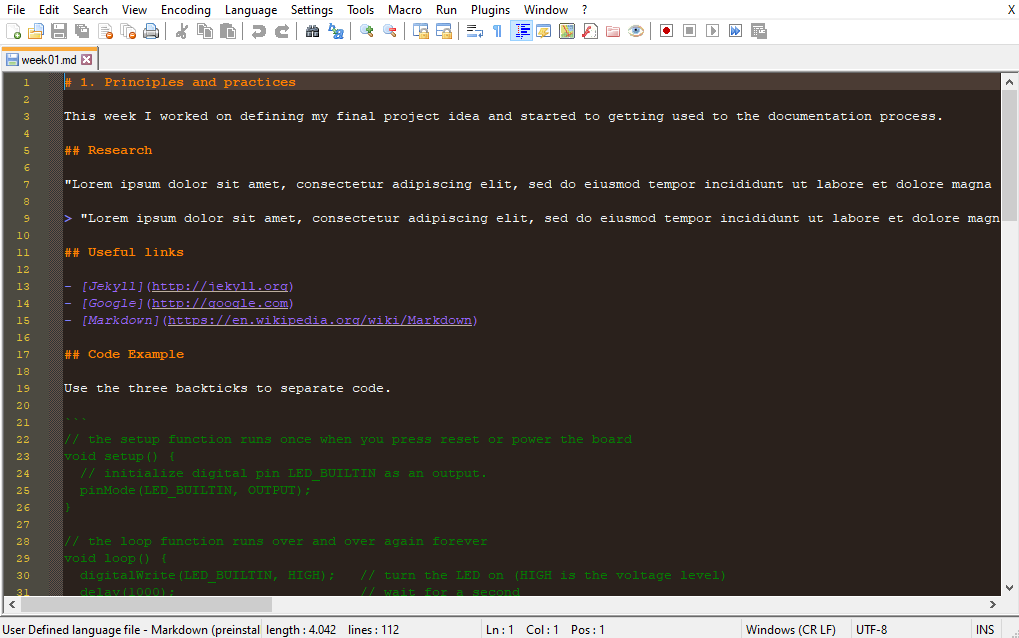
I’m a fan of the Bespin Theme, but when I opened a .md file, I was really scared because it looks like this :
but good news ! There is a way to fix that....
There is a file, especially for the markdown style, which can be edited.
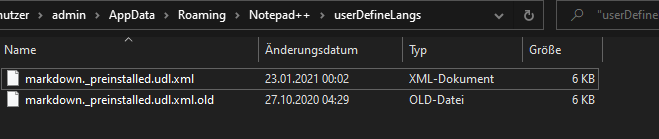
Close Notepadd++, open the Explorer and go to this path :
\%userprofile%\AppData\Roaming\Notepad++\userDefineLangs
If you would like to keep the original file, just rename it.
Download and copy my prepared markdown._preinstalled.udl.xml into this directory.
Et voila…
…it’s not perfect, but it looks much better now !
Generate SSH-Key
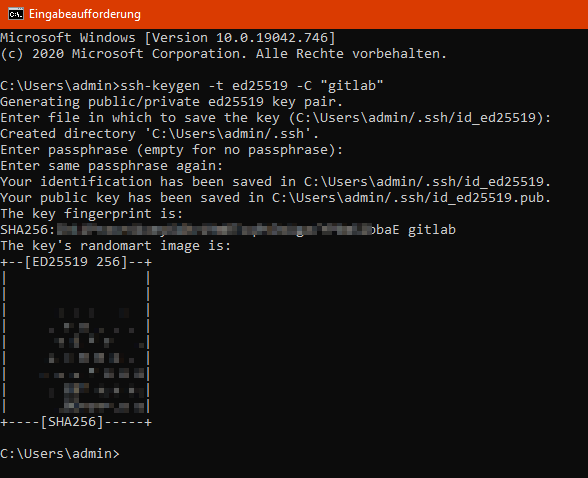
To generate a ssh-key, do the following steps:
- open command-prompt
ssh-keygen -t ed25519 -C "gitlab"
-C Flag is optional for setting a comment
- just press enter
Passphrase is optional and is not recommended because it’s “uncomfortable” to enter a passphrase with every commit
- enter a passphrase
- enter passphrase again to confirm
It should be look like this :
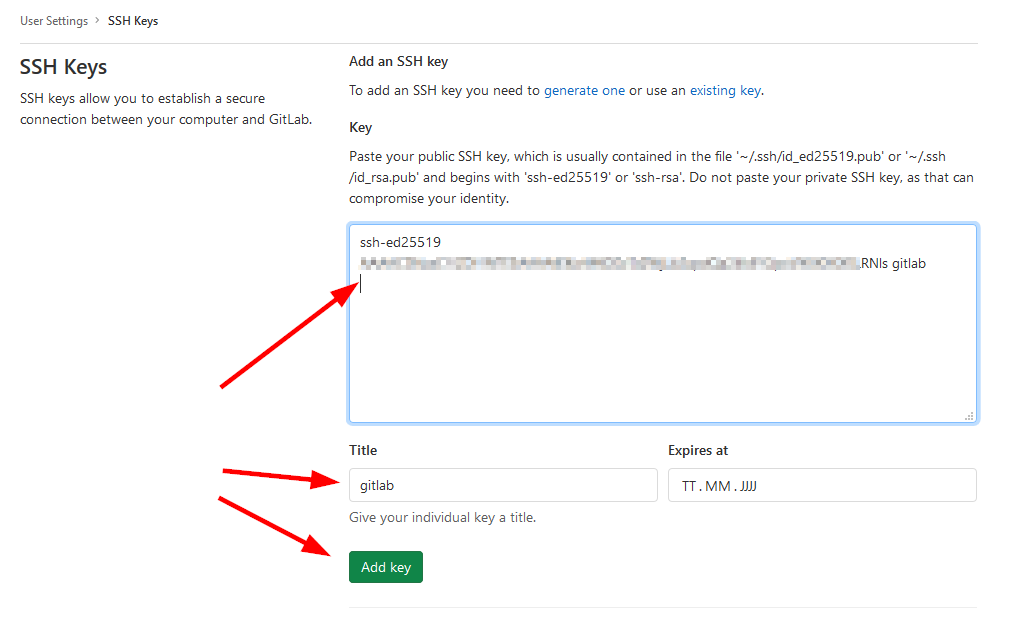
the ssh-key is stored in the directory
\%userprofile%\.ssh
Login to your gitlab-profile and go to “User Settings” - “SSH Keys”
open the File
"\%userprofile%\.ssh\id_ed25519.pub"
in a Text Editor
- copy the hole content and paste it in the “keys-window” on gitlab
Install git for windows
Download latest git for windows version
in my case it is this one
Run Setup
- next (License Screen)
- next (use standard Folder)
- next (use standard options)
- next (use standard start menu folder)
- now choose your preferred Editor! ( I prefer Notepad++ )
- next (Let Git decide)
- next (Use Git from Command line)
- next (Use openSSH)
- next (Use OpenSSL)
- next (Checkout Windows-style)
- next (Use MinTTY)
- next (Default)
- next (Git Credential Manager Core)
- next (Enable file system caching)
- next (uncheck “Enable experimental.....”)
- install & Finish
Create a Folder where you would like to work in.
open command-prompt:
cd "Your Work Folder"
git clone git@gitlab.fabcloud.org:your/project/path.git
cd "your-repository"
git config user.name "Your Name"
git config user.email "you@example.org"
git config --global user.name "Your Name"
git config --global user.email "you@example.org"
Here is an example, filled with my setup…
cd \%userprofile%\FabAcademy\gitlab
git clone git@gitlab.fabcloud.org:academany/fabacademy/2021/labs/bottrop/students/lars-mattern.git
cd lars-mattern
git config user.name "Lars Mattern"
git config user.email "lars.mattern@xxxxxx-ruhrwest.de"
git config --global user.name "Lars Mattern"
git config --global user.email "lars.mattern@xxxxxx--ruhrwest.de"
Install Python + MkDocs
Download latest python version
in my case it is this one
- run setup
- check “Add Python 3.9 to path”
- Install now
To upgrade pip and install MkDocs
Open Command Prompt :
python -m pip install --upgrade pip
pip install mkdocs
pip install mkdocs-material
pip install mkdocs-git-revision-date-localized-plugin
Now you have access to your page, and you can start to edit and coding it.
To do so, open a command line and start the local MkDocs server
cd "path-to-your-git-directory"
mkdocs serve
your site can be accessed with your preferred web browser under 127.0.0.1:8000
To make my life a little bit easier, I wrote a small batch script, which starts the MkDocs Server and opens my Firefox Browser automatically.
Just open your preferred editor and add the following lines :
# path could be looks like :  cd \Users\admin\FabAcademy\gitlab\lars-mattern
cd path-to-your-git-directory
start firefox http://127.0.0.1:8000/
mkdocs serve
save it e.g., on your desktop and name it “MKdocs_starter.cmd”
The Firefox Tab starts possibly with “page not found”, but don’t worry, it’s because the MkDocs Server needs some seconds to start. Just refresh the page with F5 and you are good to go :-)
Optimizing images for the page
I took all images with my smartphone and because of it’s resolution, the size of the pictures would explode my page and some images had to be cut.
To do so, I used a combination of Greenshot and the Microsoft PowerToys, so there was no need of an additional software like GIMP or imagemagick
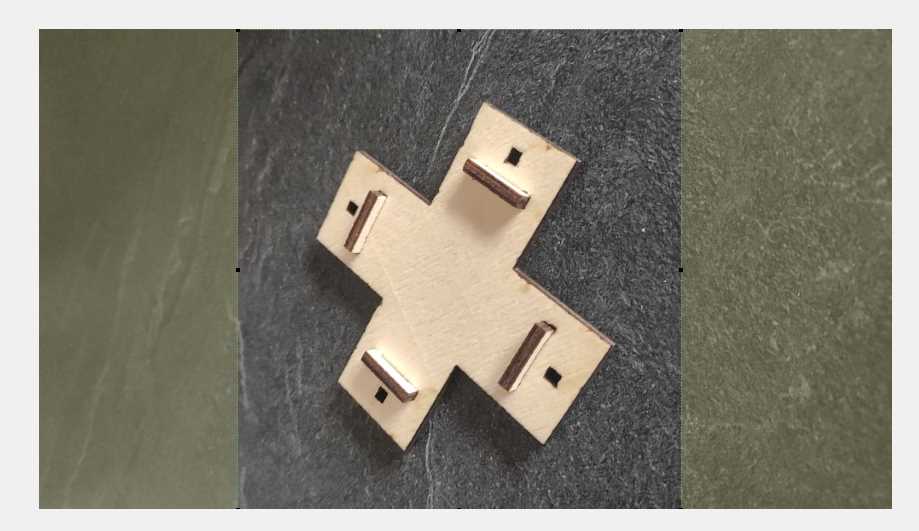
A good example how I did it, is the last picture of my week 03. Computer-controlled cutting.
I resized and also cut the picture a bit.

The original file size is round about 5 MB and has a resolution of 2250 x 4000 pixels.

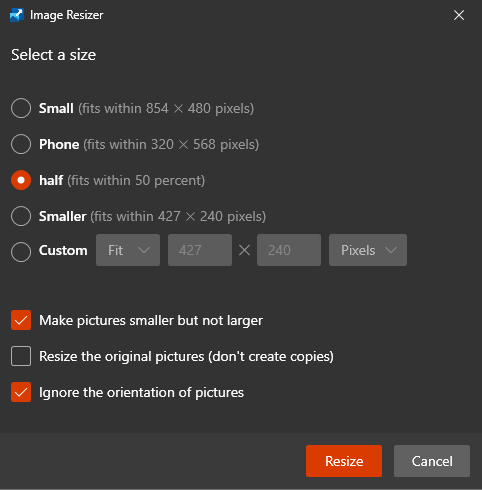
First I resized the picture with the Microsoft PowerToys to a resolution of fits within 854 x 480 pixels , as described above. I do this step only for easier cutting in Greenshot.
With a right click on the resized picture, I open it in Greenshot.

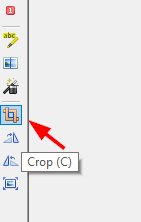
With the Crop (C) function
I marked the part, which should be cut
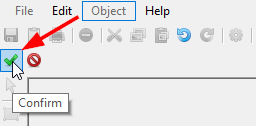
and finish it with confirm
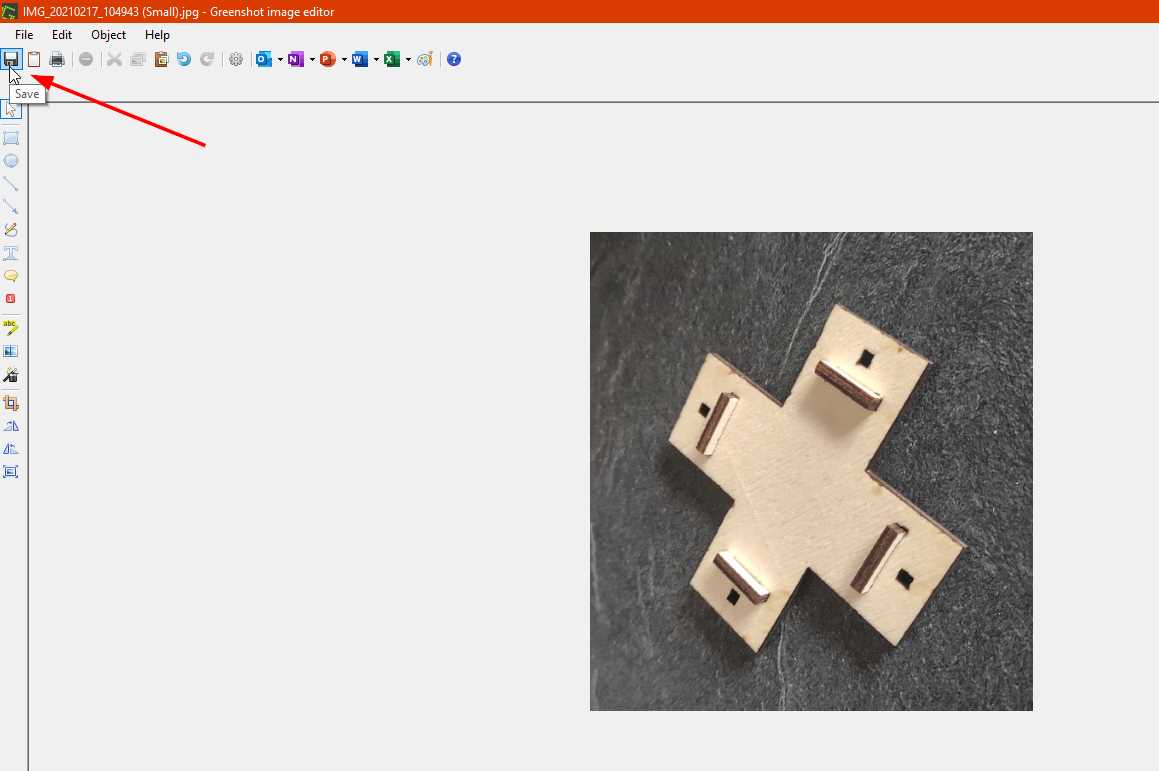
And save the cropped picture.
If it’s necessary, I finished the process by resizing the picture again with the PowerToys to fits within 427 x 240 pixels

The edited picture has now a file size of 17 KB B-)
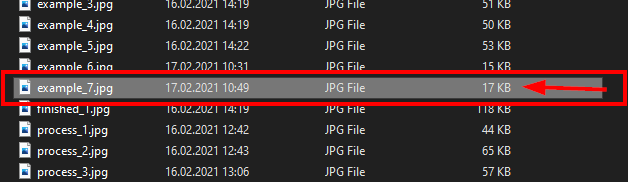
I generally used a resolution of fits within 427 x 240 pixels and fits within 854 x 480 pixels for all my pictures.
In my opinion it is a good compromise between file size and resolution.
Optimizing videos for the page
For video edit, I used a combination of handbrake and the windows 10 build in Video Editor.
It’s not the most elegant way, but it works very good during the weeks :-D
I just would like to resize and trim my clips, so I don’t want to install and use a whole professional Video Editing Suit.
As an example how I did it, is a video of my week 06. Electronics design.
I resized and also cut the video.
The original video has a file size of nearly 29 MB

and the VLC Media Player shows me the following codec information

First, I tried to open the video directly in the Windows 10 Video Editor, but I got an error message
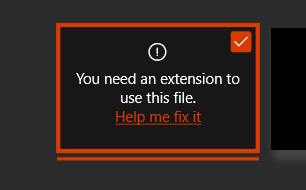
It means, that the codec of the video is not supported and I need to buy the corresponding codec from the Microsoft Store.
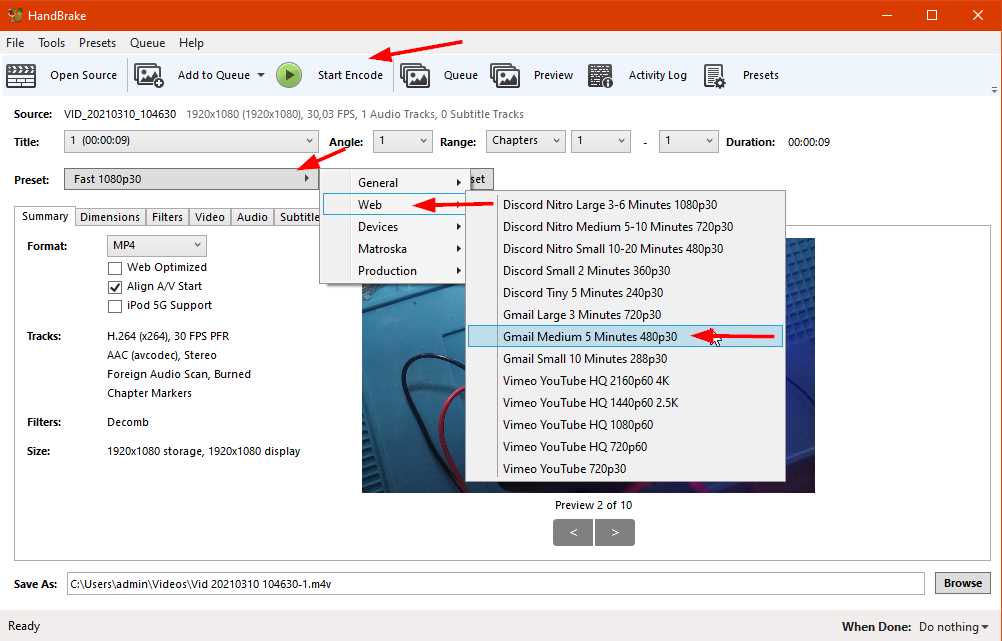
To get around this, I open the video in handbrake and Encode the video with the preset Web - Gmail Medium x Minutes (480p30)
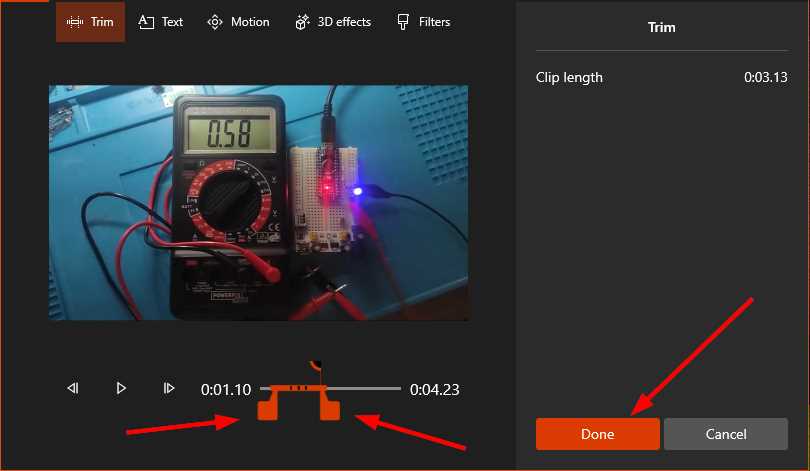
Now I’m able to open the file in the Windows 10 Video Editor and with drag and drop I put the video in the storyboard. Now I can use the Trim function
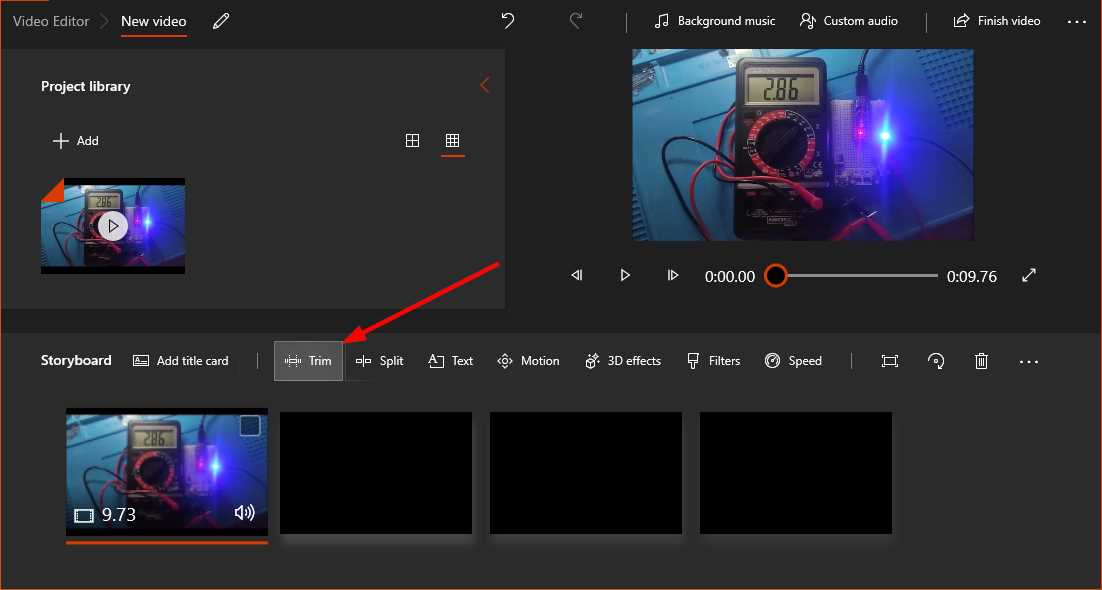
and define the start and endpoint and confirm with Done
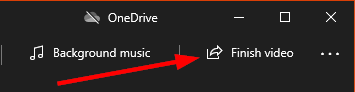
Back in the main screen click on Finish video
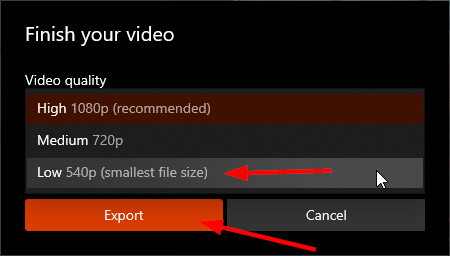
I choose the lowest resolution and export the trimmed video.
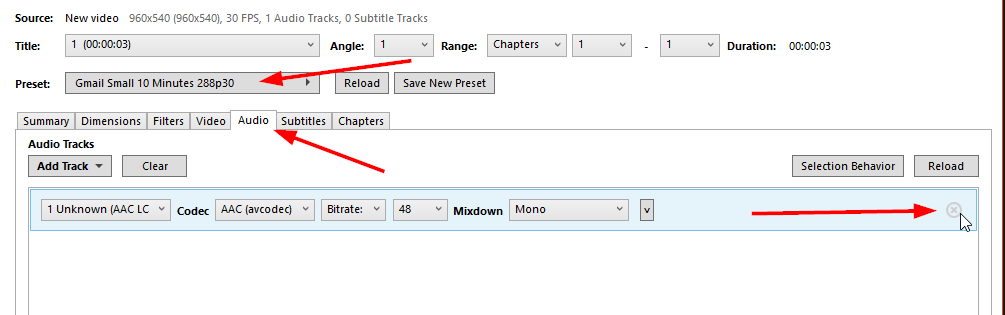
Now I opened the trimmed video in handbrake again and chose the preset Web - Gmail Small x Minutes (288p30)
I really don’t like autoplaying videos with sound and it doesn’t matter if it is just a noisy machine or music, so I removed the audio track on ALL my videos.
Another BIG advantage: It shrinks the file size !
So, I change to the Audio tab and remove the audio track…
After encoding, the video has a file size from just 98 kb B-)

I scaled the videos on the page to it’s doubled size. Because of the low resolution, I can’t see every dust particle any more :-D , but it’s definitely okay and fine to visualize corresponding things, where it’s necessary.
The example at the beginning, shows the original sized video.
Just for my final presentation video I used kdenlive
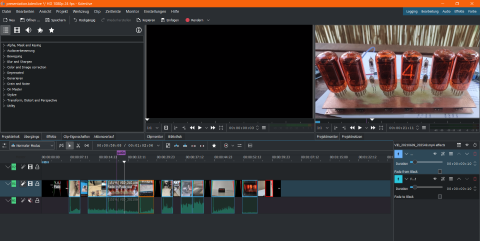
The finished version is available HERE
manage the size of the web page
Ideally the page should grow round about 1-2 MB per week.
Sadly Windows 10 has no inbuild feature like the linux command line tool du. There are similar tools around the web like Sysinternals du or TreeSize, but I don’t want to install more additional software.
I just paid attention to the file sizes and if they were bigger than 100 KB, I tried to adjust them by scaling the pictures again or convert the png to jpg with Greenshot and/or zipping the downloads.
I added videos only, where it’s really necessary to visualize some things, like the pwm measurement shown above.
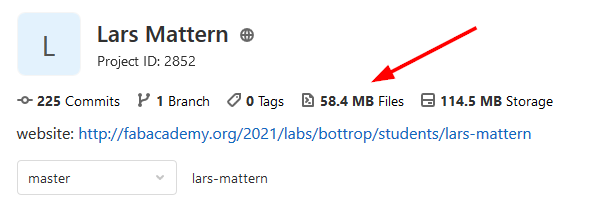
In the first weeks I additionally had an eye on the directory properties
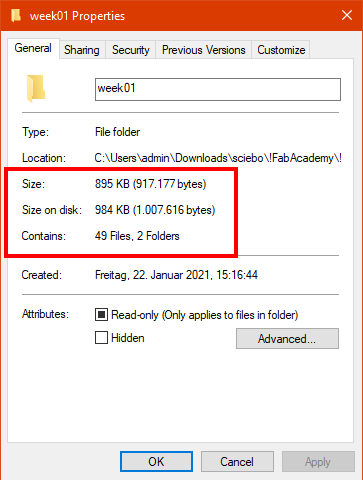
and the rest of the weeks just on the gitlab Files space.
This is the result, after a nearly completed page.
After a view weeks I saw, that I’m good to go with my As-Small-As-Possible strategy.