14. Interface and application programming
Instruction
individual assignment:
- write an application that interfaces a user with aninput &/oroutput device that you made → Here
group assignment:
- compare as many tool options as possible → in this page
What I did in this week
- Try to use “blynk” as a interface of IoT→ in this page
- Try to use “App Inverntor” as a interface of iOS and Android App→ in this page
- Comparison between blynk and App inventor → in this page
Try 1 : Blynk as a interface of IoT
set up blink and arduino by following tutorial
In Detail
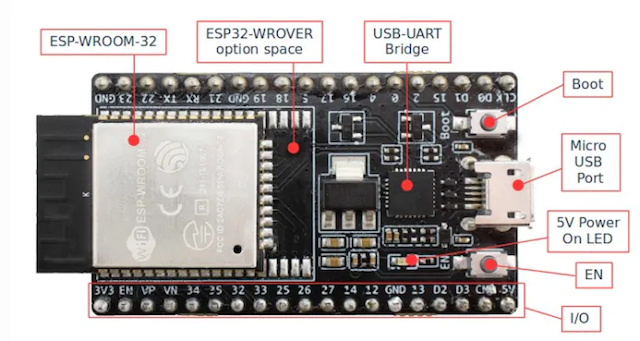
- ESP32-WROOM-32 module soldered to the ESP32-DevKitC V4 board. Optionally, ESP32-WROOM-32D and ESP32-WROOM-32U or the ESP32-SOLO-1 module can be soldered in place of the ESP32-WROOM-32.
- USB-UART bridgeSingle-chip USB-UART bridge with up to 3Mbps transfer rate.
- BootDownload button: Press the EN button while holding down the boot button to enter firmware download mode. The firmware can then be downloaded from the serial port.
- Micro USB portUSB interface Serves as power supply for the board and communication interface between the PC and the ESP module.
- 5V Power On LED This LED illuminates when USB or external 5V power is applied to the board. For more information, see the schematic in the associated documentation.
- EN Reset button: Pressing this button resets the system.
- I/O Most of the I/O pins on the ESP module are split into pin headers on this board. Users can program ESP32 to perform various functions such as PWM, ADC, DAC, I2C, I2S, SPI, etc.
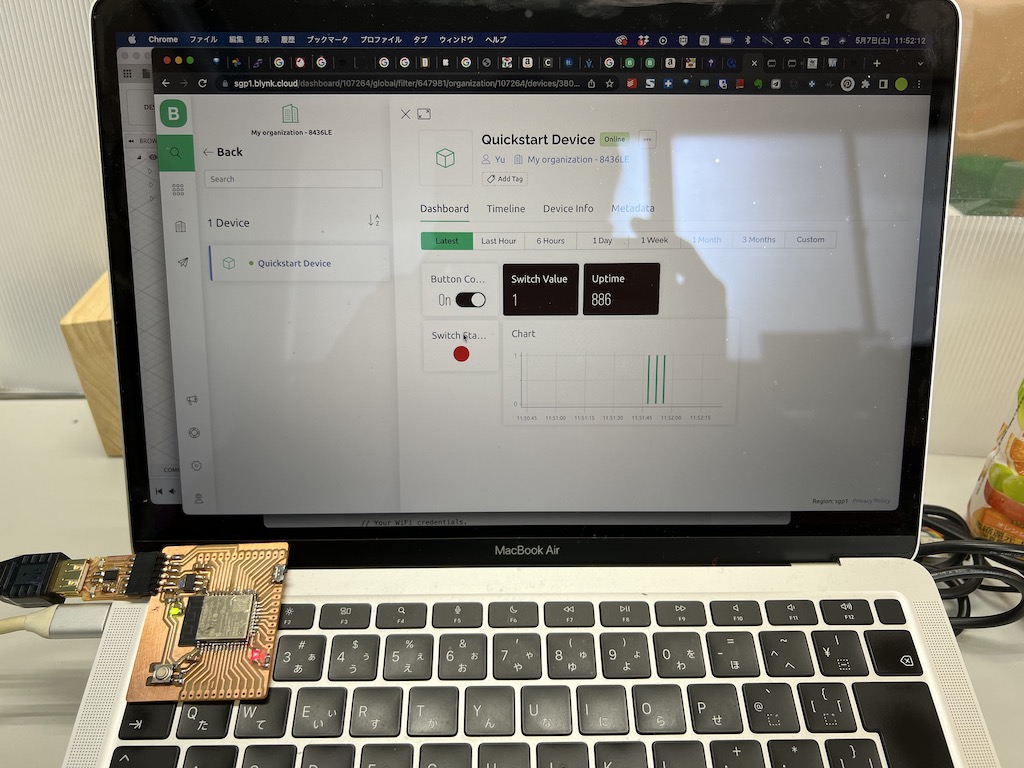
→ Port did not show up, so I used a board that was in the lab.
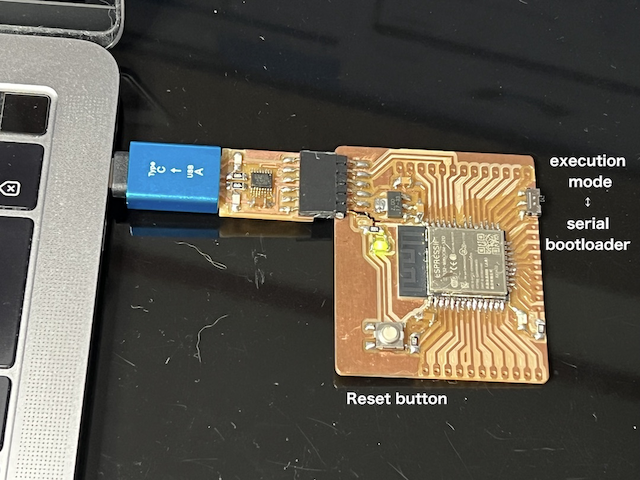
When uploading sketch, use slide switch to serial bootloader and press Reset button
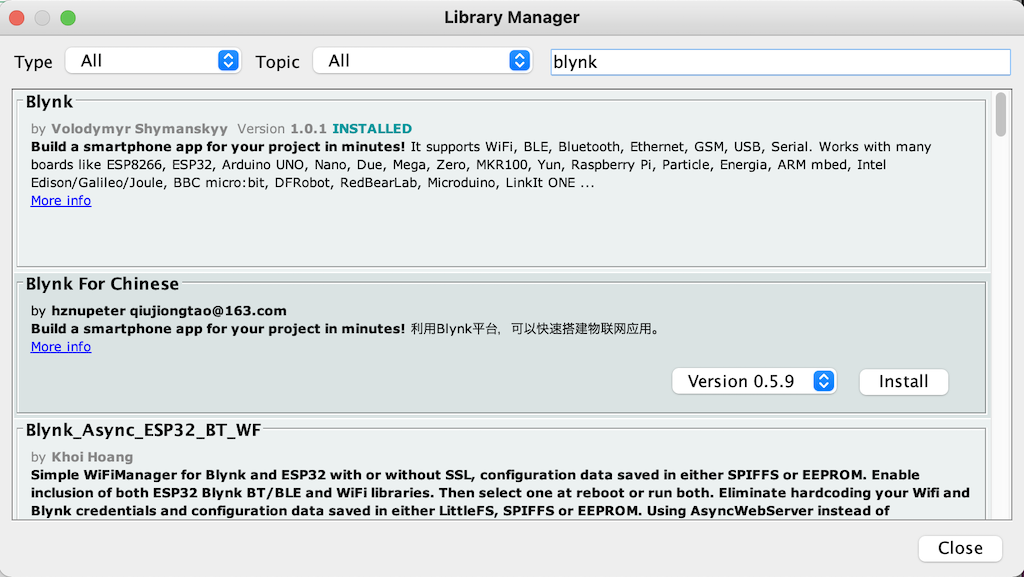
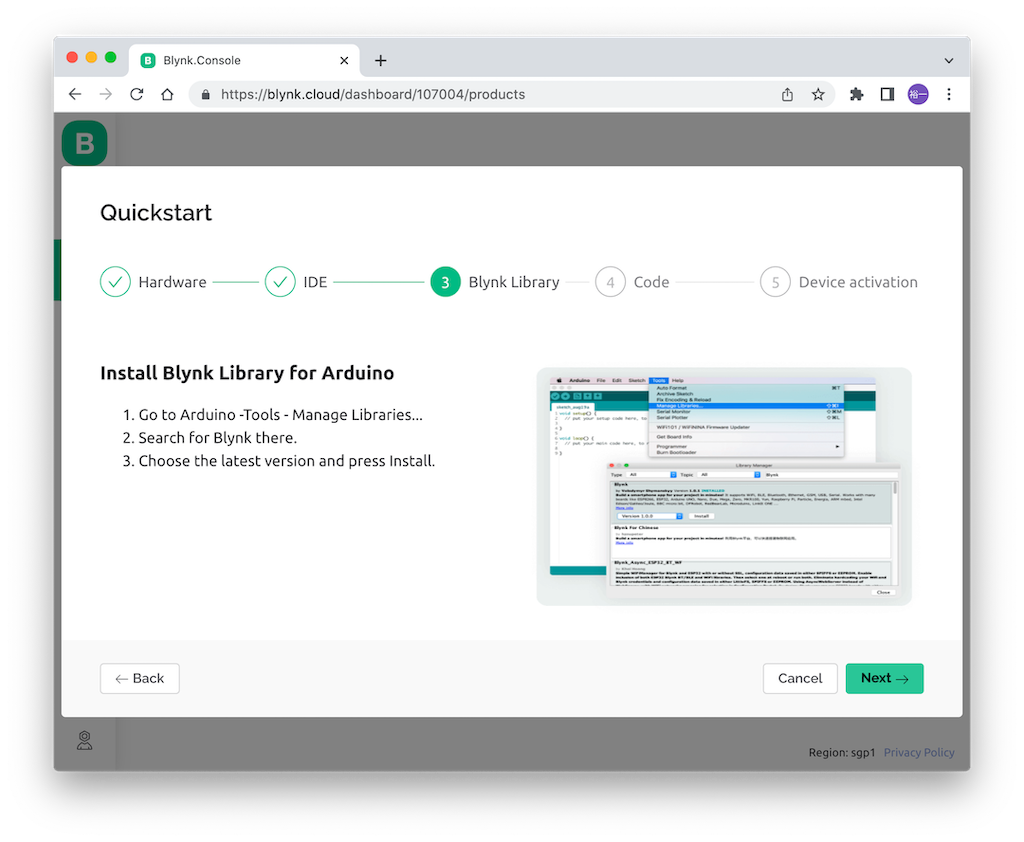
- add Manage Libraries - Blynk
ver 1.0.1
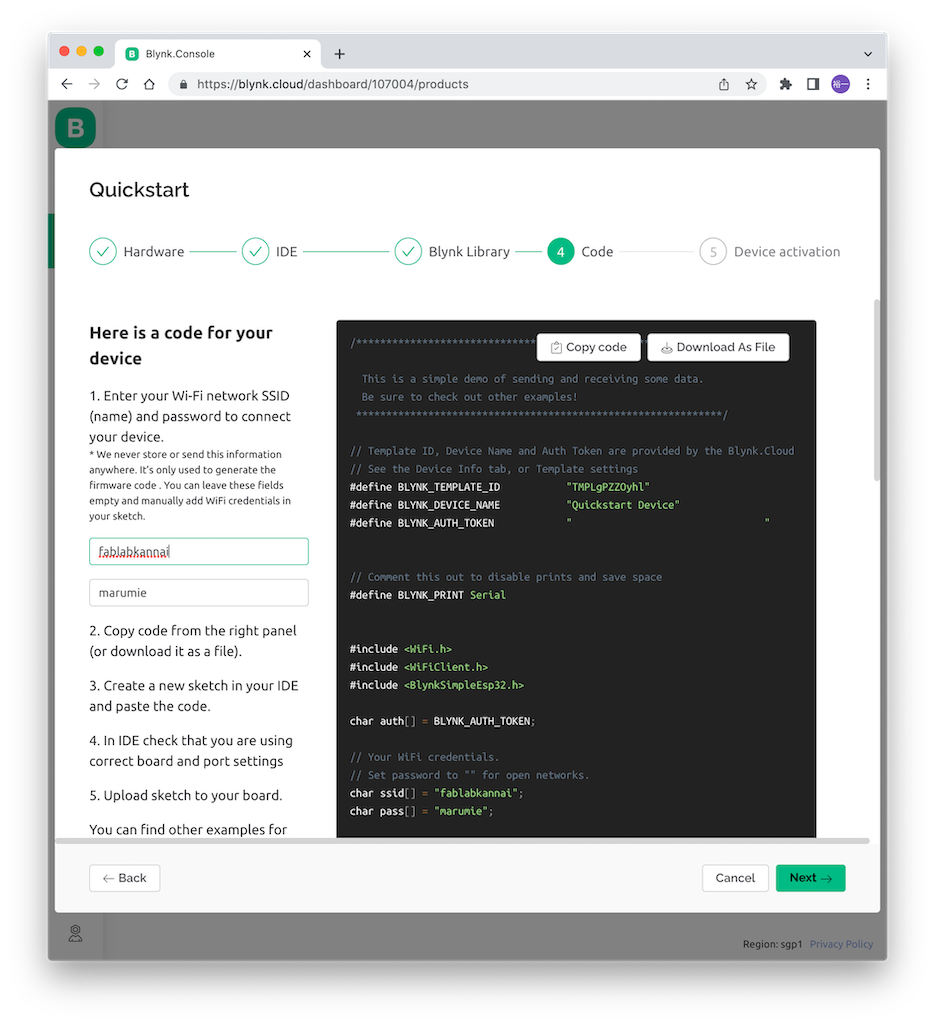
Code for quickstart
- Follow the tutorial for a quick start
- In Arduino IDE, Tools - Manage Libraries… -> Search “Blynk” and Install
/*************************************************************

  This is a simple demo of sending and receiving some data.
  Be sure to check out other examples!
 *************************************************************/

// Template ID, Device Name and Auth Token are provided by the Blynk.Cloud
// See the Device Info tab, or Template settings
#define BLYNK_TEMPLATE_ID           "TMPL5Iq6LyFU"
#define BLYNK_DEVICE_NAME           "Quickstart Device"
#define BLYNK_AUTH_TOKEN            "P8IKQhekfkIEEpxETdFvRTV8av5N4GGO"

// Comment this out to disable prints and save space
#define BLYNK_PRINT Serial

#include <WiFi.h>
#include <WiFiClient.h>
#include <BlynkSimpleEsp32.h>

char auth[] = BLYNK_AUTH_TOKEN;

// Your WiFi credentials.
// Set password to "" for open networks.
char ssid[] = "fablabkannai";
char pass[] = "xxxxxxxxx";

BlynkTimer timer;

// This function is called every time the Virtual Pin 0 state changes
BLYNK_WRITE(V0)
{
  // Set incoming value from pin V0 to a variable
  int value = param.asInt();

  // Update state
  Blynk.virtualWrite(V1, value);
}

// This function is called every time the device is connected to the Blynk.Cloud
BLYNK_CONNECTED()
{
  // Change Web Link Button message to "Congratulations!"
  Blynk.setProperty(V3, "offImageUrl", "https://static-image.nyc3.cdn.digitaloceanspaces.com/general/fte/congratulations.png");
  Blynk.setProperty(V3, "onImageUrl",  "https://static-image.nyc3.cdn.digitaloceanspaces.com/general/fte/congratulations_pressed.png");
  Blynk.setProperty(V3, "url", "https://docs.blynk.io/en/getting-started/what-do-i-need-to-blynk/how-quickstart-device-was-made");
}

// This function sends Arduino's uptime every second to Virtual Pin 2.
void myTimerEvent()
{
  // You can send any value at any time.
  // Please don't send more that 10 values per second.
  Blynk.virtualWrite(V2, millis() / 1000);
}

void setup()
{
  // Debug console
  Serial.begin(115200);

  Blynk.begin(auth, ssid, pass);
  // You can also specify server:
  //Blynk.begin(auth, ssid, pass, "blynk.cloud", 80);
  //Blynk.begin(auth, ssid, pass, IPAddress(192,168,1,100), 8080);

  // Setup a function to be called every second
  timer.setInterval(1000L, myTimerEvent);
}

void loop()
{
  Blynk.run();
  timer.run();
  // You can inject your own code or combine it with other sketches.
  // Check other examples on how to communicate with Blynk. Remember
  // to avoid delay() function!
}
Arduino
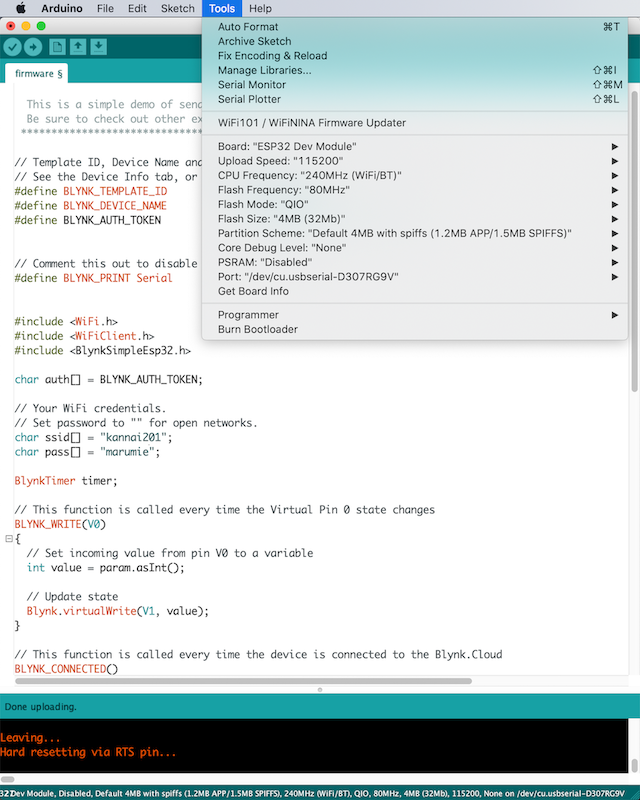
- When running program in ESP32, use slide switch to execution mode and press Reset button
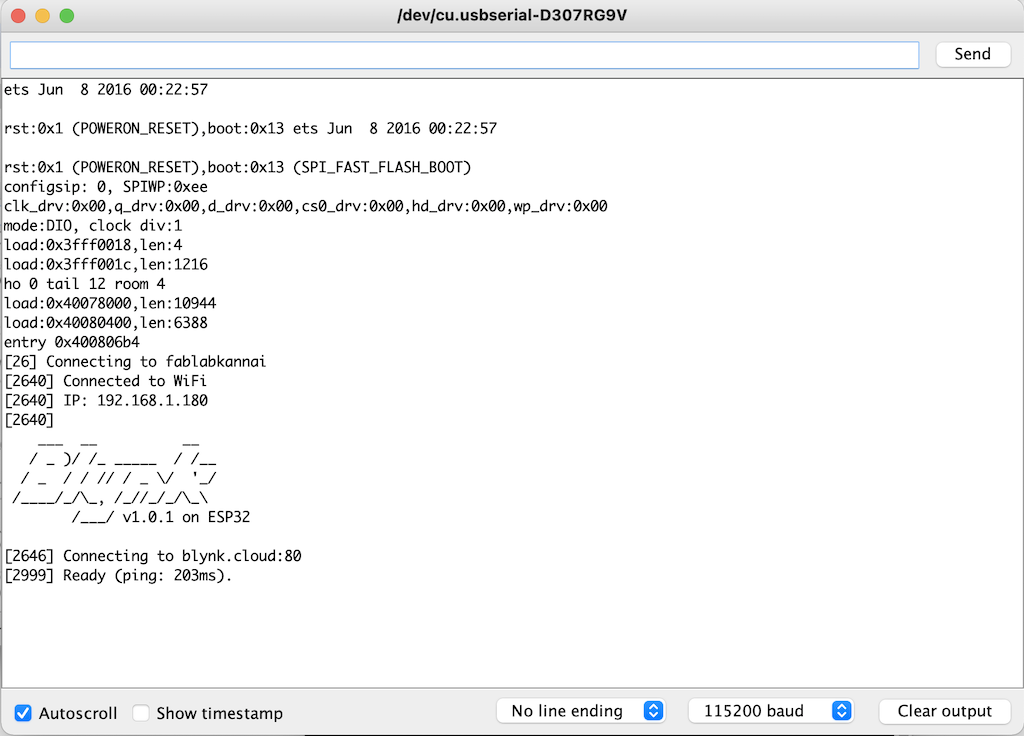
Congrats / succeed in setting
GPIO pin control
- assign LED to Pin 13
/*************************************************************

  This is a simple demo of sending and receiving some data.
  Be sure to check out other examples!
 *************************************************************/

// Template ID, Device Name and Auth Token are provided by the Blynk.Cloud
// See the Device Info tab, or Template settings
#define BLYNK_TEMPLATE_ID           "TMPL5Iq6LyFU"
#define BLYNK_DEVICE_NAME           "Quickstart Device"
#define BLYNK_AUTH_TOKEN            "P8IKQhekfkIEEpxETdFvRTV8av5N4GGO"

// Comment this out to disable prints and save space
#define BLYNK_PRINT Serial

#include <WiFi.h>
#include <WiFiClient.h>
#include <BlynkSimpleEsp32.h>

char auth[] = BLYNK_AUTH_TOKEN;

// Your WiFi credentials.
// Set password to "" for open networks.
char ssid[] = "fablabkannai";
char pass[] = "xxxxxxxxxxxx";

BlynkTimer timer;

// This function is called every time the Virtual Pin 0 state changes
BLYNK_WRITE(V0)
{
  // Set incoming value from pin V0 to a variable
  int value = param.asInt();

  //////////////////////////////////////////////////////////////////////////add
  if (param.asInt() == 1) {
    // execute this code if the switch widget is now ON
    digitalWrite(13, HIGH); // Set digital pin 13 HIGH
  }
  else {
    // execute this code if the switch widget is now OFF
    digitalWrite(13, LOW); // Set digital pin 13 LOW
  }

  ////////////////////////////////////////////////////////////////////////added

  // Update state
  Blynk.virtualWrite(V1, value);
}

// This function is called every time the device is connected to the Blynk.Cloud
BLYNK_CONNECTED()
{
  // Change Web Link Button message to "Congratulations!"
  Blynk.setProperty(V3, "offImageUrl", "https://static-image.nyc3.cdn.digitaloceanspaces.com/general/fte/congratulations.png");
  Blynk.setProperty(V3, "onImageUrl",  "https://static-image.nyc3.cdn.digitaloceanspaces.com/general/fte/congratulations_pressed.png");
  Blynk.setProperty(V3, "url", "https://docs.blynk.io/en/getting-started/what-do-i-need-to-blynk/how-quickstart-device-was-made");
}

// This function sends Arduino's uptime every second to Virtual Pin 2.
void myTimerEvent()
{
  // You can send any value at any time.
  // Please don't send more that 10 values per second.
  Blynk.virtualWrite(V2, millis() / 1000);
}

void setup()
{
  // Debug console
  Serial.begin(115200);

  pinMode(13, OUTPUT); /////////////////////////////////////////////////////add

  Blynk.begin(auth, ssid, pass);
  // You can also specify server:
  //Blynk.begin(auth, ssid, pass, "blynk.cloud", 80);
  //Blynk.begin(auth, ssid, pass, IPAddress(192,168,1,100), 8080);

  // Setup a function to be called every second
  timer.setInterval(1000L, myTimerEvent);
}

void loop()
{
  Blynk.run();
  timer.run();
  // You can inject your own code or combine it with other sketches.
  // Check other examples on how to communicate with Blynk. Remember
  // to avoid delay() function!
}
Arrange Interface
- Add Switch Status
-
Add history chart
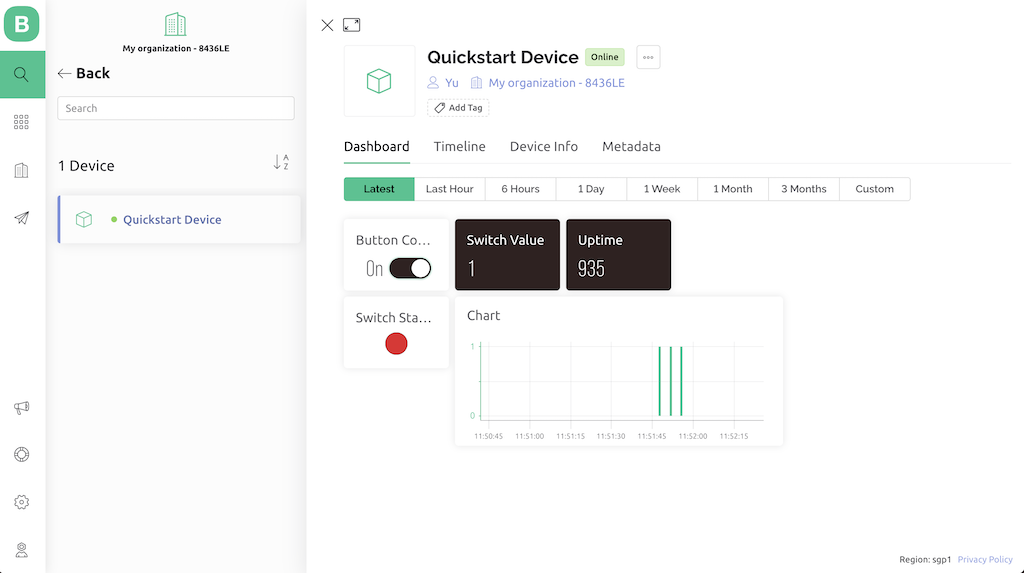
Install iOS App of Blynk and set up device
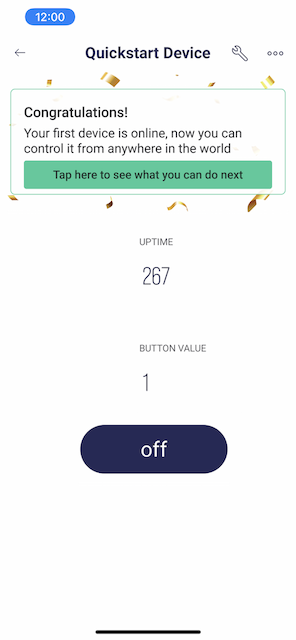
- can be run from a smart phone
- can be worked even if not connected to the same Wifi (amazing)
Smartphone - 4G - Blynk Cloud - Wifi - ESP32
Try 2 : App Inventor as a interface of iOS and Android App
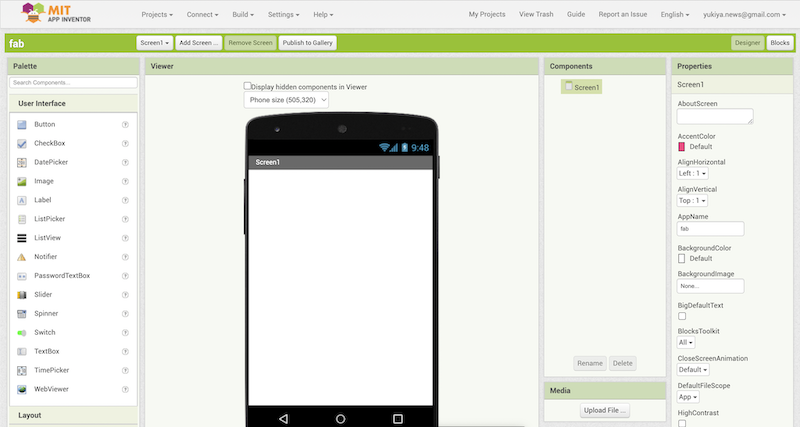
Create the interface
-
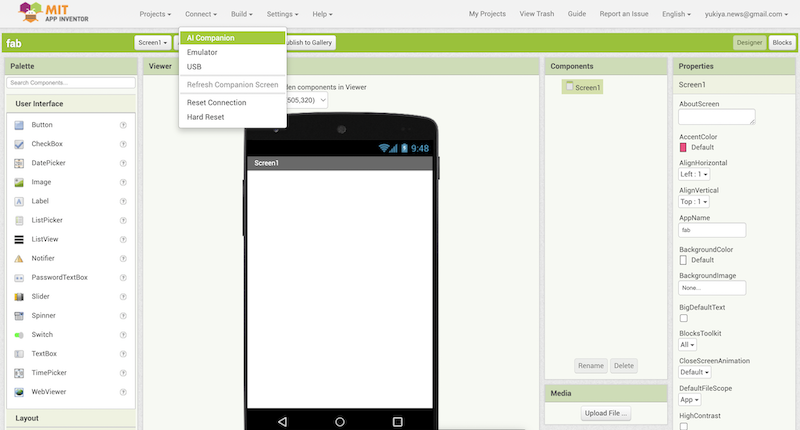
Connect > AI comparison
-
Scan code
-
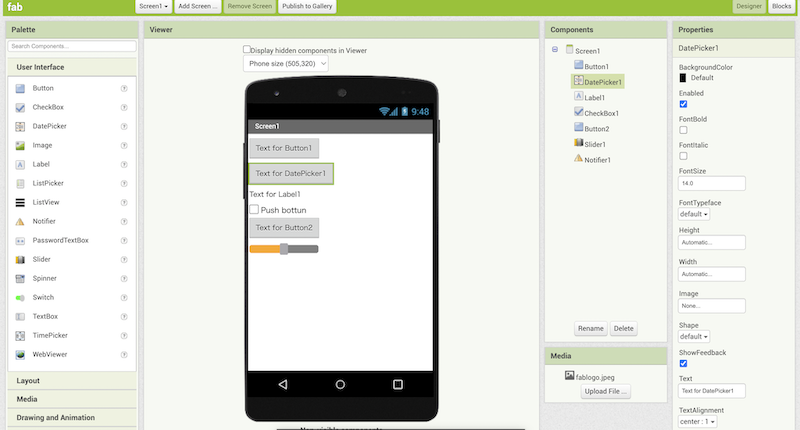
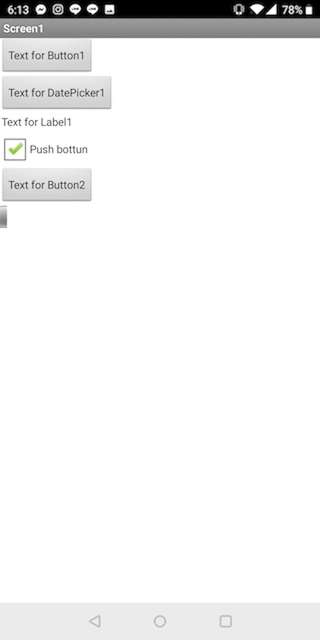
Design Mode: put a variety of button on the screen below
-
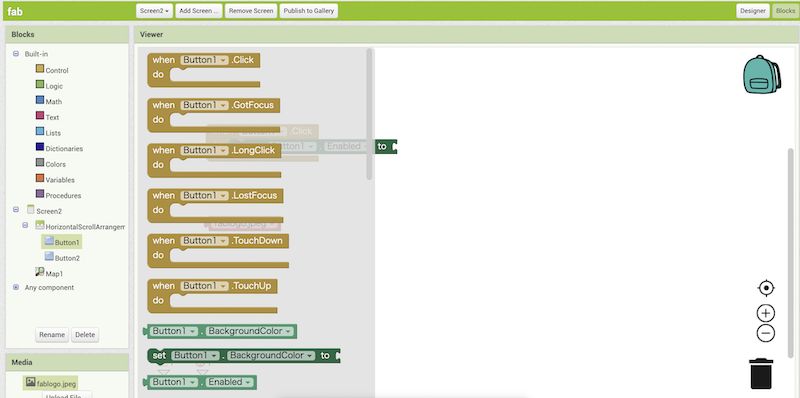
Block Mode as a logical structure
Build to export apk in Android
-
Build > Android App(apk)
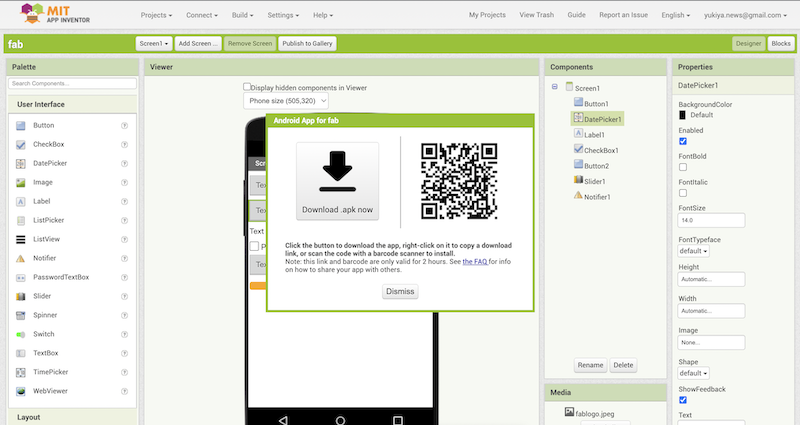
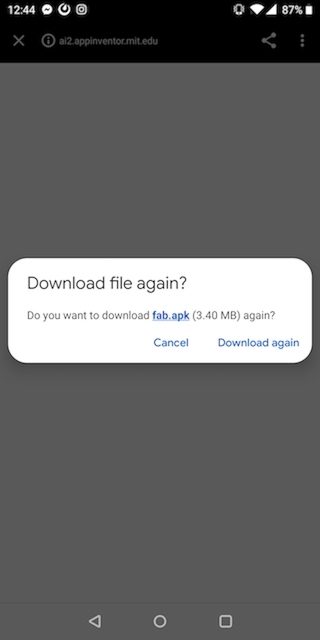
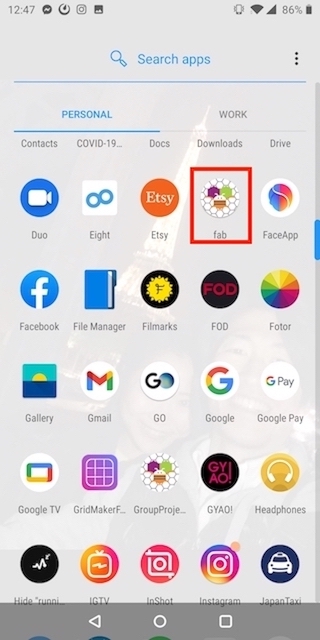
-
Scan QR code and open in Android

Comparison between blynk and App inventor
File
Last update:
July 11, 2022