4. Electronics production
nueval
- nueval
- Login with fablabs.io
- Student’s checklist -> Send Message to Instructor(in English) -> Local evaluation
- Progress -> Completed (Assignment done)
- (Local eval) Completed x 2 -> Request to Global Evaluation
- Global Evaluator will be assigned -> Global Evaluation starts
- (Global eval) Completed all + Final Presentation -> Graduate!
Preparation for next week
3D Scanning and Printing
group assignment:
- test the design rules for your 3D printer(s)individual assignment:
- design and 3D print an object (small, few cm3, limited by printer time)
that could not be made subtractively
- 3D scan an object (and optionally print it)
FAQ Define cannot be easily made subtractively
Answer: Your model has undercuts), overhangs, nested parts, meshes etc.
Ref. assesment
Preparation
- idea or model for 3D printing
- idea or find object for 3D scan
Group Assignment
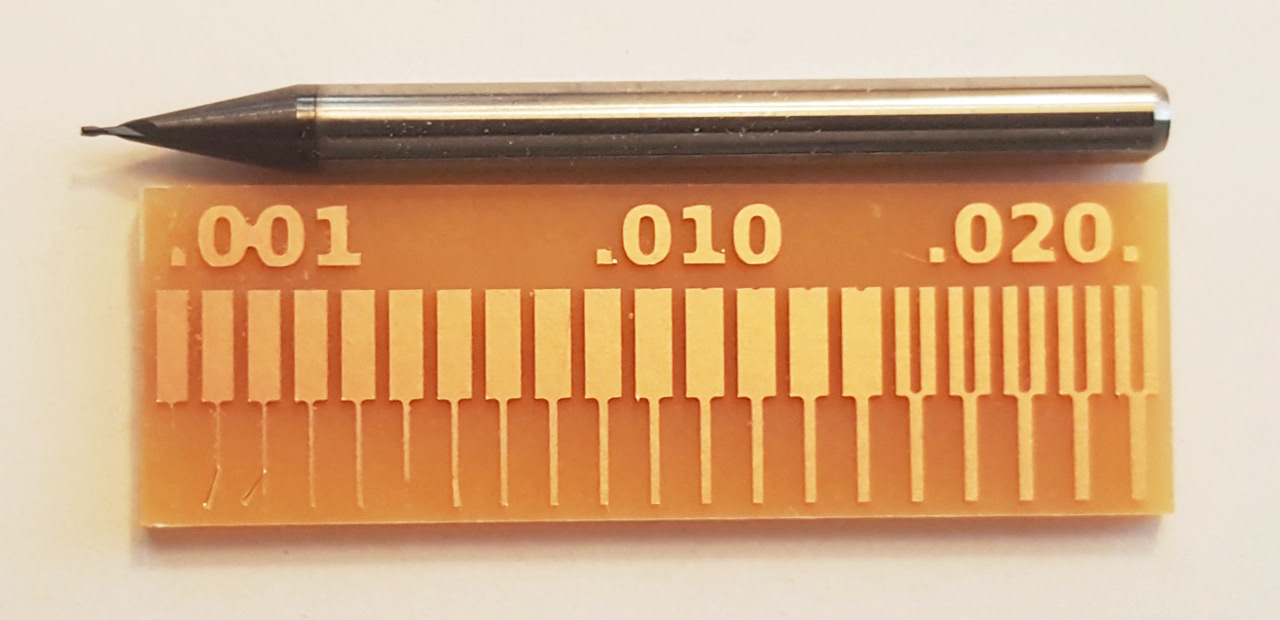
characterize the design rules for your in-house PCB production process
extra credit: send a PCB out to a board house
Group assignment:
Characterize the design rules for your in-house PCB production process:
document feeds, speeds, plunge rate, depth of cut (traces and outline) and tooling.
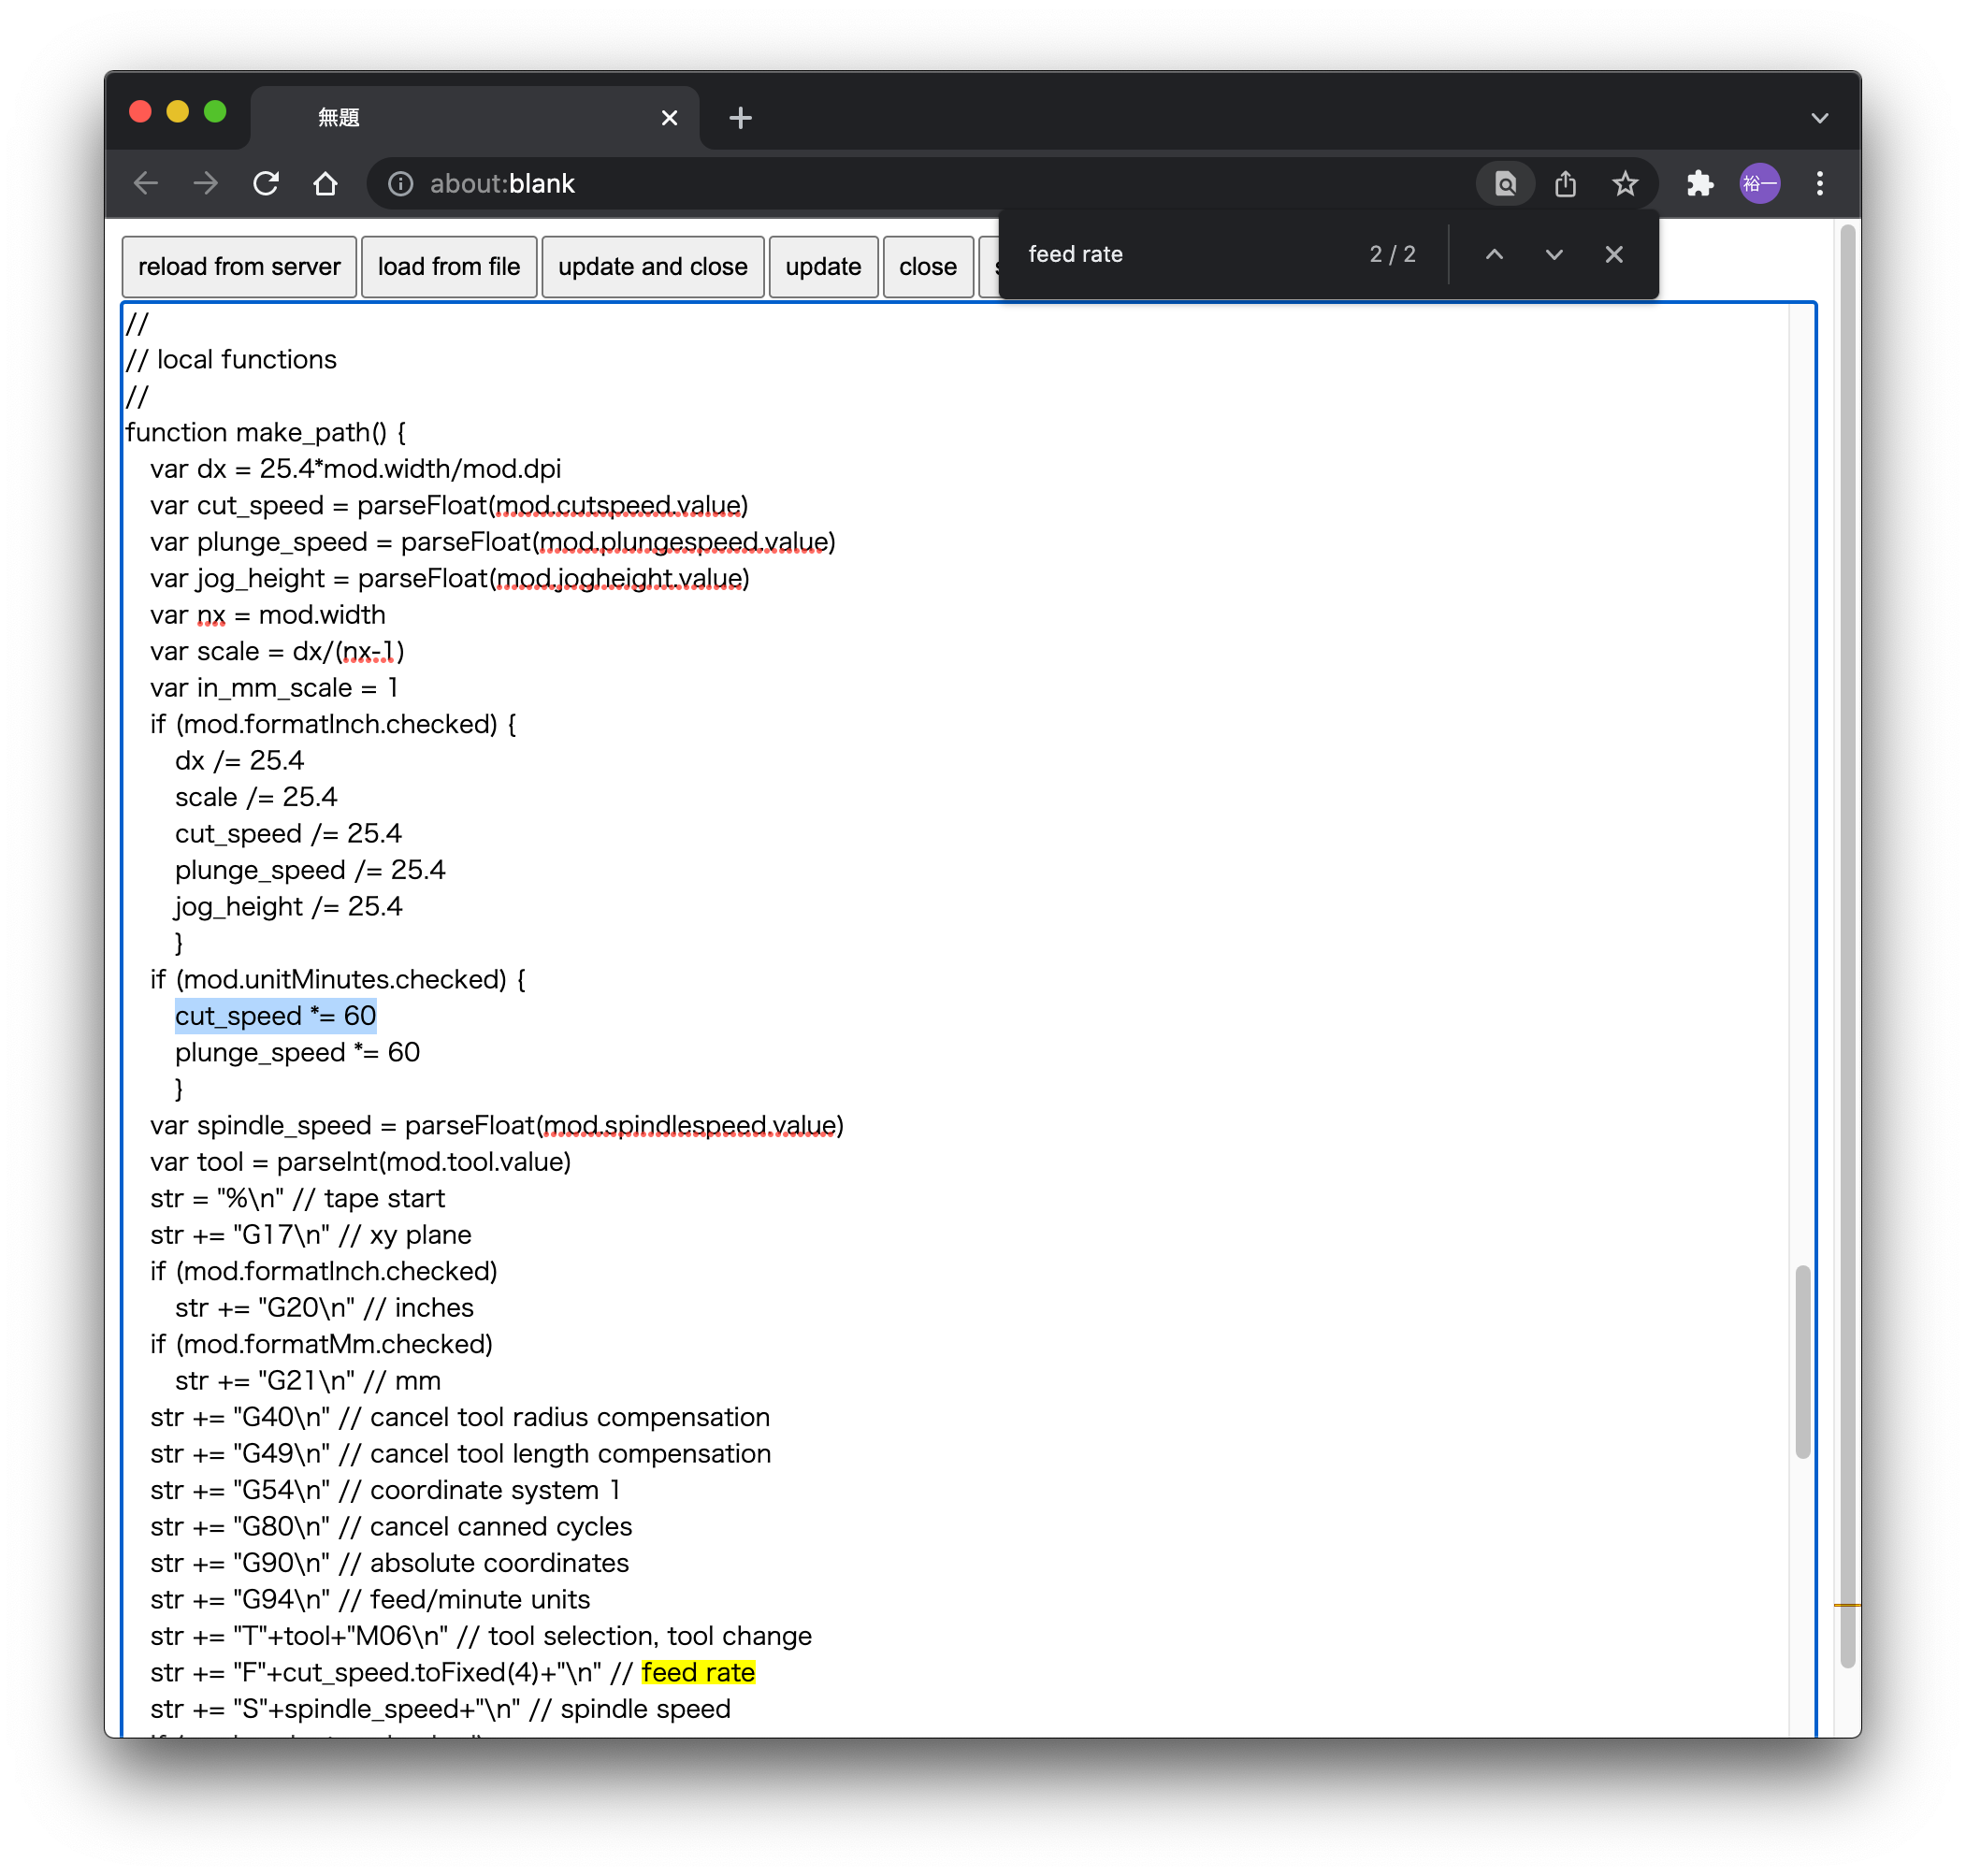
- Feed Rate
- the distance which the cutting tool during one spindle revolution [ipm]or[mpm]
- Ref. Difference Between Feed Rate and Cutting Speed in CNC Machining
Note
In Mods’ path to G-code module, cut speed (mm/s) is used to calculate F(Feed rate) in G-code.
Example:
Mods path to G-code module
- cut speed 1(mm/s)
G-code .nc
- F60.0000(mm/min)
-
characterize the design rules
-
CAM and Machine
| CAM | Gcode sender | Machine | PC |
|---|---|---|---|
| Fabmodules | (included) | Roland MODELA MDX-15 | Linux in lab |
| Mods | (included) | Roland MODELA MDX-15 | Linux in lab |
| Mods | gSender | Sainsmart Genmitsu PROVerXL | Your PC |
- http://fabmodules.org/ -> 404
- Mods
ToDo
-
Set up milling environment
-
mill
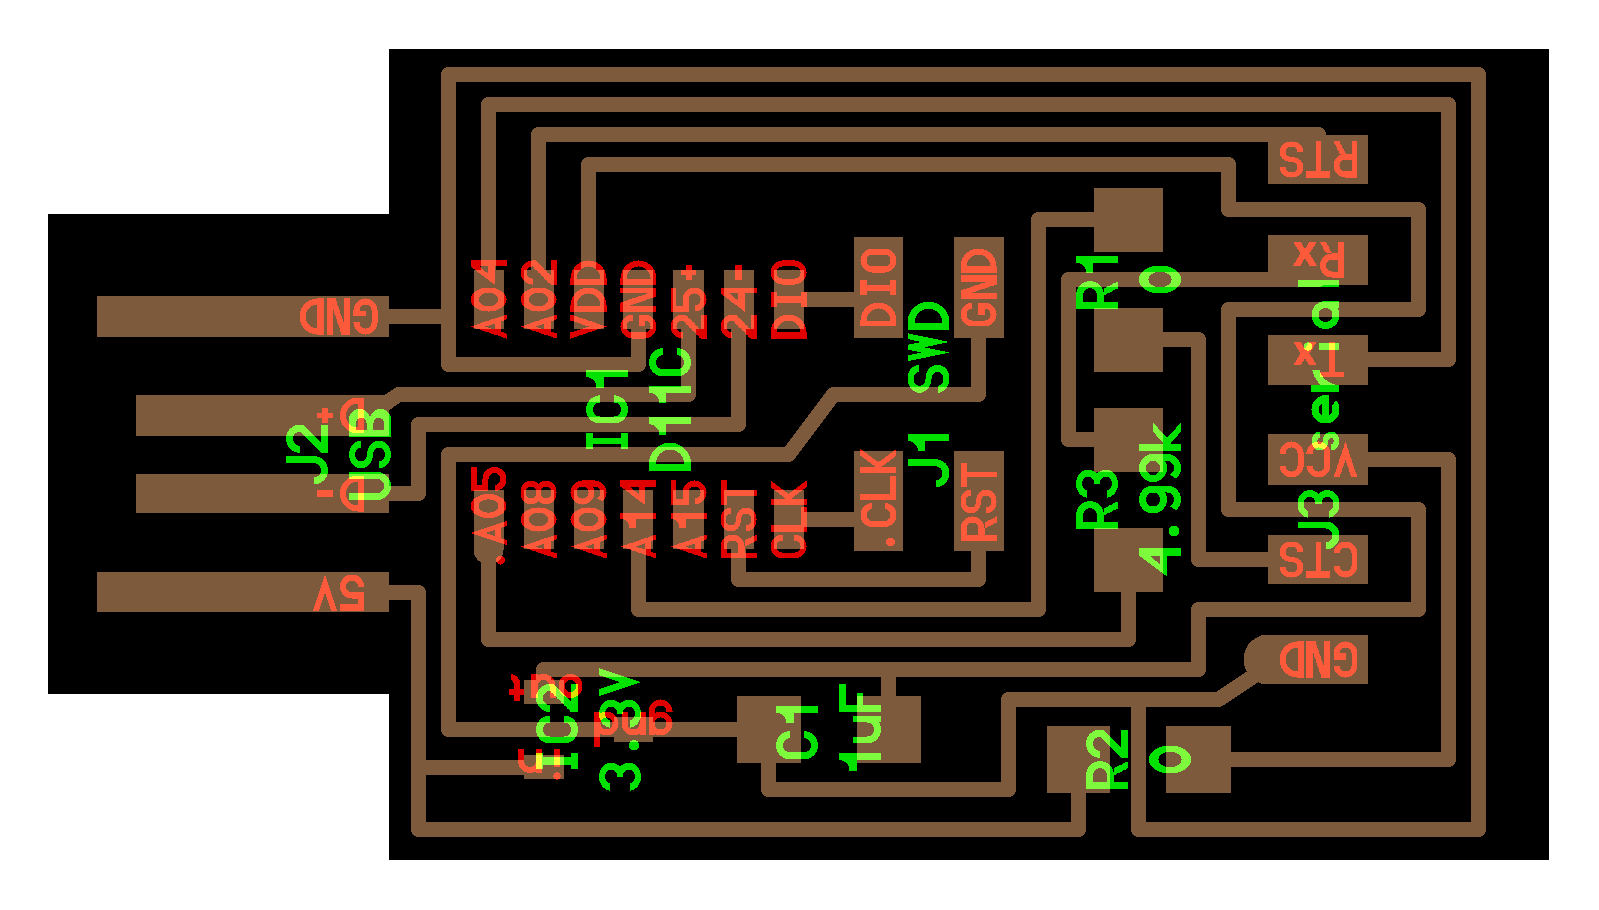
Individual Assignment
make an in-circuit programmer that includes a microcontroller:
extra credit: customize the design
mill and stuff the PCB
test it to verify that it works
extra credit: try other PCB processes
MCU
| Family | MCU | Interface | in-circuit programmer(Assignment) |
|---|---|---|---|
| original AVR | ATtiny44ATmega328P | ISP | Fab ISP |
| AVR | AVR-13216 | UPDI | USB-Serial board & Serial-UPDI board |
| ARM | SAMD11C | JTAG/SWD | FreeDAP board |
| Xtensa | ESP8266ESP32 | Serial | USB-Serial board |
Attention
FA2022 Trend
SAMD11C -> USB-Serial board
To Programm SAMD11C, need another DAP programmer board
(Not FTDI chip)
AVR-1
| in-circuit programmer | Adapter board | Target Board |
|---|---|---|
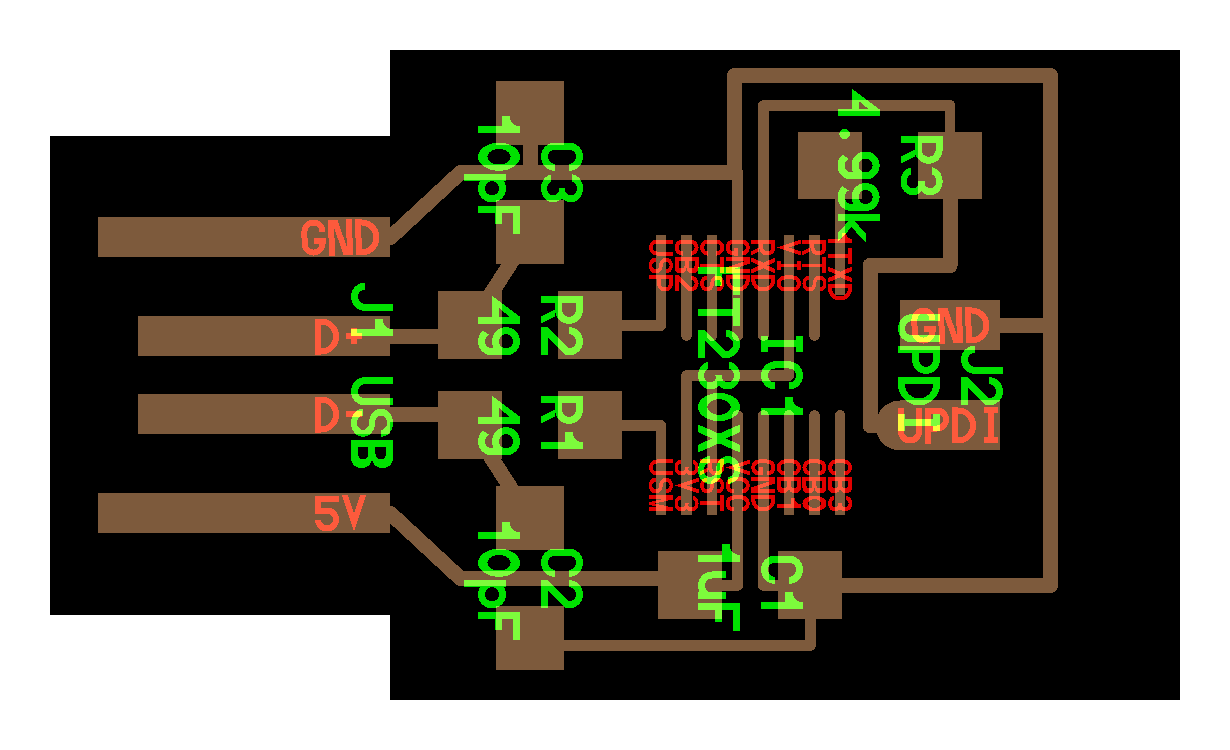 USB-FT230XS-UPDI USB-FT230XS-UPDI |
 hello.t3216 hello.t3216 |
|
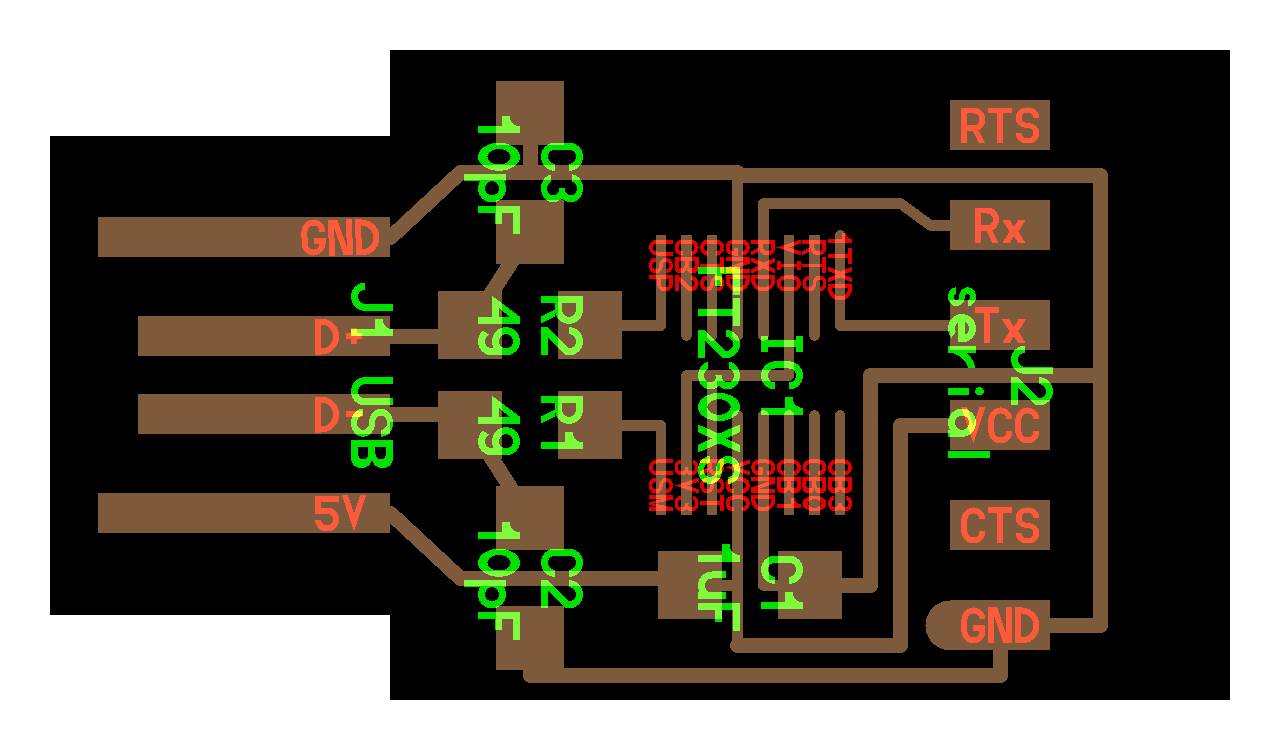 USB-FT230XS-serial USB-FT230XS-serial |
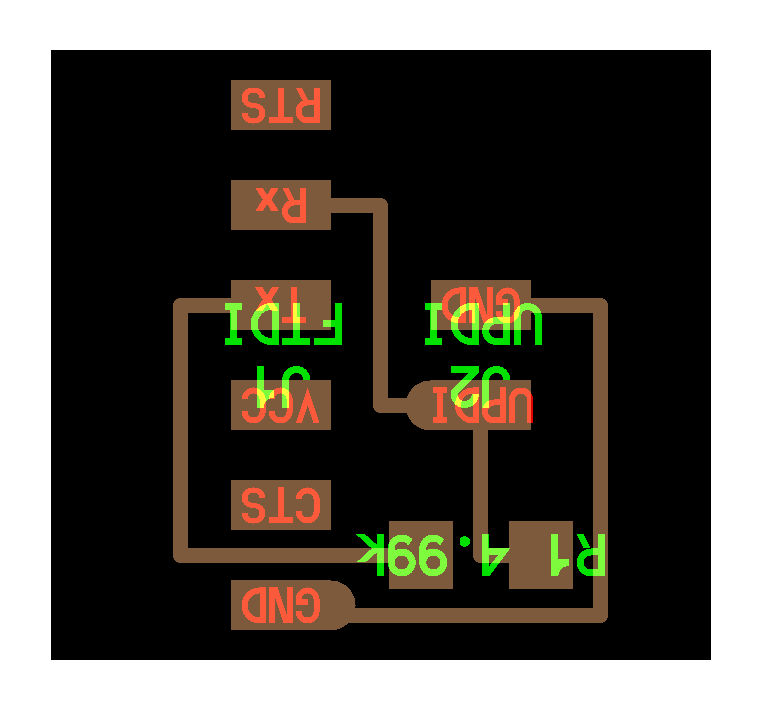 serial-UPDI serial-UPDI |
|
 hello.D11C.serial.5V.1.1 hello.D11C.serial.5V.1.1 |
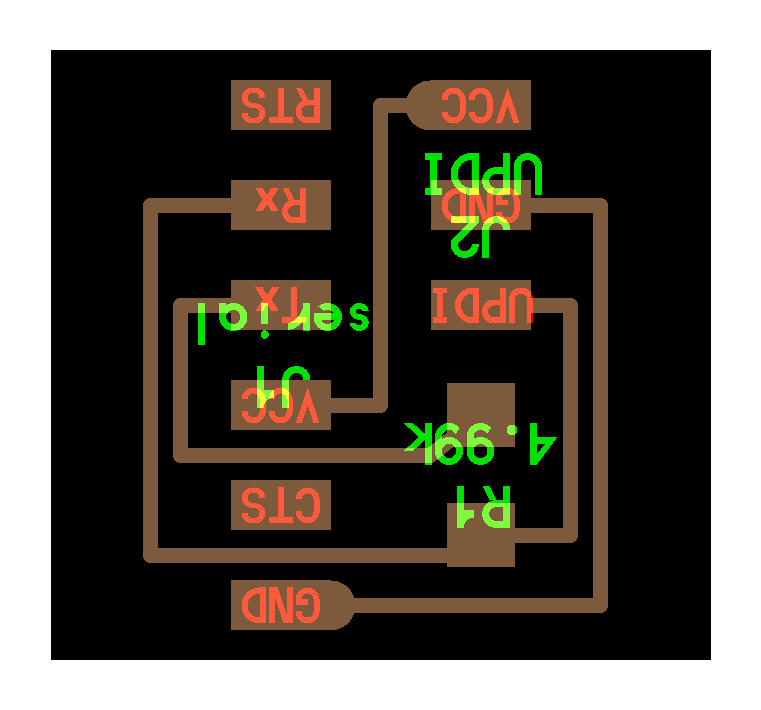 serial-UPDI.3 serial-UPDI.3 |
ARM
| in-circuit programmer | Adapter board | Target Board |
|---|---|---|
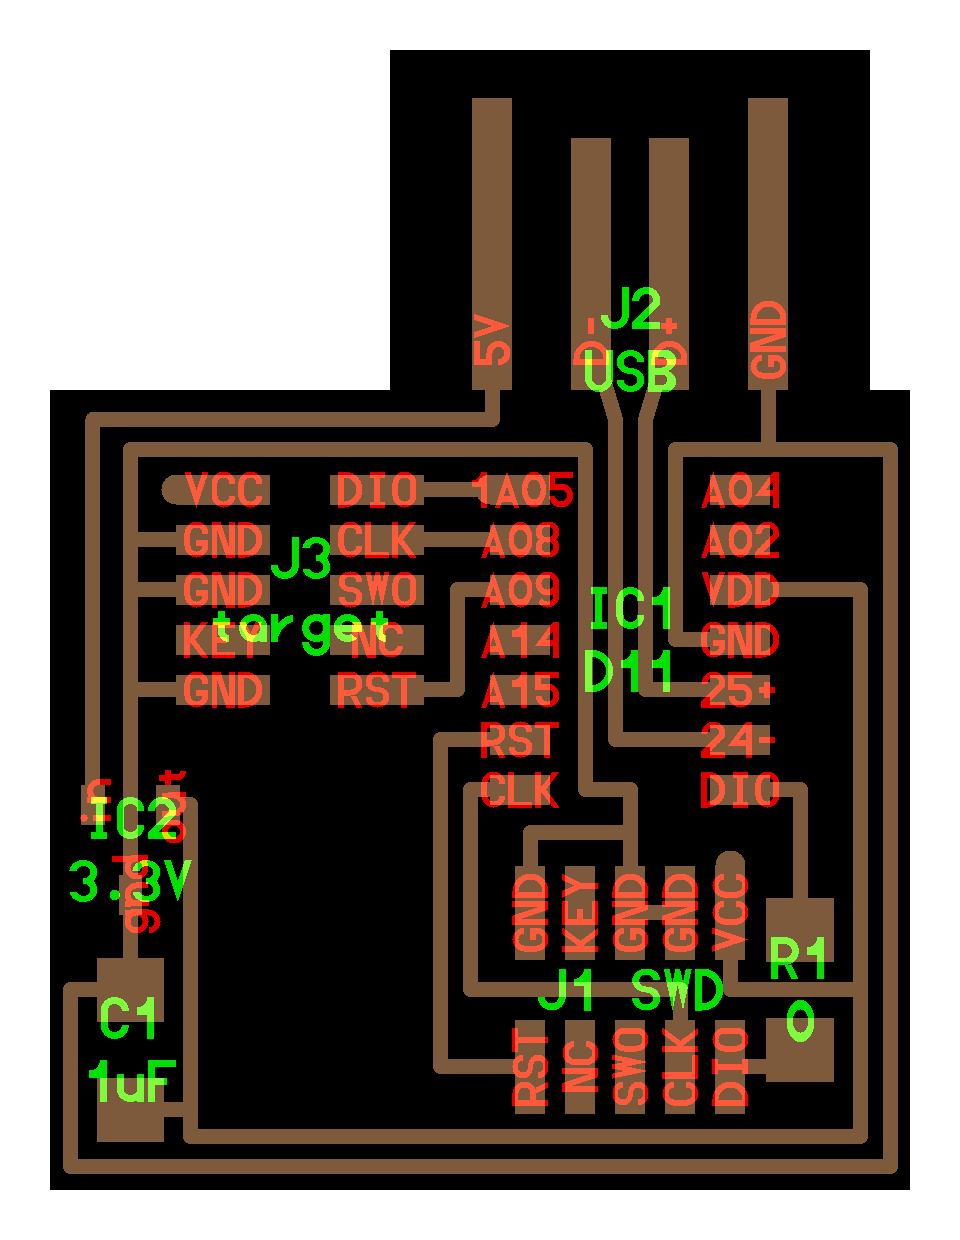 hello.CMSIS-DAP.10.D11C hello.CMSIS-DAP.10.D11C |
||
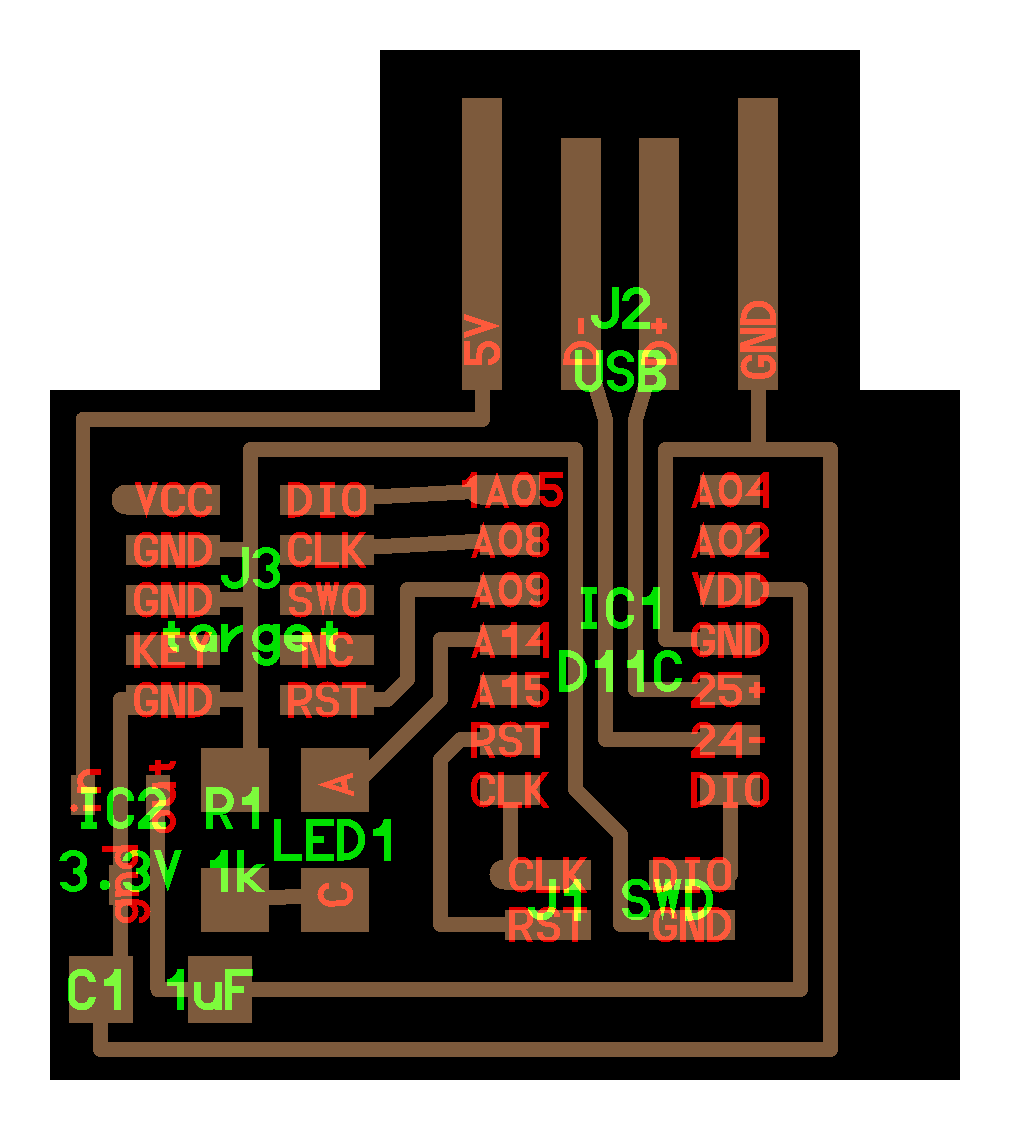 hello.CMSIS-DAP.4.D11C hello.CMSIS-DAP.4.D11C |
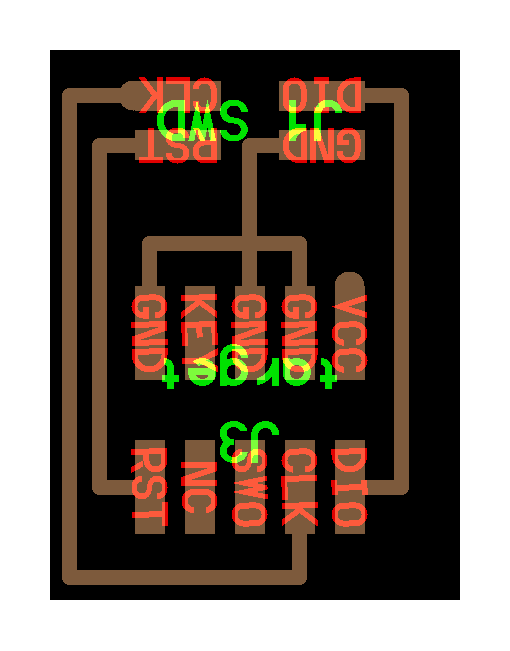 hello.SWD.10-4 hello.SWD.10-4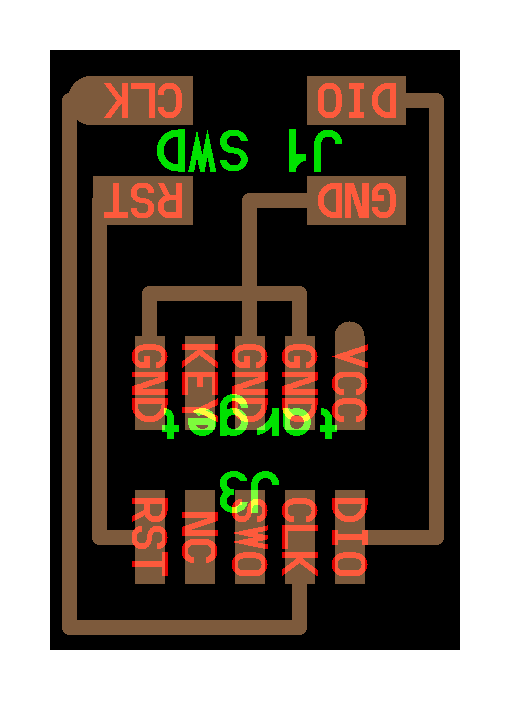 hello.SWD.10-4.1 hello.SWD.10-4.1 |
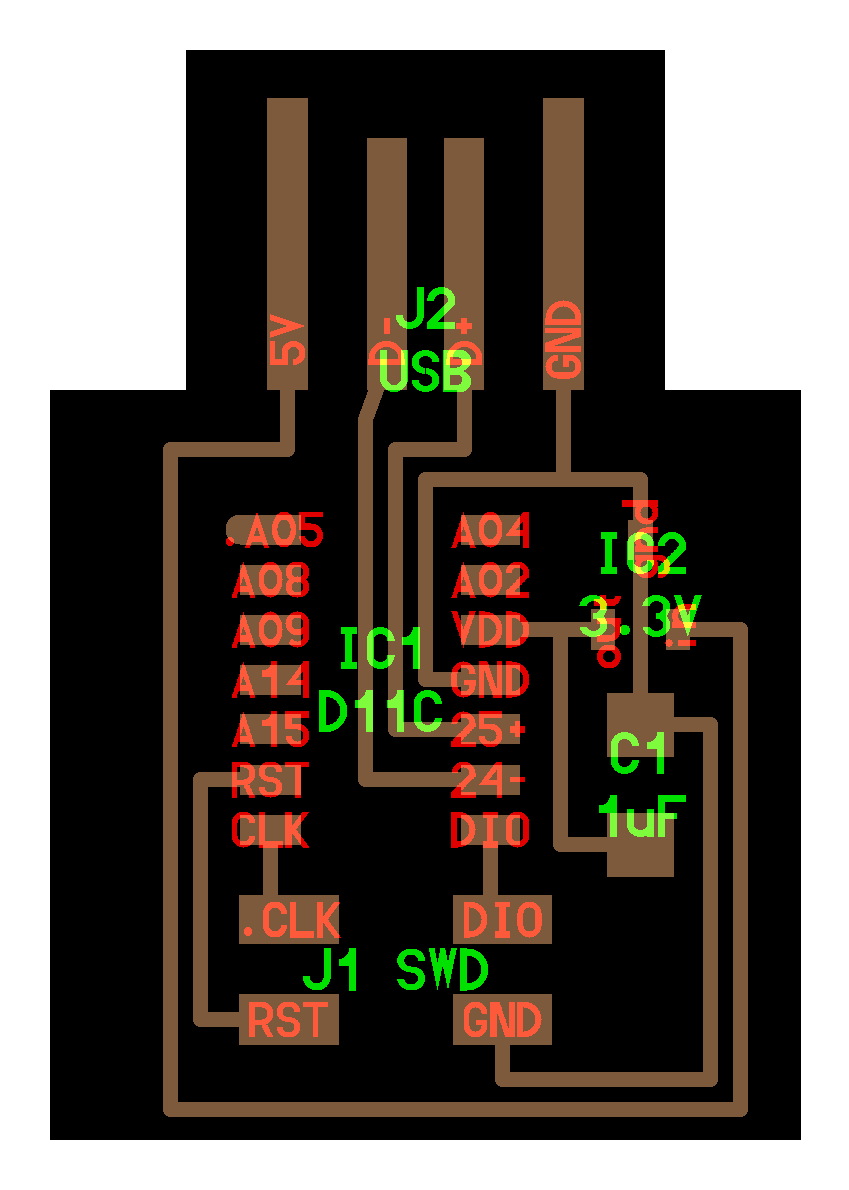 hello.D11C.echo.1 hello.D11C.echo.1 |
Xtensa
| in-circuit programmer | Adapter board | Target Board |
|---|---|---|
| USB-FT230XS-serialhello.D11C.serial.5V.1.1 |
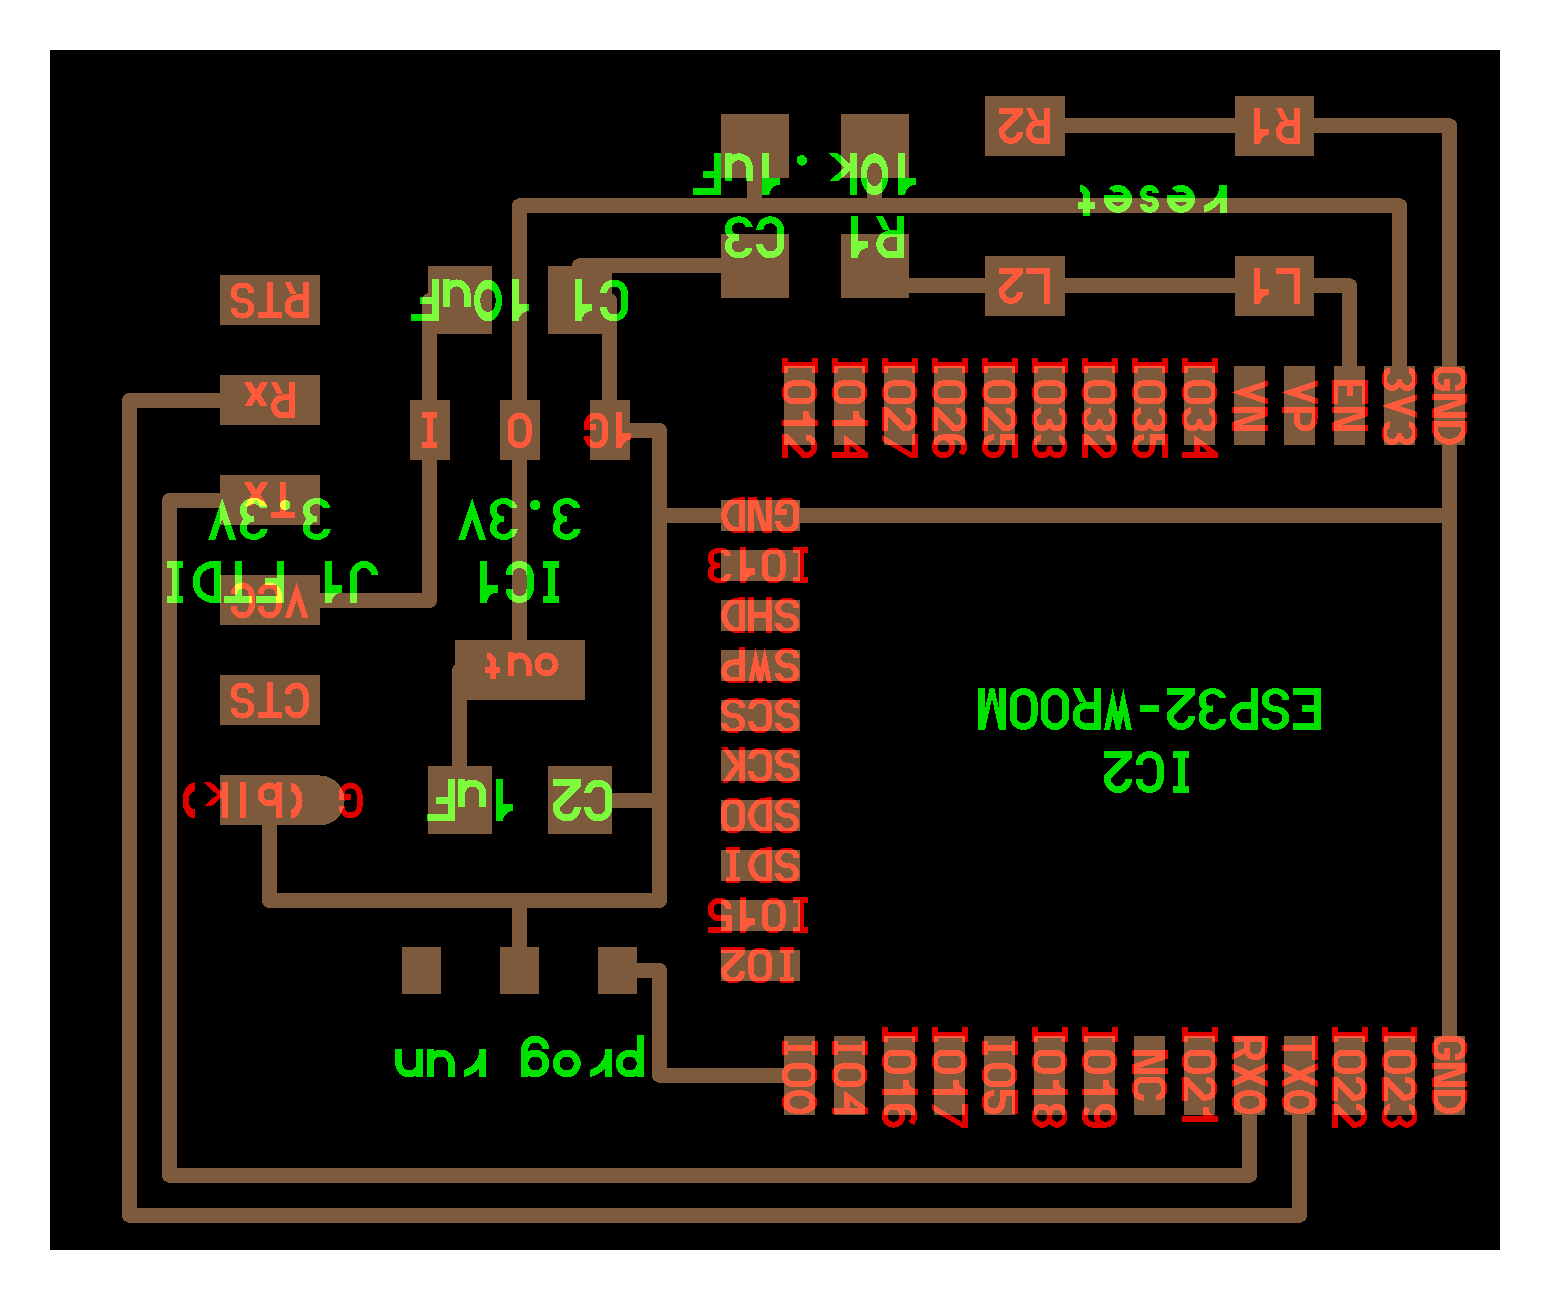 hello.ESP32-WROOM hello.ESP32-WROOM |
Commercial
DAP
| ICE | DAP board |
|---|---|
 Atmel-ICE Atmel-ICE |
 MAX32625PICO MAX32625PICO |
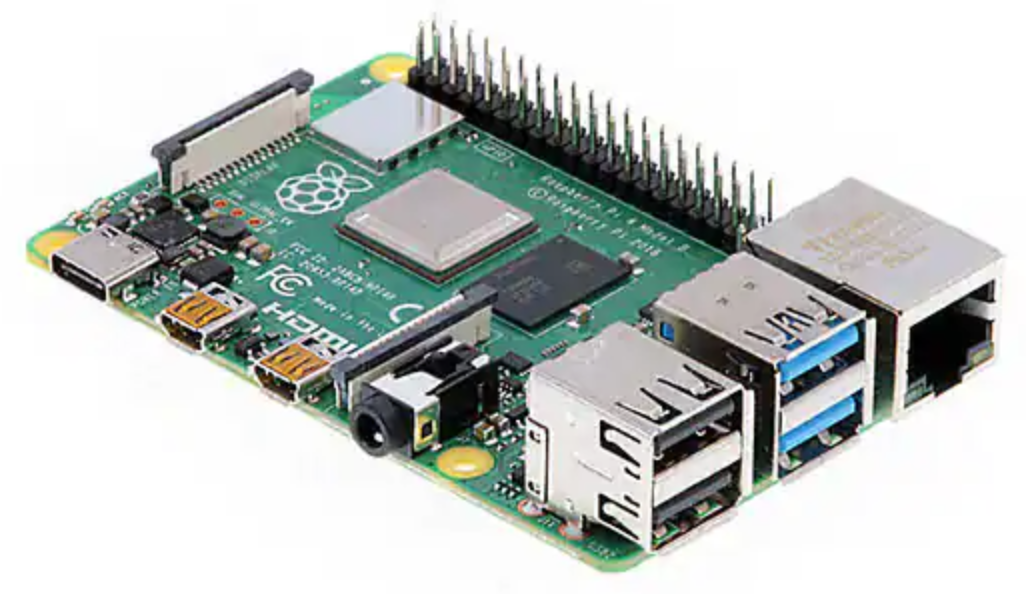
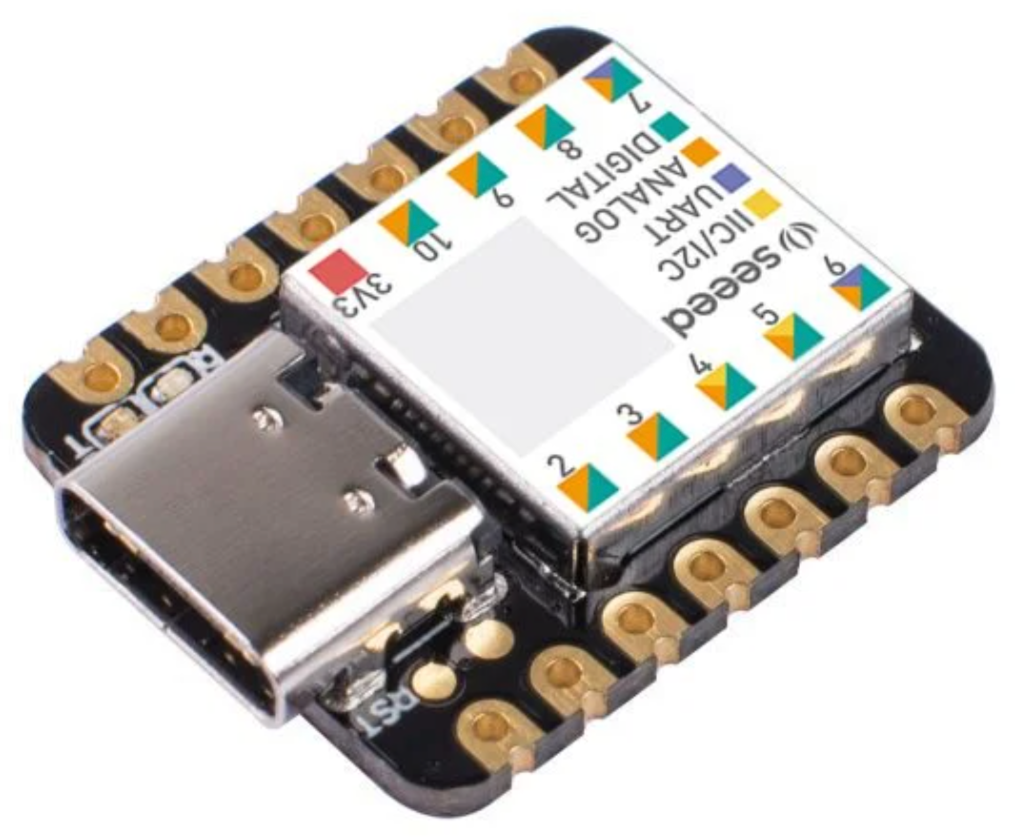
Raspberry Pi & Seeeduino Xiao
Ref. FA2022 Embedded Programming Environment
| Raspberry Pi4 | Seeduino Xiao |
|---|---|
 |
 |
USB-Serial
| Digikey | SwitchScience | Akizuki |
|---|---|---|
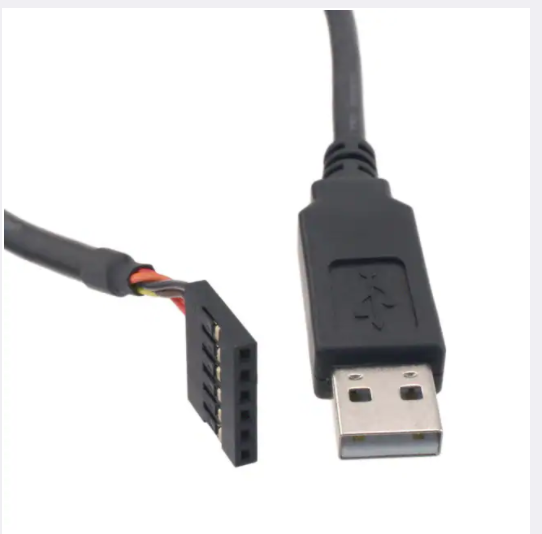 TTL-232R-5V TTL-232R-5V |
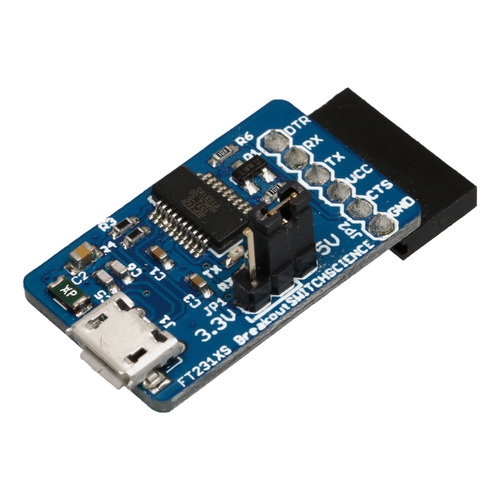 FTDI USE serial Rev.2 FTDI USE serial Rev.2 |
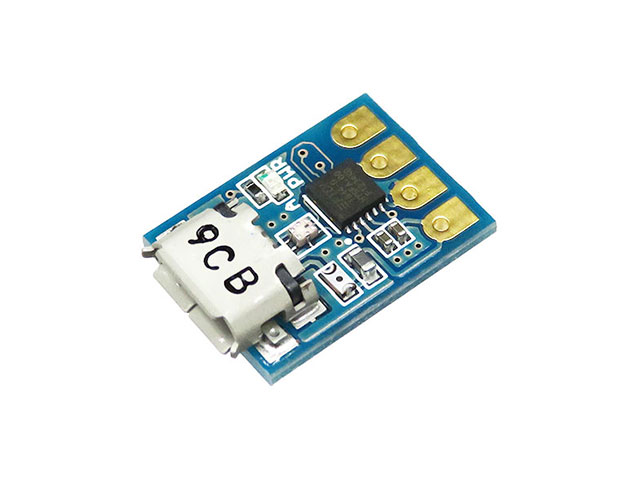 FT234X module FT234X module |
Note
Mkdocs tips
Open Link target in new page
[text](path/to/link){:target="_blank"}
Image Size (width)
{width=300}
Click image to other link
[](path/to/link)
Todo
- Mill in-circuit programmer and Adapter board for AVR-1
| in-circuit programmer(This week) | Adapter board(This week) | Target Board (week06/Pre-session) |
|---|---|---|
| hello.D11C.serial.5V.1.1 |
serial-UPDI.3 |
hello.t3216 |
-
Solder components
-
Set up programming environment
- Raspberry Pi4
- Install Ubuntu
- Wifi Setting (lab’s and your_house’s)
- SSH
- no displey
- no keyboard and mouse
- install edbg
- Seeeduino Xiao
- Arduino IDE
- Board manager
- DAPLink sketch
- Arduino IDE
- Raspberry Pi4
-
Burn Bootloader
- your PC —(WiFi, SSH)—> Pi4—(USB)—> Xiao—(jumper wiers)—> hello.D11C.serial.5V.1.1_board
-
Program 3216 board
- your PC —(USB)—> D11C.serial—>UPDI_Adapter—>3216_board
- Arduino IDE
- Board manager
- Example Sketch (Blink)