10. Output devices
Instruction
- individual assignment: add an output device to a microcontroller board you’ve designed, and program it to do something
- group assignment: measure the power consumption of an output device
What I did in this week
- practice to set up the output device by using arduino →in this page
- try to set it up by using my own breakout board →in this page
- measure the powerconsumption of an output device →in this page
- add an output device to a microcontroller board you’ve designed →individual page
- program it to flash LED →individual page
practice to set up the output device by using arduino
I choose Neo Pixel LEDs as an output device. First of all, I try to LED flashing by using arduino.
I refered to this arduino guide page
Neo Pixel circuit
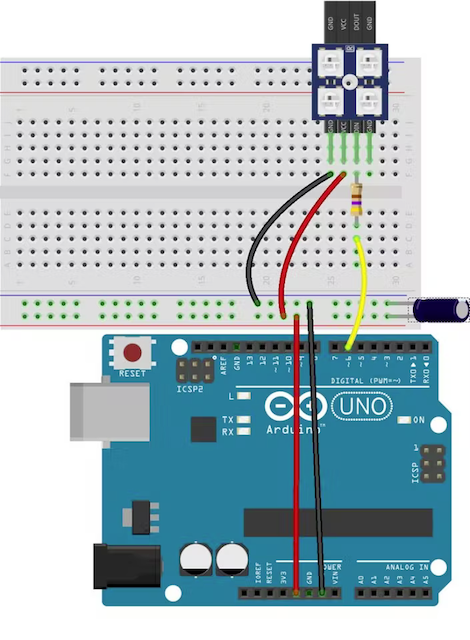
learn about NeoPixel LEDs and how to control them with Arduino.
- Before connecting NeoPixels to any large power source (DC “wall wart” or even a large battery), add a capacitor (500–1000 µF at 6.3V or higher) across the + and – terminals as shown above. The capacitor buffers sudden changes in the current drawn by the strip.
- Place a 300 to 500 Ohm resistor between the Arduino data output pin and the input to the first NeoPixel. The resistor should be at the end of the wire closest to the NeoPixel(s), not the microcontroller. Some products already incorporate this resistor…if you’re not sure, add one…there’s no harm in doubling up!
Read Adafruit NeoPixel Userguide
Design Circuit
- wiring arduino uno to bread board which connect to NeoPixel

- Program it
Test 1 :Blink mode
/*

NeoPixel LEDs

modified on 7 May 2019
by Saeed Hosseini @ Electropeak
https://electropeak.com/learn/

*/

#include <Adafruit_NeoPixel.h>
#ifdef __AVR__
#include <avr/power.h> // Required for 16 MHz Adafruit Trinket
#endif

#define PIN        6
#define NUMPIXELS 8


Adafruit_NeoPixel pixels(NUMPIXELS, PIN, NEO_GRB + NEO_KHZ800);

void NeoBlink(int num, int wait)
{
for (int i = 0; i < num; i++)
{
pixels.setPixelColor(i, 35, 35, 35);
}
pixels.show();
delay(wait);
for (int j = 0; j < num; j++)
{
pixels.setPixelColor(j, 0, 255, 0);
}
pixels.show();
delay(wait);
}

void setup()
{
pixels.begin();
pixels.setBrightness(50);
}

void loop()
{
NeoBlink(NUMPIXELS, 500);
}
- done
movie

Test 2 : Fading mode
/*

NeoPixel LEDs

modified on 7 May 2019
by Saeed Hosseini @ Electropeak
https://electropeak.com/learn/

*/

#include <Adafruit_NeoPixel.h>
#ifdef __AVR__
#include <avr/power.h> // Required for 16 MHz Adafruit Trinket
#endif

#define PIN        6
#define NUMPIXELS 8

Adafruit_NeoPixel pixels(NUMPIXELS, PIN, NEO_GRB + NEO_KHZ800);

#define DELAYVAL 500 // Time (in milliseconds) to pause between pixels

void NeoFade(int FadeSpeed)
{
int fspeed;
for (int i = 0; i < NUMPIXELS; i++) { pixels.setPixelColor(i, 165, 242, 243); } for (int j = 130; j > 0; j=j-10)
{
pixels.setBrightness(j);
pixels.show();
delay(FadeSpeed);
}
}

void setup() {
pixels.begin();
}

void loop() {
NeoFade(300);
}
- done
movie
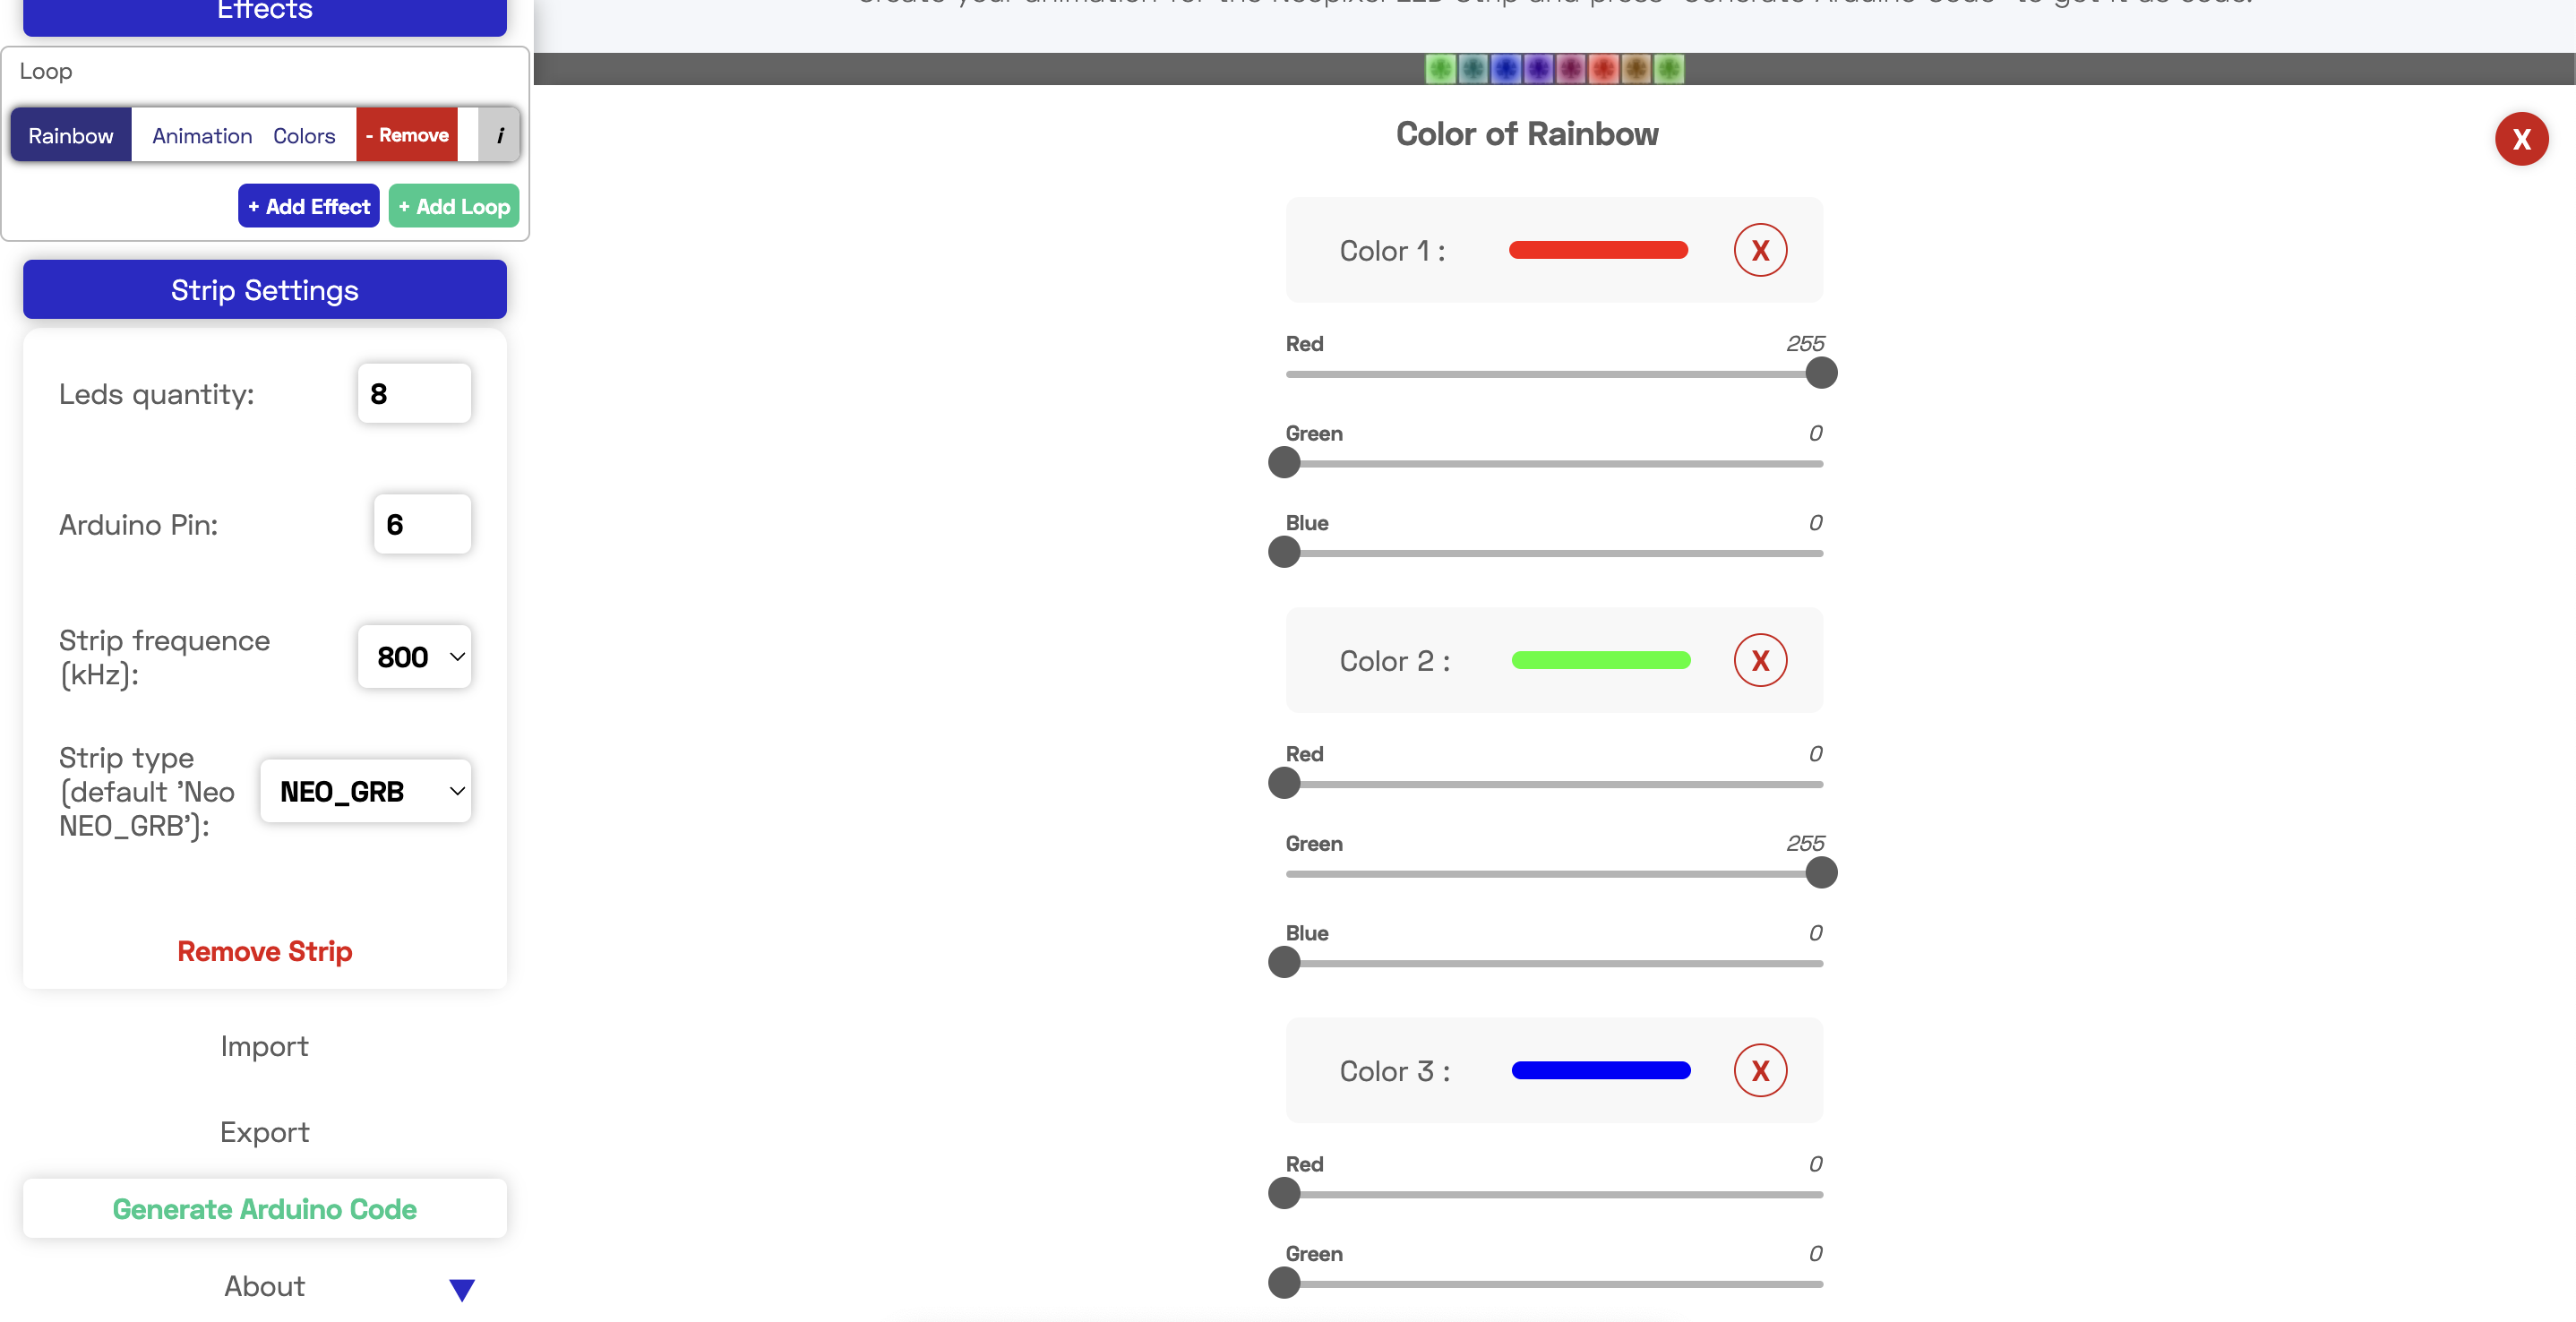
Test 3 : Rainbow
- Design how to light by Neo Pixel Effect Generator
click “add led strip”
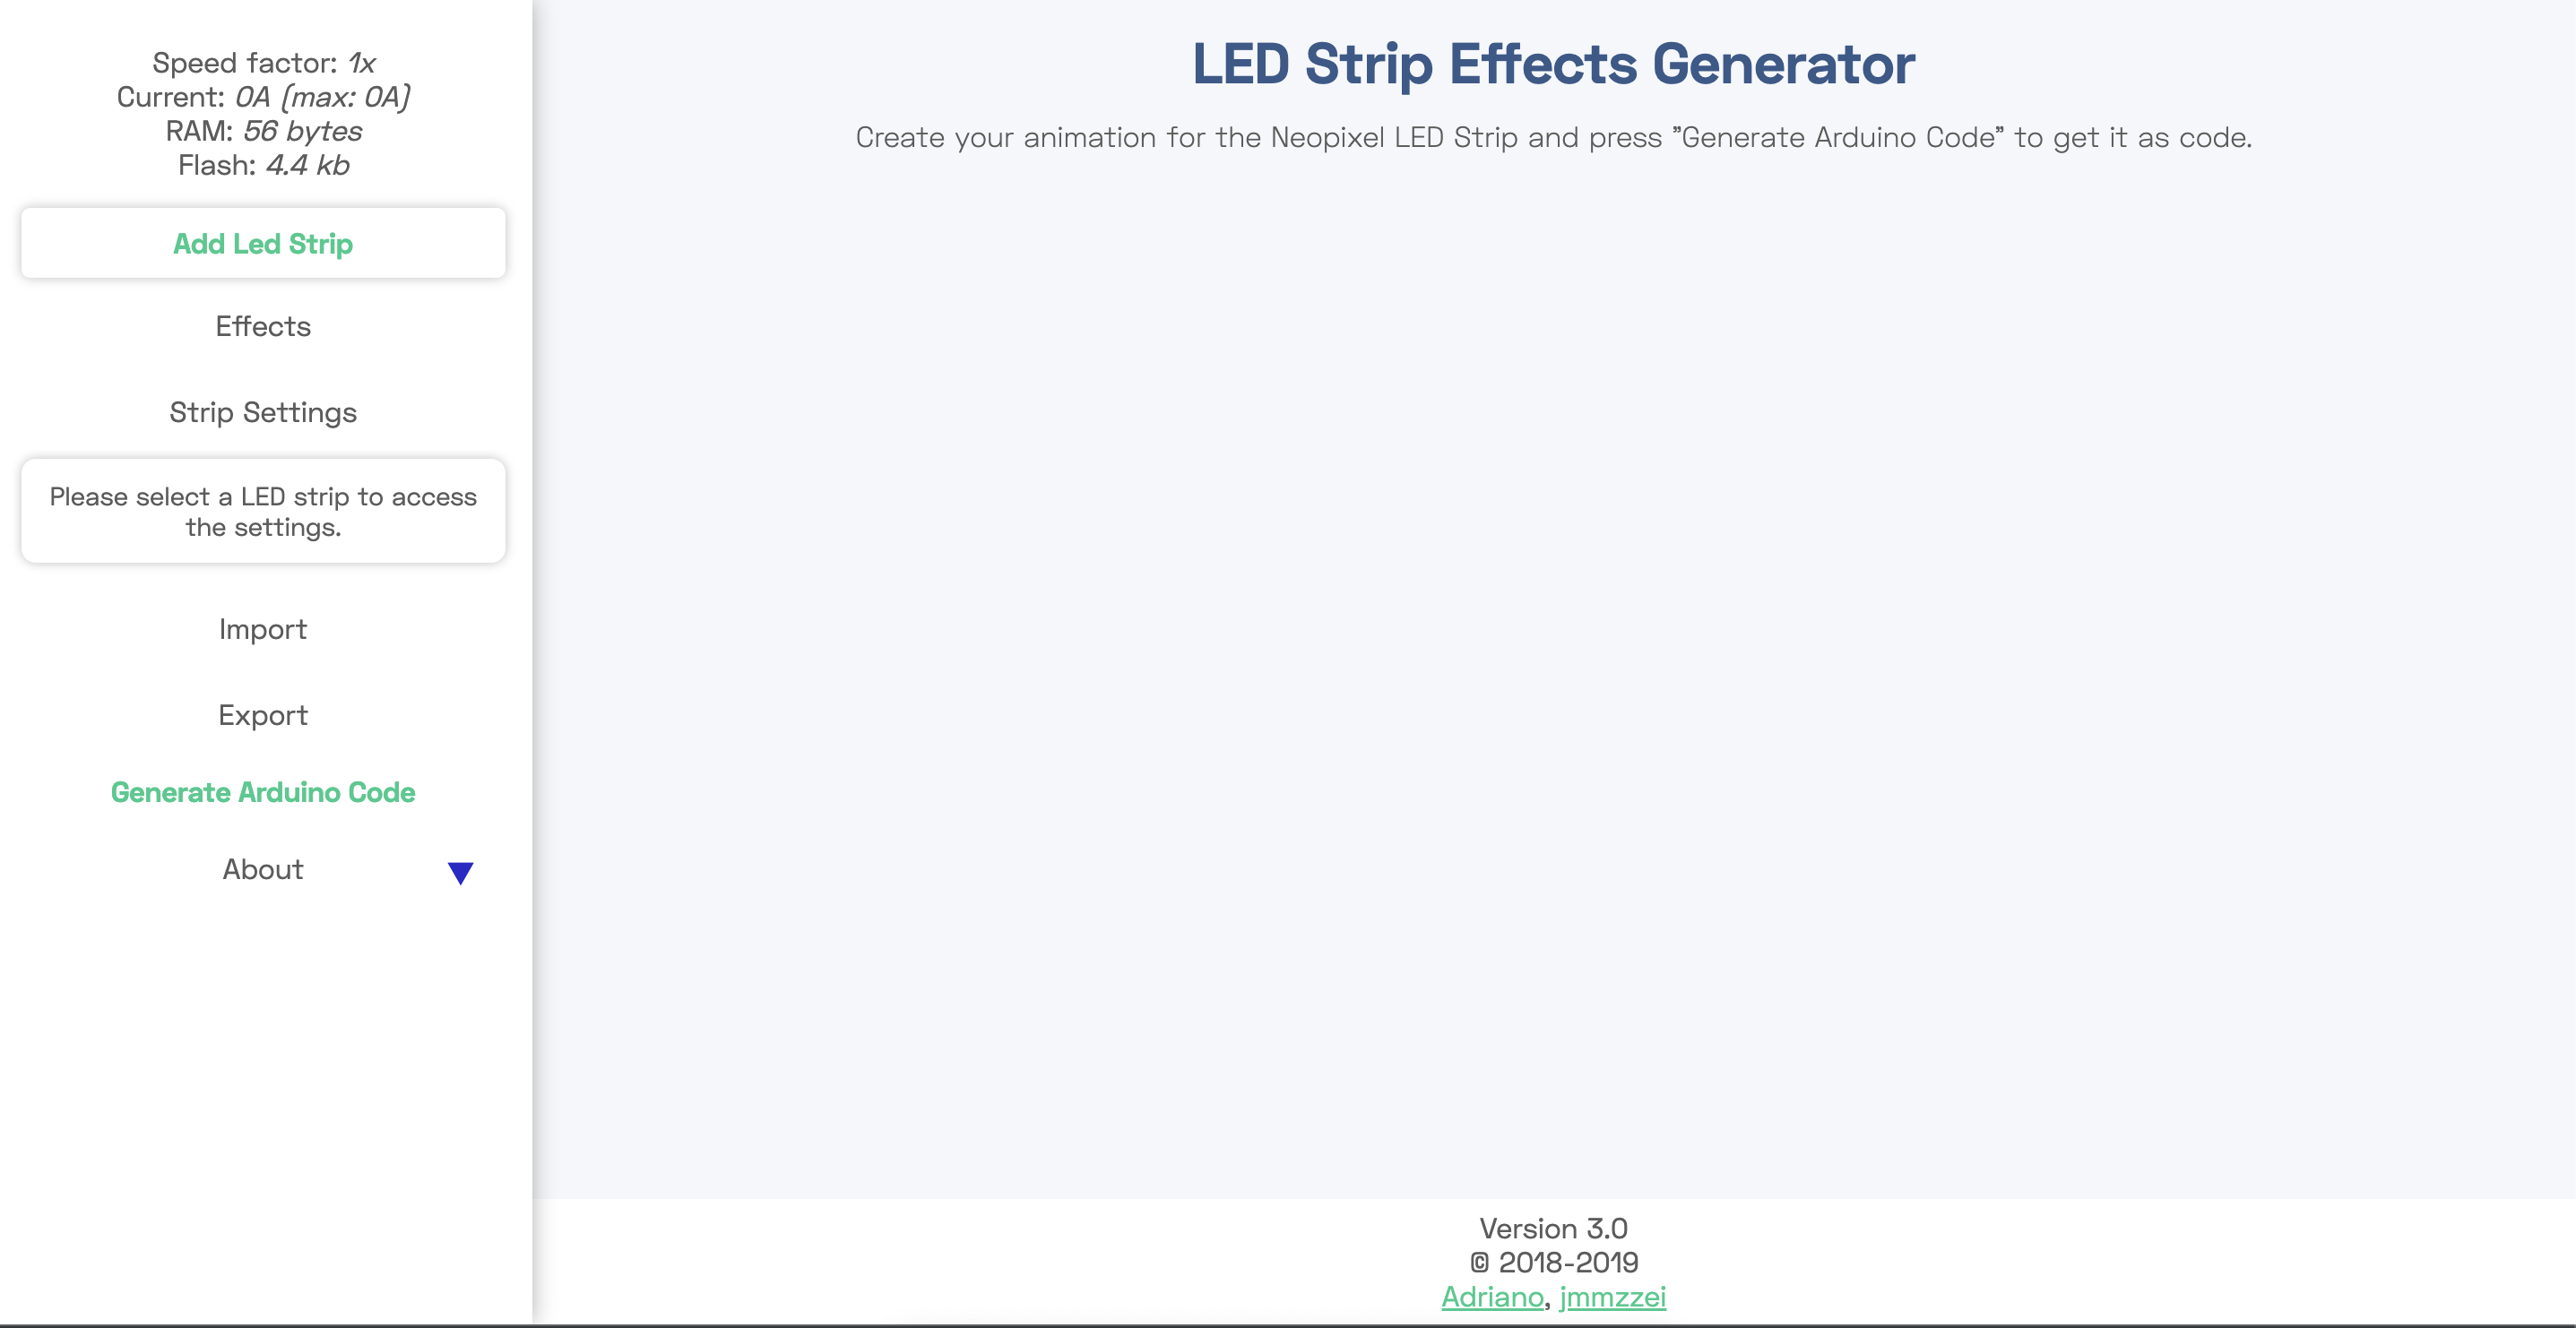
click the led image and setting it
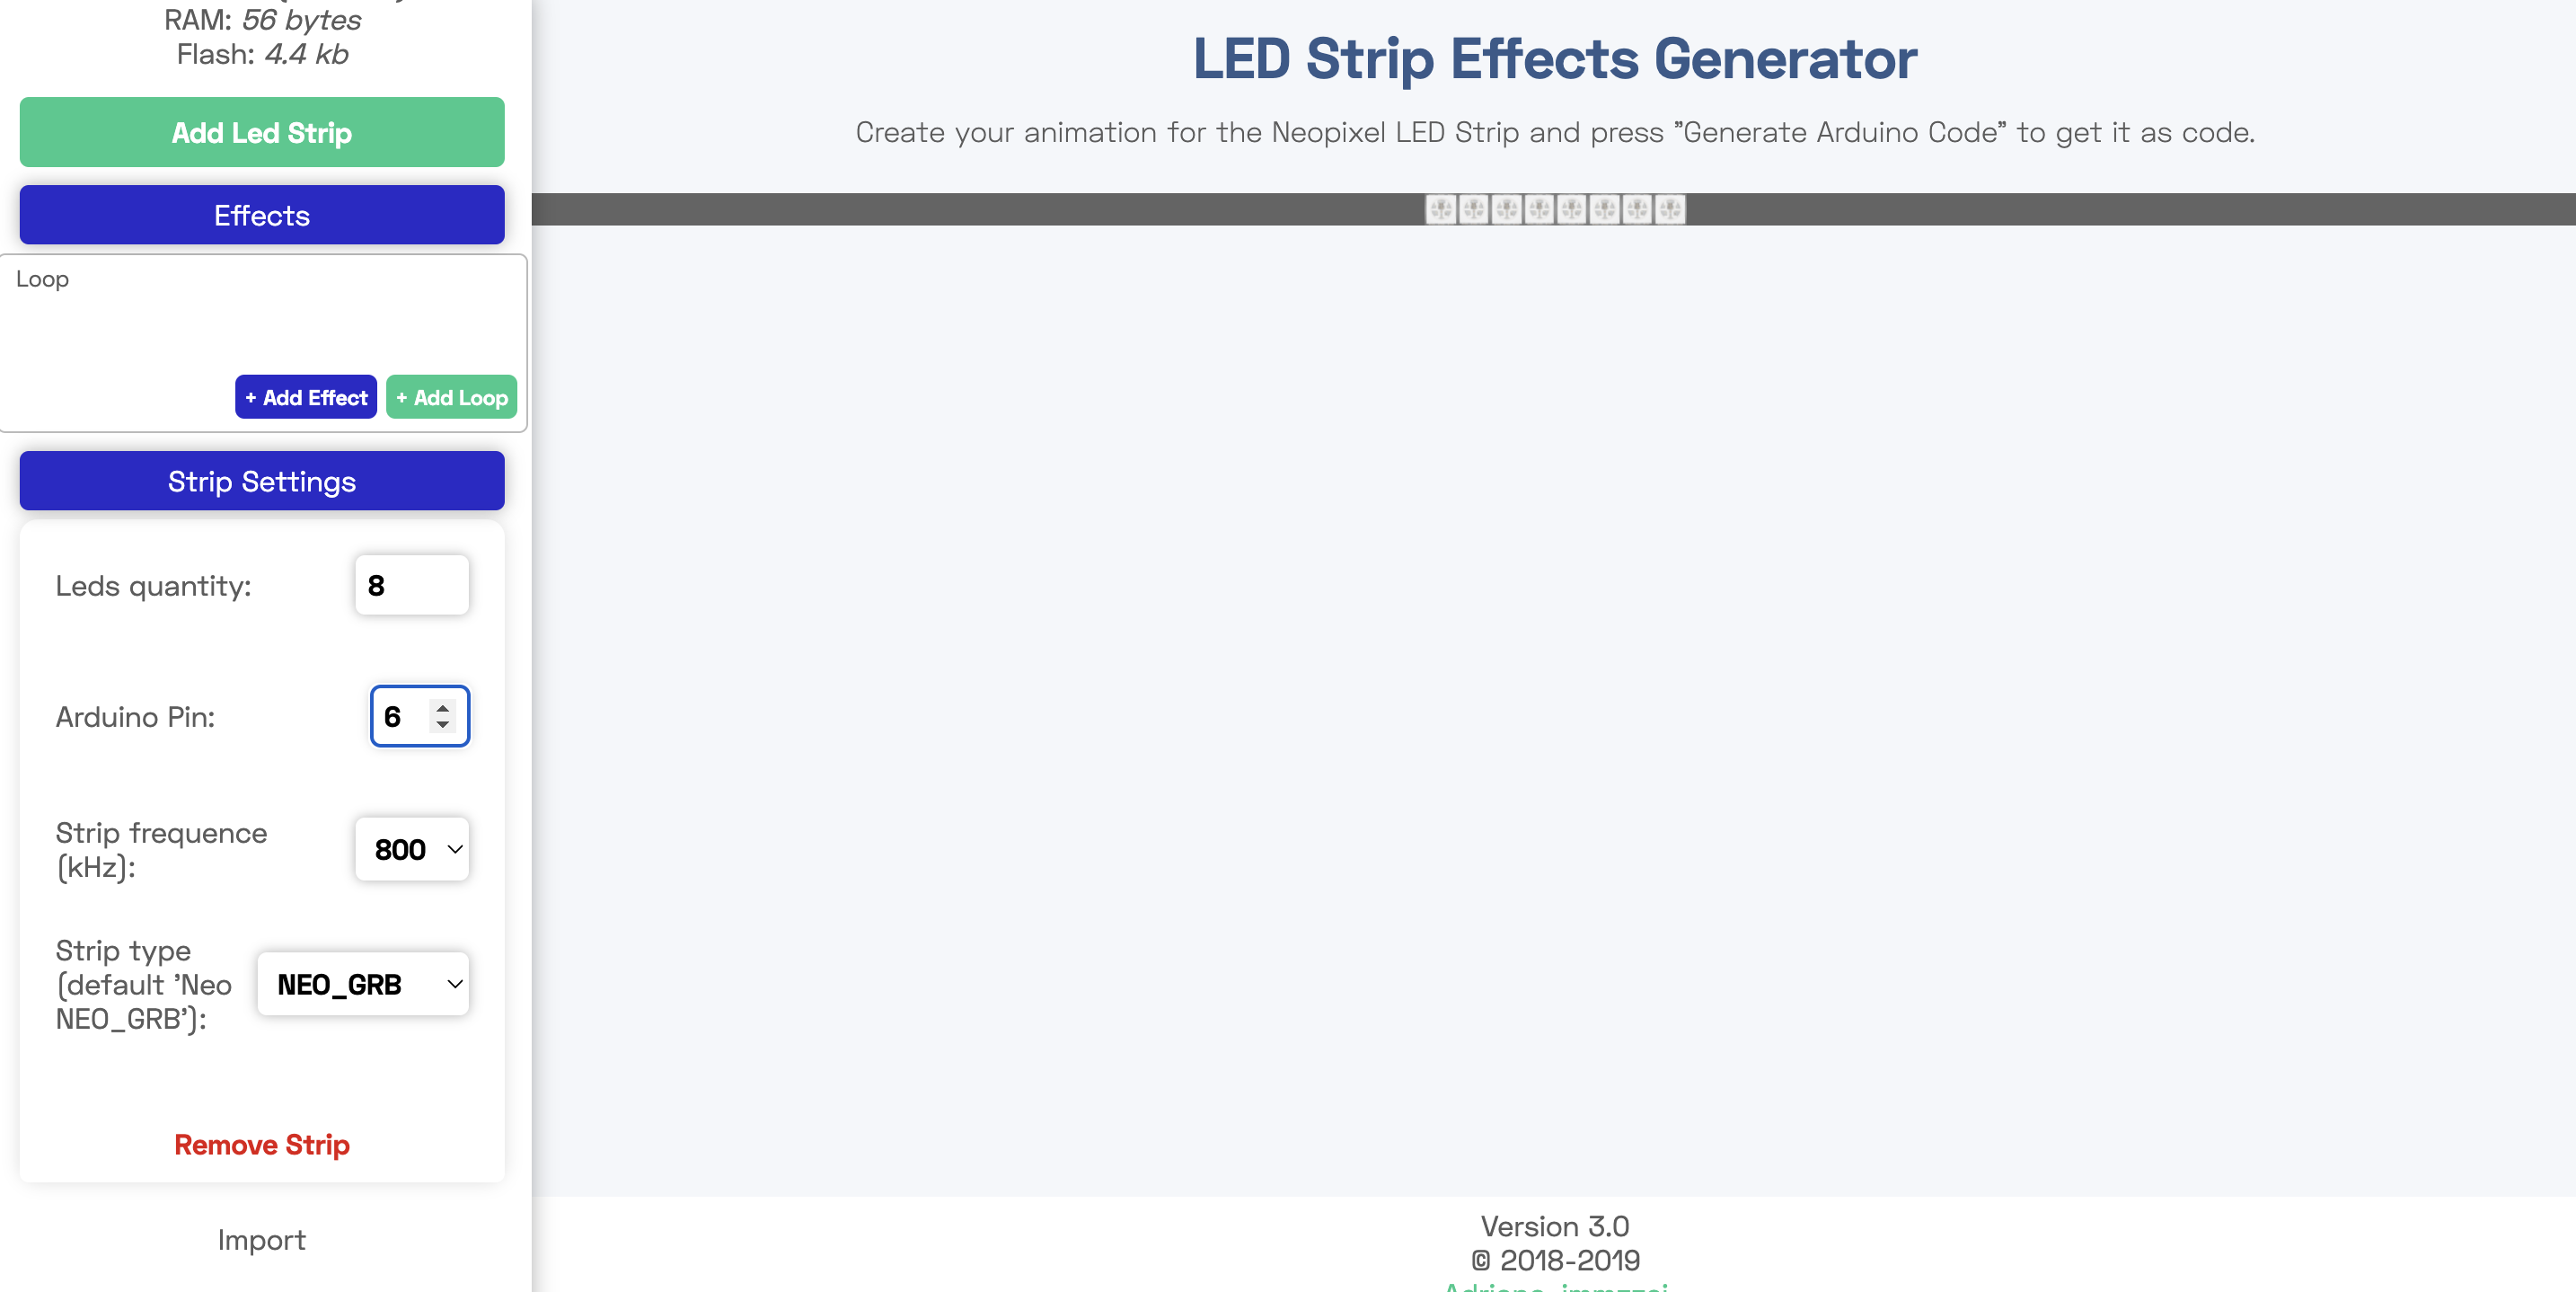
Add effect Rainbow
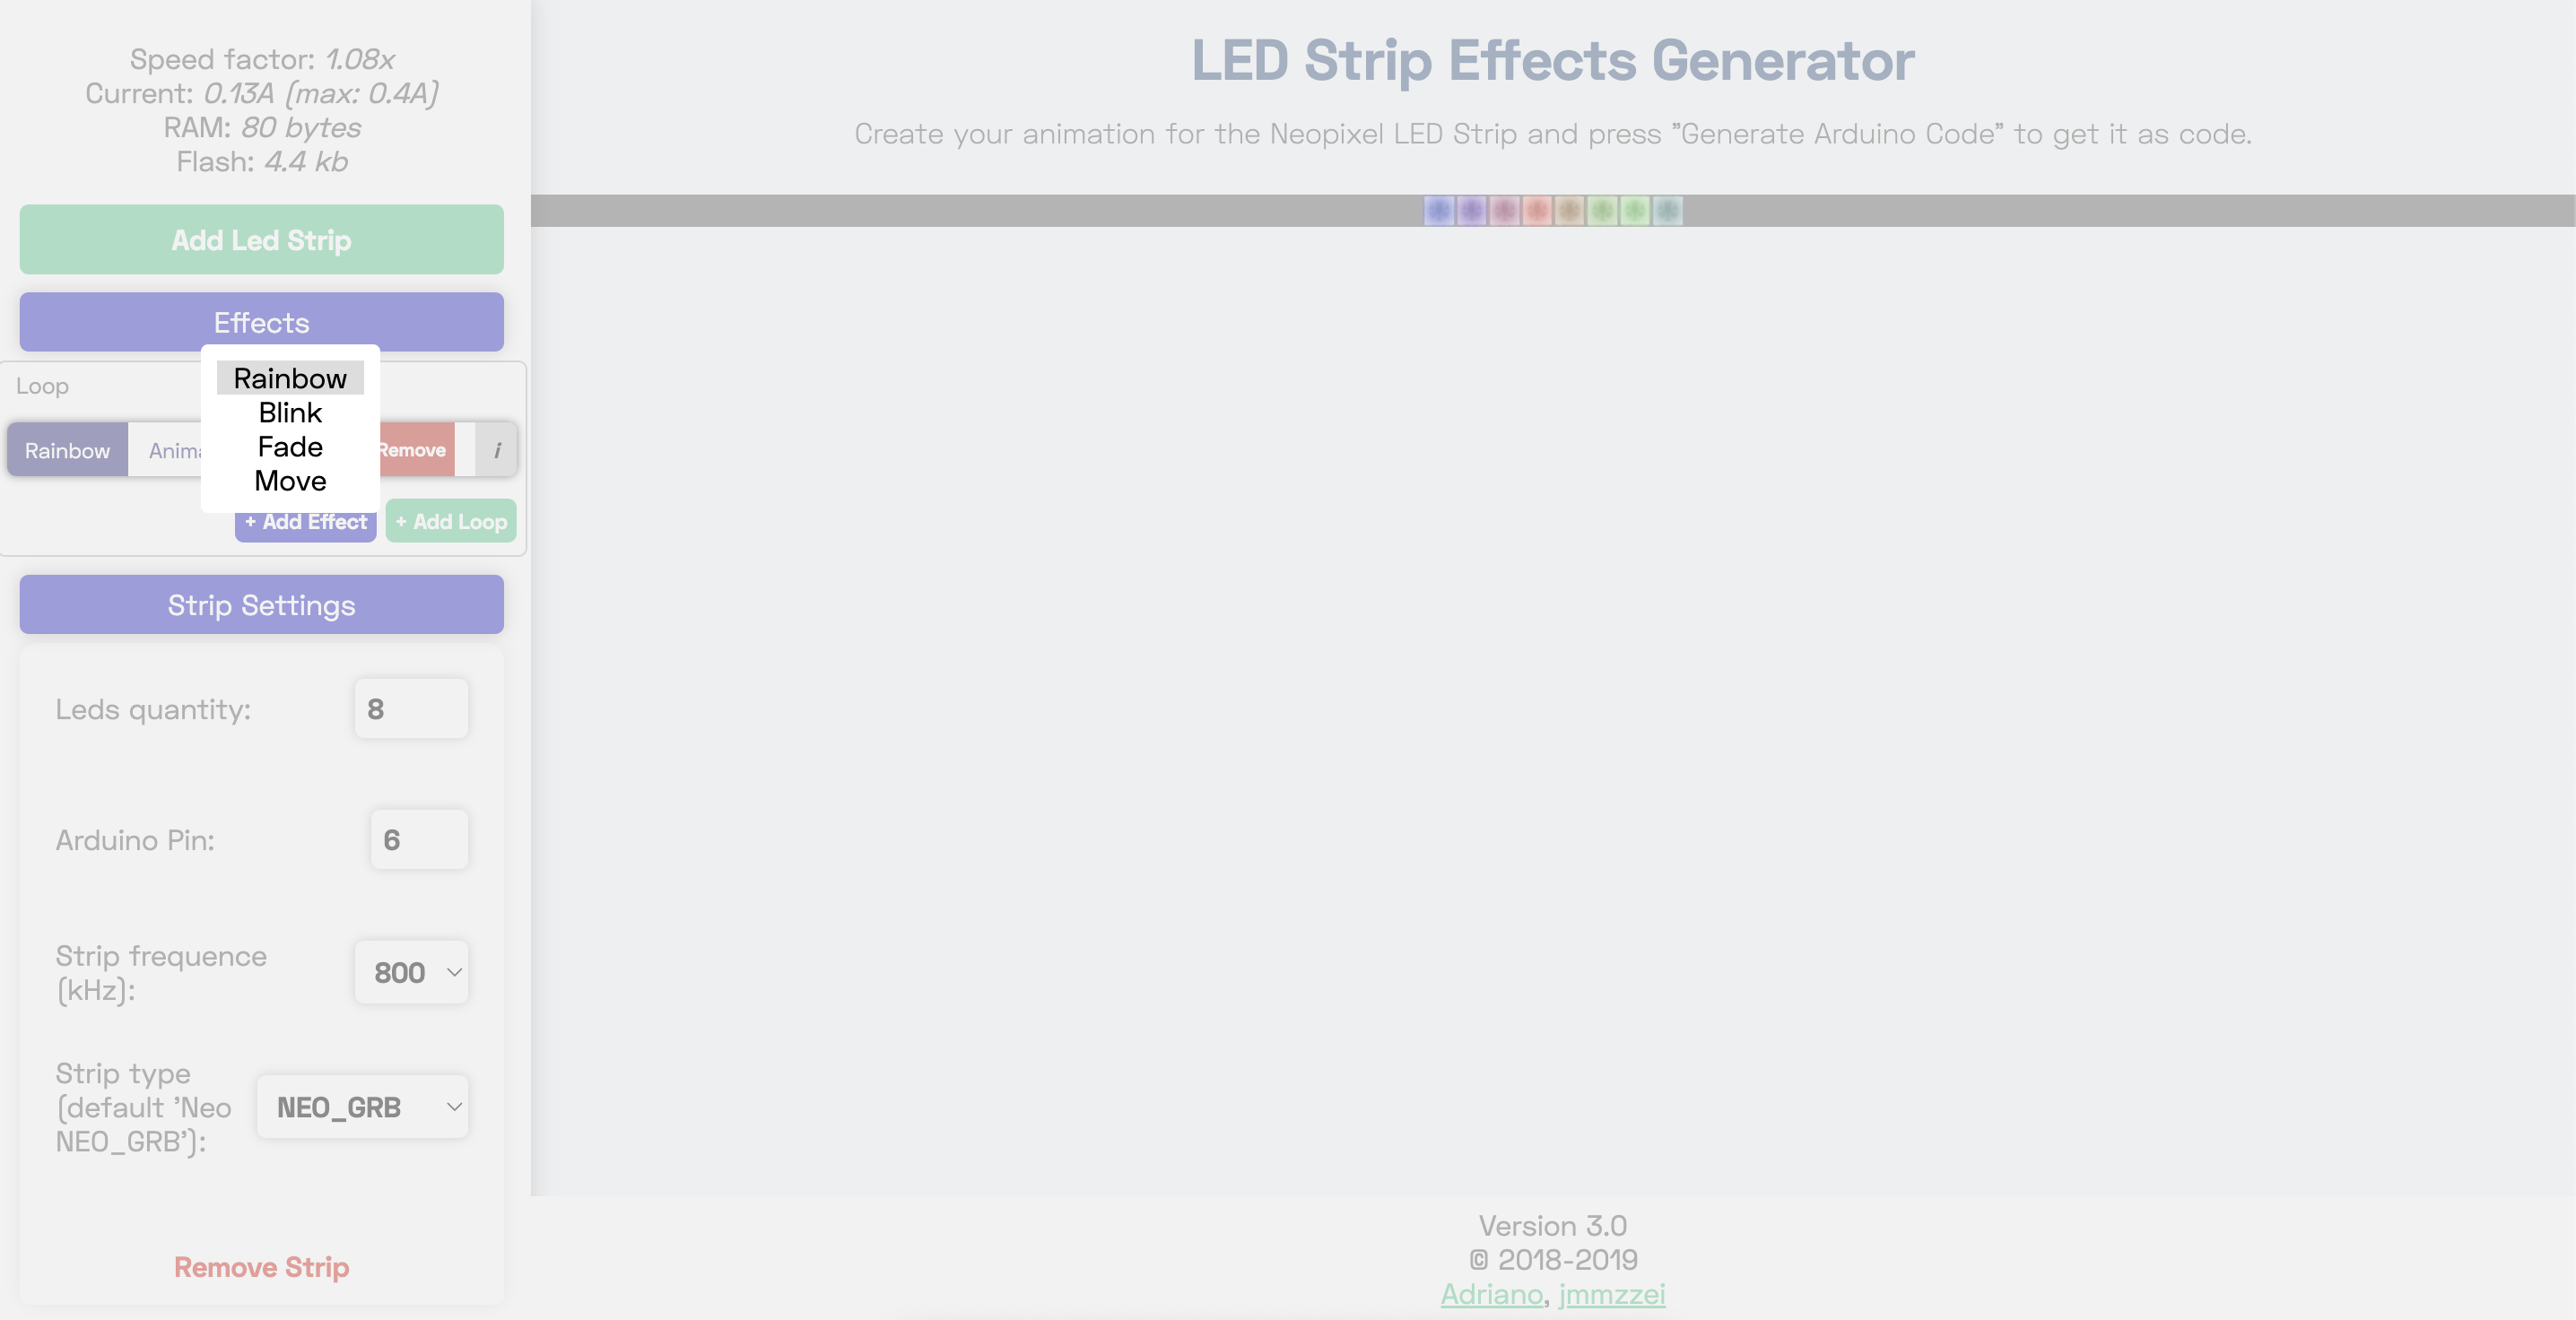
set animation and color
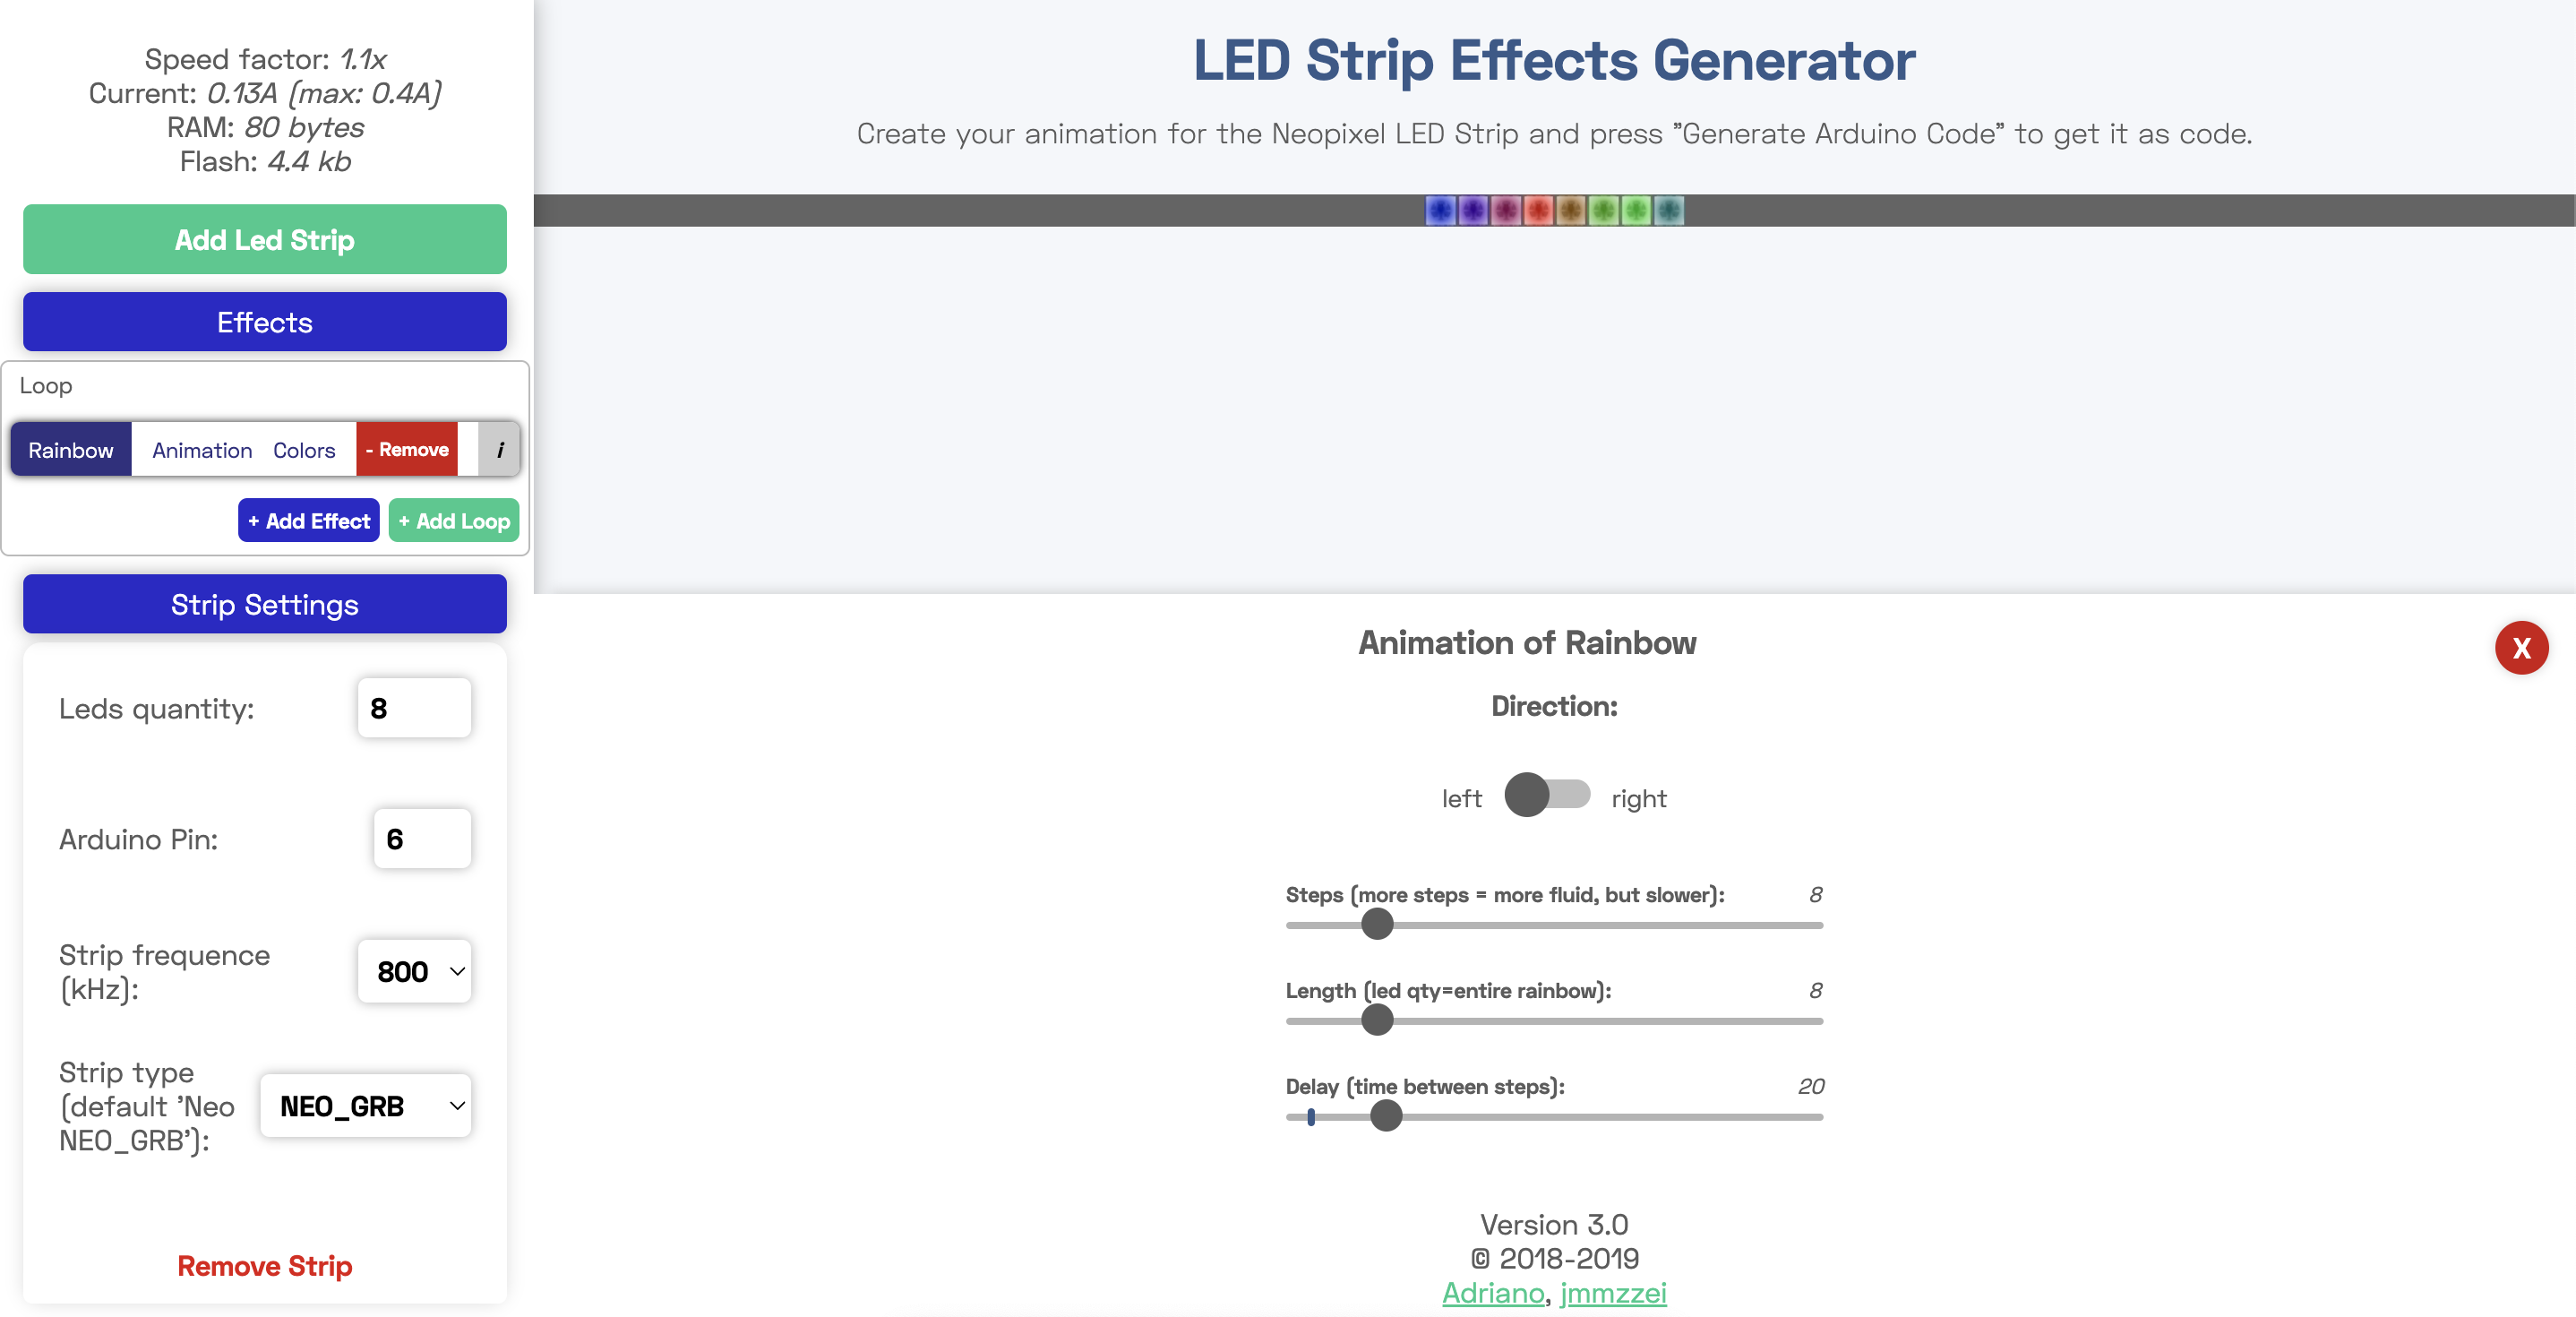
Generate code
- write the program which is generated
#include <Adafruit_NeoPixel.h>

class Strip
{
public:
  uint8_t   effect;
  uint8_t   effects;
  uint16_t  effStep;
  unsigned long effStart;
  Adafruit_NeoPixel strip;
  Strip(uint16_t leds, uint8_t pin, uint8_t toteffects, uint16_t striptype) : strip(leds, pin, striptype) {
    effect = -1;
    effects = toteffects;
    Reset();
  }
  void Reset(){
    effStep = 0;
    effect = (effect + 1) % effects;
    effStart = millis();
  }
};

struct Loop
{
  uint8_t currentChild;
  uint8_t childs;
  bool timeBased;
  uint16_t cycles;
  uint16_t currentTime;
  Loop(uint8_t totchilds, bool timebased, uint16_t tottime) {currentTime=0;currentChild=0;childs=totchilds;timeBased=timebased;cycles=tottime;}
};

Strip strip_0(8, 6, 8, NEO_GRB + NEO_KHZ800);
struct Loop strip0loop0(1, false, 1);

//[GLOBAL_VARIABLES]

void setup() {

  //Your setup here:

  strip_0.strip.begin();
}

void loop() {

  //Your code here:

  strips_loop();
}

void strips_loop() {
  if(strip0_loop0() & 0x01)
    strip_0.strip.show();
}

uint8_t strip0_loop0() {
  uint8_t ret = 0x00;
  switch(strip0loop0.currentChild) {
    case 0:
           ret = strip0_loop0_eff0();break;
  }
  if(ret & 0x02) {
    ret &= 0xfd;
    if(strip0loop0.currentChild + 1 >= strip0loop0.childs) {
      strip0loop0.currentChild = 0;
      if(++strip0loop0.currentTime >= strip0loop0.cycles) {strip0loop0.currentTime = 0; ret |= 0x02;}
    }
    else {
      strip0loop0.currentChild++;
    }
  };
  return ret;
}

uint8_t strip0_loop0_eff0() {
    // Strip ID: 0 - Effect: Rainbow - LEDS: 8
    // Steps: 8 - Delay: 20
    // Colors: 3 (255.0.0, 0.255.0, 0.0.255)
    // Options: rainbowlen=8, toLeft=true,
  if(millis() - strip_0.effStart < 20 * (strip_0.effStep)) return 0x00;
  float factor1, factor2;
  uint16_t ind;
  for(uint16_t j=0;j<8;j++) {
    ind = strip_0.effStep + j * 1;
    switch((int)((ind % 8) / 2.6666666666666665)) {
      case 0: factor1 = 1.0 - ((float)(ind % 8 - 0 * 2.6666666666666665) / 2.6666666666666665);
              factor2 = (float)((int)(ind - 0) % 8) / 2.6666666666666665;
              strip_0.strip.setPixelColor(j, 255 * factor1 + 0 * factor2, 0 * factor1 + 255 * factor2, 0 * factor1 + 0 * factor2);
              break;
      case 1: factor1 = 1.0 - ((float)(ind % 8 - 1 * 2.6666666666666665) / 2.6666666666666665);
              factor2 = (float)((int)(ind - 2.6666666666666665) % 8) / 2.6666666666666665;
              strip_0.strip.setPixelColor(j, 0 * factor1 + 0 * factor2, 255 * factor1 + 0 * factor2, 0 * factor1 + 255 * factor2);
              break;
      case 2: factor1 = 1.0 - ((float)(ind % 8 - 2 * 2.6666666666666665) / 2.6666666666666665);
              factor2 = (float)((int)(ind - 5.333333333333333) % 8) / 2.6666666666666665;
              strip_0.strip.setPixelColor(j, 0 * factor1 + 255 * factor2, 0 * factor1 + 0 * factor2, 255 * factor1 + 0 * factor2);
              break;
    }
  }
  if(strip_0.effStep >= 8) {strip_0.Reset(); return 0x03; }
  else strip_0.effStep++;
  return 0x01;
}
- done
movie
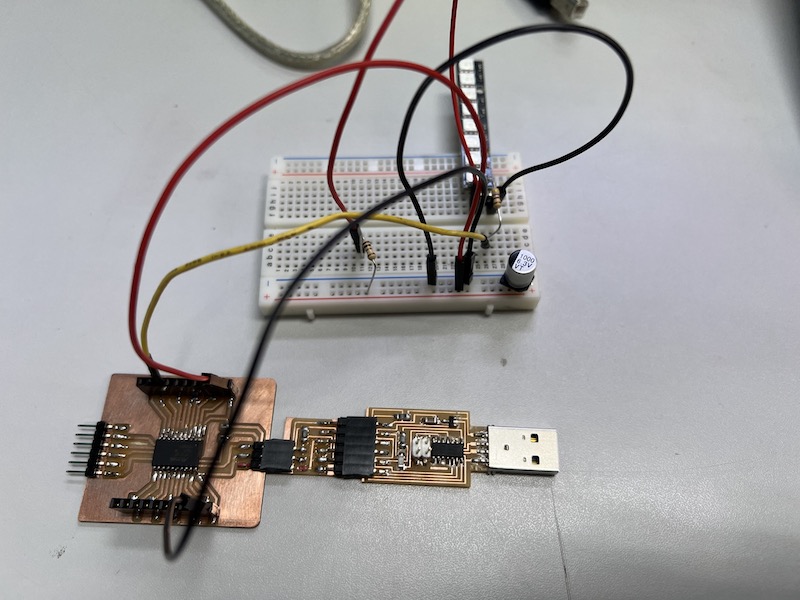
try to set it up by using my own breakout board →in this page
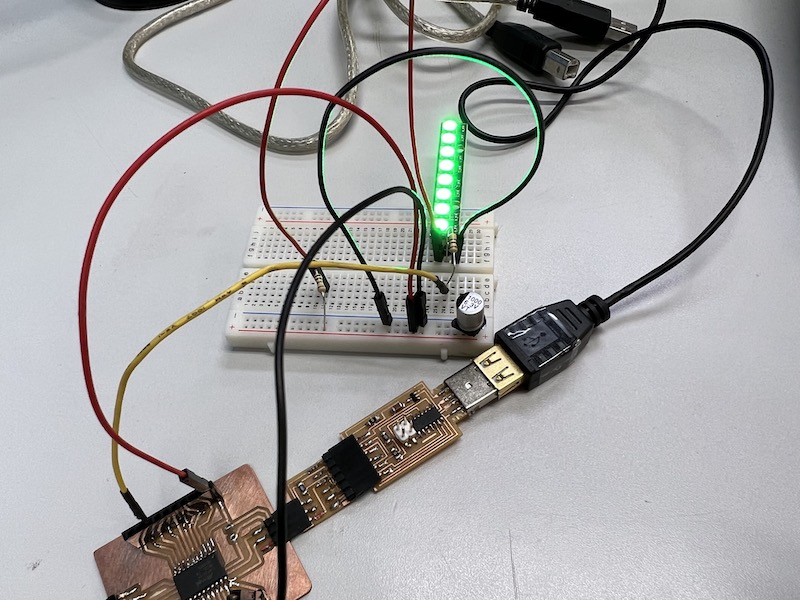
-
replace the arduino UNO to ATtiny 3216 breakout board which I built before
-
take advantage of the sample code in arduino : Example > Tiny NeoPixcel > simple
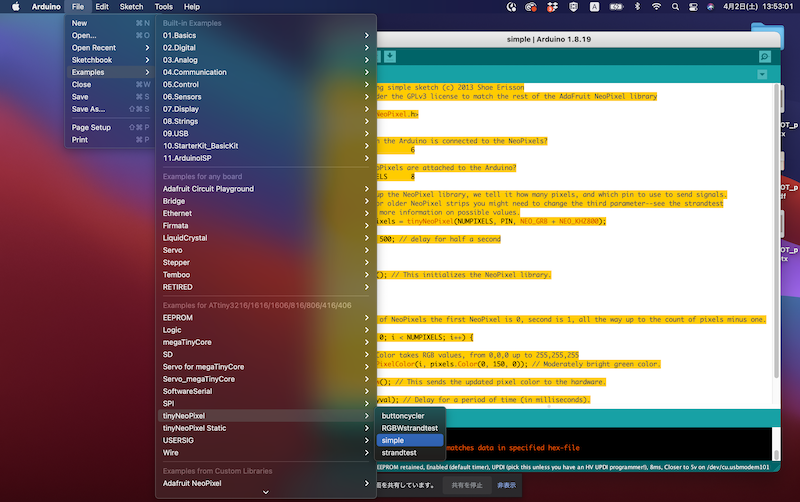
-
edit code
// NeoPixel Ring simple sketch (c) 2013 Shae Erisson
// released under the GPLv3 license to match the rest of the AdaFruit NeoPixel library

#include <tinyNeoPixel.h>

// Which pin on the Arduino is connected to the NeoPixels?
#define PIN            6

// How many NeoPixels are attached to the Arduino?
#define NUMPIXELS      8

// When we setup the NeoPixel library, we tell it how many pixels, and which pin to use to send signals.
// Note that for older NeoPixel strips you might need to change the third parameter--see the strandtest
// example for more information on possible values.
tinyNeoPixel pixels = tinyNeoPixel(NUMPIXELS, PIN, NEO_GRB + NEO_KHZ800);

int delayval = 500; // delay for half a second

void setup() {

  pixels.begin(); // This initializes the NeoPixel library.
}

void loop() {

  // For a set of NeoPixels the first NeoPixel is 0, second is 1, all the way up to the count of pixels minus one.

  for (int i = 0; i < NUMPIXELS; i++) {

    // pixels.Color takes RGB values, from 0,0,0 up to 255,255,255
    pixels.setPixelColor(i, pixels.Color(0, 150, 0)); // Moderately bright green color.

    pixels.show(); // This sends the updated pixel color to the hardware.

    delay(delayval); // Delay for a period of time (in milliseconds).

  }
}
- how to light : fade-in
/*

NeoPixel LEDs

modified on 7 May 2019
by Saeed Hosseini @ Electropeak
https://electropeak.com/learn/

*/

#include <tinyNeoPixel.h>

#define PIN       6
#define NUMPIXELS 8

tinyNeoPixel pixels = tinyNeoPixel(NUMPIXELS, PIN, NEO_GRB + NEO_KHZ800);

// int delayval = 500; // delay for half a second
// #define DELAYVAL 500 // Time (in milliseconds) to pause between pixels

void NeoFade(int FadeSpeed)
{
int fspeed;
for (int i = 0; i < NUMPIXELS; i++) { pixels.setPixelColor(i, 165, 242, 243); } for (int j = 1; j < 255; j=j+2)
{
pixels.setBrightness(j);
pixels.show();
delay(FadeSpeed);
}
}

void setup() {
pixels.begin();
pixels.clear(); // Set all pixel colors to 'off'

}

void loop() {
NeoFade(50);
}
-
done
measure the power consumption of an output device
- insert a registor of 1 ohm before Neo Pixel LED as a shunt registance
Note: What is “shunt resistance”?
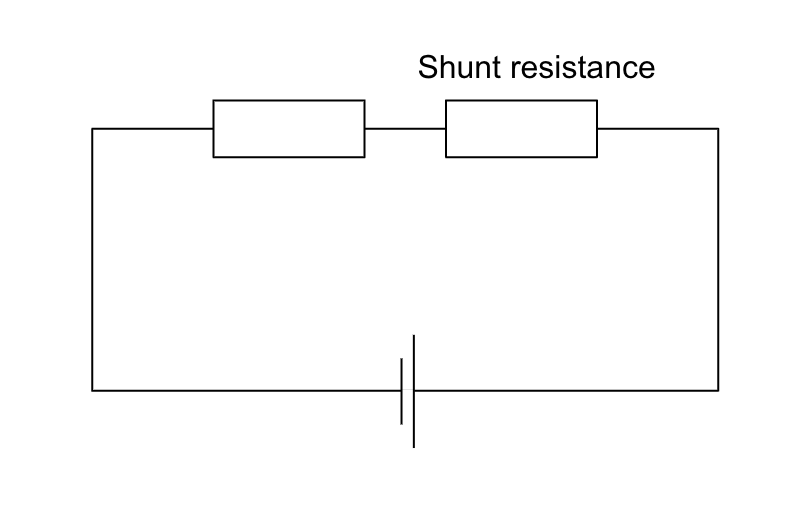
A shunt resistor is used to measure electric current, alternating or direct. This is done by measuring the voltage drop across the resistor because of its resistor having a very low value of resistance. Shunt resistance should be 1/1000 or less of the total resistance. It is explained in detail here.
- edit code which come to illuminate LED the blightest (parameter is 255 )
// NeoPixel Ring simple sketch (c) 2013 Shae Erisson
// Released under the GPLv3 license to match the rest of the
// Adafruit NeoPixel library

#include <Adafruit_NeoPixel.h>
#ifdef __AVR__
#include <avr/power.h> // Required for 16 MHz Adafruit Trinket
#endif

// Which pin on the Arduino is connected to the NeoPixels?
#define PIN        6 // On Trinket or Gemma, suggest changing this to 1

// How many NeoPixels are attached to the Arduino?
#define NUMPIXELS 8 // Popular NeoPixel ring size

// When setting up the NeoPixel library, we tell it how many pixels,
// and which pin to use to send signals. Note that for older NeoPixel
// strips you might need to change the third parameter -- see the
// strandtest example for more information on possible values.
Adafruit_NeoPixel pixels(NUMPIXELS, PIN, NEO_GRB + NEO_KHZ800);

#define DELAYVAL 500 // Time (in milliseconds) to pause between pixels

void setup() {
  // These lines are specifically to support the Adafruit Trinket 5V 16 MHz.
  // Any other board, you can remove this part (but no harm leaving it):
#if defined(__AVR_ATtiny85__) && (F_CPU == 16000000)
  clock_prescale_set(clock_div_1);
#endif
  // END of Trinket-specific code.

  pixels.begin(); // INITIALIZE NeoPixel strip object (REQUIRED)
}

void loop() {
  pixels.clear(); // Set all pixel colors to 'off'

  // The first NeoPixel in a strand is #0, second is 1, all the way up
  // to the count of pixels minus one.
  for (int i = 0; i < NUMPIXELS; i++) { // For each pixel...

    // pixels.Color() takes RGB values, from 0,0,0 up to 255,255,255
    // Here we're using a moderately bright green color:
    pixels.setPixelColor(0, pixels.Color(255, 255, 255));
    pixels.setPixelColor(1, pixels.Color(255, 255, 255));
    pixels.setPixelColor(2, pixels.Color(255, 255, 255));
    pixels.setPixelColor(3, pixels.Color(255, 255, 255));
    pixels.setPixelColor(4, pixels.Color(255, 255, 255));
    pixels.setPixelColor(5, pixels.Color(255, 255, 255));
    pixels.setPixelColor(6, pixels.Color(255, 255, 255));
    pixels.setPixelColor(7, pixels.Color(255, 255, 255));

    pixels.show();   // Send the updated pixel colors to the hardware.

//    delay(DELAYVAL); // Pause before next pass through loop
  }
}
-
take measurement the potential difference between shunt registors by a multimeter
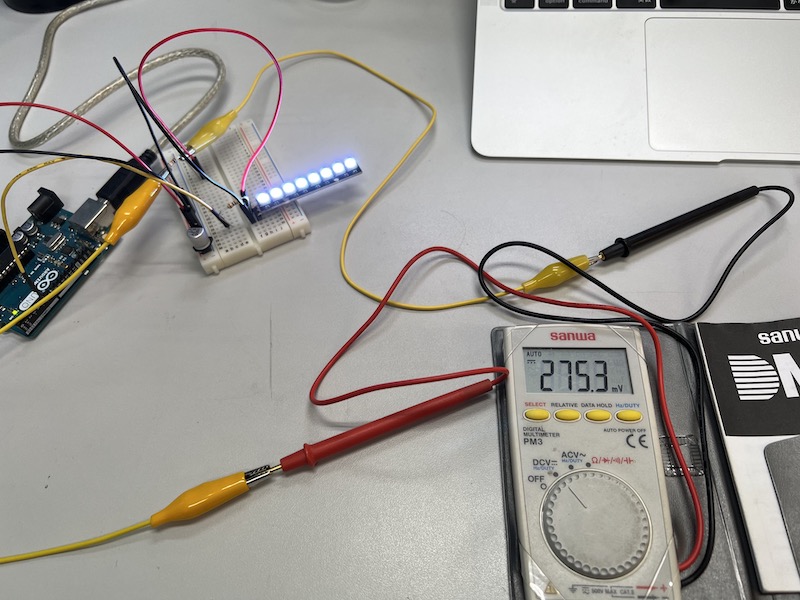
275.4 mV
V=IR
∴ I=V/R=275.4/1 =275.4mA [1]
- Reduce light intensity by half ( parameter is 128 )
// NeoPixel Ring simple sketch (c) 2013 Shae Erisson
// Released under the GPLv3 license to match the rest of the
// Adafruit NeoPixel library

#include <Adafruit_NeoPixel.h>
#ifdef __AVR__
#include <avr/power.h> // Required for 16 MHz Adafruit Trinket
#endif

// Which pin on the Arduino is connected to the NeoPixels?
#define PIN        6 // On Trinket or Gemma, suggest changing this to 1

// How many NeoPixels are attached to the Arduino?
#define NUMPIXELS 8 // Popular NeoPixel ring size

// When setting up the NeoPixel library, we tell it how many pixels,
// and which pin to use to send signals. Note that for older NeoPixel
// strips you might need to change the third parameter -- see the
// strandtest example for more information on possible values.
Adafruit_NeoPixel pixels(NUMPIXELS, PIN, NEO_GRB + NEO_KHZ800);

#define DELAYVAL 500 // Time (in milliseconds) to pause between pixels

void setup() {
  // These lines are specifically to support the Adafruit Trinket 5V 16 MHz.
  // Any other board, you can remove this part (but no harm leaving it):
#if defined(__AVR_ATtiny85__) && (F_CPU == 16000000)
  clock_prescale_set(clock_div_1);
#endif
  // END of Trinket-specific code.

  pixels.begin(); // INITIALIZE NeoPixel strip object (REQUIRED)
}

void loop() {
  pixels.clear(); // Set all pixel colors to 'off'

  // The first NeoPixel in a strand is #0, second is 1, all the way up
  // to the count of pixels minus one.
  for (int i = 0; i < NUMPIXELS; i++) { // For each pixel...

    // pixels.Color() takes RGB values, from 0,0,0 up to 255,255,255
    // Here we're using a moderately bright green color:
    pixels.setPixelColor(0, pixels.Color(128, 128, 128));
    pixels.setPixelColor(1, pixels.Color(128, 128, 128));
    pixels.setPixelColor(2, pixels.Color(128, 128, 128));
    pixels.setPixelColor(3, pixels.Color(128, 128, 128));
    pixels.setPixelColor(4, pixels.Color(128, 128, 128));
    pixels.setPixelColor(5, pixels.Color(128, 128, 128));
    pixels.setPixelColor(6, pixels.Color(128, 128, 128));
    pixels.setPixelColor(7, pixels.Color(128, 128, 128));

    pixels.show();   // Send the updated pixel colors to the hardware.

    //    delay(DELAYVAL); // Pause before next pass through loop
  }
}
-
take measurement the potential difference between shunt registors by a multimeter again
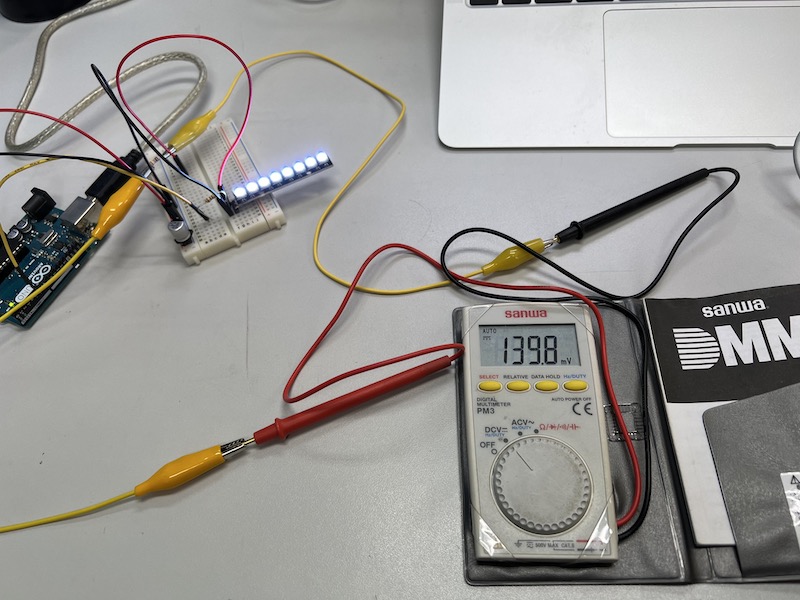
139.8 mV
V=IR ∴ I=V/R=139.8/1 =139.8mA [2]
- calcurate the ratio of [1] to [2]
275.4 / 139.8= 1.969
→By doubling the light intensity, the current is almost doubled.
- calcurate Power Consumption of shunt resistor
P255 = I×V =275.4mV × 275.4mA = 75.85μW [3]
P128 = I×V =139.8mV × 139.8 mA = 19.54μW [4]
calcurate the ratio of [3] to [4] which answer is 75.8 / 19.5 = 3.88
- calcurate Power Consumption of NeoPixels
Though I forgot to measure voltage of between VCC and GND on first neopixel, if it is 5V,…
P255 = 5V * 275.4mA = 1377mW =1.3W
P128 = 5V * 139.8mA = 699mw = 0.699W