Setting Up MkDocs
Installing Python
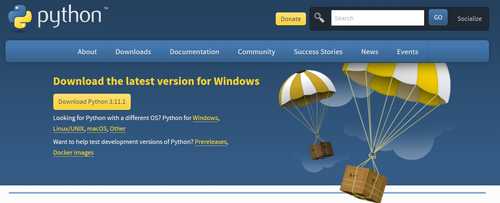
Downloading The Installer
Since MkDocs uses Python's package manager, Pip, for the install process, I had to install Python on my machine before installing MkDocs.
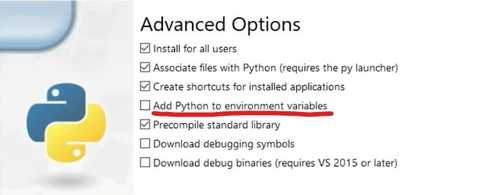
Environment Variables
After downloading the installer, I ran it and used all of the default settings. Then as I went to run Python in the command line, I realized that I hadn't added Python to my environment variables because I recieved the following error.
python3 is not recognized as an internal or external command, operable program, or batch file
To solve this, I opened my computer's Environment Variables and added the following to my system's and user's PATH variable.
C:\Users\adams\AppData\Local\Programs\Python\Python311
C:\Users\adams\AppData\Local\Programs\Python\Python311\Scripts
Then, I could type python3, pip, or the names of any packages I'd installed with pip into my command line, and my computer knows to search the PATH directories to see if the program is containted within those. If I didn't add these lines, I would need to write the following in the command line instead of pip every time:
"C:\Users\adams\AppData\Local\Programs\Python\Python311\python" -m pip
Avoidable Problem
As Griffin Orsinger later pointed out to me, it turns out I could have simply checked the Add Python to environment variables option in the Python installer to avoid this problem.
Installing VSCode
To edit my site, I used the Visual Studio Code IDE (VSCode). I downloaded the installer and ran it with all of the default settings.
Using MkDocs
I followed this tutorial to set up my documentation.
Installing MkDocs
I closed and reopened my terminal to ensure the PATH environment variable had updated, then typed the following command to install MkDocs.
pip install mkdocs
Making The Project
I navigated to the directory in which I wanted to create my project and executed the following.
mkdocs new fab-documentation
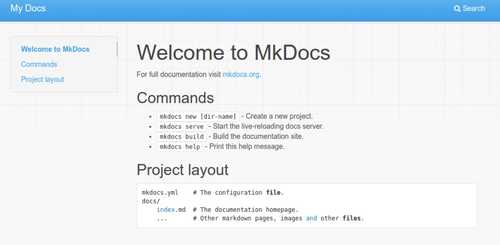
This created a subdirectory called fab-documentation in my current directory and created a boilerplate project in the subdirectory. I navigated to the subdirectory and tested the site.
cd fab-documentation
mkdocs serve
Then, in my web browser, I navigated to http://127.0.0.1:8000/ and saw my site!
Customizing My Site
I opened the fab-documentation directory in VSCode and opened the mkdocs.yml file. I changed the first line from site_name: MkDocs to site_name: Adam Stone Fab Academy Documentation. After saving the file, the site automatically updates without refreshing; the site will keep updating until the mkdocs serve command is stopped.
Next, I changed my mkdocs.yml file to the following.
site_name: Adam Stone Fab Academy Documentation
nav:
    - Home: index.md
    - About: about.md
    - Lessons:
      - 'Week 0': lessons/prefab/week0.md
      - '3D Printer': lessons/prefab/3dprinter.md
theme: readthedocs
This changed the theme and linked more pages. I put quotes around any page in the navigation with a space in it, and made sub-panels in the navigation using the syntax above where the Lessons header includes the Week 0, 3D Printer, and MkDocs pages.
The site didn't work until I actually created these files - I created a lessons/prefab directory under the docs directory and created two files: week0.md and 3dprinter.md. I chose to make the subdirectory so that, in the following weeks, my documentation directory will be far more organized.
I used this website, this website, and this cheatsheet to learn the Markdown syntax for MkDocs.
Note that the tutorial I linked above suggests using the curl command to copy and example about.md Markdown file, yet this command caused me trouble as the HTTP request returned more information than simply the file contents (shown below), so I instead manually created a new .md file in VSCode.
StatusCode        : 200
StatusDescription : OK
Content           : # Pugnae sit poterat quodsi

                     ## Admonitu gratus numen
                    Lorem markdownum artisque tradita dantur, bracchia, et Apollinis. Gratia
                    inscripsere quemquam Aurorae Latini desiderat haberet adit spina oppida,...
RawContent        : HTTP/1.1 200 OK
                    Transfer-Encoding: chunked
                    Connection: keep-alive
                    access-control-allow-origin: *
                    Content-Type: text/plain; charset=utf-8
                    Date: Fri, 27 Jan 2023 03:22:29 GMT
                    Server: nginx/1.14.2...
Forms             : {}
Headers           : {[Transfer-Encoding, chunked], [Connection, keep-alive], [access-control-allow-origin, *], [Content-Type, text/plain;
                    charset=utf-8]...}
Images            : {}
InputFields       : {}
Links             : {}
ParsedHtml        : mshtml.HTMLDocumentClass
RawContentLength  : 2236
Image Trouble
I created an img directory in the docs directory to store my images, with more subdirectories to organize my photos.
As I was adding images to this very page, I used the following syntax.

Yet when I look at the page, the image wouldn't load.

I realized the the problem was that I was using a relative path from the perspective of the home directory - because I was editing a .md file in a subdirectory, I first had to navigate out of the subdirectory then into the img directory to access the photo. When I changed the syntax, it worked perfectly. (../ means going back a directory).

Fenced Code Blocks
The next features I wanted to add to my documentation were Fenced Code Blocks, or sections of code that are set apart from the normal text in a website. For example:
def my_func():
    print("Hello, world!")
When first researching how to create Fenced Code Blocks, I encountered this GitHub repository with an MkDocs extention that appeared to solve my problem. The website said to include the following in my mkdocs.yml file.
markdown_extensions:
  - pymdownx.highlight:
      anchor_linenums: true
  - pymdownx.inlinehilite
  - pymdownx.snippets
  - pymdownx.superfences
When I saved the .yml file, I got an error that the extentions weren't installed.
ERROR    -  Config value 'markdown_extensions': Failed to load extension 'pymdownx.highlight'.
            ModuleNotFoundError: No module named 'pymdownx'
Aborted with 1 Configuration Errors!
Before figuring out how to install the extention, I realized that the MkDocs Tutorial Page had code blocks, so they might work without an extention. I deleted the extentions from my .yml file and tried adding the syntax that the extension explained on their website, and it worked!
```py
def my_func():
    print("Hello, world!")
```
On a side note, to be able to type ``` in this fenced code block, I had to indent the whole block instead of wrapping it in ```.
    ```py
        def my_func():
            print("Hello, world!")
    ```
Resizing Images
For certain images, I wanted to manually adjust this size. This forum explained that, to enable this functionality, I have to add the following to my mkdocs.yml file.
markdown_extensions:
  - attr_list
Then, changed my image Markdown syntax to the following, changing 150px to the desired dimensions. You can also only include the width or height option, and the other will automatically be changed to preserve the original image ratio.
{: style="height:150px;width:150px"}
Major Refactoring
There is one large problem with the way I'm currently using MkDocs and GitLab: if I want to both backup my docs folder with my Markdown files and display the built site directory on my webste on GitLab, I'll end up having to build every time I make changes, copy the build to the public directory, and I'll use double the storage for each JPG image. To solve this, I decided to reconfigure my .gitlab-ci.yml file and file structure so that GitLab builds the project when a commit is made and I only upload my docs folder and mkdocs.yml file.
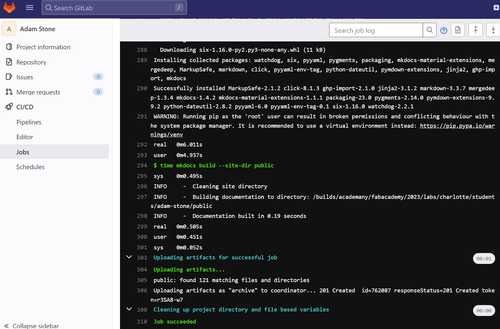
First, I decided to explore the .gitlab-ci.yml configuration files. I played around with changing this line in the GitLab web IDE, making a commit, and watching the pipeline (the server executing commands in the .yml file). To get to the pipeline after making a commit, navigated to the Jobs menu (under CI/CD) then selected the most recent job.
I noticed that changing the following line changed the terminal commands the server executed on every commit.
pages:
  stage: deploy
  script:
  - mkdocs build --strict --verbose
  artifacts:
    paths:
    - public
To try to solve my problem, I pushed my docs folder into the public folder then modified the pages options in the gitlab-ci.yml file to the following.
pages:
  stage: deploy
  script:
  - cd public
  - mkdocs build --strict --verbose
  - cd ..
  artifacts:
    paths:
    - public
Then, the job was successful, but the deploy job failed! For some reason I was unable to open the terminal log for this pipeline, it turns out that Dan Stone's GitLab had been reset to the default MkDocs template without a public directory or needing to upload an MkDocs build, so I simply looked at his .gitlab-ci.yml file for guidance. I then replaced my .yml file with the following, deleted my public folder, and moved the docs folder and mkdocs.yml file into the main directory of the repo. I also created an empty .gitignore file and the following requirements.txt file to the base directory of the repo.
jinja2>=3.0
markdown>=3.2
mkdocs>=1.4.2
mkdocs-material-extensions>=1.1
pygments>=2.14
pymdown-extensions>=9.9.1
Then, the jobs succeeded and my site worked!
image: python:3.11-slim

before_script:
  # install Git for the mkdocs revision plugin
  - time apt update && apt-get install -y git
  # Install mkdocs and theme
  - time pip install -r requirements.txt

test:
  stage: test
  script:
  - time mkdocs build --site-dir test
  artifacts:
    paths:
    - test
  rules:
    - if: $CI_COMMIT_BRANCH == $CI_DEFAULT_BRANCH
      when: never

pages:
  stage: deploy
  variables:
    ENABLED_GIT_REVISION_DATE: "true"
    GIT_DEPTH: 0
  script:
    - time mkdocs build --site-dir public
  artifacts:
    paths:
      - public
  rules:
    - if: $CI_COMMIT_BRANCH == $CI_DEFAULT_BRANCH
Extentions
I also wanted to learn how to add extentions to MkDocs.
Mermaid Flow Charts
I read about the Mermaid extention here.
Following the linked GitHub page, I followed the installation functions and ran the following.
pip install mkdocs-mermaid2-plugin
I then added this to my mkdocs.yml file.
plugins:
    - search
    - mermaid2
Here is the example from the extention's webpage. I learned more about Mermaid's syntax here.
```mermaid
graph TD
A[Client] --> B[Load Balancer]
B --> C[Server01]
B --> D[Server02]
```
I also added the following to requirements.txt.
mkdocs-mermaid2-plugin==0.6.0
I figured out the line to add by running pip freeze in the terminal then looking for mermaid in the console.
Then, I used this to create the flowchart on my Final Project Outline page.