Personal Assignment: Molding and Casting
This group assignment based on the "Molding and Casting" course content completed two practical projects: https://fabacademy.org/2025/labs/chaihuo/docs/week14/chaihuo/week14_group_assignment/
- Creating a dog-shaped pen holder using LEGO bricks, clay, and polyurethane resin (PU)
- Casting a small tin soldier using indium-tin-bismuth low-temperature alloy, hot water, and a syringe
For detailed information, please visit the group page.
Project Overview
This personal assignment based on the "Molding and Casting" course content involved designing and creating a commemorative coin. The project went through multiple iterations, from directly 3D printing the model, to designing a rigid mold for direct casting, and finally adopting the standard "rigid model → flexible mold → final product" workflow. Through this process, I gained a deep understanding of the core principles of mold design, material properties, and the importance of manufacturing techniques.
Design Goals and Materials
Design Goals
- Create a double-sided commemorative coin with Chaihuo Makerspace's Logo on one side and the Fab Lab Logo on the other
- Achieve a smooth surface on the final product
- Apply the molding and casting techniques learned in class
Materials Used
- 3D Printing Material: Gold PLA material (Bambu Lab A1 Combo printer)
- Mold Material: Silicone rubber for molds
- Casting Material: Polyurethane resin quick-drying AB resin (mixed at 1:1 ratio)
- Release Agent: White vaseline
Tools Used
- Fusion 360 (design software)
- 3D printer (Bambu Lab A1 Combo)
- Tool pliers (for securing the mold)
- Plastic measuring cups (for material mixing)
- Wooden stick (for stirring)
- Soft brush (for applying release agent)
Design and Manufacturing Process
First Attempt: Directly 3D Printing the Commemorative Coin Model
My initial idea was to directly create the commemorative coin model through 3D printing, which would allow me to quickly validate the design effect.
Design and Printing Process
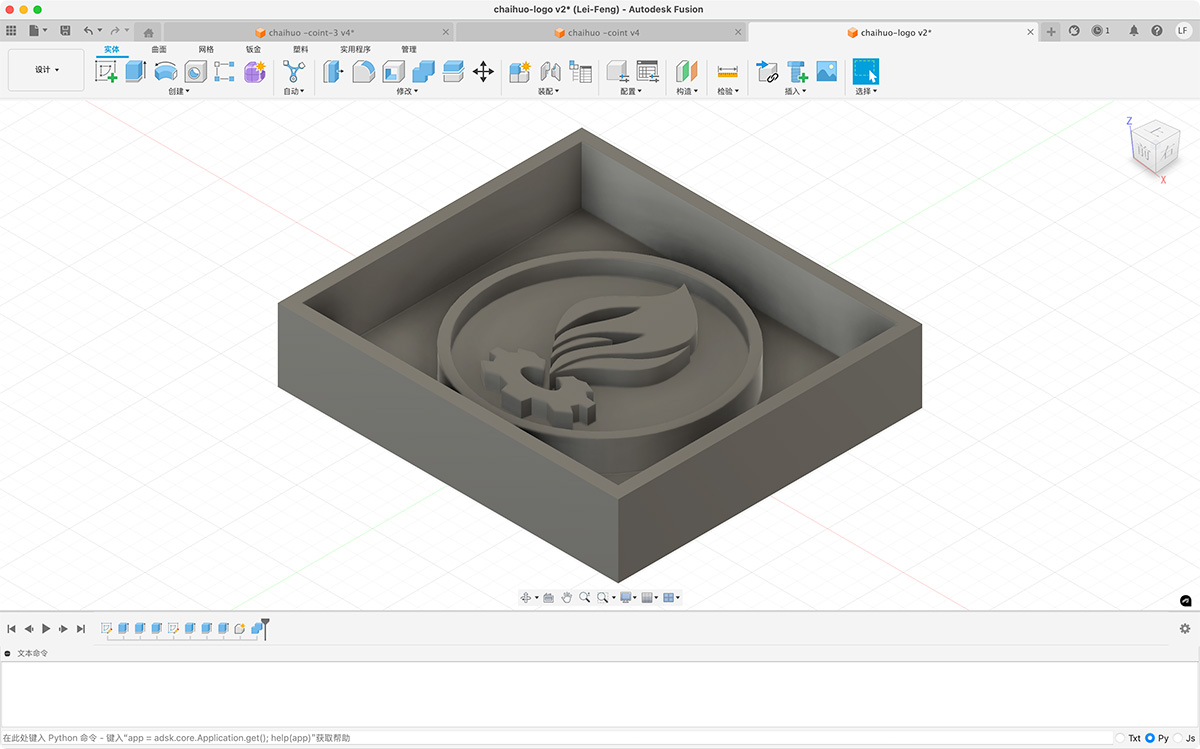
- Used Fusion 360 to design a double-sided commemorative coin about the size of a 1 Euro coin (diameter 23.25mm)
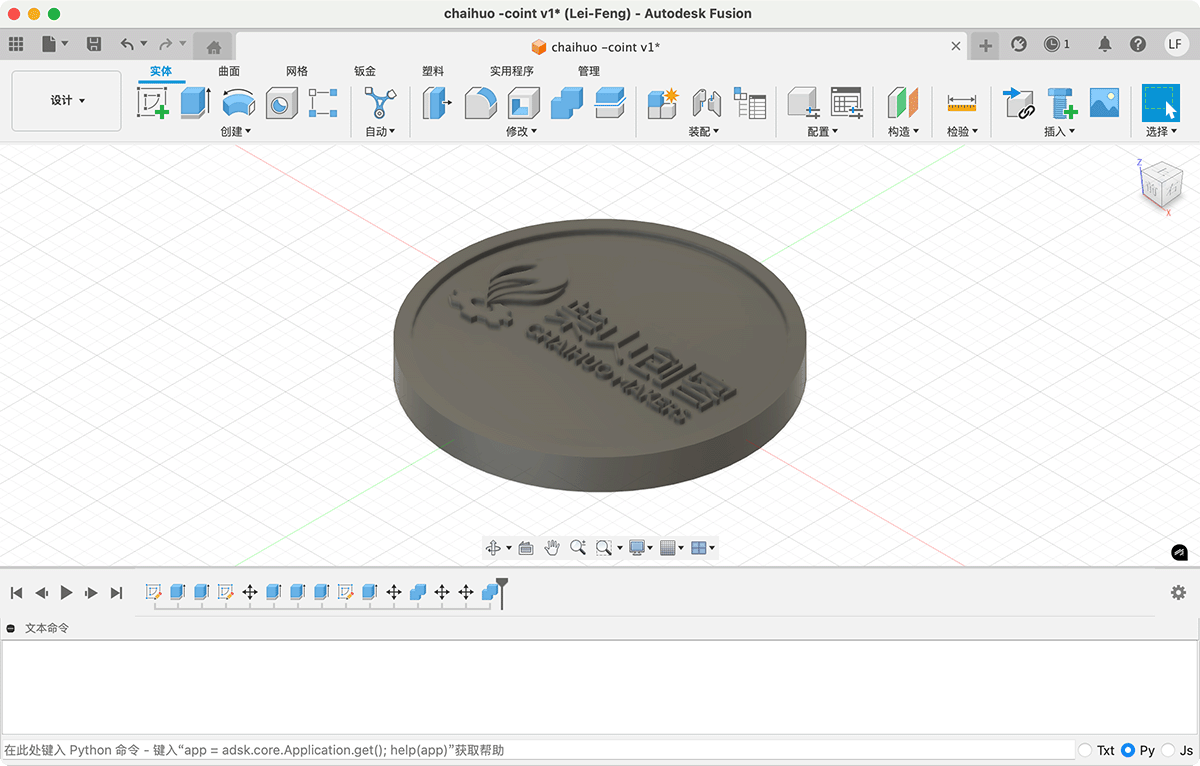
One side of the coin features the Chaihuo logo
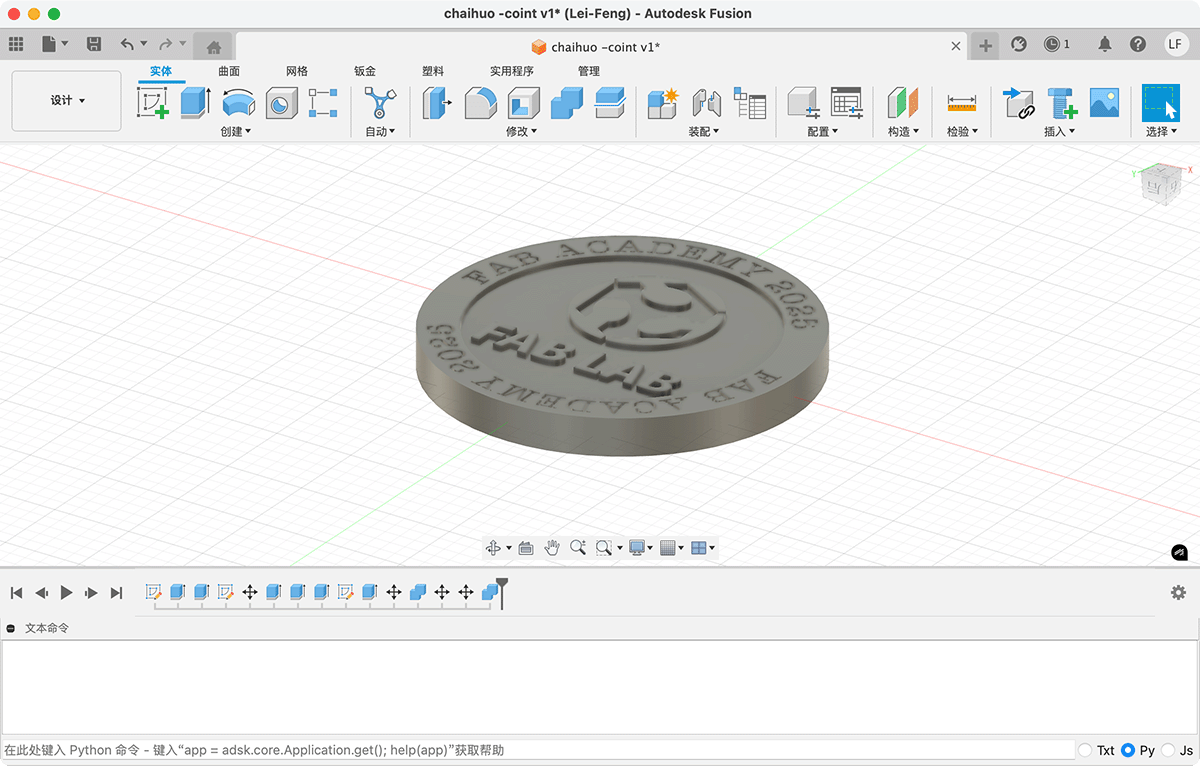
The other side of the coin features the Fab LAB logo. To test future mold details, I added some text
Access the design source file: https://a360.co/4k0d0Cm
- Designed one side with the Chaihuo Makerspace Logo and the other with the Fab Lab Logo
- Designed appropriate thickness and text details, and exported as a
.stlfile - Used the Bambu Lab A1 3D printer with PLA Silk material for direct printing. To improve surface smoothness, I enabled the "Ironing" option in the Bambu Studio software's print quality settings and set the ironing mode to "Concentric."
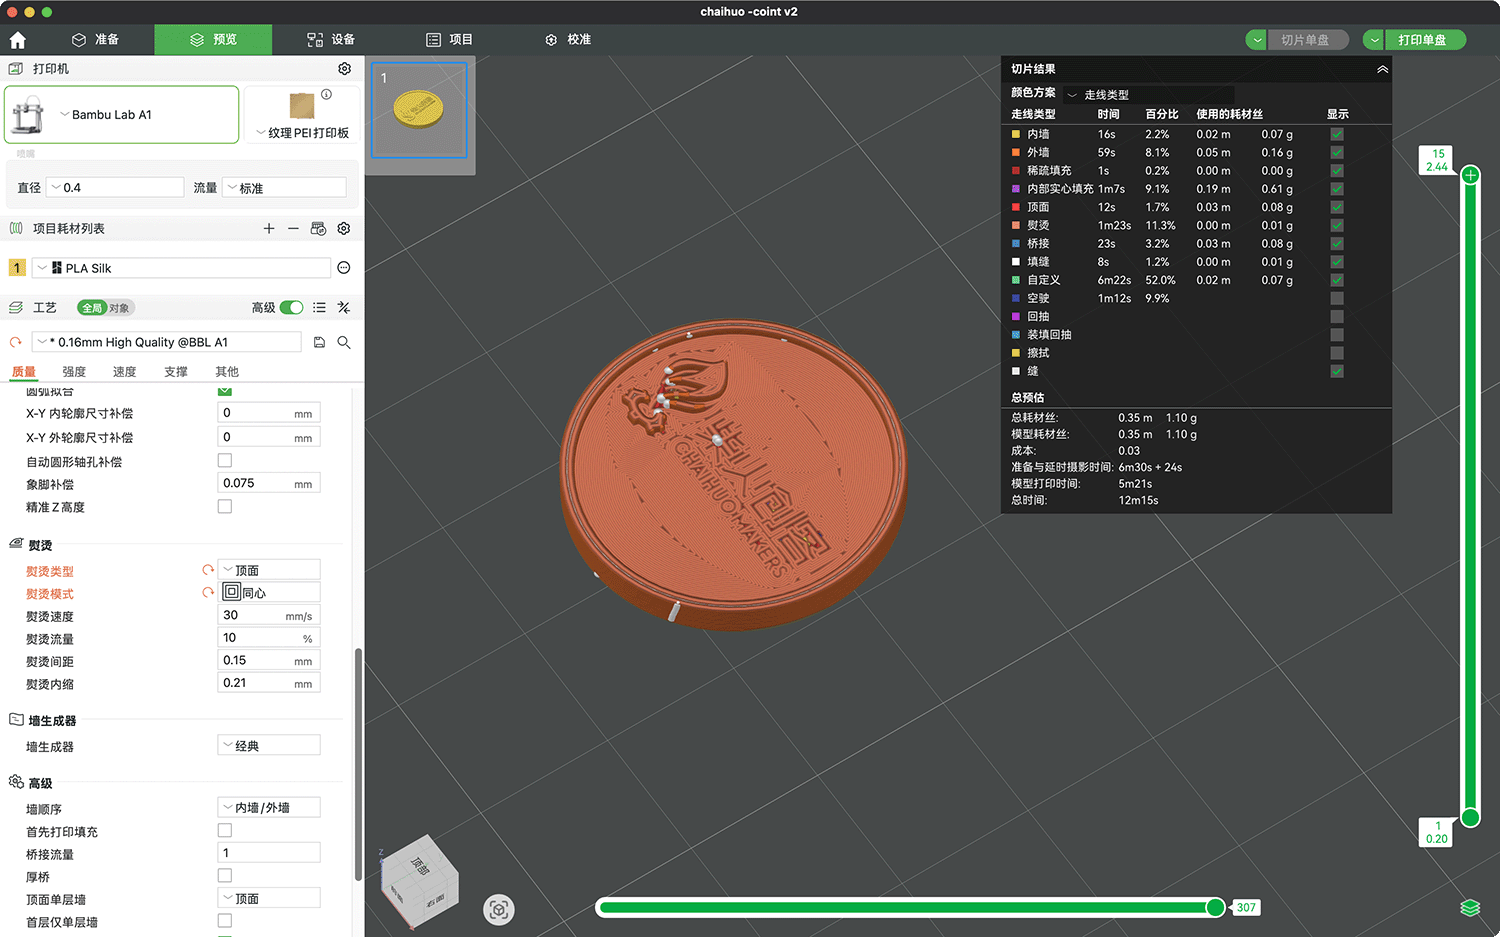
Used the Bambu Lab A1 3D printer with PLA Silk material for direct printing, with the "Ironing" option enabled in the Bambu Studio software's print quality settings
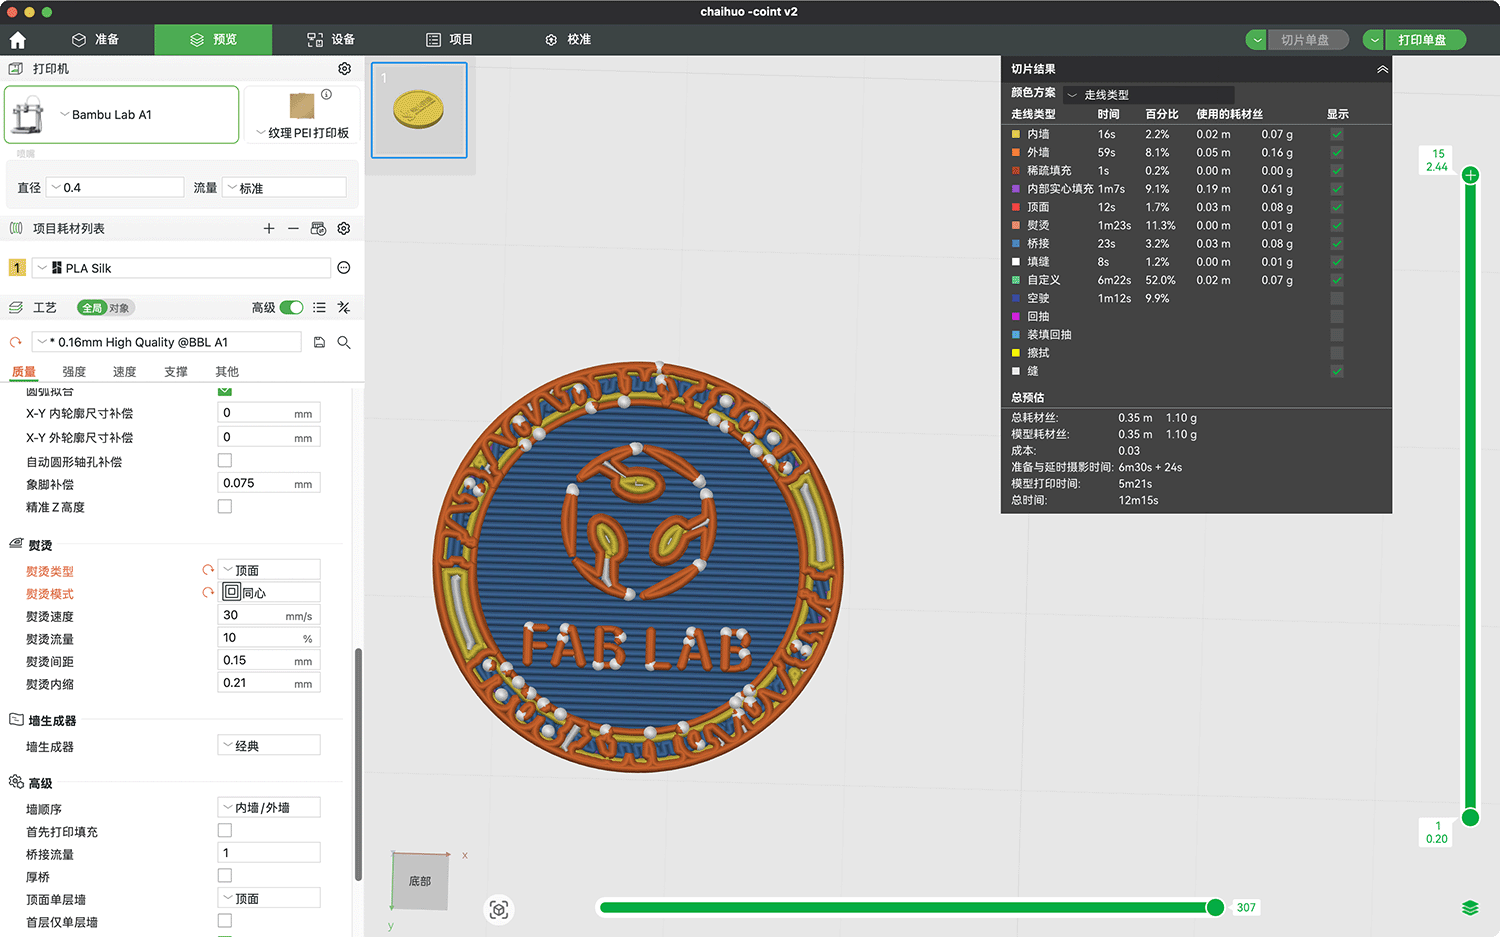
- I checked the slicing preview effect on the back and found that the text details could not be properly output. So I enlarged the coin to a diameter of 35mm, which barely made the text visible.
For a badge the size of a Euro coin, slightly complex text details had already exceeded the limits of what the 3D printer could represent
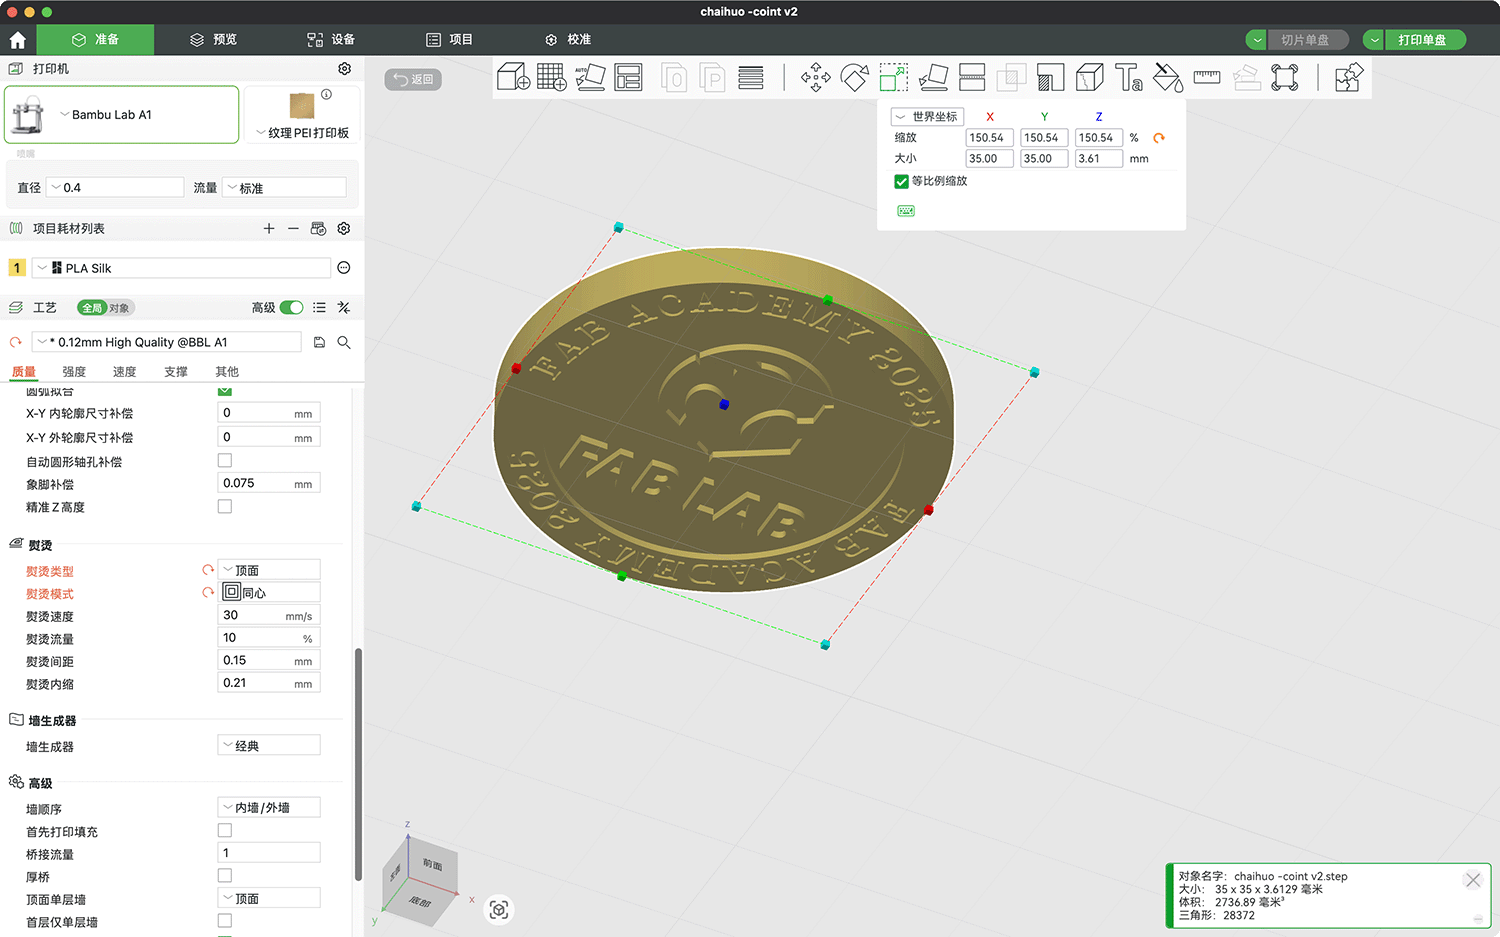
Enlarged the printed commemorative coin to 35mm
To improve printing precision, I set the process to * 0.12mm High Quality @BBL A1.
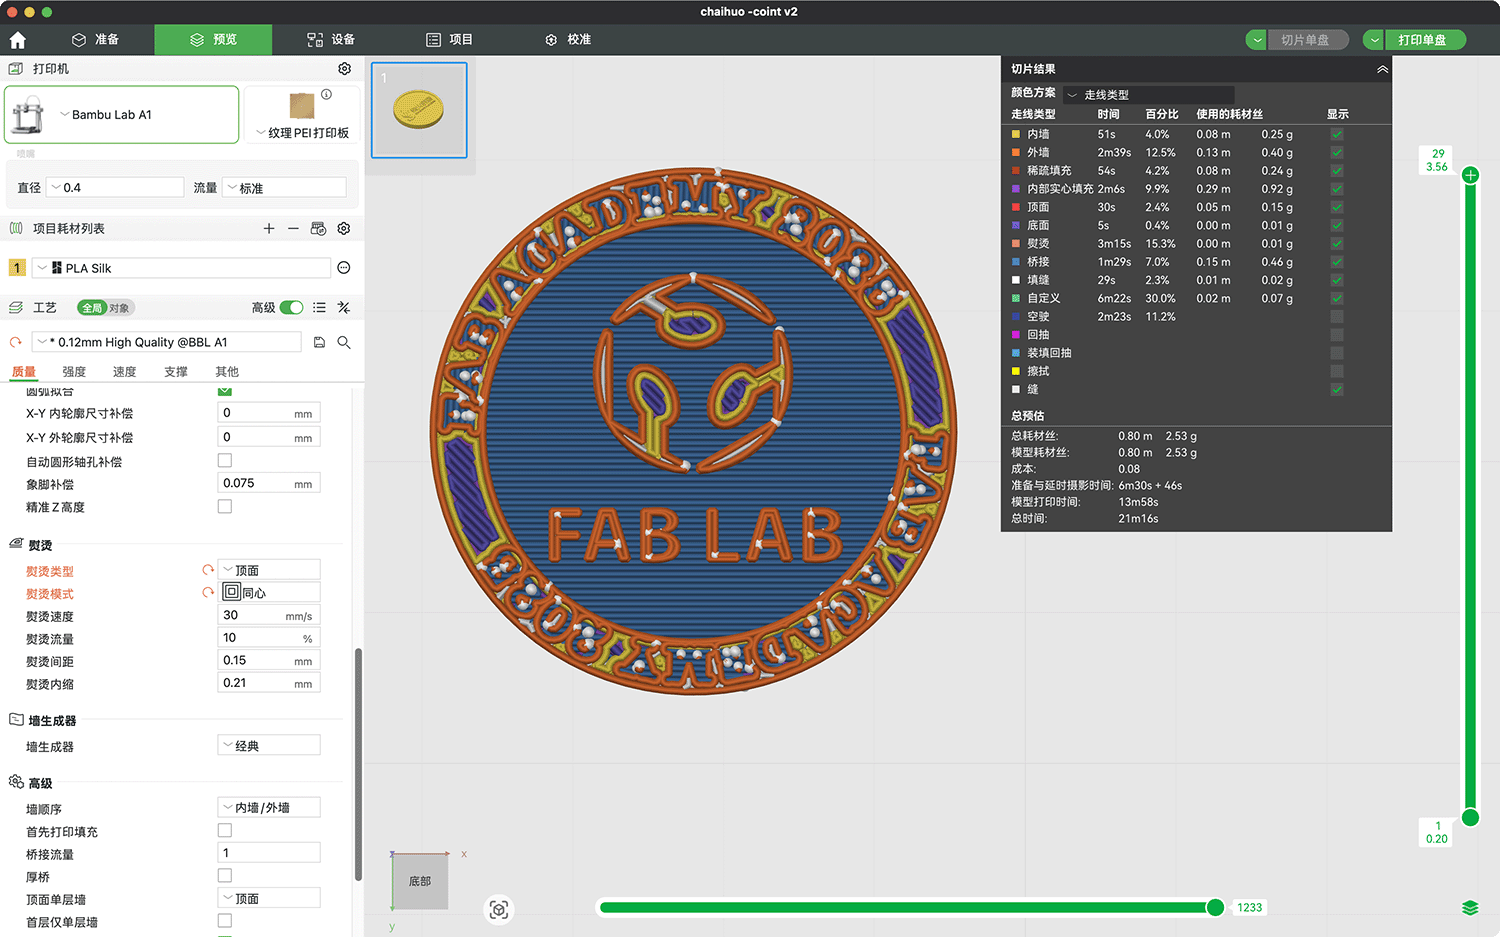
Now the text effect can be seen in the slicing preview
Problems Encountered
- Only the upper surface of the printed model was relatively smooth; the quality of the overhanging parts on the bottom surface was poor
- The model size was too small (about the size of a 1 Euro coin), and the printing precision was insufficient to present the details
- The overall effect was not ideal and could not meet the "smooth surface" assignment requirements
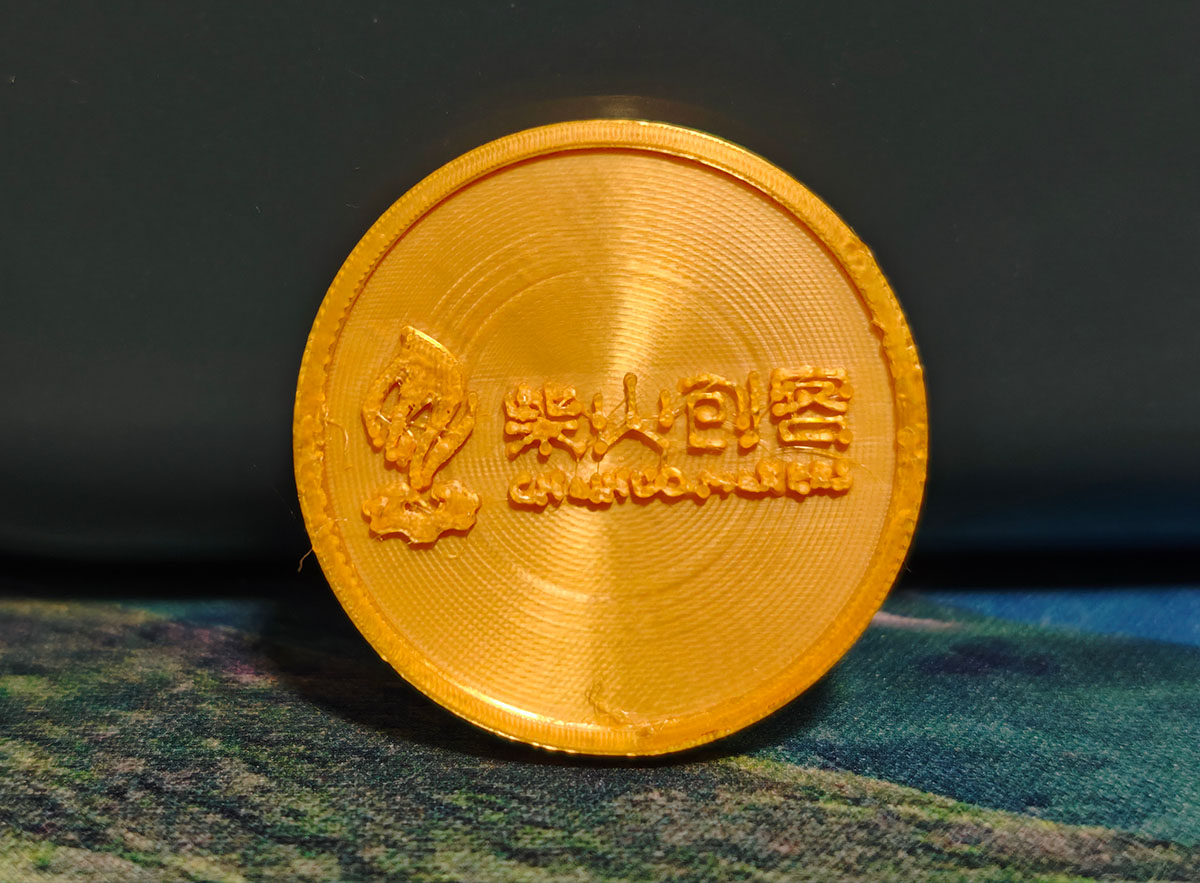
The effect of printing on the top surface was decent with the ironing effect, but the text parts were still quite deformed
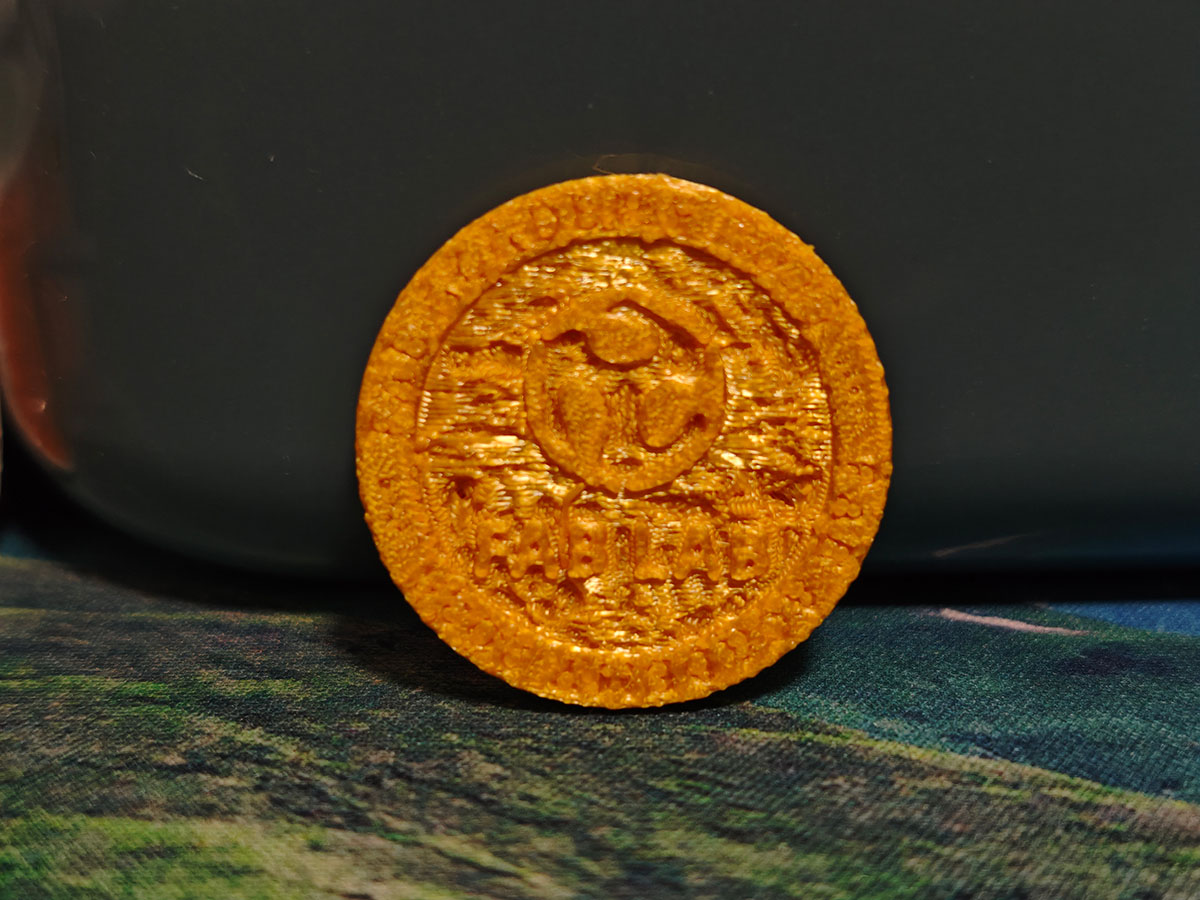
The bottom surface was completely unacceptable
It appears that 3D printing smaller badges directly is not feasible.
Second Attempt: Designing a Rigid Mold for Direct Casting
Recognizing the limitations of direct printing, I decided to design a two-part mold that could be joined together for directly casting the final commemorative coin.
Design Approach
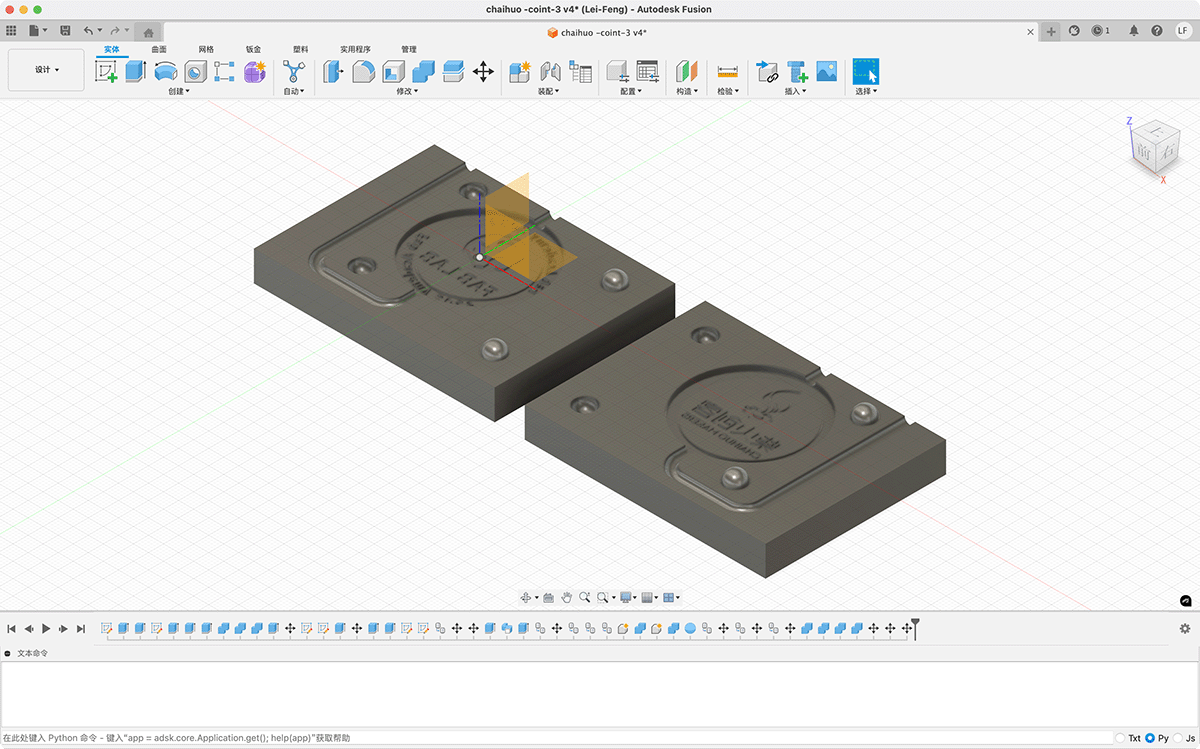
- Redesigned a split mold consisting of two joinable halves.
- The interior of the mold was the negative of the commemorative coin, and I increased the size of the coin to ensure that text details could be fully represented.
- Added injection ports and vents, as well as four alignment pins created by cutting and merging spherical and mold models that could interlock with each other. The completed design was exported as a
.stepfile.
Design source file: https://a360.co/4jx01bi
- Optimized print settings in Bambu Studio through parameter adjustments to improve surface smoothness. To keep the text details clear, I modified the wall generator option to Arachne. Arachne can adjust the extrusion line width according to the subtle structure of text, more precisely printing the outlines and details of text, and optimizing the fill path, reducing problems caused by fixed line width limitations. The clear text seen in the slicer software is a manifestation of Arachne's refined processing capability.
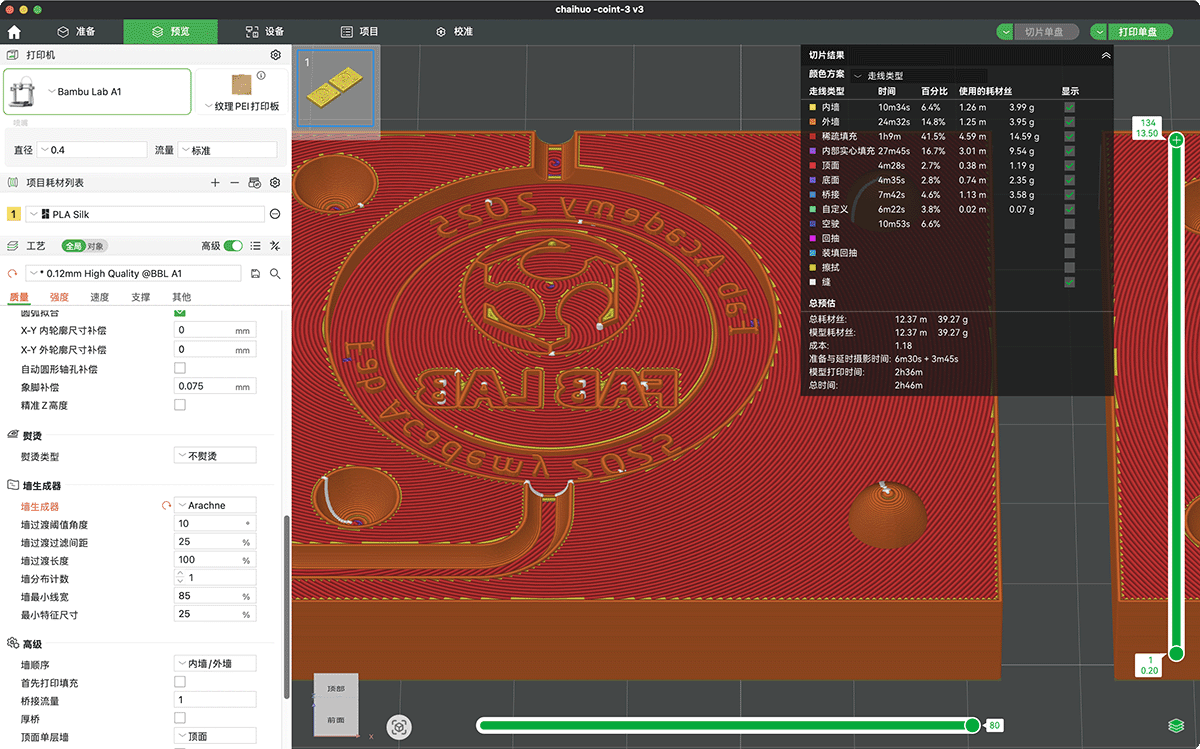
Changing the wall generator to Arachne can improve text display effects
Manufacturing Process
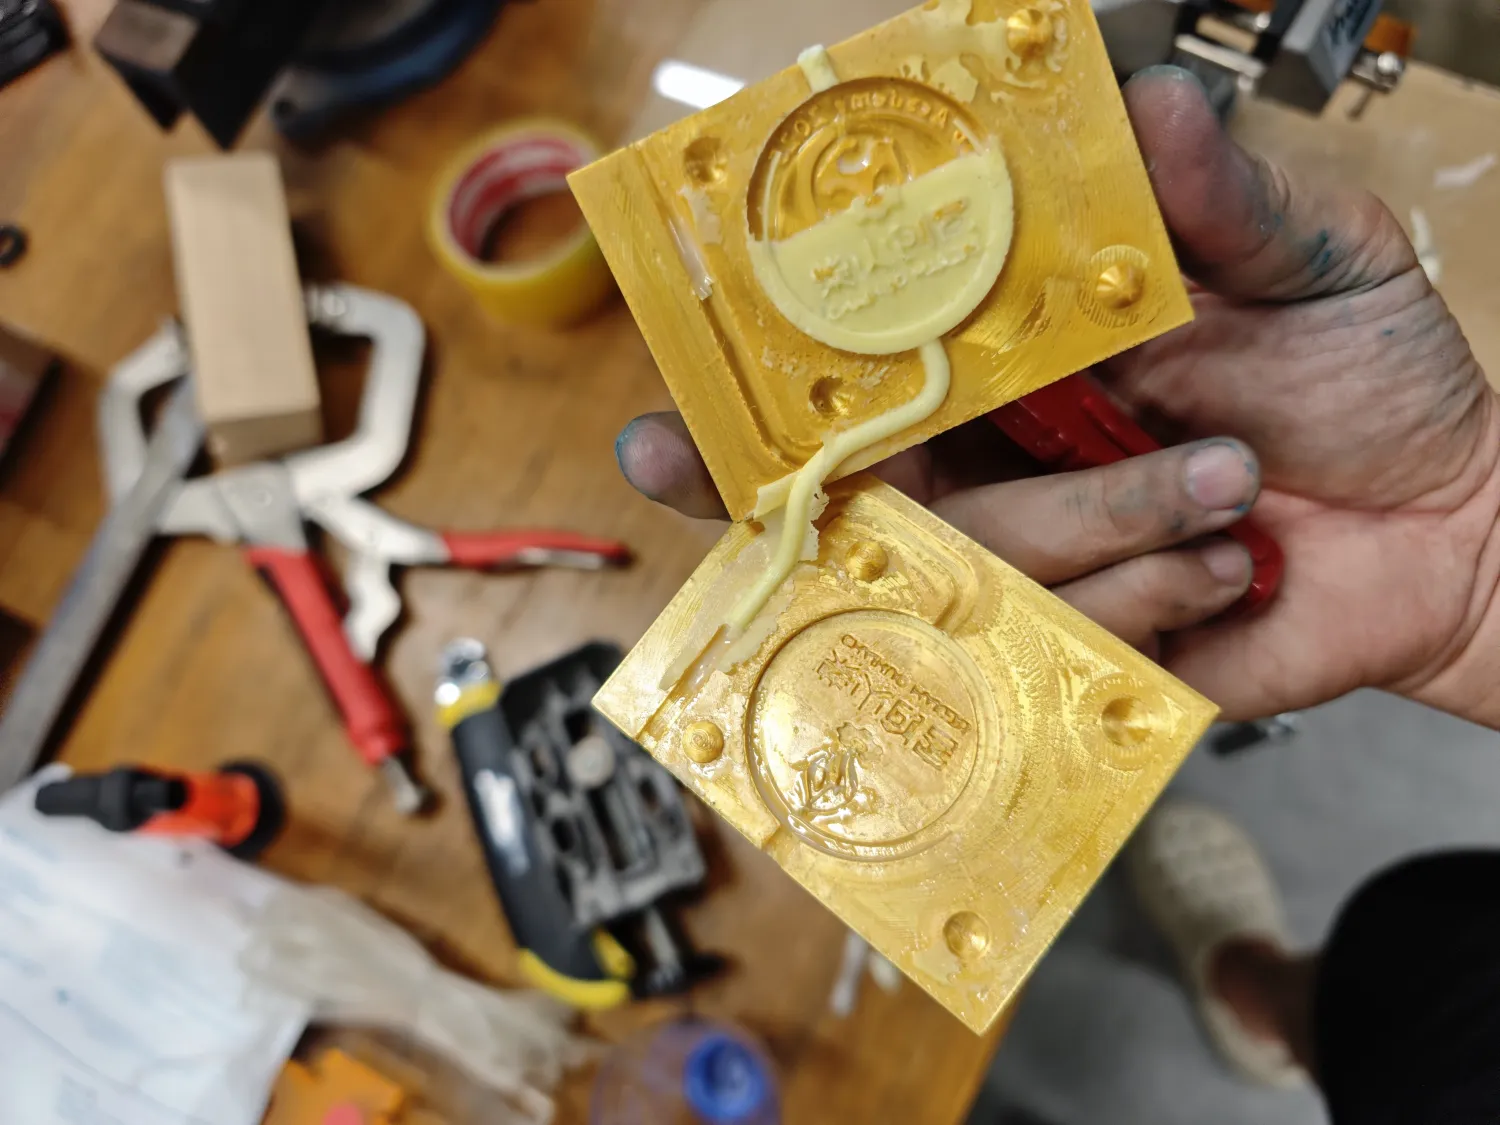
- Used Bambu Lab A1 Combo to print the two mold components. To improve print quality, I also enabled the wipe tower, and the printed mold looked pretty good.

The 2 mold parts can fit together and have injection holes and vents
- For the interior of the mold, I used a flexible old toothbrush to evenly apply white vaseline as a release agent. I thought this treatment should make the surface smooth and easy to demold.
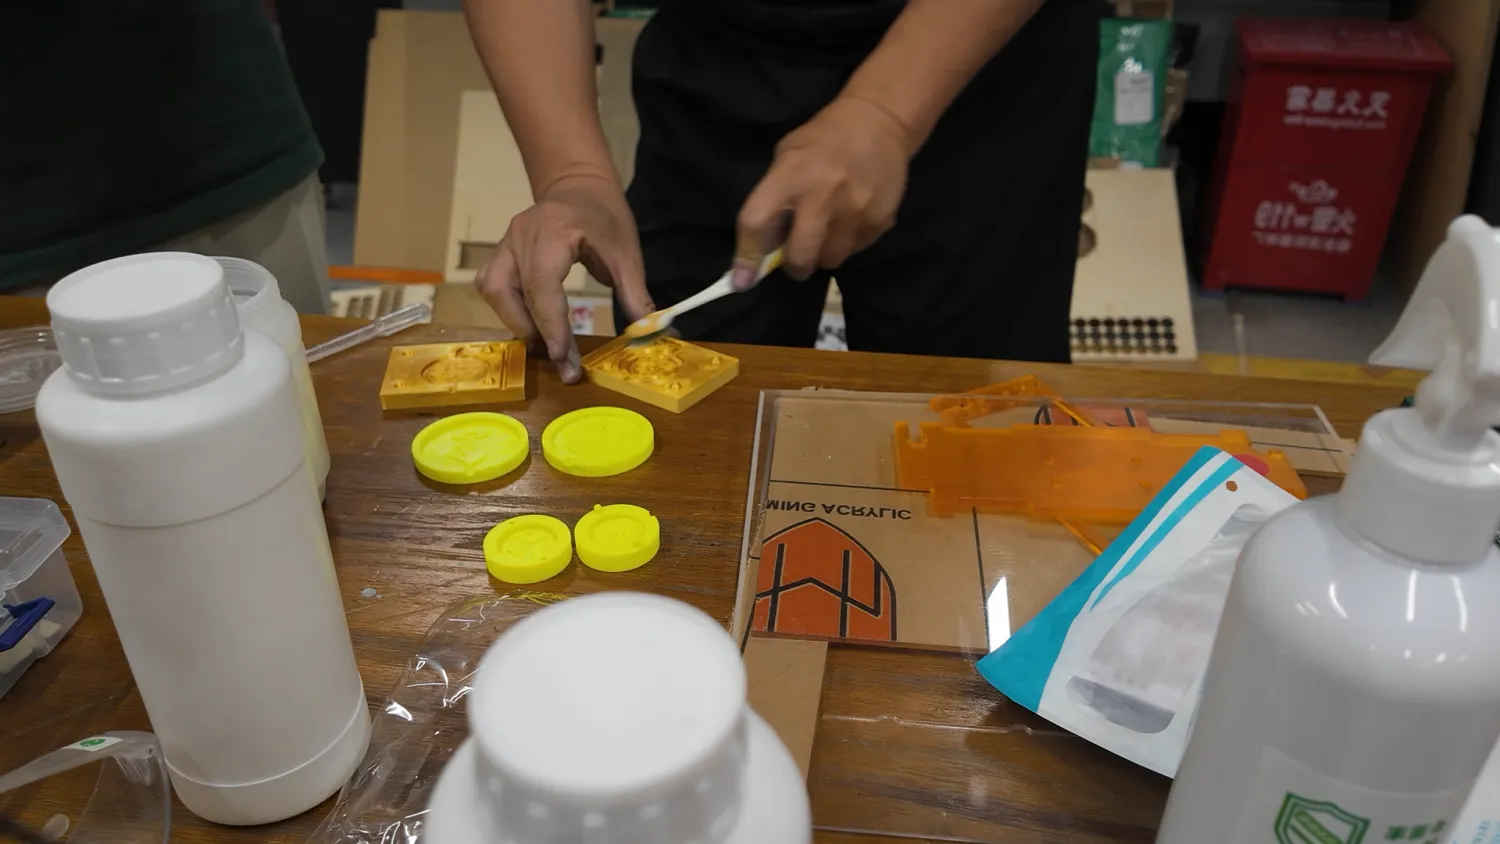
Applying vaseline to the printed mold
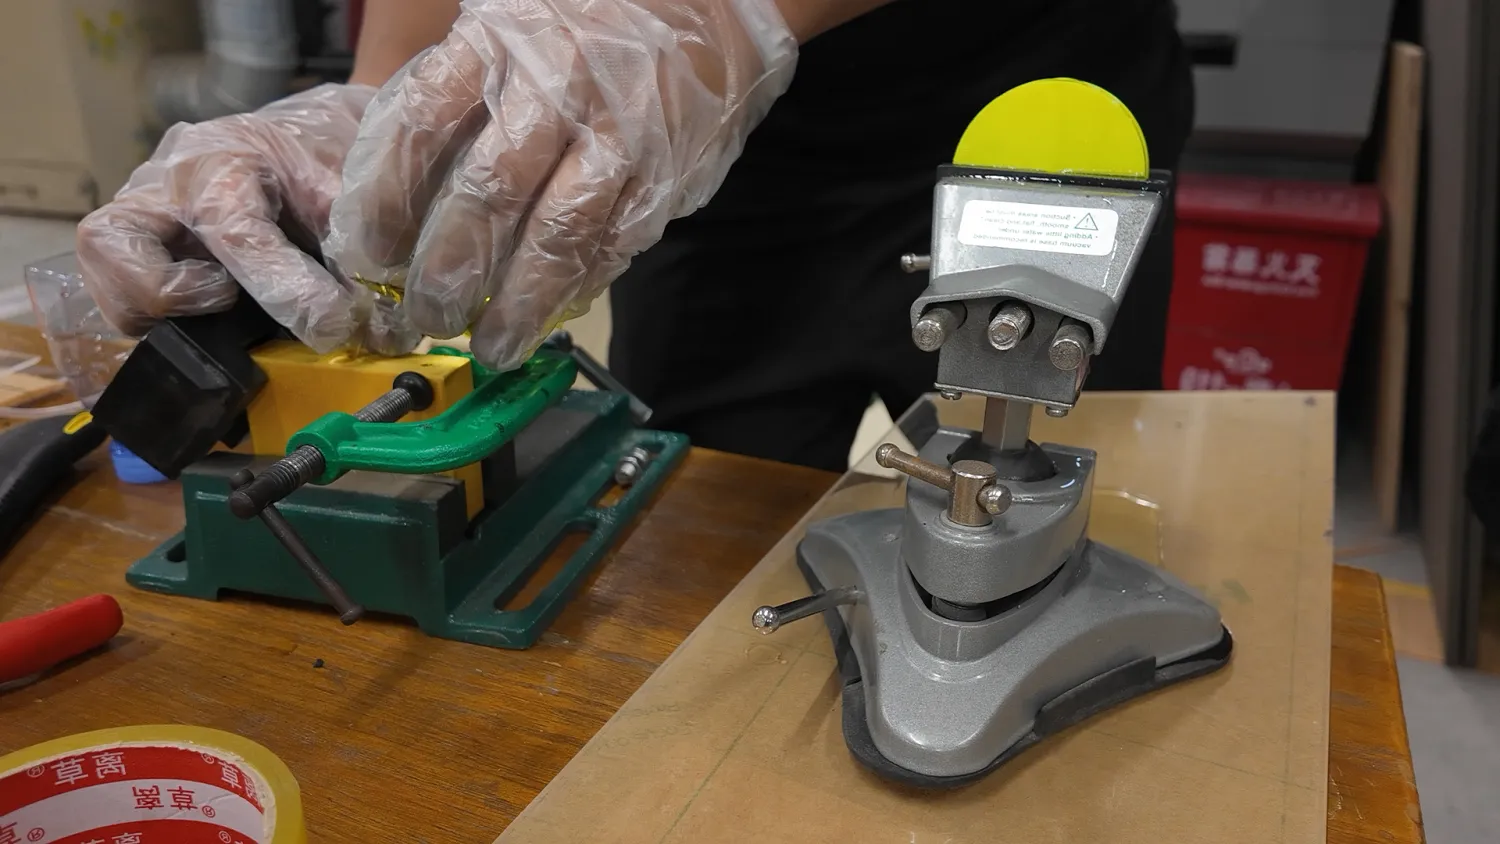
- Used tool pliers to clamp and secure the two halves of the mold. The only concern now was that the injection port seemed too small.
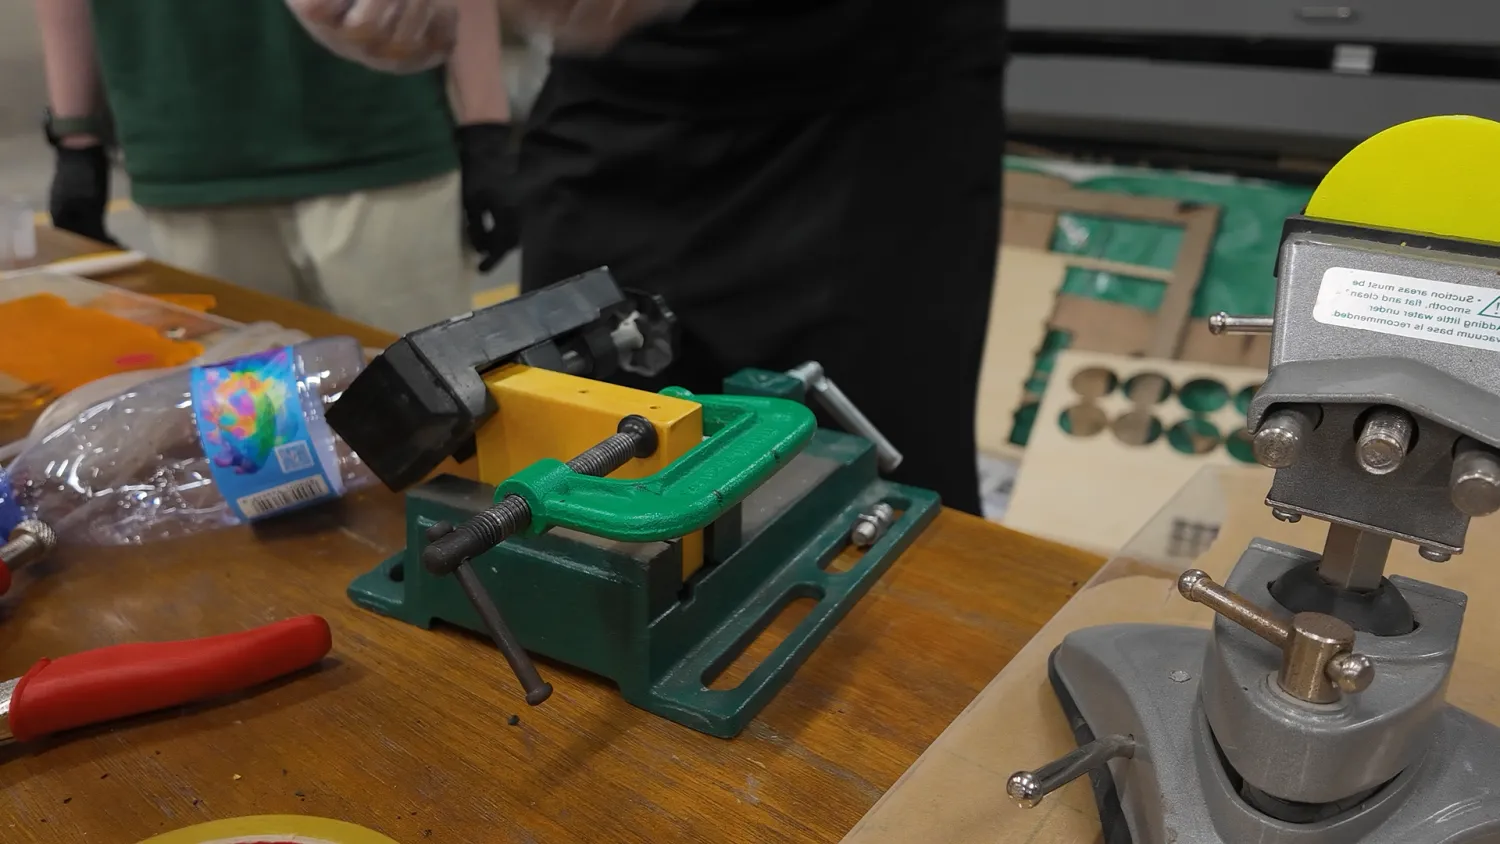
Using tool pliers to clamp and secure the mold
- Attempted to pour the prepared AB resin through the injection port. I tried to make a small funnel, but because the opening was small, the injection speed was very slow, causing it to begin solidifying before the mold was completely filled.
The small injection port made casting difficult
Problems Encountered
- The injection port was designed too small, causing the AB resin to start solidifying before the mold was completely filled
- The solidified product was almost impossible to remove from the PLA mold
- Both the mold and the product were damaged during the demolding attempt
- There was a fundamental error in the entire process design: directly casting rigid products with rigid molds, lacking a flexible intermediate step
It began to solidify when only half filled and could not be demolded. Despite using a release agent, the cast piece was firmly stuck to the mold
Removing the product from the rigid mold was a disaster
Third Attempt: The Standard Three-Step Process
After two failures, I revisited the course content and realized I should follow the standard "rigid model → flexible mold → final product" workflow.
Design Improvements
- Redesigned the commemorative coin model, increasing the size (diameter about 73 millimeters)
- Simplified the logo pattern, increased the relief depth to improve recognizability, and changed from double-sided to single-sided
- Designed a model suitable for making silicone molds (positive rather than negative mold)
- Considered demolding angles to ensure there were no overhanging or undercut structures
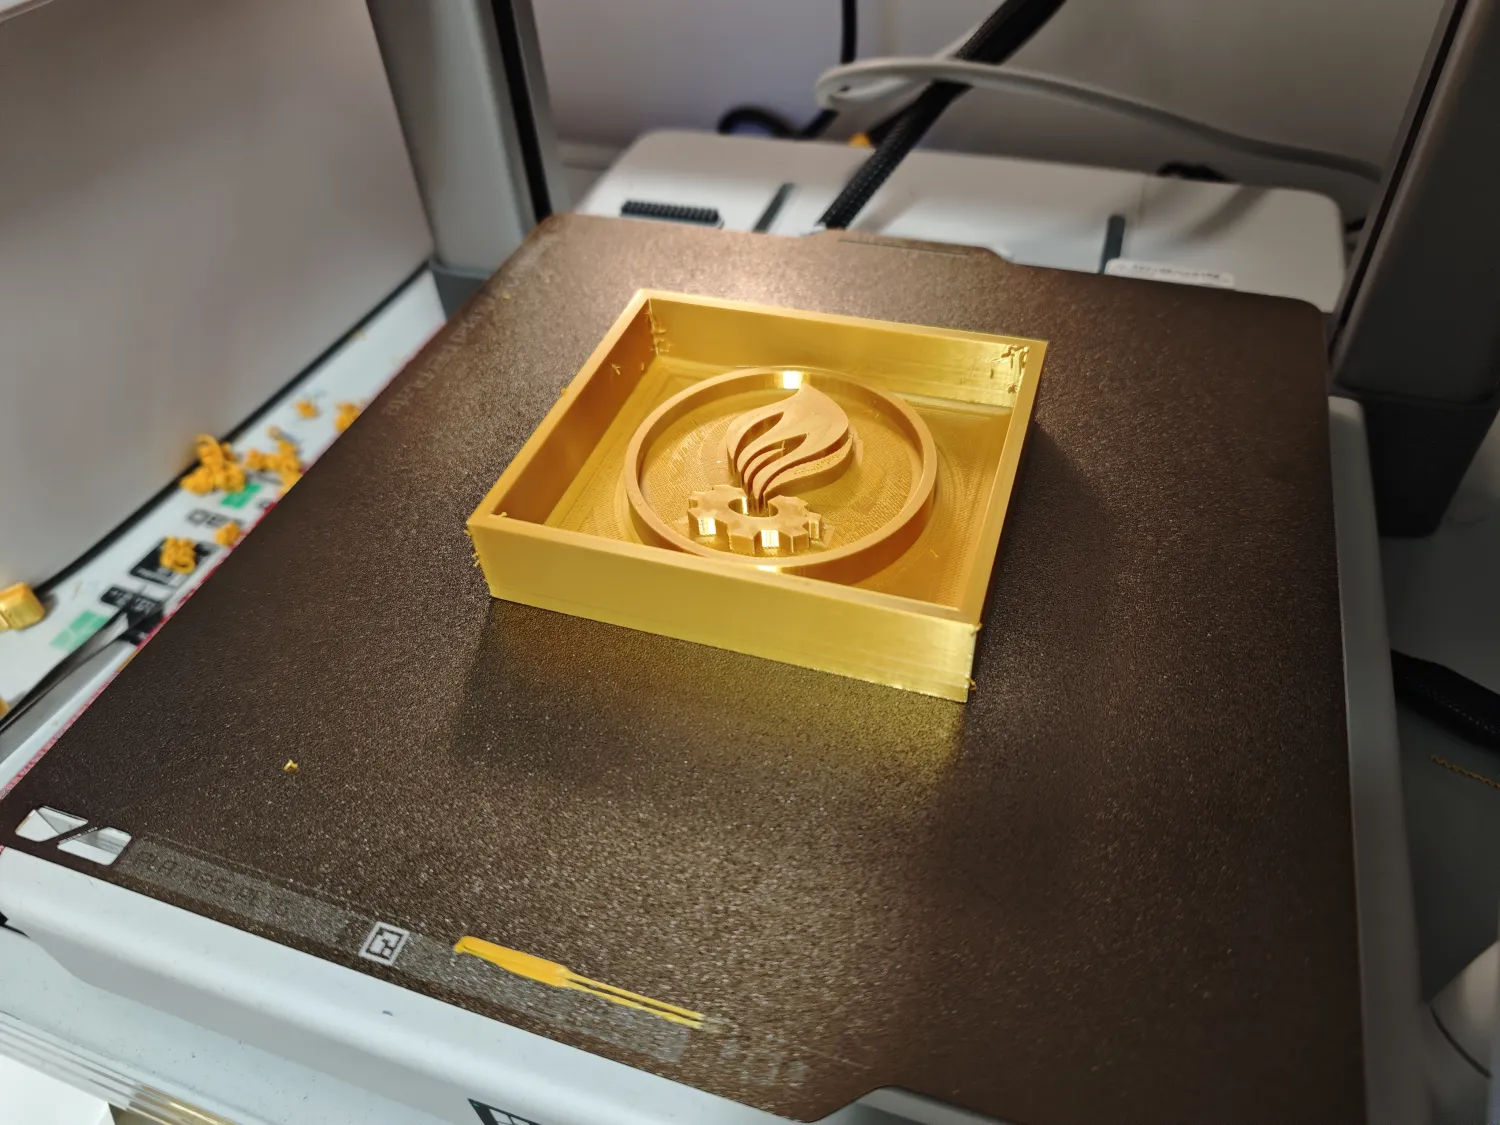
- Added a mold frame to the commemorative coin model to facilitate directly pouring silicone to obtain the mold
Design source file: https://a360.co/3Gs4Js7
Production Steps
- Printing the Rigid Model
- Printed the commemorative coin model using optimized printing parameters (0.12mm layer height, 100% infill)
- Post-processed the printed part, lightly sanding the surface to improve smoothness
- Making the Silicone Mold
- Evenly applied white vaseline release agent
- Mixed silicone and curing agent according to the instructions
- Slowly poured in the silicone, ensuring the model was covered and no bubbles formed
- The mold was sturdy enough to tap on the table to speed up bubble removal
- Left at room temperature for 24 hours, waiting for the silicone to fully cure
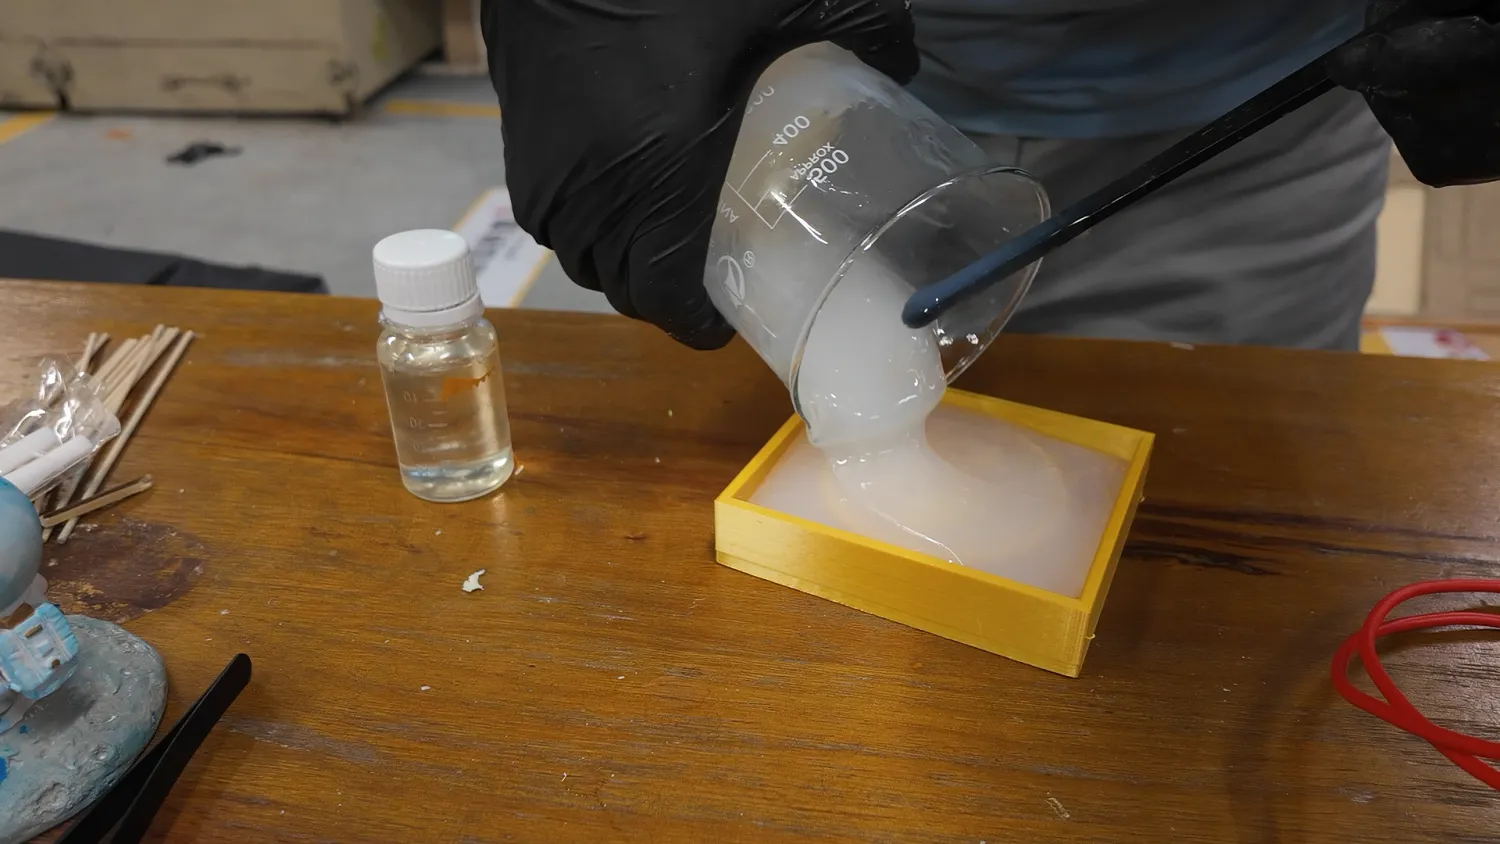
Pouring silicone mixed with curing agent into the mold
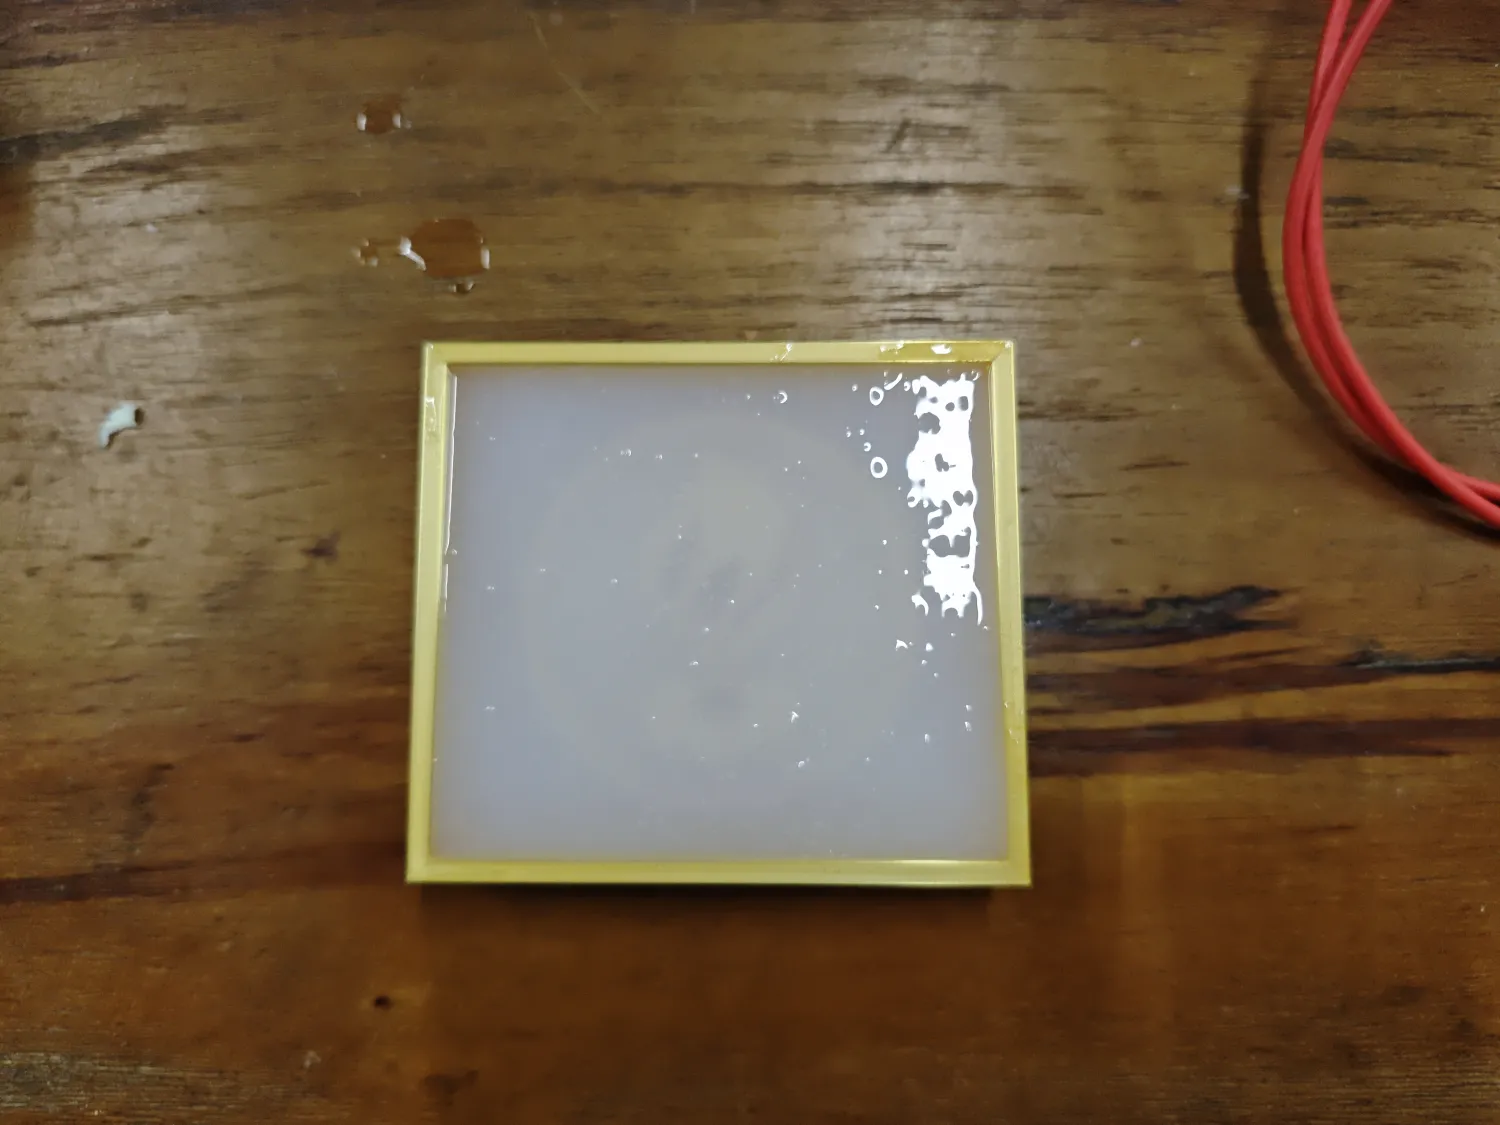
Repeatedly tapped forcefully on the table to accelerate bubble removal, then left to stand for 24 hours
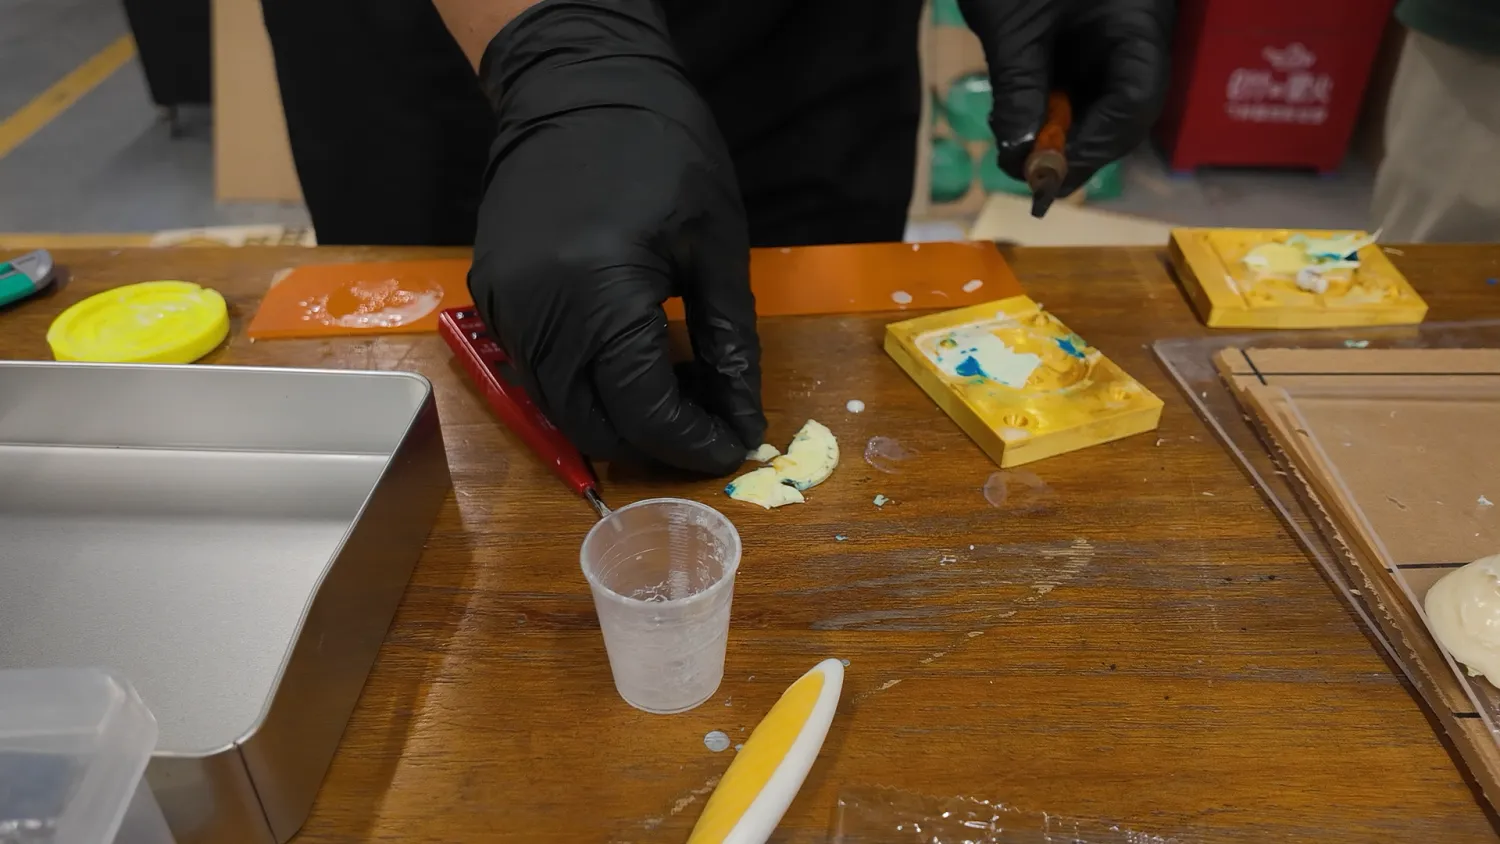
- Casting the Final Product
- Removed the original model from the silicone mold

This process was relatively easy; the silicone mold could easily be removed from the printed mold
- Applied another thin layer of release agent to the inside surface of the silicone mold
- Prepared AB resin at a 1:1 ratio
- Quickly mixed the two AB components (about 15-20 seconds)
- Poured the mixed AB resin within the working time (1.5-2 minutes)
- Gently shook the mold to eliminate bubbles
- Carefully demolded after waiting about 20 minutes
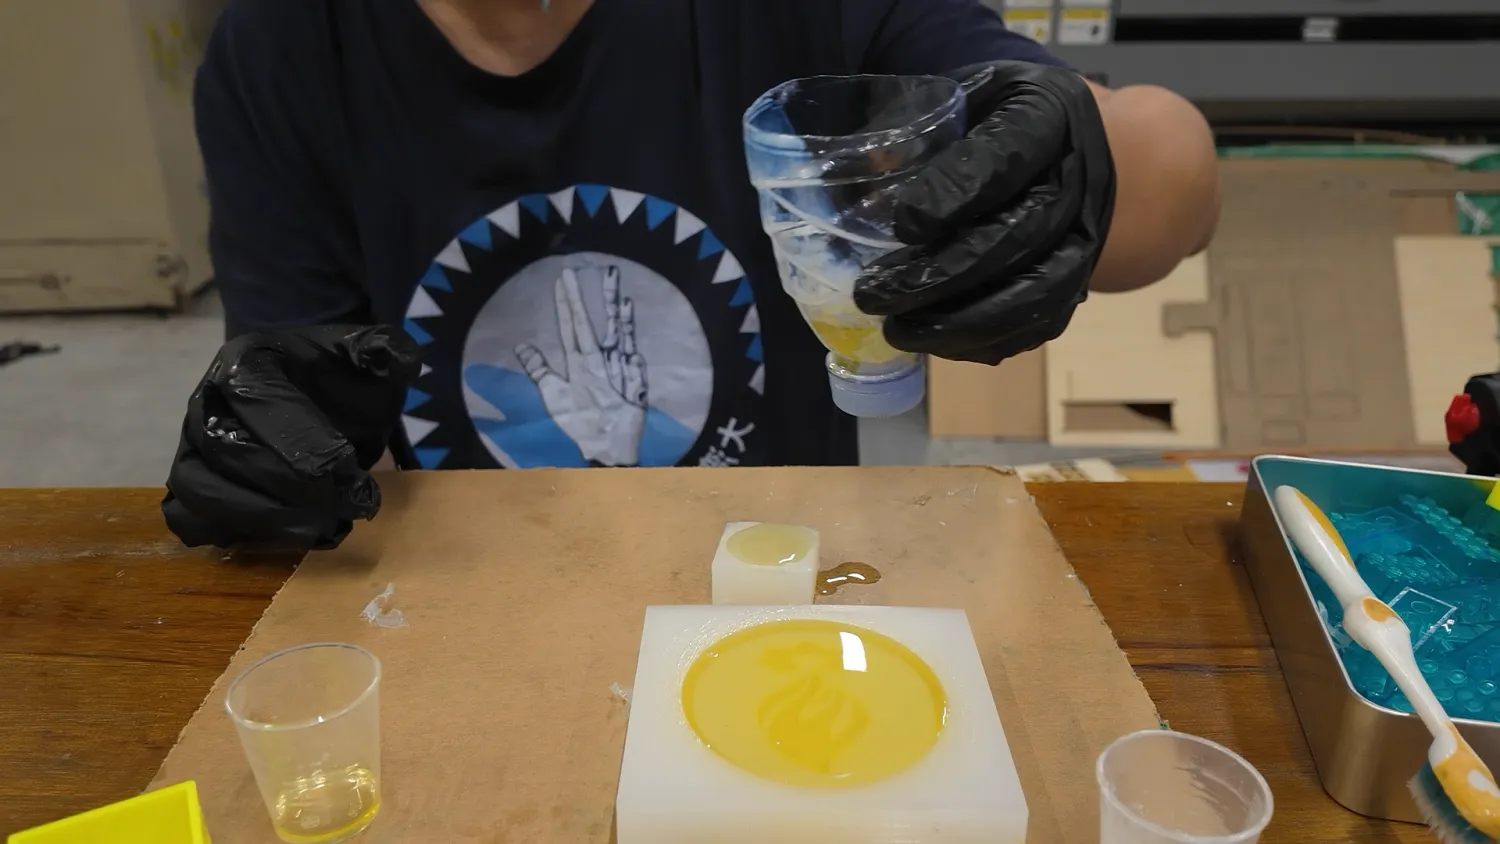
Pouring the prepared AB resin into the silicone mold
Results and Analysis
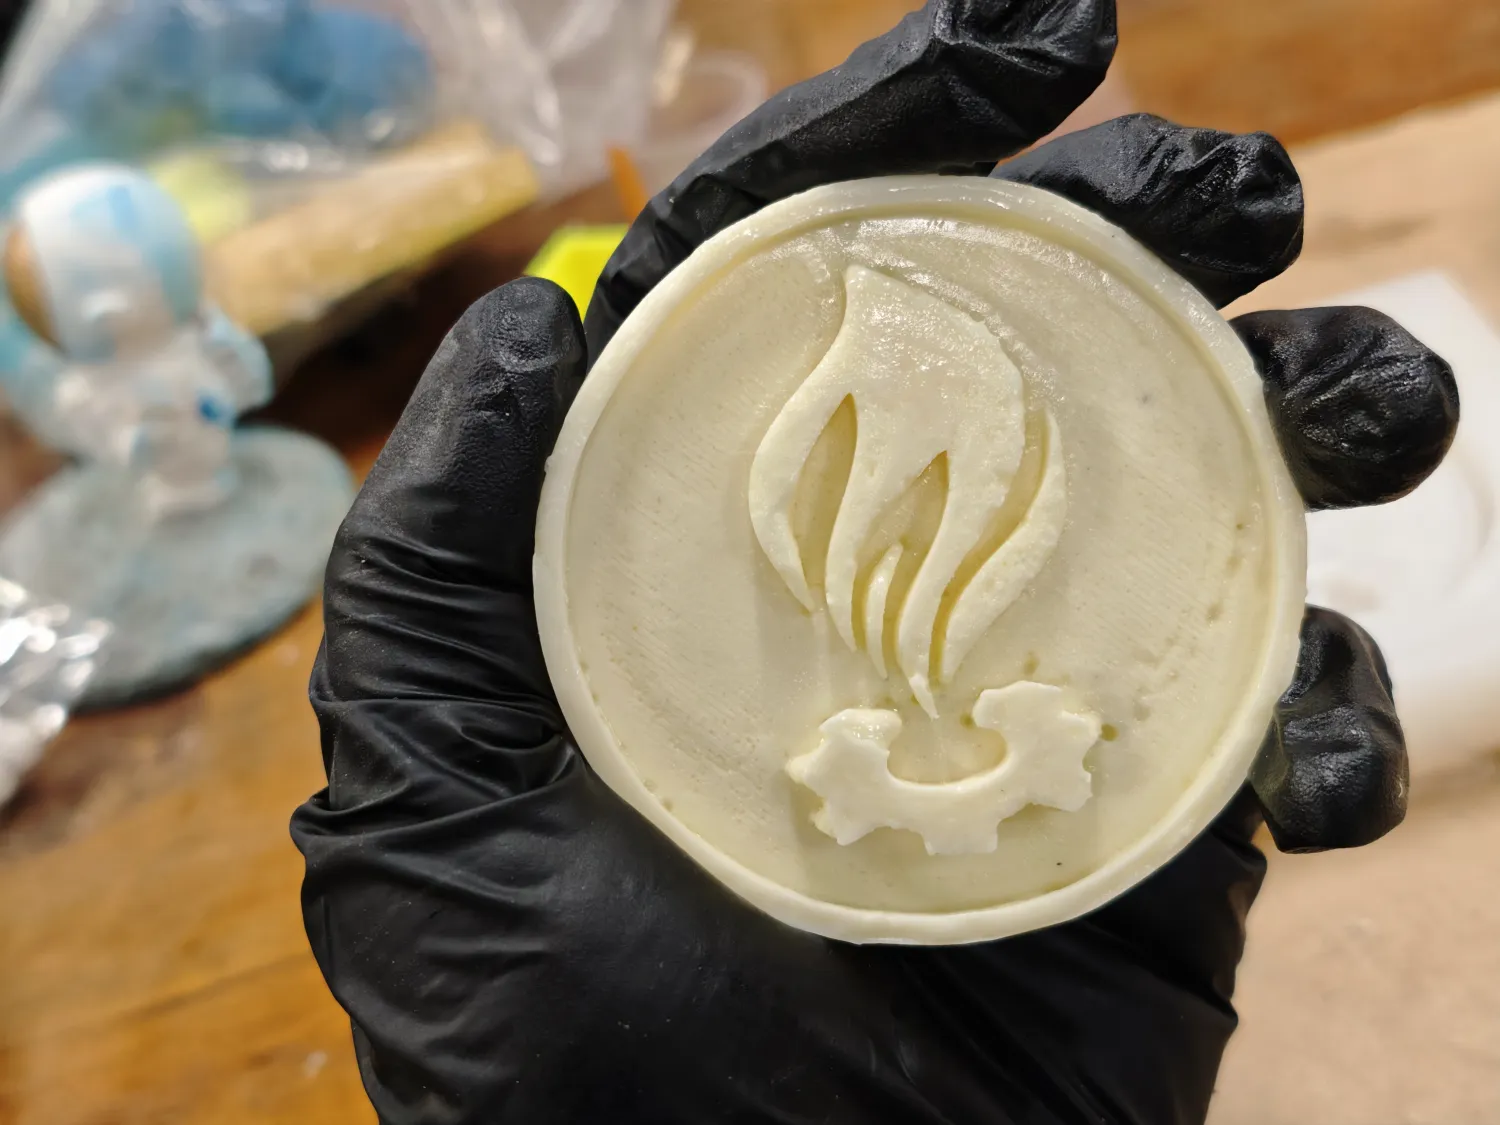
Final Product
The final commemorative coin had the following characteristics:
- Diameter about 7 centimeters, thickness about 1.5 centimeters
- Good surface quality with clear details
- Single-sided design, showcasing the Chaihuo Makerspace Logo
- Regular shape, smooth edges, with some bubble marks in parts of the bottom
Technical Analysis
- Surface Quality: Successfully obtained a high-gloss surface through silicone mold transfer
- Detail Reproduction: The logo lines are clearly identifiable with sharp edges
- Material Properties: AB resin hardens after curing, is durable and has good preservation properties
- Dimensional Accuracy: Dimensional error compared to the original design was controlled within 0.5mm
Experience Summary
Successes
- Adopted the correct "rigid model → flexible mold → final product" workflow
- Optimized 3D printing parameters to obtain a high-quality original model
- Effectively controlled bubble problems during silicone mold making
- Managed the time window during quick AB resin pouring
Areas for Improvement
- Could try using higher resolution print settings or an SLA printer
- Design a dedicated pouring system rather than simply pouring directly
- Explore adding color pigments to make the final product more visually appealing
- Consider using pressure-assisted or vacuum-assisted technology to further reduce bubbles
Learning Reflections
Through this personal assignment, I gained a deep understanding of the following points:
- Importance of Process: Mold making and casting have their inherent workflow; skipping or simplifying steps often leads to failure
- Understanding Material Properties: Different materials (rigid PLA, flexible silicone, cured AB resin) have drastically different properties; understanding these properties is crucial for success
- Shift in Design Thinking: From "directly manufacturing products" to "manufacturing tools for manufacturing products," this shift in thinking is crucial for the field of industrial design
- Learning from Failure: The first two failed attempts provided valuable experience that guided me to find the correct method
- Value of Patience: Mold making is a process that requires patience, especially during the material curing stage
Conclusion
This molding and casting project successfully completed the entire process from design to production. Although it experienced two failed attempts, it was these failures that guided me to find the correct method. The final commemorative coin met the requirements of a smooth surface and clear details, successfully applying the knowledge and skills learned in the course.
This practice not only deepened my understanding of the theory of mold making and casting but also developed my problem-solving ability and process planning skills. By completing the entire process from design to production with my own hands, I gained a more comprehensive understanding of digital manufacturing, especially a deeper appreciation of how to transform digital designs into physical products.