Week 1:Git and GitLab Environment Setup and Usage Guide
As Fab Academy students, mastering version control tools is our first technical challenge. This skill is not only essential for daily assignment submissions but also fundamental for modern digital manufacturing project management. Let me share my configuration process and experience.
Environment Setup
As a macOS user, the first step in configuring the Git environment is installing Git itself. Although macOS typically comes with Git pre-installed, I recommend reinstalling it through Homebrew to ensure we're using the latest version.
First, if Homebrew isn't already installed, we need to open the terminal and execute the following command:
/bin/bash -c "$(curl -fsSL https://raw.githubusercontent.com/Homebrew/install/HEAD/install.sh)"After installation, use Homebrew to install Git:
brew install gitOnce installed, we can verify the installation and check the Git version with:
git --versionNext is configuring global user information. This step is crucial as this information will appear in all our code commit records:
git config --global user.name "Your Name"
git config --global user.email "your.email@example.com"To ensure the configuration is correct, we can view the current settings with:
git config --listThis information will appear in every code commit record, serving as our electronic signature in project collaboration.
The next step is configuring SSH keys. This is an easily overlooked but extremely important step. Use the command:
ssh-keygen -t rsa -C "your.email@example.com"After generating the key, we need to add the public key to our GitLab account's SSH Keys settings. This not only enhances security but also makes subsequent code pushing more convenient.
Repository Initialization and Management
Understanding Project Repository
In the Fab Academy course, each student receives a dedicated Git repository (notified via email). This repository isn't just a place to store code; it's a digital archive for recording our learning journey and showcasing project outcomes. Through this repository, our documentation is automatically published to our personal website for assessors to review and share with other students.
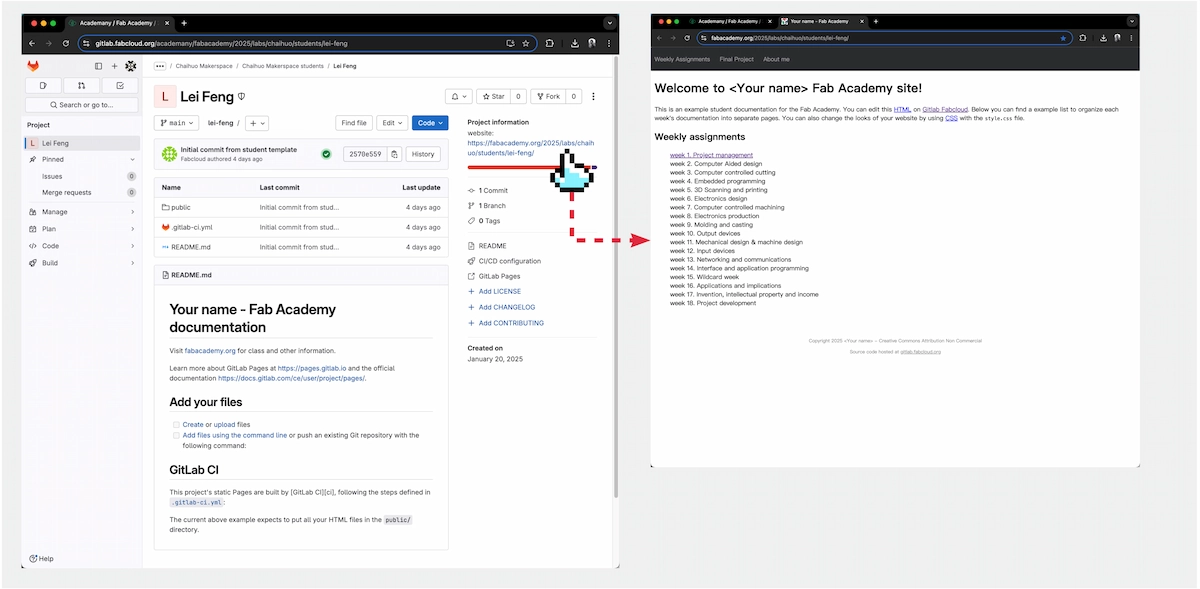
The left image shows my personal repository, though its contents are only visible to my personal account. The link at the pointer is the public link to my personal website stored in this repository: https://fabacademy.org/2025/labs/chaihuo/students/lei-feng/. Clicking it shows your personal website on the right. Currently, this website is just a generic template, and we'll begin rebuilding it soon.
Working Directory Setup
Before cloning the repository, we need to choose an appropriate working directory. It's recommended to create a dedicated folder locally for all Fab Academy content. For example:
# Create working directory
mkdir ~/Documents/FabAcademy2025
cd ~/Documents/FabAcademy2025

# Clone repository
git clone git@gitlab.fabcloud.org:academany/fabacademy/2025/labs/chaihuo/students/lei-feng.gitDirectory Structure Analysis
After cloning, we'll have a complete project template. The directory structure is carefully designed, with each folder having its specific purpose:
lei-feng/                    # Project root directory
├── public/                  # Website publishing directory
│   ├── 404.html            # 404 error page
│   ├── about.html          # Personal introduction page
│   ├── assignments/        # Assignment documents directory
│   │   ├── week01.html     # Week 1 assignment
│   │   └── final-project.html  # Final project documentation
│   ├── images/             # Image resources directory
│   │   ├── avatar-photo.jpg    # Personal avatar
│   │   └── sample-photo.jpg    # Sample image
│   ├── index.html          # Website homepage
│   └── style.css           # Stylesheet file
├── .gitlab-ci.yml          # GitLab CI/CD configuration file
└── README.md # Project documentationThe .gitlab-ci.yml file plays a crucial role in the project. This configuration file defines the continuous integration and continuous deployment (CI/CD) process, telling GitLab how to automatically build and publish our documentation to the website. Whenever we push new changes to the repository, GitLab automatically executes the tasks defined in this file, publishing the contents of the public directory to our personal website. This automated process allows us to focus on content creation without worrying about deployment details.
README.md is typically used to explain basic project information and usage instructions.
Website content is primarily stored in the public directory. index.html serves as the website's entry page, the first content visitors see. The assignments directory stores weekly assignment documents where we'll detail our learning process and project progress. The images directory centrally manages all image resources, ensuring document structure cleanliness. style.css defines the visual style of the entire website, ensuring interface uniformity and professionalism.
This structure not only meets course requirements but also provides a clear framework for subsequent document management. As the course progresses, we'll gradually enrich the content of each section, ultimately forming a complete project archive.
Daily Workflow
After configuration, the common daily workflow is as follows:
The first step is ensuring local code is synchronized with the remote repository:
git pull origin masterThen, when editing documents or modifying code, I regularly execute:
git add .
git commit -m "Update description"Pay special attention to commit message standardization here. A good commit message should concisely explain the content of this change, which is very important for future version tracking.
Finally, push updates to the remote repository:
git push origin masterTroubleshooting and Solutions
I've encountered some common issues during use; here are the solutions:
If you encounter permission issues when pushing, first check if the SSH key is correctly configured. You can test the connection with:
ssh -T git@gitlab.fabcloud.orgIf you encounter merge conflicts, don't panic. First, use:
git statusto check specific conflict files, then manually resolve conflicts, and finally recommit.
VSCode Workflow Setup and Recommendations
For newcomers to version control, command-line operations often require memorizing many commands, which can create a learning barrier. Especially when frequent code commits and branch management are needed in daily operations, using modern IDEs like Visual Studio Code (VSCode) with graphical interfaces can significantly reduce operational complexity and improve development efficiency.
VSCode provides excellent Git integration support, allowing us to manage code versions graphically. Here's how to set up a VSCode development environment suitable for the Fab Academy course.
Opening the Project Repository
After downloading and installing VSCode from the official website and launching it, we have two ways to open the project repository:
- Through the menu: Select "File > Open Folder", navigate to our previously created FabAcademy2025 directory, and select the cloned
lei-fengfolder. - Through the command line: Execute in the project directory:
code .When opening for the first time, VSCode might ask if you trust the folder's authors; select "Yes". At this point, we should see the complete project file structure in the left explorer.
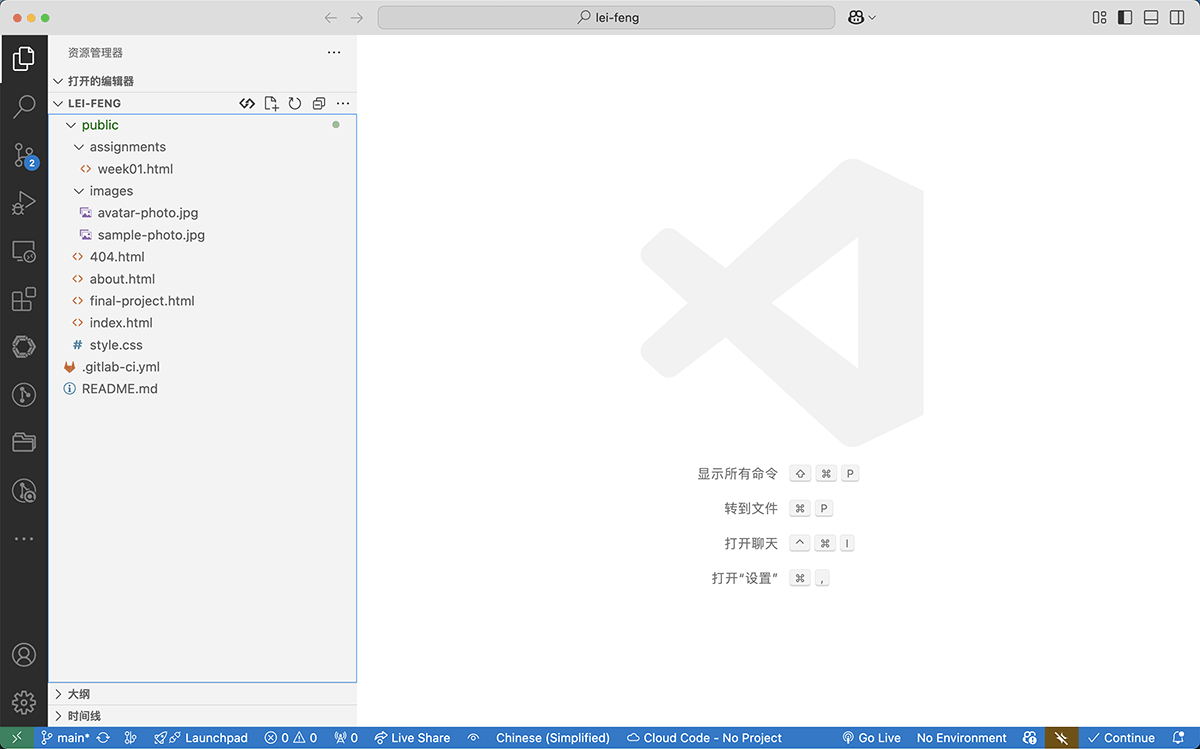
The VSCode interface after opening the project files, with repository folder contents visible in the left explorer.
Essential Extensions Installation
To better support our development work, we need to install some extensions. Click the "Extensions" icon in the left activity bar (shortcut Ctrl+Shift+X), then search for and install these extensions:
- GitLens
- Search for "GitLens"
- This extension allows us to intuitively view code modification history
- After installation, it displays the last modification information for each line of code in the editor
- Live Server
- Used for previewing our website effects
- After installation, right-click on index.html and select "Open with Live Server" to preview the website in real-time in the browser
- HTML CSS Support
- Provides intelligent suggestions for HTML and CSS
- Helps us edit website code more efficiently
- Live Preview
- Used for directly previewing HTML files in VSCode
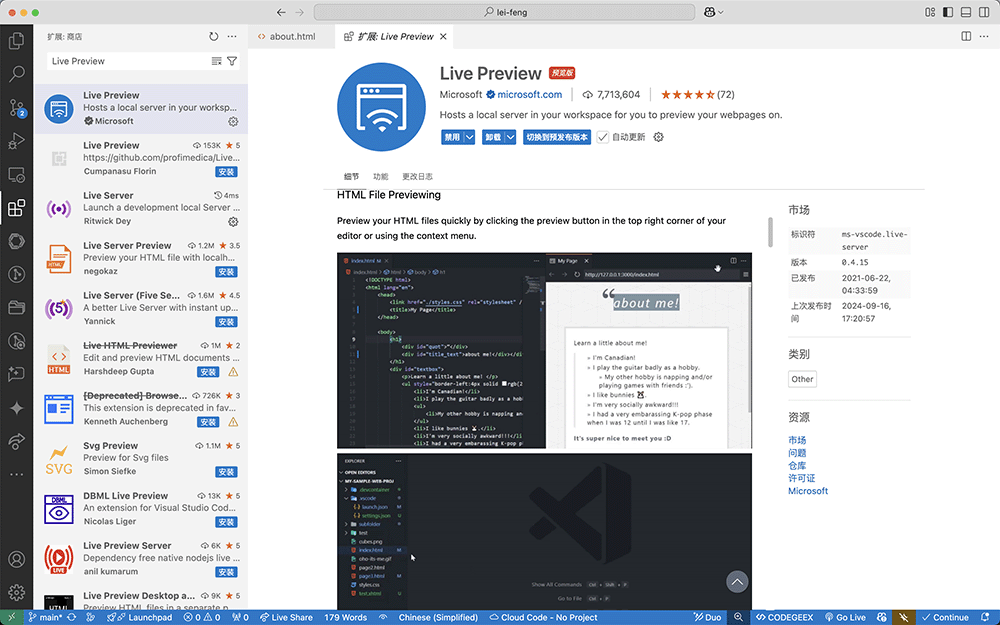
Status after successfully installing the Live Preview extension
Now, click the file explorer icon on the left, find about.html in the left resource list, and you'll see a Show Preview icon. Try clicking it.
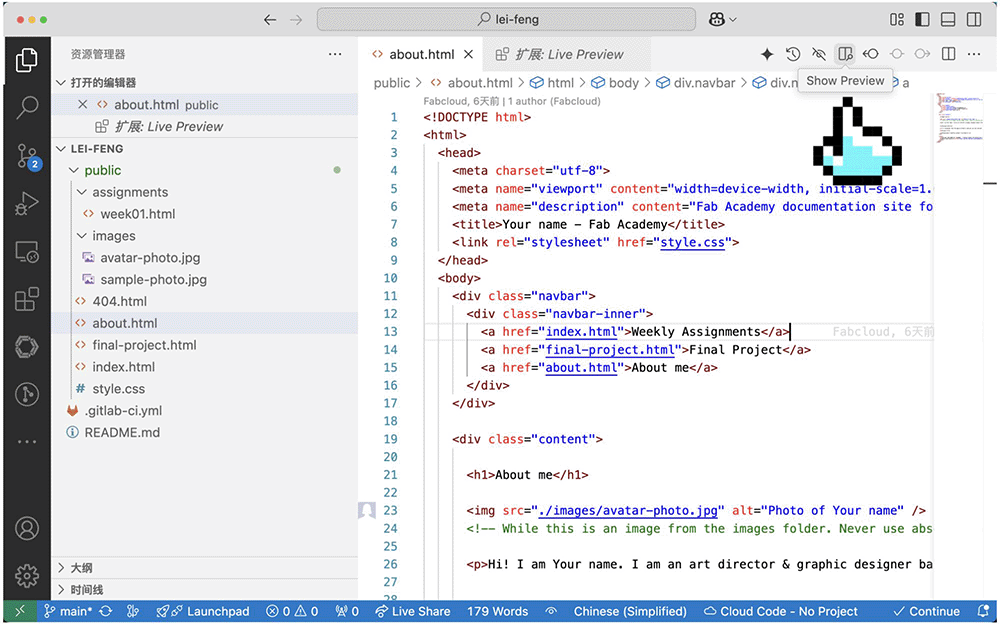
After installing the Live Preview extension, accessing .html files adds a preview icon
Next, we can immediately see how this html page actually appears.
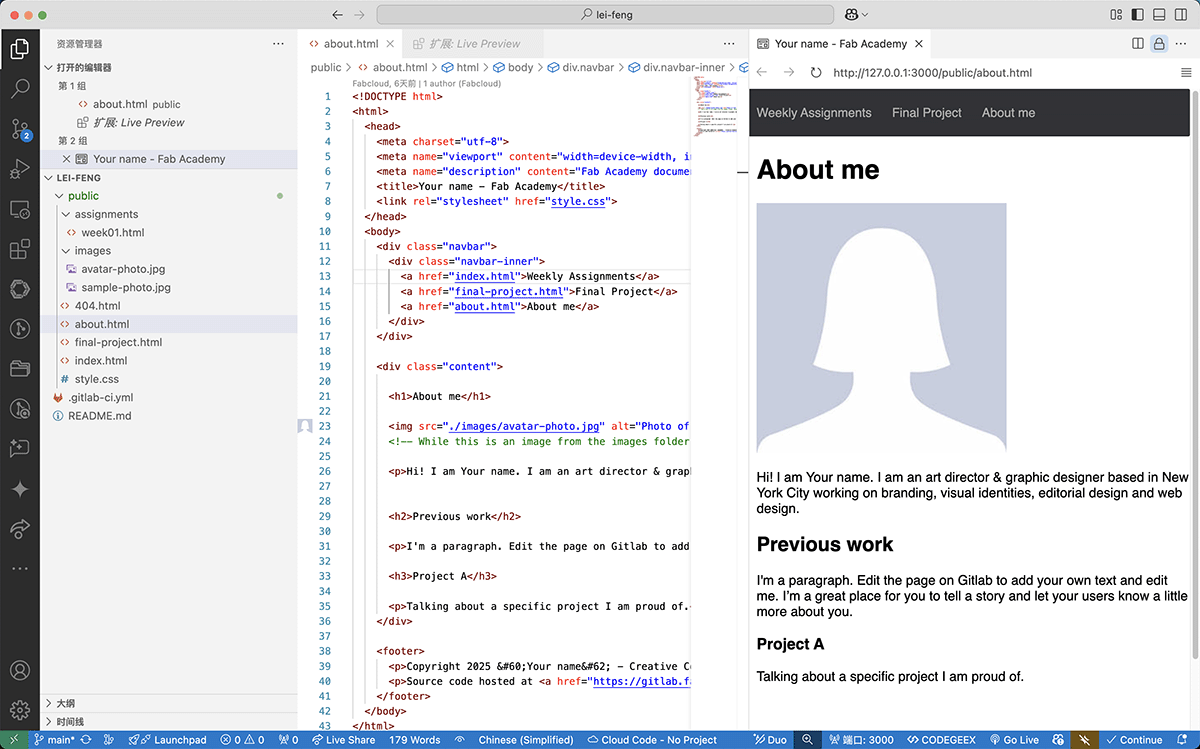
After enabling html preview, our html file shows how it will look when published, rather than a bunch of hard-to-understand HTML code.
Find "I am Your name." in the code editing area, change it to your own name, and the preview area will show the change immediately. Then save the modified file.
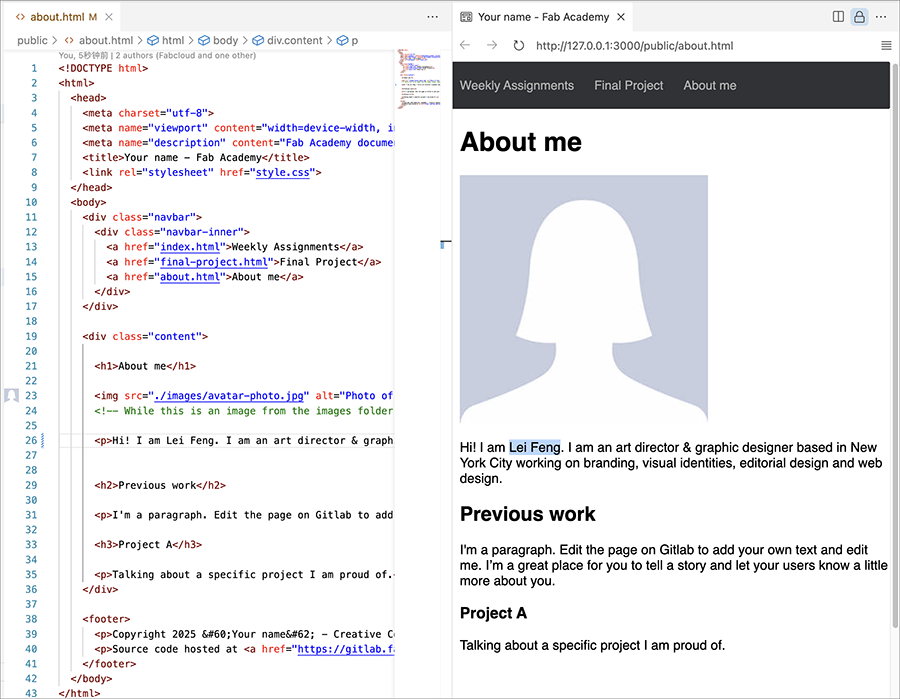
Modify and save the name in about.html
Using VSCode for Code Version Management
VSCode's source code management features make Git operations more intuitive. Click the source code management icon in the left activity bar (shortcut Ctrl+Shift+G) to see all code changes.
We just edited and saved the about.html file, and to commit changes to about.html, we can:
- Find the modified file in the source code management panel
- Hover over the file and click the "+" to stage changes
- Enter a descriptive commit message "Update about.html with personal name" in the text box above
- Click the "Commit" button (✓) at the top of the window to complete the commit

- Use "Sync" to push the commit to the remote repository. To complete the sync operation, you can:
- Click "..." (more options) on the far right of "Source Control"
- Select "Pull, Push" from the popup menu
- Choose "Sync" to synchronize your changes to the remote repository

Making commits in the source code management interface
After pushing, we can access the remote repository through a browser, open the about.html file, and see that the name part has been modified.
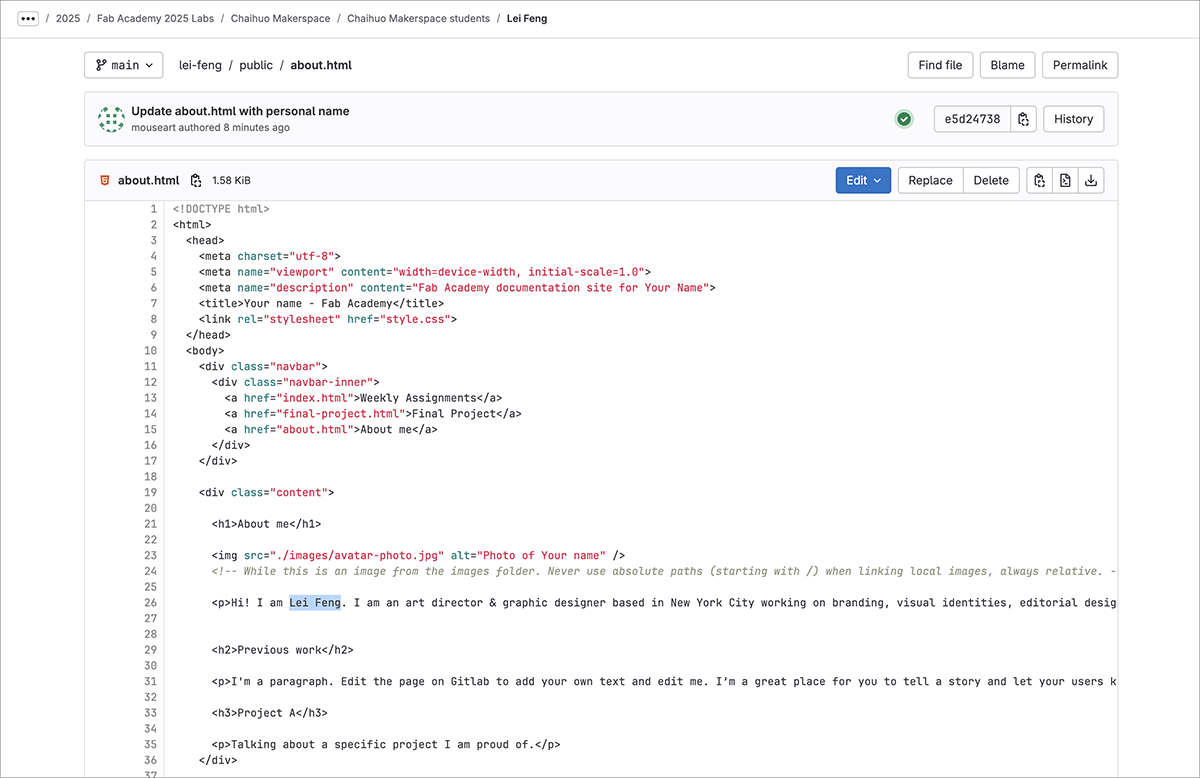
The
about.htmlfile in the remote repository has also been updated, with the name portion modified
Useful Features Explanation
These VSCode features are particularly useful in daily development:
- Preview HTML files
- After installing Live Server, right-click on HTML files
- Select "Open with Live Server"
- The website will open in the browser and automatically refresh with file modifications
- File comparison
- Click on modified files in the source code management panel
- VSCode will show side-by-side difference comparison view
- Helps us accurately understand the changes made
- Integrated terminal
- Use shortcut Ctrl+` to open the built-in terminal
- Can directly execute Git commands
- No need to switch to external terminal windows
Through the combination of these tools, we can build an efficient development environment focused on course content creation and project advancement. As we become familiar with these tools, we'll find version control and document management becoming increasingly manageable.
Work Recommendations
Based on my experience, I'd like to share a few suggestions:
First, develop a habit of regular commits. Don't wait until completing large amounts of work to make a single commit, as this both increases the risk of errors and defeats the purpose of version control.
Second, value commit message quality. A good commit message should allow others (including your future self) to quickly understand the content and reason for this modification.
Third, create branches before making important modifications. This ensures stability in the main branch while safely developing and testing new features.
Mastering these tools and processes might take some time, but the investment is worthwhile. Because in the upcoming course, these will become important components of our daily work.
With this knowledge, we can begin building our personal website.