Week 2: Computer-Aided Design — Converting Raster to Vector Graphics
Project Overview
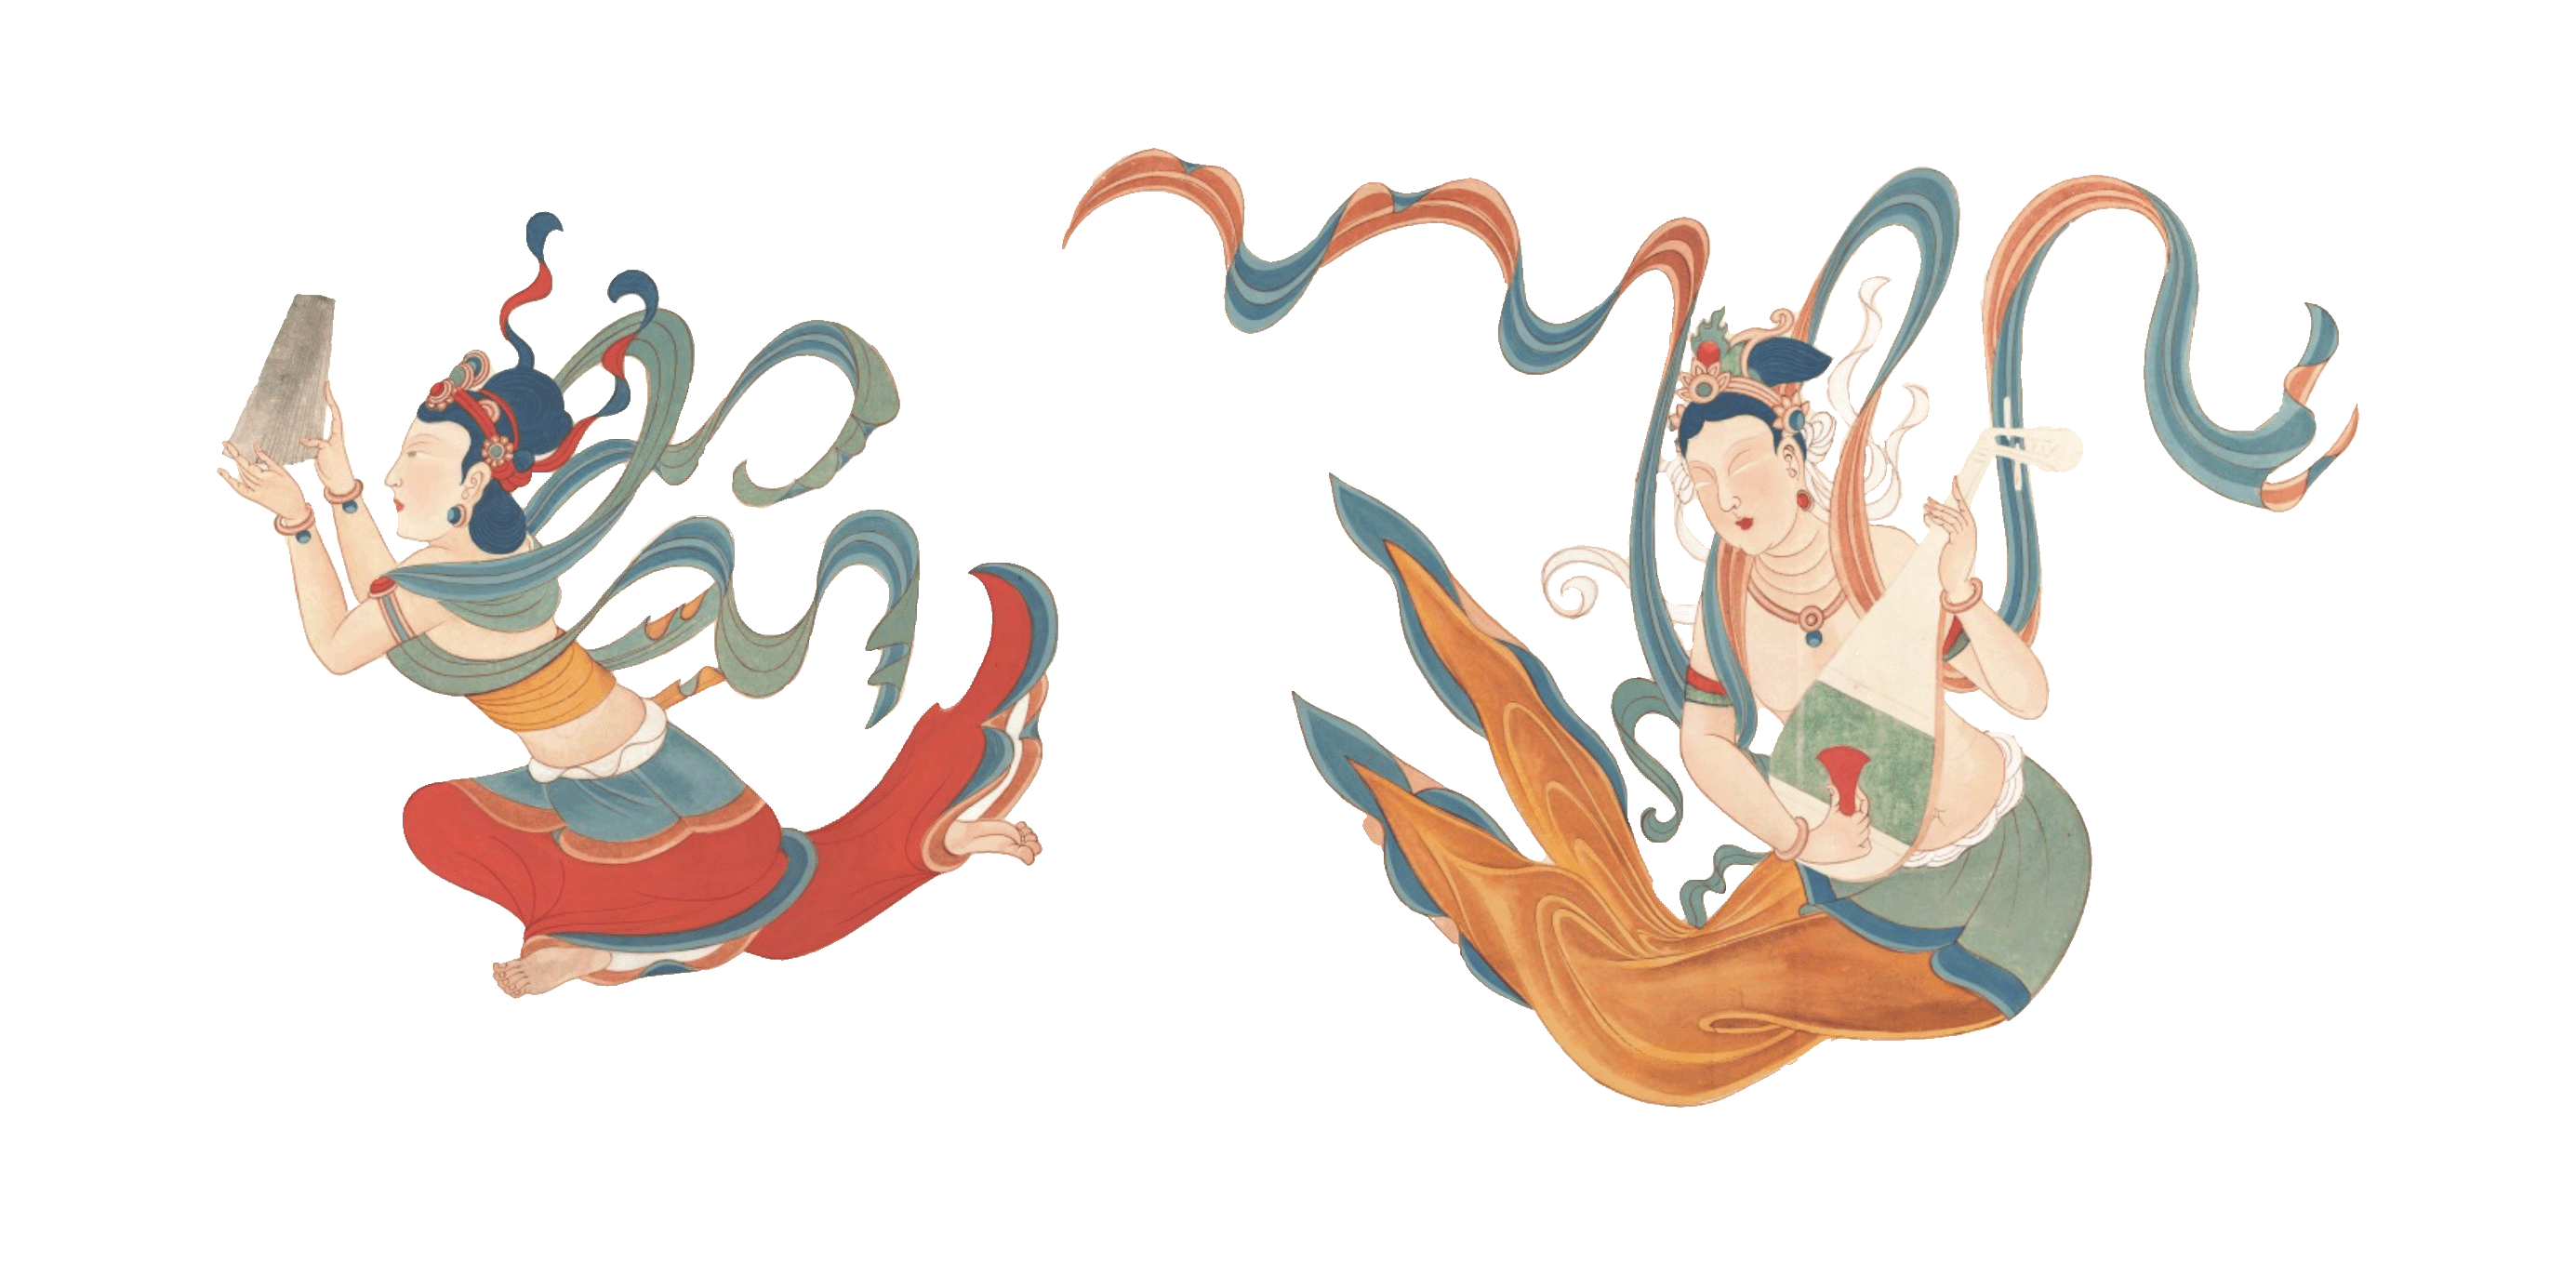
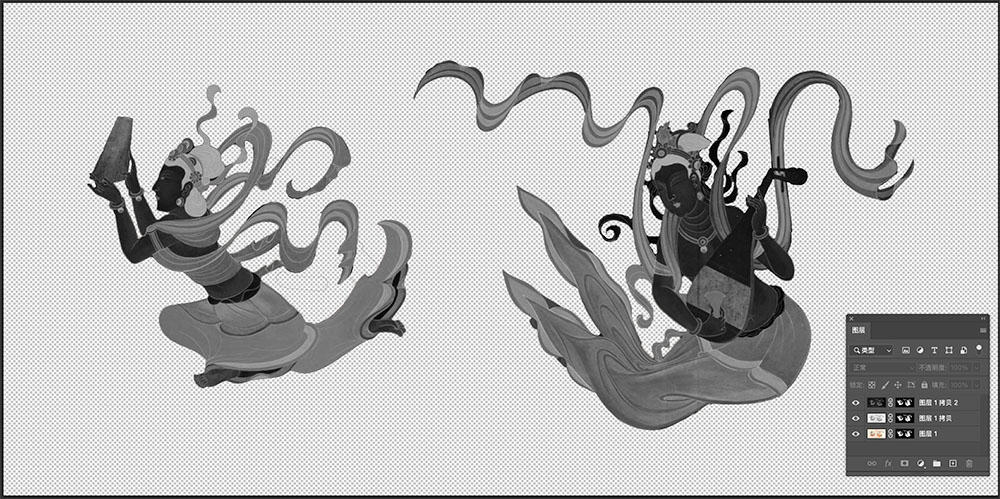
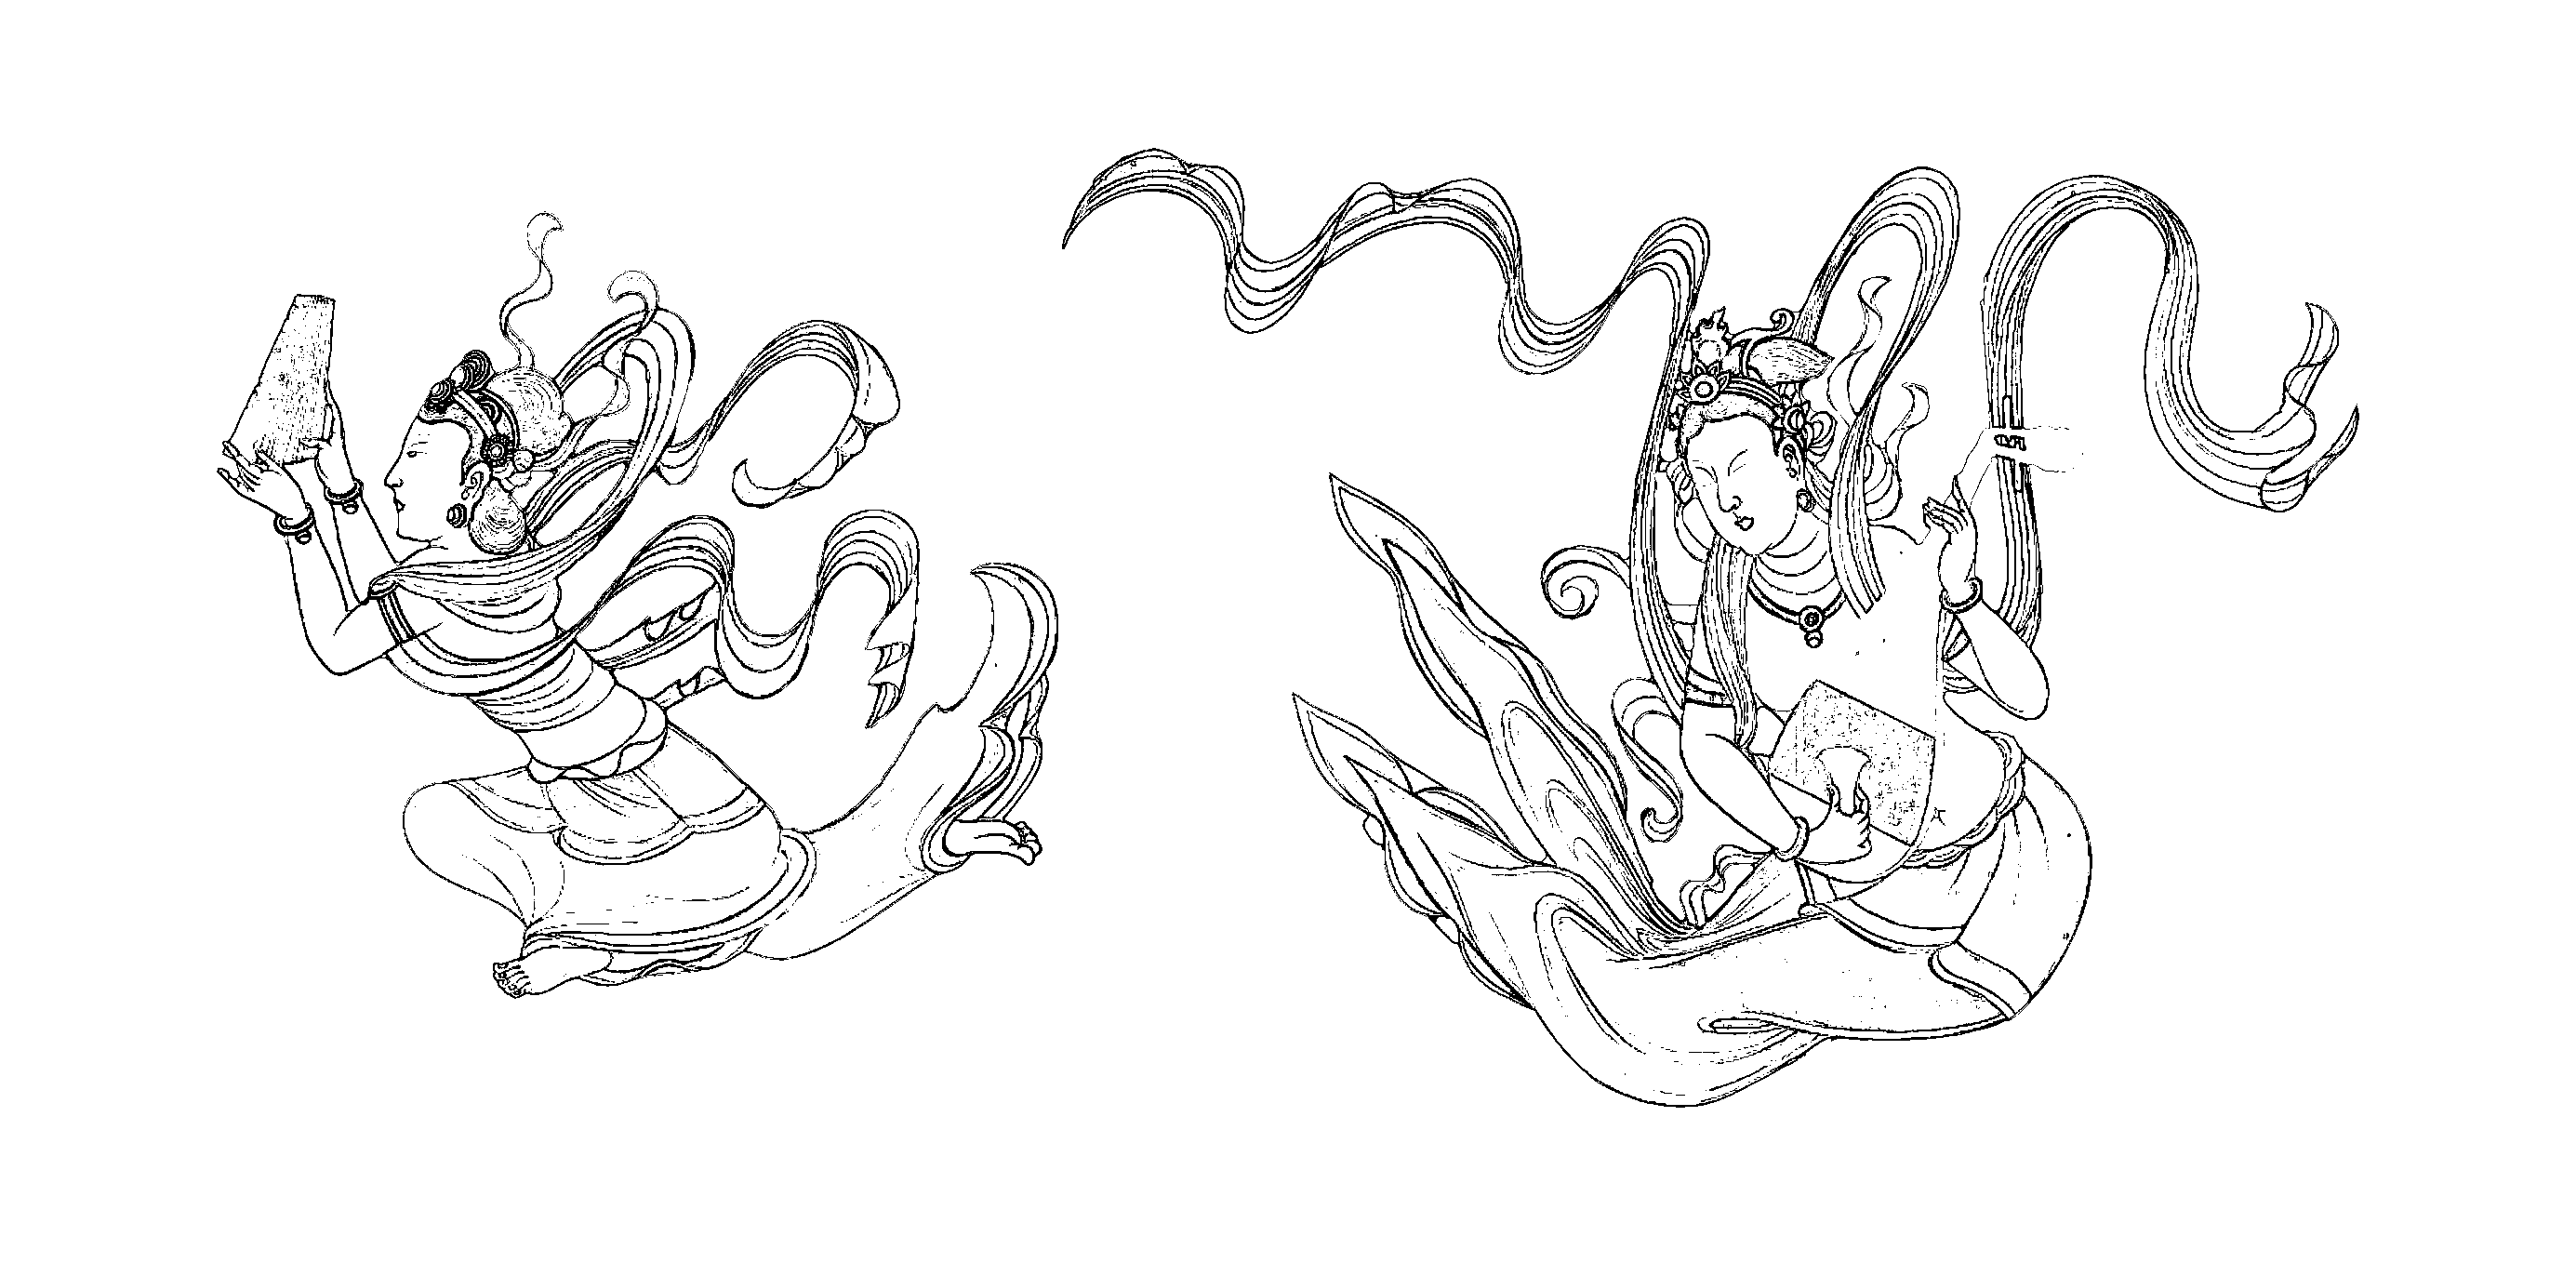
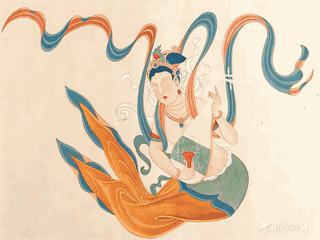
For my final project—the Magic Zoetrope—I want to use Zhang Daqian's copy of the Dunhuang mural "Late Tang Musical Instrument Two-Body Buddha" as source material for the rotating section. The mural depicts two flying deity figures, which I plan to print on semi-translucent paper in a cylindrical format. As the cylinder rotates, viewers will see the dancing musical instrument deities in motion.
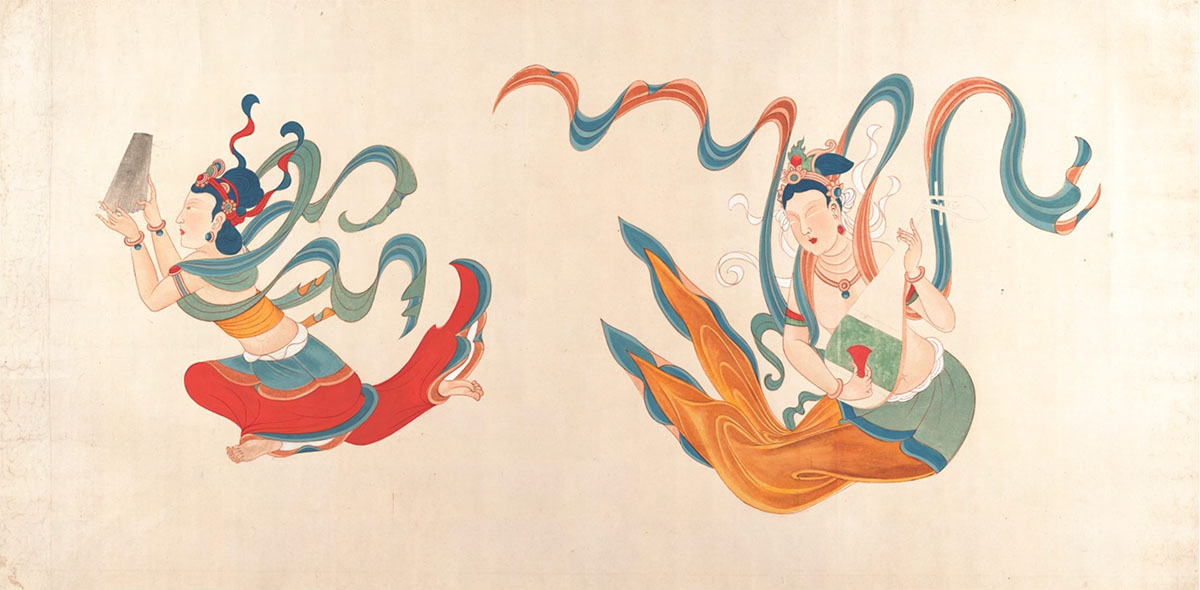
Zhang Daqian's copy of the Dunhuang mural "Late Tang Musical Instrument Two-Body Buddha"

The two flying deity figures are perfect for the rotating pattern of the Magic Zoetrope
For this exercise, I aim to accomplish the following goals:
- Image Background Removal: I want to isolate the bodhisattva figures with a transparent background, allowing me to print them on any semi-transparent paper or transparent film used for the rotating cylinder.
- Convert to Black and White Line Art: Extract black and white line art from the color image.
- Vectorize the Line Art: Convert the black and white line art to vector format, preparing materials for the upcoming laser cutting course to experiment with laser engraving effects.
This process will help us understand the characteristics of different image formats while laying the foundation for subsequent digital manufacturing techniques.
Basic Concepts
Graphics and images are fundamental to computer-aided design, as we need them to express both our design intentions and processes. Before beginning the actual image conversion work, we need to understand two basic types of digital image representation: raster images (pixel-based) and vector graphics. Each format has its characteristics and plays different roles in digital design.
Raster Images
Raster images, also known as bitmap images, are composed of a grid of pixels. Each pixel contains specific color information, collectively forming the complete image.
Characteristics of raster images:
- Resolution dependent: Loses quality when enlarged
- Larger file sizes: Must store information for each pixel
- Suitable for: Photos and continuous-tone images
- Common formats: JPG, PNG, BMP, etc.
When raster images are enlarged sufficiently, you can see individual colored squares that make up the pixels, and the image becomes blurry
Vector Graphics
Vector graphics are based on mathematical equations, composed of geometric elements such as points, lines, curves, and shapes.
Characteristics of vector graphics:
- Resolution independent: Can be scaled without loss of quality
- Smaller file sizes: Only stores mathematical descriptions of graphic elements
- Suitable for: Logos, icons, technical drawings, etc.
- Common formats: SVG, AI, EPS, etc.
After vectorization, SVG images can theoretically be enlarged "infinitely"
:::tips In digital manufacturing, correctly choosing and converting image formats directly affects the final production quality. For example, laser cutting typically requires clear vector paths, while 3D printing texture maps are better suited for raster images. Understanding these basic concepts helps us make the right technical choices in subsequent digital manufacturing processes. :::
1. Background Removal
First, I obtained a high-resolution screenshot of the mural from Google Arts & Culture platform (https://g.co/arts/vR6XPac9VrxZzyzX8) and saved it as a PNG format, with dimensions of 2770x1372 pixels and approximately 4.5MB in size.
For image processing, I used Photoshop (PS), which I'm familiar with. After opening the mural image in PS, it provides a background removal function in a floating window.
Opening the mural image in PS
After clicking the "Remove Background" button, most of the background was removed, but there were some errors—some areas that should have been removed were kept, and some that should have been kept were removed.

The effect after using the background removal function, showing some errors
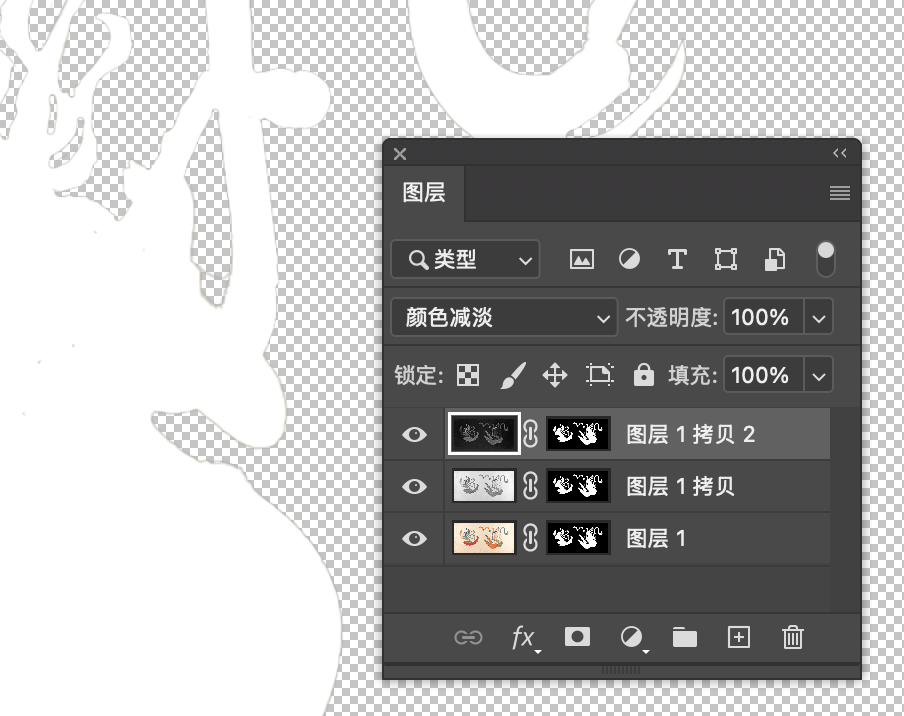
Note that a mask was added to the layer on the right, as shown below. A mask can be understood as a black and white image, where black represents hidden areas and white represents preserved areas.
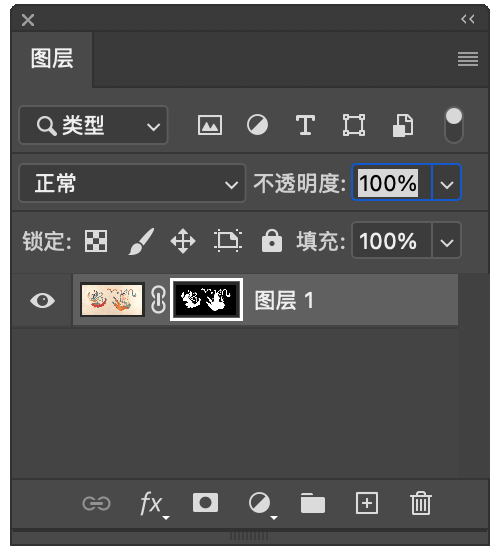
PS adds a mask after removing the background. This mask can be understood as a grayscale image, where black indicates areas to remove, white indicates areas to show, and middle grays represent transparency
We can edit this black and white mask using the tools below, along with the Quick Selection tool, Brush tool, etc., to correct areas that need to be hidden or shown. Additionally, you can use the "x" key to quickly switch between "Remove from Mask" and "Add to Mask" functions; and use the "[" and "]" keys to control brush size for precise detail work.
After refining the mask, we now have the desired background removal effect, and I saved the PS file.

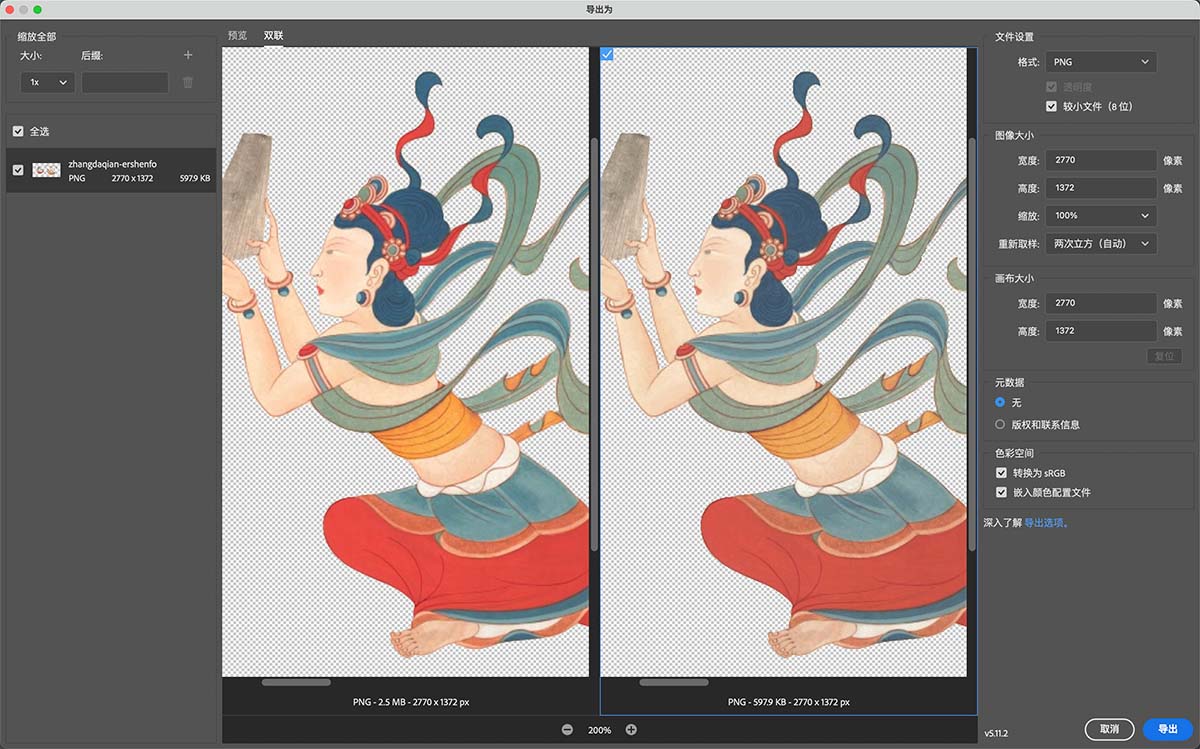
Then using PS's export function, we can see in the preview that saving as PNG results in 2.5MB. Since this image has relatively few colors, if we want to further reduce the file size, we can check "Smaller File (8-bit)", which will limit the image to 256 colors, reducing the file size to 598KB.
Now, we've successfully obtained a PNG image with a transparent background.
2. Converting to Black and White Line Art
- Copy and Desaturate: Continuing in PS, duplicate the original color layer in the layers panel (shortcut Ctrl+J, or Command+J on Mac), then desaturate the copied layer using Image>Adjustments>Desaturate (shortcut Ctrl+Shift+U, or Command+Shift+U on Mac), with the effect shown below:
The image effect after adding a grayscale adjustment layer.
- Copy and Invert: Continue in PS by copying the desaturated layer, then invert it using Image>Adjustments>Invert (shortcut Ctrl+I, or Command+I on Mac), with the effect shown below:
The effect after color inversion
- Color Dodge: In PS, change the blending mode of the inverted layer to Color Dodge, at which point the image will turn white, as shown below.
Set the inverted image's blending mode to "Color Dodge"
- Use the "Minimum" Filter: Use Filter>Other>Minimum from the menu bar, typically a radius value of 1 is sufficient. The effect is shown below.

The effect after using the Minimum filter
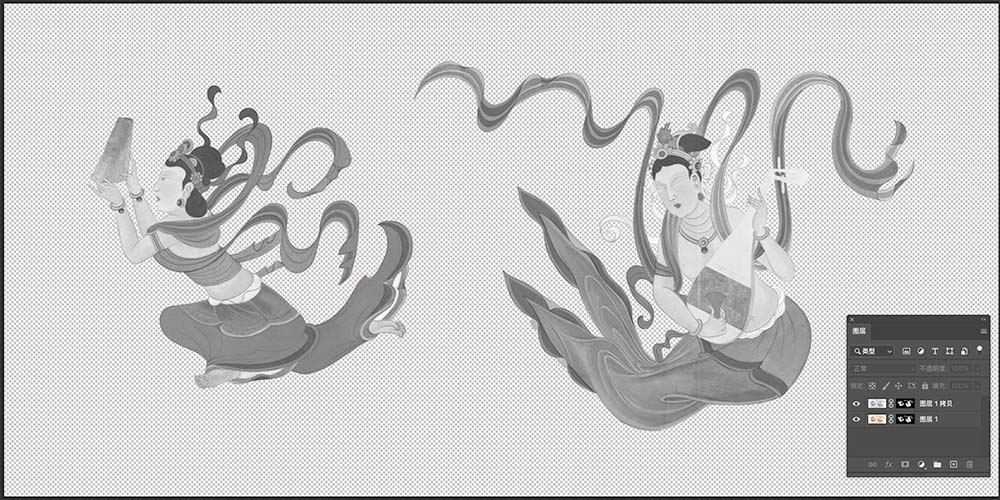
- Stamp Visible Layers: Select the 2 copied layers and use the shortcut Ctrl+Alt+E (Command+Alt+E on Mac) to stamp visible layers, then group the original layers and hide their visibility. The layers panel state is shown below.
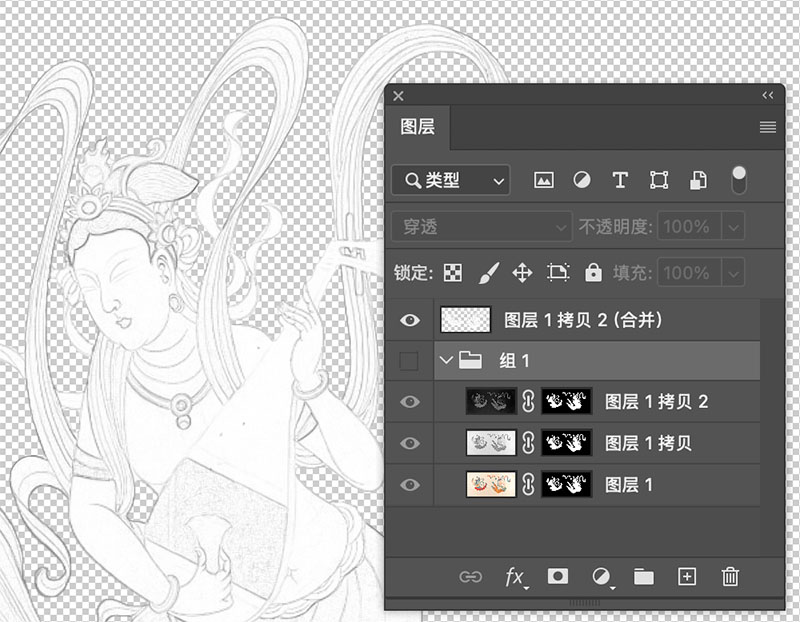
Layer state after stamping layers
- Select Lines Based on Color Range: On the merged layer, use Select>Color Range from the menu, sample the line colors, and adjust the fuzziness. You can turn on selection preview set to "Quick Mask" mode, where red areas indicate parts to be removed. Ensure necessary line parts are preserved before confirming.
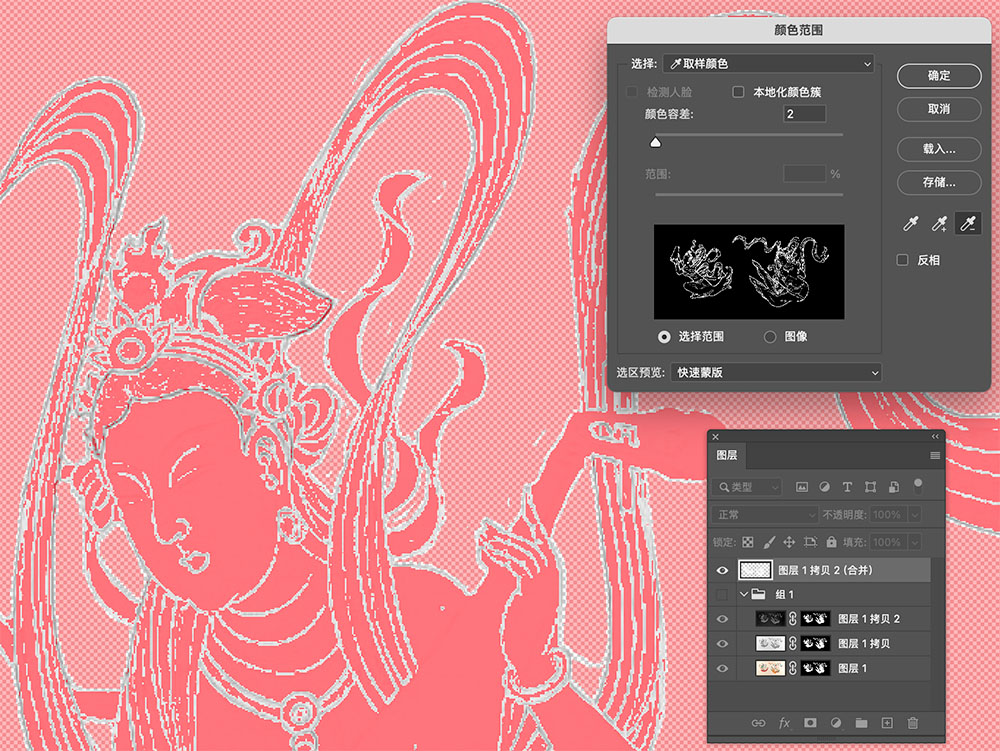
Adjust the color range, use the eyedropper tool to add and subtract lines and background, and adjust color tolerance to keep the desired line range
Create a mask from the line selection, now the image contains only the line content.

Create a mask from the obtained line selection, now only lines remain in the image
- Make Lines Clearer: Use Image>Adjustments>Hue/Saturation on the layer (not the mask) (shortcut Ctrl+U, Command+U on Mac), open the Hue/Saturation panel, and move the Lightness slider to the leftmost position (-100). Now you can see clear line effects, as shown below.
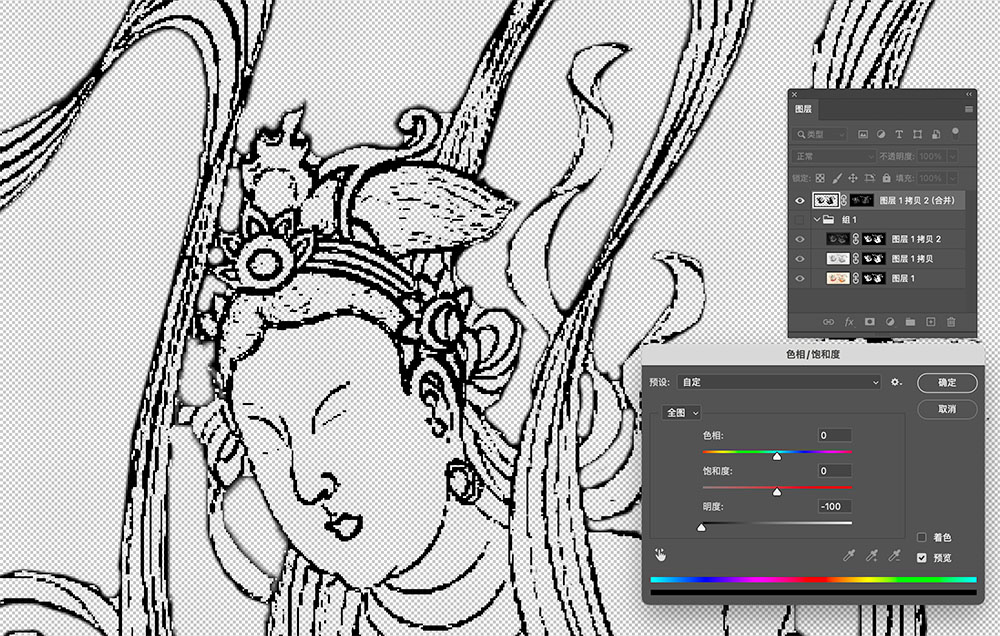
The effect of setting Lightness to -100 in the Hue/Saturation panel.
- Export Line Art: Now we can export the clear line art as a PNG format. The effect of this image against a white background is shown below.
The effect of the exported clean line art
3. Vectorizing Black and White Line Art
I used Adobe Illustrator (AI) to vectorize the line art. After importing the line art PNG image, use Object>Image Trace from the menu bar, and you can quickly obtain a vector image, as shown below.
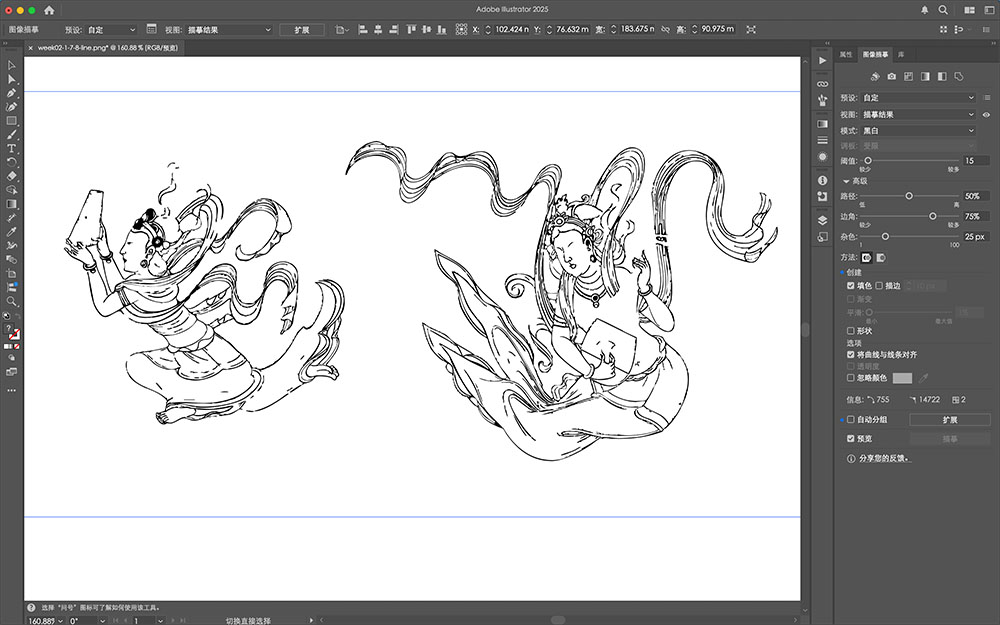
The image after tracing in AI
When zoomed in, you can see the vectorized details.
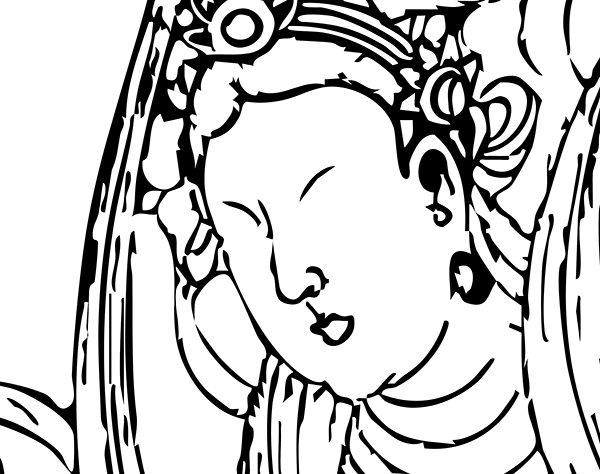
The vectorized line art image
Export the traced image as SVG format, compared with the original color draft.

Comparison between vectorized line art and original color draft
File Downloads
Color PNG with transparent background
Image and Video Compression
In the digital manufacturing process, optimizing images and videos is crucial for web publishing and project presentation. Large-sized images and videos not only increase webpage loading time but also occupy significant storage space. This section introduces how to optimize image and video files using command-line tools ImageMagick and ffmpeg.
Batch Processing Images with ImageMagick
ImageMagick is a powerful open-source command-line image processing tool that supports reading, writing, and converting over 200 image formats.
Installing ImageMagick
- Windows: Download the installer from official website
- macOS: Install using Homebrew
brew install imagemagick - Linux: Install using package manager
sudo apt-get install imagemagick
Basic Image Compression
Here are some commonly used ImageMagick commands for optimizing images we processed in previous steps:
# Convert PNG to optimized JPG (85% quality)
convert week02-1-7-8-line.png -quality 85% line-optimized.jpg

# Resize image to specified width, maintaining aspect ratio
convert week02-1-6-8.png -resize 1200x line-resized.png

# Batch process all PNG images in a folder
mogrify -resize 1200x -quality 85% -format jpg *.pngIn my project, I used the following commands to optimize all processed images to sizes and file sizes suitable for web display:
# Optimize my vector and bitmap images
convert week02-1-6-8.png -resize 1200x -strip -quality 85% web-color-image.jpg
convert week02-1-7-8-line.png -resize 1200x -strip -quality 90% web-line-image.jpgOptimization Effect Display
A file size comparison before and after optimization is shown below:
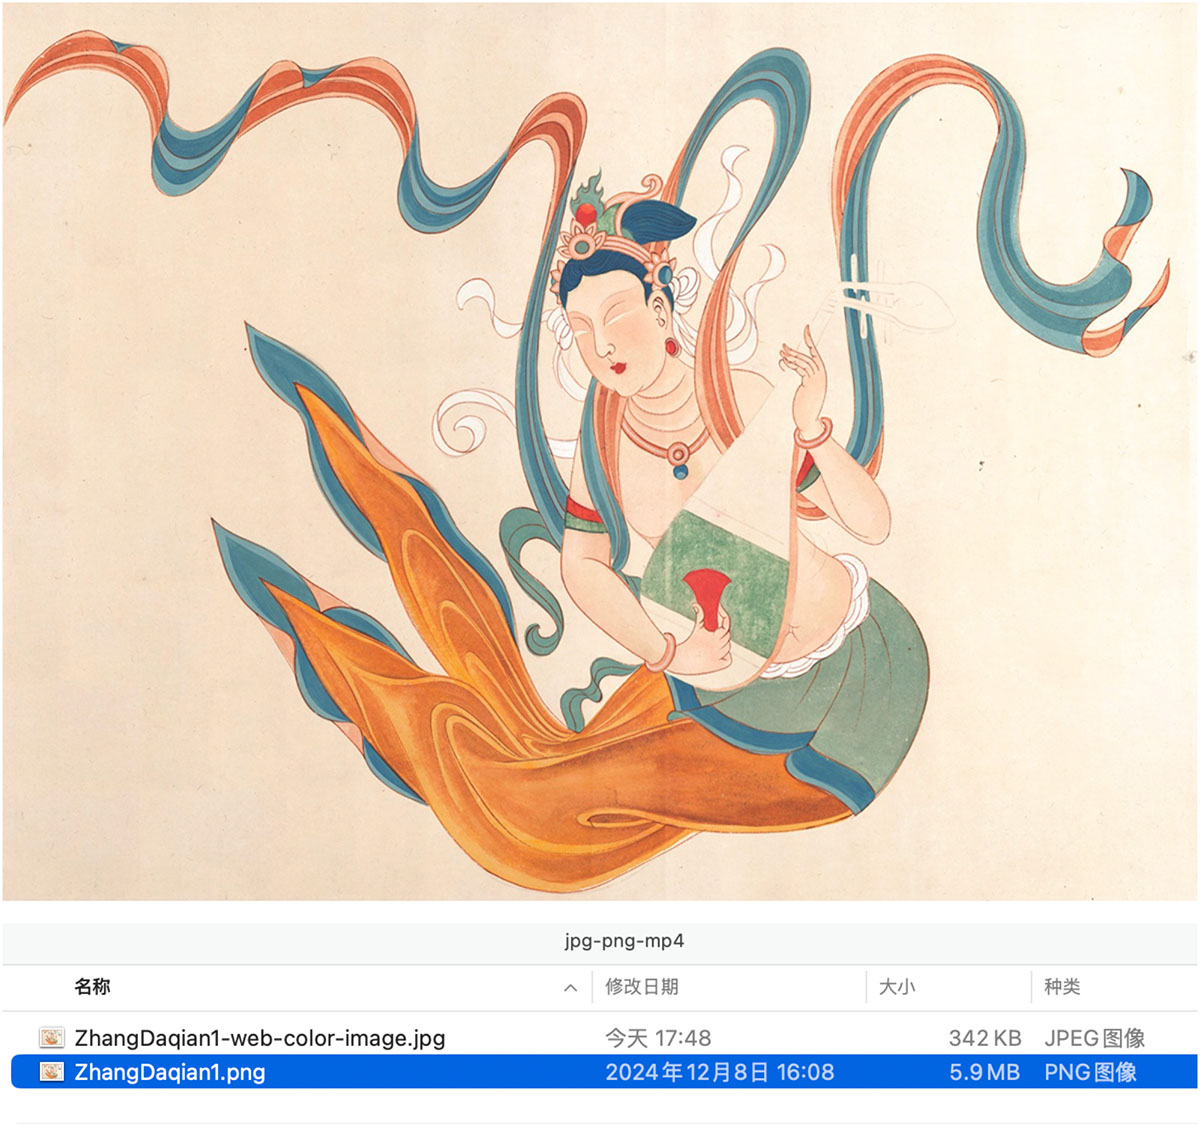
- Original color PNG file (2400x1804)
ZhangDaqian1.png: 5.9M → Optimized JPG (1200x902): 342KB
The difference in file size is enormous.
File size comparison of a PNG image optimized to JPG
Advanced Image Batch Processing
For multiple images that need to be displayed on a webpage, I created a batch processing script:
#!/bin/bash
# Create thumbnails and optimized images for blog

mkdir -p web-images

for img in *.png; do
  # Create thumbnails (300px wide)
  convert "$img" -resize 300x -quality 85% "web-images/thumb-$img.jpg"

  # Create web-optimized version (1200px wide)
  convert "$img" -resize 1200x -strip -quality 85% "web-images/web-$img.jpg"
done

echo "Processing complete! Files saved in web-images folder"Processing Videos with ffmpeg
ffmpeg is one of the best command-line tools for processing videos. I used the AI tool https://jimeng.jianying.com/ai-tool/image/generate to generate a 5-second video using the test image that was optimized from PNG to JPG.
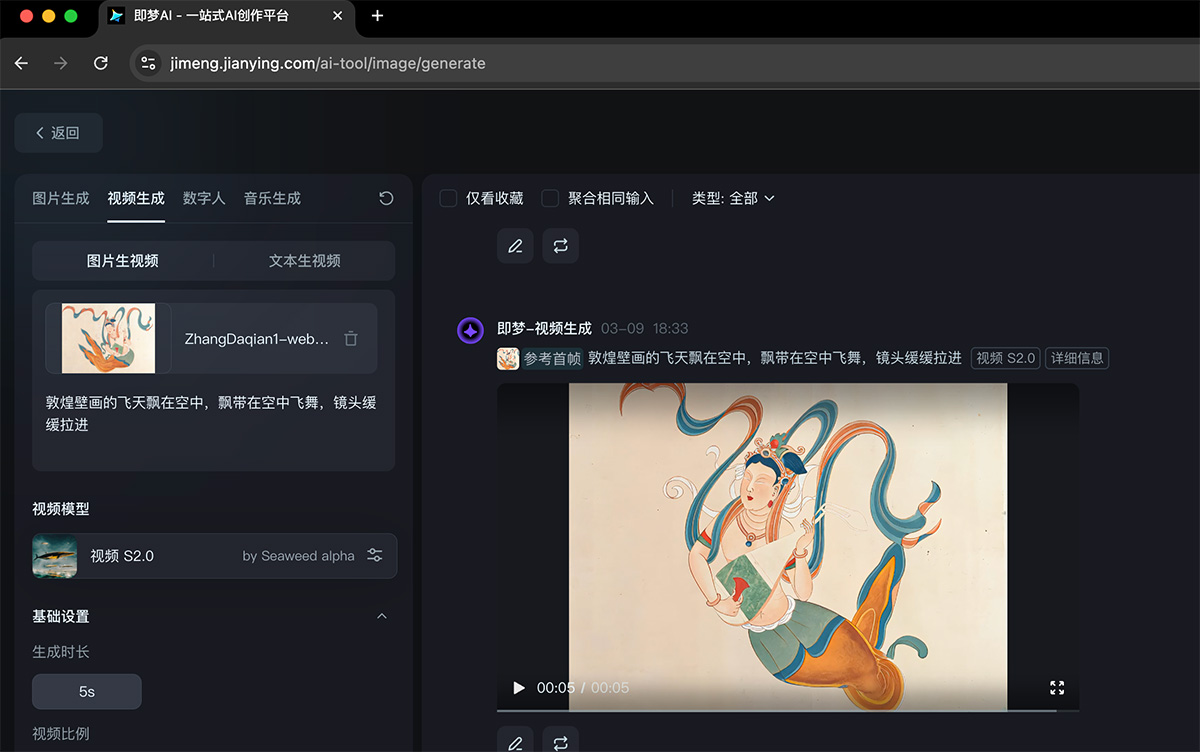
Jimeng AI tool allows uploading images and adding prompt words to generate videos
After downloading, this 5-second video has a resolution of 1280×960 and is about 4.4 MB.
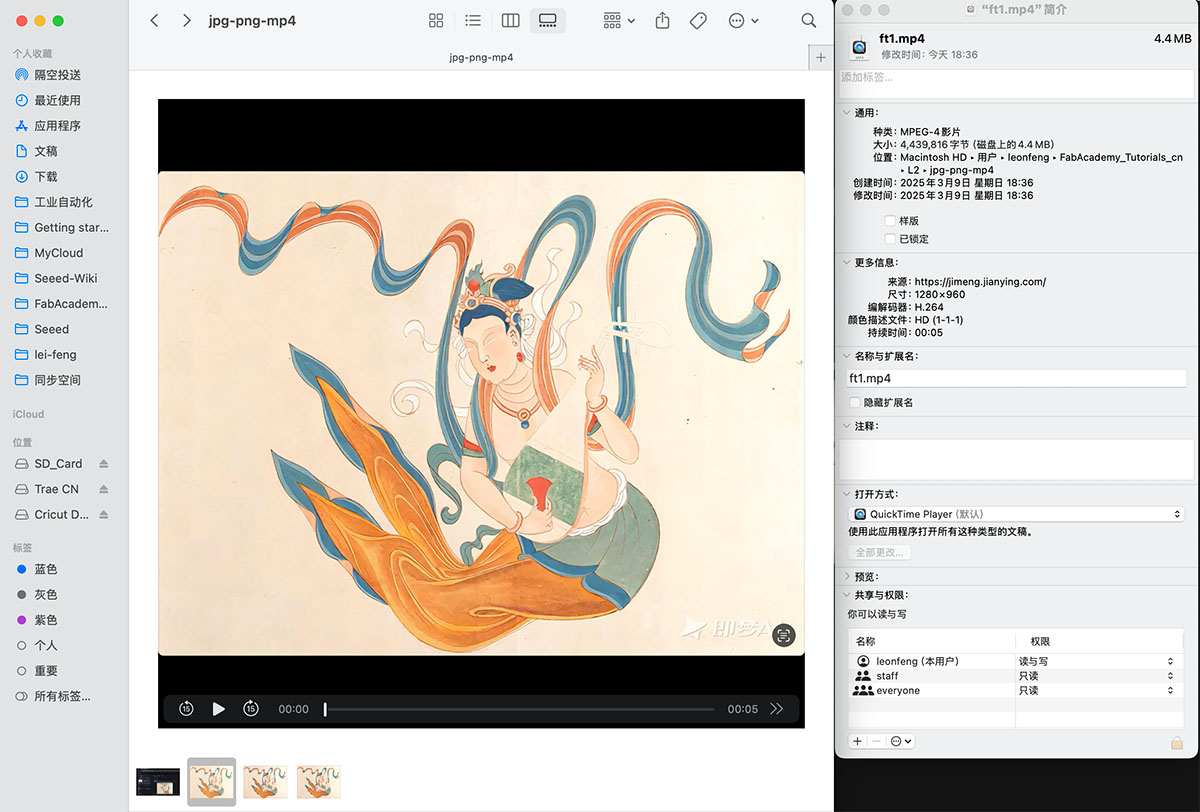
The MP4 video with 1280×960 resolution is about 4.4 MB
Installing ffmpeg
- Windows: Download from official website
- macOS: Install using Homebrew
brew install ffmpeg - Linux: Install using package manager
sudo apt-get install ffmpeg
Basic Video Compression
Here are basic commands for compressing videos using ffmpeg:
# Convert video to H.264 encoding, suitable for web publishing
ffmpeg -i input_video.mp4 -c:v libx264 -crf 23 -preset medium -c:a aac -b:a 128k output_video.mp4

# Adjust video resolution to 720p
ffmpeg -i input_video.mp4 -vf "scale=-1:720" -c:v libx264 -crf 23 -preset medium -c:a aac -b:a 128k output_720p.mp4For my video, I used the following command for optimization:
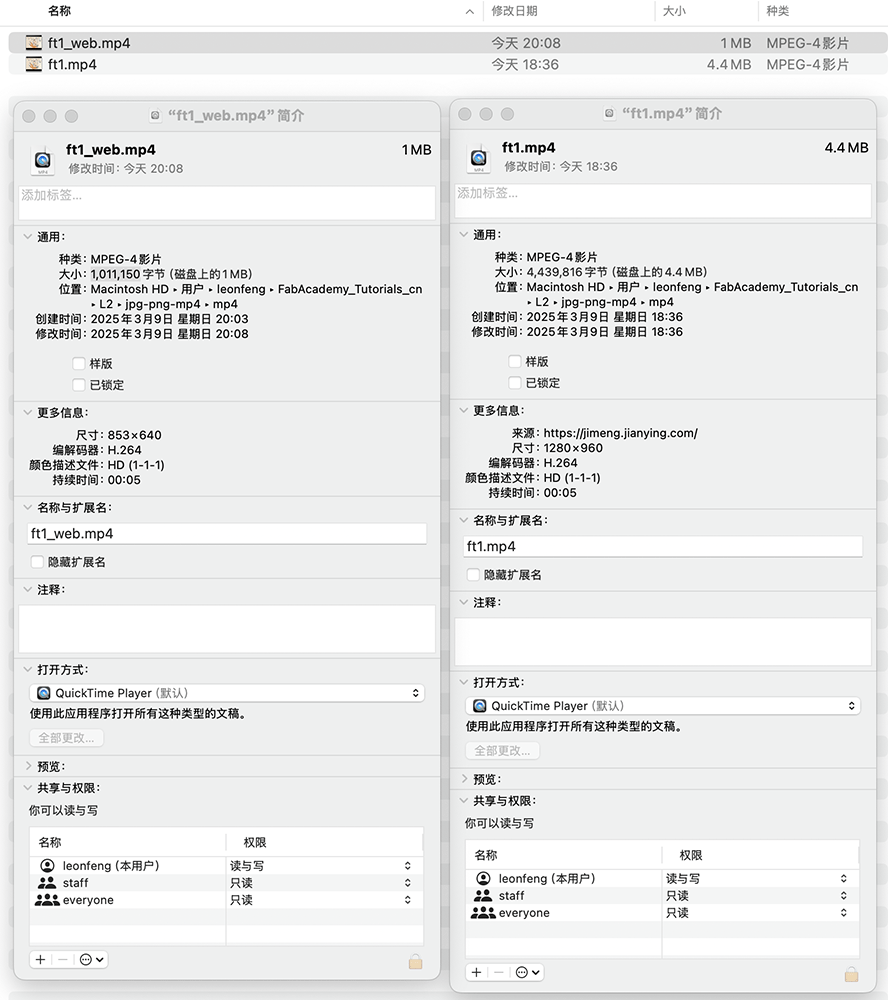
# Optimize demo video, set resolution to 854:640
ffmpeg -i ft1.mp4 -c:v libx264 -crf 23 -preset medium -c:a aac -b:a 128k -vf "scale=854:640" ft1_web.mp4File size comparison before and after optimization:
- Original video: 4.4MB (1280 × 960, 5 seconds)
- Optimized video: 1MB (854 × 640, 5 seconds)
Advanced Video Processing
To better showcase the video effect, I also created a GIF animation using ffmpeg:
# Extract 5 seconds from the video to create a GIF
ffmpeg -ss 00:00:00 -i ft1_web.mp4 -t 5 -vf "fps=6,scale=320:-1:flags=lanczos,split[s0][s1];[s0]palettegen=max_colors=128[p];[s1][p]paletteuse=dither=bayer:bayer_scale=5" ft1_web.gifThis GIF is only 1.1 MB.
Output video as a GIF image