Week 5 Individual Assignment: 3D Printing Diatom Structure
One of the requirements for this week's assignment is to "design and 3D print a small object (a few cubic centimeters, considering printing time constraints) that cannot be made through subtractive manufacturing, such as a structure with internal cavities."
When thinking about what to print, images of diatoms I had seen in the past flashed into my mind.
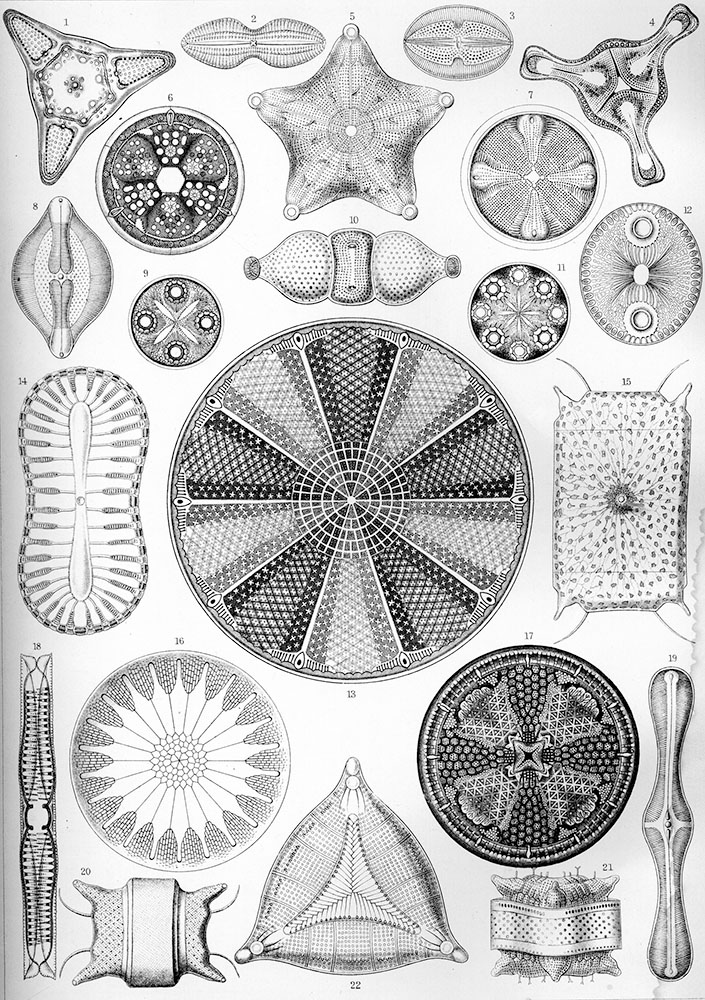
"Art Forms in Nature" (1904), Plate 4: Diatomeae
Fortunately, I found a downloadable diatom structure model on https://sketchfab.com/ (as shown in the image below, the red arrow pointing to the download icon indicates this is a downloadable model), so I decided to try this.
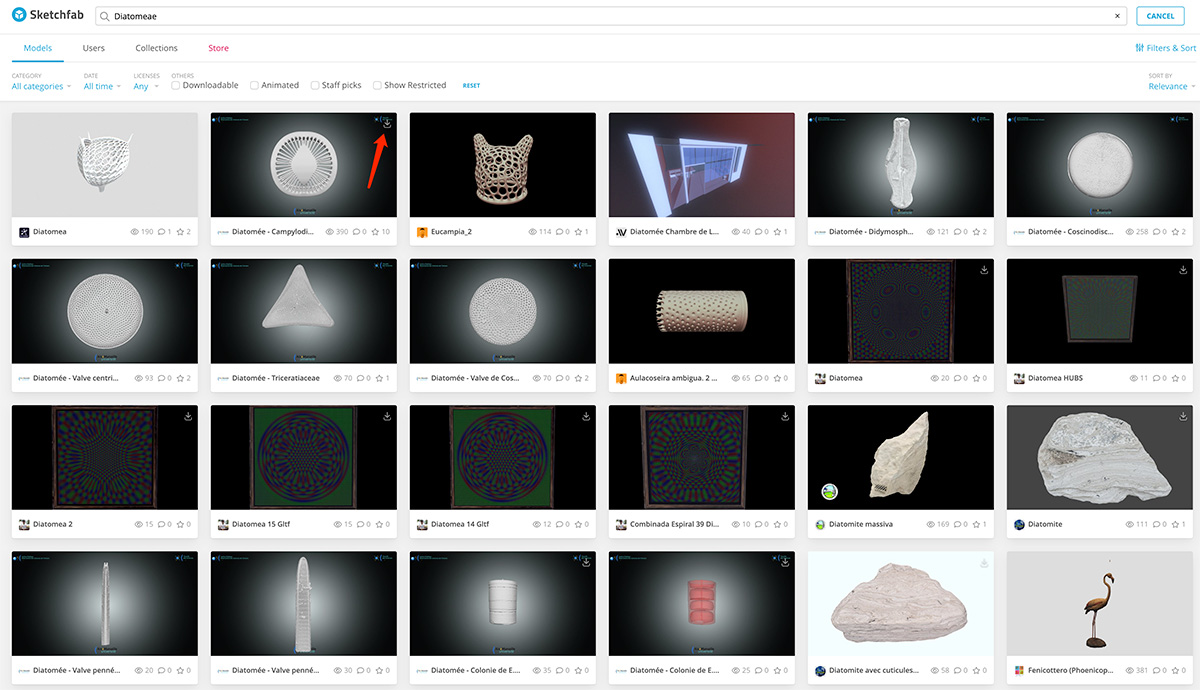
Found a downloadable diatom model on sketchfab.com
Project Overview
This project aims to use a Bambu Lab A1 Combo printer and PETG Translucent material to print a 3D model of a microscopic organism—the diatom Campylodiscus hibernicus. The model was obtained from Sketchfab, and through appropriate scaling and print settings, it showcases the complex silica shell structure of this single-celled algae.
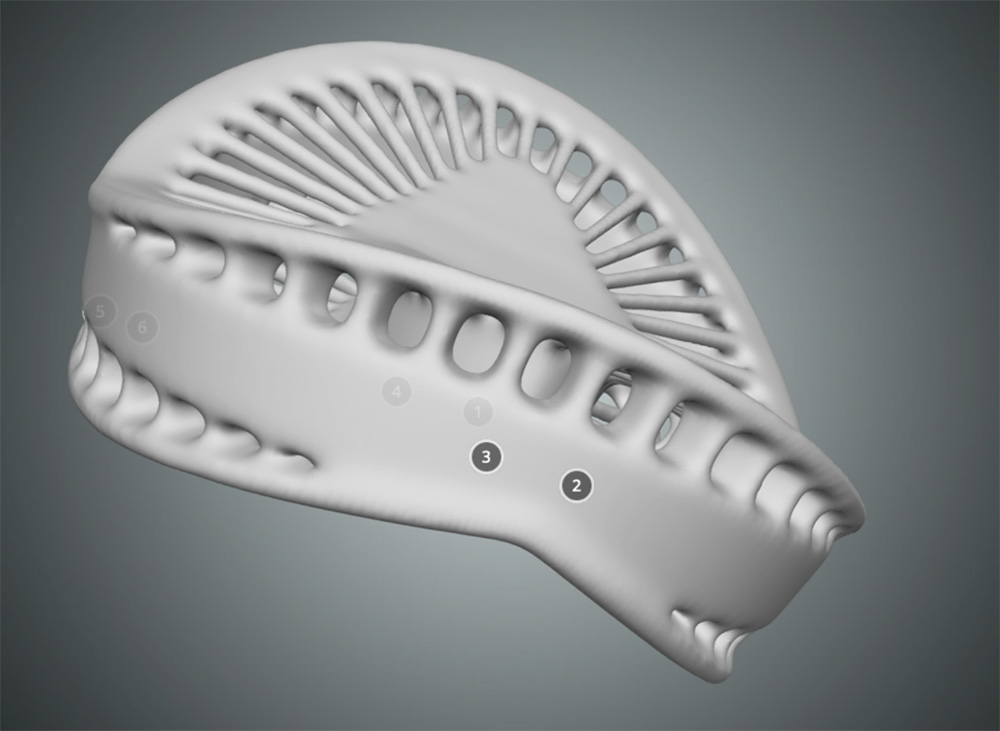
Viewing the diatom model structure in 3D mode, this is a structure that currently cannot be directly produced using subtractive technology
Materials and Tools
- Printing object: Diatom Campylodiscus hibernicus 3D model (Sketchfab link)
- 3D modeling software: Bambu Studio
- 3D printer: Bambu Lab A1 Combo (0.4mm nozzle)
- Printing material: PETG Translucent
Detailed Workflow
Model Preparation
Model Acquisition
- Downloaded the model from Sketchfab, and after extracting, obtained the "Diatom - Campylodiscus hibernicus.stl" file.
- This model was created by David Peterman, suitable for educational and display purposes.
Model Inspection and Adjustment
- Opened Bambu Studio software and imported the STL file.
- Scaled the model to have a maximum dimension of 50mm, ensuring uniform scaling to maintain proportions, as shown below.
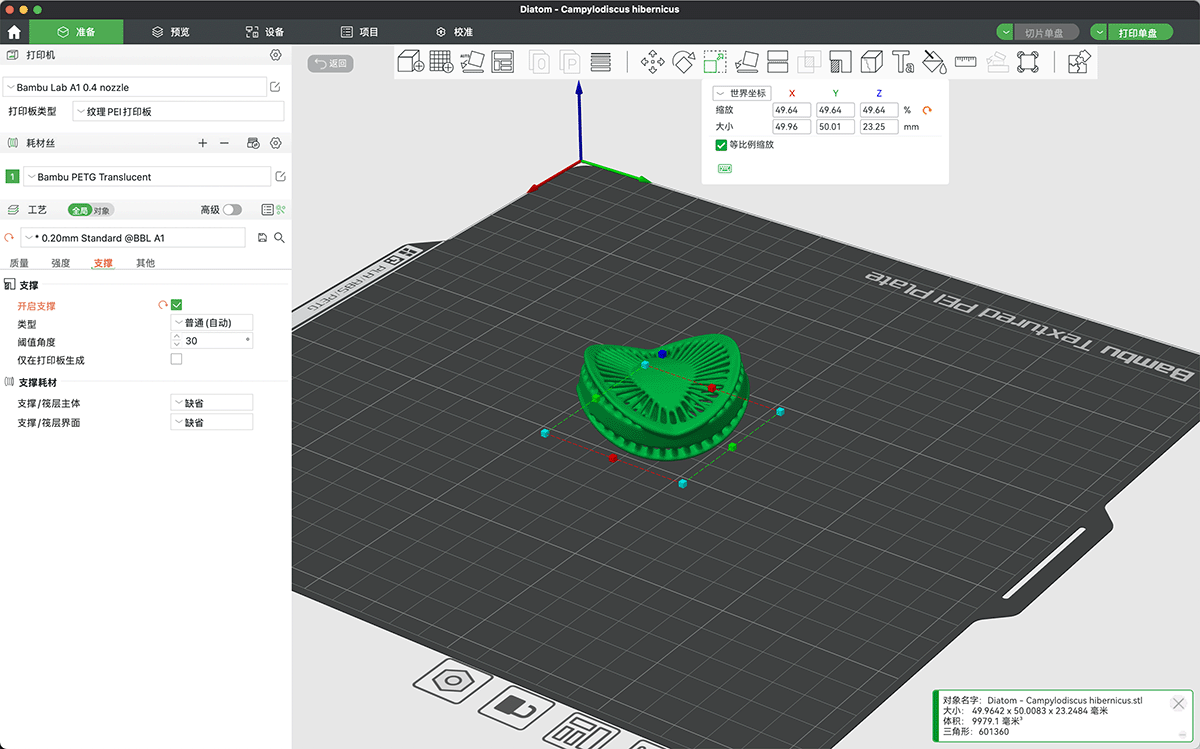
Imported the diatom STL file into Bambu Studio software and scaled it to a maximum dimension of 50mm
- Used the auto-orientation function, as shown below, which stood the model upright.
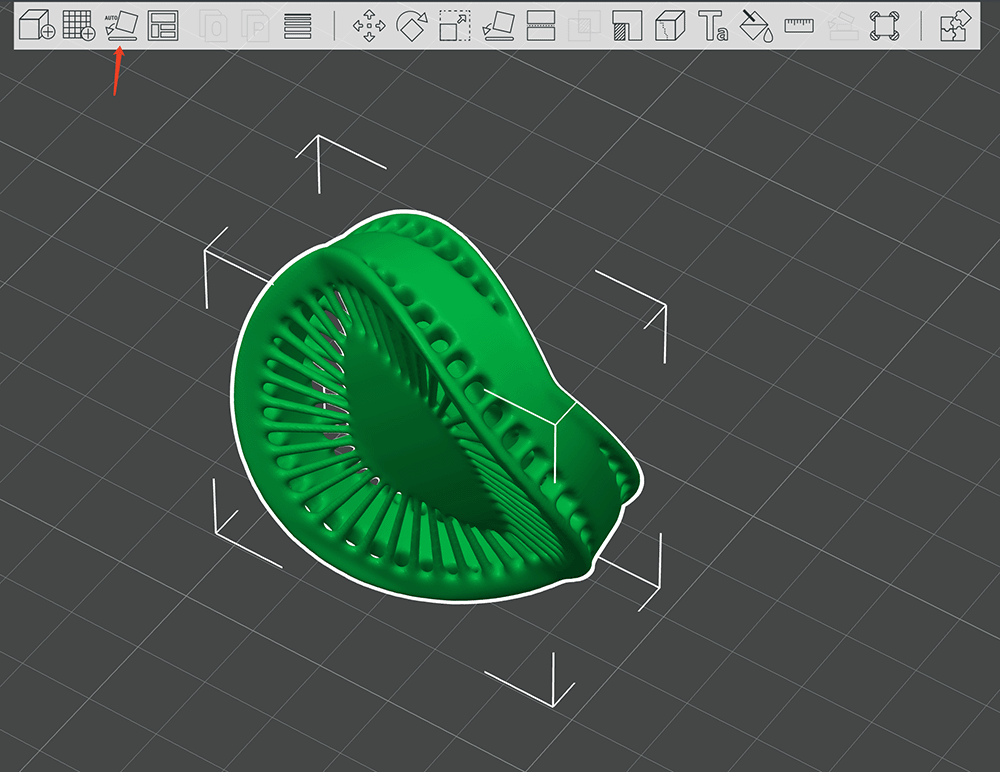
Using auto-orientation, the diatom model was stood upright
- Then used global arrangement (shortcut A) to adjust the model orientation, making the flat bottom face toward the print platform, and placing the model in the center of the print area, as shown below.
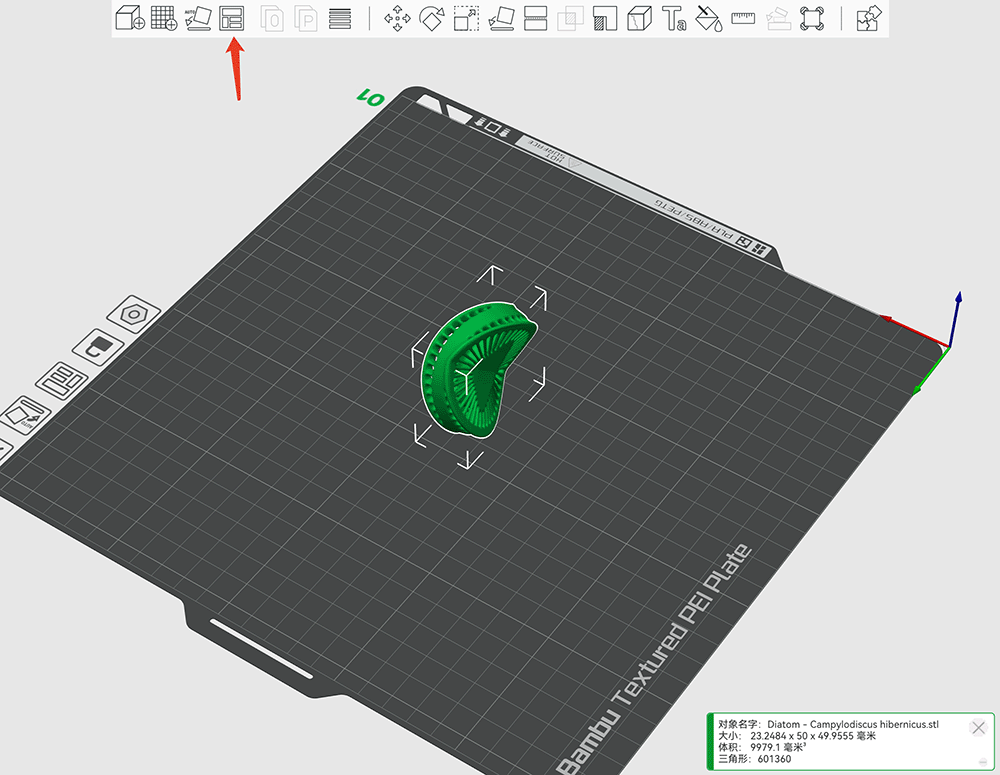
Using global arrangement, the diatom model was placed in the center of the print platform
Print Parameter Settings
Printer and Material Selection
- Selected printer model: Bambu Lab A1 Combo
- Nozzle diameter: 0.4mm (default)
- Material type: PETG Translucent (1.75mm diameter)
2.2 Print Parameter Optimization
Below are the product parameters provided for Bambu PETG Translucent material, understanding these parameters is crucial for successful printing.
Physical Properties
| Item | Value |
|---|---|
| Density | 1.25 g/cm³ |
| Vicat softening temperature | 79 °C |
| Heat deflection temperature | 74 °C |
| Melting temperature | 228 °C |
| Melt flow index | 11.7 ± 1.5 g/10 min |
Mechanical Properties
| Item | Value |
|---|---|
| Tensile strength | 33 ± 4 MPa |
| Elongation at break | 8.2 ± 1.3 % |
| Flexural modulus | 1610 ± 130 MPa |
| Flexural strength | 68 ± 3 MPa |
| Impact strength | 37.4 ± 3.3 kJ/m² |
Printing Guidelines
| Item | Data |
|---|---|
| Pre-printing drying conditions | Convection oven: 65 °C, 8 h X1 series printer heated bed: 75 - 85 °C, 12 h |
| Applicable print plates | Engineering material print plate / High-temperature print plate / Textured PEI print plate |
| Print plate surface treatment | Apply adhesive |
| Print bed temperature | 65 - 75 °C |
| Nozzle size | 0.2 / 0.4 / 0.6 / 0.8 mm |
| Print nozzle temperature | 230 - 270 °C |
| Print speed | < 220 mm/s |
| Printing and storage environment humidity | < 20% RH (sealed, with desiccant) |
Based on these product parameters, I adjusted some print settings.
- Temperature settings:
- Nozzle temperature: 250°C (to enhance transparency)
- Bed temperature: 70°C (to ensure adhesion)
- Layer height settings:
- First layer height: 0.2mm (to capture details)
Variable Layer Height Adjustment
The purpose of variable layer height is to find a balance between improving surface quality and maintaining print speed.
- Entered the "Variable Layer Height" function in Bambu Studio.
- Selected the "Adaptive" and "Smooth Mode" buttons to optimize layer height distribution, as shown below.
- Checked the contour preview to ensure the fine structures of the diatom would be correctly captured.
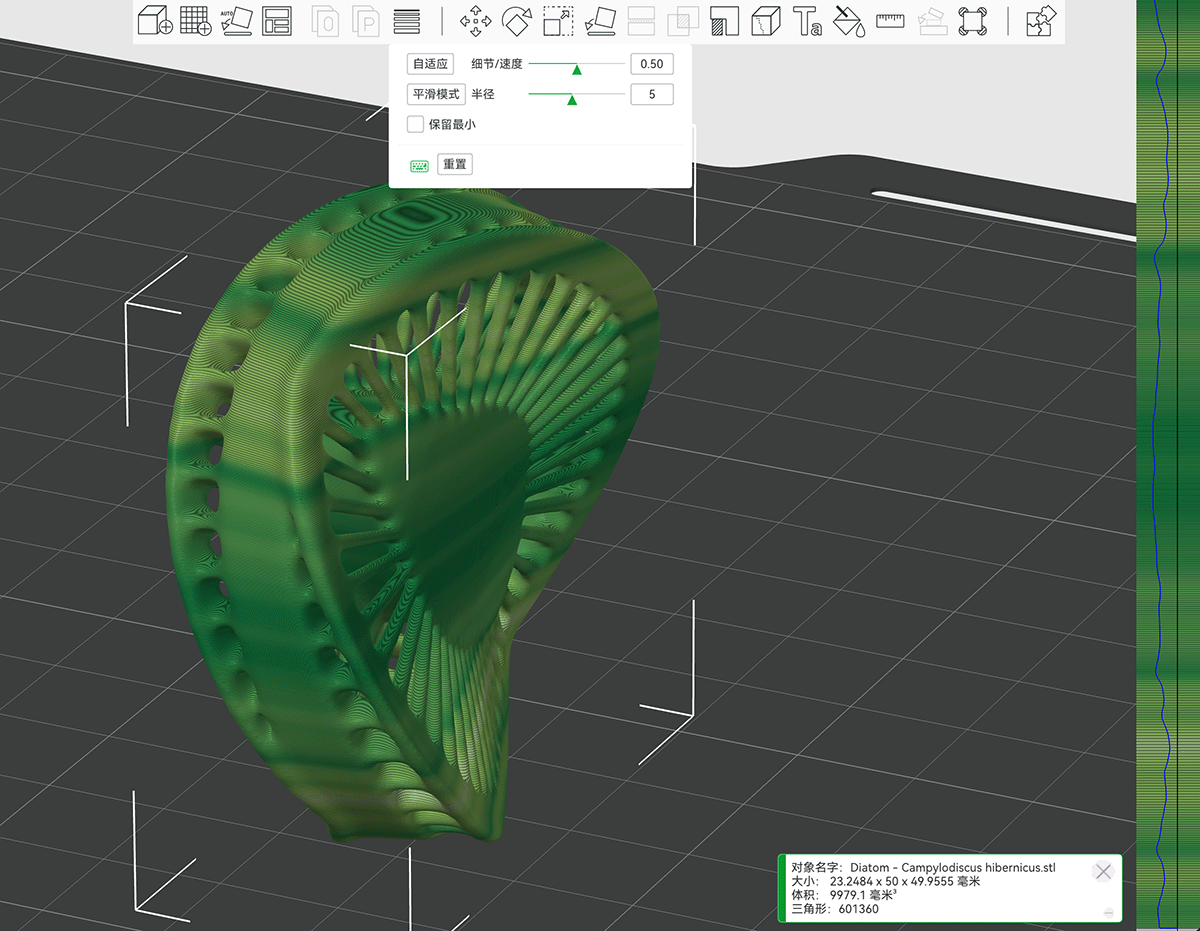
Effect of variable layer height using adaptive plus smooth mode
Support Selection and Slicing
Bambu Studio offers a choice between normal supports and tree supports. I tried both and sliced them. From the total estimation reports below, we can see:
Normal supports take 2h49m, tree supports take 2h57m. The time difference is not significant, so I chose tree supports, which are said to be better for complex structures.
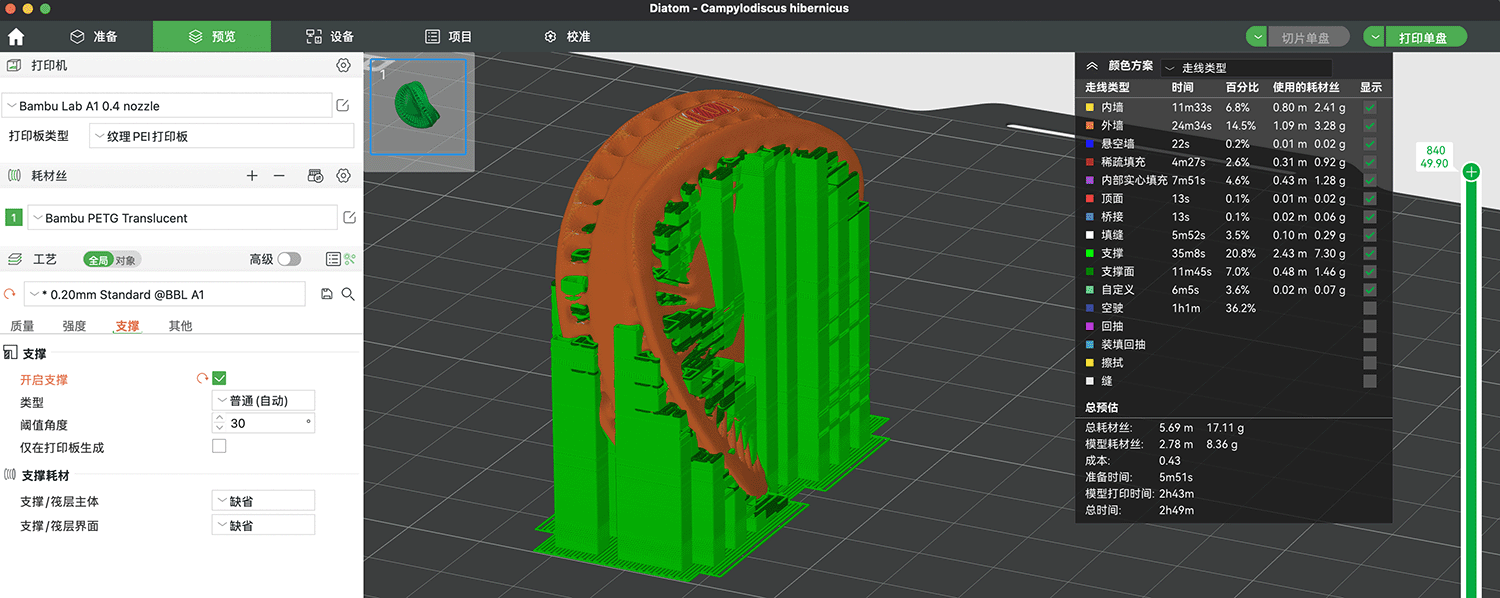
Total time for normal supports: 2h49m
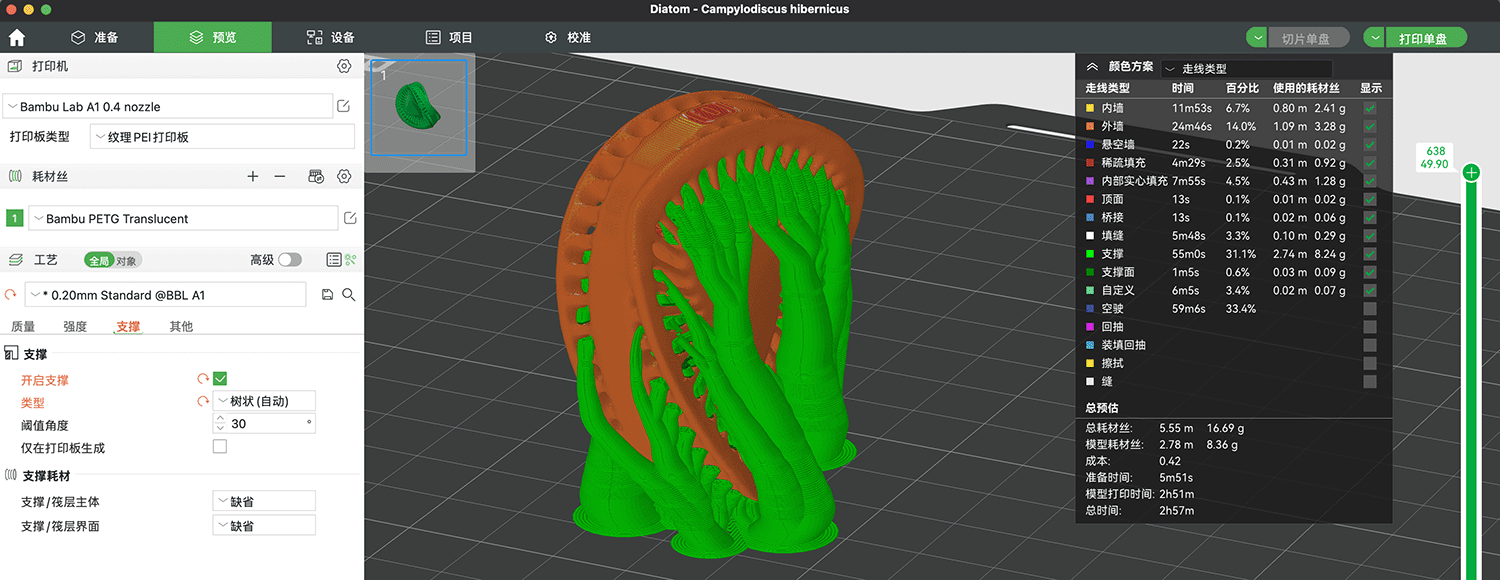
Total time for tree supports: 2h57m
4. Tree Support 3D Printing Process
4.1 Printer Preparation
- Confirmed the print platform was clean and calibrated.
- Loaded the PETG Translucent material and confirmed normal extrusion.
- Preheated the printer to the set temperature.
Bambu's printer has a high degree of automation, automatically performing various calibration and preparation tasks.
4.2 Print Execution
- Started the print job and monitored the first layer adhesion.
- Observed the layer bonding and transparency effect formation during printing.
- Waited for the model to cool after printing was complete.
The model took almost 3 hours to print, and some debris and filaments appeared on the tray, which didn't look good.
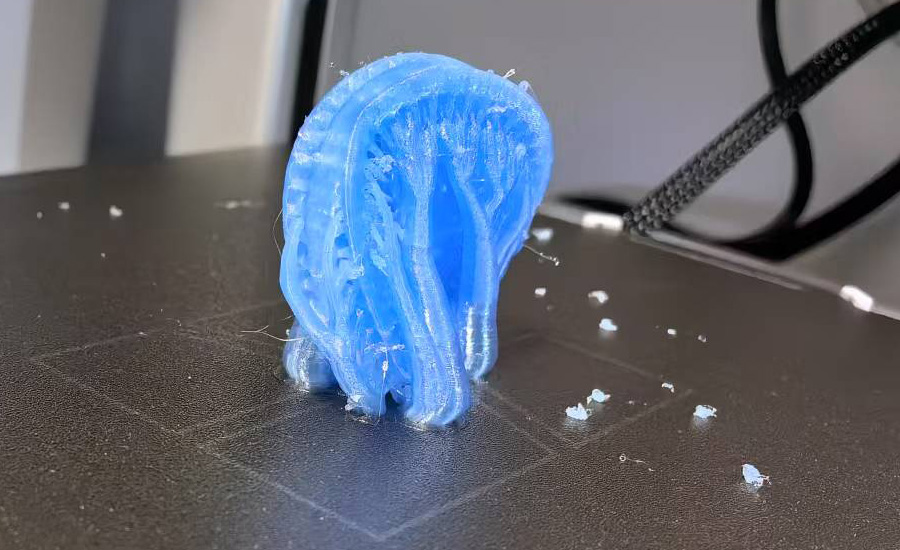
Diatom version 1.0 print result, using tree supports
Support Removal Revealed Print Failure
After removing the print from the tray, I tried to remove the supports with tools and found that the supports were very tightly bonded to the structure. Especially when removing the middle, more delicate parts, removing the supports would tear these structures off as well.
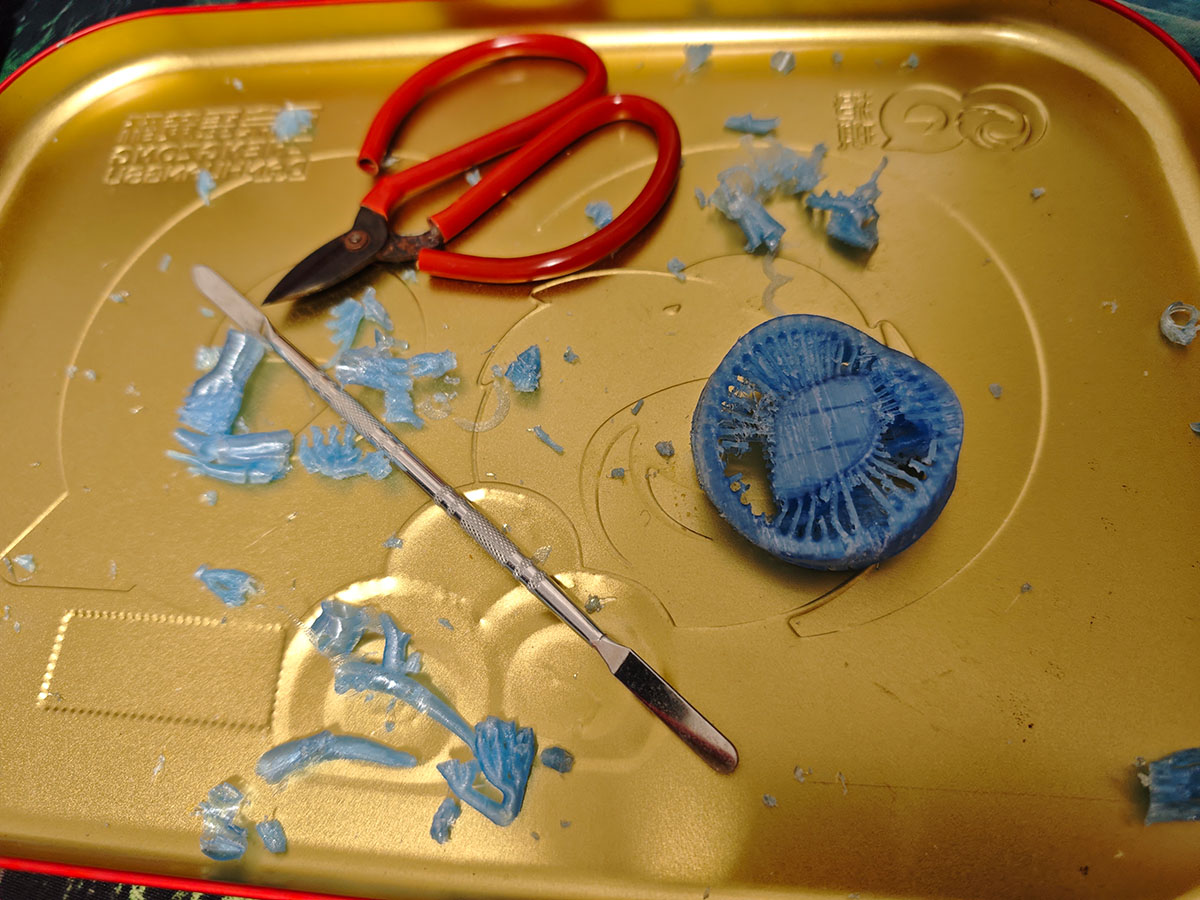
Support removal turned into a major failure
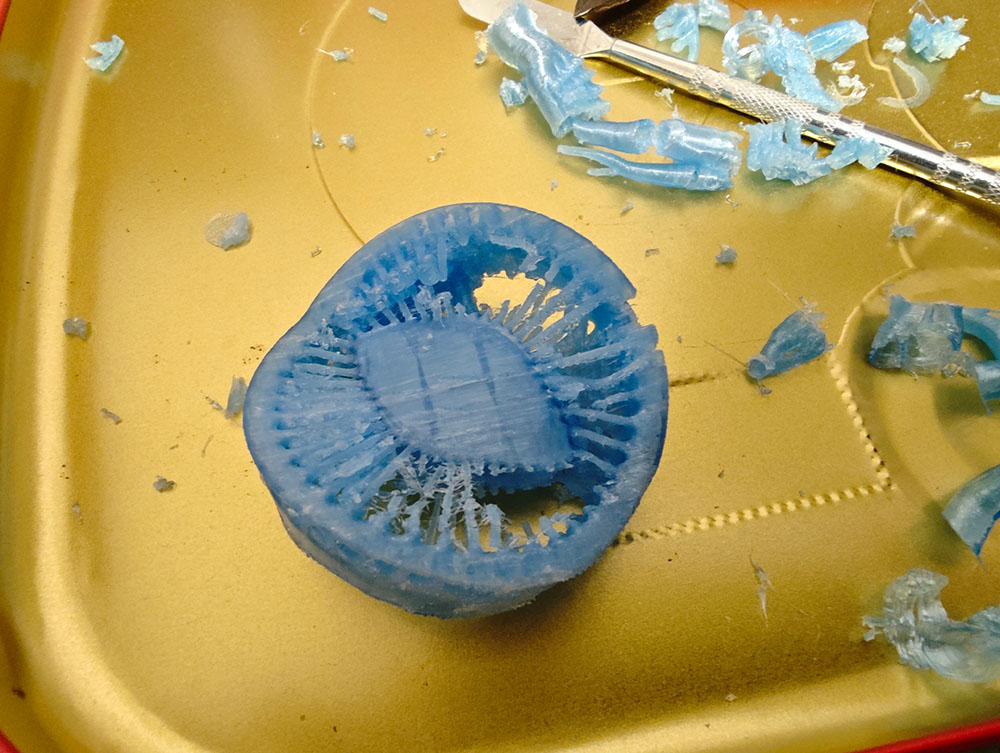
I analyzed the possible causes of failure:
- Variable layer height is not friendly to such delicate structures; on the failed sample above, obvious layer marks can be seen
- Tree supports are not friendly to structures with many fine details
Printing Again with Normal Supports and No Variable Layer Height
This time I switched to normal supports in Bambu Studio and turned off variable layer height. The printing time was also reduced by almost 1 hour.
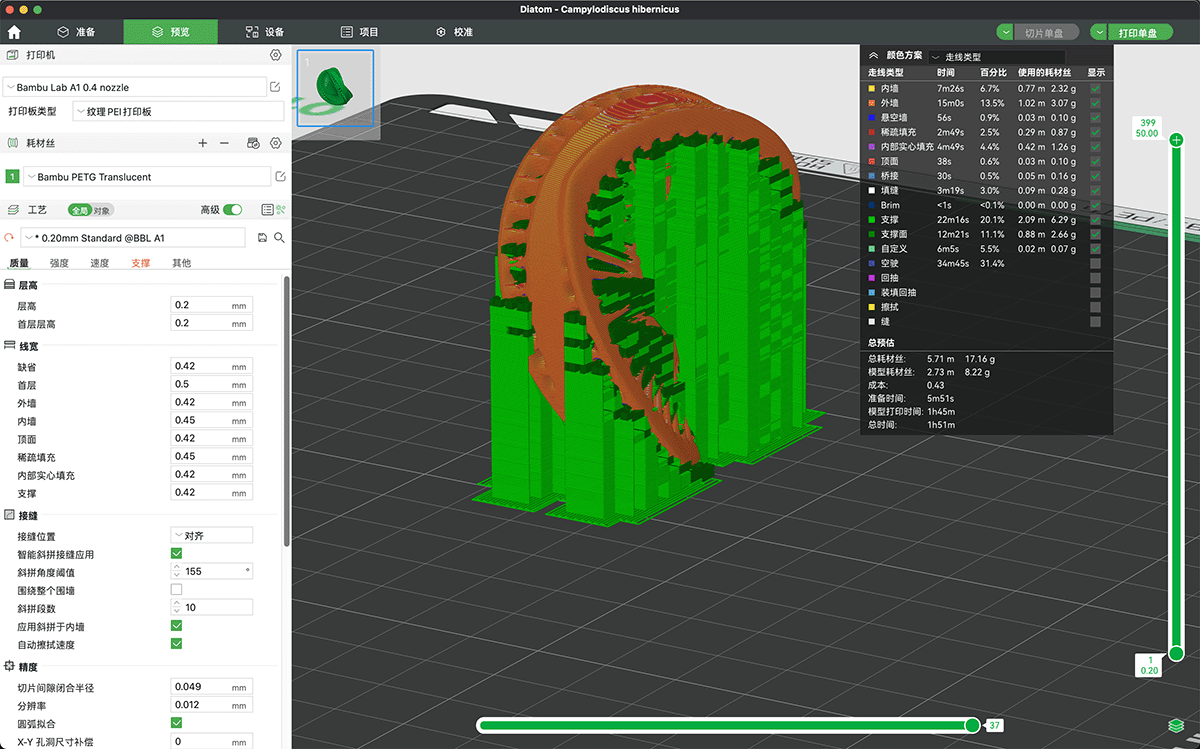
Set to normal supports and turned off variable layer height
This print went more smoothly, and the tray was much cleaner.
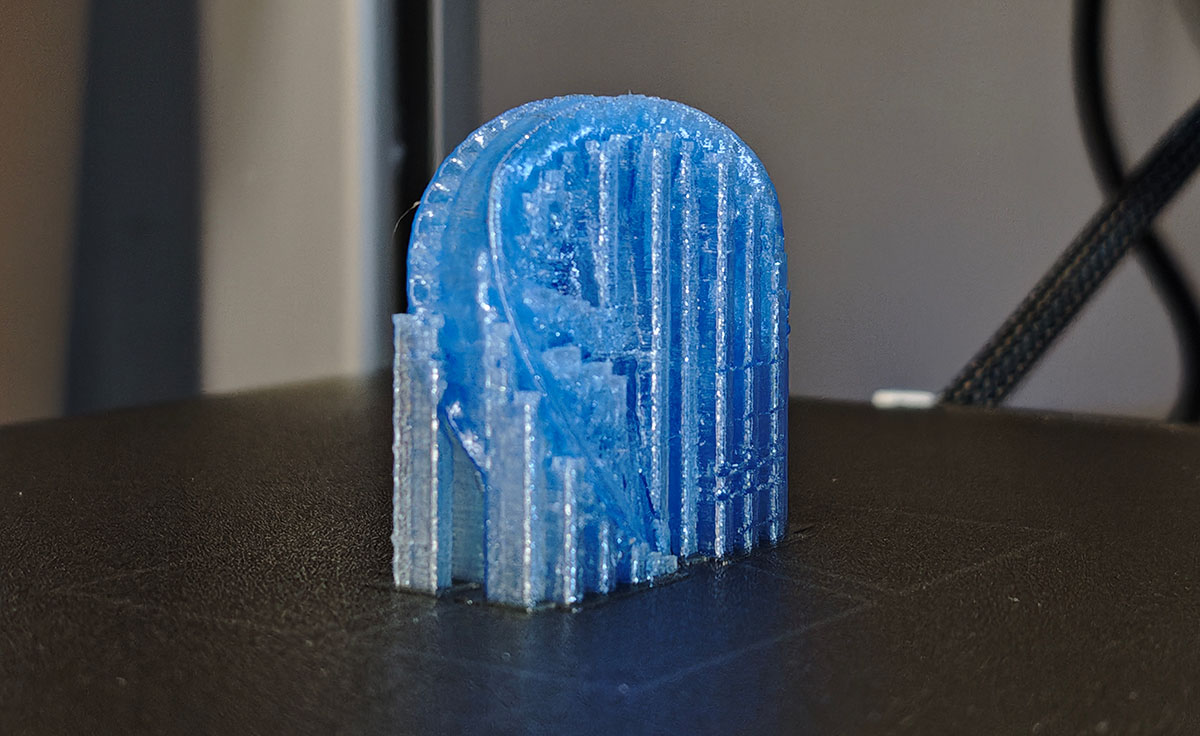
Diatom version 2.0, the print result with normal supports looks better
Next, I started to remove the supports, which was still a laborious task.
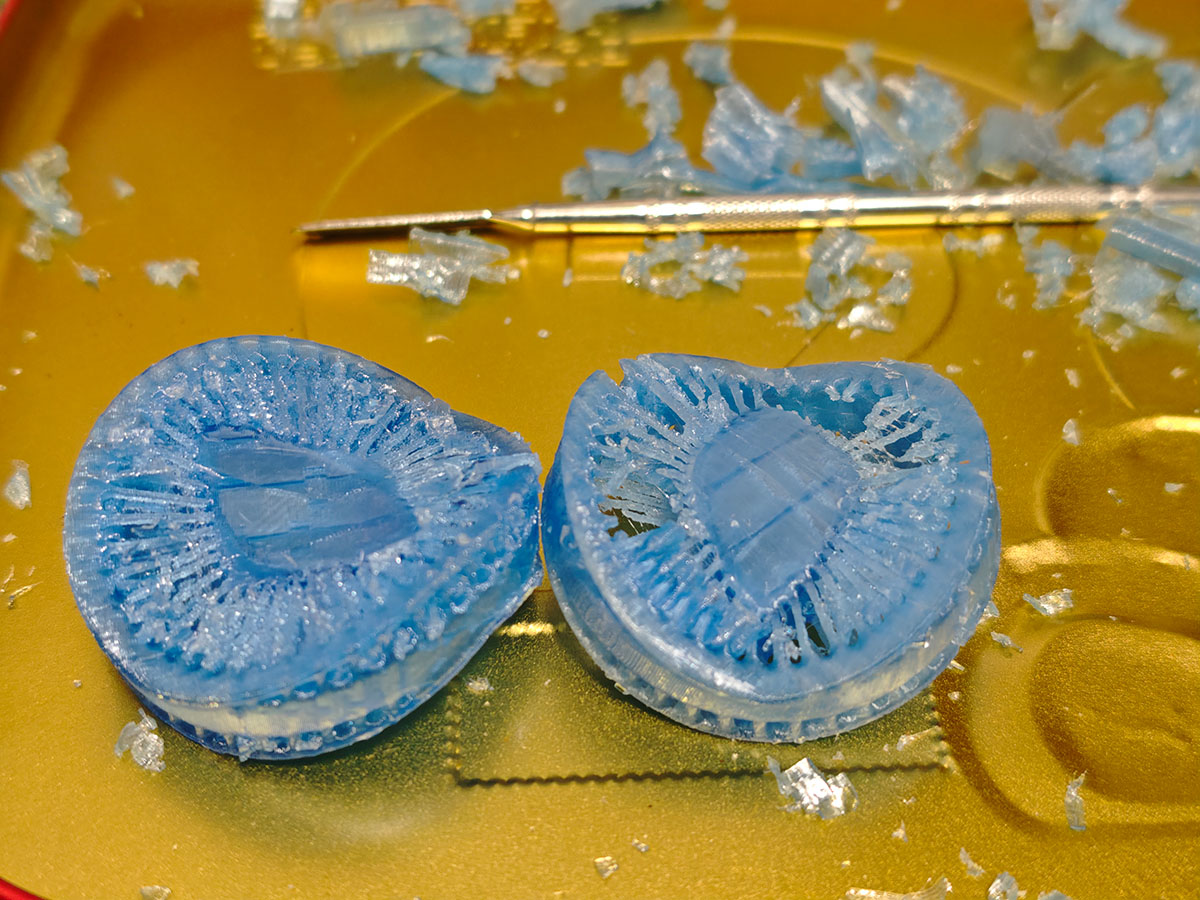
Left: result with normal supports, Right: result with tree supports
This time there was a slight improvement. The outer edge of the diatom looked good, but the internal delicate and hollow parts still had support adhesion issues.
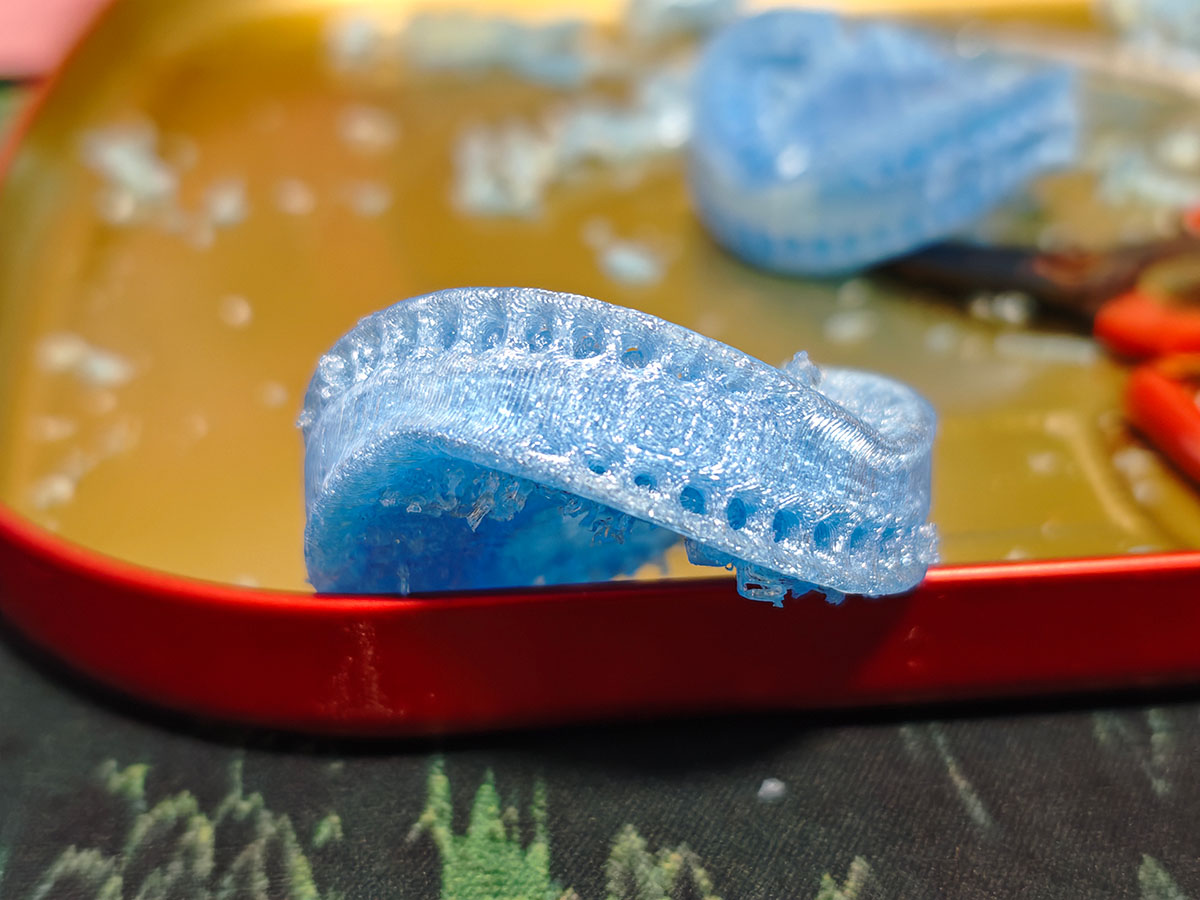
AI Failure Analysis and Improvement Suggestions
As a 3D printing novice, this counts as my second failure. I consulted Claude, providing project images and documentation with the following prompt:
I'm trying to print a diatom structure, 50mm in maximum dimension, and I've tried both normal supports and tree supports. Normal supports are slightly better, but the supports are severely bonded to the hollow fine structures. Please help me write a failure analysis and provide improvement suggestions.
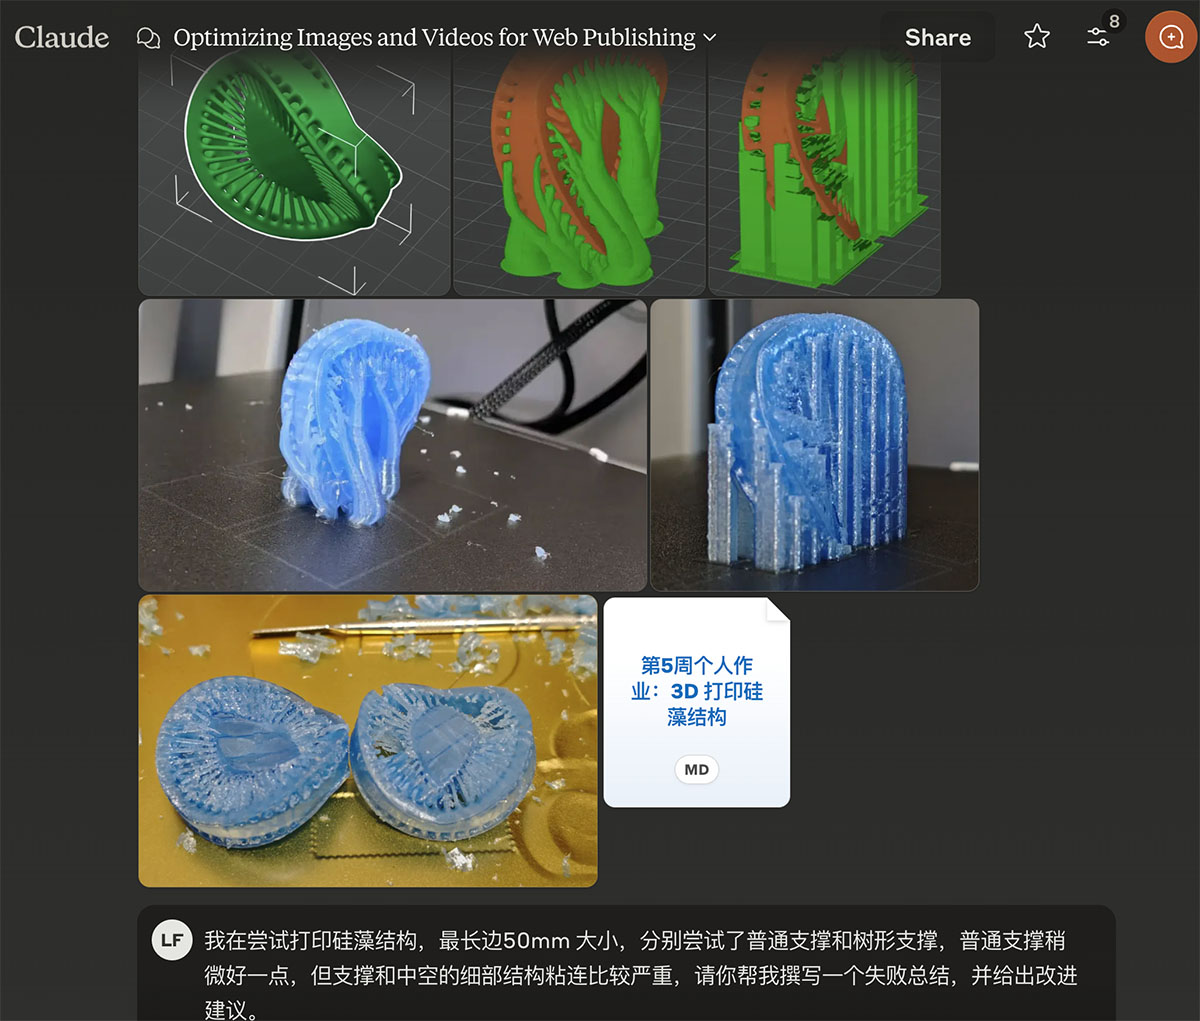
Seeking help from Claude
Below is the problem analysis and improvement suggestions provided by Claude.
Problem Analysis
- Support structure adhesion issue: Both tree supports and normal supports severely bonded to the model's small internal structures, causing damage to the model's integrity when removing the supports.
- Structure detail implementation limitations: The fine internal structures of the diatom model require high precision from FDM printers, especially the radial internal pillars and hollow parts.
- Improper layer height settings: Variable layer height settings may not be friendly to such complex microstructures, leading to obvious layer marks.
- PETG material characteristics: Although PETG has good transparency, it has stronger adhesion, which is not conducive to support separation.
Improvement Suggestions
- Model Modification and Splitting
- Consider splitting the model into upper and lower halves; horizontal printing may reduce dependency on supports
- Increase the thickness of critical fine structures, sacrificing some original details to improve printability
- Add breakpoints to the model in CAD software to facilitate later support removal
- Print Parameter Optimization
- Reduce nozzle temperature to 230-240°C to reduce excessive material flow and adhesion
- Increase the Z-axis gap between supports and model (0.2mm→0.3mm)
- Use a lower layer height (0.12mm or 0.1mm) to improve detail representation
- Reduce support density (15%-20%) and increase XY distance between supports and model
- Material and Post-Processing Selection
- Consider using water-soluble PVA as support material (if the printer supports dual extrusion)
- Try using SLA/DLP photosensitive resin printing, which is better for microstructure representation
- Using PLA might provide easier support separation than PETG (although transparency would be reduced)
- Use an ultrasonic cleaner to help dissolve the contact points between supports and model
- Print Orientation Adjustment
- Try printing the model at a 45° angle, which may reduce the number of internal supports
- Consider multiple small tests to find the optimal print orientation
- Other Technical Explorations
- If conditions allow, consider using a resin printer (SLA/DLP) for such detailed structures
- Try a printer with a smaller nozzle diameter (such as 0.2mm or 0.25mm)
- Use specialized support software (like Meshmixer) to generate more intelligent support structures
Feasibility Experiment Suggestions
- Print a quarter or eighth of the model first for testing to find the optimal parameters
- Adjust the model, thickening critical fine structures to at least 0.8mm or more
- Experiment with hot water or alcohol soaking to help separate PETG supports from the model
- Explore using breakaway support settings, setting the support contact points to minimum in Bambu Studio
Through these improvement measures, the internal fine structures of the diatom might print better, especially regarding the separation issue between supports and the model. If conditions allow, consider a resin printer for optimal microstructure representation.
Since I only had one spool of PETG material, I decided to try adjusting the parameters to see if I could improve the print quality. So I opened the printer's advanced settings and sent each section's settings to Claude, asking the AI to help me modify the parameters, as shown below.
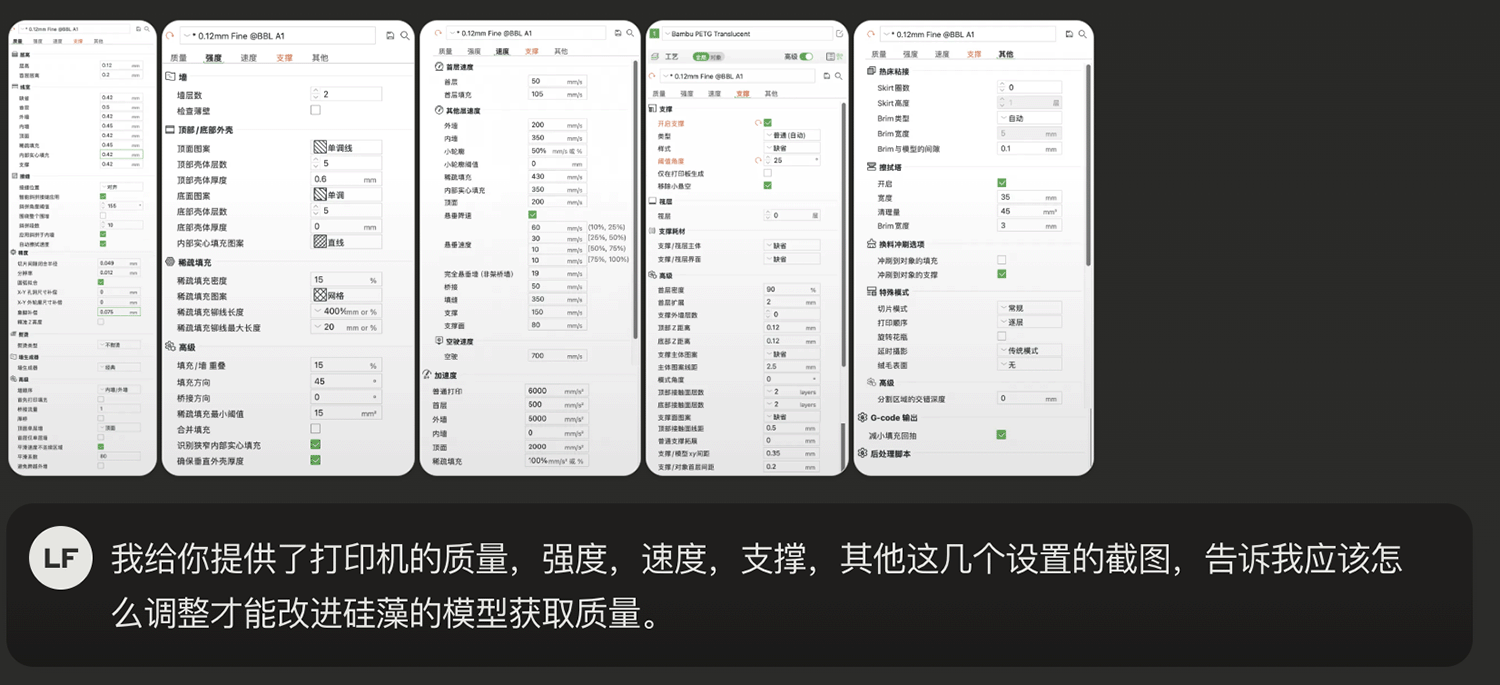
Provided Claude with the current printer parameter settings and asked for improvement suggestions
The prompt was:
I've provided screenshots of the printer's quality, strength, speed, support, and other settings. Tell me how I should adjust them to improve the quality of the diatom model.
Below are the problem analysis and improvement suggestions provided by Claude.
Based on your diatom printing process and Bambu Lab A1 printer settings screenshots, I'll analyze how to optimize the settings to improve the diatom model print quality, especially addressing the support removal difficulty and detail preservation issues.
Print Parameter Optimization Suggestions
Layer Height Settings
- Current: 0.12mm (Fine), first layer 0.2mm
- Suggested modifications:
- Maintain 0.12mm layer height, suitable for detailed printing
- Turn off variable layer height, which is more beneficial for consistency with this type of microstructure
Support Settings
- Current: Normal supports, contact angle 25°, XY distance 0.35mm, Z distance 0.12mm
- Suggested modifications:
- Increase Z distance: From 0.12mm to 0.16-0.2mm, making supports easier to separate
- Increase XY distance: From 0.35mm to 0.45-0.5mm
- Reduce contact angle: From 25° to 15-20°, reducing the number of supports
- Support density: Reduce to 10-12% (currently 15%)
- Check "Use different support/model XY distance for first layer", set to 0.3mm
Temperature and Cooling Settings
- Suggested modifications:
- Lower nozzle temperature: For PETG Translucent, set to 240°C (instead of the current possible 250°C)
- Increase cooling fan speed: Increase to 80-100% for delicate parts
- Enable bridging settings: Make sure "Bridging fan" option is checked, increase to 100%
Print Speed
- Current: Outer walls 200mm/s, inner walls 350mm/s
- Suggested modifications:
- Slow down outer wall speed: Reduce to 120-150mm/s
- Slow down inner wall speed: Reduce to 200-250mm/s
- Slow down support speed: From 150mm/s to 100mm/s
- Small feature speed: Reduce to 30% or lower
Sparse Infill Settings
- Current: 15% grid pattern, wide spacing between lines
- Suggested modifications:
- Increase infill density: For diatom structures, increase to 20-25%
- Change infill pattern: Use "triangular" or "cubic" infill, which provides better support than grid
Other Key Settings
- Check "Detect thin walls": Already enabled, correct
- Bottom/top solid layers: Increase to 3-4 layers to improve surface quality
- Wipe tower settings: Maintain width at 35mm, but purge volume can be increased to 60mm³ to ensure the nozzle is clean before printing
Diatom Model Specific Optimizations
- Model modification suggestions:
- Before printing, use 3D modeling software (like Meshmixer) to manually add some breakpoints to make supports easier to remove
- Split the model into upper and lower parts to print separately, then bond them
- Support removal techniques:
- After printing, soak the entire model in 40-50°C warm water for 10-15 minutes
- Use fine tweezers and tools like toothpicks to carefully remove supports
- Alternative print orientation:
- Try rotating the model 45°, with the top facing the print platform
- This may reduce interaction between support structures and internal delicate structures
- Try different support types:
- Your tests show that normal supports are slightly better than tree supports
- Use normal supports, but further reduce the support contact point size
These adjustments focus on improving the separation between supports and the model while maintaining sufficient support strength to ensure model integrity. For PETG material, increasing the distance between supports and the model and lowering the nozzle temperature are key to solving adhesion problems.
After modifying the settings and slicing, this time it took 2h51m (close to the previous tree test time), as shown below. Then I started printing.
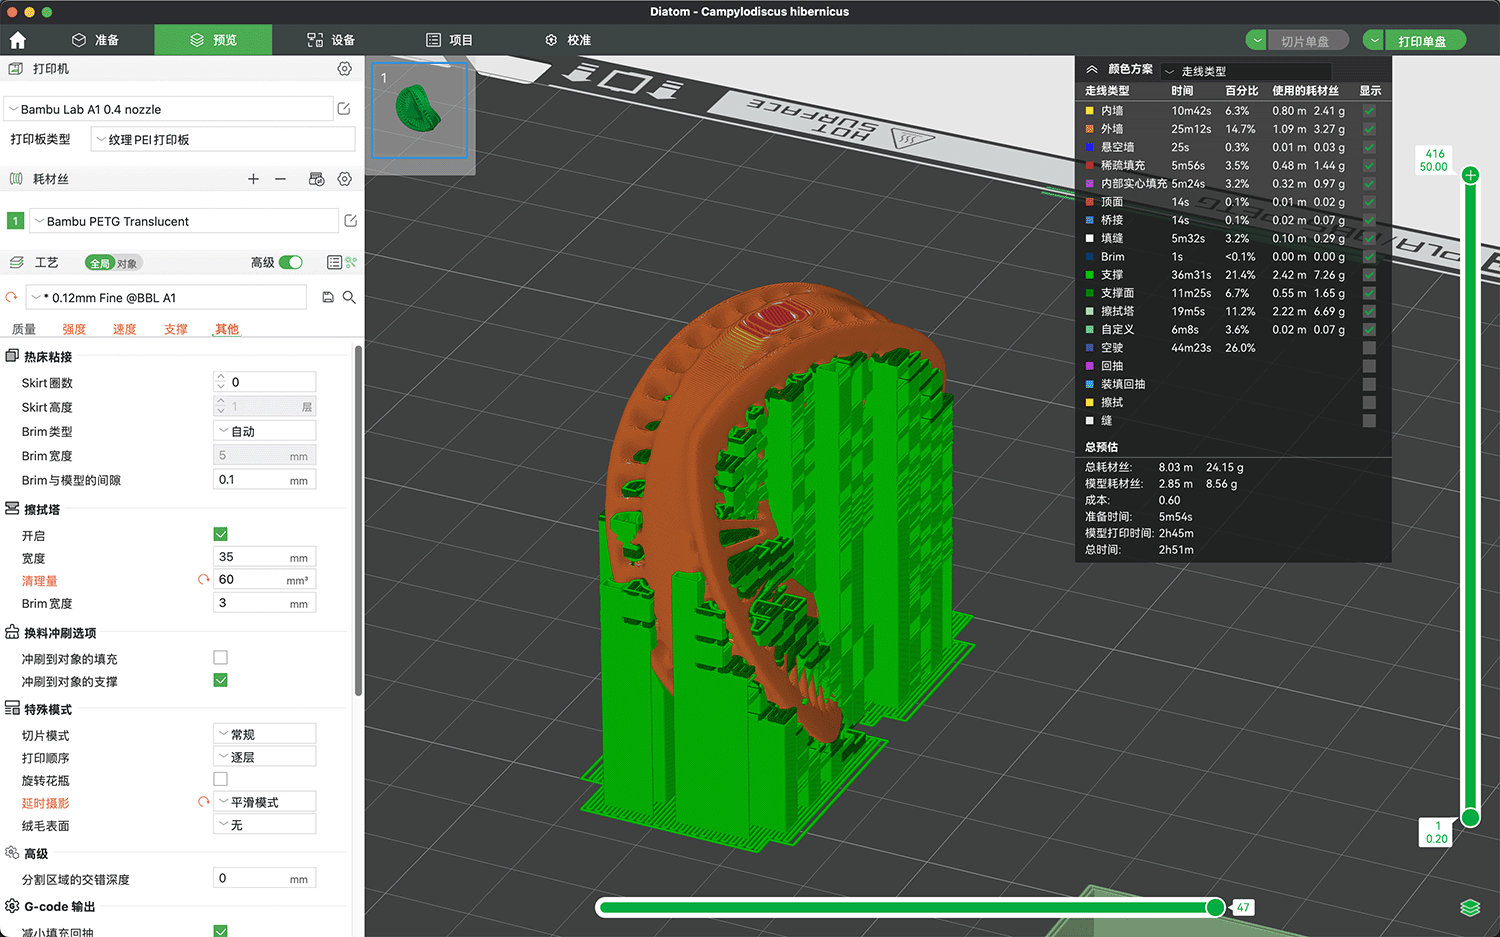
Sliced again after parameter modifications
After nearly 3 hours of printing, this result also looked good.
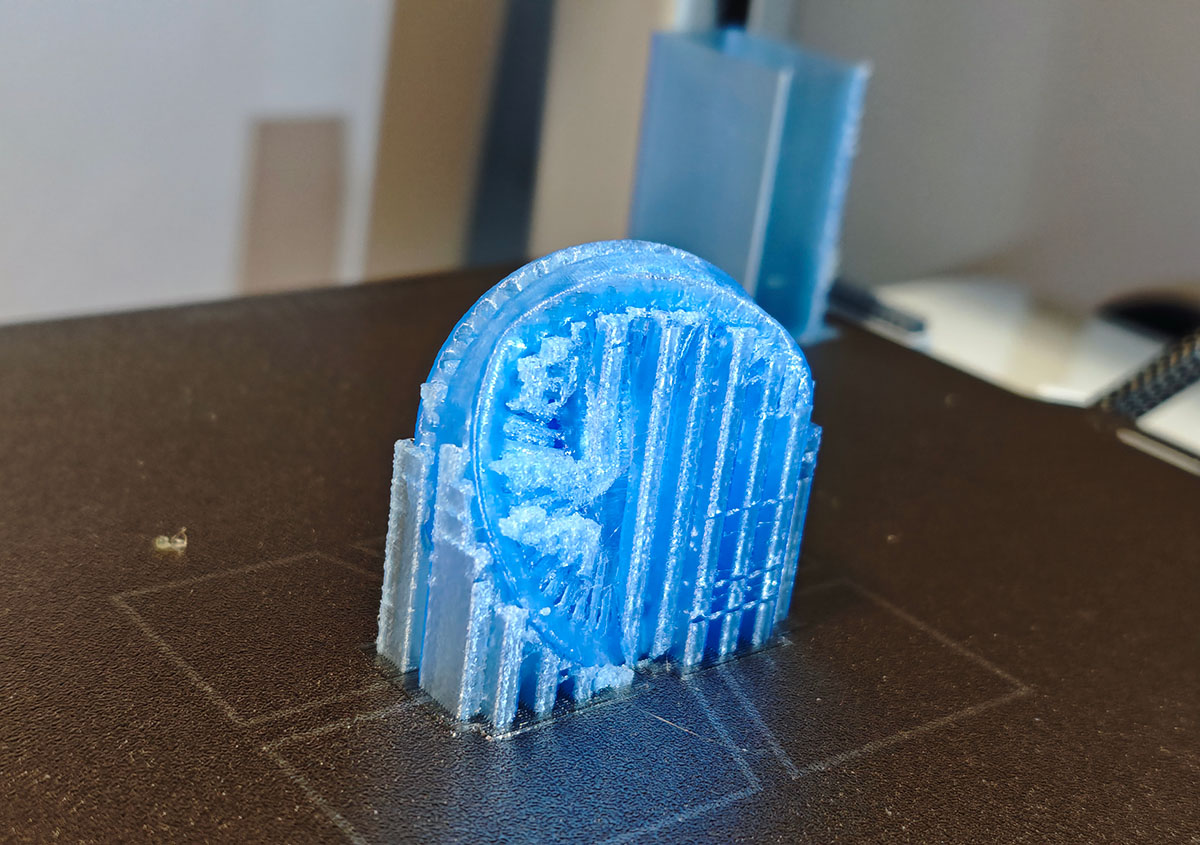
Diatom version 3.0, with wipe tower visible in the background
To improve print quality, I checked the wipe tower option, which adds a cube structure to the tray, as shown below.
A wipe tower (also called a purge tower or prime tower) has several important functions in 3D printing:
- Cleaning the nozzle - During printing, the nozzle may have residual material or leakage. The wipe tower allows the printer to wipe the nozzle on the tower before starting each layer, removing these residues.
- Stabilizing extrusion - When the printer rests or moves to different parts of the model, extrusion may become unstable. The wipe tower ensures that the extrusion flow is stable before starting to print critical parts of the model.
- Multi-material printing assistance - For multi-material or multi-color printing, the wipe tower is used to clean the nozzle during material switching, preventing color mixing or cross-contamination.
- Reducing stringing - By providing a target point for the nozzle to move to before reaching the model, it reduces stringing issues caused by long-distance movements.
In your diatom model printing, the wipe tower can help maintain consistent extrusion of the PETG material, especially before printing areas that require fine details. You have already enabled the wipe tower in your settings, with a width of 35mm and a purge volume of 45mm³, which is reasonable for complex models.
If you find severe nozzle stringing or poor quality in detailed parts, consider slightly increasing the purge volume to 60mm³ to ensure the nozzle is completely clean before printing critical sections.
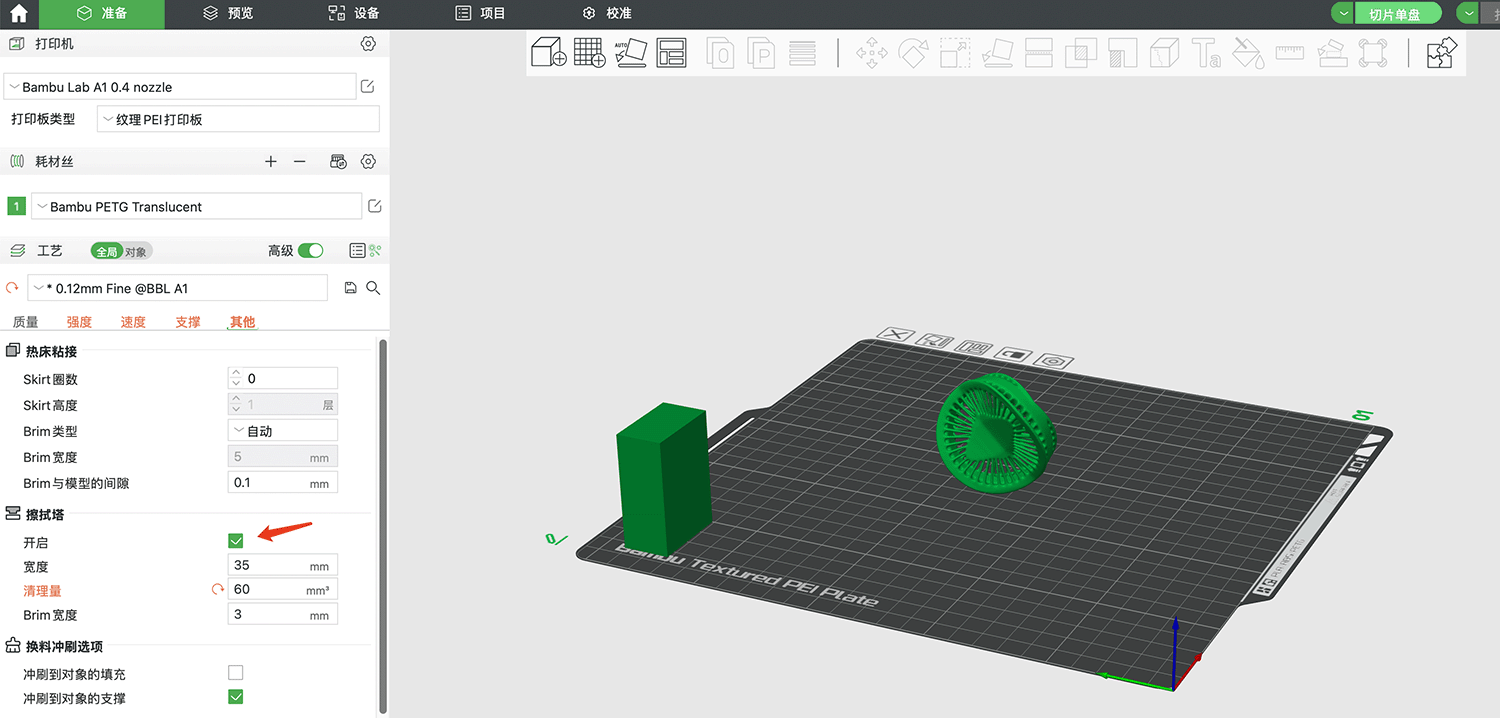
Checking the wipe tower option adds a hollow cube structure to the tray
The actual printed wipe tower.
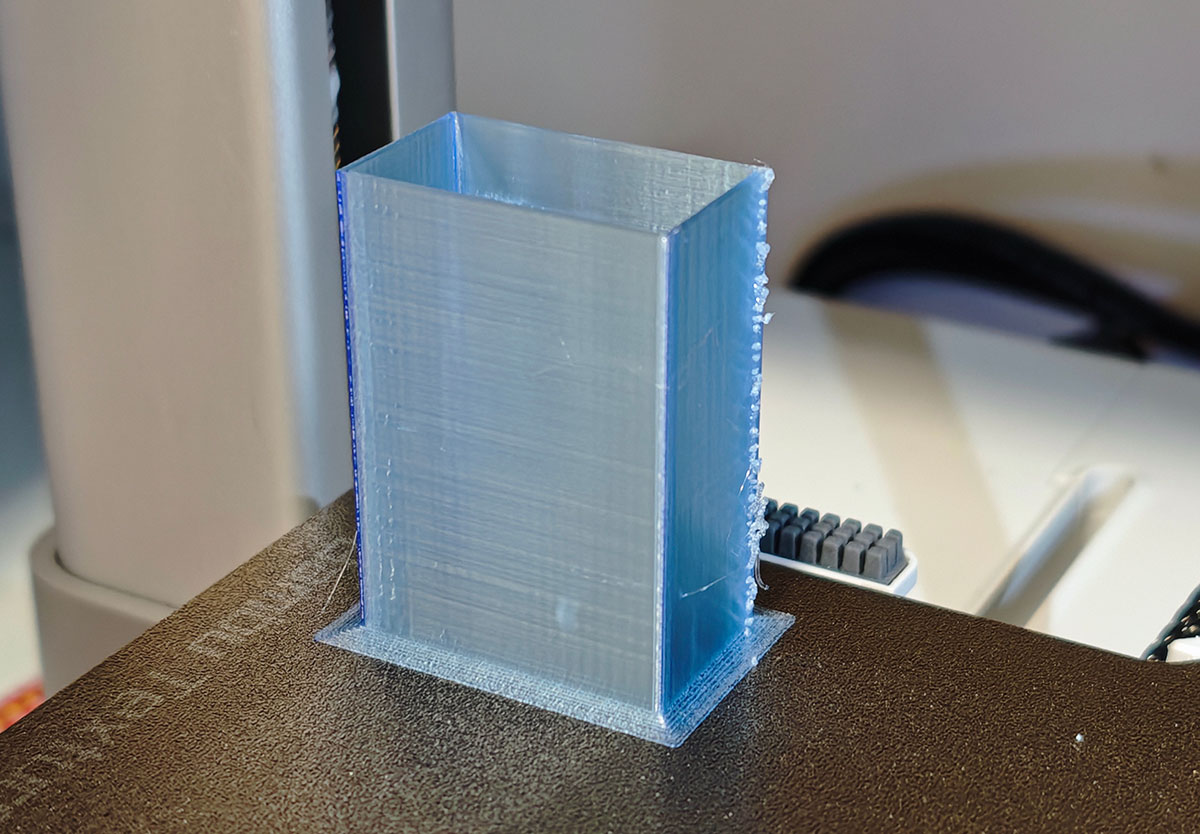
The printed wipe tower
Next came the difficult process of removing the supports.
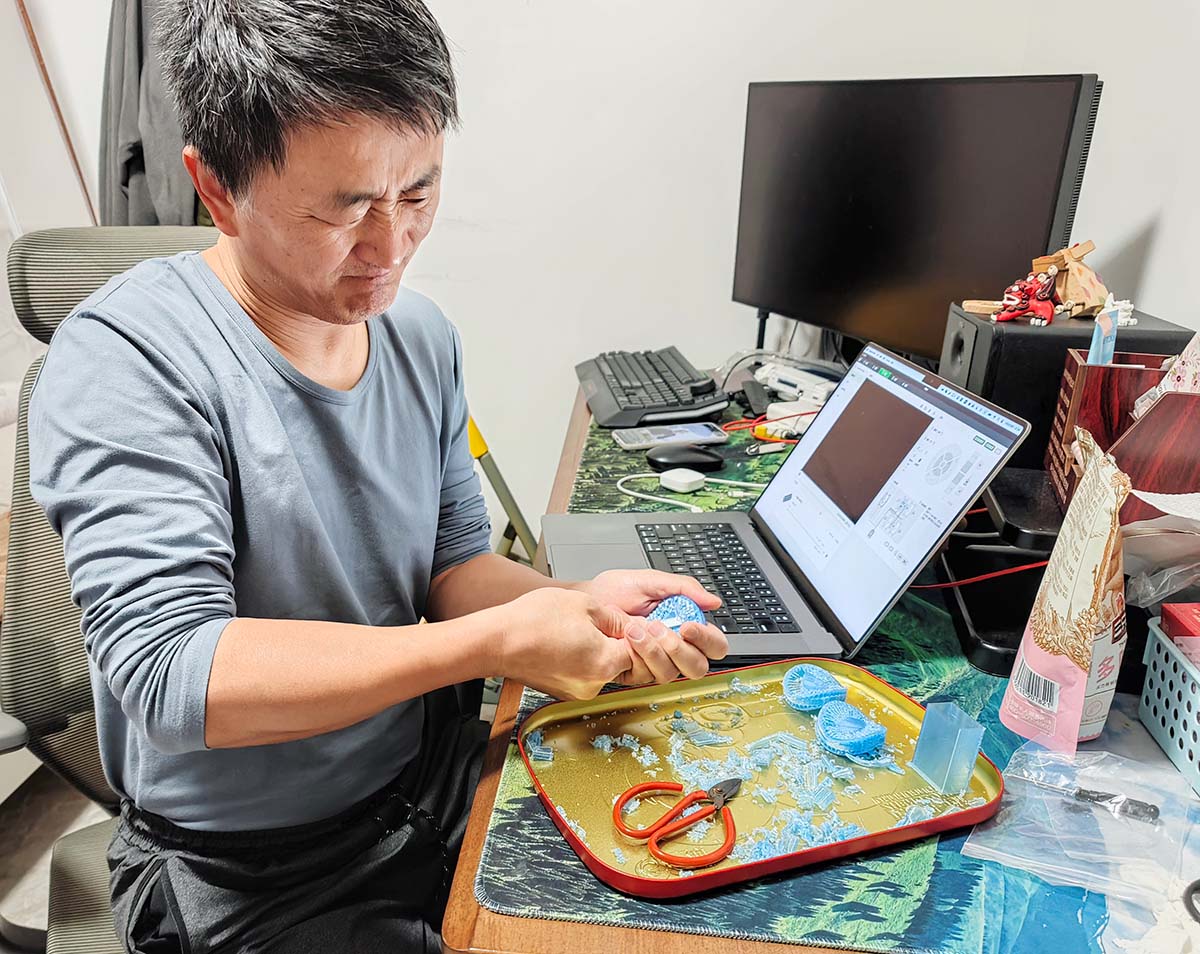
The process of removing supports was still difficult, even taking longer than the printing time
After spending several hours removing what I thought could be removed, I found that the hollow parts inside still couldn't be successfully cleared, as shown in the right image below.
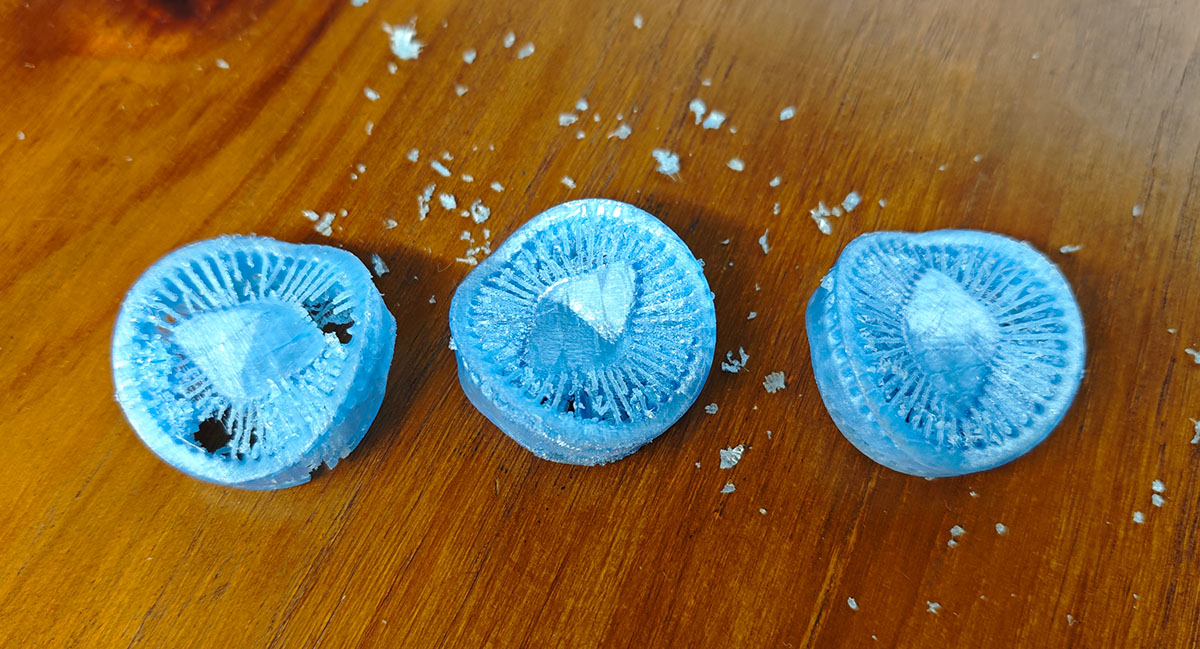
Diatom versions 1.0-3.0 from left to right, still unable to remove the supports inside the hollow structure
It seems that for this structure, to get better results, it's recommended to use water-soluble PVA as support material.
 Lei Feng Fab Academy 2025