Week 09. Output devices
In this week our instructor showed us the demonstration of power supply consumed by the LED making a simple circuit. Now know how to use power supply and determine the power for our output devices.
Assignments
Individual assignment: - add an output device to a microcontroller board you’ve designed and program it to do something
Group assignment: - measure the power consumption of an output device
In my final project I wanted to use DC motor so I tried to find it’s power consumption and control the speed as well as our Guru Rico insisted me to play with Voltage to control the speed of the motor. I connected DC motor to the power supply GWINSTEK. I used crocodile clipper to connect the motor to the power supply.
I gave the less voltage of 5 Volts and I noticed that the motor is rotating at the high speed that needs huge gear reduction ratio.
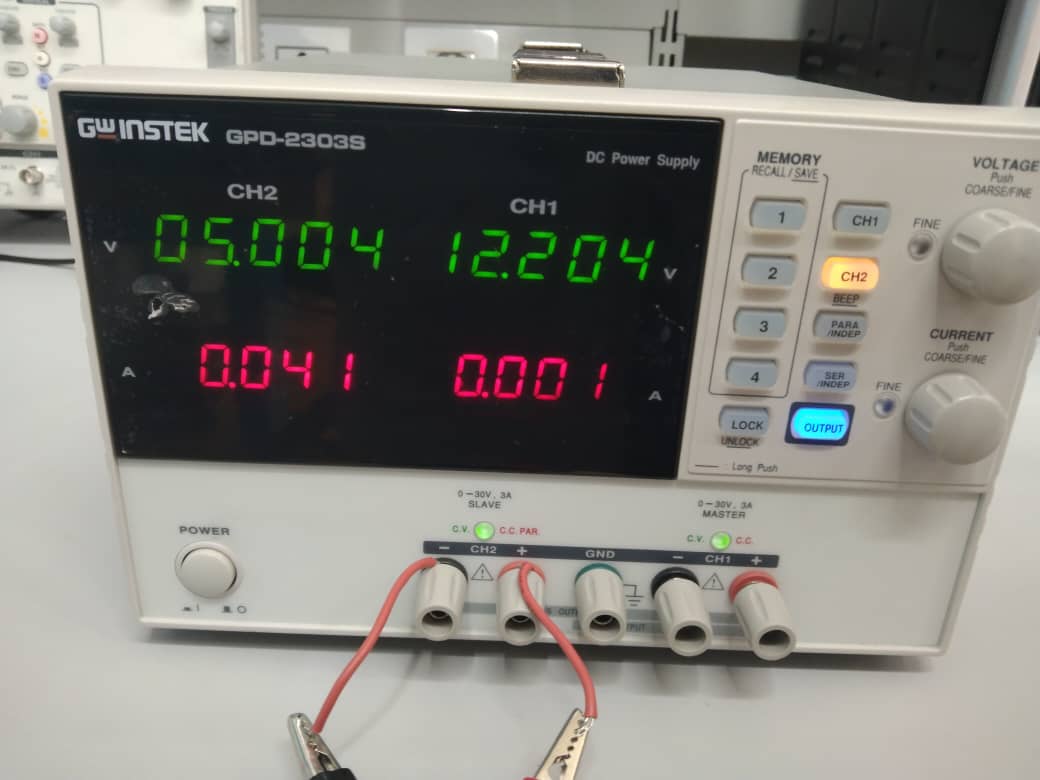
To find the power consumed I used the formula P=VI (Voltage x current)
Voltage I gave=5V
Current drawn=0.041 Ampere
P=5x0.041=0.205A
I reduced the voltage to 3 Volts but it still have higher RPM which will be challenging for me to get the rotation into desired angle. And I still reduced the voltage to least up to 1volt which is very slow but I think it cannot drive with the load. So I switch on using servo motor having 360 degree rotation as it will be convenient for me to control over desired angle.
Link for the group assignment is here
Individual Assignment
Customizing the board
In the Electronics Production week I used LED as an output and now we are asked to use different output device. So I will take this assignment as a good opportunity to control my servo to the certain angle as I replaced DC motor with servo motor for my final project.
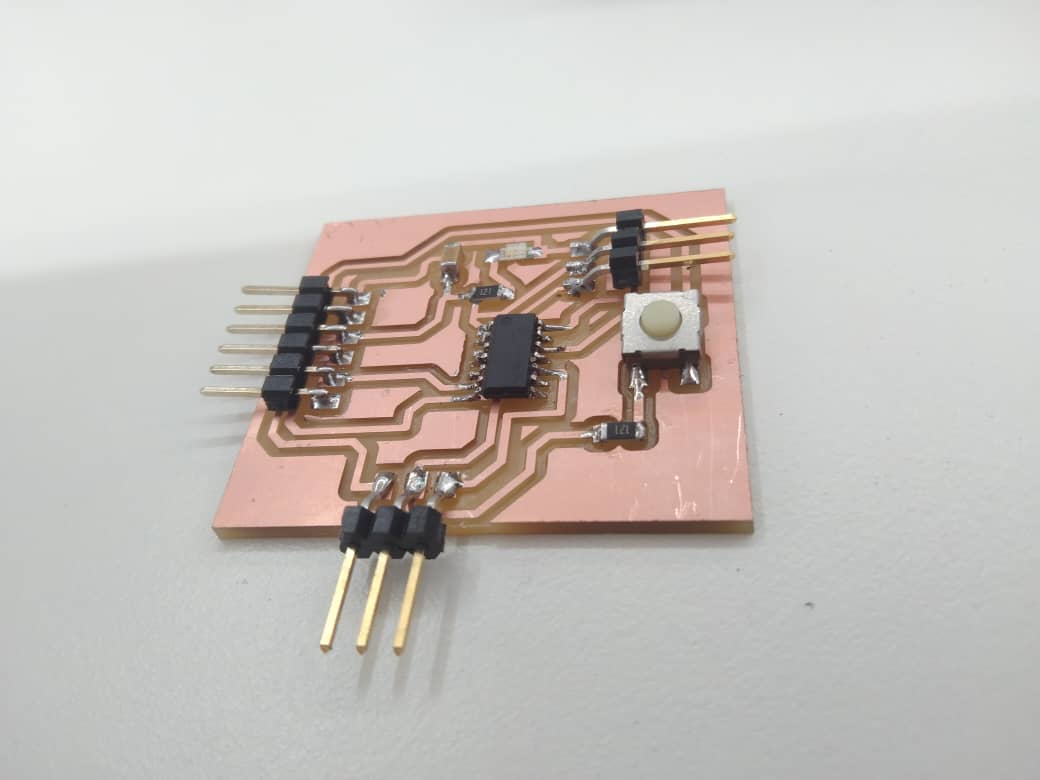
Customized PCB design
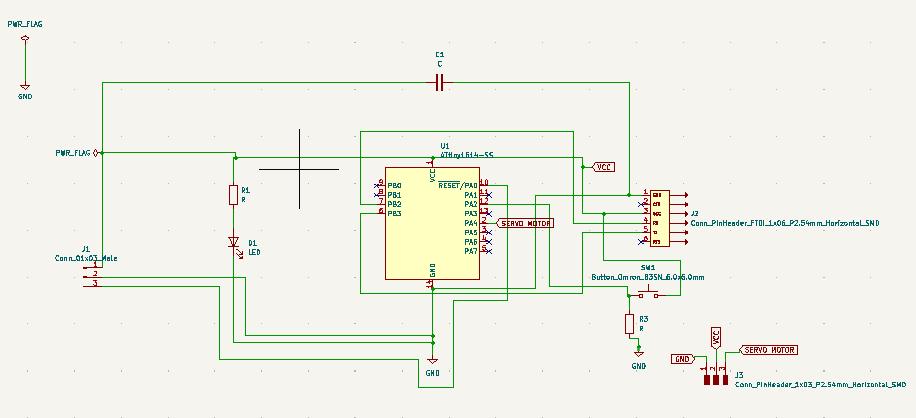
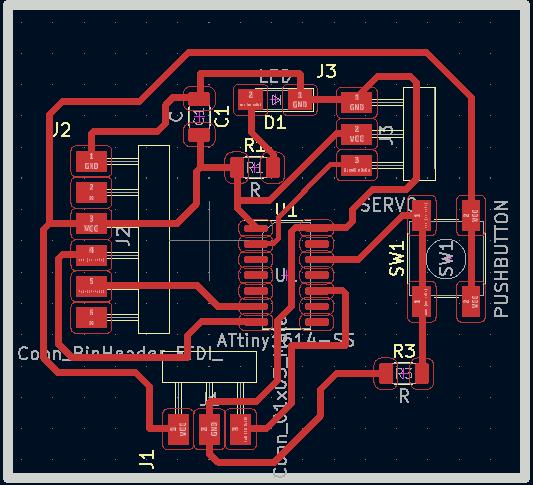
Components: 1. ATTiny 1614 2. resistor 220 ohm 3. capacitor 4. push button 5. 3Pin header connector as UPTI and servo motor connection 6. 6 Pin header as FTDI 7. Servo Motor
Milling the board.
I had to mill the board twice this time since my Z didn’t get properly set and the copper didn’t get removed. But I did not waste the board as I can re-set only Z axis and XY remains same.
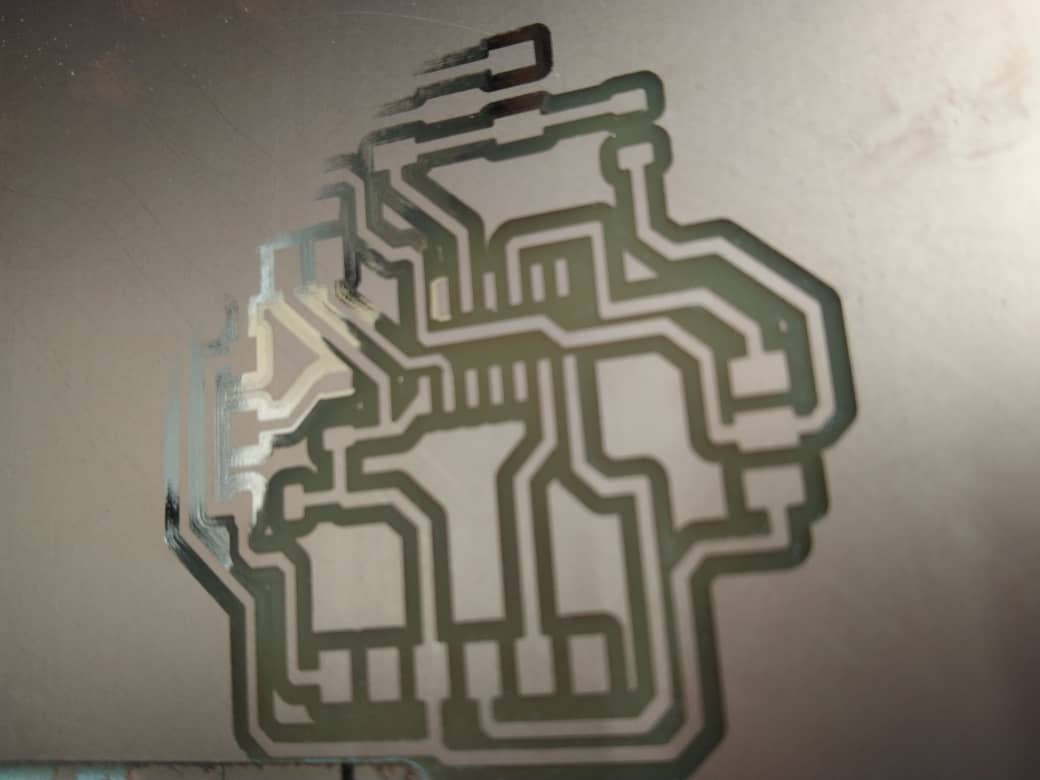
My final board
Programming the board
I fried my MCU by connecting UPDI directly to output pin header and I had to re-soldered only the MCU and uploaded the programme and the servo worked.
I used the code from IDE example set attached below.
   #include <Servo.h>

    Servo myservo;  // create servo object to control a servo

    int pos = 0;    // variable to store the servo position

    void setup() {
     myservo.attach(0);  // attaches the servo on pin 0 to the servo object
    }

    void loop() {
    for (pos = 0; pos <= 180; pos += 1) { // goes from 0 degrees to 180 degrees
     // in steps of 1 degree

    myservo.write(pos); // tell servo to go to position in variable 'pos'
    delay(15); // waits 15 ms for the servo to reach the position
    }

    for (pos = 180; pos >= 0; pos -= 1) { // goes from 180 degrees to 0 degrees
     myservo.write(pos);  // tell servo to go to position in variable 'pos'
    delay(15); // waits 15 ms for the servo to reach the position
    }
    }
Controlling Servo with pushbutton
To control the servo with push button code I used is attached below.
#include <Servo.h>

Servo myservo;
int buttonPin = 9;
int buttonState = 0;
int angle = 0;

void setup() {
myservo.attach(0);
pinMode(buttonPin, INPUT);
}

void loop() {

    buttonState = digitalRead(buttonPin);
    if (buttonState == HIGH) {
    angle += 10;
    if (angle > 180) {
    angle = 0;
    }

    myservo.write(angle);
    delay(100);
}
}
Serial Communication
In my final project I want the servo to move in certain angle without delay timer and without going back to initial position, therefore I tried to control the printing the angle.The code is attached below and it worked.
#include <Servo.h>

Servo myservo;
   int inputangle = 0;

void setup() {
     myservo.attach(0);
     Serial.begin(9600);
}

void loop() {

    if(Serial.available()>1)
{

inputangle = Serial.parseInt();

    myservo.write(inputangle);

    // delay(100);

    Serial.println(inputangle);
}
}
Serial monitor Video
Design file for this week is here