Week 07. Computer Controlled Machining
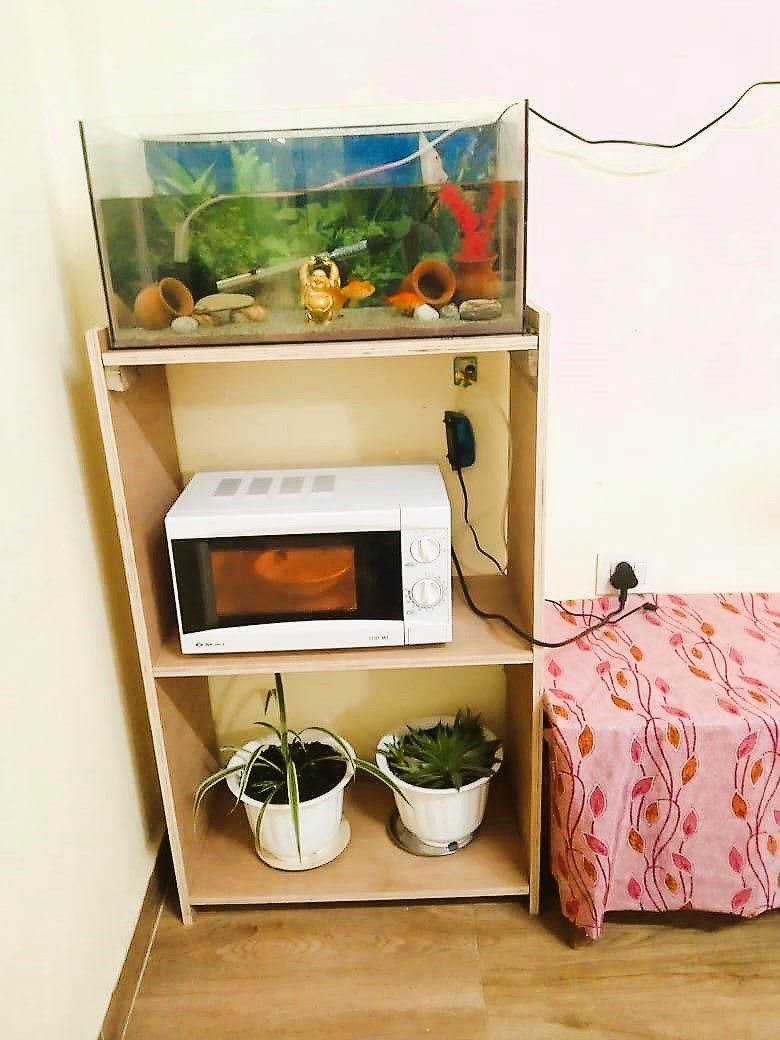
It is my passion to make things with hand like initially designing and the putting into a machine and get a product. This week I found it a good time to make shelf for my aquarium.
Assignment
-
Group assignment
- Do your lab’s safety training test runout, alignment, fixturing, speeds, feeds, materials, and tool paths for your machine
-
Individual assignment
- make (design+mill+assemble) something big (~meter-scale)
- extra credit: don’t use fasteners or glue
- extra credit: include curved surfaces
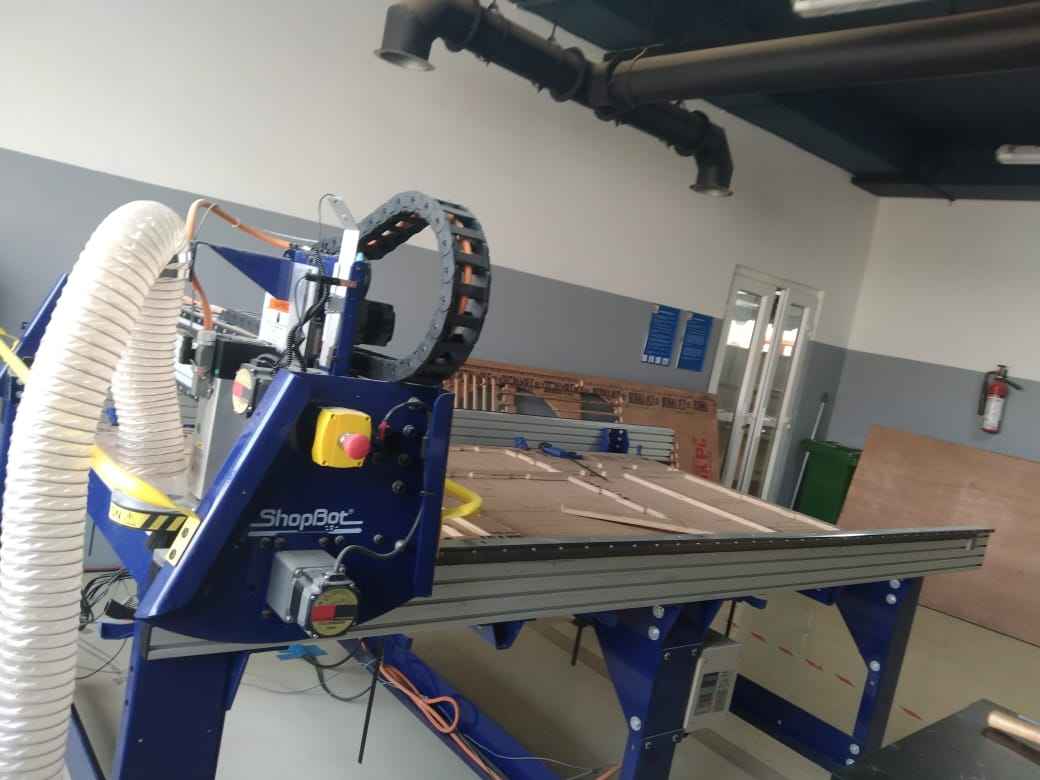
As a group assignment we all went to shopbot CNC router and studied the safety protocols and operating procedures. As part of contribution to group assignment I setup the machine for operation and made a file to generate a tool path in V-carve and cut it in shopbot. Detailed finding for the group assignment is linked here
Shopbot
In our lab we use shopbot Alpha 96x48. The software we use to generate tool path is V-carve and shopbot3 to run the machine.
Safety Measures
To use any machines it is very important to follow safety measures as listed below:
- Always wear safety shoes to prevent heavy material falling onto leg and causing injury.
- Wear safety hand gloves
- Wear ear muff as if produces noise
- Always wear face mask and eye glass as there will be dust particles flying in the air.
- Do not wear loss clothes and always tie your hair if its long.
- Do not leave the machine when in operation.
- Always keep the emergency switch in your hand during machine operation because if any faulty occurs it is convenient to put off the machine instantly.
- Do not go near bed or touch spindle when in operation.
- Always put on exhaust fan when running machine.
Designing a rack in Fusion360
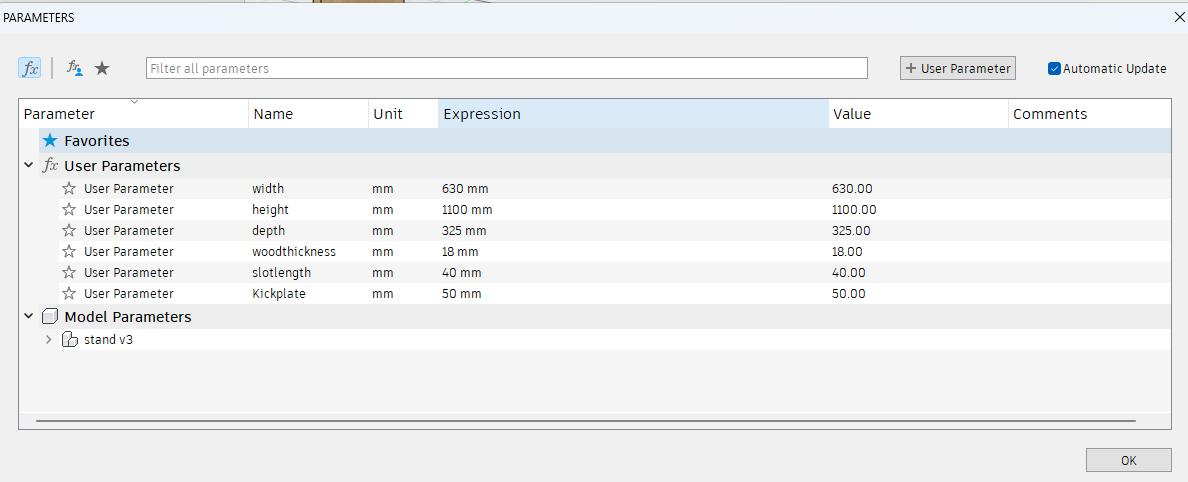
I used fusion 360 to design as I found it more easier and comfortable using different tools and also easier to use parametric design compared to FreeCad.
-
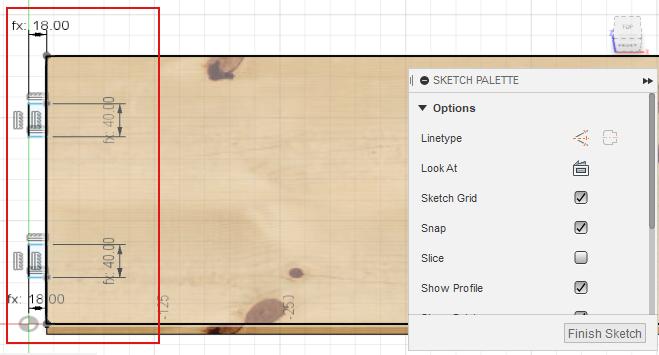
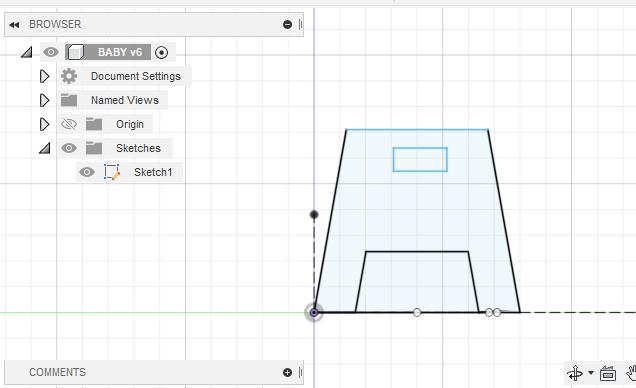
Firstly I made a rectangle with random dimensions. Then I set the parameters and the give the dimension to the rectangle.
-
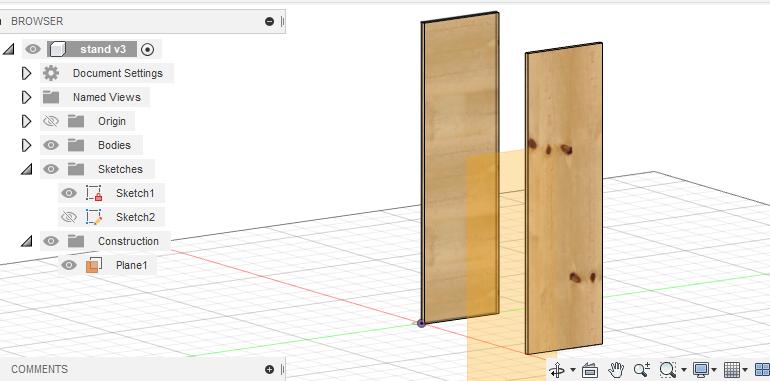
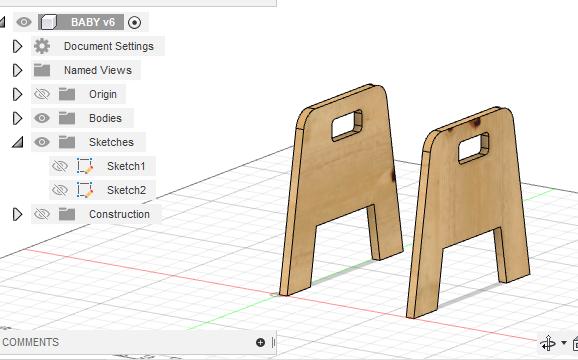
I extruded the sketch into body and did mirroring to get the other side of the stand.
-
Along with self making I made a tab to hold the stand at the side. To do this we can make in on one side and do mirroring.
-
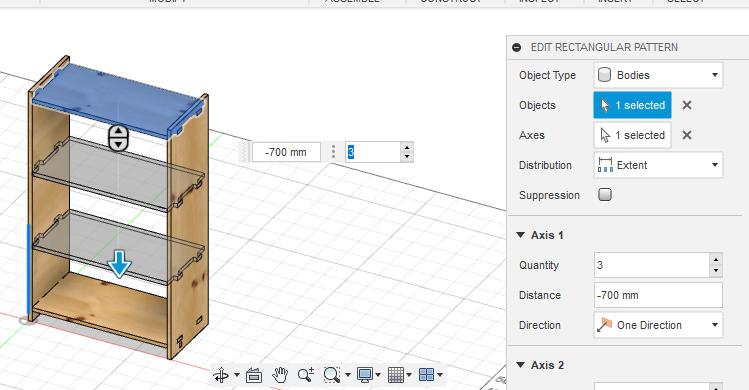
Then I made a three shelf. Firstly I made only top one and then did a rectangular pattern into four numbers.
-
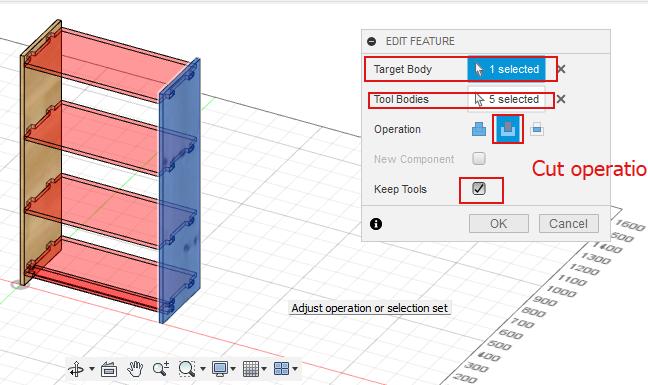
To create the slot where the tab goes in and hold the side I used a combine feature under modify drop down list. Choose the target body and then choose the tool body and select the operation as cut and tick on Keep Tools. I did the same on both side.
-
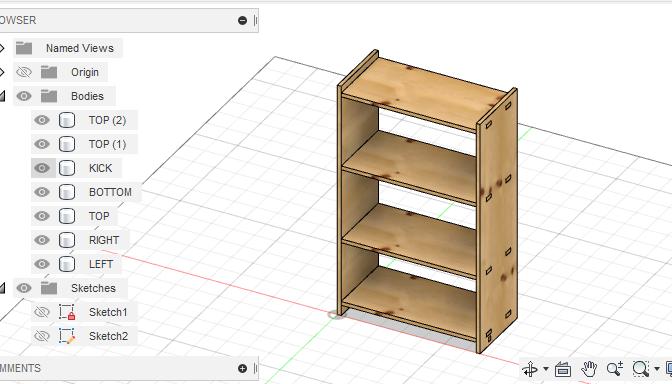
This is the initial whole look of my final rack in fusino360. I am excited to see how the actual product will be. Idid not use dog bone fillet in fusion360 as I feel comfortable using it in Vcarve.
-
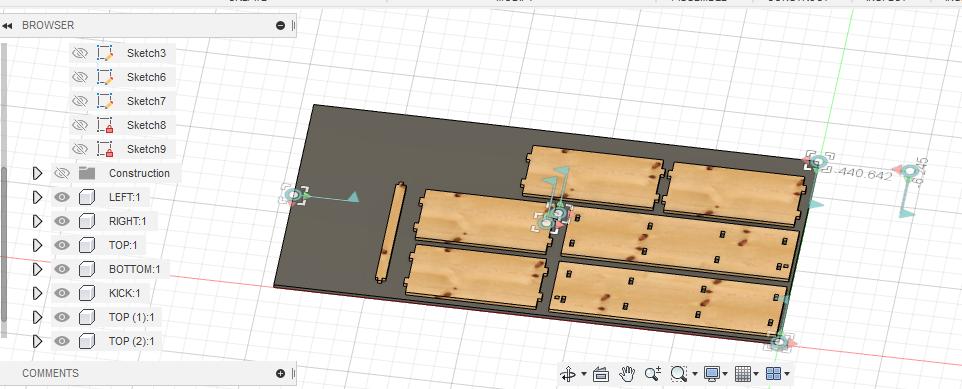
I want create component from the body so that I can lay it on the stock and export as one dxf file. Right click on the each body can click on create component from body. I renamed each component as top , bottom left right and so on. I made a stock of 8feet x 4feet to lay the parts on it. I consider this step to be important as we can estimate whether our design fits in or not.

-
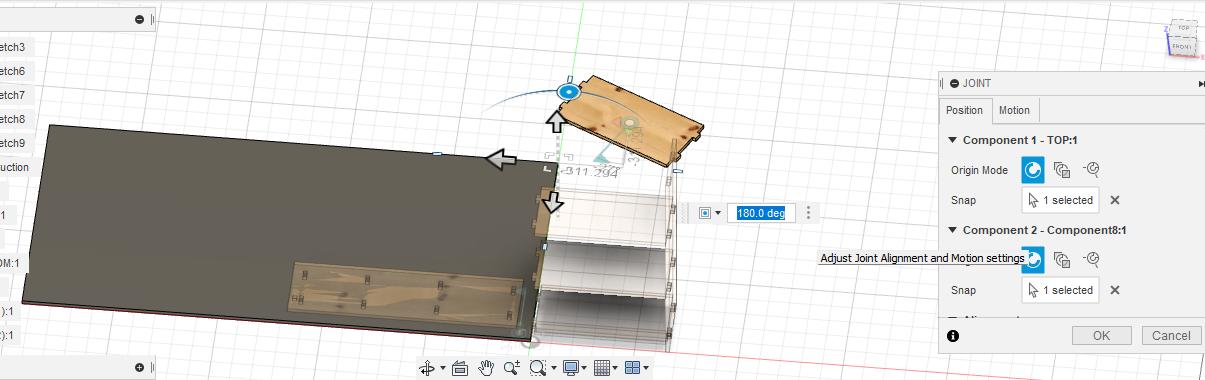
I created component for the stock as well and ground it by right clicking on it and click on ground option. To lay the parts on the stock I selected joint under Assemble option.
-
I set the motion to planer and layed the bodies one by one.
-
I did a projection from the bodies and exported the sketches by right clicking on the sketch and select save as dxf.

Working in shopbot
-
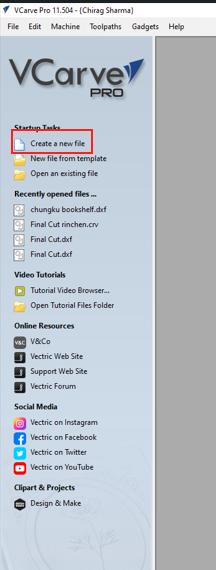
Open the software called VcarvePro and created a new file.
-
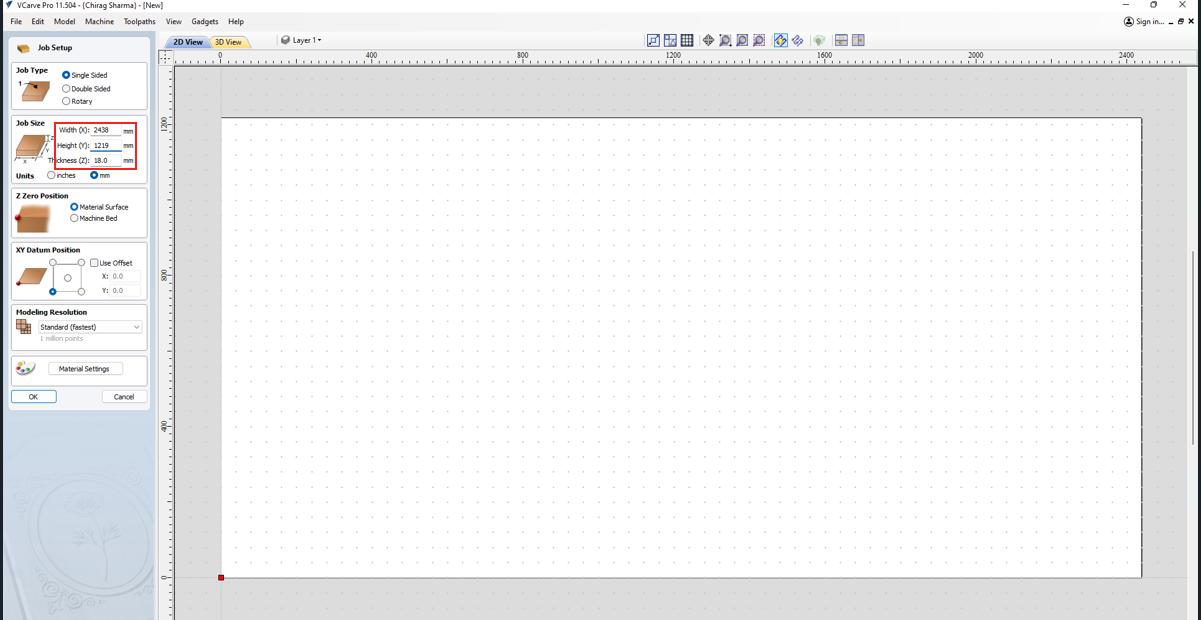
In the new page enter the size of the stock/job size and choose the unit properly. In my case I used 8 feet x 4 feet size stock I converted into mm.
-
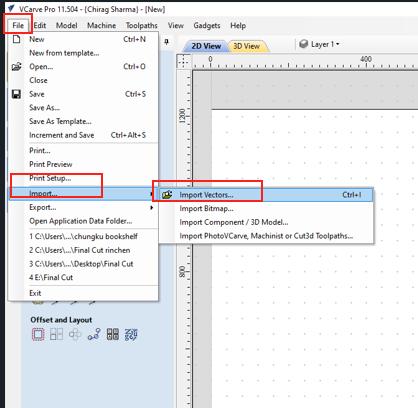
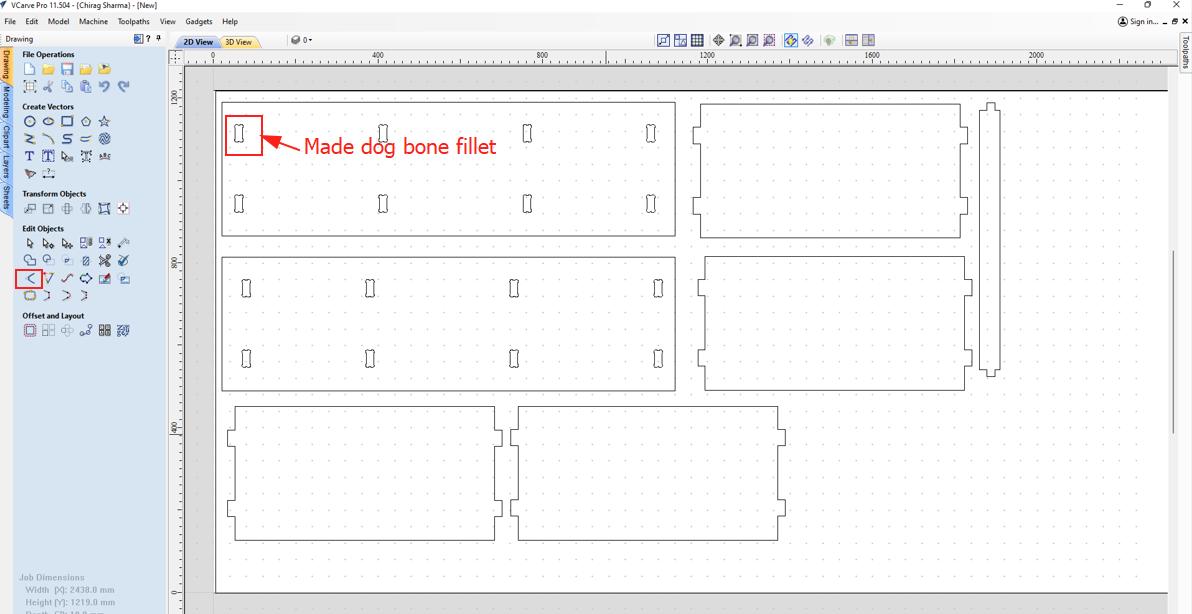
To import my design I went to file >> Import >> Import vector file . The design gets displayed on the stock we created as shown below.
-
Since I didn’t make a dog bone fillet in fusion360 I need to make in Vcare. It is important to make dog bone fillet because it allows us to fit the tab easily without sanding or hammering.
-
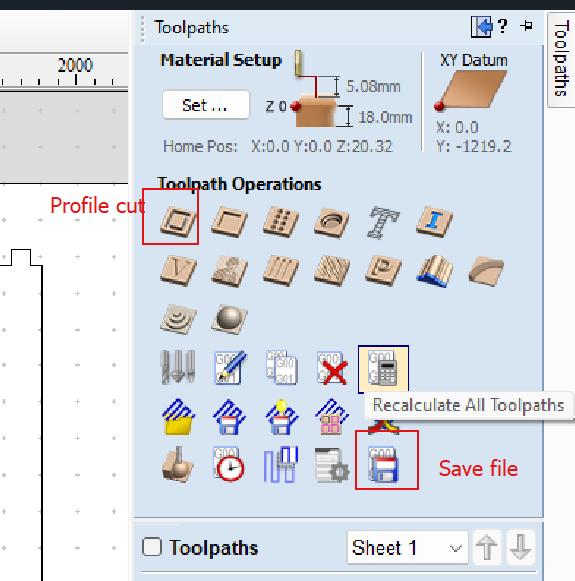
I selected only the slot cut first to generate tool path. I wanted to do it separately because I want to cut it inside of the line. I selected profile cut option the one marked below.
-
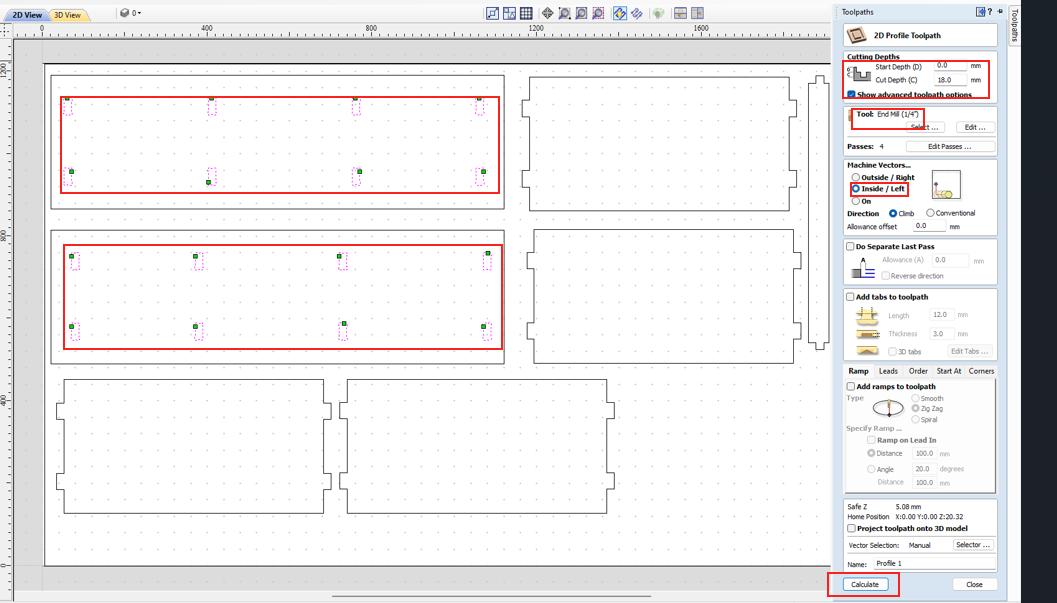
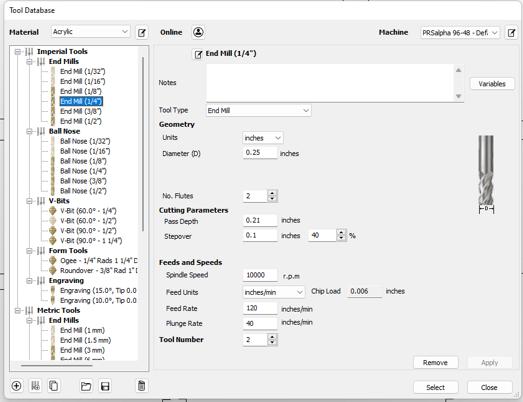
I selected end mill tool of 1/4 inch.
-
Similarly to slot cut I selected all the edge cut lines and selected the machine vector to be outside. To calculate tool path I clicked on calculate.
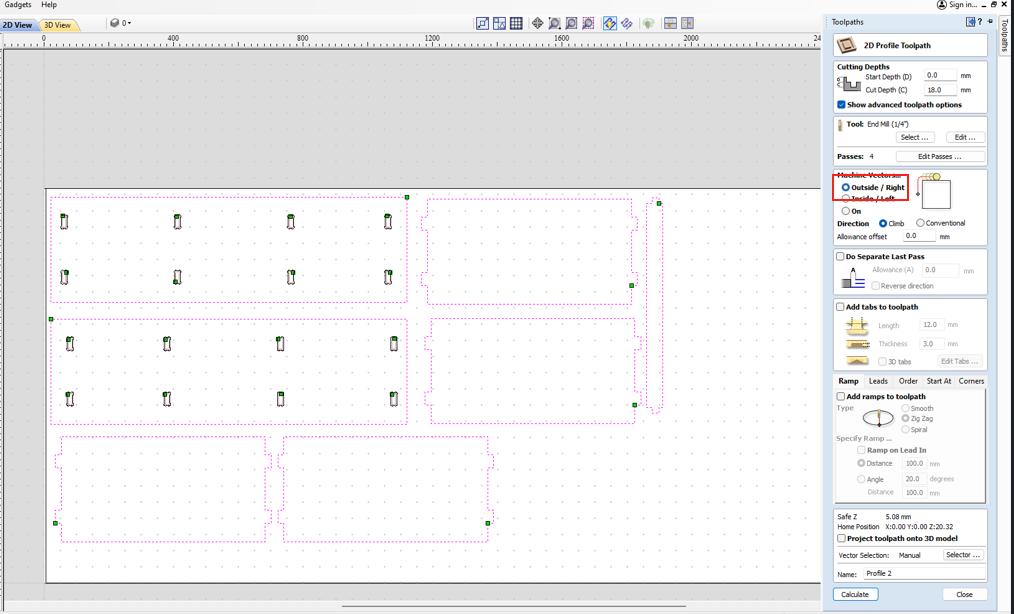
-
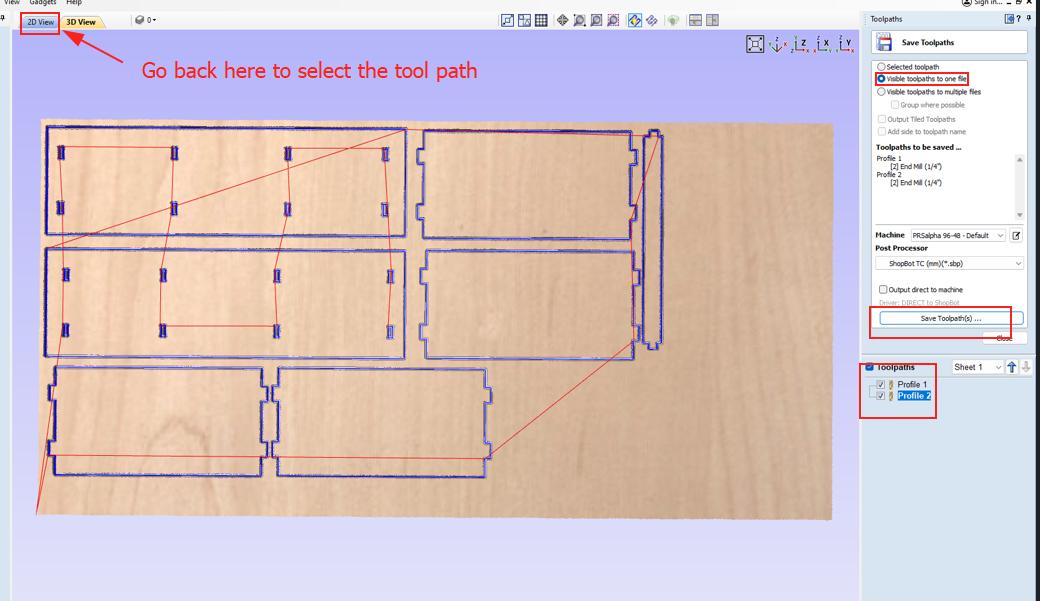
We can view the tool path and the cut portion in 3D. To generate a new tool go back to 2D view. Click on the Save option to save the file. To save multiple tool path select on Visible tool path on one file.
Spindle Speed setting
The spindle speed and feed rate for a ShopBot CNC router depends on different factors as below: - Type of material being used - The desired cutting depth and speed. And also hard materials(wood of different types like hardwood or plyboard) require slower spindle speeds while softer materials like wax we can use faster spindle speeds. For milling we are provided the plywood of 28mm which is soft and I was used 1/4” Upcut Carbide End Mill. For this the spindle speed is RPM 18000 and the feed rate is 4 inches per second
Shopbot3 controller
To start cutting we need to run software called shopbot3. Before running software switch ON the machine from the switch box. Otherwise it will keep on locating tool.
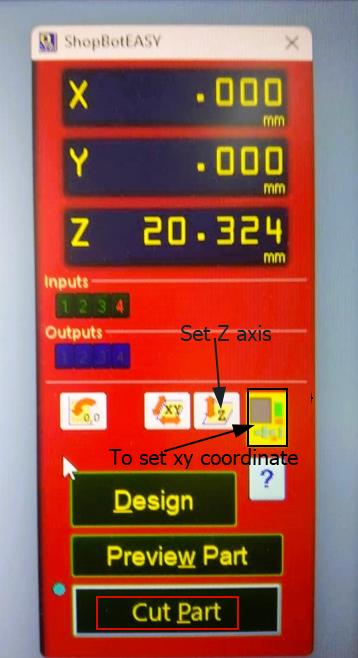
Set XY coordinate by moving the spindle to the desired position followed by setting the Z coordinate.
It allows us to set the Z axis and move the XY coordinate. Basically it has four input functions as below:
- Z zero plate
- X limit switch
- Y limit switch
-
Z limit switch and inverse
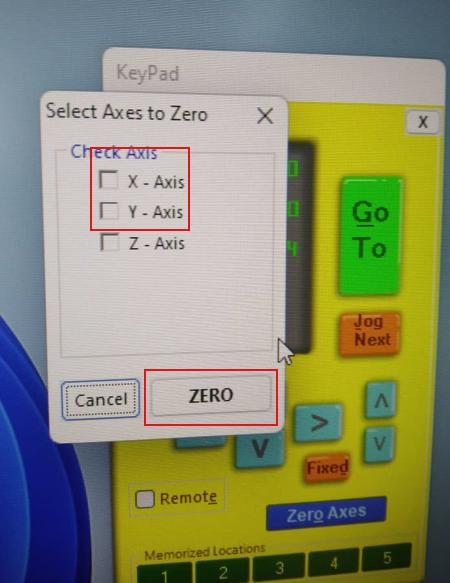
By clicking on the yellow dialog box we can se the XY coordinate. In window pop up and click on blue button and tick XY and then click ZERO.
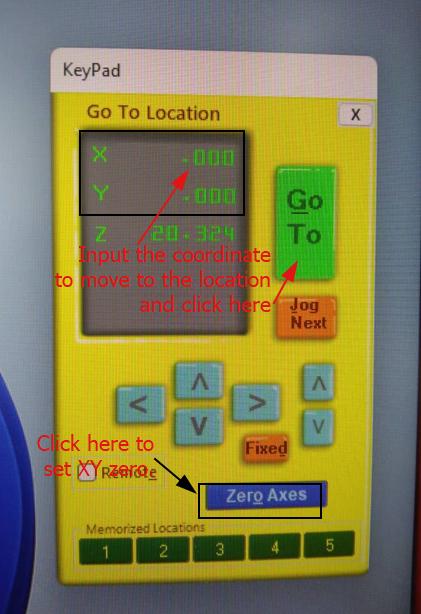
In the go to location if we enter the desired coordinate and click on Go To button the spindle moves to the desired location. Never put zero axis to 0 and move as it is going to break the bit.
When clicking on the Z axis setting button the message pop up to asking to clip the crocodile clip on the body and to keep the aluminum plate on th job piece. After doing this just click OK. The Spindle drops twice on the aluminum plate to calibrate and set Z height. Finally click OK. Every time we change job piece reset Z height as the thickness differs.
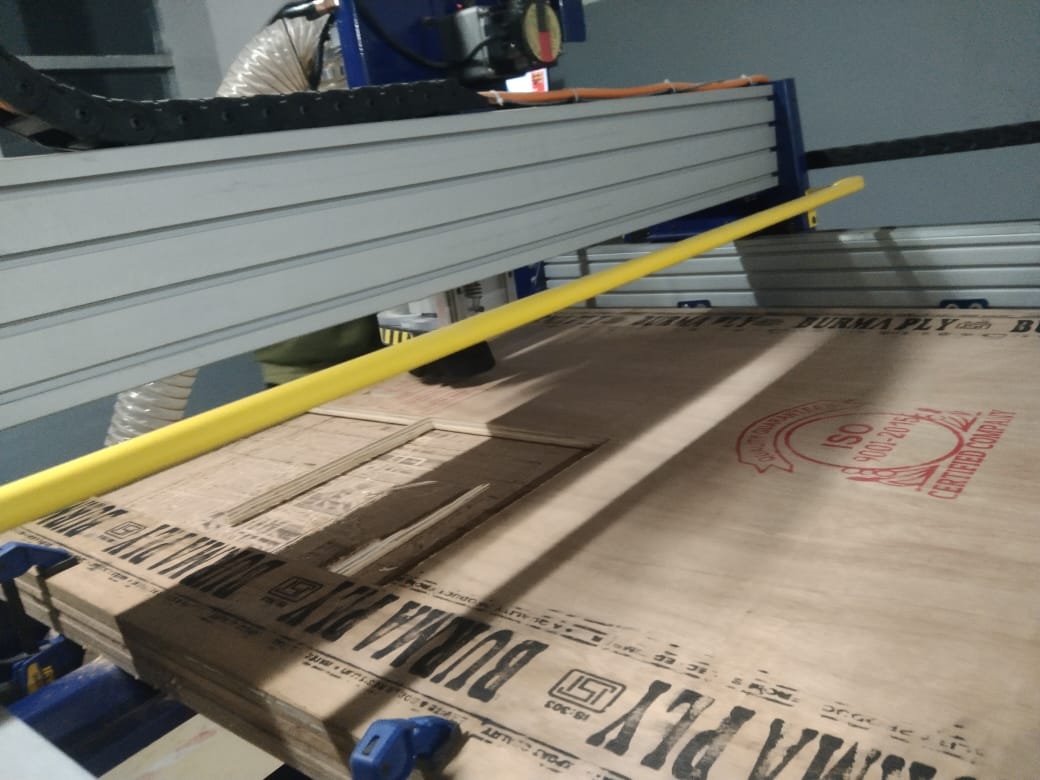
After setting coordinates click on Cut Part and select the file and click on start. Before clicking to start the machine it is important to read the message pop up. It says us to start the spindle from the remote then only machine moves.This is important as it saves from end mill breakage.
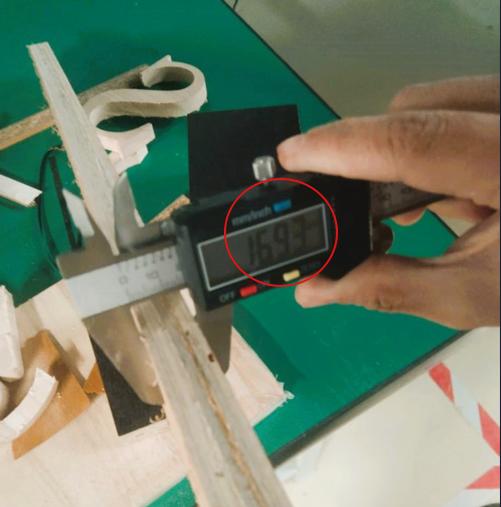
I wasted two pieces of wood as the tab got loss in the slot. The thickness of the plywood was different in different portion. So i went back to 2D fine and edited the dog bone fillet to 5mm.
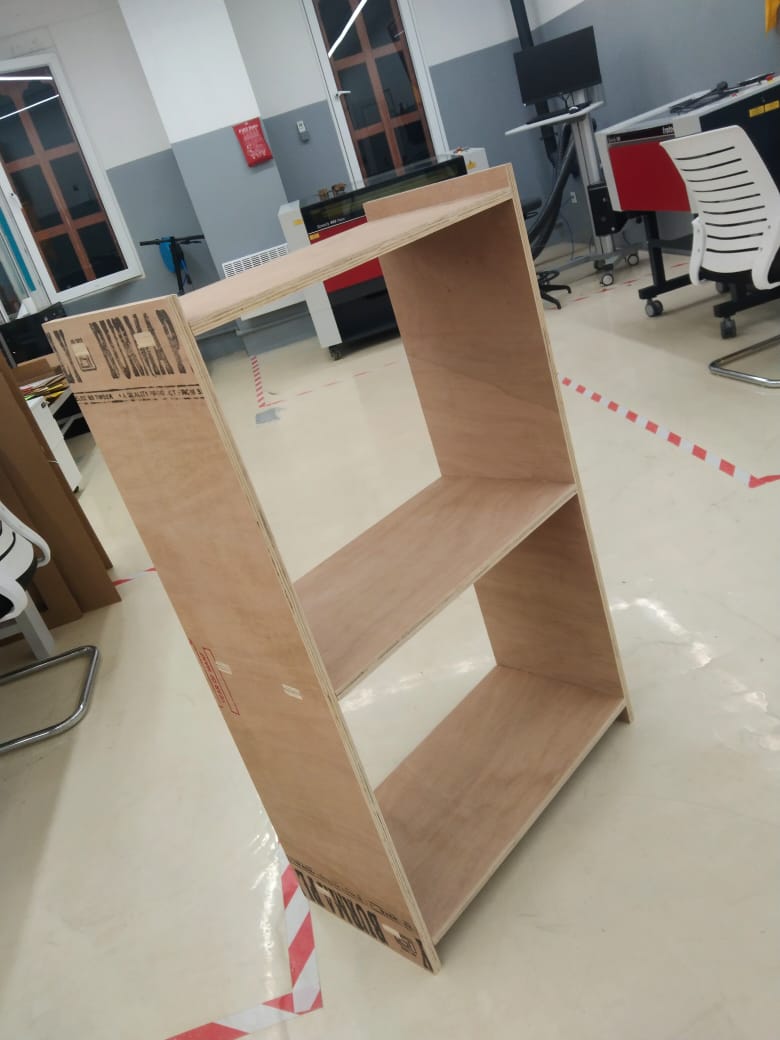
This is the final assembled aquarium stand.
Reaching back to home I gave a extra support from the below as the aquarium is heavy and if in case the tab breaks.
In the extra stock left I made a chair for my baby girl as I got inspired from the link.
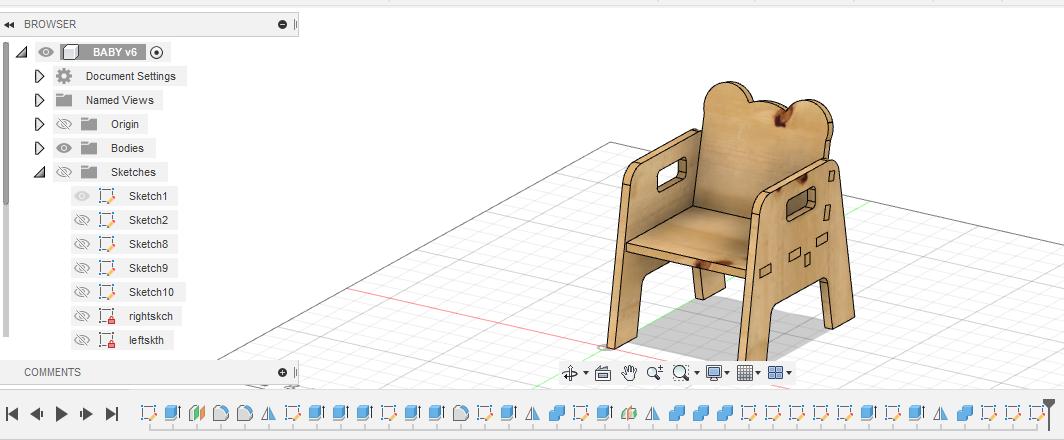
Designing chair
I did not use the parametric design for this. At edges to give a curve edges I decided to 100 degree bend.
I extruded one side and made fillet on top edge and did a mirroring to make the other side.
To make a teddy’s head I selected the sketch plan for the backside and used circle with 100mm diameter for side ways and 300mm for middle. Then I extruded the part.
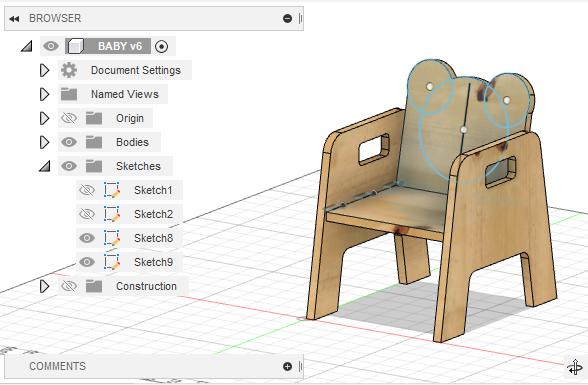
This the the initial look of the chair in fusion360. I did a projection for each body and exported a file as dxf format.
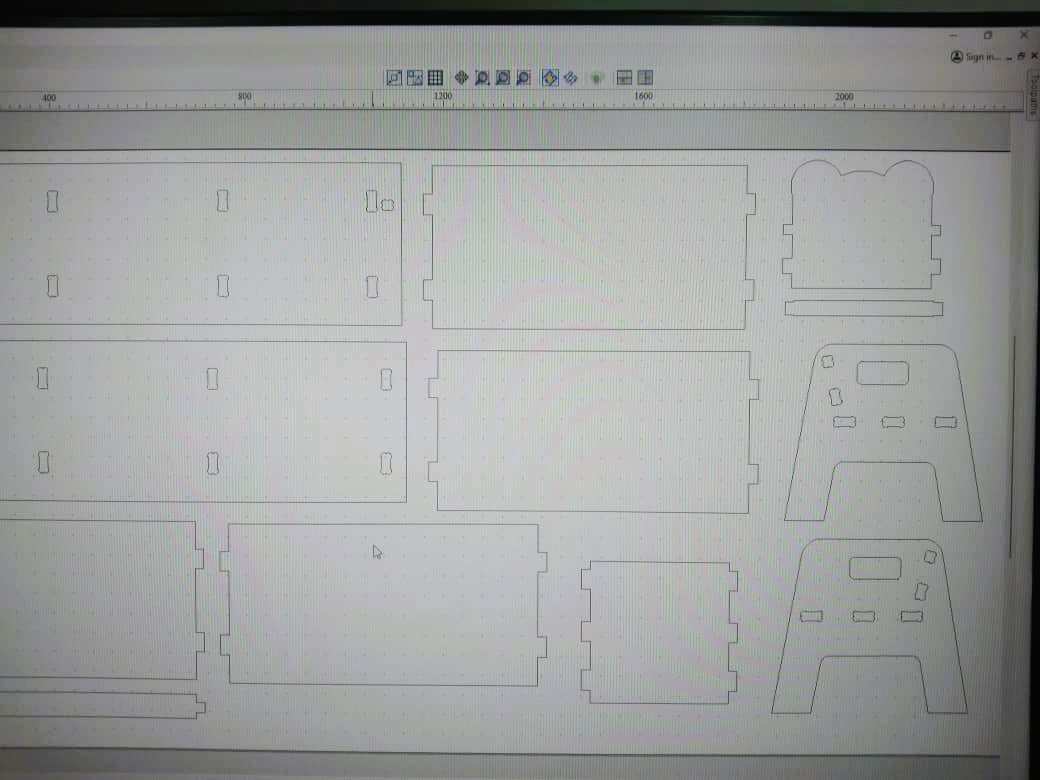
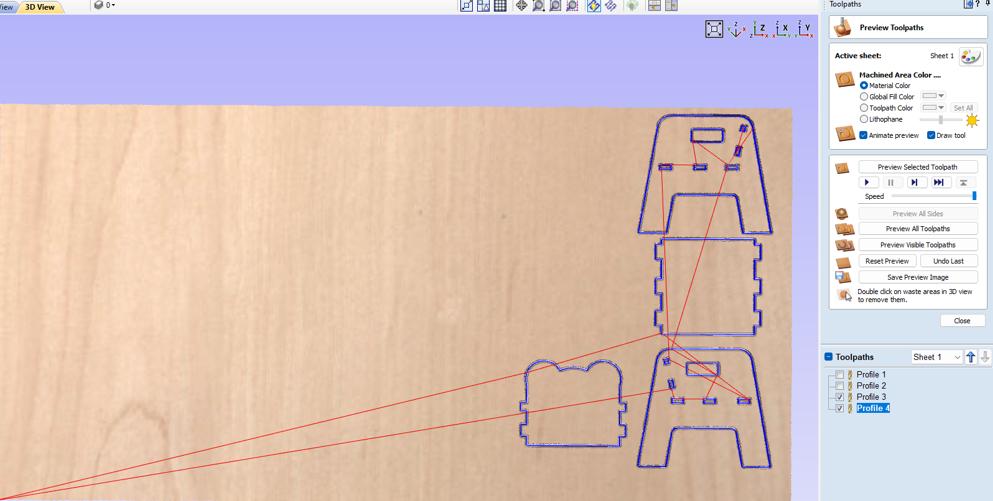
Then I imported the file in VcarvePro and generated a tool path. I used the same coordinate and placed the my vector file in empty space.
This is the final look of the chair.
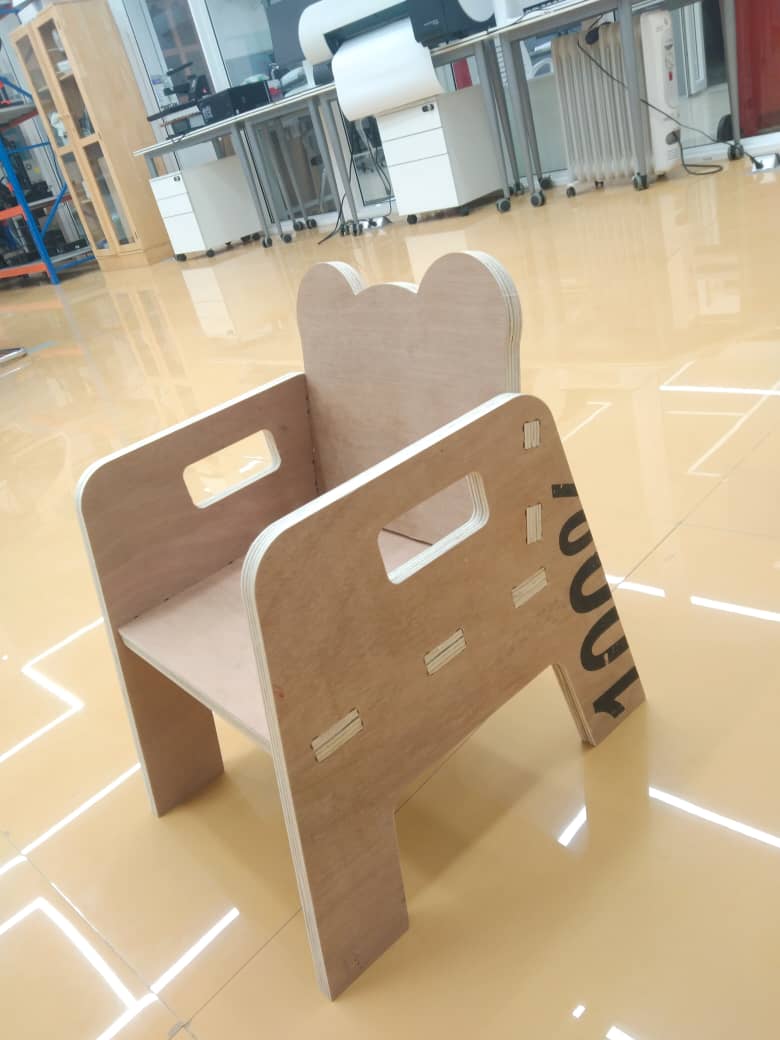
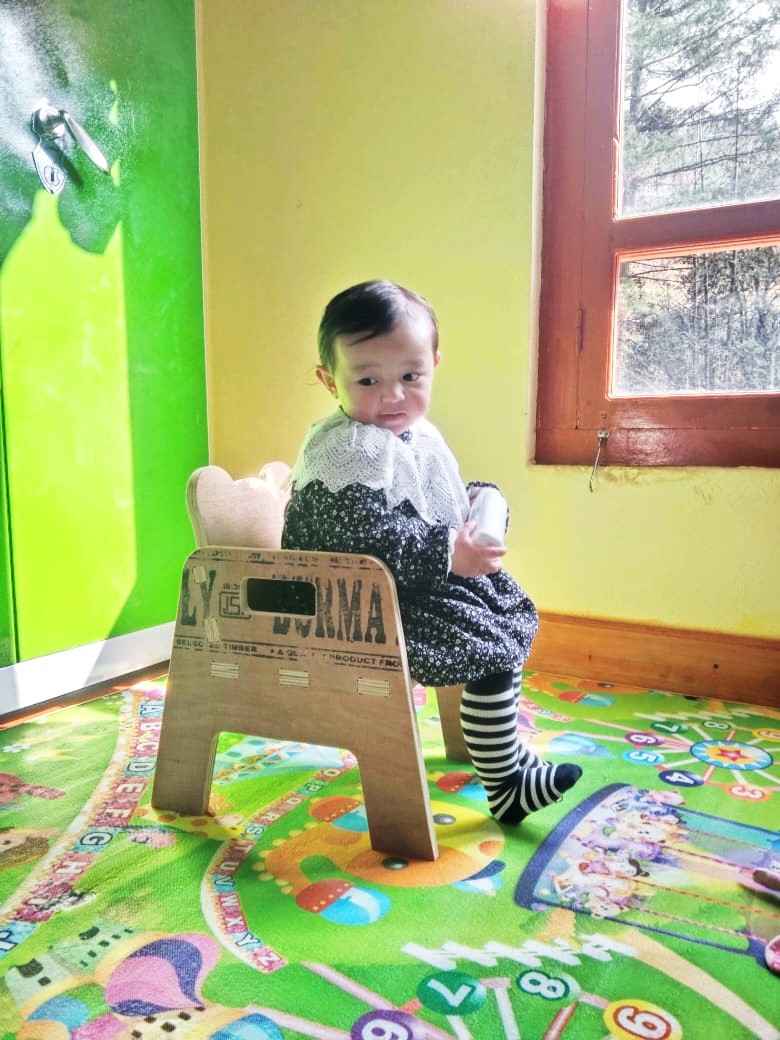 Baby using the chair effectively on her playground.
Design file for this week is here