Week 03. Computer Controlled Cutting
Computer-controlled cutting is a cutting process of engraving or cutting on various materials using computer-controlled machines.
Out of many other computer controlled machine we have in our lab in the third week of fabacademy we learned how to use vinyl cutter and laser cutter specifically.
Assignment of the week:
-
Group assignment:
-
To characterize the laser cutter’s focus, power, speed, rate, kerf and joints clearance.
-
Individual assignment:
-
To make a sticker with vinyl sticker
- To design a parametric press fit kit
Characterizing laser cutter in the lab
For this part of the assignment the lasercutter’s focus, power, speed, rate, kerf, joint clearance had to be characterized. The Trotec has a very cool feature wherein you can color code certain colors to have certain parameters linked to it.
To play around with this, in the JobCenter go to settings -> Material template settings. Here you can see all the colors and you assign different functions and parameters to each of the colors.
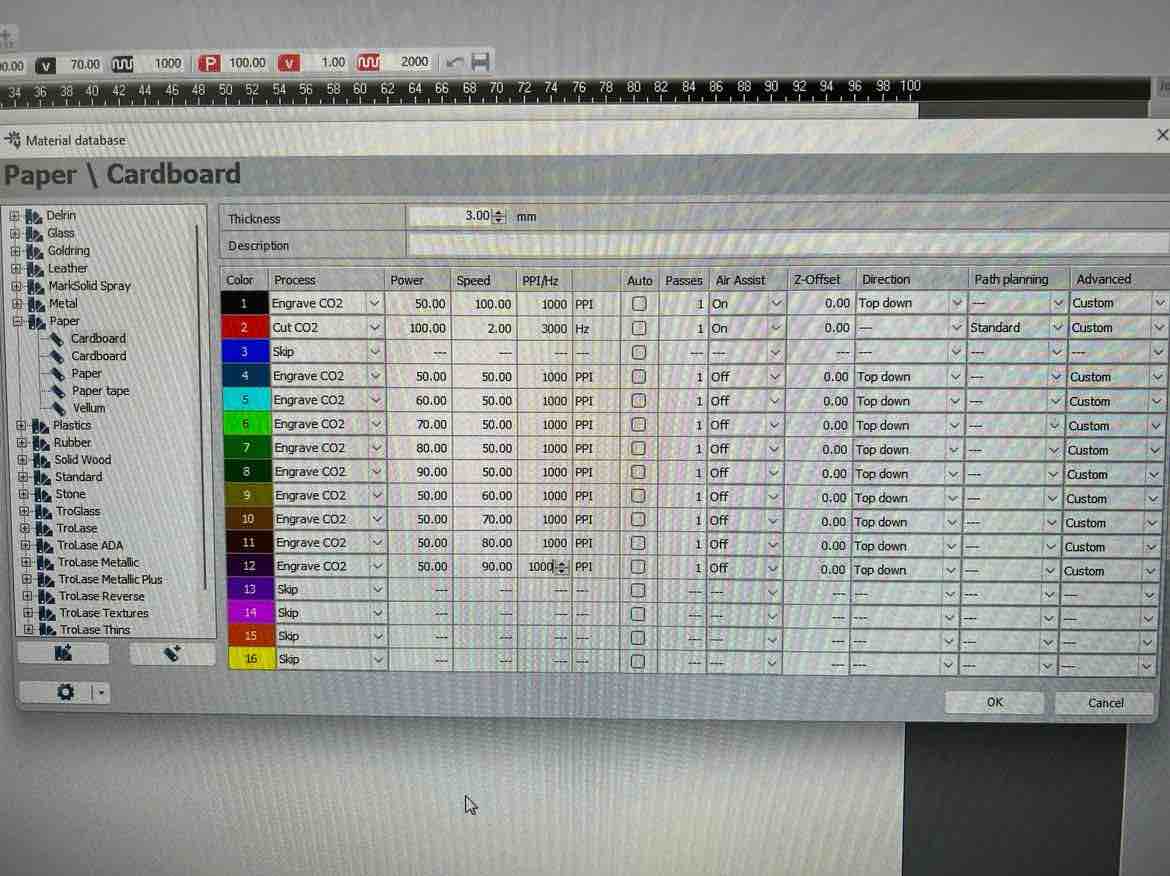
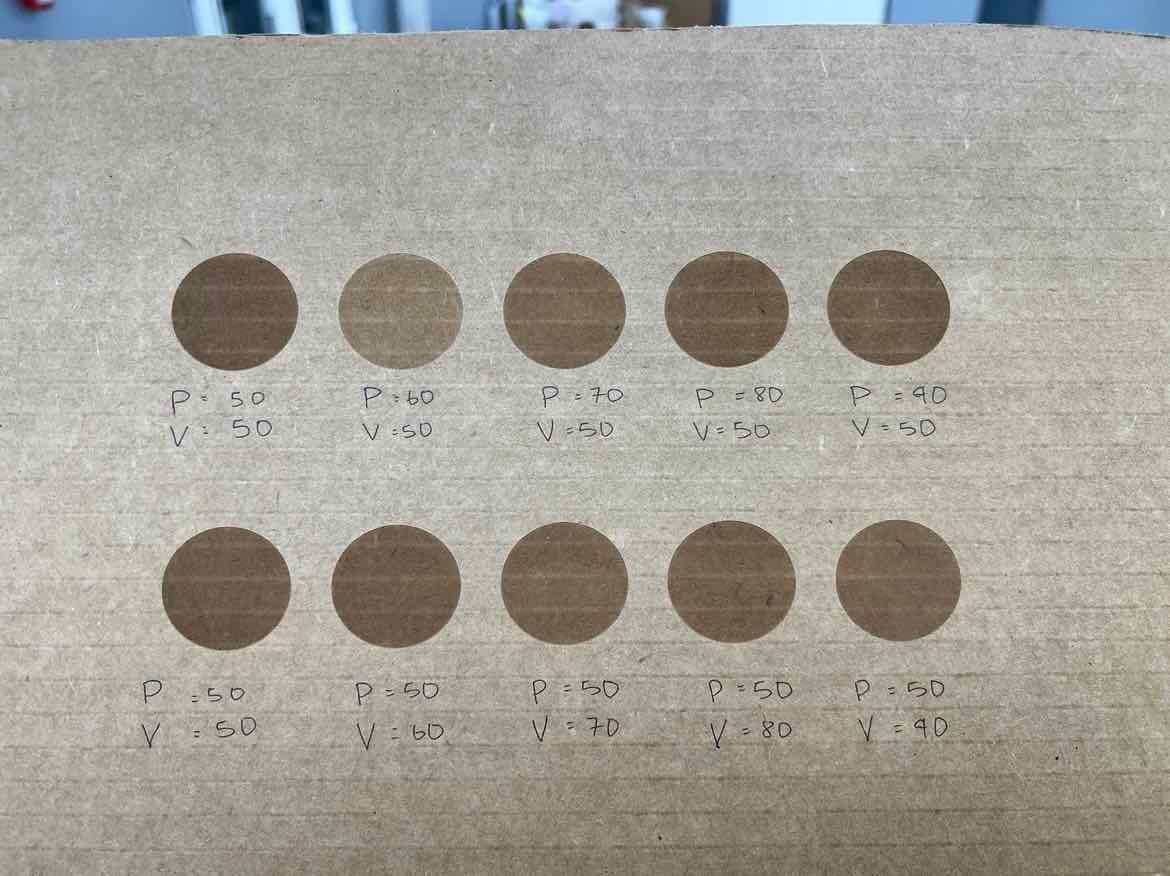
To characterize the laser, the colors were coded to have different powers and velocities in order (frequency constant at 1000) to conduct a comparison study and to create a coupon for the lab.
-
p = power
-
v = velocity/speed
-
~ (squigly line) = frequency/ pulse of the laser
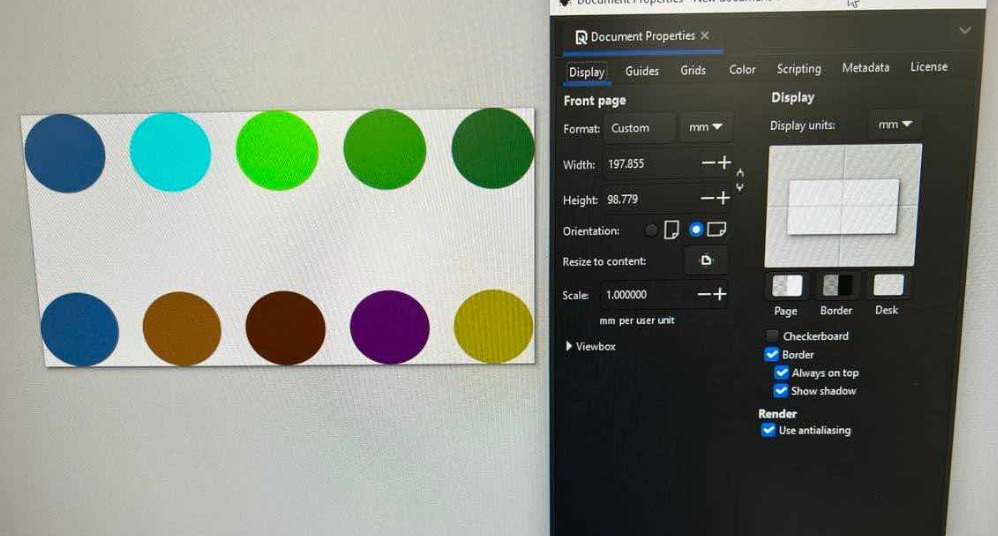
Using Inkscape circles were created with different colour fill as per the colour codding in JobController.
Upon the completion of the job, you can see the different affects of the velocities and powers on the engraving. More power makes it darker. Higher velocites with same power dosen’t engrave as much.
Link to the group assignment is here
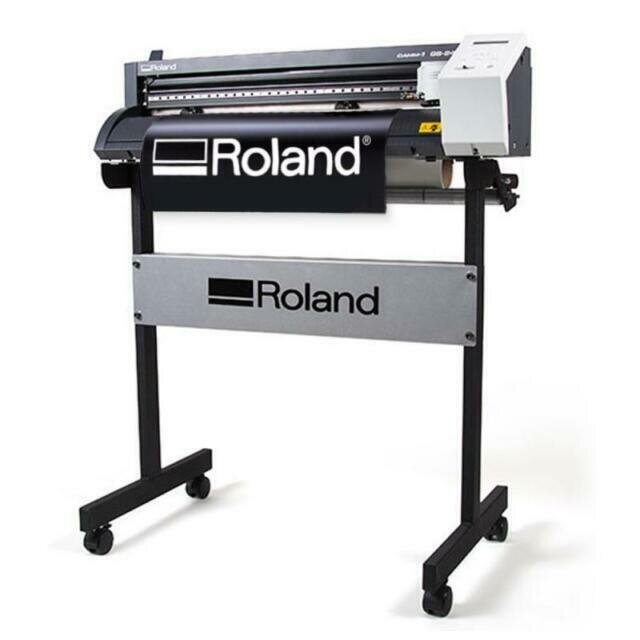
Vinyl cutter: Roland GS-24 CAMM-1
A vinyl cutter is a type of computer-controlled machine that is used to cut vinyl material into precise shapes. It works by using a sharp blade to cut the vinyl material along a path that is specified by a computer program.
Setting up Vinyl cutter
Before performing the vinyl cutting I checked whether the machine is connected to the computer through USB cable.
I used Inkscape to convert the raster PNG image to Vector image. In the prevIous week we are already aware of raster and vector image and its usage.
Firstly I loaded the vinyl onto the machine and adjusted and aligned the rollers with the edges of the vinyl and the white sticker as shown below in image.

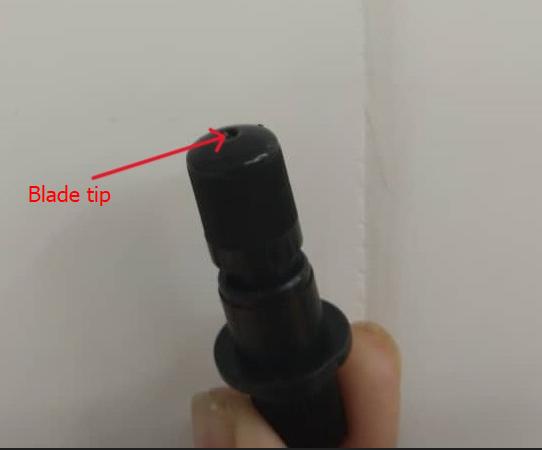
The blade is usually covered by the tool holder. Adjust the blade depth just enough to to feel the tip of the blade with the figer tip
Some of the command keys you can find of vinyl cutter
- Test:To perform a small test cut on the vinyl.
- Origin:It is used to set the starting point for cutting. When pressing the ORIGIN button, the cutter head moves to the specified origin point.
- Pause:It pause the cutting process
- Force:It is used to adjust the amount of pressure that the cutter applies to the vinyl when cutting.If the blade is new we keep it 70gf.
- Enter: It is used to confirm and save changes to settings on the machine.
- Pen force: It allows you to adjust the amount of force that the cutter applies to the vinyl when cutting.
- Power on anf off : To turn ON and OFF the machine.
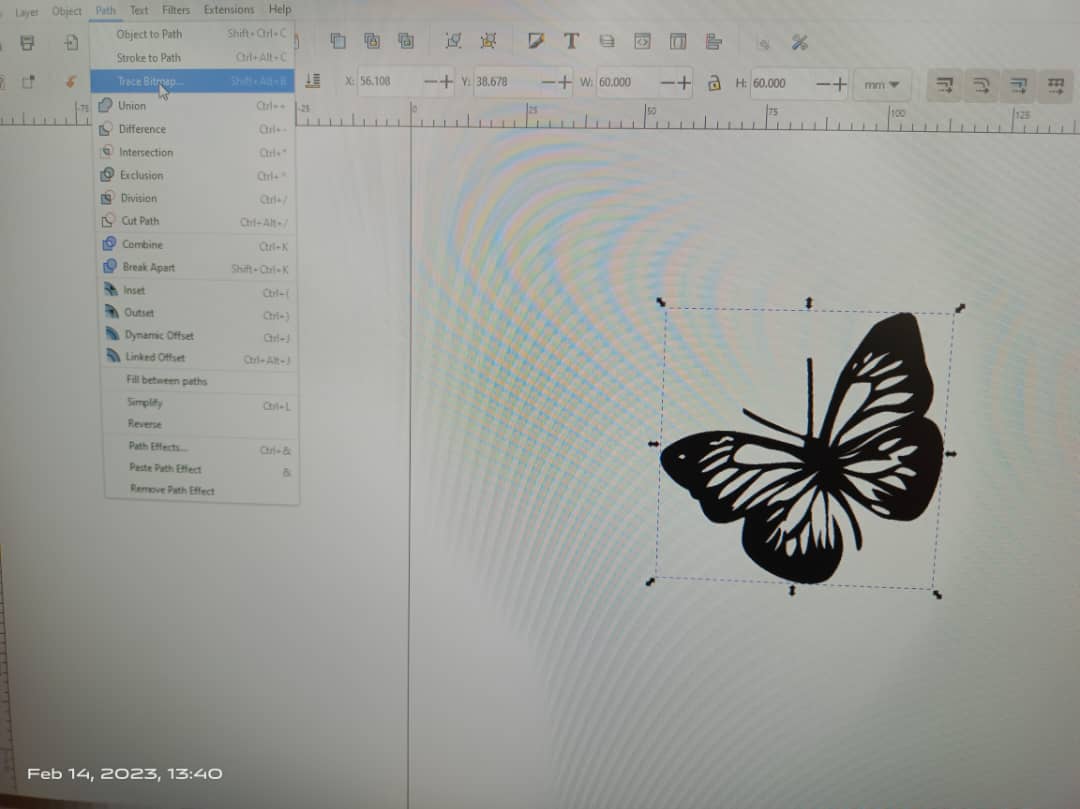
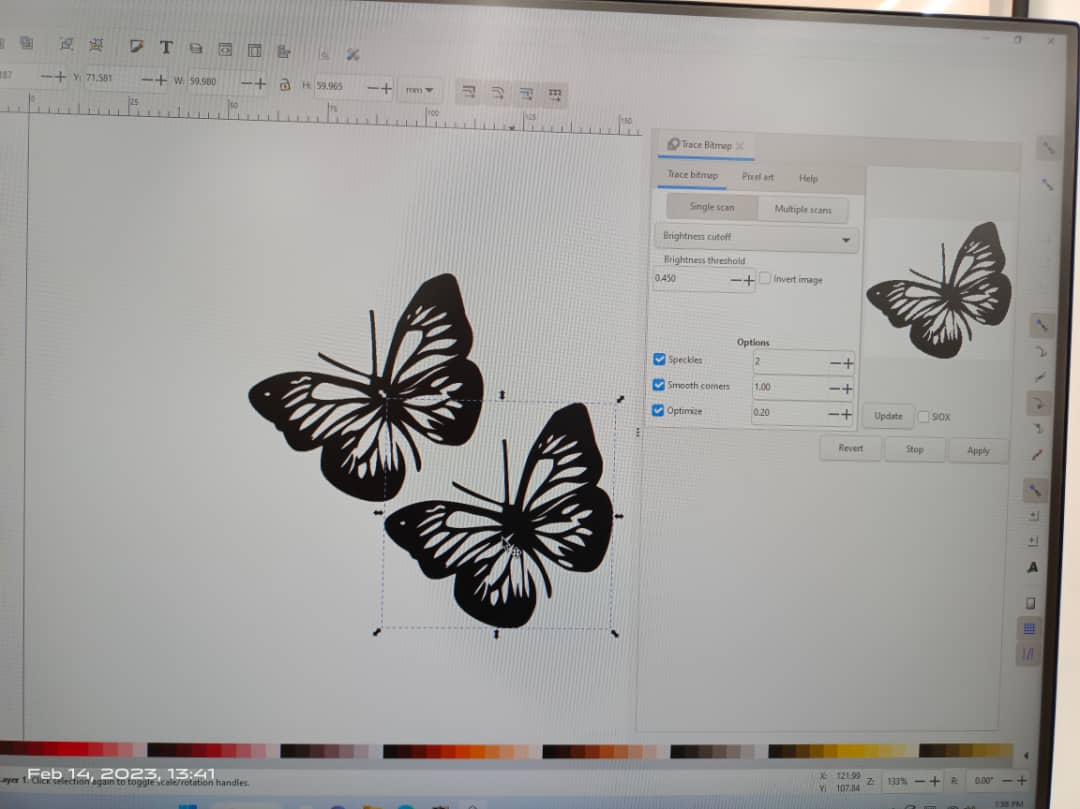
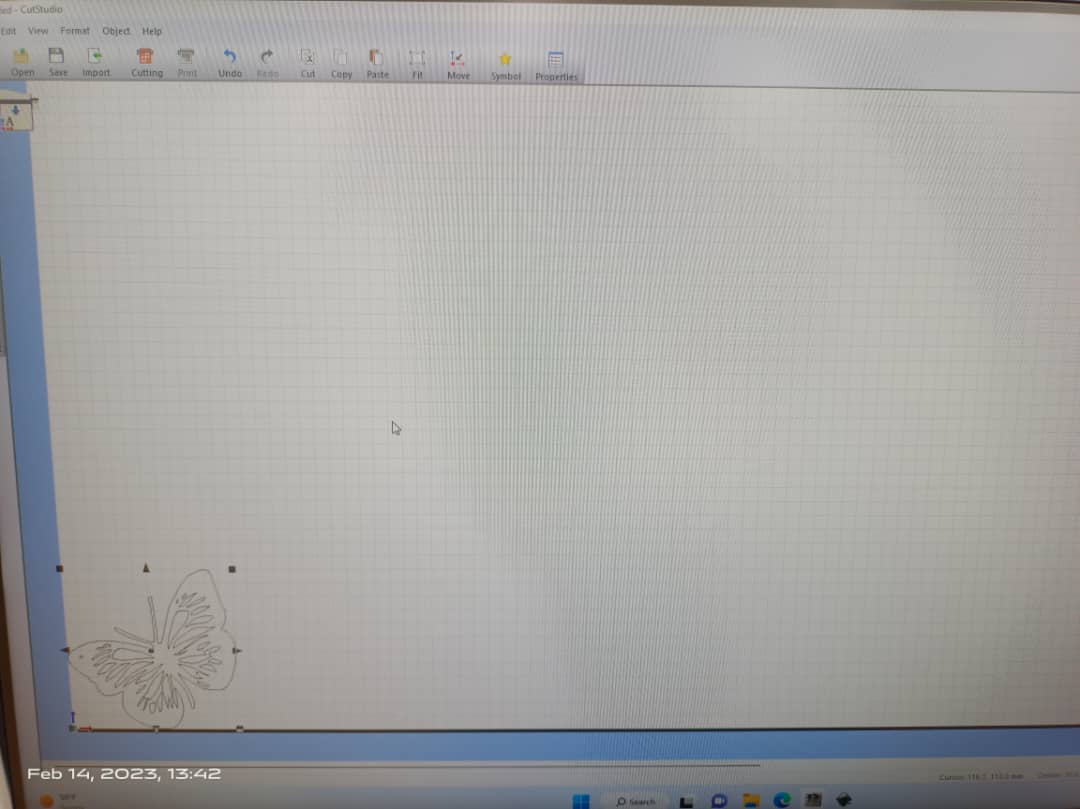
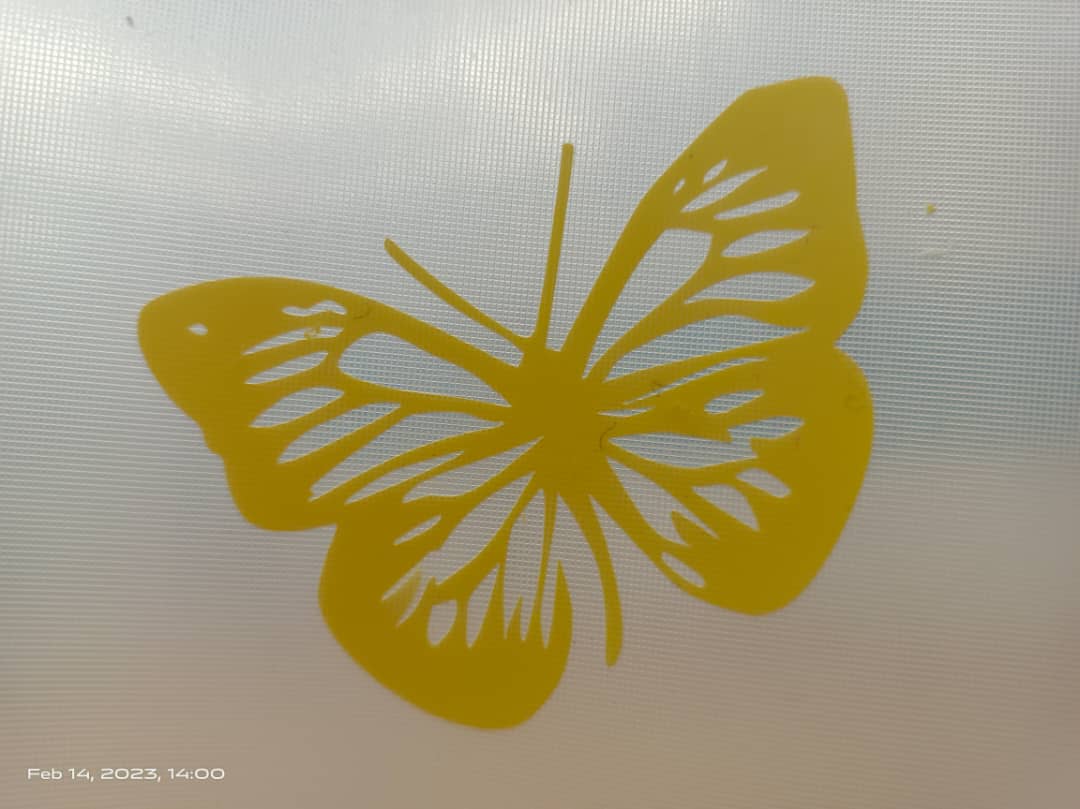
As a assignment of this week I want to cut a sticker for my laptop. - Fistly I to converted the raster file to vector file tracing bithmap. In inkscape under path drop down list go to Trace bithmap. At the same time adjust the side of the image (width and height as per requirement).
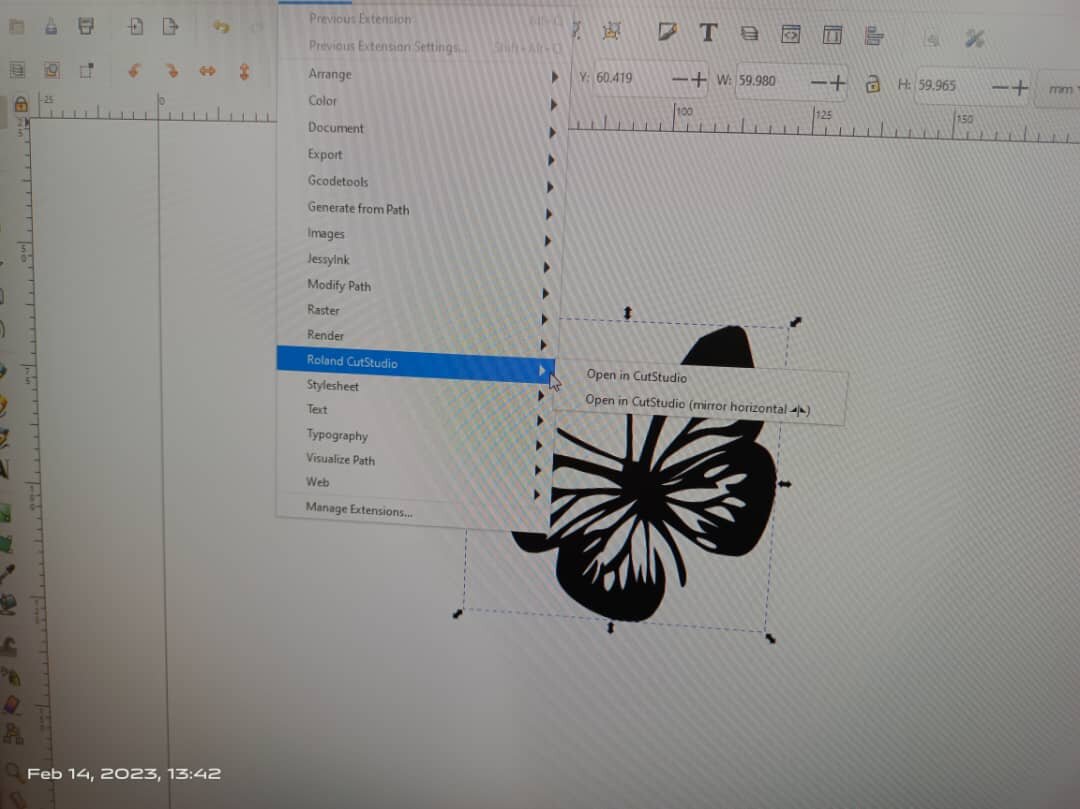
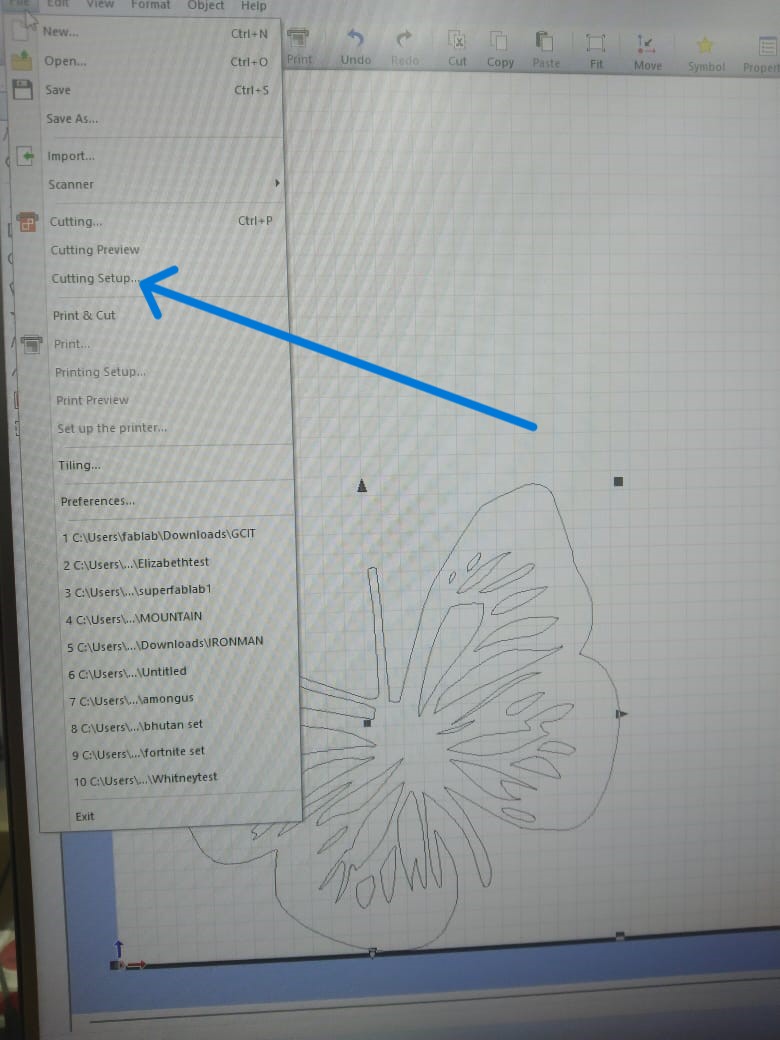
- Go to Extension drop down list and select Roland cut studio and select Open in Cut Studio.
- Go to file menu and select Cutting Setup.
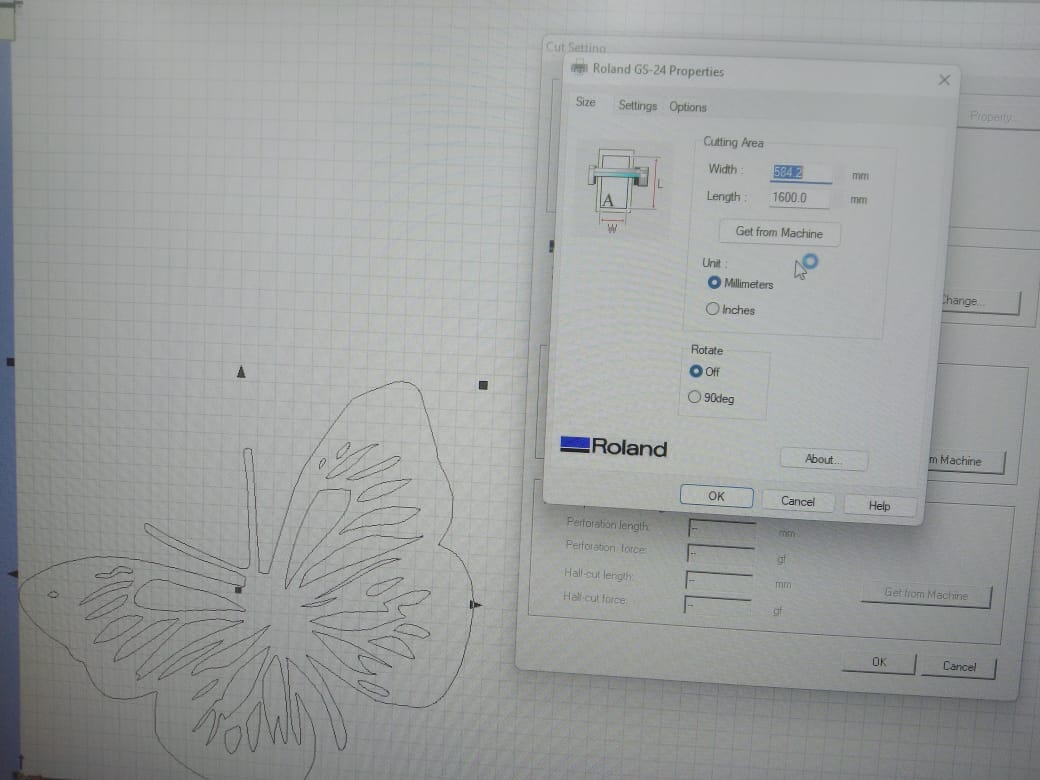
- On the window pop up click on Change option and click on Get from machine and click OK.The cutting starts.

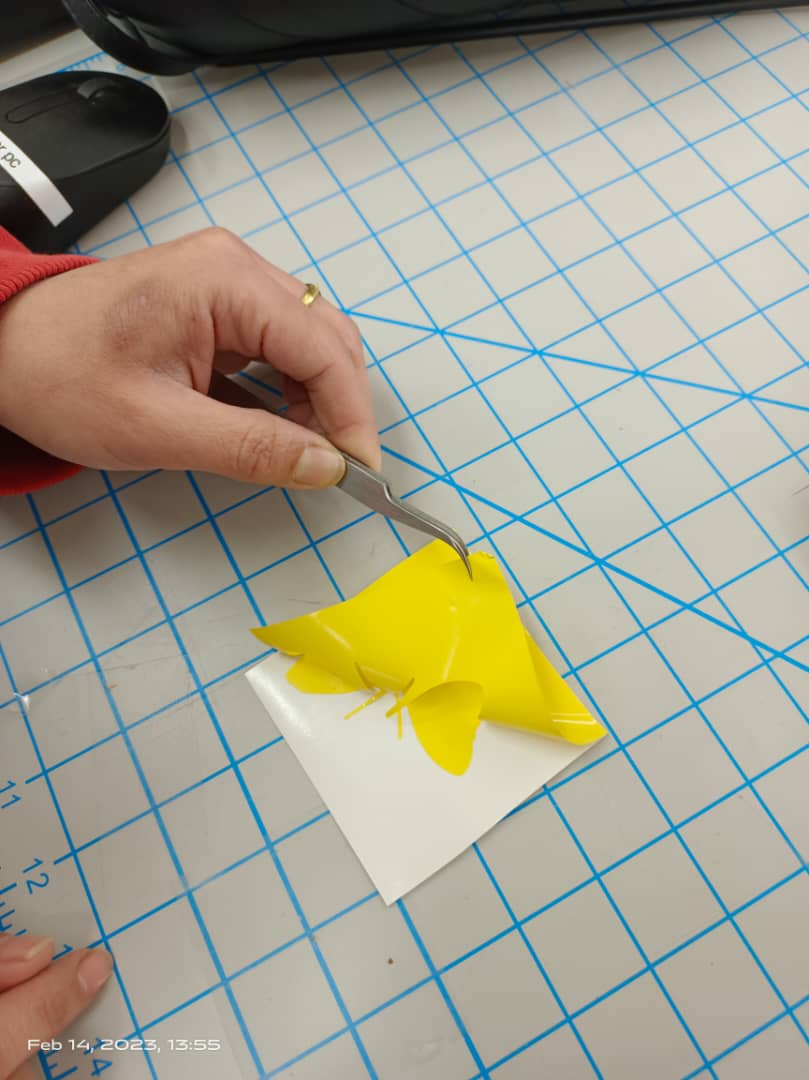
- Turn off the machine and take out vinyl. To remove the unwanted portion of the sticker cut we need a tweezer.
- Transfer the sticker to the white transfer tap and press it with squeezy.
- Finally past the tap along with the sticker on the laptop and remove the tap carefully.
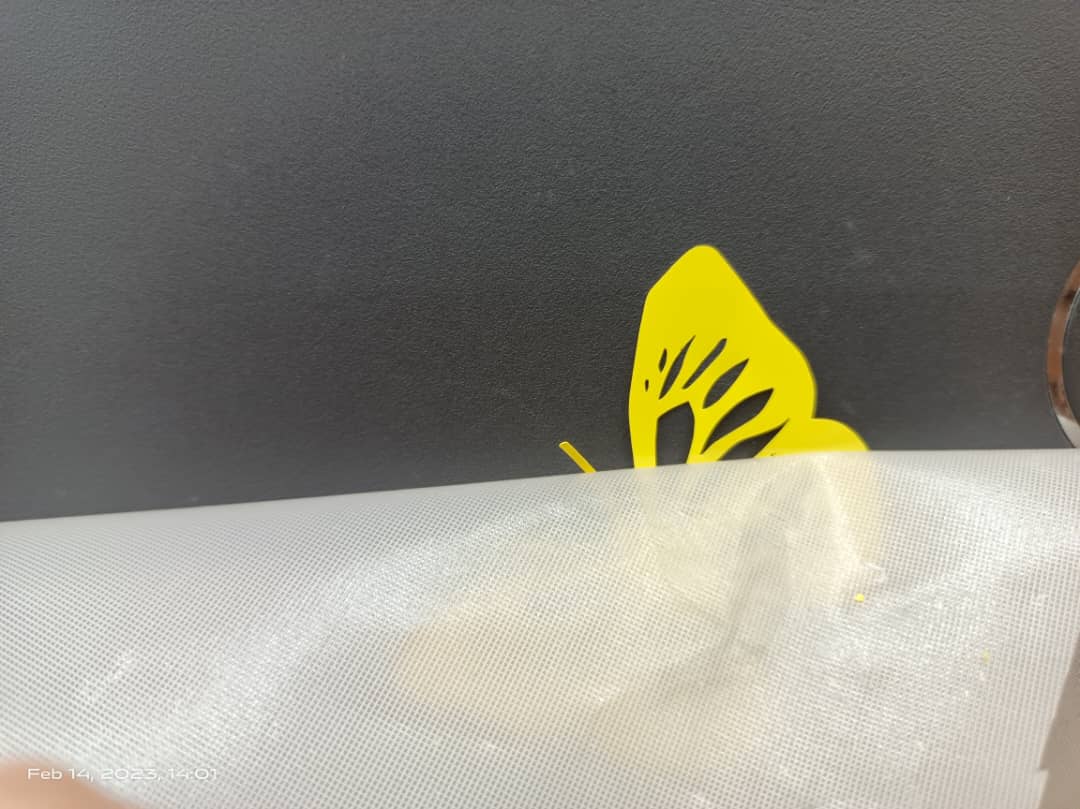
- Finally I got the beautiful sticker on my laptop.

Laser Cutter
A laser cutter machine is a computer-controlled machine that cuts or engraves on various materials using a high-powered laser beam. In this week along with laser cutter operation we are also taught to clean the lens and the mirror as it is important component of the machine through which the laser is directed.
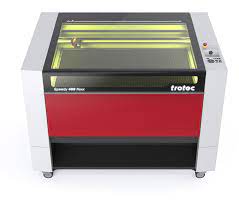
Laser Cutter- Trotec Speedy 400 flexx (CO2, Fiber)
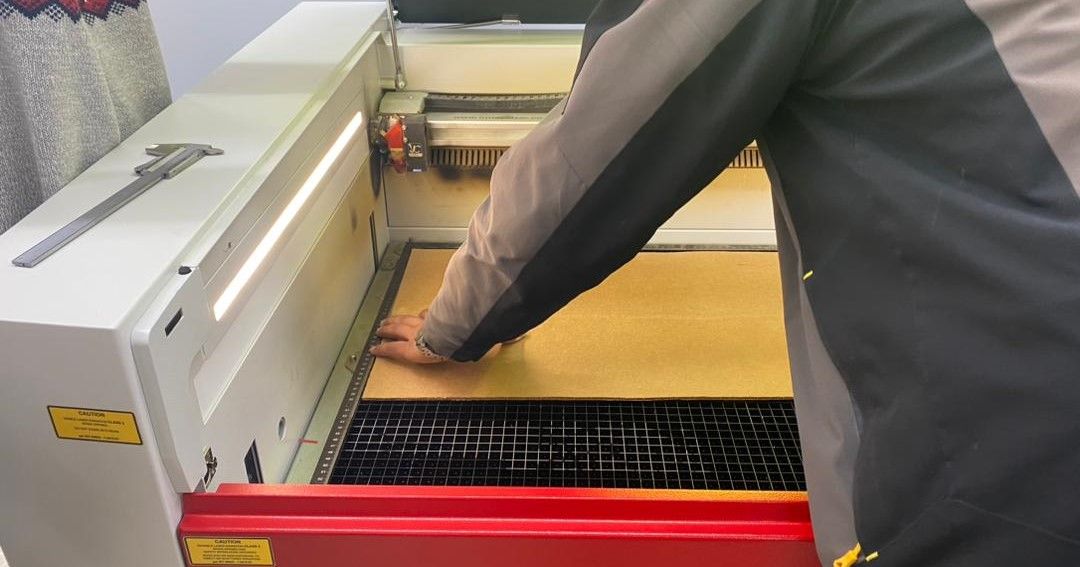
In our lab we use two laser cutter, speedy 400(CO2, fiber) and speedy 100 (CO2). Before we worked on assignment our we were briefed on the safety measures on the usage of laser cutter.
- Never leave the machine when in operation.
- Use the appropriate settings for each type of material which can prevent from catching fire.
- Keep the fire extinguisher near by.
- Keep the exhaust ON
Working with laser cutter
-
Make sure that the machine cover is closed before power is ON. To switch ON the power use the key shown below. When the machine gets switch ON it gives double beep sound.Open the cover only after the beep sound. The nozzle automatically comes to the origin(0,0).
-
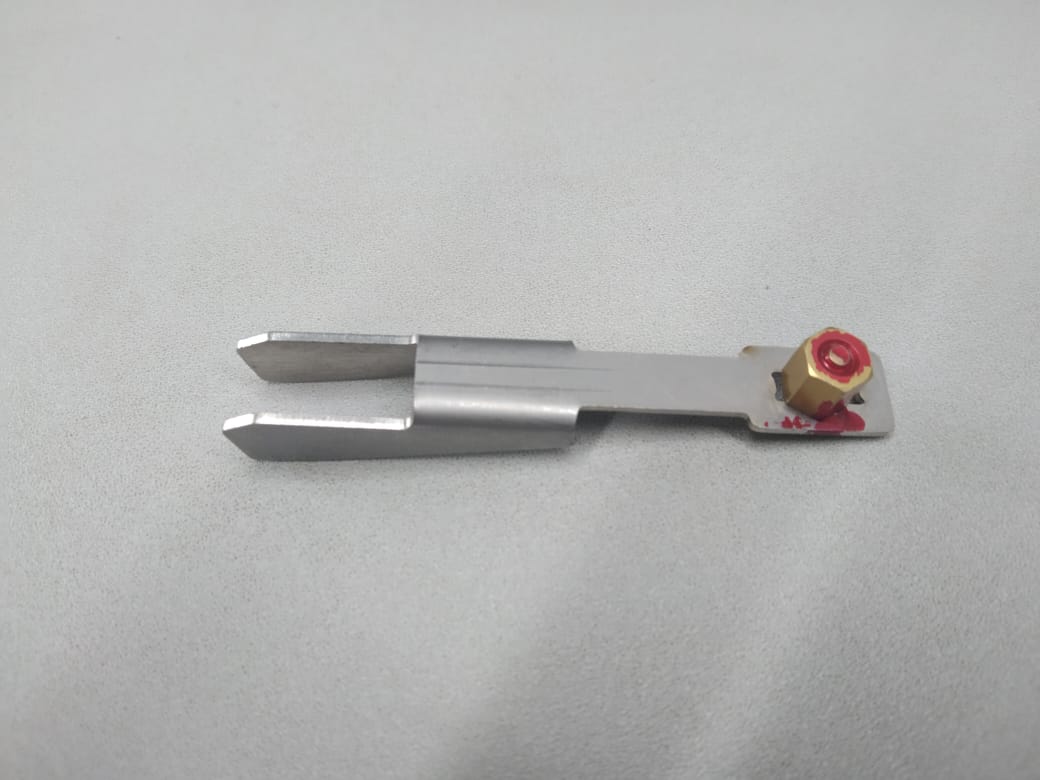
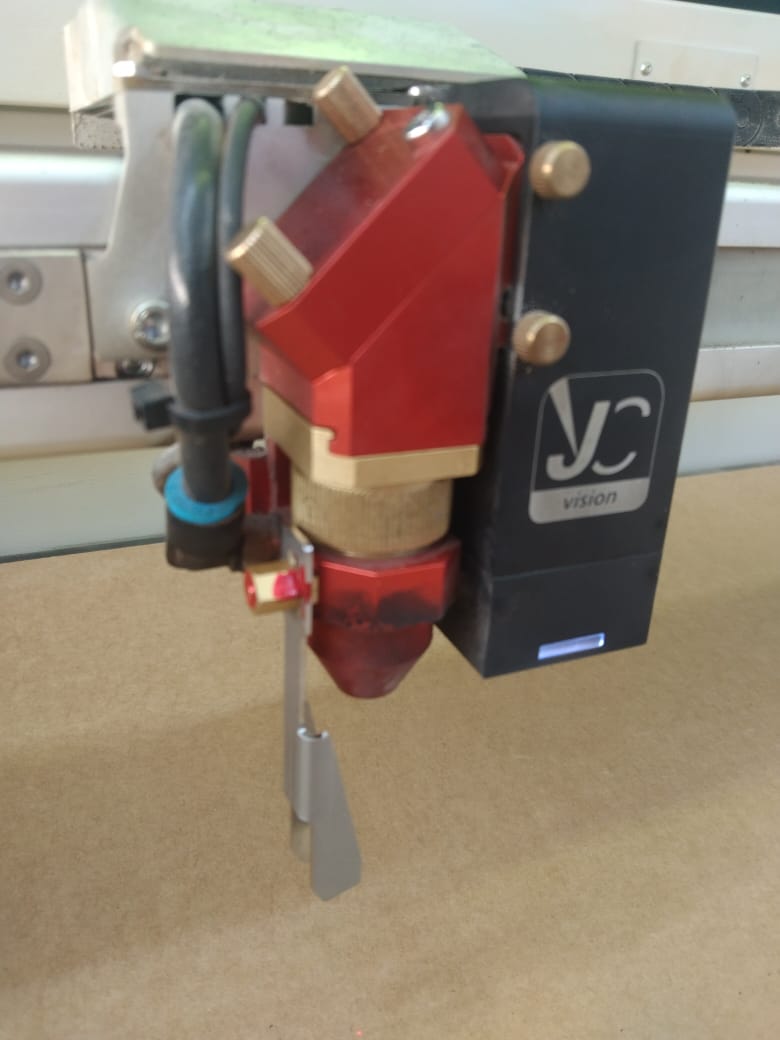
Place the work piece to the left corner of the bed. Move the nozzle to the middle of the work piece to set Z axis.
- Setting Z axis position: Use the Z axis tool to adjust the working height of Z axis. Place the z axis leveling tool at the hex head of the nozzle. To determine the Z axis Move upward direction(z+) using Z-axis button until the tool falls. When done close the lid.
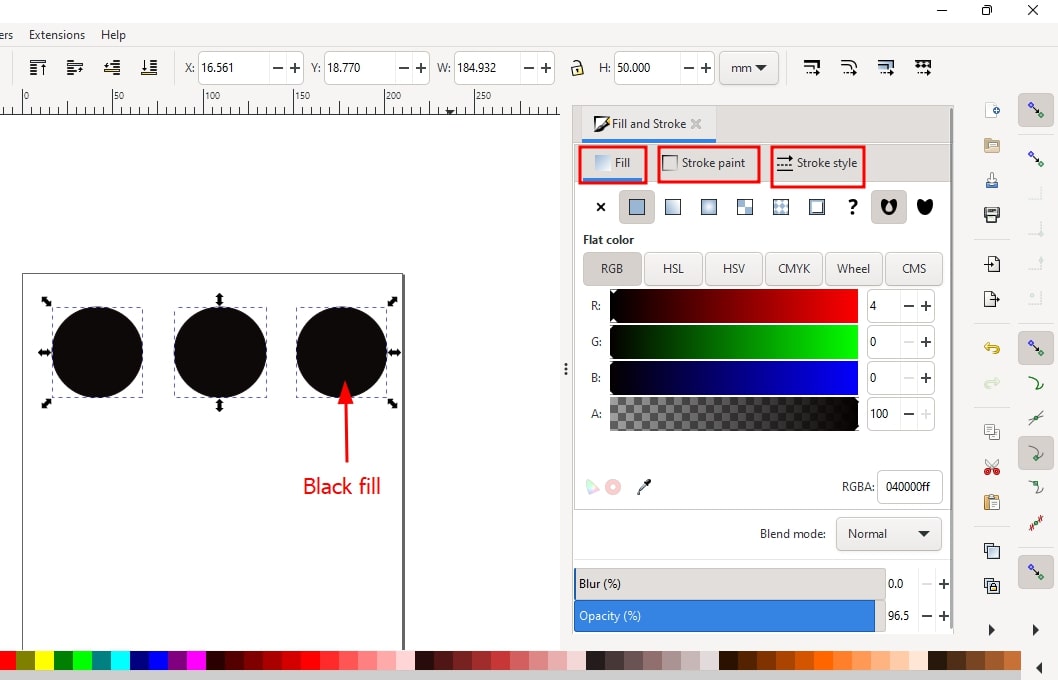
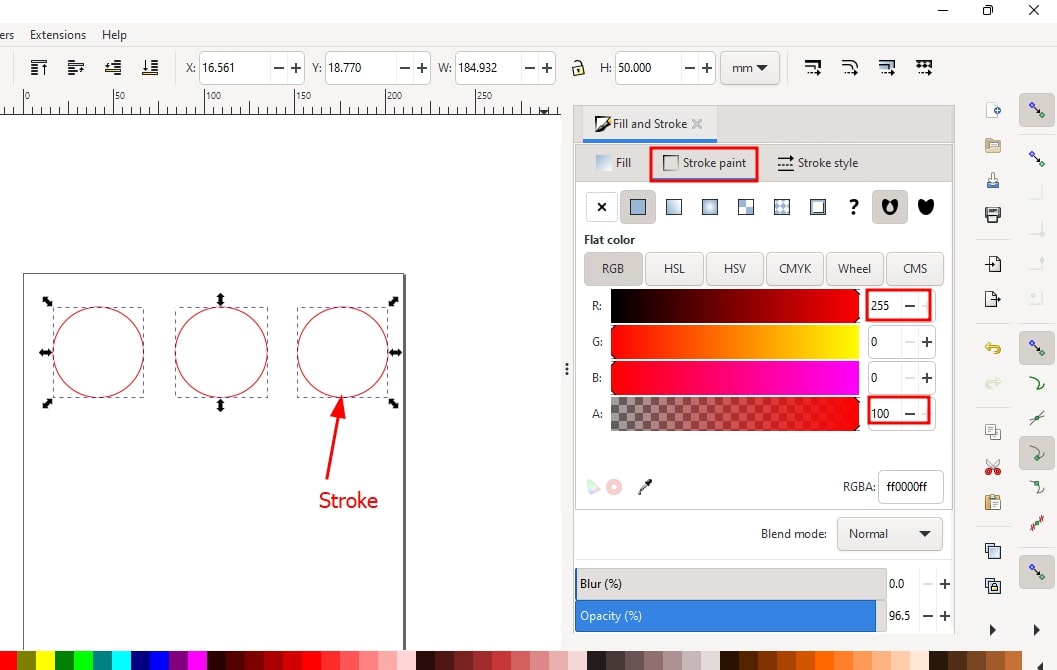
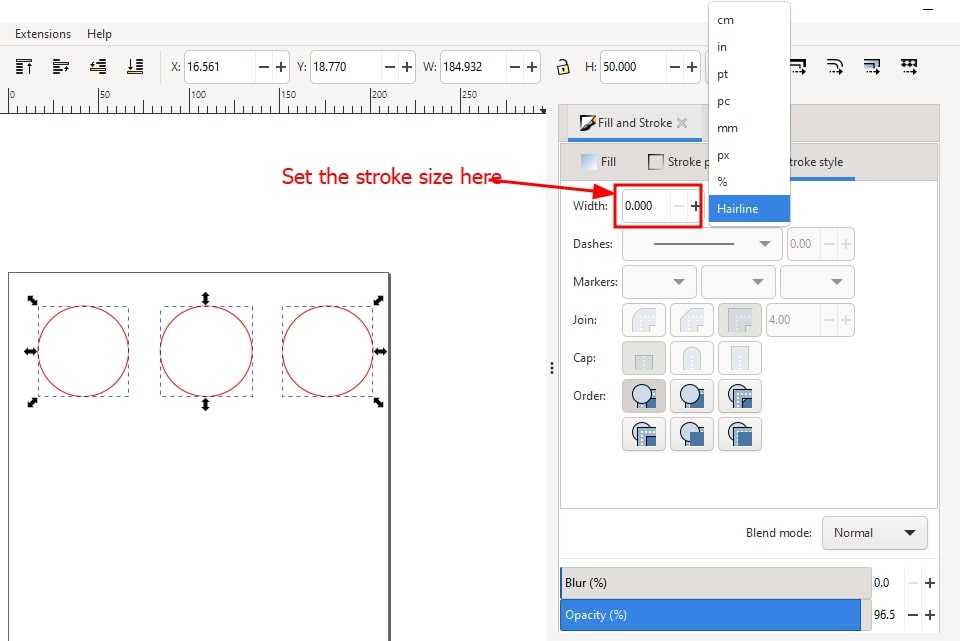
- Inkscape is used as a design Software. In laser cutter a black fill will be engraved and red lines called stroke will be cut. Therefore, it is important to setup the strock thickness typically setting it upto 0.01mm or can be used Hairline as well. The stroke is invisible unless you zoom in.
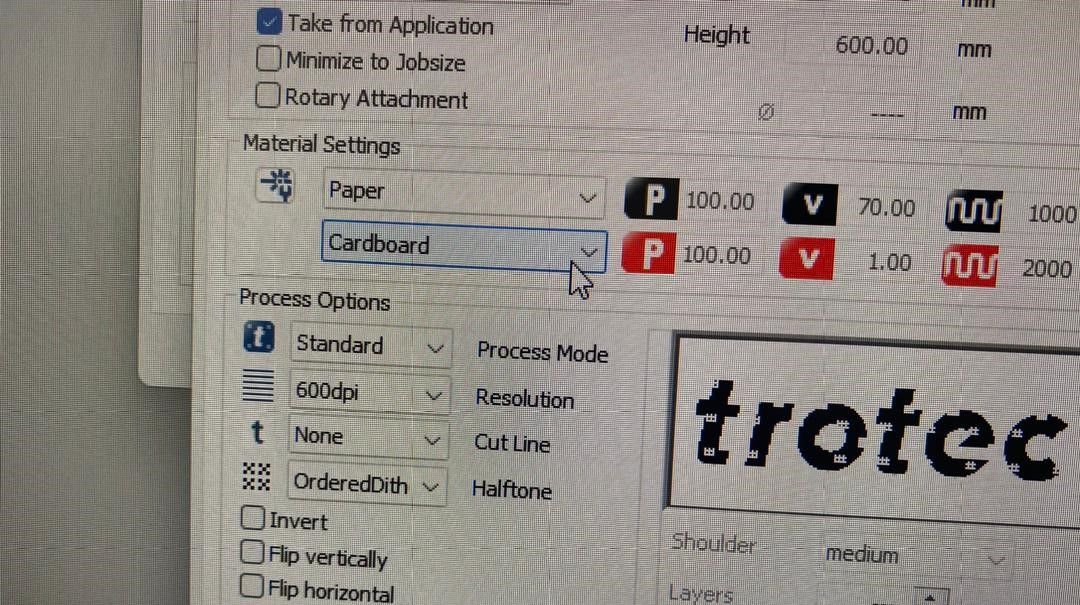
- To start cutting go to File menu and hit on Print. In window pop up menu hit on Preferences > take from application. Do not forget to select the type of material using.
-
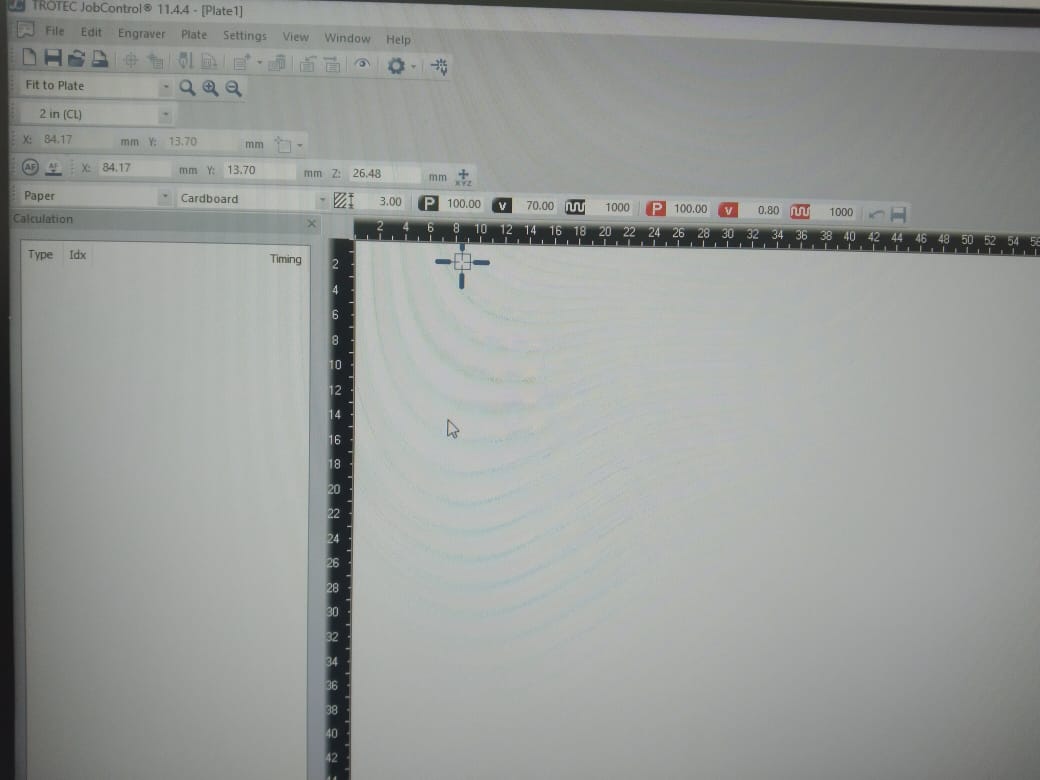
Then press on JC(JOB controller) and hit on Apply > Print. The job controller page gets open and the file gets transferred in this JC along with beep sound indicating that the machine is connected to the controller.
-
On the JC page white portion is the bed of the machine and Plus like sign is the nozzle and it locates where the origin is set.On the JC page we can set the X and y coordinate from where the job starts and also we can use 0,0 coordinate. We can also move the nozzle to different coordinate by entering coordinate and clicking on Move option.
- Drag the file to the center of the nozzle or the origin and click on play button to start cutting or engraving.
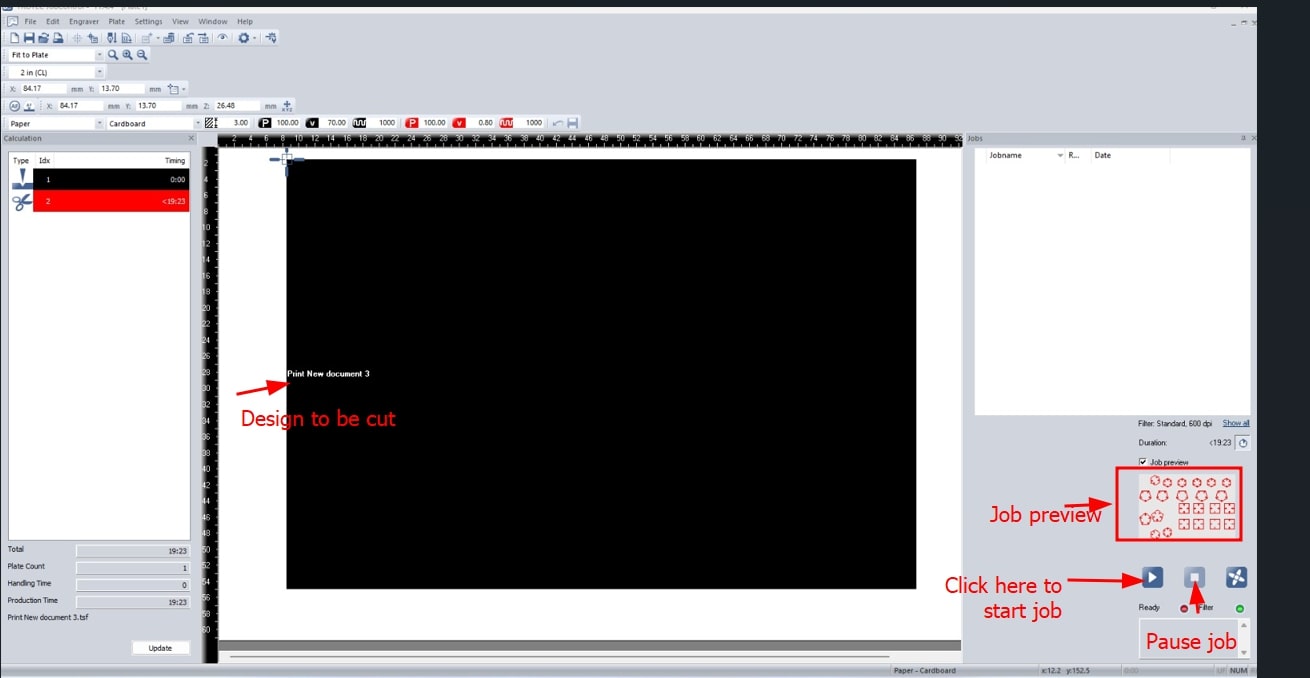
- We need need to adjust this three parameters namely Power, Frequency and Velocity according to the material using. To cut properly increase the Frequency rather than increasing the power. If we increase the power there is high chances of burning the material and also catchin the fire. If the design is cut properly it will drop automatically as shown below.
Individual Assignment
Our individual assignment of this week was to make a parametric press fit kit.
I made a pen holder because I found that I found in this link and I wanted to make it using parametric design using laser cut. This is the final look of my pen holder.

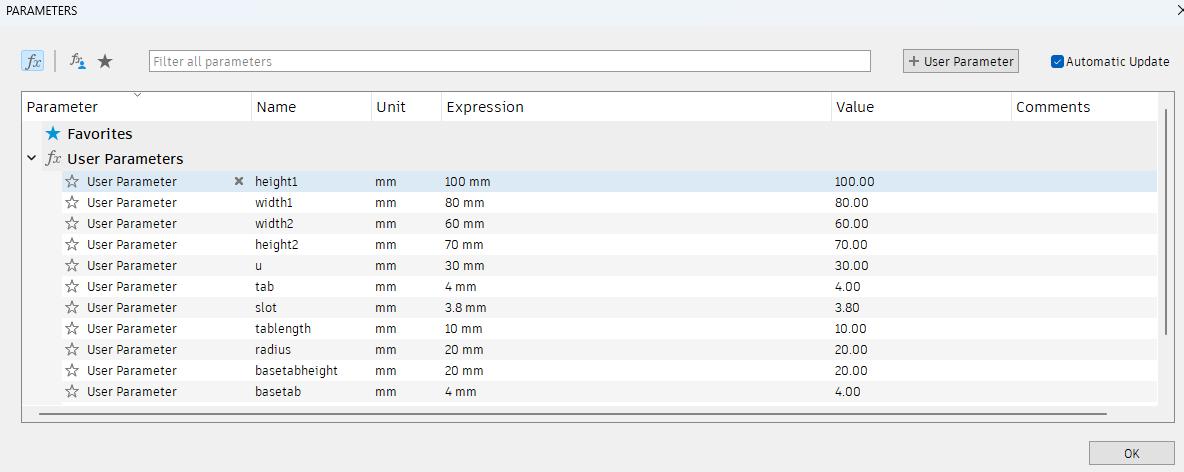
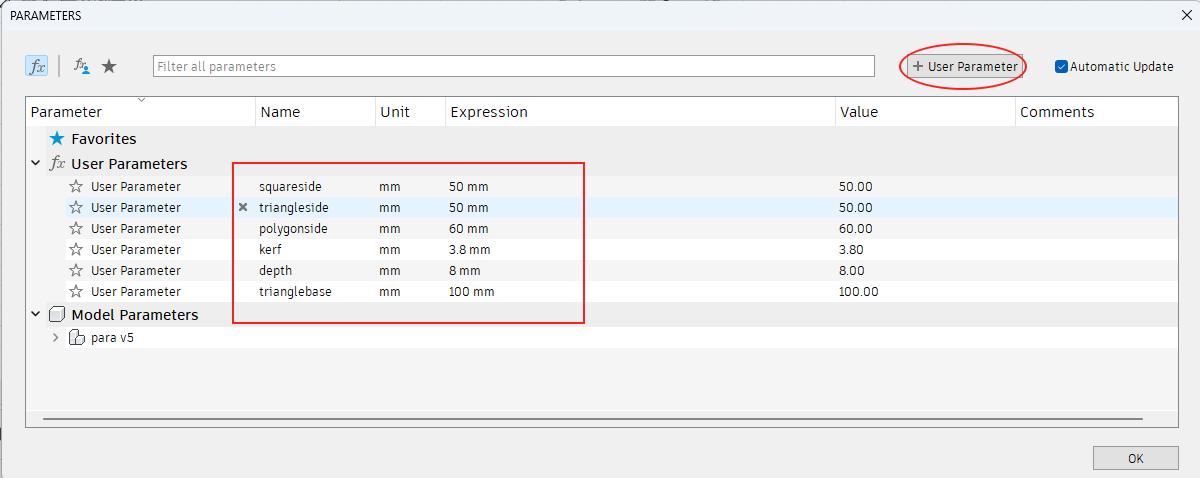
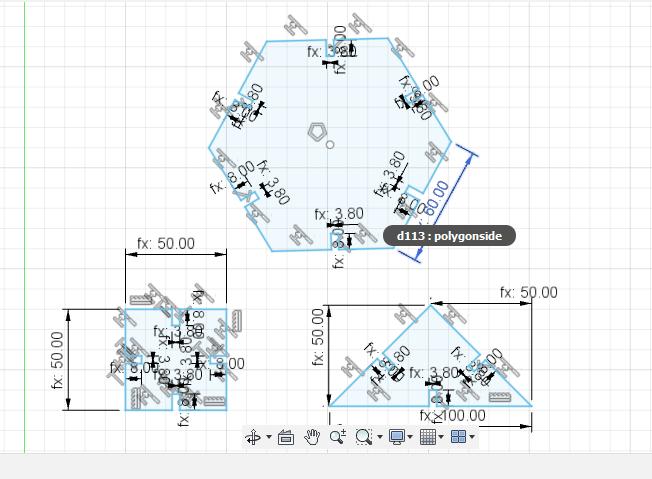
To make the design parametrically I firstly made a rectangle sketch and then I went to Change parameter under Modify drop down list and defined the parameters.
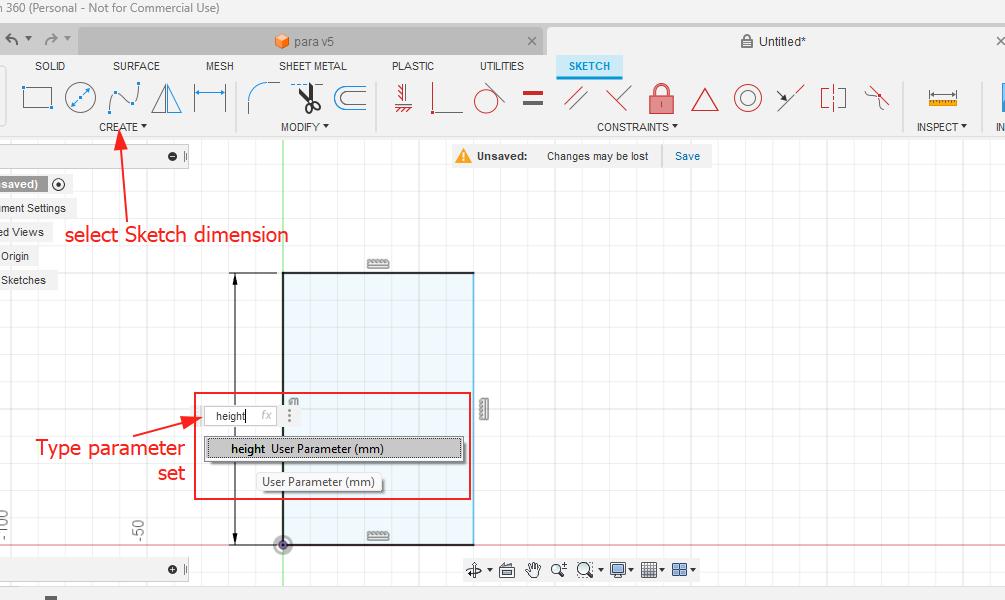
I went back to sketch and the gave the dimension to the length and height. As the dimensions are already defined I can directly type the parameters set. We can always go back to change parameter and change the dimensions.
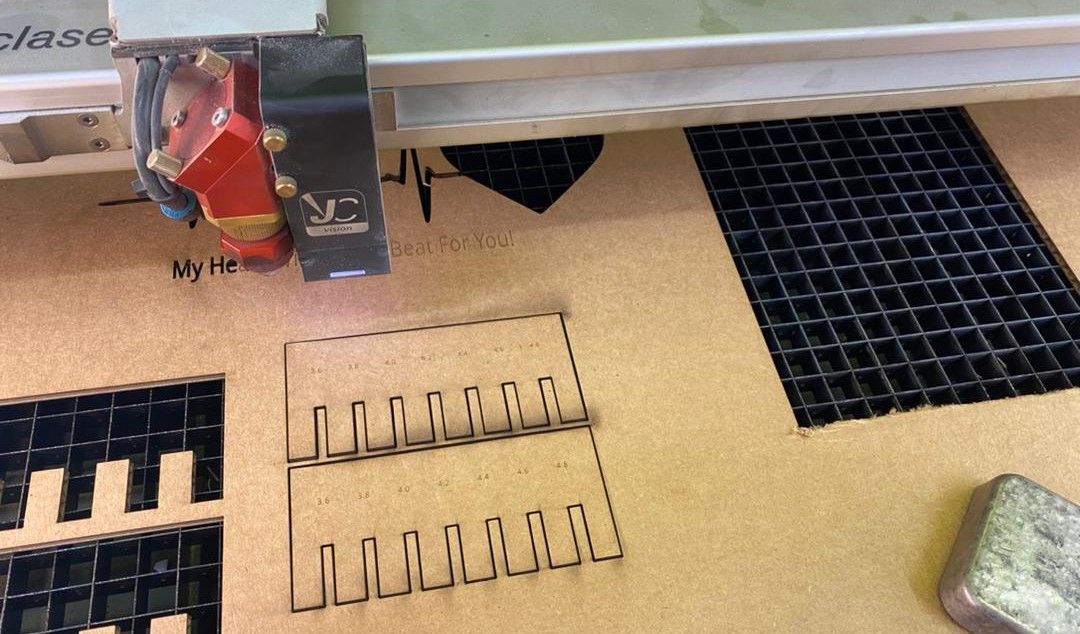
I exported the sketch into dxf file by right clicking on the sketch and choose >> save as dxf. Then I imported the dxf in inkscape on computer connected to laser cut machine and adjusted the stroke size to 0.01mm send did laser cut.

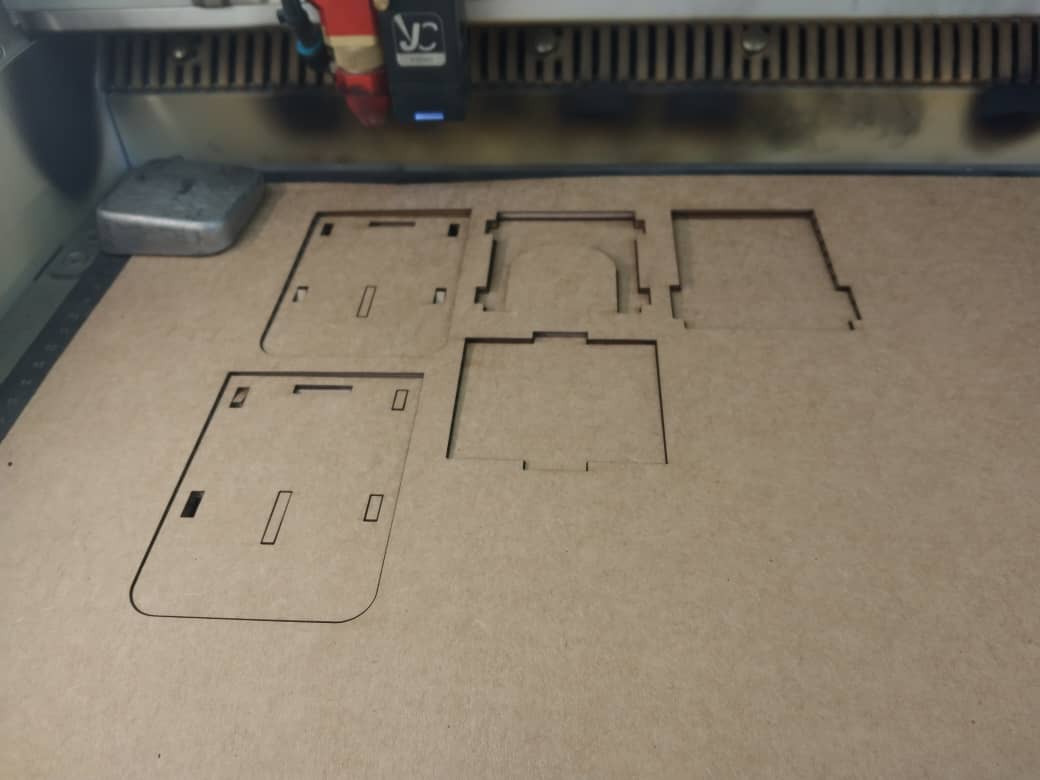
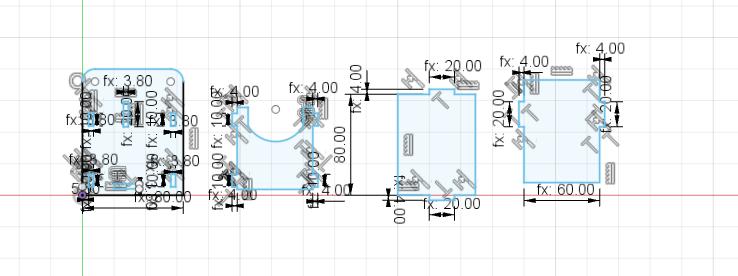
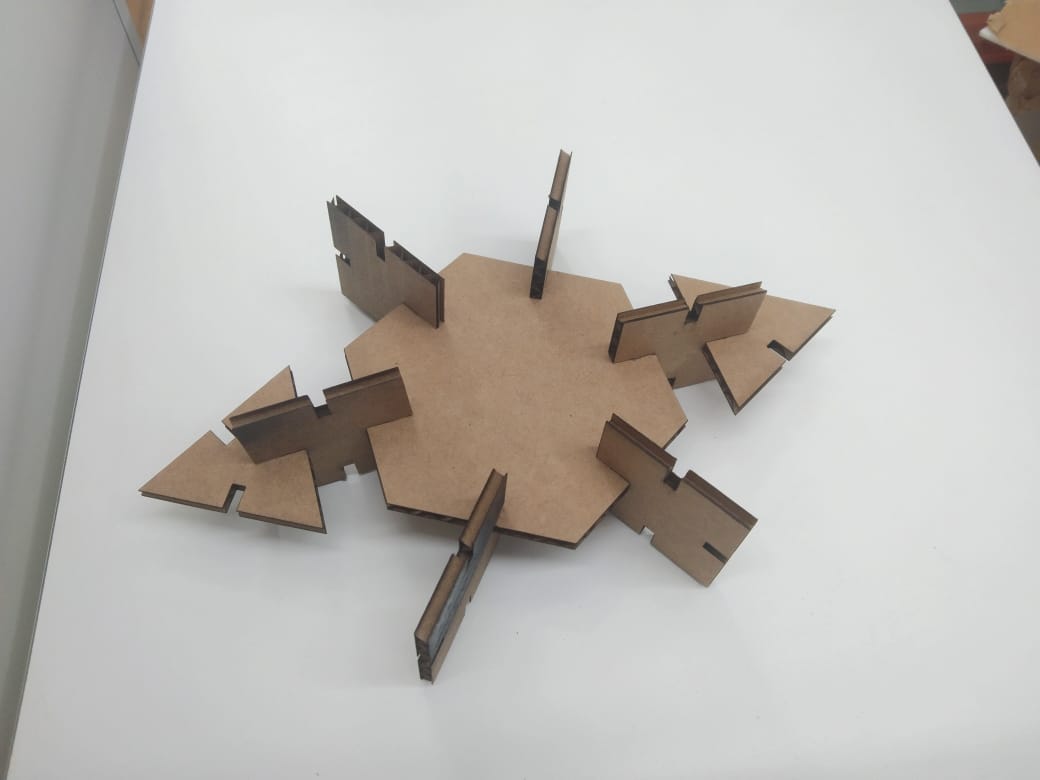
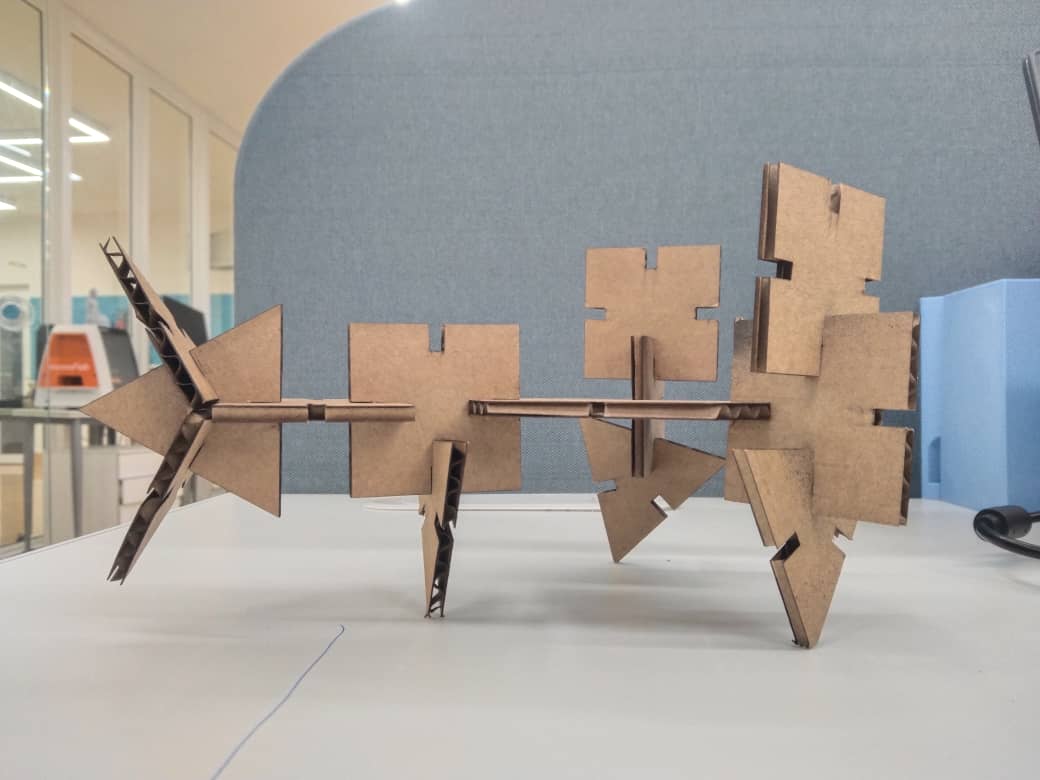
The above pen holder cannot be assembled in multiple shape and it cna be fitted only in one functional shape. Our assignment requires parametric kit to be assembled in more than one shapes. So I decided to make this a simple crawling tortoise. Firstly I designed 2d sketch using fusion 360.
I exported my 2D sketches in dxf format and imported in Inkscape for laser cutting. In Inkscape firstly I adjusted the stroke size to 0.01mm and made it red for cutting. Then I sent it in trotect job control for cutting by giving print command. The press fit I assembled is displayed below.
Design file for this week is here