1.5. Principles and Practices
My Final Project Idea
I struggled greatly with coming up with a project idea. My problem was that (over the years) I have had numerous ideas that I have never followed through with or developed further. Sometimes, in my working with students, I freely gave ideas to them as they struggled to come up with one on their own. I was able to live vicariously through my students as I watched them iterate through these projects (many times in extracurricular competitions they had entered).
I always told myself that if I ever did Fab Academy, I would choose a project that was “serious” and beneficial to humanity. For the past four months (in preparation for Fab Academy), I have had ideas that would– no doubt– be fun to make/build, but as I talked them through with colleagues, I started to veer in tangential directions. For many weeks, I wanted to create a device to help my daughter (a D1 Goalkeeper, who sustained a season-ending knee injury in her third game this past fall) maintain hand-eye coordination as she worked to get back onto the field. I went down a lot of rabbit holes ranging from capacitive touch to 3D domes. I eventually abandoned this idea as two new ideas entered the “hamster wheels” of thought as I interacted with family members (my brother, who grows orchids, and my oldest grandson– age 5, who is in love with anything to do with space exploration).
On January 19th, I sat down with a colleague, Dr. David Taylor, and pitched both of my ideas to him. We mapped out both ideas on the white board, and in doing so, we (I) realized that I should abandon my Orchid idea (for now anyway). We realized that the project relating to my grandson would hit more of the target skills studied in Fab Academy over the next twenty weeks. The image below shows our thought map from my discussion with Dr. Taylor.
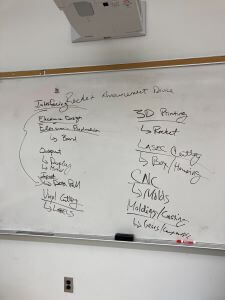
This is a typed out version of how Dr. Taylor and I outlined the skills to be incorporated into my final project.
| Fab Academy Skill (Week)/Date | Task Toward Final Project |
|---|---|
| Computer-Controlled Cutting/CNC-2/9 | Making mold for casting and molding |
| Inputs-4/20 | Data (launch information) from SpaceX |
| Outputs-3/30 | Making rocket enter launch sequence |
| Computer-Aided Design/Vinyl Cutting-2/2 | SpaceX logos (blue and white) |
| Computer-Aided Design/3D Printing-2/2 | Parts for horizontal and vertical bars |
| Electronic Production/Electrical Design-2/16. 3/2 | Circuitry of device |
| Computer-Controlled Machining/Laser Cutting-3/9 | Housing of the electronics |
| Molding/Casting-3/23 | Rockets and boosters |
| Interface and Application Programming-5/4 | Programming 412 chip/control initiate launch sequence |
| Computer-Controlled Machining/Mechanical Design-3/9-4/6 | Servos generating movement of rocket in launch sequence |
Excited that I have finally landed on an idea (pun intended), I began writing a description and drawing rough sketches of the project. My grandson often watches SpaceX launches with his grandfather, and they have watched countless videos about the lunar landing and the events leading up to it. One of his favorite blankets has a blueprint of the Falcon 9 Rocket on it; he loves talking about Falcon 9 Rockets and the Crew Dragon. One of the coolest moments with him was when my husband and I saw a barge carrying a recently launched and returned Falcon 9 rocket while in Port Canaveral, Florida over spring break. We took a photo of it (shown below).
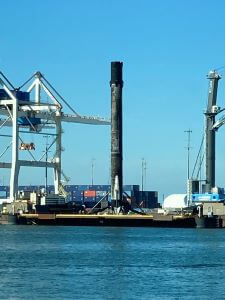
While our grandson was excited to see the used rocket, he was disappointed that he had missed the launch. I am going to build a device that will alert my grandson when a SpaceX launch is going to happen.
I realize that this project does not impact humanity (on a whole), but it– hopefully– is going to mean the world to a five-year-old boy who dreams of space exploration. Seeing it come to fruition will mean the world to me.
Final Project Designs
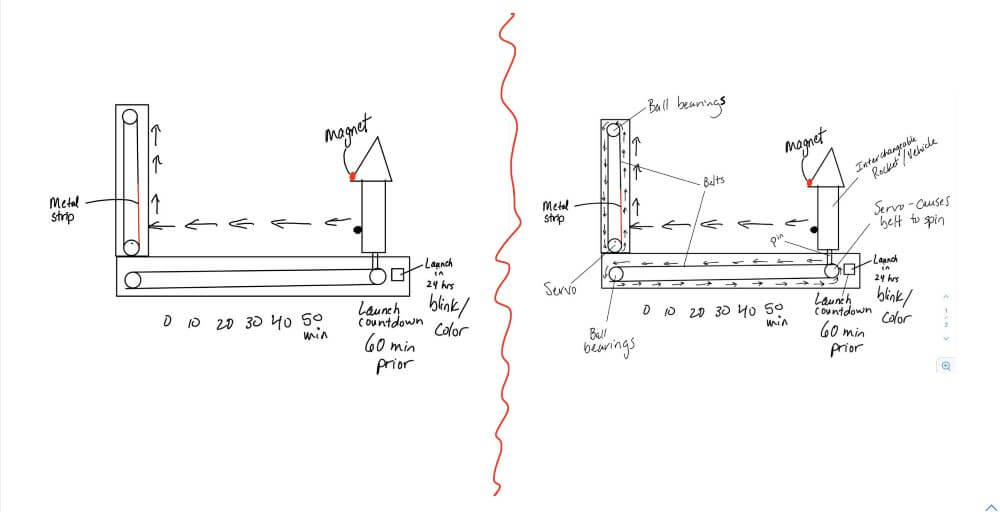
I want my SpaceX Launch Alert to be able to pull launch data (an input) from SpaceX data on the Internet. This data would be used to trigger a 3D-printed model of the Falcon 9 rocket to start to crawl horizontally over a fixed distance toward a vertical “launch area”. At the point that the rocket launch time is achieved, the rocket will travel vertically a short distance (simulating a launch sequence).
On January 26th, I decided to sit down and discuss my project with three students. As I explained the overall components and goals of my project, I sketched out the following design; I then returned to it later and labeled it. I made these rough sketches in the Notability app on an iPad using an apple pencil.
As I was writing an assignment for my high school students in Fusion 360, I decided to try to create a rough 2D sketch of my project using Fusion 360 as well. I drew the three (top, front and right) views of my project plan so far. In order to get the shape of the Falcon 9 Rocket, I went to this website and found images of SpaceX rockets. I took a screenshot of the Falcon 9 Rocket for the sole purpose of tracing it on an inserted canvas in Fusion 360 and scaling it to the relative size I wanted it to be. I had to convert the .jpg into a .png since Fusion 360 required the .png file type. From the “Create” dropdown, I selected “Points”, and placed points along the rocket. I then used the “Spline” tool to connect the points, and this diagram shows the Fusion 360 iteration of the rocket portion if the design. Once again, I used the Notability app on my iPad to combine and mark up the images as needed.
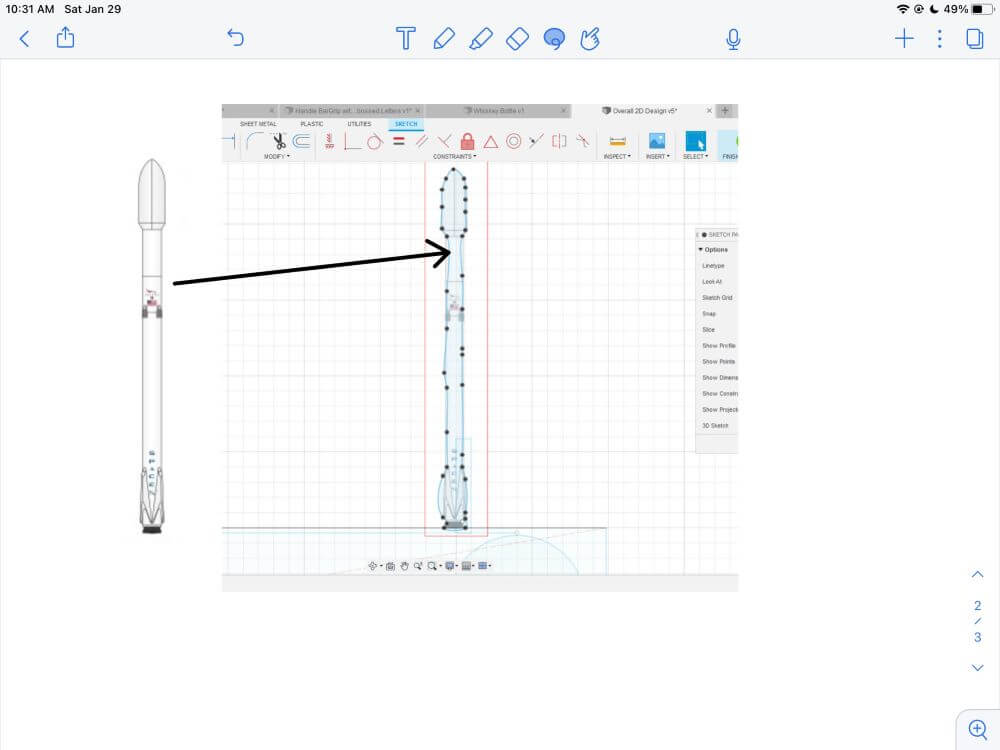
When I used the Spline tool, it did not come out as I wanted it, and I thought (incorrectly) that I should delete the points and re-place the points again. This time, I added nearly 1 point per box. I then used the “Spline” tool to create the shape of the rocket.
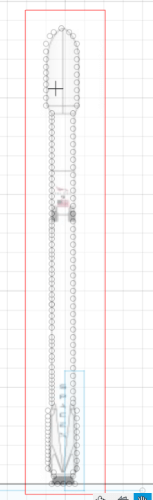
This wound up being a bad idea because there were now too many splines to generate a smoother curve. To remedy the issues with this, I decided to use the “Line” command for all of the rocket except for the cone. This third time around, I placed fewer points that were symmetric to each other, I was able to draw the rocket well enough to represent it in the “front” view. I wound up having to repeat this process again (now a fourth time) to make the “right” view. This rocket drawing wound up being my best one. I combined all three sketches from Fusion 360 into one drawing and marked it up using Microsoft Word.
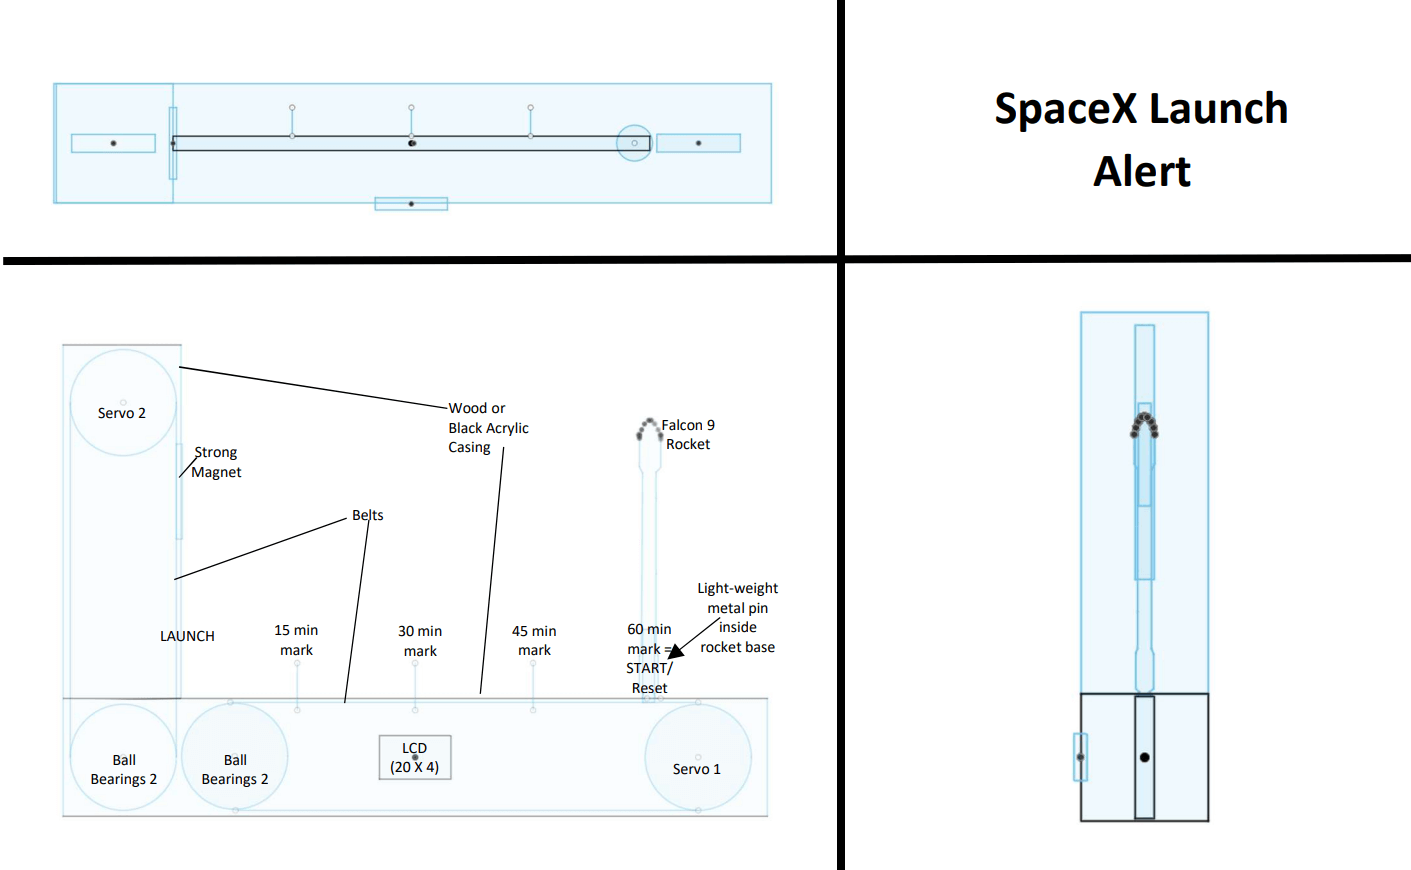
In this overall version, I decided to symmetrically place the LCD screen in the middle of the front view. While researching the size of LCD screens that are available, I came across a 20 x 4 LCD screen, and I hope to implement this one into my project.
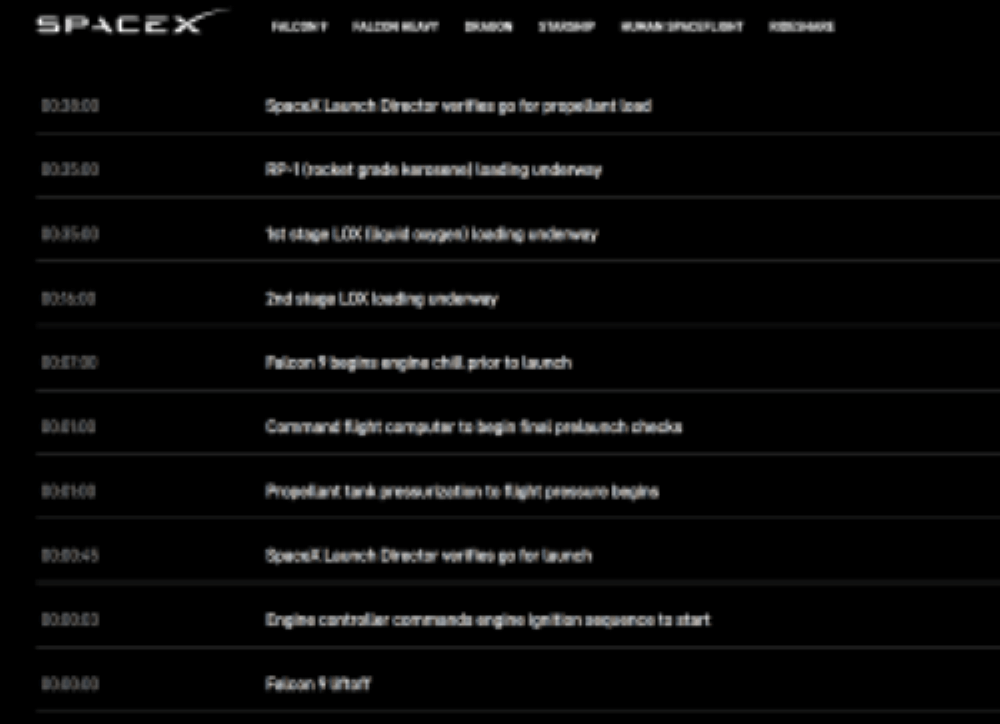
Looking online at SpaceX information, I found the typical launch sequence.
I would like for the LCD screen to communicate four lines of information to my grandson.
Line 1: Hello James
Line 2: Date of Next Launch
Line 3: Stage in Launch-from SpaceX website that corresponds and changes in the real time launch window EX. 1st stage LOX (liquid oxygen) loading under way
Line 4: Rocket Type Ex. Falcon Heavy
On January 29th, I was giving my design more thought, and I was concerned about the horizontal movement of the rocket as it begins its slow crawl to the launch pad area. I did an Internet search of how NASA and SpaceX transport their rockets. I found a video of NASA’s crawler transporter carried the space shuttles. I then watched this video to see how SpaceX transports their rockets, and it led me to re-think my design. If I have the time, I may try to design a crawler similar to the ones used to carry the Falcon 9 Rockets to their launch pads. This may actually be simpler than using a Servo with a belt to make the rocket move. Also, I feel that the rocket should actually be laid on its side, and then, as it reaches the launch location, it tilts upward where it can then be picked up vertically.