'If you cannot get what you like, you will have to like what you get.'
African Proverbs
Computer-controlled machining
This week, we are charged to do a group assignment, and two individual assignments. These are given below:
Group Assignment
You can view the Group Assignment on this Link.
Individual Assignment
Software
To execute this task, I will use Fusion 360. Other CAD softwares, though also good, have not proven their ease-of-use and user-friendliness like Fusion 360. So I am presently not in the mood to try this on other software. 'If it ain't broke don't fix it!'
I believe you know how to do CAD designing by now, so I can save myself the stress of narrating how I designed the CAD drawing. One thing I can inform you is that parametrisizing the design process will save you a lot of hassle down the line. So you might as well get good at that, if you are not already good at it.
In addition, I know other CAD designing software might have this, but I also used the 'Mirror' function on Fusion 360 a lot. This helped me with the symmetricity of the design.
Welcome to the Garden of Eden
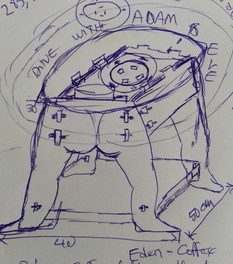
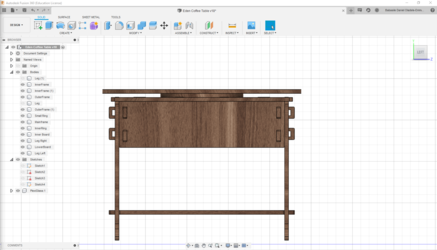
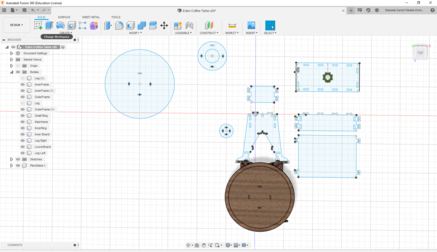
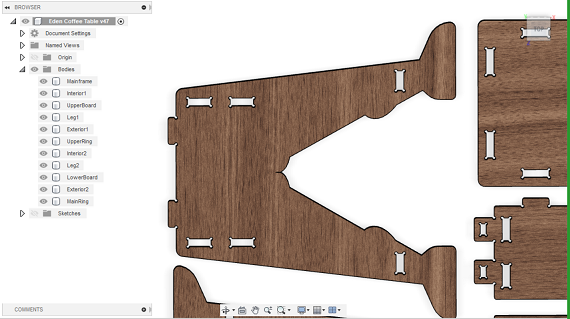
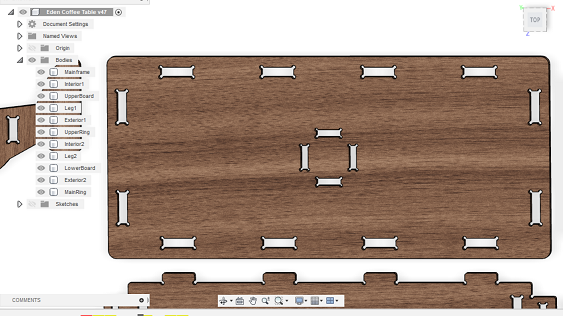
So in order to execute this assignment, I created a design which I named 'Eden'. Eden is a coffee table which I created because I lacked one in my apartment. The sketch of the design is below:
More Information about Eden
Eden is a Coffee table with a rotary upper board. The purpose of the rotary board is to enabled easy sharing of things or one could easily say it is to encourage a sense of 'Community' amongs us as human. This sense of sharing is further defended by this lovely quote from an unknown source “If we have no peace, it is because we have forgotten that we belong to each other.” The dimension of Eden is 50cm x 40cm x 48.3cm. In addition, the table is called Eden, because the standing frame of the design was created in the Adamic natural form. This Adamic form also contributed to the conception and design of the project in such a way that no screw or external materials, safe wood, would be required. On the design, I have also made room for it to accommodate a plexiglass of 3mm thickness.
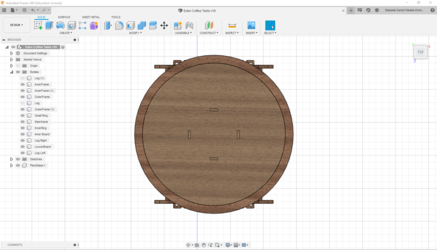
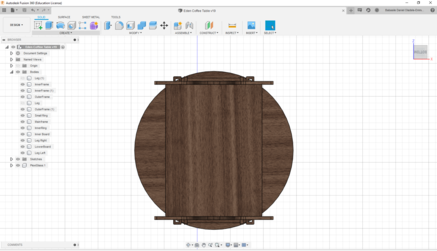
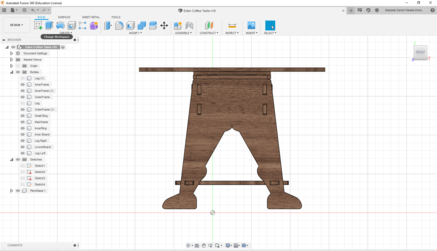
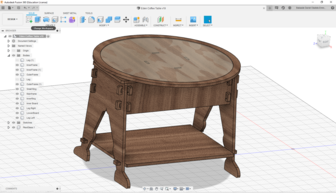
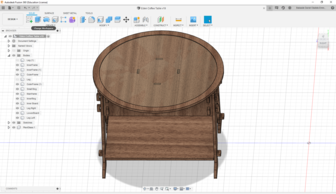
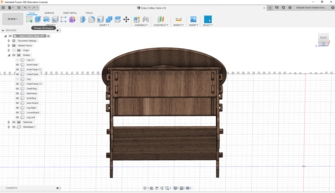
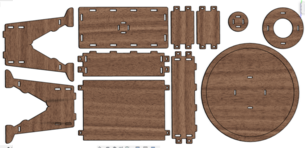
Below are the outcome of the sketch above.
Room for improvement
While designing Eden, I also conceived that the table might do well with a little drawer. However, I have decided to first test the initial design before making this modification to the project. In addition, this modification will also be done without any foreign material such as screws.
After finishing the design, the next thing I did was to setup my design for manufacturing on the CNC machine. However, before fabricating the design on the CNC, I was advised by my Fab Instructor (Daniele Ingrassia) to first make a mini version of the design using the laser cutter.
Setting up for Milling
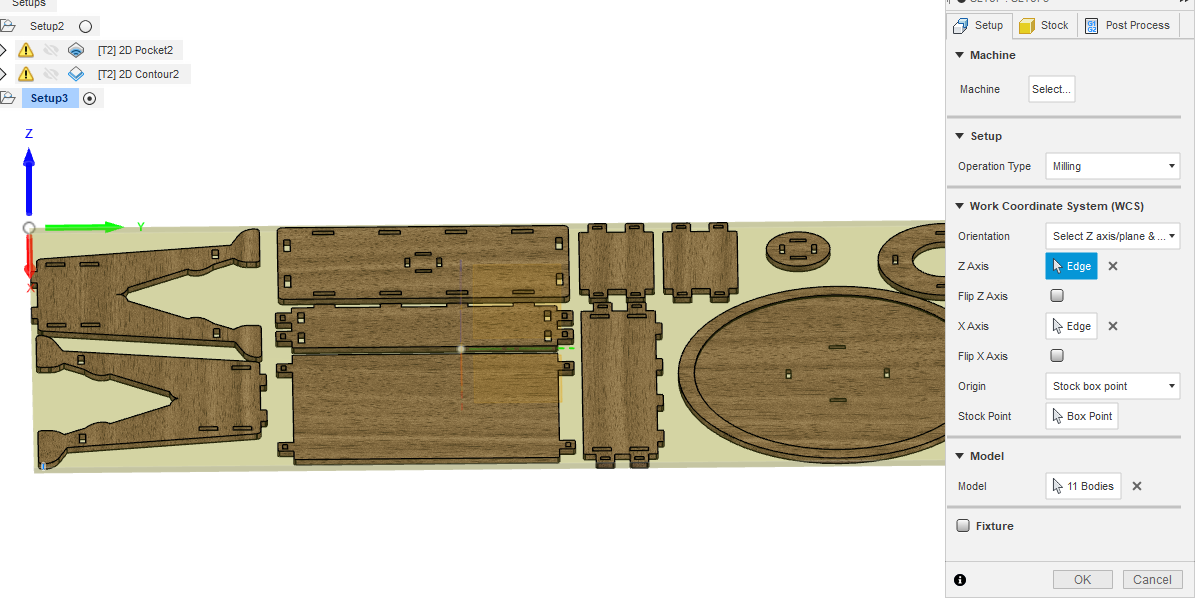
So to setup the design for CNC machining, you have to change from the design to manufacture as depicted in the picture below.

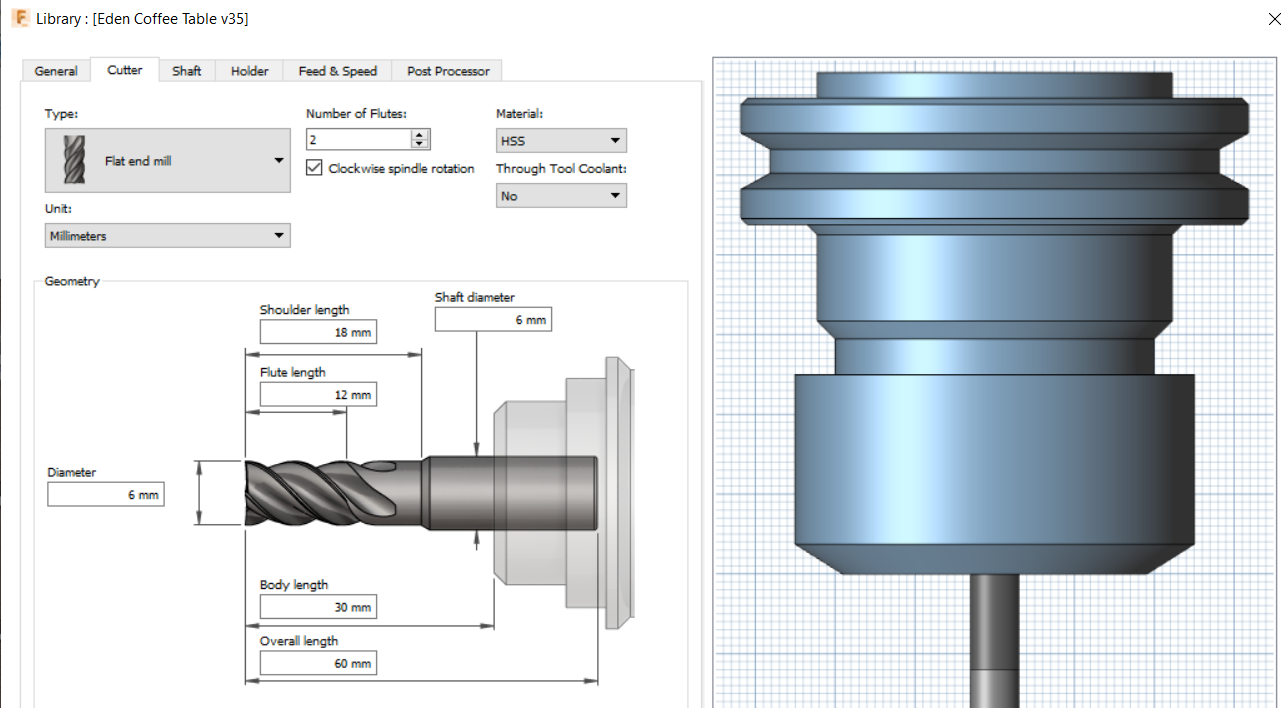
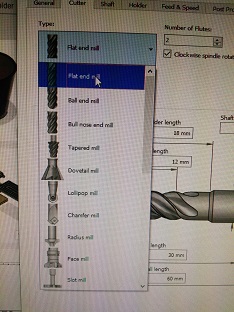
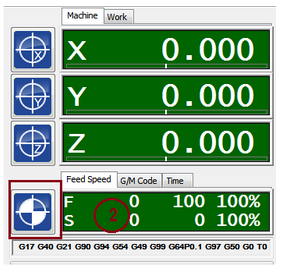
After this, then you click option 2 to enter the parameter for the end mill you will use. This will include the spindle speed (that is the rotation speed of the spindle), the type of end mill (ball, flat), number of flutes on your end mill, the length, and diameter as well. An example has been depicted in the pictures below.
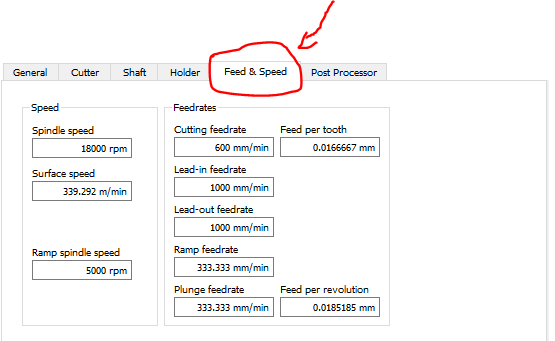
To modify the spindle speed, please click the tab titled 'Feed & Speed', then change all the necessary parameters based on the job you are about to execute. Please check the illustration below.
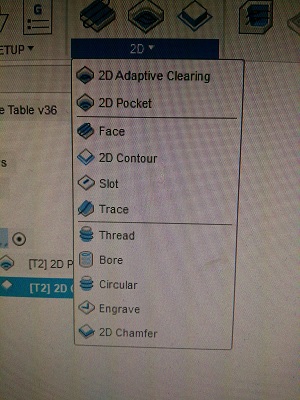
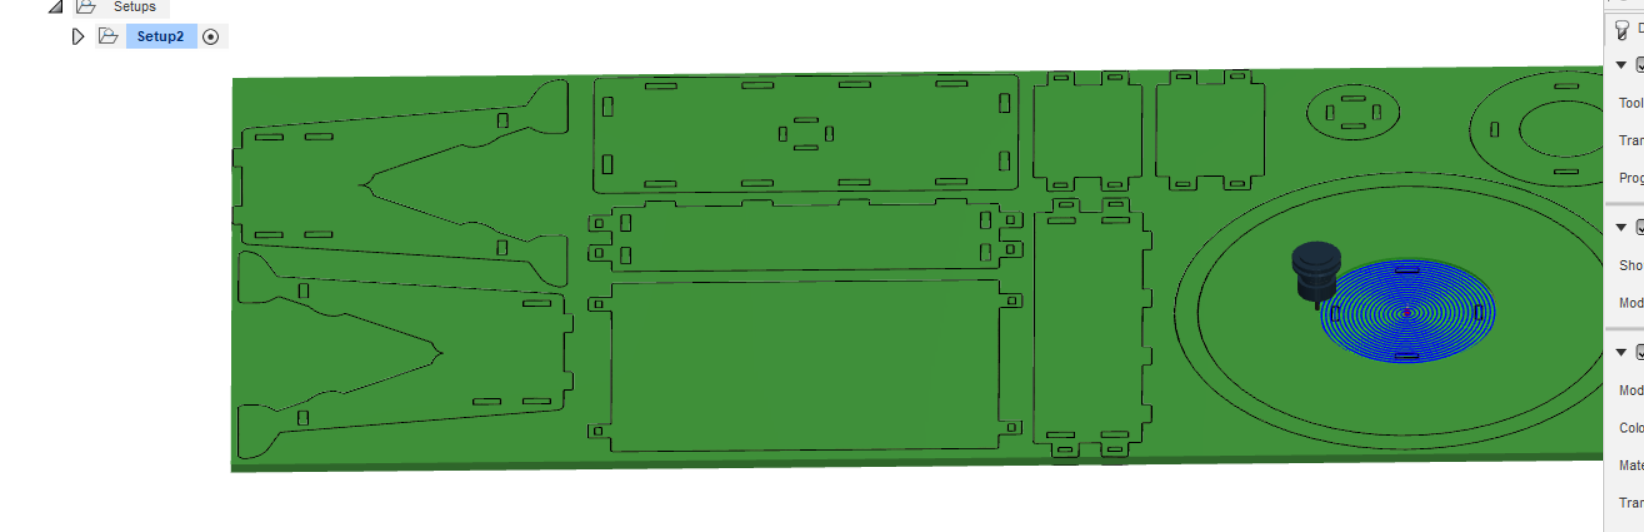
After this, then you execute option 3, which is to setup the milling of the design. There are different options to get this done. So select '2D' on the tab, then select either 2D Pocket, 2D Adaptive Clearing or depending on the task you are trying to execute. After doing this section, you should have something like the pictures depicted below.
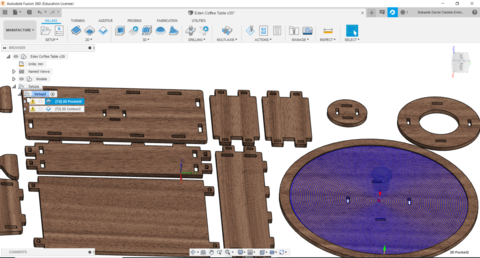
This pocket is where the 3mm Plexiglass will be placed.

Silly fehler!
I noticed I did not select the holes for the pegs while making the simulation. So please do not forget that what is not selected will not be milled. Another error I made was not to include the 'Dog Bone' in the original design. I will rectify this before cutting the design.
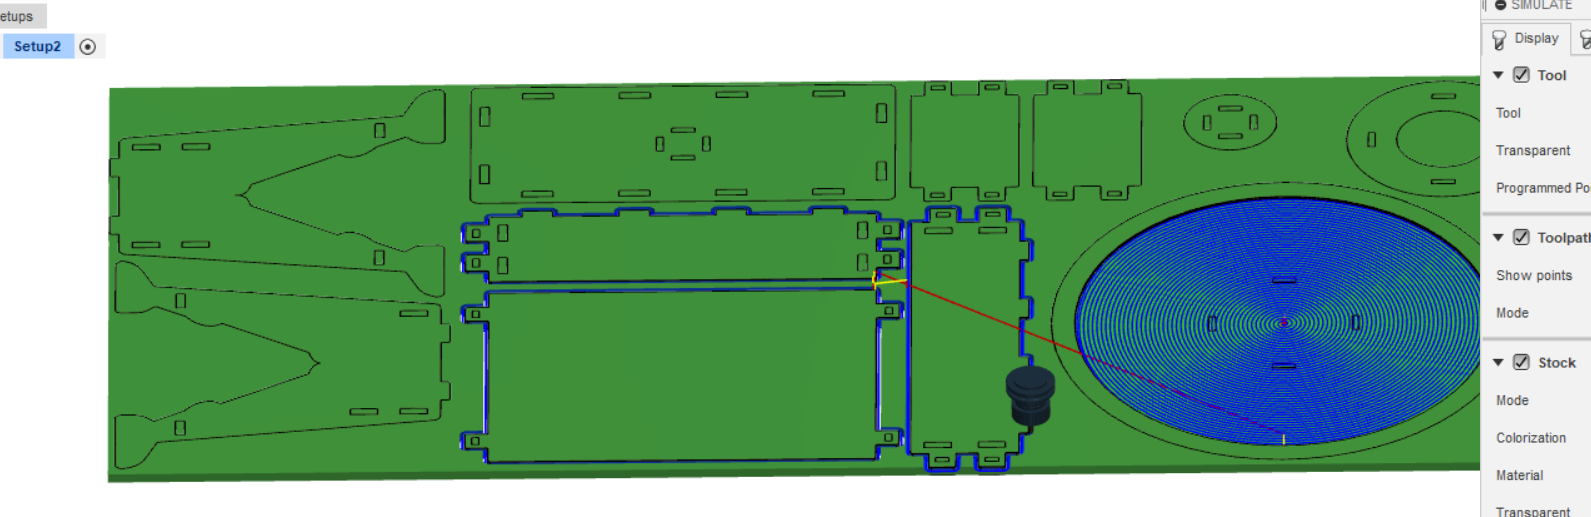
After this, the last option is to do a quick simulation to verify whether the fabrication process will be successful. In my case, there are some cautions shown by the software. One of which is a 'Collision' warning. So before proceeding, ensure that all warnings are solved.

Unfortunately, due to Corona virus, my lab was closed on March 12, 2020. So I cannot provide a physical representation of the design. So you might as well say I do not practice what I preach. So as soon as we are back in operation, I will upload all the pictures of the final jobs.
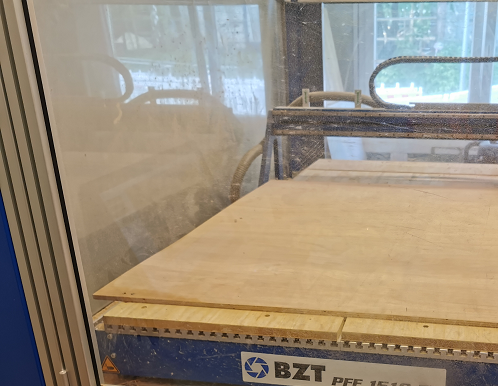
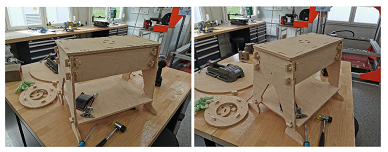
So, after a long lay off, as at May 23, 2020, we are slowly resuming work at the lab. However, the access has been restricted to maximum twice a week, and maximum of two employees at the lab. So I am trying to catch up with the assignments I was unable to do due to the lockdown. That been said, I have resumed work on making the Eden Coffee table. The pictures below shows the state of things.
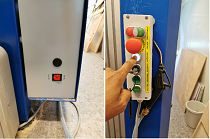
How to Start the Machine
The first thing to do is to switch on this button, and press this white glowing button here.
After this, you switch the spindle switch at the back of the CNC machine. See picture below.
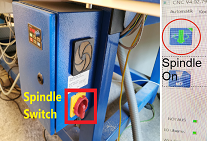
After this, you do the following:
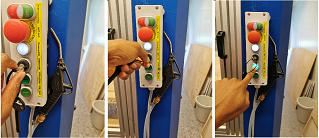

NOTE: In case of an emergency just press the emergency button or press the stop button to pause it (SAFETY FIRST).
You can also change the spindle(S) speed and the speed (F) in case you are too much in a hurry to babysit the machine. This does not or should not have any negative effect on the quality of the job you are trying to execute. It only reduces the waiting period.
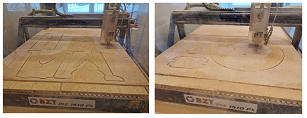
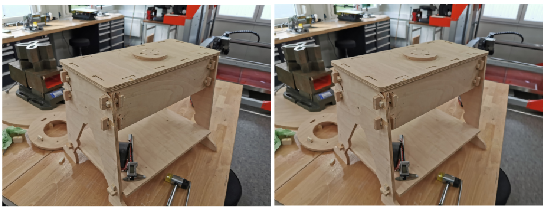
Below you will find the pictures of the machining job and the assembled design
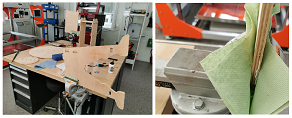
One thing worth noting is that, the plywood provided has warped. So, I used screws to secure it on the board of the machine. This proved efficient for the milling process. However, I stumbled upon lots of issues during the assembling process. So what I did was to spray the warped machined part with hot water, and then I placed lots of stones on it, after which I put it in the sun. Hopefully this should correct the warping.
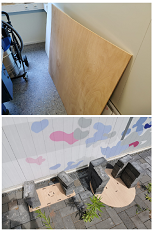
Mistakes or Issues
Whilst I wait for the wood to be straightened, I proceeded with assembling of the other parts that are not too crooked to be assembled. NoteAnother silly mistake I made was that I forgot to include the 'dog Bone' (Whoof! Whoof!). An ideal reason for this ommission is because I am not a dog lover (lame excuse). So I learnt its importance the hard way, because I manually had to file the edges. I will fix this and insert the file in the download folder.
Another issue I faced was the breakage of the plywood. Just when I felt I had overcame one adversity came rolling another avalanche. The plywood for some weird reasons started cracking up from its core. So I resulted to the local method. I used wood glue to hold it together. You won't die on me now!
Assembling
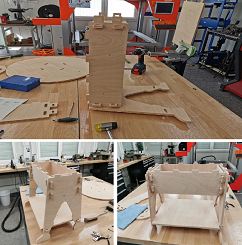
After this, I inserted the peg to give it a rigid stance.
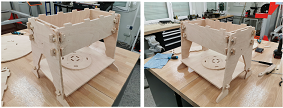
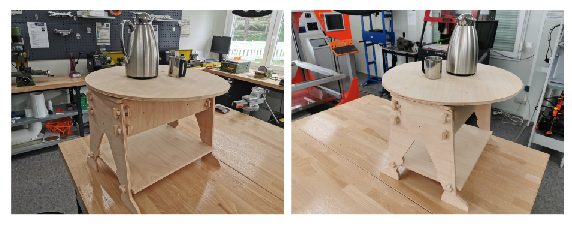
After waiting for almost 7 hours, the wood showed a sign that it could be manipulated to fit to the already assembled part. So I carried on with the assembly of the project. However, the warping made it a two-man job. So I called my colleague ('Flying Ottoman') to assist with the crucifixion. Below, you will find the complete picture of the project, as well as a video to show how it works.
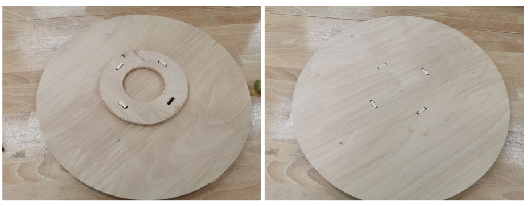
After this, I assembled the rotary part of the main board.
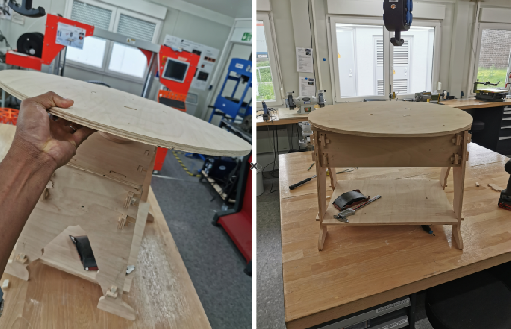
Below is the picture of the fully assembled Eden Coffee Table. So you are officially welcome to the Garden of Eden for a hot cup of coffee!
Video presentation of Eden
New Eden (Dog Bone)
As promised, I have modified the design to include the dog bone. So to all the dog lovers out there, have super fun in the Garden of Eden!
Click on this LINK to download the design fusion 360's format of the 'Eden Coffee Table'.