'He who wants to ride on a Lion's back must be ready to lie in its stomach.'
African Proverbs
Tasks
This week's task is divided into two parts. From observation, I think this will be our life till we are through with Fab Academy! We will have a group assignment and also an individual assignment.
<Group Assignment
Characterize the design rules for your PCB production process
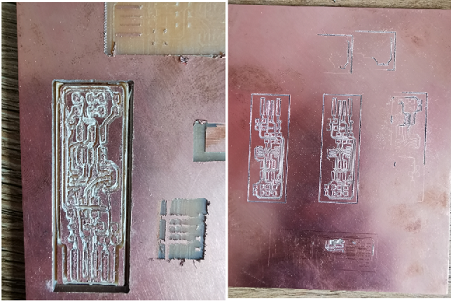
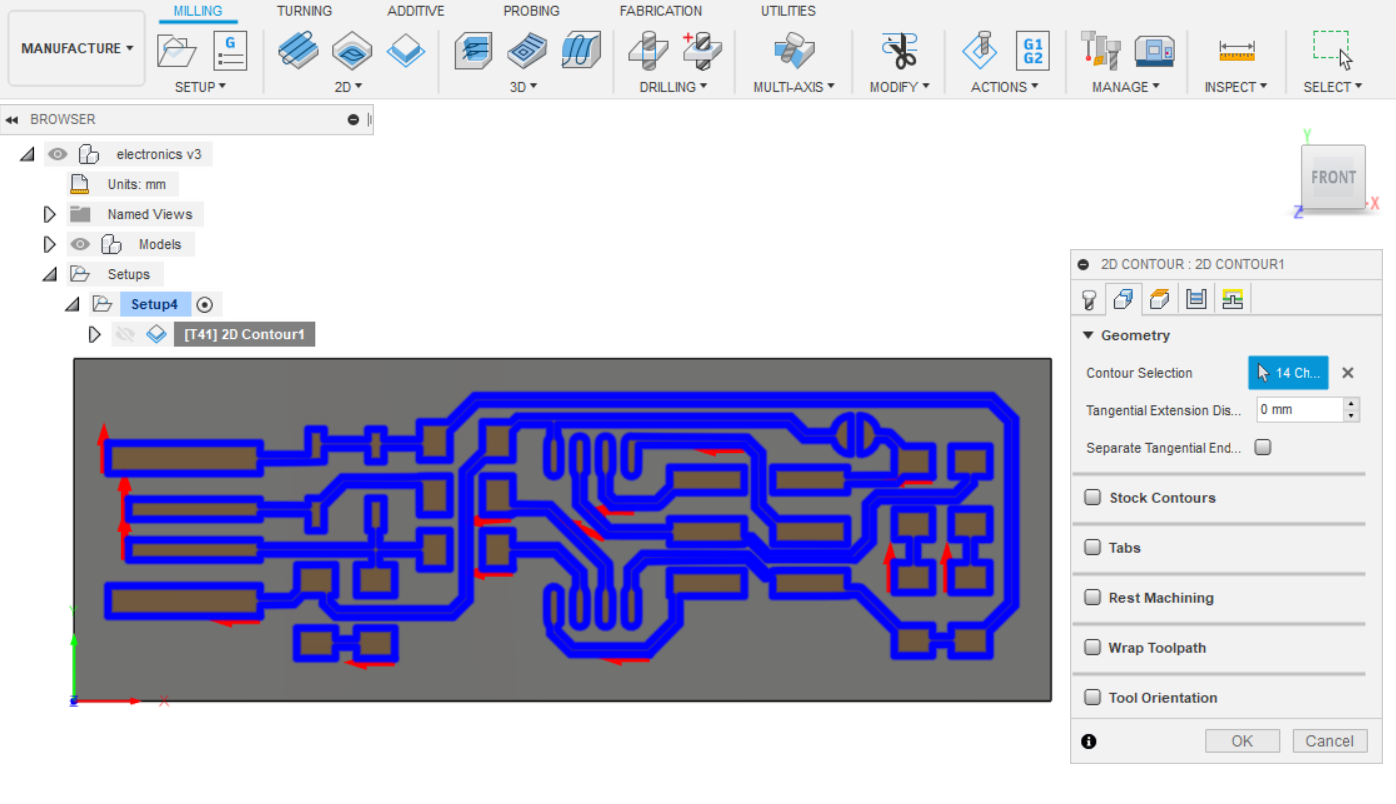
To do the group assignment, I milled this line test file. The tool I used to mill this is the carving V-bit end mill that came with the Snapmaker machine. Its properties are: Solid Carbide, Single Flute, 30 Degree, 1/8'' Shank.
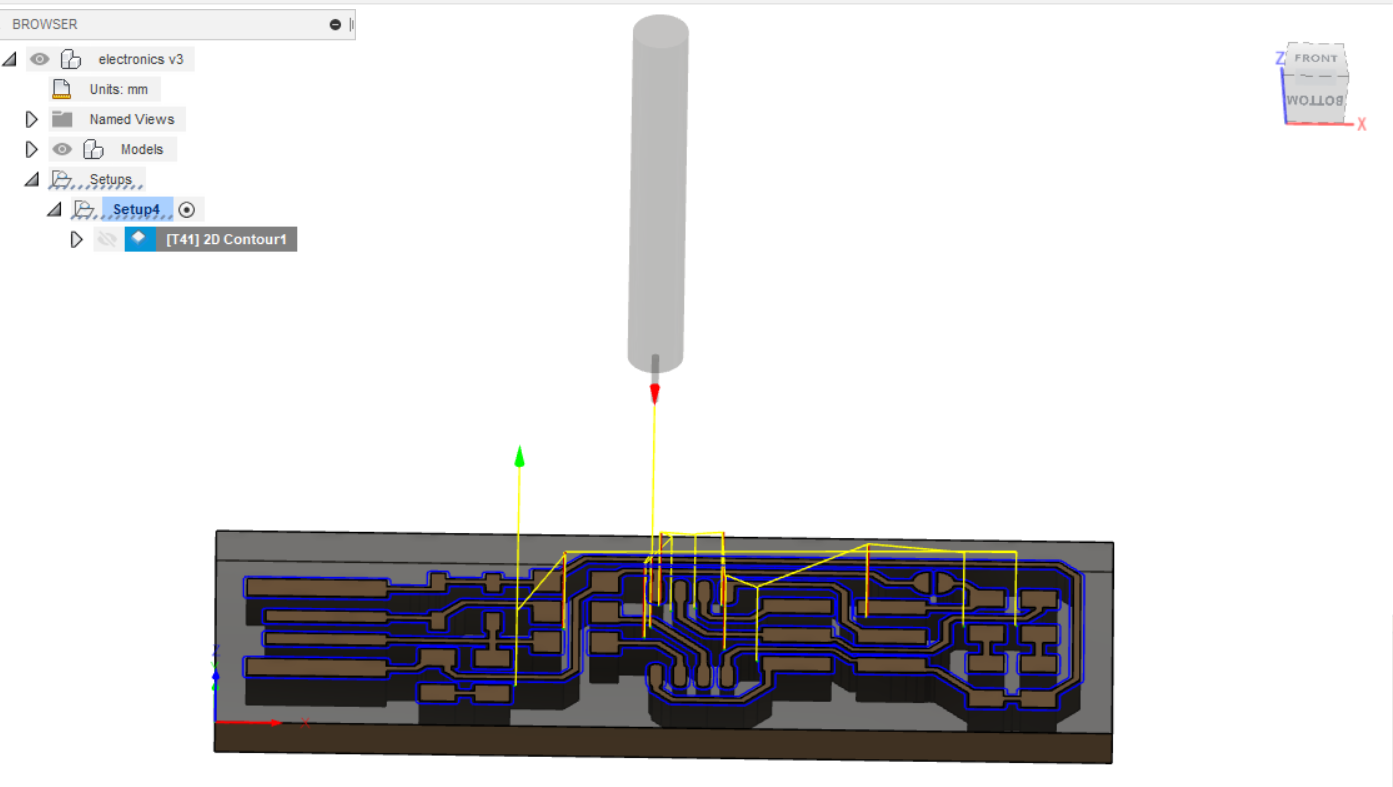
The first thing I did was to convert the png file to DXF, then insert this into Fusion. After this I then extruded the traces, followed by the outline.
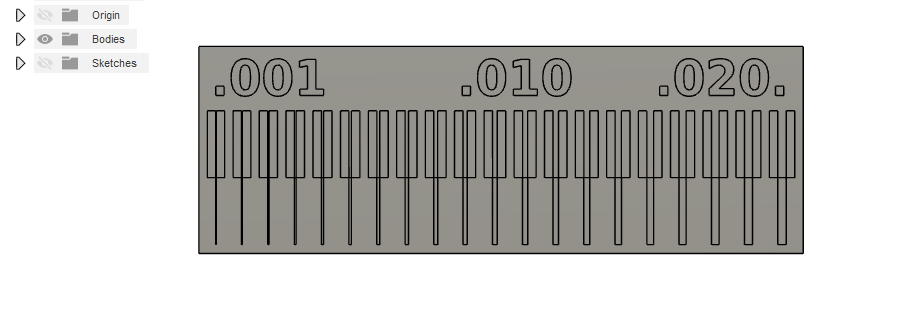
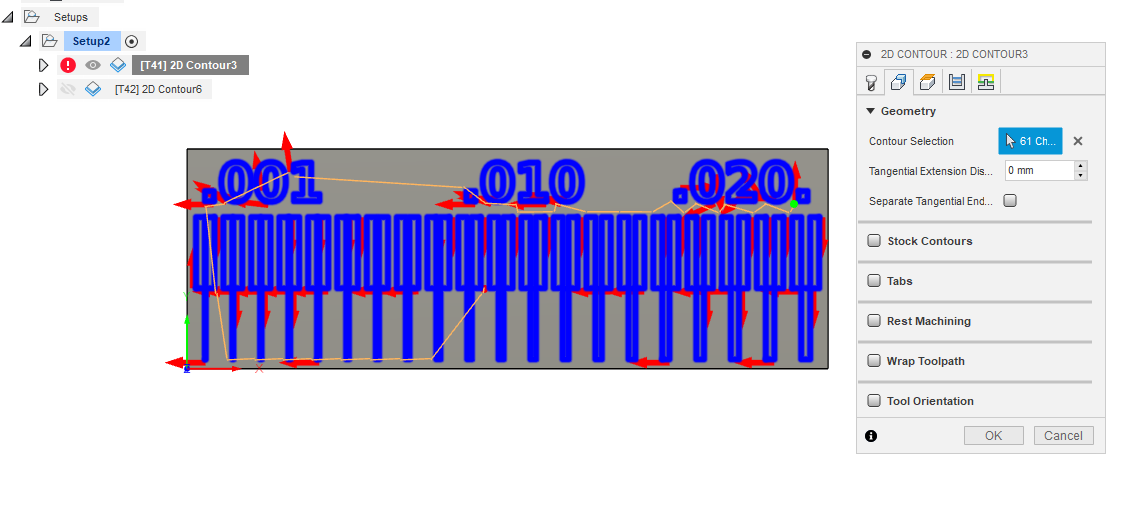
Then I prepared it for milling by setting it up as '2D Contour'
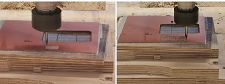
Then I milled it.
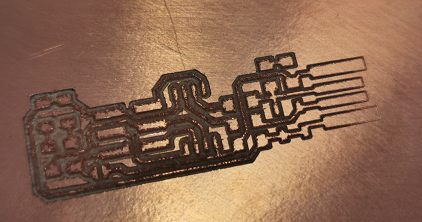
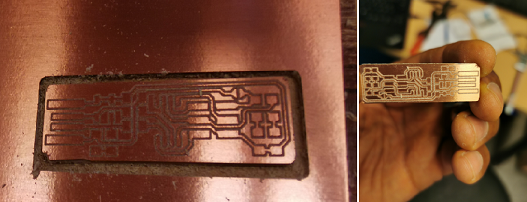
Below is the picture of the finished product.
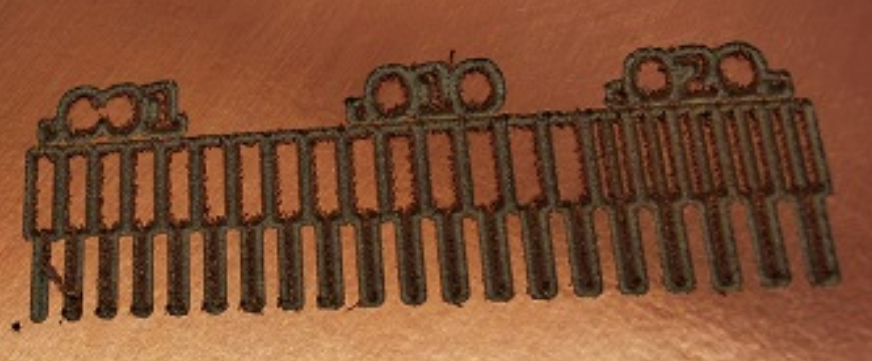
It is worth noting that this could have been done properly had it been we had 0.2 - 0.4 end mills. However, I had to use what I have to solve the problem at hand.
You can view the Group Assignment on this Link.
Individual Assignment
This week's task has already been simplified, because we already have the design of the assignment. So all I have to choose is whether I would like to do the ISP (AVR) or other designs. Consulting with my Fab instructor (Daniele Ingrassia), we agreed to fabricate Brian's ATtiny45 version of the programmer. To view please go to this Link. So all I needed to do is to download the PNG files for the traces and the board outline.
To download the files, just click on the name. This will take you to the downloadable link. So what you need do is to 'Right Click' on the image, select 'Save Image as', then save it to the folder of your choice.
Click here to download the Trace file.
Click here to download the Outline Cutout file.
PCB Fabrication (My Story)
There is nothing more difficult to take in hand, more perilous to conduct, or more uncertain in its success than to take the lead in the introduction of a new order of things.
The best way to explain what transpired is perfectly encapsulated in the quote above by Niccolo Machiavelli. The reason is because doing this assignment has been a roller coaster of steep learning curve. First it started with problems ordering the components, then lockdown due to the pandemic, next came myriad of issues with machines and finding places to mill the board. However, based on another quote by Niccolo Machiavelli which says “Where the willingness is great, the difficulties cannot be great. ” I persisted, and can partially say I am satisfied with the turn out. So below, you will find out how I did what I did.
Board Fabrication
To transform the PNG files, we need to utilize the Fabmodules to transform the files from .png to the format understood by your CNC milling machine (e.g gcode files). However, after uploading the saved G-code on my CNC machine, for some mysterious reasons the Z axis always plunge into the work bed, which wasted three 0.4mm end mills that I bought with my hard-earned money. Several attempts were made to mill the PCBs at other labs in the Fab City Hamburg network. However, all proved abortive, because one was changing office, while the other was too afraid of the pandemic to open up.
So after waiting for another 1 month to create enough bouyancy in order to invest in the end mills. I resumed work on the PCB milling on 11.06.2020. Corona, despite being a pain in the A**, proved to be a blessing in disguise.
I also attempted to mill the PCB with the Snapmaker 3-in-1 machine. However, I learnt that my friend's ( Kais Alila's) open source machine stood better chance than the almighty snapmaker. However, I am not pointing accusing fingers. I guess the frustration of not being able to use my CNC machines, and also not being able to find a FabLab around Hamburg to mill the PCB contributed to this harsh judgement of Snapmaker.
Patience is a Virtue! If you do not believe then come to me for a personal tutorial!

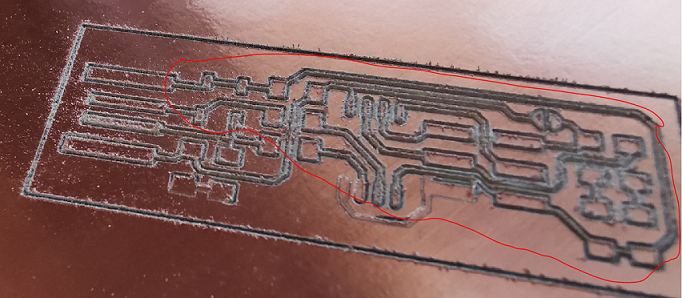
Just when I felt I had struck it rich with one of my numerous attempts, it became apparent that the goddess of luck was too busy with the god of love to even have time for a person like me. Why, because the machine chipped off some of the copper on the board. See picture below.
Instead of giving up, I had to summon the courage in me. Then I decided to toughen it out with the big CNC at the OpenLab. If there is one thing Fab Academy has taught me, that will be 'You do not know how tough you are until being tough is the only option you have left.'
Detour Strategy
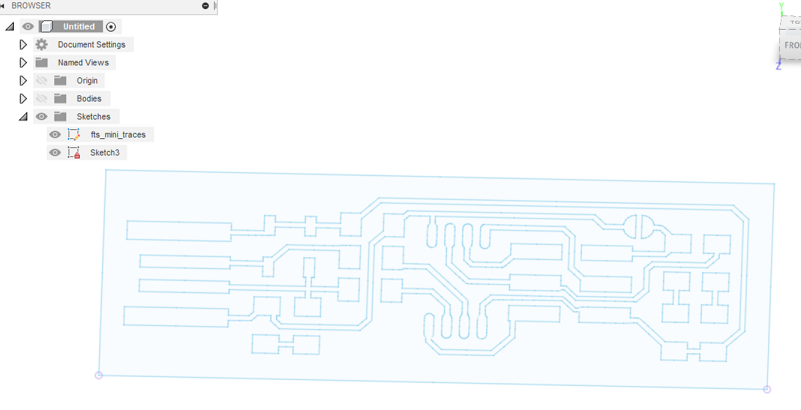
So after For this process, I made a little detour, since my milling machine does not seem to be cooperating with the G-codes generated from the Fab Modules. What I did was to convert the traces.png file from Brian to DXF using this Website. After which I inserted it to Fusion360. (Please see pictures below.)
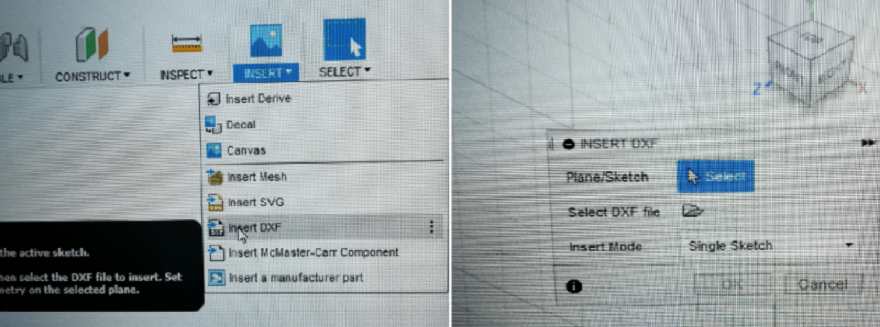
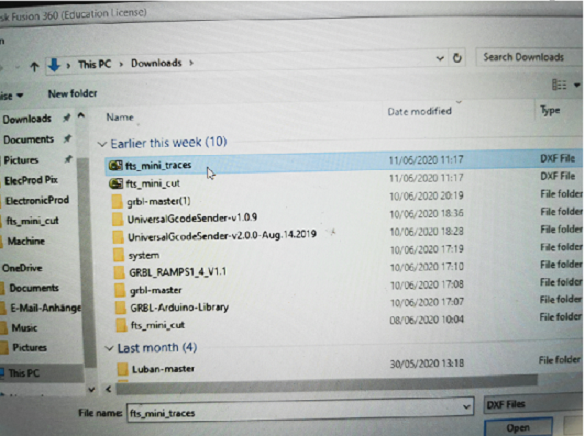
Which looked like this
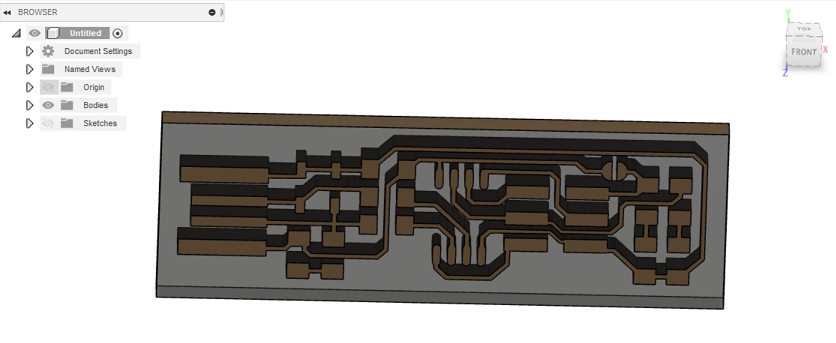
The next gymnastic I took was to make two simultaneous extrusions. The first was the body of the path to be milled by 2mm which is the exact height of the PCB boards. Then I extruded the traces by 2mm.
However, I must also note that the size of the board after inserting it from DXF was 1895mm by 665mm. So what I did was to scale it down using the formula below:
Target Size / Source Size
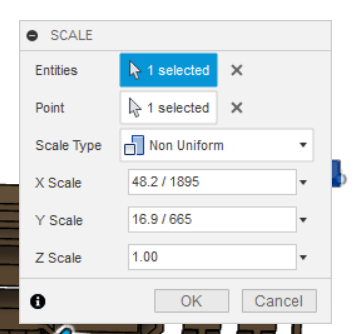
This brought the board down to the required size. Then I set up the milling process, by setting up the tool path and tool.
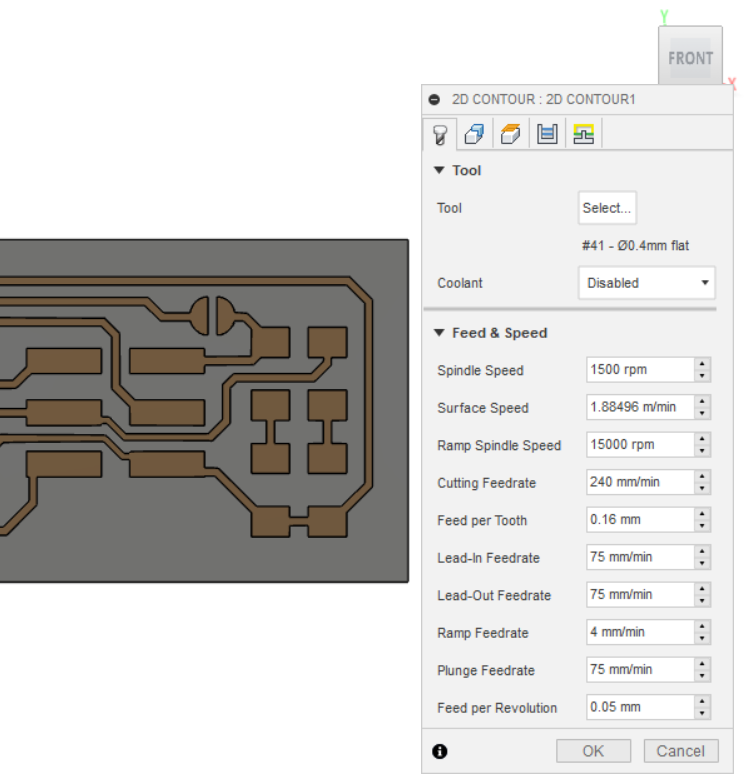
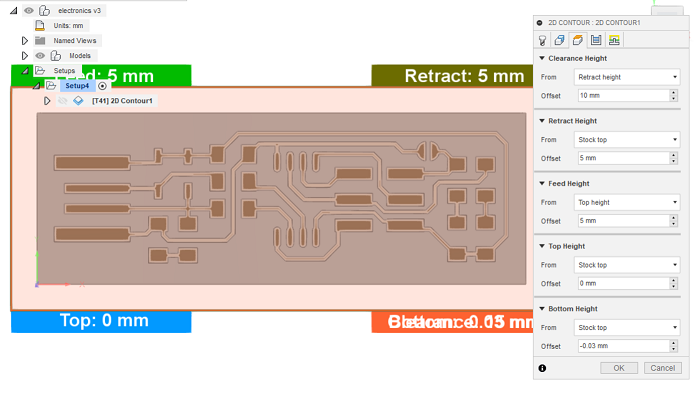
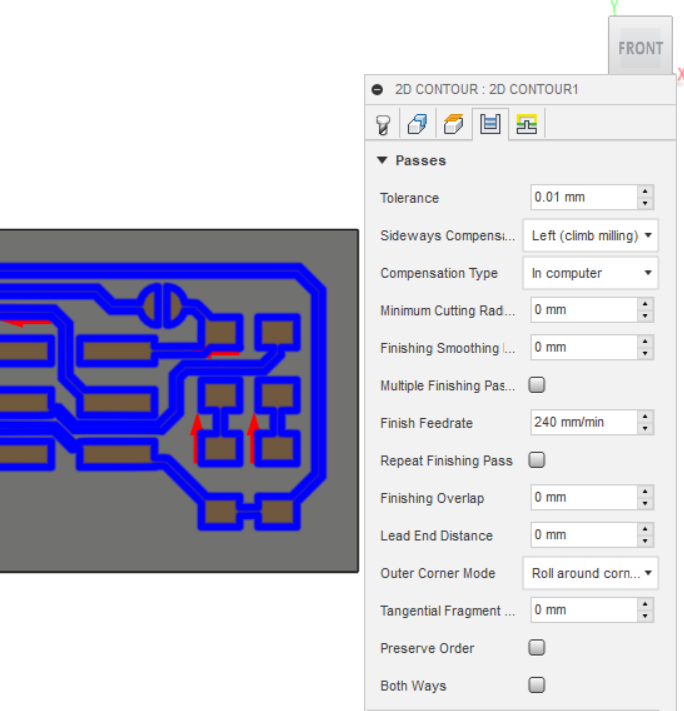
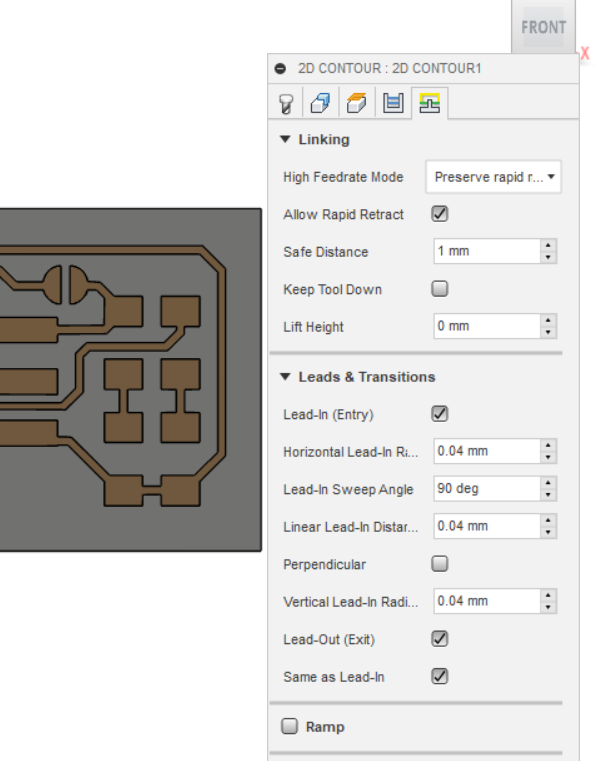
After this I set up the tool for the milling job.

Then I simulated it to know what to expect.

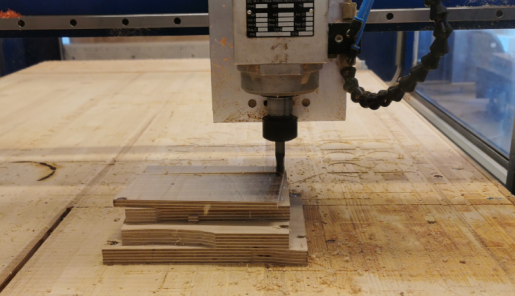
Once satisfied, then I proceeded to milling it with the big CNC machine at OpenLab Hamburg.
First test
After getting series of errors with the 'Machine limit violation. I decided to elevate the PCB board on the milling machine. The first test was done with an end mill of 0.4mm. Everything was going well, until the CNC software showed an error message that communication was lost with the machine. Which I believed chipped the flutes of the end mill, hence damaging it. See Picture below.

Second test
With the second test, I used the filer at OpenLab Hamburg to sharpen the V-bit endmill that came with the SnapMaker machine. The reason for doing this is also benign to me. I was just tired of the series of disappointments. I also did this because I observed that the frequency of usage had taken a toll on the end mill. So instead of wasting money in buying another one, and also wasting time in waiting for it to be delivered. I decided to file it. Well, Fab Academy is supposed to teach you 'How To Make Almost Anything', which includes making your challenges POOF! This proved to have worked. However, I discovered that my adapted workbed was not leveled.
So I created a 150mm bx 150mm box on Fusion360, and I used this to level the workbed.
Third test
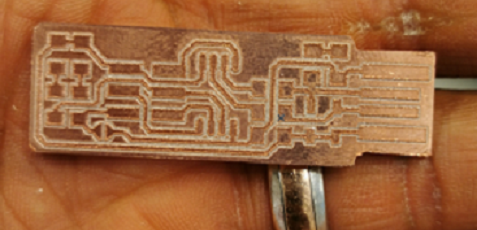
After leveling the workbed, I successfully did the traces of FabISP! This was an EUREKA Moment!
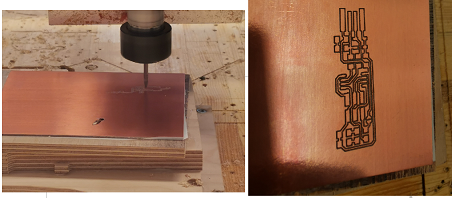
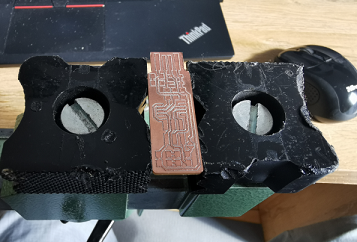
However, this was shortlived. Because while trying to cutout the outline of the PCB, towards the end of the task, the board started losing its grip on the workbed. So I stopped and manually filed the remaining part.
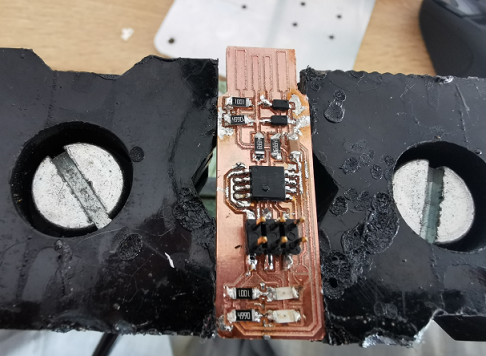
Voila! Now you know why I said patience is a virtue. After going through the immense process of cleaning it up, I finally got something more acceptable.
Stuffing
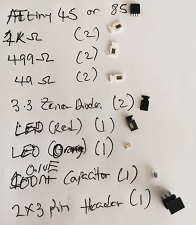
After milling the PCB, I proceeded to soldering the components on the board. Below are the lists of components soldered on it.
After this, I proceeded to preparing to stuff the stuff up. After some minutes of, I finished the job. History has taught me not to celebrate too soon. So I will wait till after I have uploaded the program.
After following Brian's recommendation, that the connection to the USB port can be enhanced by flowing some solder onto the USB contacts on the board. I also did the same.
After this, I proceeded to the real test of all my efforts, which is the programming part. Hopefully all goes well.
Programming
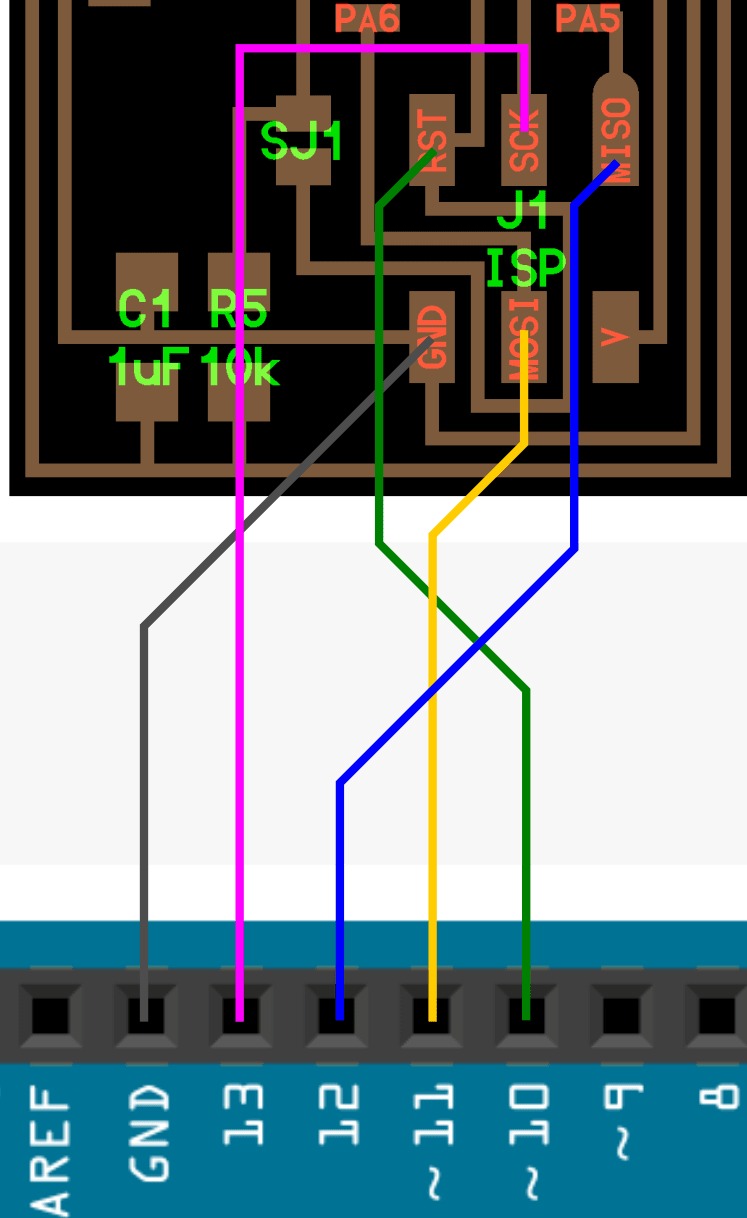
This is the moment of truth, where we will find out how brave a warrior is. To get this done well, you have to ensure that all steps are followed with the eyes of eagle. So for this step I will start by using my Arduino UNO as an ISP. This happens to be the easiest of all the quests on this journey to reclaim the 'Makerian Colony'.
Get an Arduino UNO, if it has been previously used for other projects, then it is mandotary you first clear the memory by going to
'File' --> 'Examples' --> 'EEPROM' --> 'eeprom_clear'
Upload this on your Arduino UNO. I definitelky assumed you have selected the port and the right Arduino before uploading. If not, we will summon the executioner, to deal with your sacrilege.
After this, you can now upload the ArduinoISP sketch on the board. To do this you just need to go to:
'File' --> 'Examples' --> 'ArduinoISP' --> 'ArduinoISP'
Then click upload to program the board into an ISP.
Thanks to Brian, his effort made it easy to program the board. However, the connection he placed to download the Atmel Studio software was broken. My Fab Instructor (Daniele) now shared this LINK which required less effort unlike the ones suggested by Brian for Windows platform, hence making it extremely easier to program the board.
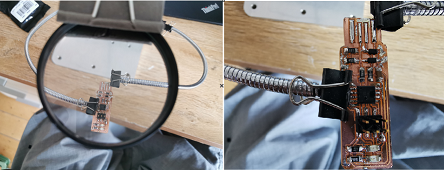
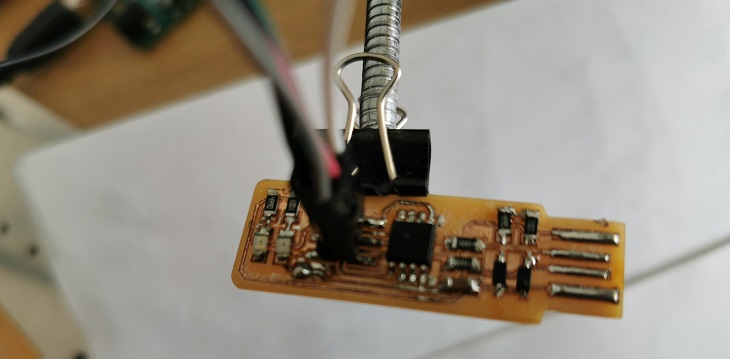
To connect the Arduino board to your FabISP, just follow the picture below. In case you are not sure of the orientation, it is best you have Brian's model opened whilst you do that.
In addition, you have to make minor changes to your device in order to get everything working. Unfortunately, if you miss one of these steps or did not do them properly, you might just be playing Russian Roulet with a fully loaded pistol.
To continue, I followed Brian's model , with the exception of the broken link for the Atmel studio. I downloaded the Firmware source code. Extracted and opened it. Then I navigated to the file called 'Makefile', then I opened it with a text editor.
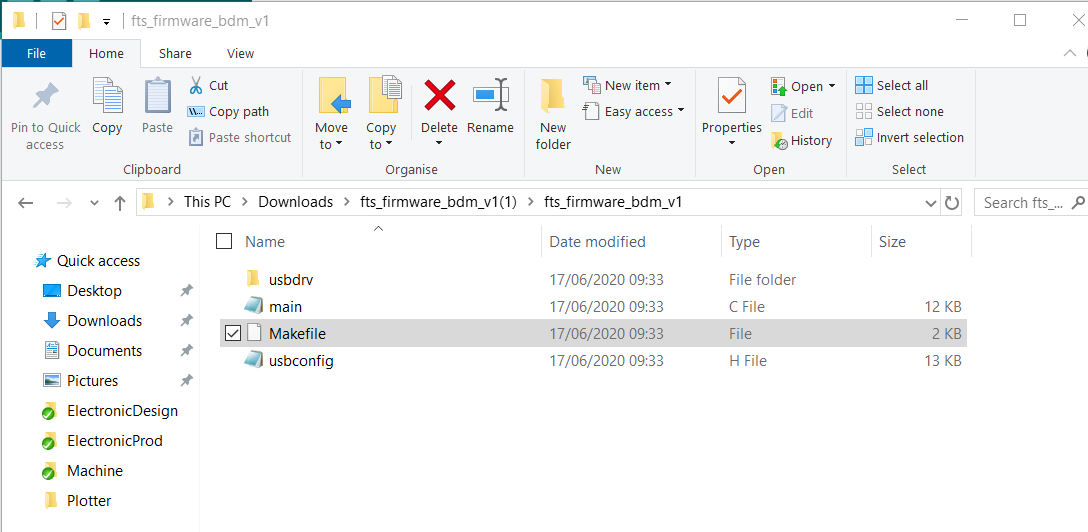
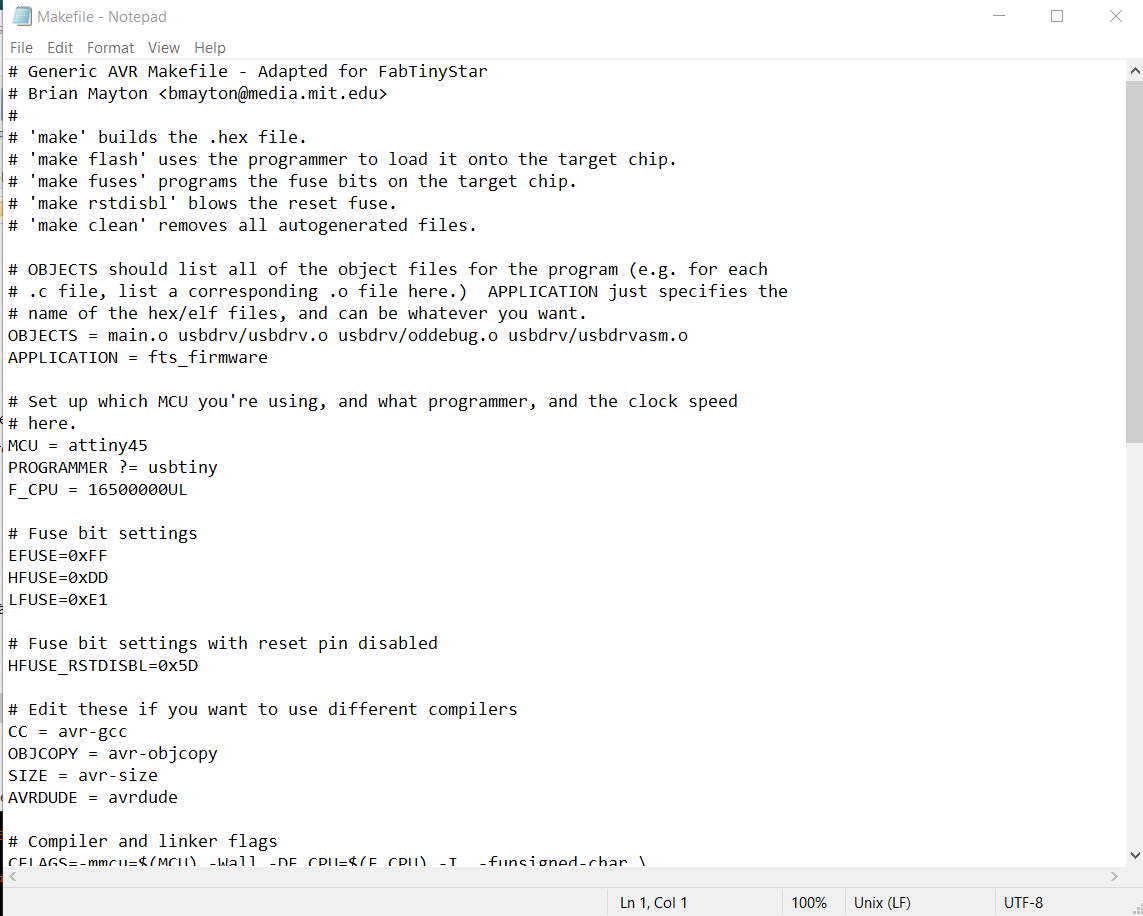
Then with the help of Daniele, I made some modifications to the 'Makefile'. The changes made are documented in the pictures below.


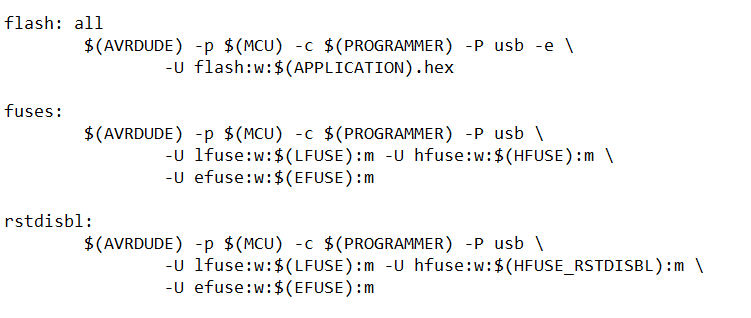
The job is not done yet, you still have to make some changes to the DUDE's address. Which Dude?! AVRDUDE! The changes made here are to insert the communication channel of the Arduino Uno into the Makefile document. These changes are depicted in the pictures below.
After this, I just saved the changes, then open Git Bash, to start bashing my way through the assignment.

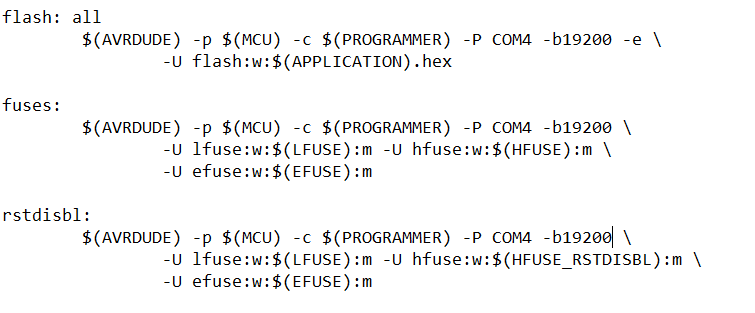
Then, like a brave warrior, in the name of the King to I gave it a command to 'Make'
make
Which it heeded without any complaints. However, when I gave it another command to 'make flash', the FabISP responded with some heretic comments.
make flash
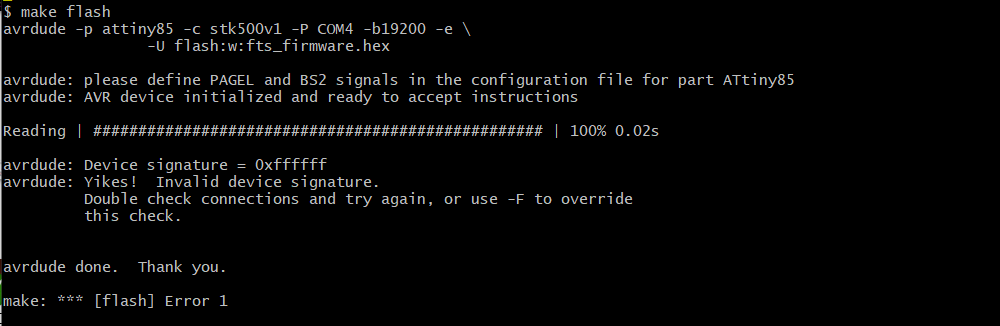
Well, I guess I celebrated too soon. Just as I started getting a big head for having resolved the issues with the software download and modifications, then the programmer showed me what kind of pain it could be on someone's derier. So I went back to my humbled self.
Daniele, cited that the error simply shows a lack of communication between the Arduino and the FabISP. Upon inspection of my board, he noticed that I might have created some bridges between the traces and the body of the board. Now, it became apparent that I also have skills in constructing bridges without a Civil Engineering degree. So in order to solve the problem. I decided, with a box cutter and a tweezer, to carefully or painstakingly remove the copper layout on the body of the board. In a layman's term, I stripped it naked (but not totally nude).
Then I tested all connections on the FabISP to know if there is still a bridge left, as well as connections from the Arduino board to the FabISP. As for now, I did not find anything. Hopefully it should work now.
After the test and clean up. I went back to where I was. So I started with a 'make clean' command, to reset the board to its original position.
make clean
Then, i reentered the 'make flash' command. Which will erase the target chip, and program its flash memory with the contents of the .hex file you built before.
make flash
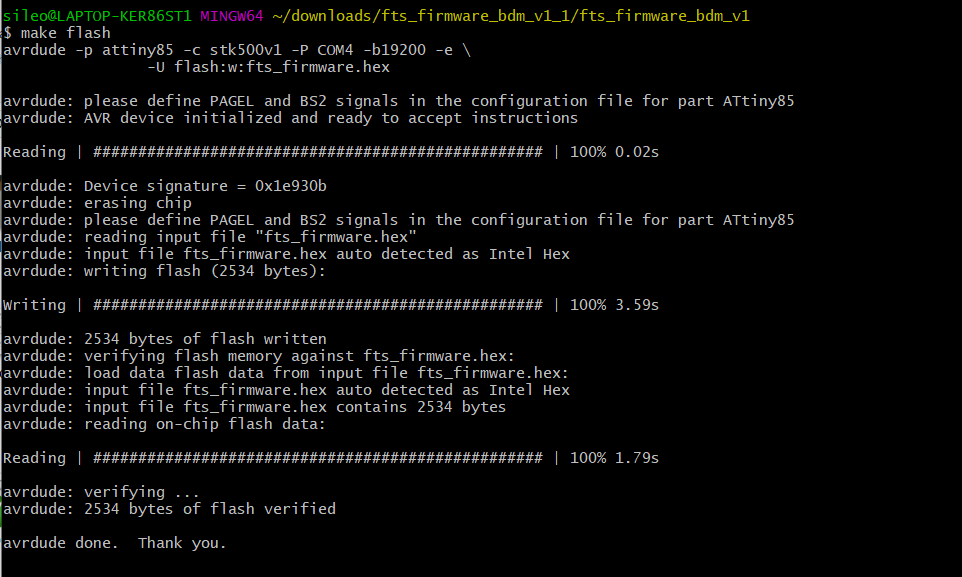
Very happy to note that this worked! After this I entered the 'make fuses' command. This will set up all of the fuses except the one that disables the reset pin.
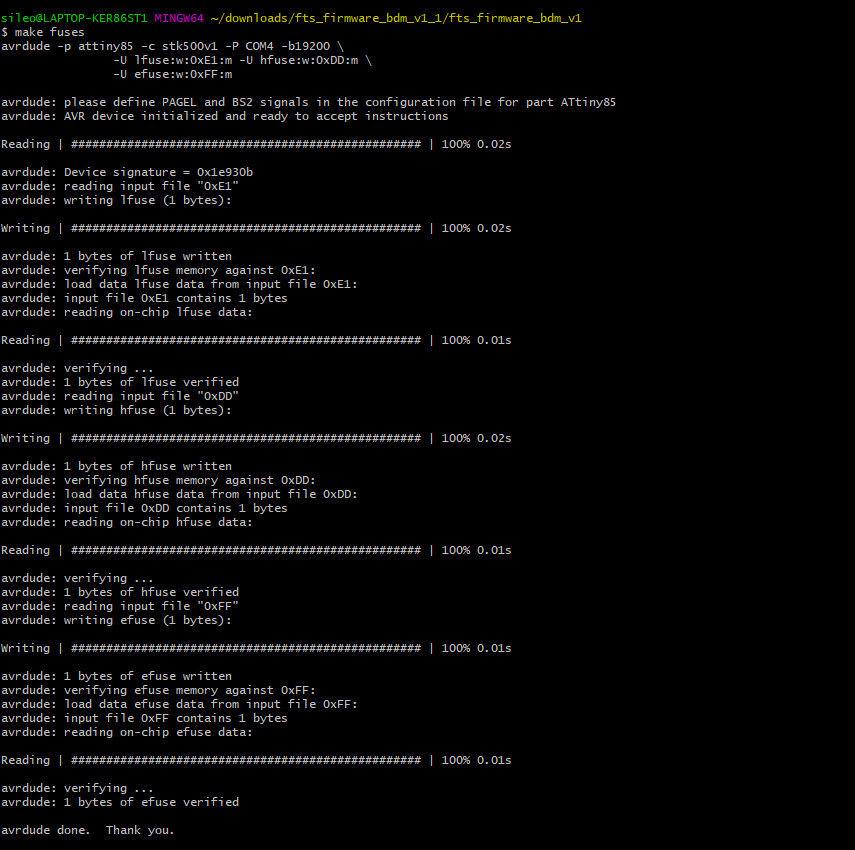
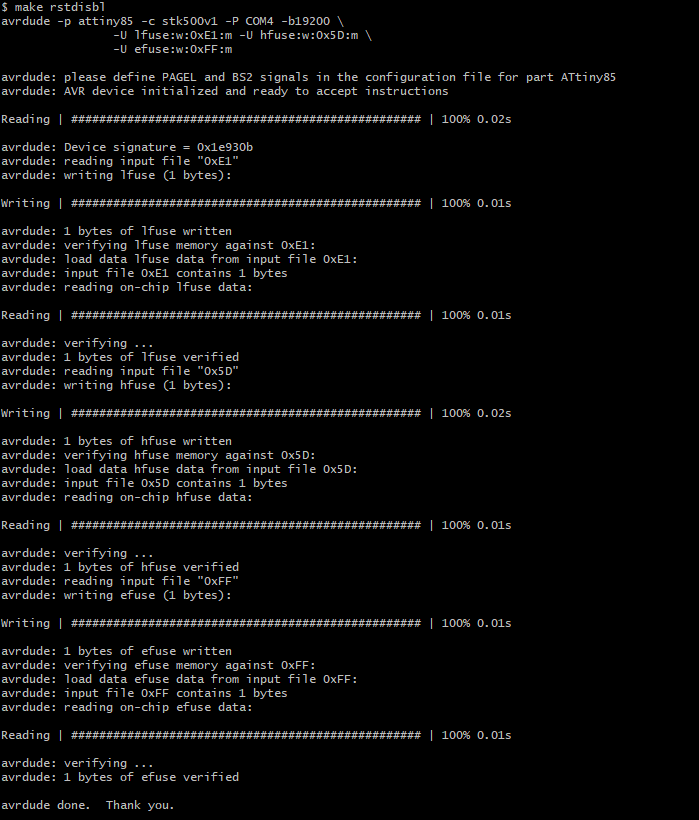
After this, you still have one last command to give to the FabISP. this is 'make rstdisbl'.
make rstdisbl
Hero Shot
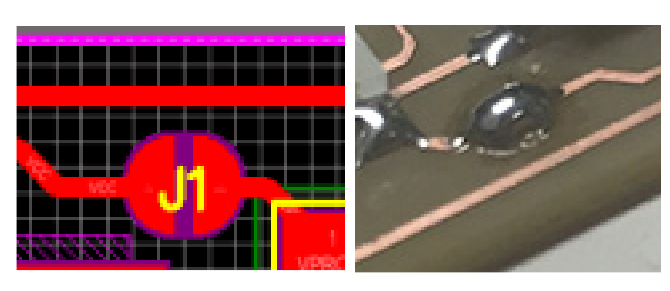
It is time to test whether the FabISP works, the first thing to do, based on Brian's model is to blow the fuse, that is the part of the FabISP that was temporarily soldered together. Check the picture Below
After this, the board should be able to function as a programmer for other boards.
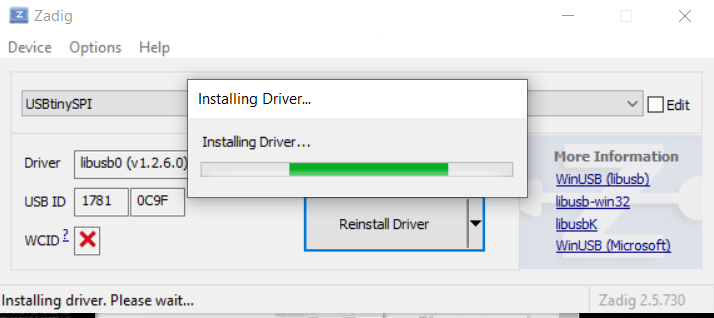
So I thought! However, another problem was exposed whilst trying to connect to the USB port. Zadig could not see my device. At first I thought my board must be a John Cena (WWE) fan (You Can't See Me!)
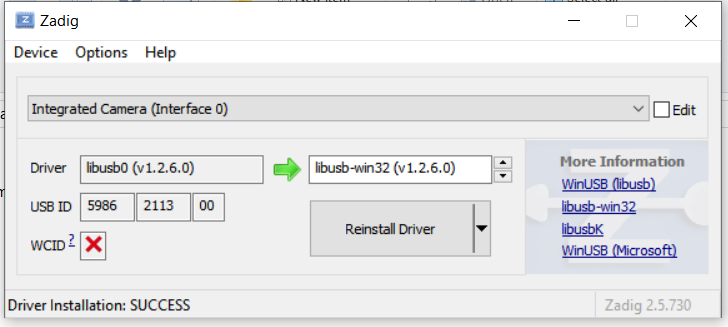
Thank God for Daniele's intervention, I would have given the troublesome board a walk of shame! It became apparent that I arranged the zener diode in different polarities. So I unsoldered the wrong side of the zener diode and rightly arranged it on the board. Now
After this, you have to click 'Reinstall Driver'
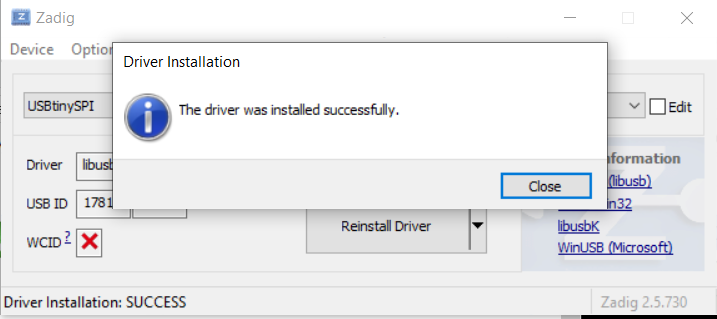
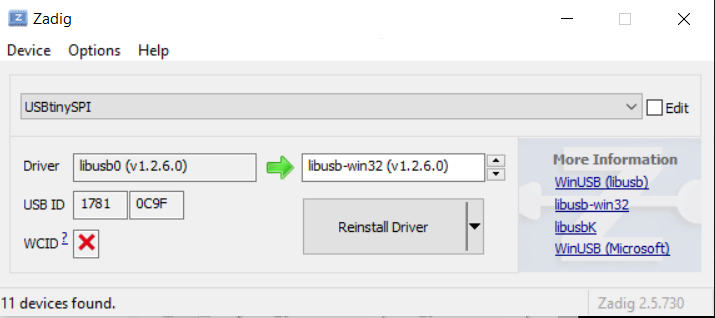
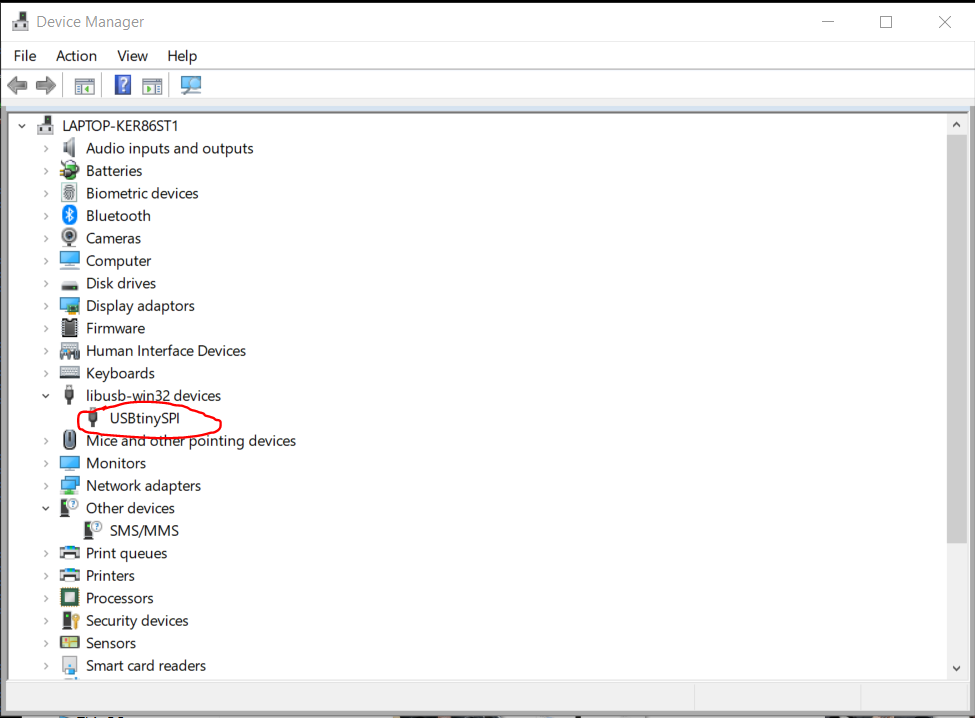
Then after this, you have to navigate your way to Device manager, or simply search in the search pane on Windows. This is important to show that the system actually sees your board. Go to
'Device Manager' --> 'libusb-win32 devices'
Once you click on 'libusb-win32 devices', you should see the treasure right in front of you.
Welcome to the 'Makerian Colony'! This is the end of this quest. However, the future promises lots of quests!