'The dog's happy dream produces no meat.'
African Proverbs
Application and Implications
Unlike other assignments, this week we also does not include a group assignment. However, the workload covers the lessons covered till date. Which means that, by now you should be able to express, even up to 70%, the lessons you have learnt till date. The remaining 30% could come from enough practice ('Practice makes Perfect'), your instructor, and knowledgeable friends on the subject matter.
One thing also worth expressign here is that most of the things done here will be copied and pasted in the section that focuses on the Final Project itself. So DO NOT accuse me of plagiarism, because there is no such thing as self-plagiarism.
Individual Assignment
Therefore for this individual assignment, we were given what seems to be a 'Magna Carta'. These are listed below:
Final Project Proposal: FabOMeter
At the beginning of the Fab Academy, I thought of working on two projects that were listed in Week 1's Assignment
What will FabOMeter do?
FabOMeter, almost just as it is pronounced is a Fab Academy inspired InfraRed (IR) Body Temperature Thermometer. So in a nutshell, what I intend for it to do is to do are as follows:
However, unlike the existing commercial IR thermometer, FabOMeter will in addition to the factors listed above, do the following:
Who has done what beforehand?
Just like most recent innovation endeavours are based on incremental innovation, so does FabOMeter emanate from existing products, with the intent to provide additional features which radicalizes the incremental nature of the innovation process. There are tonnes of commercial versions of IR body temperature, with their cost ranging between $40 and $100. However, due to the Fab Academy approach and also adherence to the Fab Charter, the real due diligence for the project would be to identify the open source version of this projects. From my search, I found these projects Open Source Project1 and Open Source Project2 as direct antecendents to FabOMeter. Which means that, these two projects are, what 'Adam and Eve' is to the human race.
What will I Design?
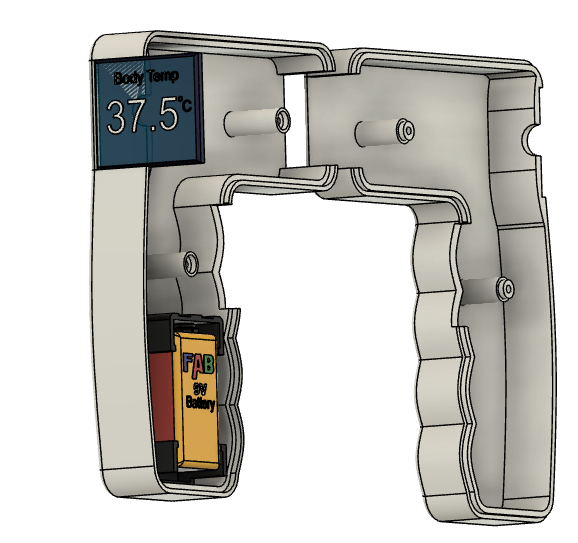
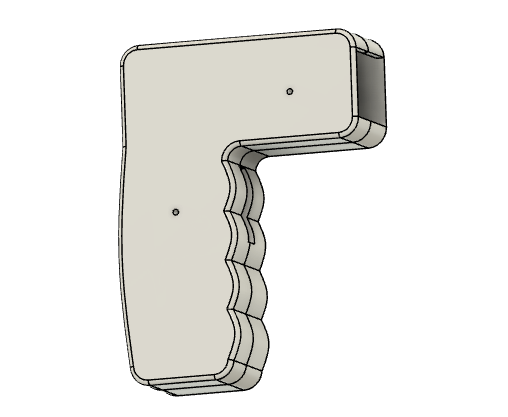
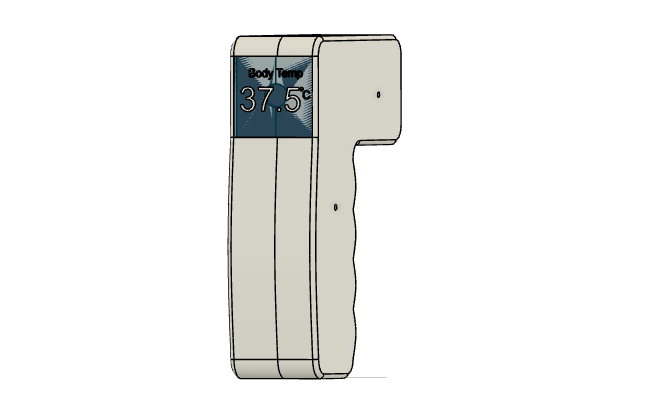
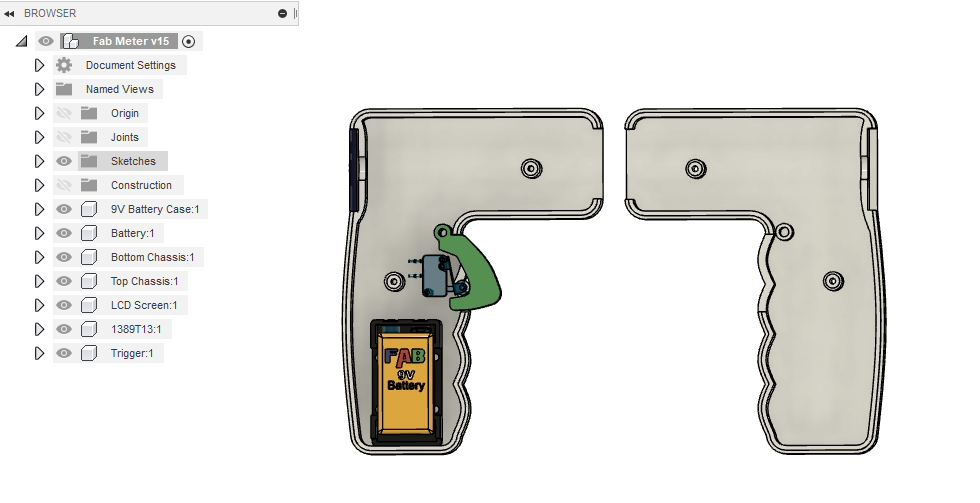
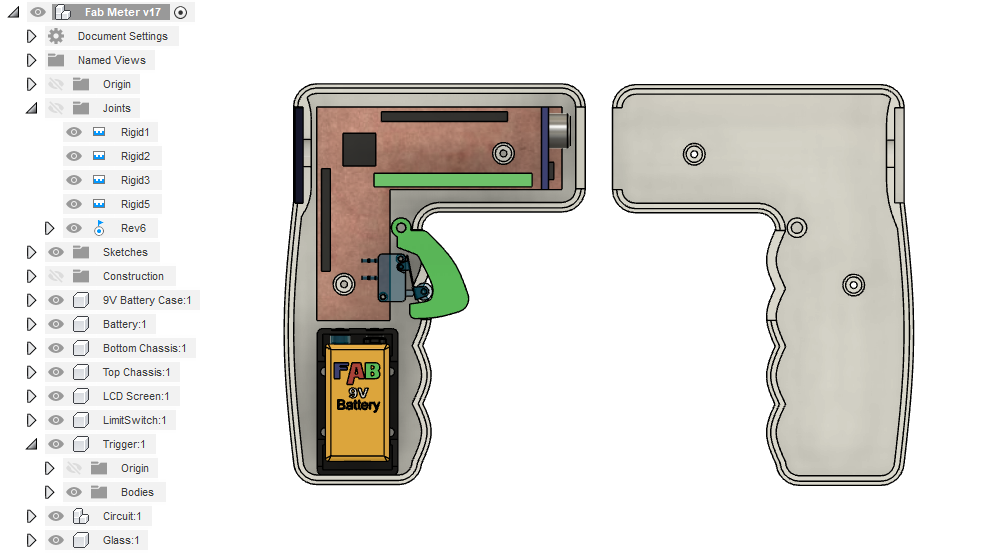
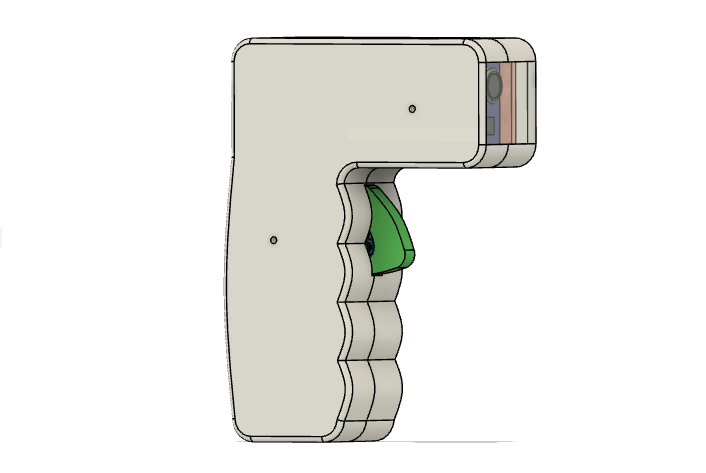
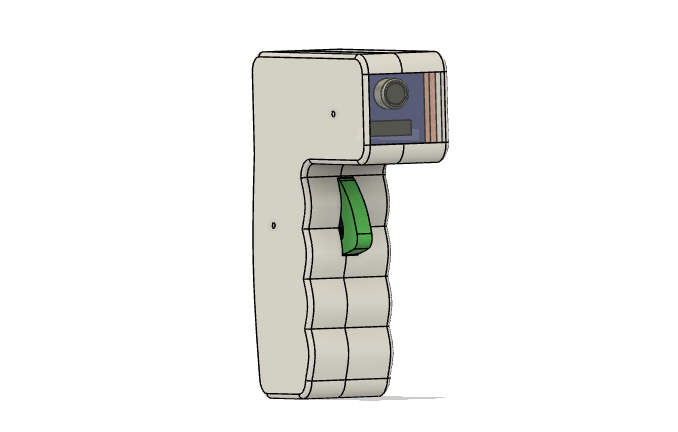
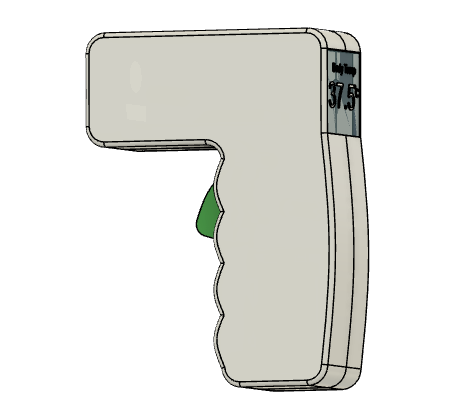
for the project, I will definitely make a CAD design for the case, as well as the electronic circuit board for the electronic components that will be used for the device. A CAD model for this design is depicted in the pictures below:
More information about this can be found HERE. However, this is a progressive work, which means regular updates will be made in this directory.
What Components will be Used?
Below are the list of components that will be used for the FabOMeter project (Please be aware that some are optional, which means they may not be included in the final project):
Note: There are other better sensors that could be used for this project. However, to afford them one might need to part ways with one of their kidneys.
Where will they Come from?
Duhhhhhhh! China of course! (pardon the jokes). I sourced the components from different online platforms (amazon.de, eBay.de, digikey.de), as well as the a local hardware or electronic store in Hamburg (Conrad). You can find the BoM for the components below.
How much will it Cost?
As it stands, the total cost of the components bought is 58.02 Euro. This also includes the fee for shipping and logistics.
You can download the bill of materials HERE .
What parts and Sysmtems will be Made?
The parts and systems to be made include the chassis or body of the device (3D printed), as well as the main circuit board that will aid communications between the electronics part such as Raspberry Pi, IR Sensor, ToF component, and others.
What processes will be used?
I will be using both the additive and subtractive fabrication processes. As well as, 3D designing (Fusion 360), Electronic designing (Eagle), Project Management (PRINCE2), and some Quality Management processes of my choosing.
What need to be answered?
To be honest, there are lots of questions that needs to be answered by me or by the device. This include:
How will it be evaluated?
It will be evaluated on the accuracy of the readings, the affordability, ease of fabrication, and its usability.
Additive or Subtractive Fabrication Processes
I guess the question here is 'Does your project include the use of a 3D printer, milling machine, or Laser cutter?'
Answer:- Without doubt, YES it does require the usage of 3D printer for the production of the chassis, as well as a Milling Machine for the fabrication of the circuit board. So in summary, I will be using both fabrication process during this project.
Make or Buy Decision
I decided to buy components such as Raspberry Pi Zero, ToF component, and the IR Temperature Sensor than make because I found it a bit challenging buying the component itself, and most times the different between the ready-made components and the stand-alone component is only a fraction of cents. Therefore, buying all these components ended up being a better decision than making them. However, acquiring the knowledge on how the components were designed and fabricated is a very useful decision. This is without doubt possible after partaking in the Fab Academy.
You can download all files HERE .
Lastly, you can follow the progress of the Final project HERE.