- design a machine that includes mechanism + actuation+automation + application
- build the mechanical parts and operate it manually
- document the group project and your individual contribution
the rest of the documentation for assembling the machine is on our group assignment page, you can check it out here
Group assignment
This week´s assignment is fully dedicated to the group project, which consists of designing a machine and then building it, the first step of this process was to decide what type of machine we wanted to build, so we started brainstorming ideas and discussing the possibilities.
- some type of plotter
- a robotic 3rd arm
- a knitting machine
- an automatic egg painting machine
- wire bender machine
brain storm ideas:
we democraticaly made a vote, and the automatic egg painting machine was the winner, mostly because easter was just around the corner, and also becasue it sounded fun and diferent, challenging but still within our capabilities in terms of time and resources.
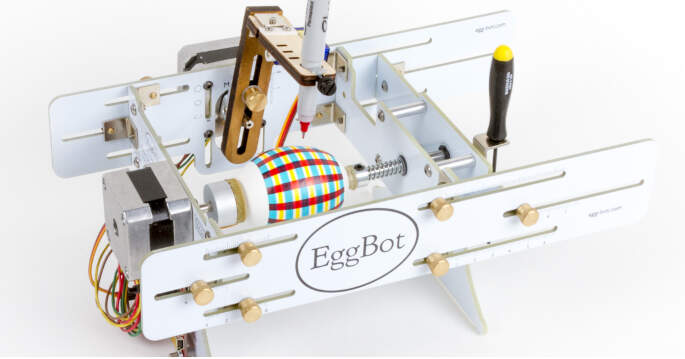
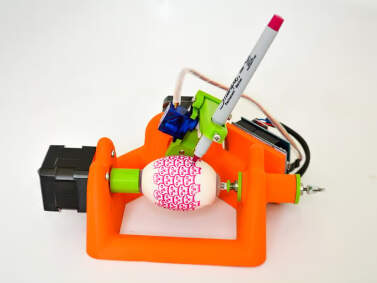
we were inspired by the eggbot and the Sphere-O-Bot, these are both open source egg painting machine projects with a lot of documentation and resources available online. the next step was to devide the tasks and start working on the machine, my task was to design and build the egg holdeing mechanism.
Machine design
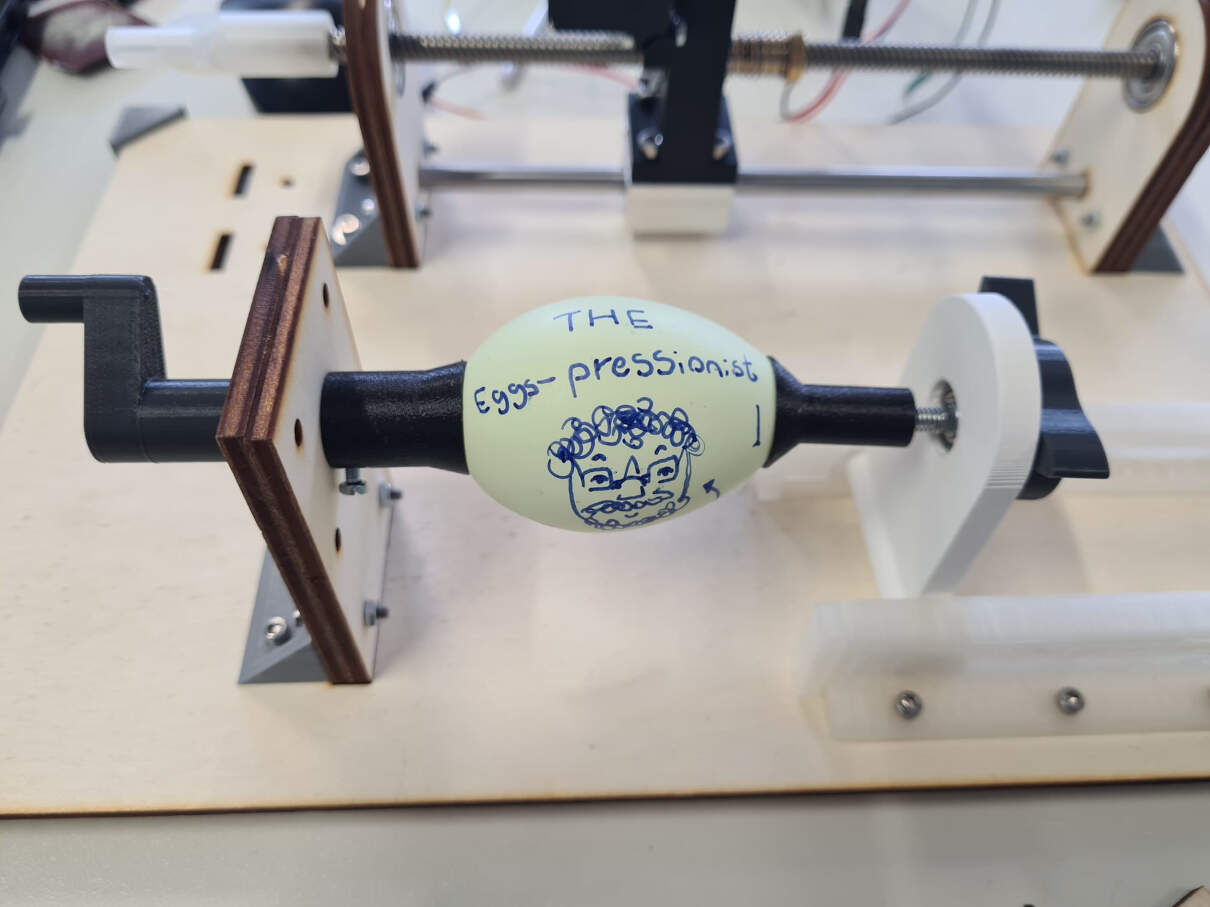
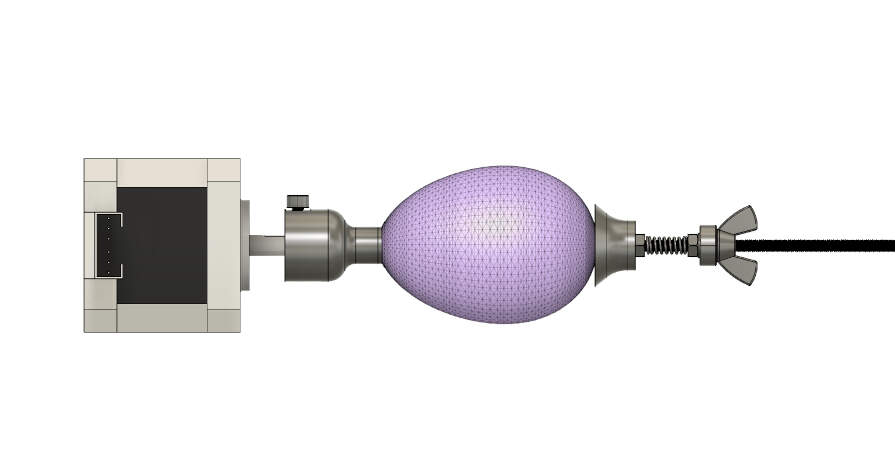
In order to hold the egg and spin, the egg holder is made of two separate parts: one that is connected to a stepper motor and the egg, and the other which only serves to hold up the other side of the egg. For now, I will address these parts as the egg scrambler (part connected to the motor) and the egg holder (part that supports the other side of the egg).
egg scrambler
The egg scrambler is a 3D printed part that is connected to the stepper motor. On one end, there is a hole that fits the motor shaft, and on the other end, there is a hole/crater/dome that fits the egg. The egg is placed on top of the dome, and the motor spins the egg. The first challenge I faced was finding a good shape for the part that was in contact with the egg. I considered a few different shapes and sizes so that it held the egg but still left most of it exposed to be painted on. I also considered the different types of materials to make this part out of.
egg holder
The egg holder is a crucial component, especially when compared to the egg scrambler. This part not only secures the egg in place but also applies a counterforce to keep it steady during spinning. To achieve the spinning motion, I utilized a bearing, while a spring provided the necessary counterforce.


Regarding the design process of this, I used the McMaster-Carr website and Fusion 360 extension to find the pre-designed components. Then, I assembled them and put them in place in Fusion 360. For this "assembly part," I followed a few sketches I made on paper. Sketching everything on paper was a way I used to better visualize the placement of the components and the overall design of the egg holder.
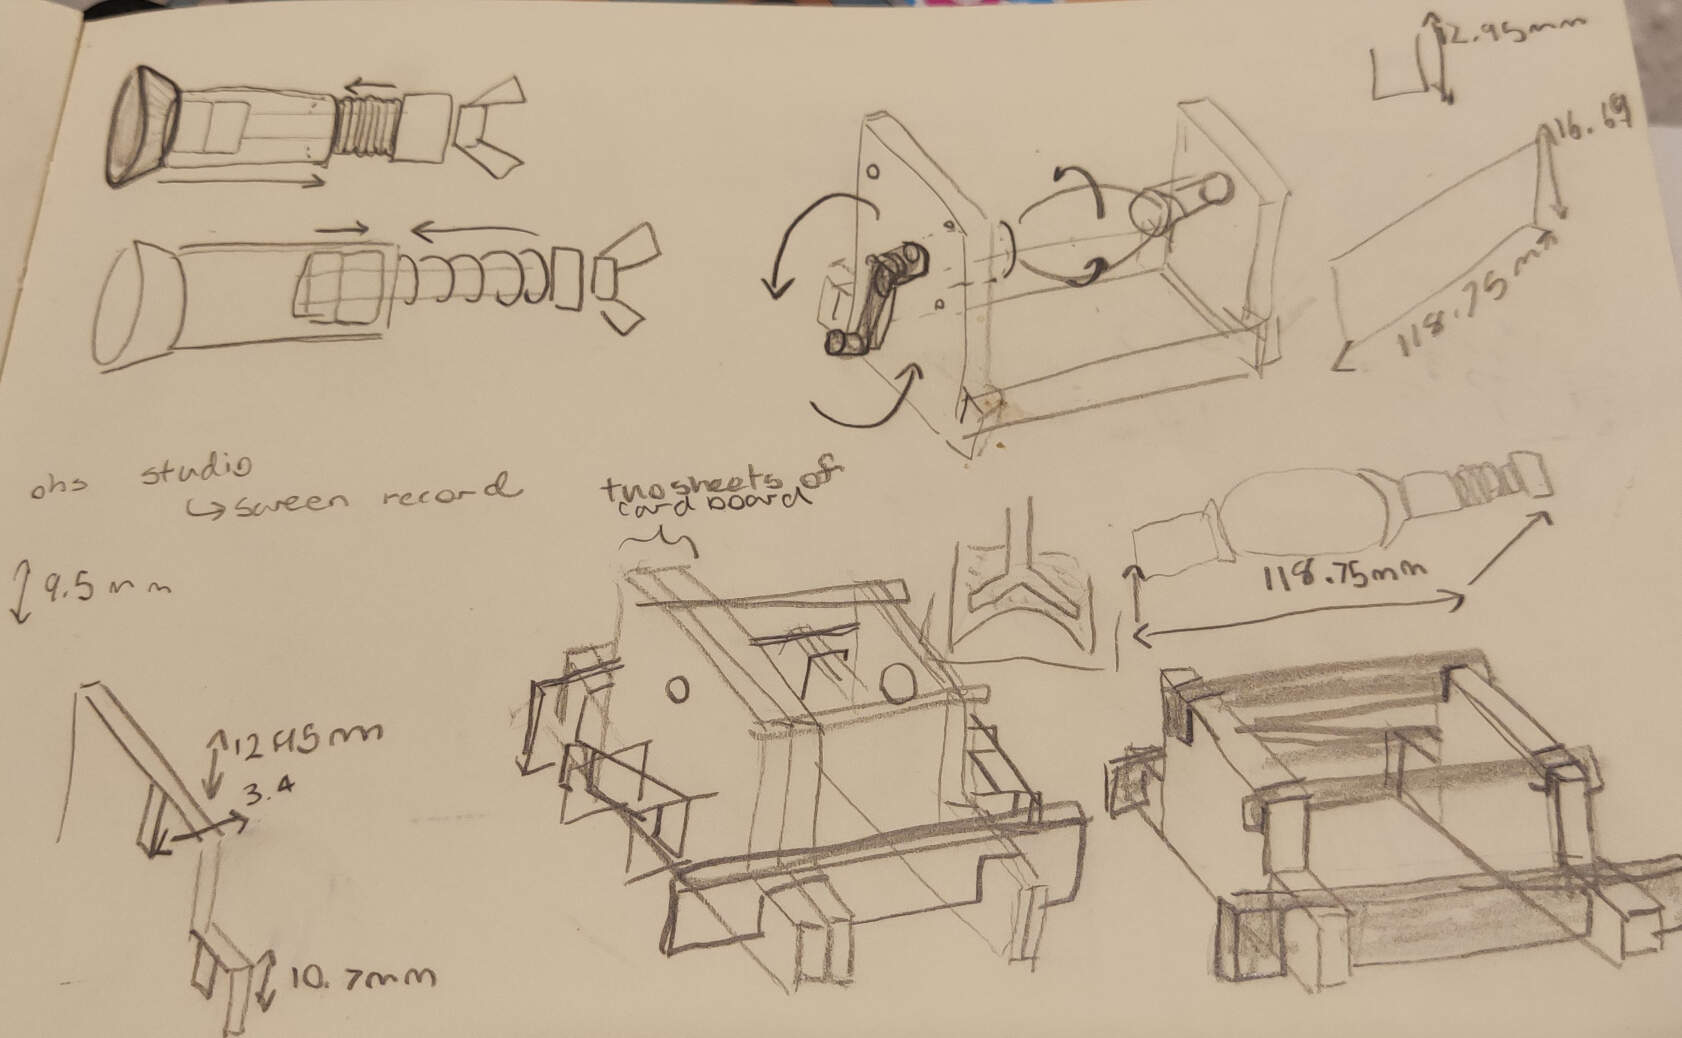

Once the assembly was complete, I focused on designing the parts responsible for actually holding the egg. In the first version, I created a cone/dome area where the egg would rest. Additionally, I added a cylinder to house a nut that connected this assembly to the rod. The overall size of this part was intentionally small, and I tested out 3D printing it with two different types of filaments. The part that connected to the motor shaft was printed with PETG, and the egg holding part was printed with flexible filament TPU because I thought this would provide a better grip and change slighly for each egg shape.
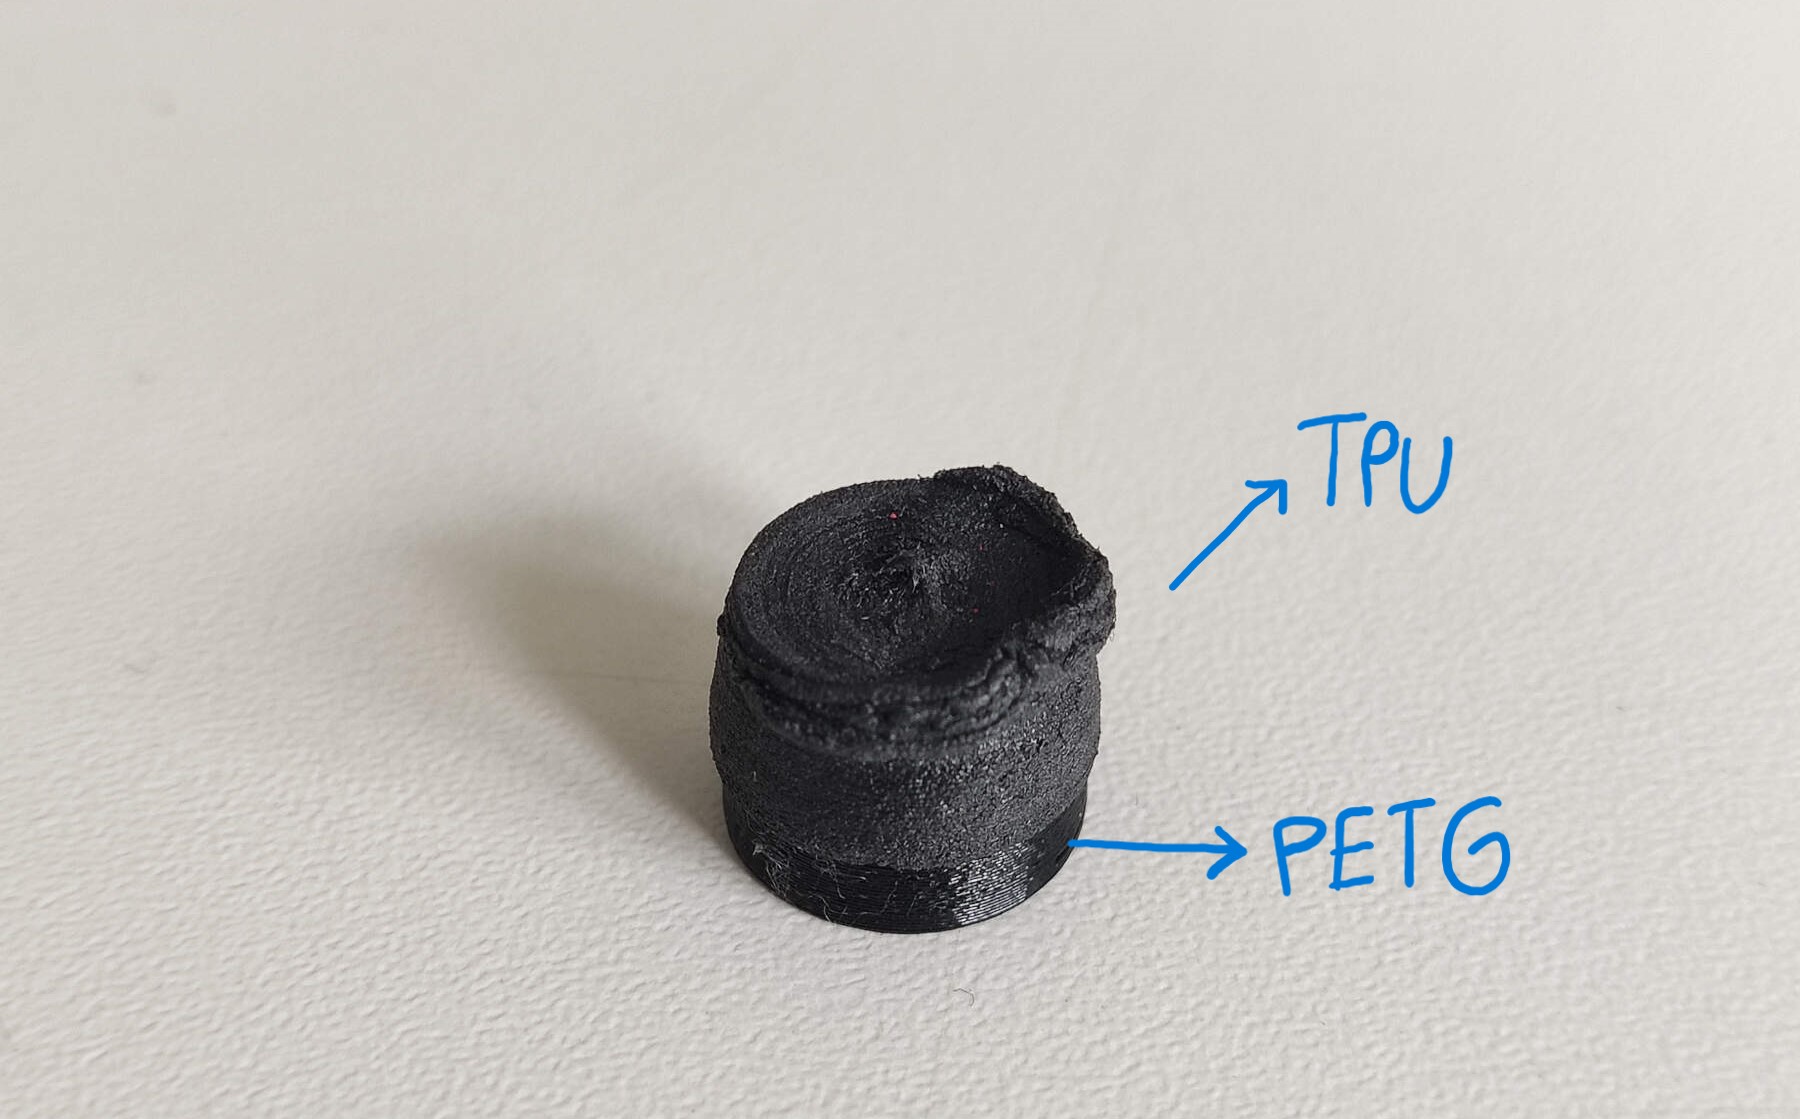
However, this first version of the egg holder was not very good. It was too small, so the egg was barely held, and I didn't take into account how the spring mechanism worked when designing it. These issues became more apparent once the part was 3D printed. Additionally, I noted that printing with TPU at such a small scale was a failure because during the print, there wasn't enough time for the filament to cool down between each layer, resulting in a disfigured part.
V2 of the egg holder wasn't that great either, so I went back to paper and drew out how the mechanism should work. Then, I brought that into Fusion 360 in the form of eggholderv3. In this version, the parts in contact with the egg are larger, and I shaped them with the help of a 3D model of an egg I found online.

egg holder v3
For Version 3, all of the 3D printed parts are made from PETG. Inside the egg holder part, there are two nuts that serve to securely hold the egg holder in place. As one screw tightens and the other unscrews, they always remain snug. Beyond the nuts, there is a washer also located inside the 3D printed part. This washer makes contact with the sides of the 3D printed component and applies pressure against the spring. Consequently, the egg holder is consistently pressed against the egg, which in turn is always pushed against the egg scrambler.

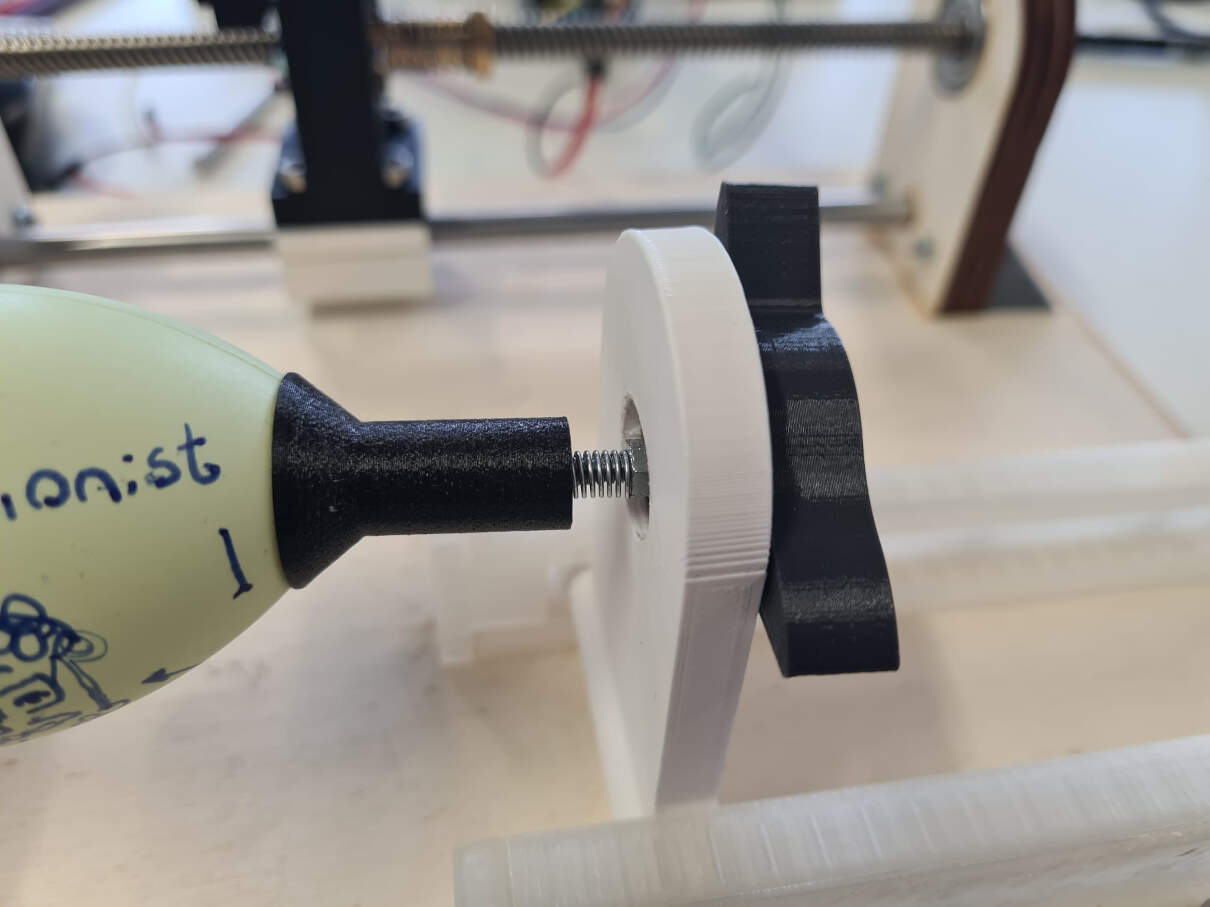
To test the egg holder mechanism, isolated from all of the other parts of the egg painting machine, I designed a simple frame on Fusion 360. Later, I cut it on the laser cutter. As you can see in the video, the mechanism works. The egg is held in place, and the spring mechanism works as expected.
Now that the egg holder mechanism is working, I will move on to the next step: integrating it with the rest of the machine.