principles & Practices, Project management

Sketching my final project
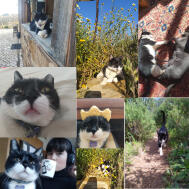
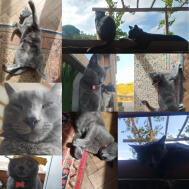
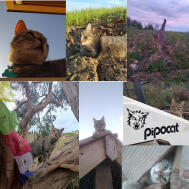
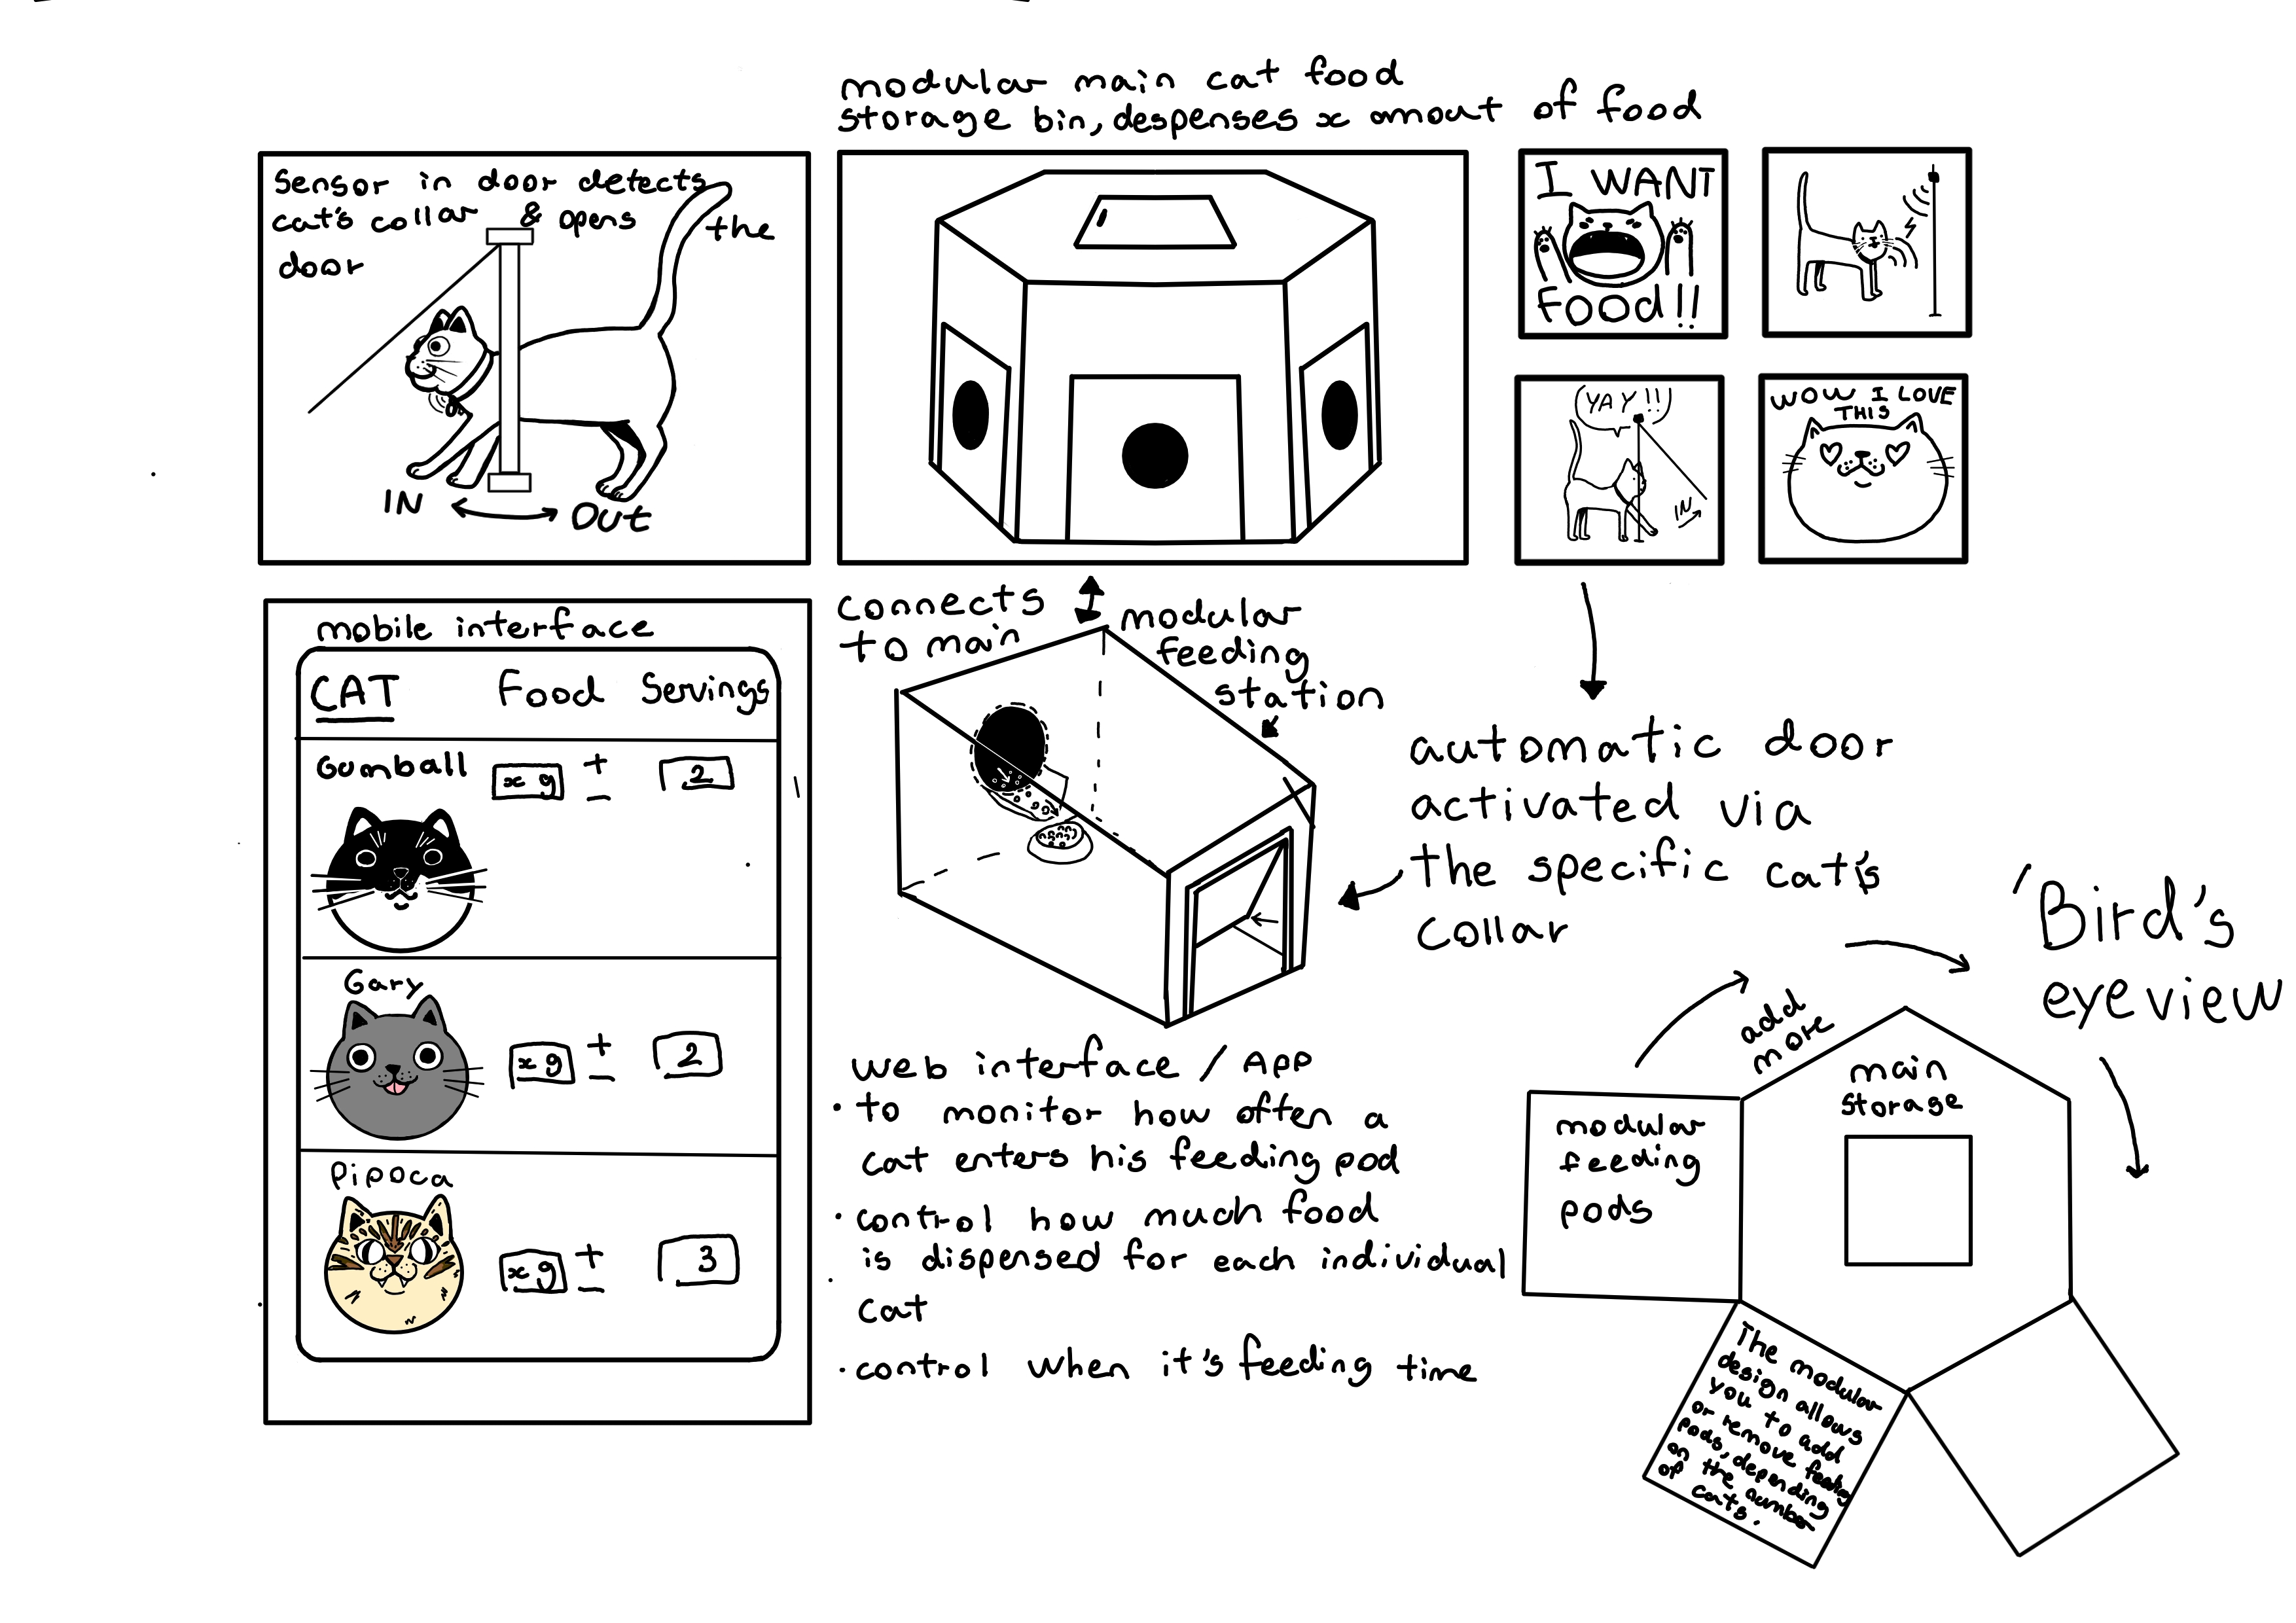
For my final project, I have decided to create an automatic cat feeder. I chose to do this because I currently face a problem with my three cats, each leading different lifestyles. Gumball has breathing issues and spends most of his days sleeping indoors. Pipoca (meaning popcorn in Portuguese) is the "wild" one who rarely stays indoors, enjoying exploring the land, climbing trees, and zooming around. Lastly, we have Gary, a mix of the two, capable of being very active or spending the whole day relaxing with Gumball. The three cats have varying food consumption patterns, and some tend to overeat due to different feeding times after we've fed them.
Introduction
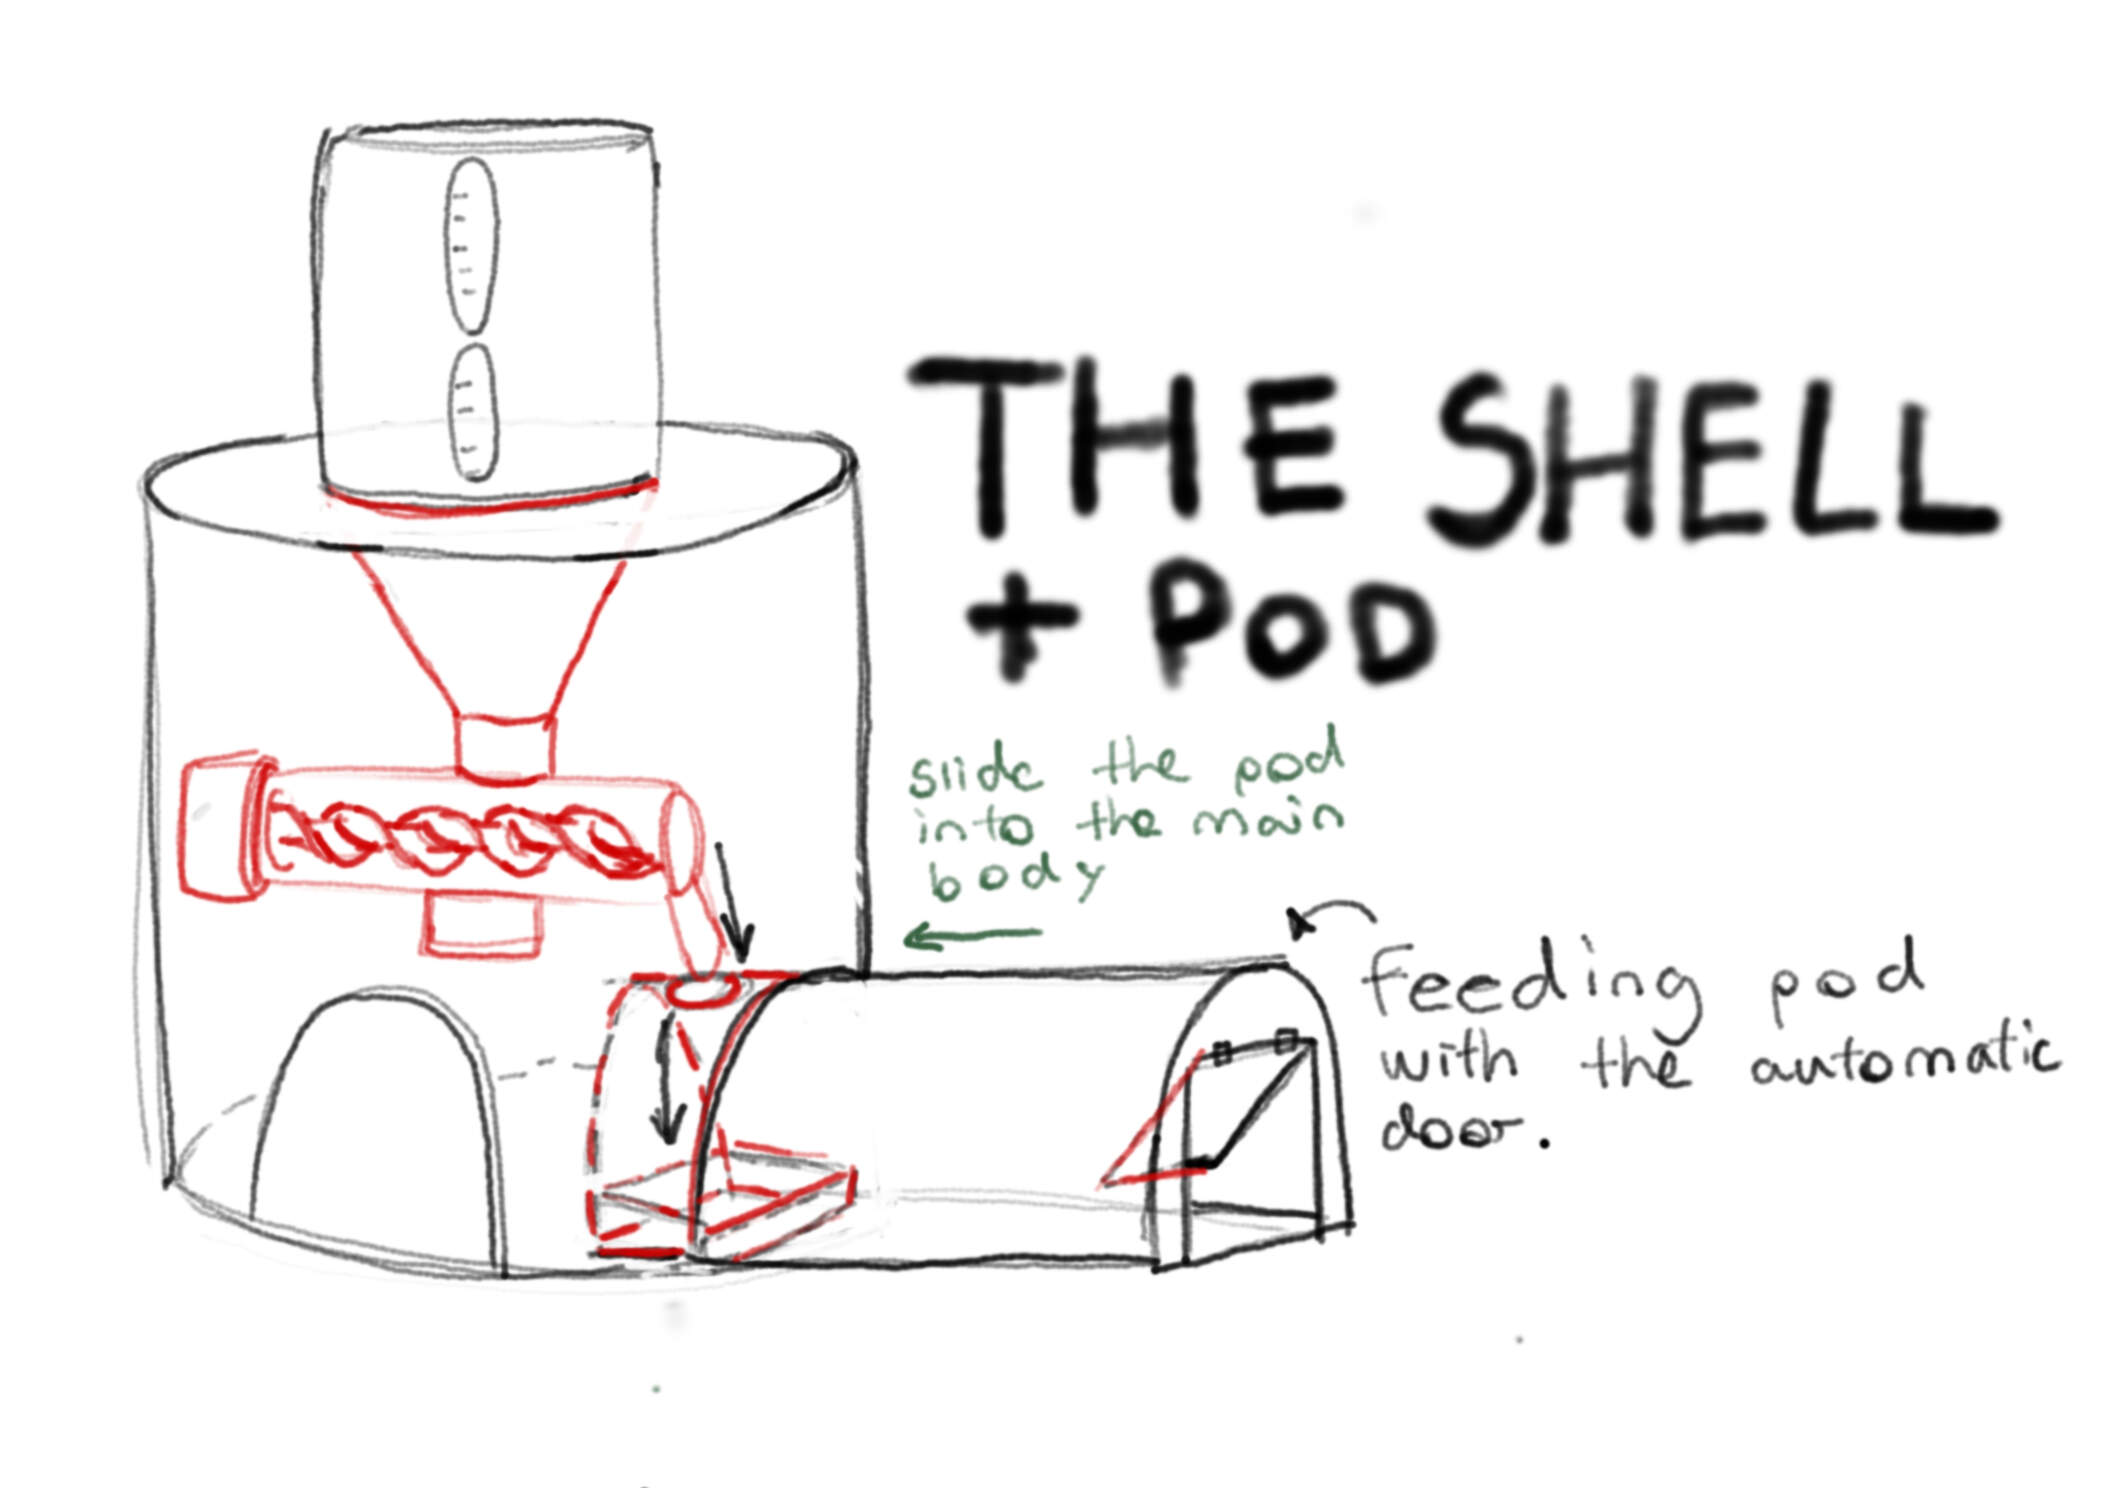
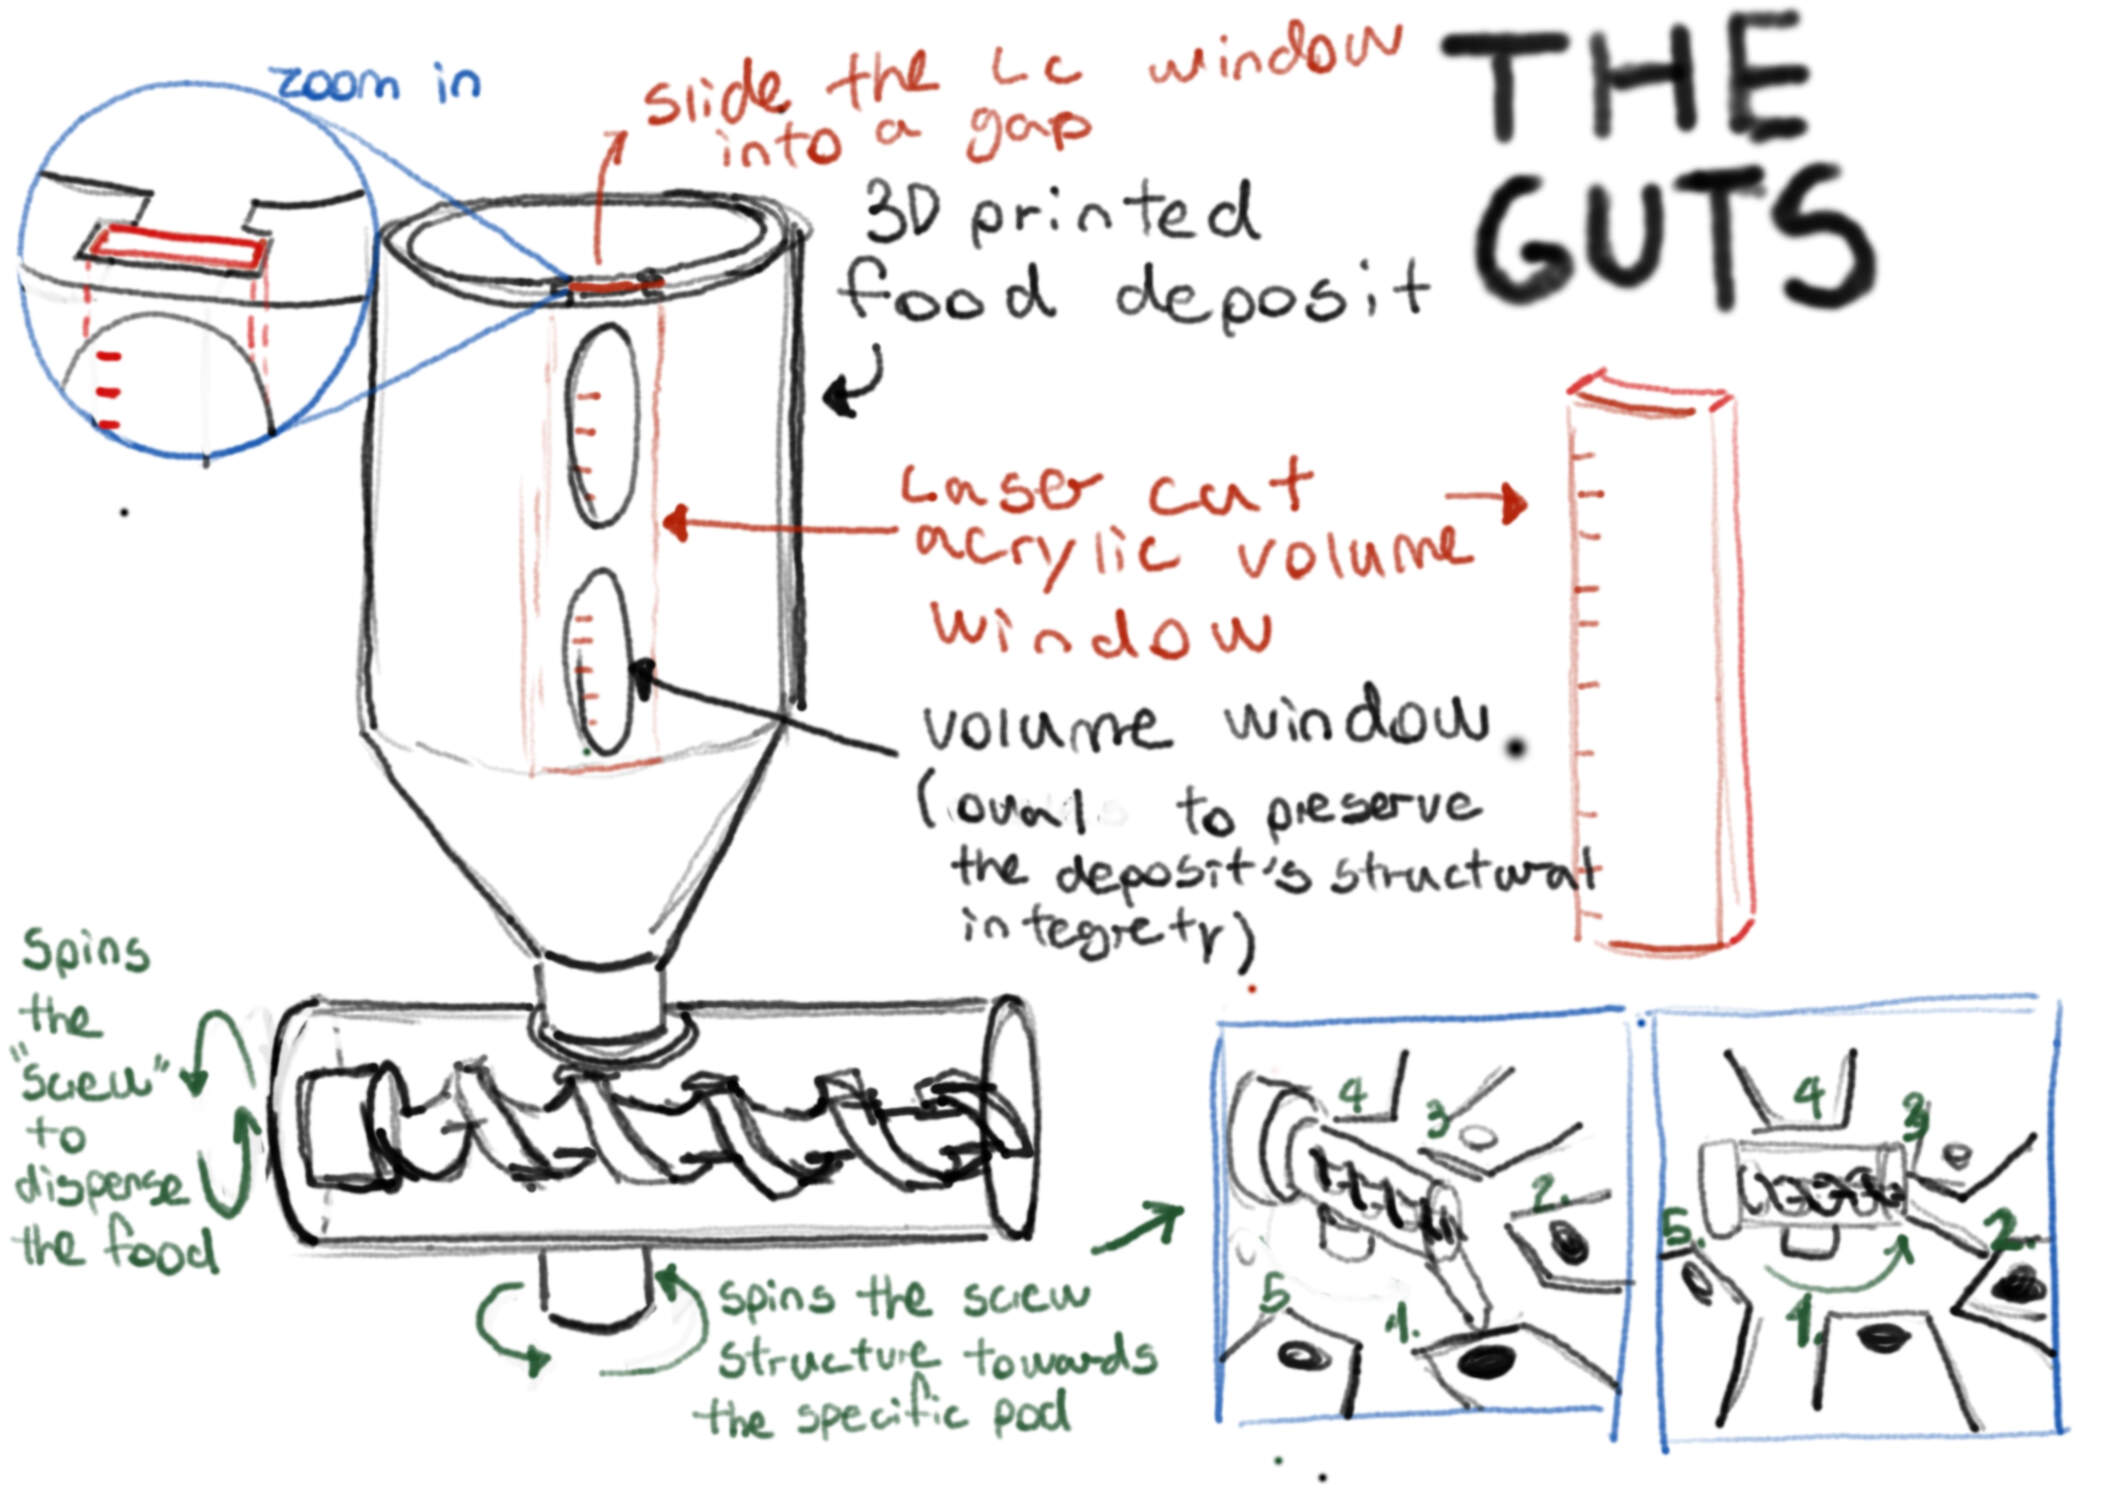
At the moment, Gumball and Gary are not at a healthy weight, while Pipoca is maintaining a healthy condition. If I start feeding one less, they end up eating each other's food. To address this issue, my solution is a modular cat feeding station. Each cat will have a designated feeding pod accessible only to them. These feeding pods will be connected to the main body where cat food is stored and dispensed to each pod separately.
more detailed sketches for the final project
Feeding Process
The feeding process would be automatic and controlled through a mobile app, allowing me to set different amounts of food for each cat. Additionally, the cat door would be activated by a specific cat collar, ensuring that it only opens for the designated cat. This system not only prevents my cats from overeating but also safeguards their food from other animals, avoiding disturbances during their meals. I live in an area where the cats are fed outside, elevated to prevent interference from dogs. However, birds and wasps in the summer still linger around their food.
My final project idea was heavily inspired by Pamela Martello's final project, where she made a cat door that only allows her cat to enter through it via his collar, and Toni F. Barreiros's final project, an automatic cat feeder that uses an Archimedes screw to dispense food.
Time management and spiral development
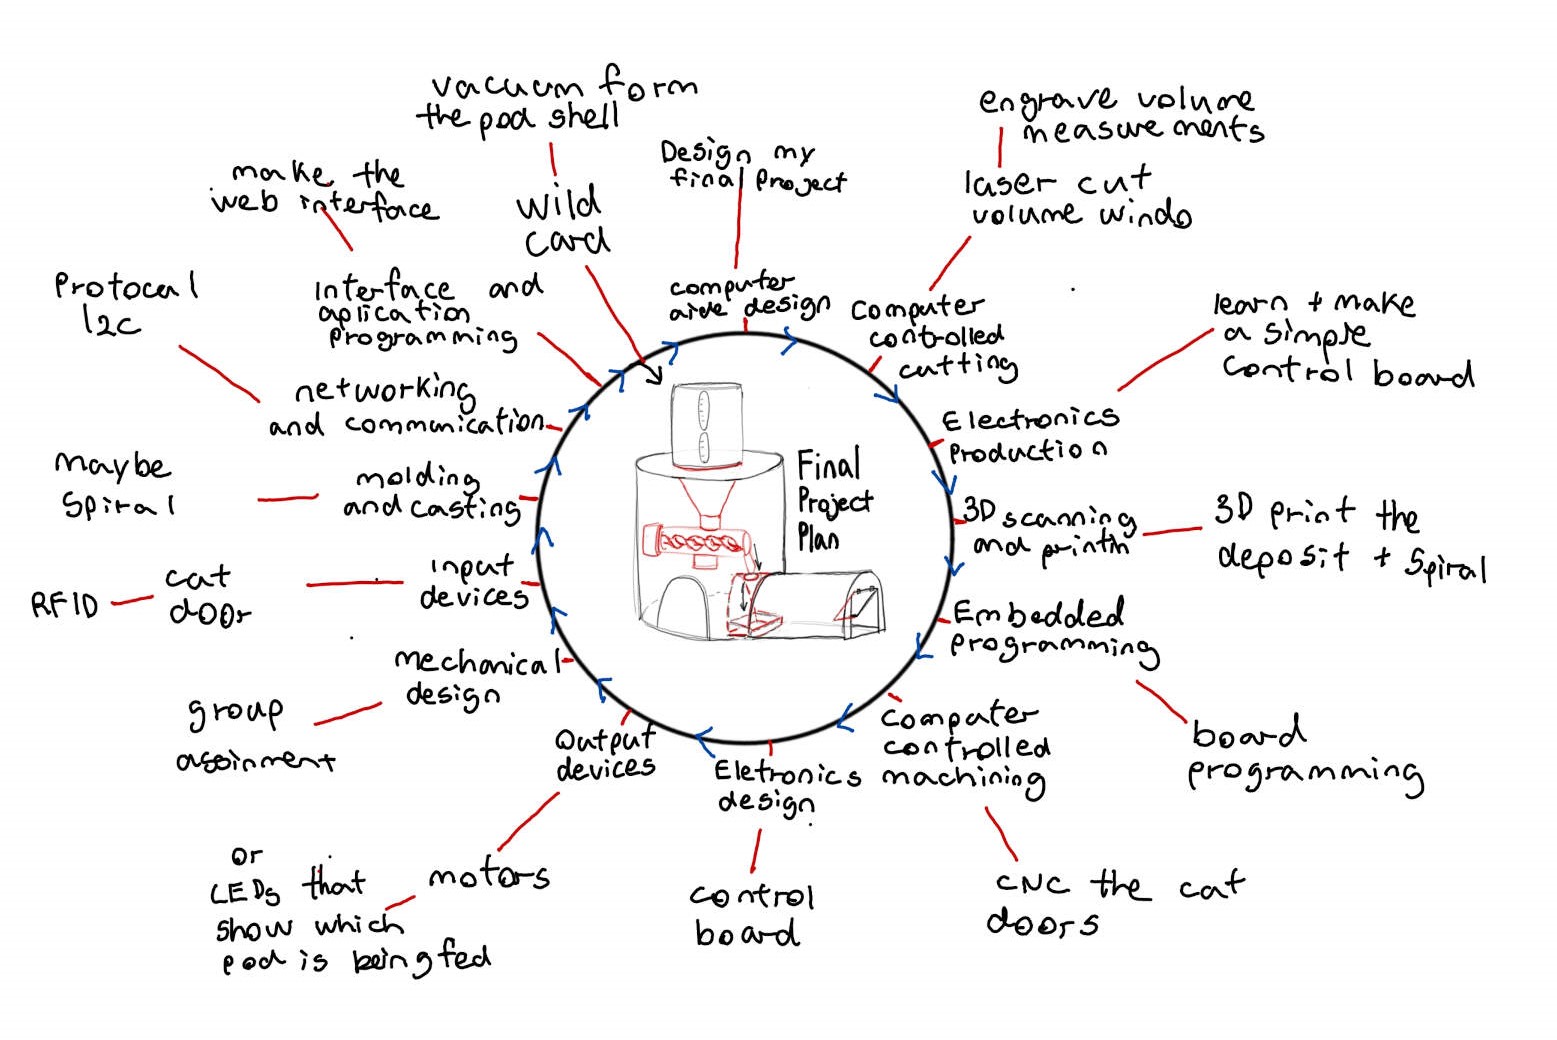
This is how I plan to manage my tasks to make my final project a reality. I want to incorporate everything I will learn into my project.
Project Setup
Downloading Linux, VS Code, WSL
First, I installed Ubuntu through the Microsoft Store.
.jpg)
.jpg)
Then I had to enable the Windows Subsystem for Linux. I did this by opening "Windows Features on or off" and selecting to turn on the feature "Windows Subsystem for Linux". After making this change, I had to reboot my computer to finish installing.
.jpg)
.jpg)
.jpg)
After this, I used Windows PowerShell to install Ubuntu with the command "wsl --install ubuntu".
.jpg)
.jpg)
Next, I installed Fish with the command "sudo apt install fish".
.jpg)
.jpg)
After I installed Fish, I started to familiarize myself with the commands on Ubuntu. I did this by making a few directories with the command "mkdir" and then the name of the directory. In my case, I called it Fab Academy.
I also tested out how to make a webpage through the terminal with the command "nano" to edit the file and "cat" to display what I wrote.
.jpg)
.jpg)
.jpg)
I'm not quite sure why some of the letters got messed up, but it still worked to help me learn. Lastly, I installed VS Code with the command "sudo snap install code --classic".
Why run VS code on linux?
You are able to run VS Code in Windows perfectly fine, especially with smaller, less demanding projects. However, by running it within Ubuntu using Windows Subsystem for Linux (WSL), you gain several advantages:
- Access to the Linux terminal
- Ability to run Linux commands
- Access to the Linux file system
- Ability to run Linux scripts
Of course, for HTML, I won't even really notice big differences, but for more complex projects, it's better to use WSL. So it doesn't hurt to start familiarizing myself with it now.
- Go to the latest release page for the latest release page for the usbipd-win project and download the .msi installer file.
- Run the downloaded usbipd-win_x.msi installer.
- Next, to attach the USB device, you run this command "dfu-util --list" to check if the device is available in Windows.
- Use "usbipd attach --wsl --busid < busid>" to attach the device. Replace < busid> with the actual bus ID of the USB device.
- After this, it should work just fine.
Note from future Bianca: I'm coming back here to relay something I noticed with running VS Code in Linux. This week I wanted to try to move away from Arduino IDE for all of the programming for my final project. I chose to do this for many reasons, the main one being that as the programs I write get more complex and control more than just one servo, in the Arduino environment everything gets so messy because they are all in the same file, and it's just unnecessarily messy. Another note is I've had some board compatibility issues between some boards like the ATtiny1614 and the newer Arduino IDE version. And all of this could have been avoided if I just did this in VS Code on PlatformIO (check further assignments and final project development for more info on this).
Anyways, with VS Code running on Linux, for C++ and any other language, there is an extra step you need to take to connect to your computer ports and thus connect to your boards. This means you need to run a virtual port in Linux, whereas in Windows this is not needed. To do this, I did the following:
Installing Git
I installed Git with the command "sudo apt install git".
.jpg)
.jpg)
Next, I configured my email (use the email registered in your GitLab), username, and password.
.jpg)
Next, I used the command "cat ~/.ssh/id_rsa.pub" to retrieve the SSH key generated. Lastly, I copied this key to my GitLab account.
.jpg)
.jpg)
.jpg)
In this last step, I cloned my repository from GitLab and opened it in VS Code with the command "cd" to enter the directory where I saved the file and "code ." to open the file in VS Code.
.jpg)
.jpg)
To better understand how to use Git, I followed this Git totorial which explains how to import a new project into Git, make changes to it, and share changes with other developers.
As I went along, I made a git "cheat sheet" to help me remember the git commands
- To find information of the origin of a repo: "git remote show origin"
- copy a ssh key to a serverssh-copy-id -i ~/.ssh/mykey.pub user@host
- to push an existent repo commit by commit to a new adress
- git remote add gitlab git@gitlab.fabcloud.org:Lucio/frankenlaser.git
- git rev-list --reverse master | ruby -ne 'i ||= 0; i += 1; puts $_ if i % 1 == 0' | xargs -I{} git push gitlab +{}:refs/heads/master
- First its necessary to be on the working directory and then make it a git directory with:
- next add all files to the local repo and stages them for commit
- commit the files that you've staged in your local repository
- push the changes to the remote repository
- I´ve had multiple problems with pushing my documentation when the size of the files was too big, to fix this I used the following commands:
- this command will remove the last commit, but the changes will still be staged
- then you can add the files again and commit them after fixing and compressing the files
- then you can push the files to the repository
- Susana Passinhas's Fab Academy webpage, I really liked the way she documents her works, and at first I used a template similar to this
- Manuela Reyes's Fab Academy webpage, I liked the aesthetic of her webpage
- Svavar Konráðsson's Fab Academy webpage is another page I liked
- The template I used, this site has some cool templates
- I started with the command "sudo apt install ncdu"
- Next, I used the command on terminal preview "ncdu" to start ncdu. ncdu will open and with the up and down arrows, and the enter key I can navigate through my directories and files
Git and Bash Notes:
Creating a new Repo
git init
git add .
git commit -m "First commit"
git remote add origin remote repository URL
git push origin master
Fixing problems with commits to gitlab
git reset --soft HEAD~1
git commit -m "commit message"
git push -f origin master
Webpage
After searching through the Fab Academy index, I found a type of webpage I liked and a few pages that inspired me. Here are a few of my favorite web pages, and also useful ones. I also used W3Schools for certain HTML and CSS functions, and to fix bugs I consulted other sites and used the "inspect" option to compare my code to another. Something that also really helped me with fixing bugs is GitHub's Copilot and Chat GPT to correct my spelling and translate certain sentences.
The way I chose to use the template and create my wesite, was maybe not the best form of doing this, basically, I downloaded the template and also created a new file, I would copy parts of the template I wanted and then paste them into the file, at first this gave me a few issues because sometimes I would forget to add some necessary parts and this would mess up the look and function of certain parts of the website.
however after a while i got the hang of this and created my own "template" for each week´s assignment page that I would just copy and paste and then eddit and add the documentation of the current week, this template looks like this:
The basic look of my page is, a side bar on the left, where I document things that are not central to the assignment, and also where I add links, files for download and an index for the page. The first part I started editing was the home page, the original looked like this:
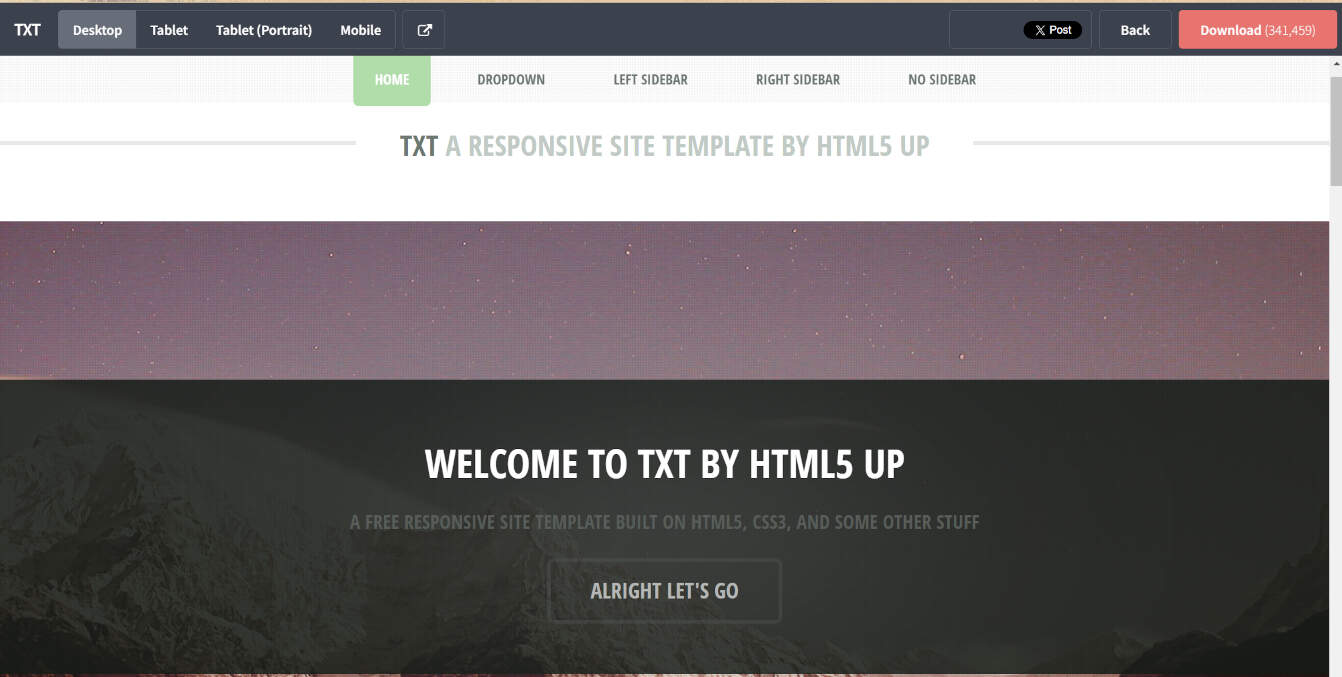
First I removed the tex at the top "TXT A RESPONSIVE SITE TEMPLATE BY HTML5 UP", and then changing the "WELCOME TO TXT BY HTML5 UP" to just my name "BIANCA GUIMARÃES", then i changed the subtext under my name to "WELCOME TO MY FABACADEMY SITE, WHERE I DOCUMENT HOW I´LL TRY TO LEARN HOW TO MAKE ALMOST ANYTHING". I liked the button on the temlate, so I added two more to have a faster way of navigating to the page I think should be displayed first for fast acsess.
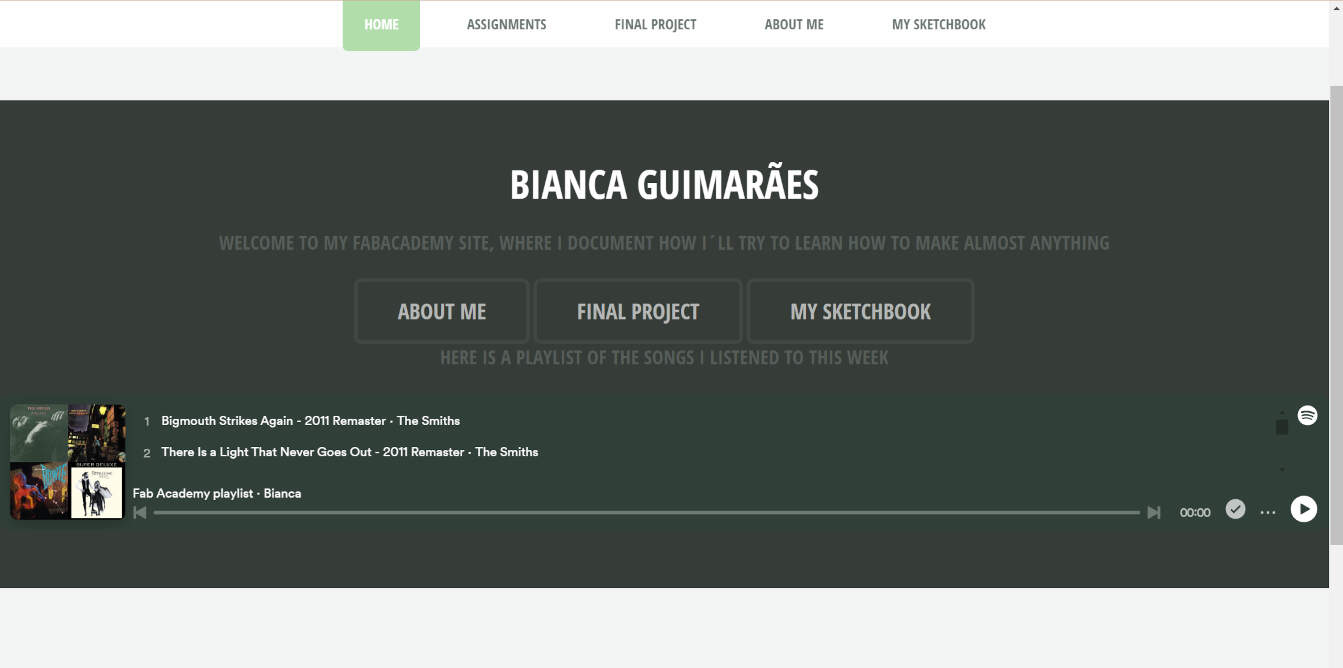
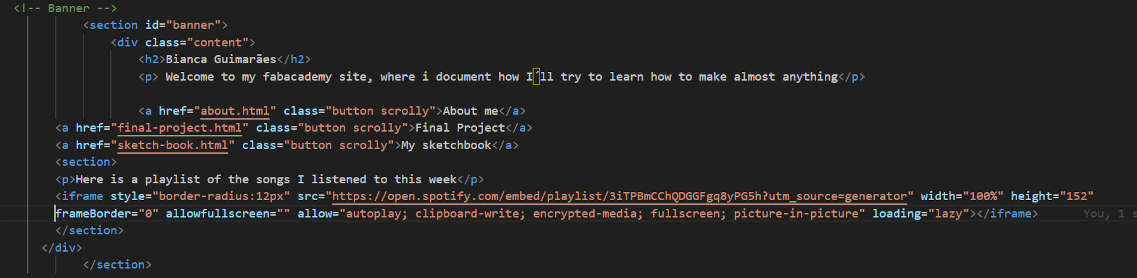
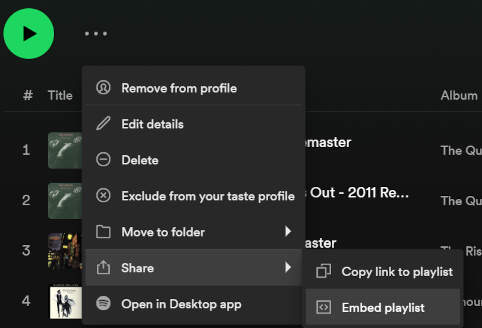
Then I also wanted to add a more personal touch to my page, so I thought of adding my spotify playlist, I did this by going to the playlist i wanted to add, then by clicking the 3 dots by the play button, i selected the "share" option, and the "embed playlist", next I simply pasted this into my html
the next essencial step was to edit the avigation bar at the top, to link all of the weeks ssignment pages
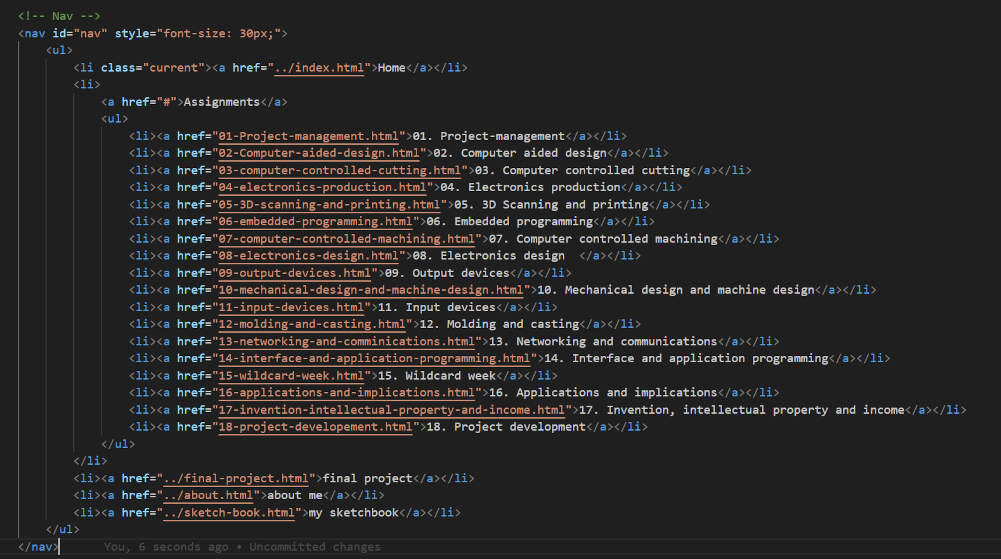
this works by linking the pages to the href, and then adding the text that should be displayed on the page, I also added a "current" class to the page I was currently on, so that I could easily see where I was on the page. for the parts that werent in the assignment folder, I added a ../ to the href, so that it would go back to the main folder and then into the folder I wanted to go to. for example: "../index.html".
Installing ncdu
I'm installing ncdu through Windows Terminal Preview. ncdu is a disk usage analyzer on remote systems, it is useful because it allows me to check the size and how much space each of my directories and files are taking up, this will help me save space on the server, and have a faster working website, as I'll be able to find and compress large files.
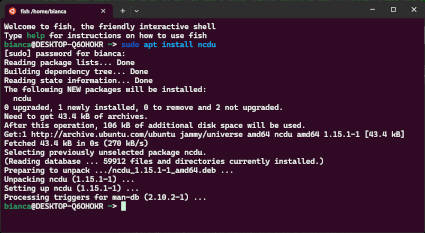
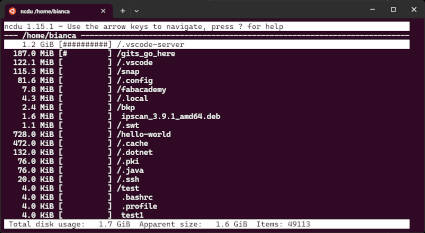
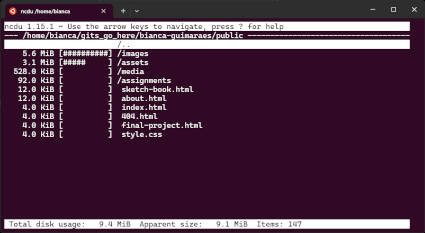
Image compression
I used GIMP and the add-on BIMP to compress my images, since I can edit multiple images all at once. To install BIMP, I ran into a few problems. Since I decided to download GIMP through the Microsoft Store, the installation of BIMP didn't work. It only worked after I reinstalled GIMP directly from the web.
to use BIMP, i simply have to open GIMP, then go to "file" and then "batch image manipulation", then I can select the images I want to compress, and then select the compression I want to use, in my case I used the "save as" option, and then selected the quality I wanted to save the images in. I can also add a "manipulation set" this is a set of changes that will be applied to the images, for my use, I used the "resize" and "format and compression" options.
.jpg)