

Computer-Aided Design
3D design
For this week's assignment, specifically focusing on the 3D component, I opted to utilize Fusion 360.
Although I have some prior experience with the software, I have not previously undertaken complex designs.
Nevertheless, I am reasonably acquainted with its fundamental tools.
On Wednesday, Neil explained the basics, providing an overview of what we would be working on and briefing us on various CAD and 2D software. Later in the week, our local instructor offered a more comprehensive explanation of how to navigate Fusion.
So, armed with insights gained from these sources and further research on my part (utilizing YouTube tutorials), I successfully translated my sketches into the realm of 3D design.
My objective was to create the main base, referred to as "the shell," along with the deposit and the internal components, which I fondly dub as the "guts" of the build.
FUSION 360
The first and crucial step, before diving into any design work, involved getting myself in "the zone" by playing some bossa nova. Following this, the official commencement of the design process began with launching Fusion 360.
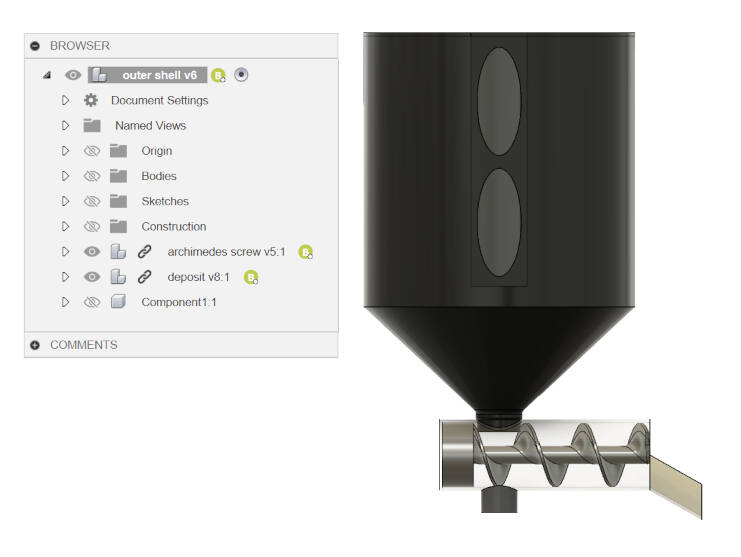
Fortunately, as I had experimented with it on my computer before, there was no need to download it again. To structure the design process for my final project, I opted to create separate component files for the three main parts. Subsequently, I assembled these components in another file to ensure a methodical and organized approach to each step of the project. The sequence I adopted for the design was from the inside out. I started the process by focusing on the "guts" of the project, providing an overview of what the final product should resemble. This segment involves a screw-like mechanism known as an Archimedes screw and a pipe to house the screw, serving as a container for the dispensed food (For the final build, I intend to use a PVC pipe). Additionally, a small funnel was incorporated to guide the food accurately to its intended destination.
The Guts:
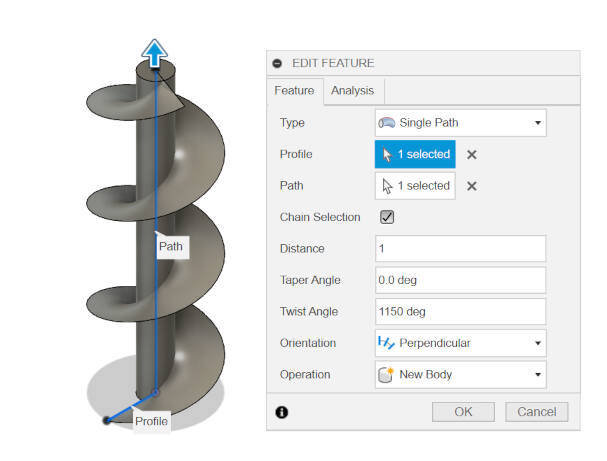
Here is the tutorial I followed to make the screw: Archimedes screw tutorial
This is a recording of the process I used to make the screw

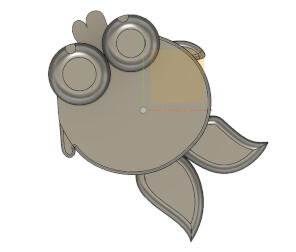
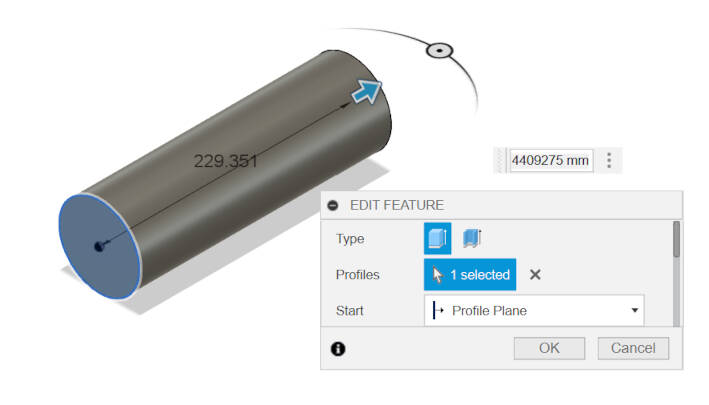
I designed the screw from a cylinder that I then used the "sweep" tool with a twist angle of 1150 deg to create the threads. To make the threads thicker, I used the "thicken tool". This also allowed me to create a fillet on the underside of the threads.


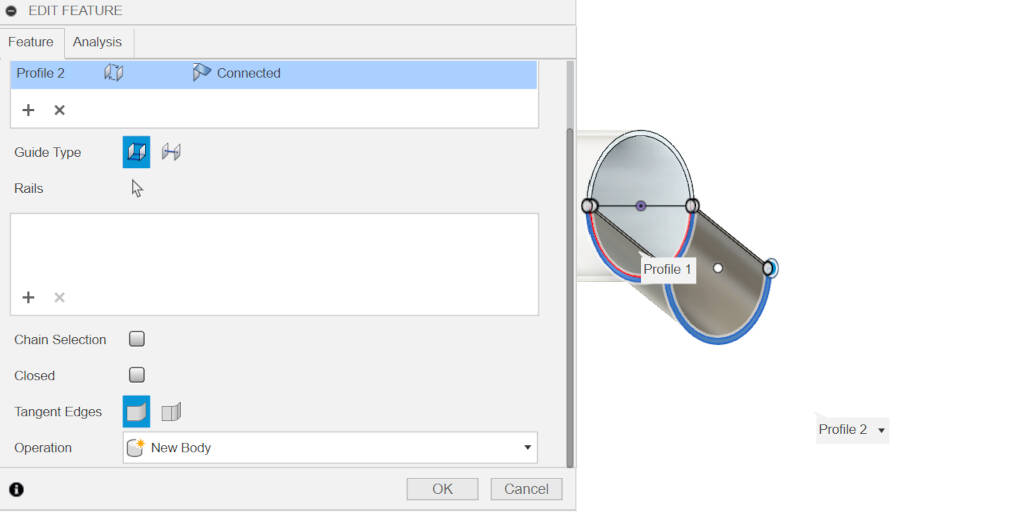
Next was the pipe that encased it. This was done simply by creating a sketch onto the base of the screw and extruding it. After this, I used the "shell" tool to hollow it out. One thing to note about this part is that instead of making the diameter of the pipe the same as the screw base, I made it slightly larger so that the screw could still move freely. Lastly, to add the half funnel part to guide where the cat food will be deposited, I made a sketch of a half circle and positioned it at a distance from the cylinder. To connect the two parts, I used the "loft" tool.

For aesthetic purposes, I used the "appearance" tool to give the pipe a transparent plastic look, allowing the screw to be visible inside it.
The deposit

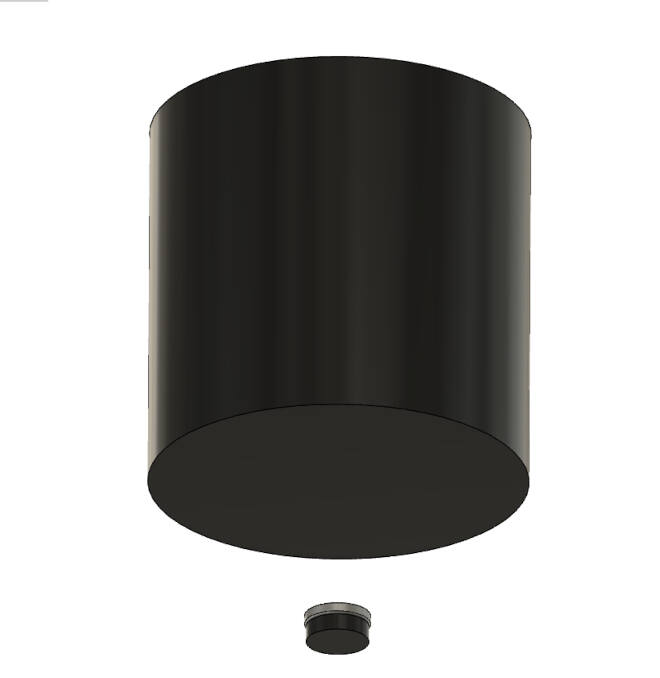
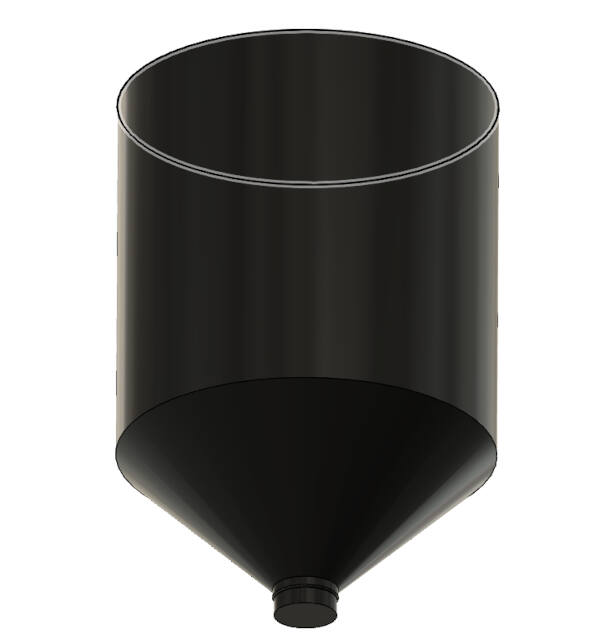
The design process of the deposit was very similar to the process for the tube/cylinder of the Archimedes screw. I started from the bottom and worked my way to the top. The connecting piece has a diameter slightly smaller than the opening on the screw part so that it can fit correctly. Moving up from that, I began with a sketch of a larger circle positioned higher than the connecting piece and extruded it. From there, I used the loft tool to connect the two bodies before employing the shell tool to hollow them out. For the volume window, I sketched a rectangle on the side of the deposit and extruded it toward the body. I selected the "join" option and removed the parts that extended through to the inside. After that, I extruded another smaller rectangle on the top part of this and extruded it downwards with the "cut" option, hollowing out the area.
To assemble the deposit and the guts, I created another file where I brought them in by simply dragging them into it. There, I used the align tool to bring them to the correct position.
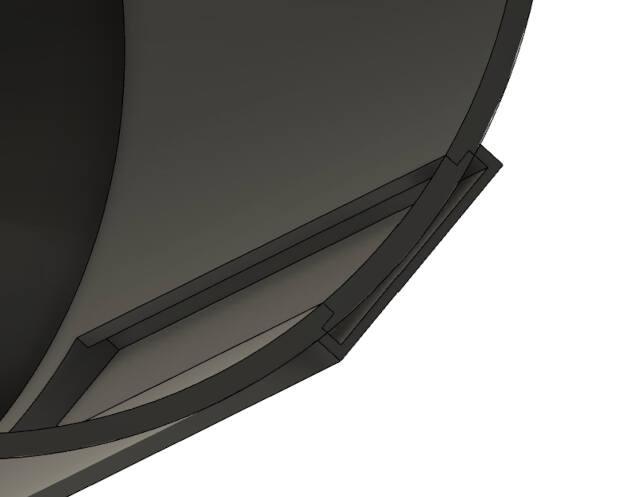
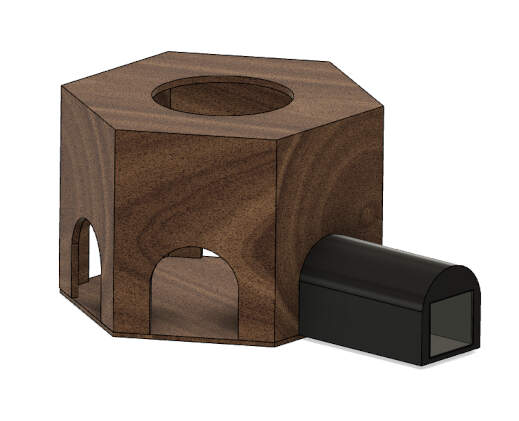
The shell + the pods
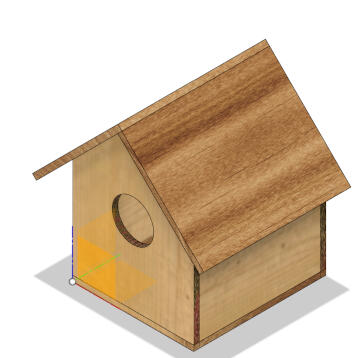
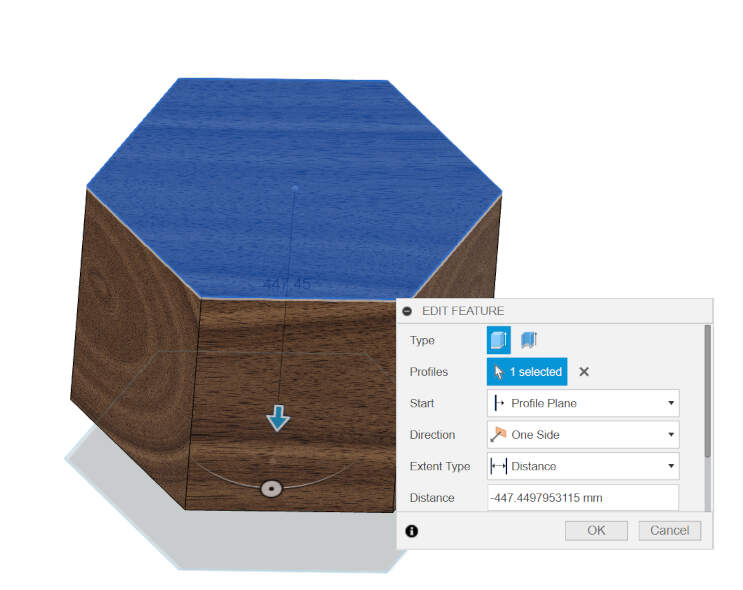
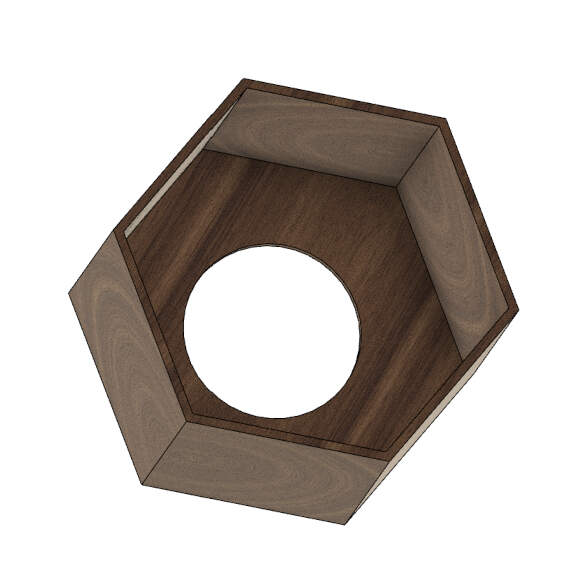
The shell's purpose is to hold the weight of the deposit, keep animals and other curious critters out, while also allowing the feeding pods to be inserted. For this design, I began with the file where everything was already assembled. This allowed me to estimate the size it should be. I created a sketch of a circumscribed polygon, e xtruded it, hollowed it out using the "shell tool," and added a circular hole at the top where the deposit would fit. After this I sketched on one of the faces of the shell the "door" where the feeding pods would fit into and extruded it inwards with the "cut option".

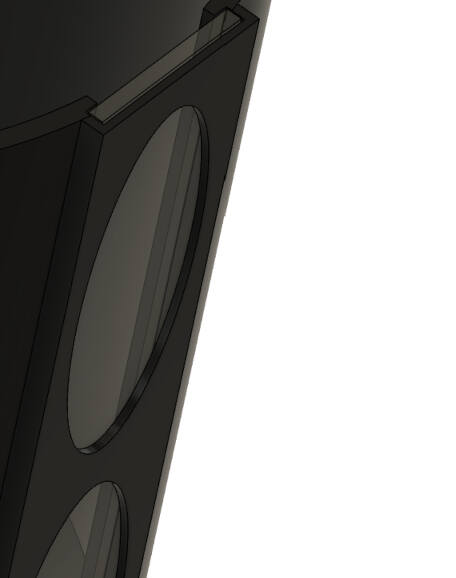
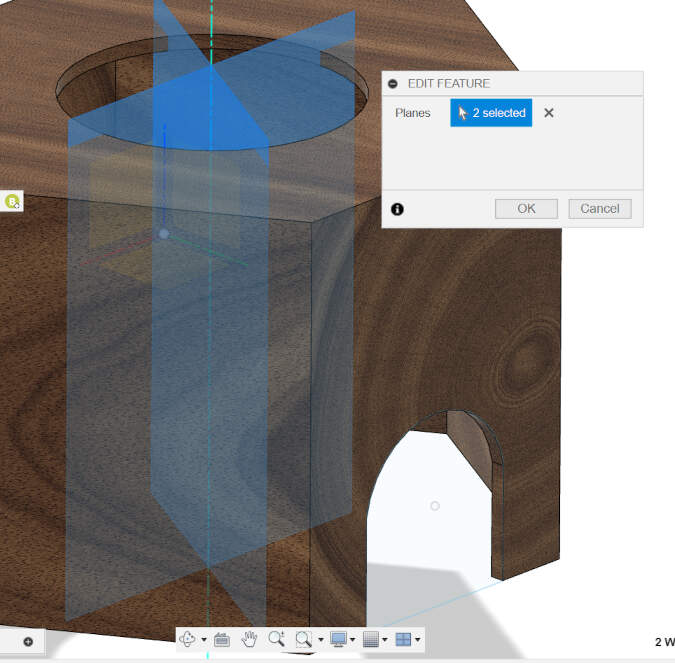
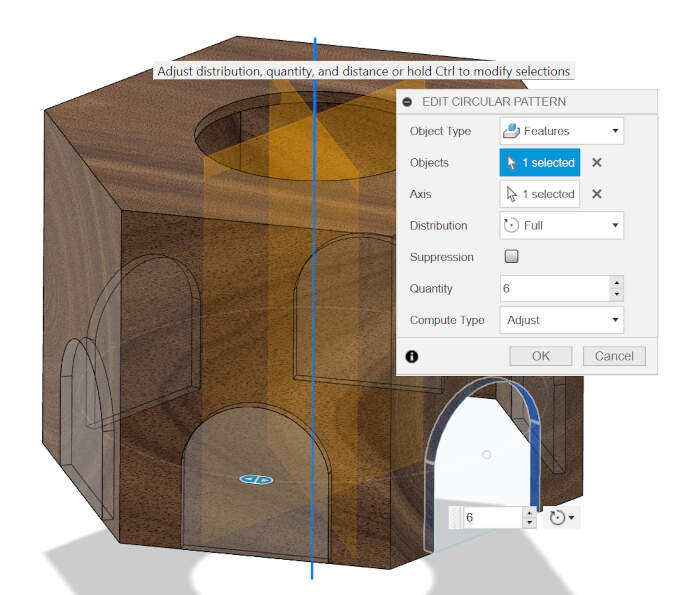
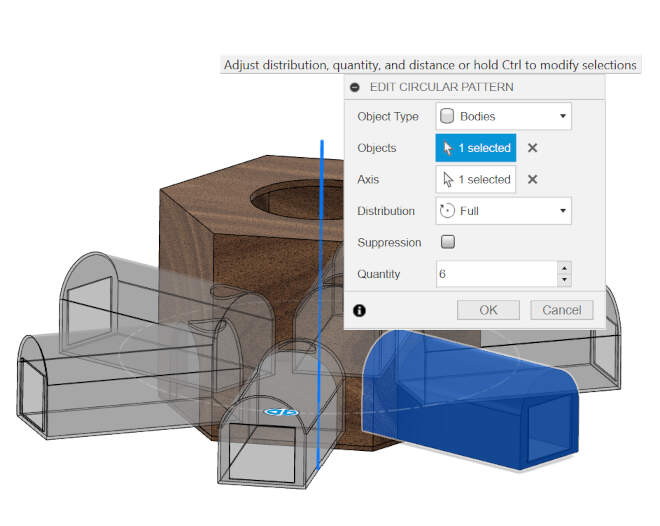
To replicate the "door" on the other five sides of the shell, I created two offset planes that intersected each other at the center of the polygon. When two planes intersect, the result is a line. From this line, I created an axis marking the center of the polygon. Using the "pattern" tool, I was then able to repeat the features of the "door" on all five sides.

The next step was to design the pods (one thing to note about them is that they sit a bit inside the shell). This was done by extruding the sketch of the doors and hollowing it out. One detail for this was making a hole at the top of it so that there was a way for the food to be deposited into it.
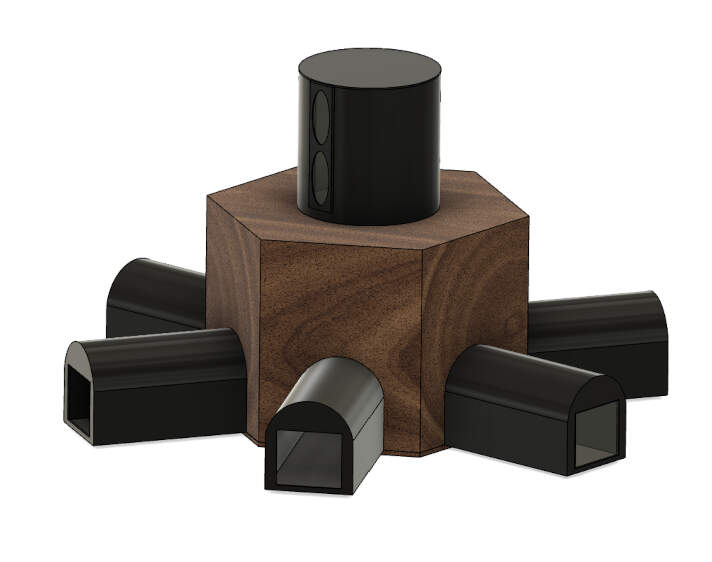
After finishing the design, I tried rendering it. I did this by going to the render option in Fusion, located at the top left corner under "generative design". There, I experimented with the setup until I was satisfied.
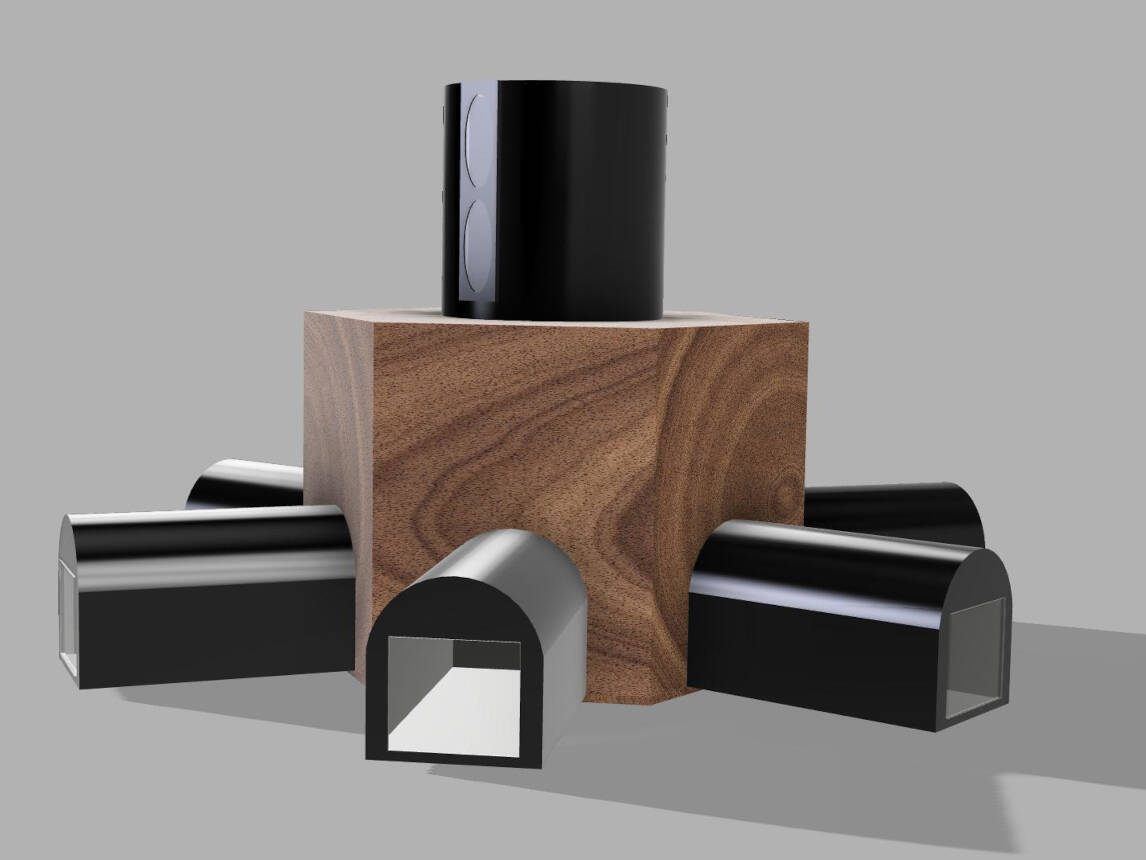
This kind of looks like a maximum security prison from some sci-fi novel :P
2D Design
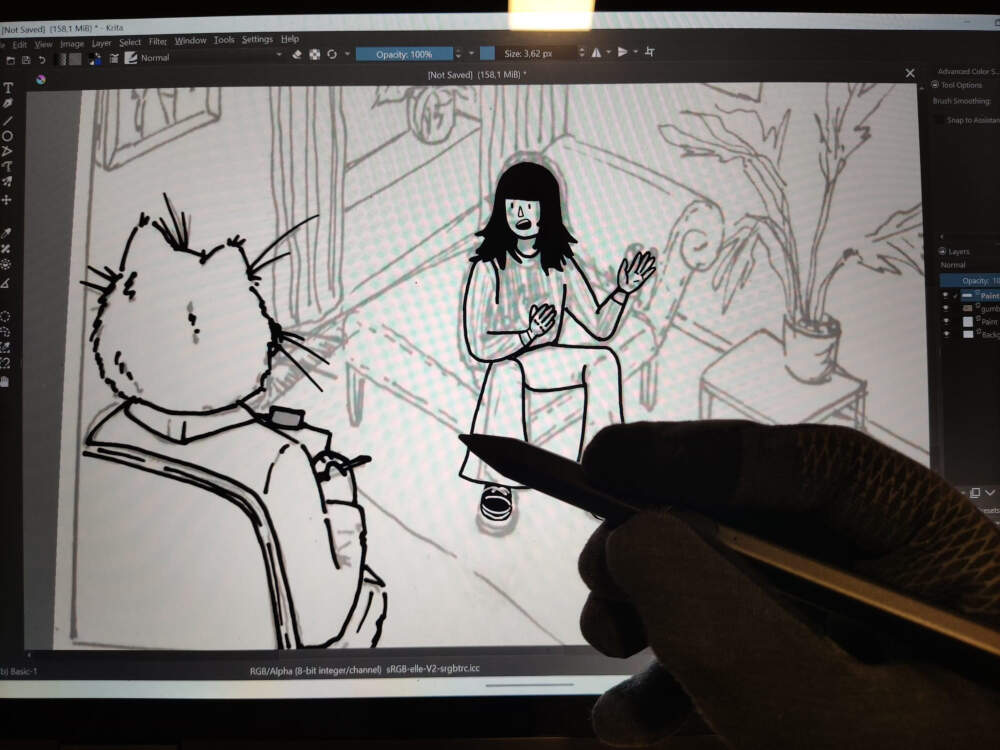
I'm quite familiar with the aspect of 2D design, and the software I use the most for raster is Krita. I used it to illustrate my sketches from the previous week. Krita is a free drawing software. In my opinion, it's one of the best options for digital art software that's free, since it has a lot of the same features as most of the paid software, like Photoshop and Paint Tool SAI.
Krita
Creating your canvas:
-
When you open up the program, click on "new file" to create your canvas.
Under the dimensions tab, you can choose how big you want your canvas to be.
-
Under the content tab, you can change the name of your file, choose how many layers you want your canvas to open with (I usually start with 3).
You can also change your background color. Please note: under the color settings, you can choose CMYK instead of RGB if you intend to print your file.


-
Finally, click "create" to make the canvas.
How to navigate the workspace:
-
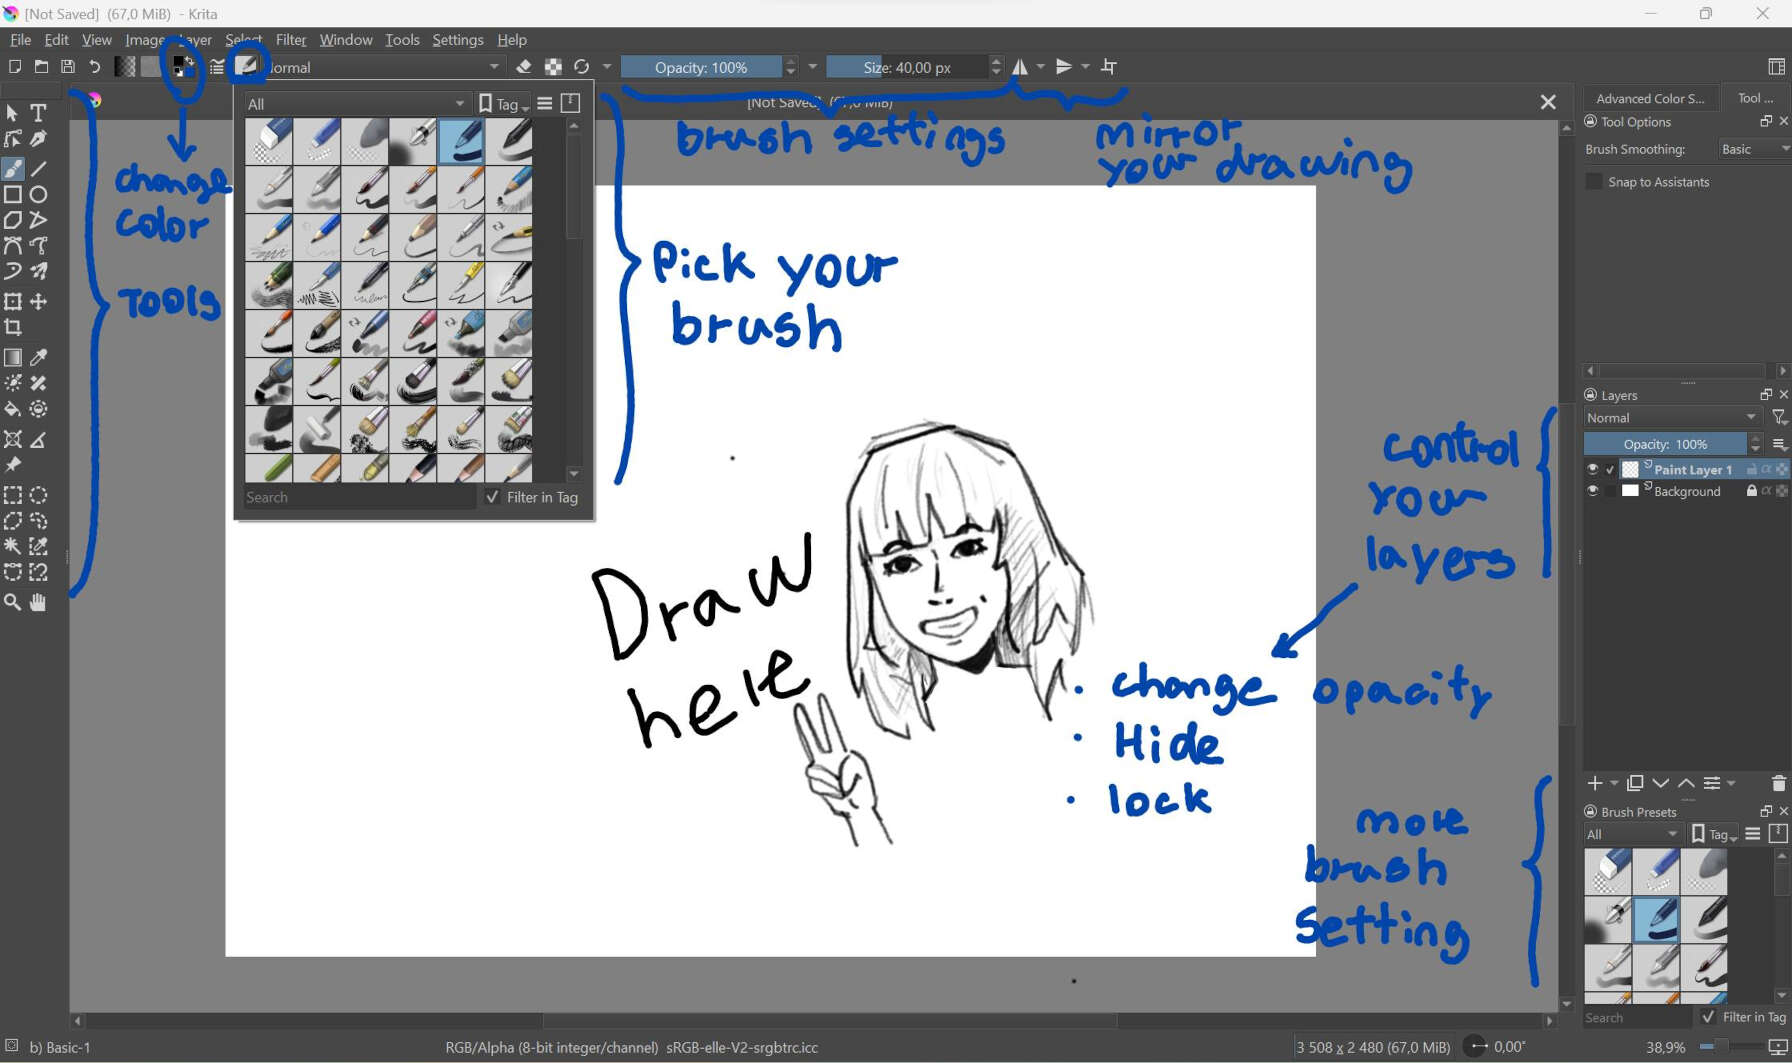
Around the canvas, you have the main toolbar at the top where you can save your file, edit your brush settings, customize to display some shortcuts, like the backspace tool (handy when you aren't using a keyboard and want to quickly undo something), the color picker tool, and the mirror tool, for example.
Several panels on both sides of the canvas. On the left, you have a few tools to manipulate the contents on the layer you are working on. Finally, there is the status bar at the bottom, where the status of your project is shown and where you can manually zoom in and out.
Useful keyboard shortcuts:
Creating your canvas:
When you open up the program, click on "new file" to create your canvas. Under the dimensions tab, you can choose how big you want your canvas to be.
Under the content tab, you can change the name of your file, choose how many layers you want your canvas to open with (I usually start with 3). You can also change your background color. Please note: under the color settings, you can choose CMYK instead of RGB if you intend to print your file.
Finally, click "create" to make the canvas.
How to navigate the workspace:
Around the canvas, you have the main toolbar at the top where you can save your file, edit your brush settings, customize to display some shortcuts, like the backspace tool (handy when you aren't using a keyboard and want to quickly undo something), the color picker tool, and the mirror tool, for example. Several panels on both sides of the canvas. On the left, you have a few tools to manipulate the contents on the layer you are working on. Finally, there is the status bar at the bottom, where the status of your project is shown and where you can manually zoom in and out.
| M | Mirror your canvas |
| 4+6 | Rotate your canvas |
| Shift + Space + Drag | For more control when rotating your canvas |
| 5 | Reset rotation |
| + and - | Zoom in and out |
| 1 | Reset zoom |
| 2 | Fit zoom to page |
| 3 | Zoom to page width |
| Shift + drag | Resize brush |
| Ctrl | Color pick |
-
Brush lag - Go to "Settings" at the top, on the main toolbar, then click "Configure Krita" and "Display". Under "Canvas Graphics Acceleration", change it from "OpenGL" to "Direct 3D via Angle". This depends on which graphics driver you have in your computer, but sometimes OpenGL can cause lag.
Another option is to change your scaling mode from "High Quality Filtering" to "Trilinear Filtering". Please note: How fast your computer is can also affect the lag you experience, or the number of layers you created in your file.
Common issues:

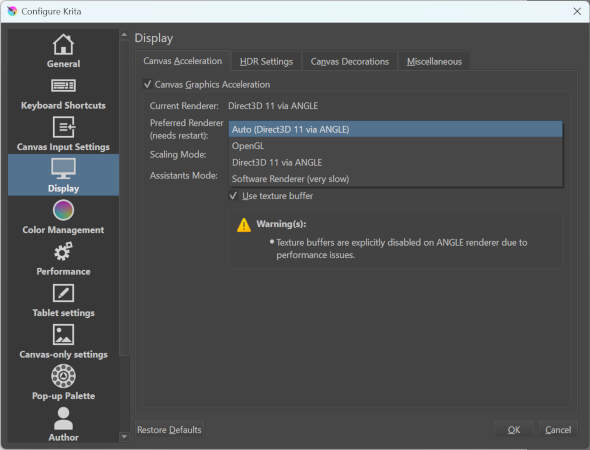
Image and video editing and compression
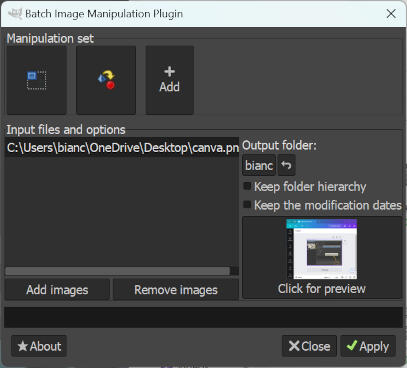
For image compression, I use GIMP and its addon BIMP (consult week 1 for more on that). For image editing, I use Canva. Canva is a free-to-use graphics design tool that you can use online or on the desktop or mobile app. I really like this program because it's easy to use and has many tools and templates at your disposal.

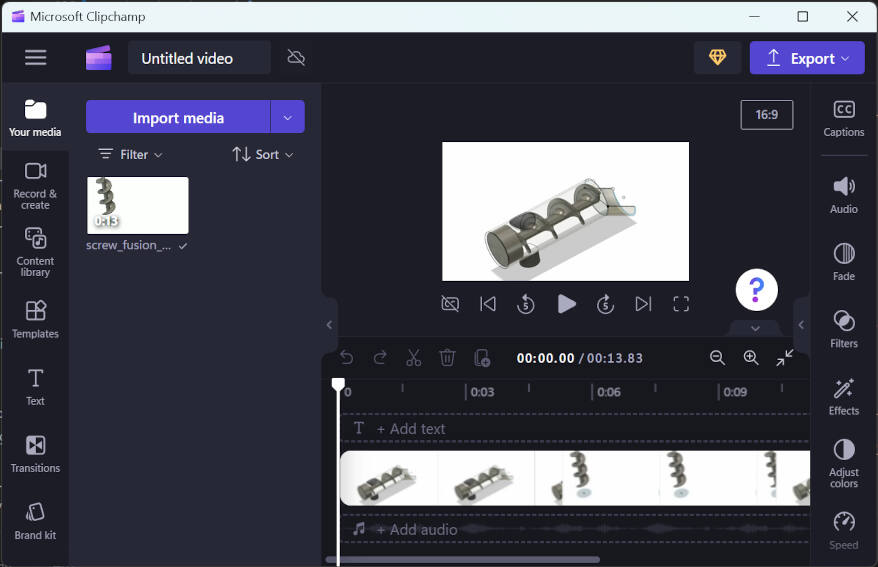
As for video editing, screen recording, and compression, I use Microsoft Clipchamp ("Clipchamp is an online video editing tool developed by Australian company Clipchamp Pty Ltd. and now by Microsoft. It is a non-linear editing software that allows users to import, edit, and export audiovisual material in an Internet browser window" - Wikipedia). I use it because the navigation of this program is very intuitive and simple. Plus, it was already installed on my computer, and I can connect it to my Microsoft account to access files remotely. I use the app Screen Recorder for Windows 11 to record my screen. It's very useful and works similarly to the "snipping tool" used for screenshots, except for videos.

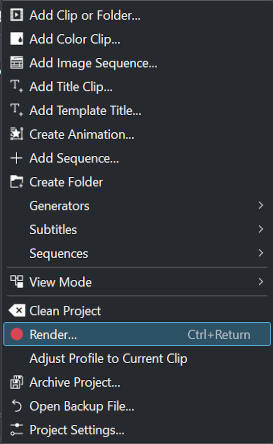
Finally, to compress videos, I use Kdenlive. So far, it has worked very well, allowing me to choose the size and quality of the compression, separate the audio from the video file, as well as change the format. Here's a simple rundown for compressing videos: at the top toolbar, click on "project," then "render," and a window will open up where you can customize your settings for the compression. Finally, click "render to file," and voila, you have compressed your video.