Interface and Application Programming 
Assignment
Individual assignment
- Write an application that interfaces a user with an input &/or output device that you made
Group assignment
- Compare as many tool options as possible
See more info and recording of the lecture here.
Frankenstein MCU
 Presenting my addition to the FMCU to Neil Gershenfeld and Fab Academy Class 2023. Link to the video.
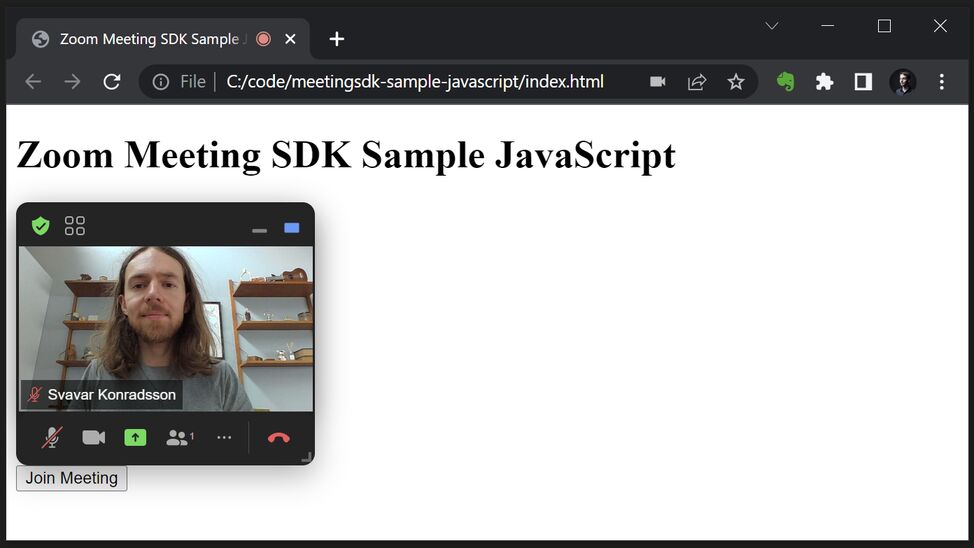
Since my instructor Þórarinn is working with Fran Sanchez on a IoT button that connects Fab Labs together, I decided to clone the repo and take a look at it. The current MCU uses Zoom to connect the Fab Labs together with live video feeds. So I searched for a way to embed Zoom into your own application and found the Zoom Meeting SDK for web, and in particular this JavaScript example.
I cloned the repo, got a secret key as a Zoom Developer and I've got the authentication server running locally on Node.js, but the readme says that I need to send a POST request to the server.
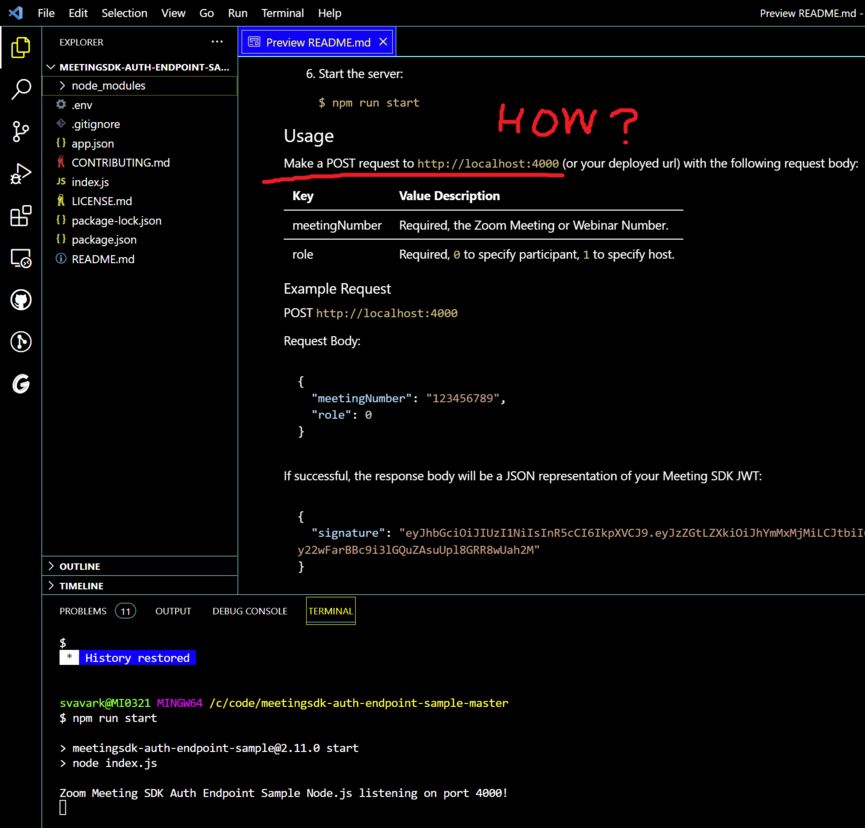 HTTP POST request trouble on the Zoom authentication server.
Google didn't give me any understandable instructions on how to make a POST request to a localhost Node.js server. So I turned to ChatGPT. This is the first time I ask it to help me solve a problem. And help it did!
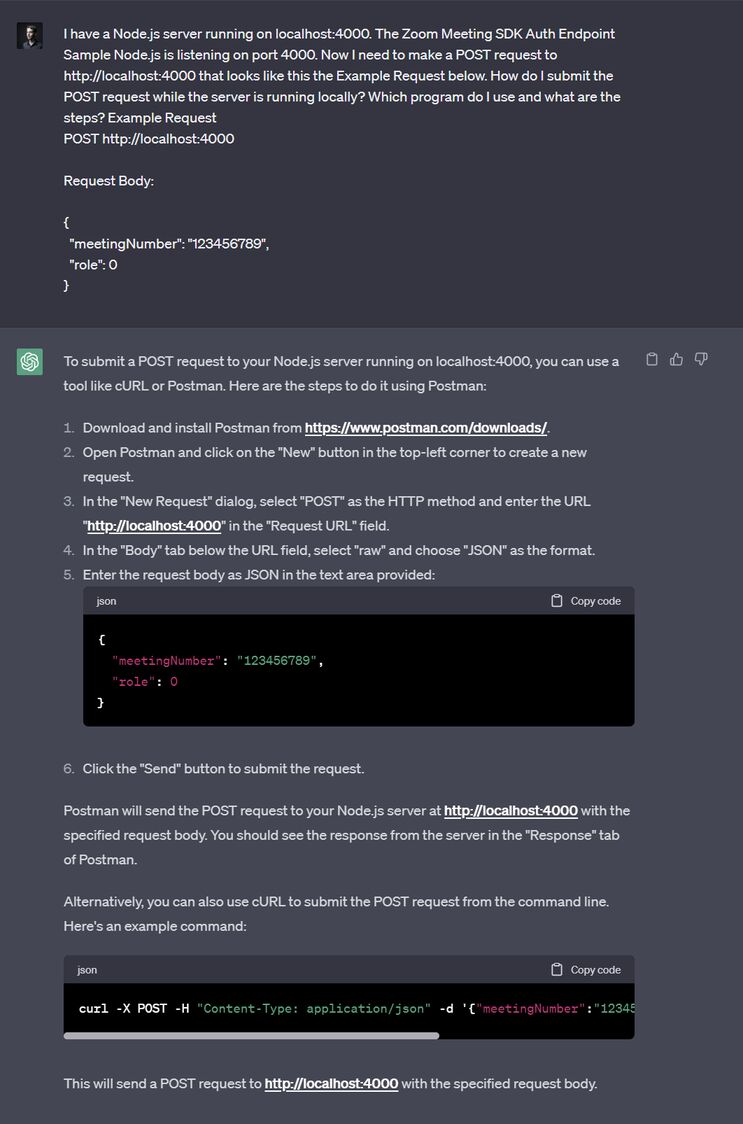 ChatGPT to the rescue!
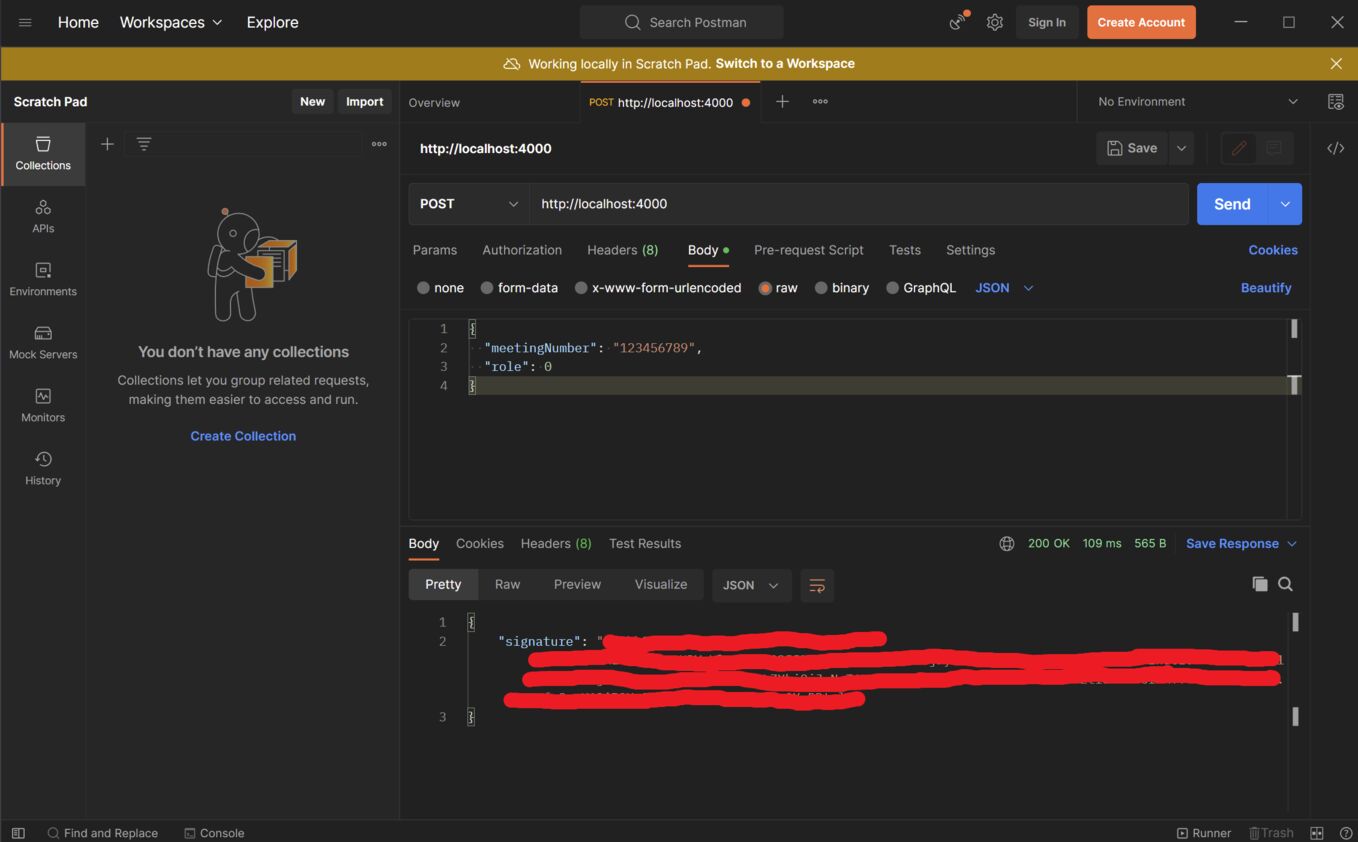 Making an HTTP POST request using Postman. At the bottom you can see the signature that the Zoom authentication server returns. Thanks ChatGPT!
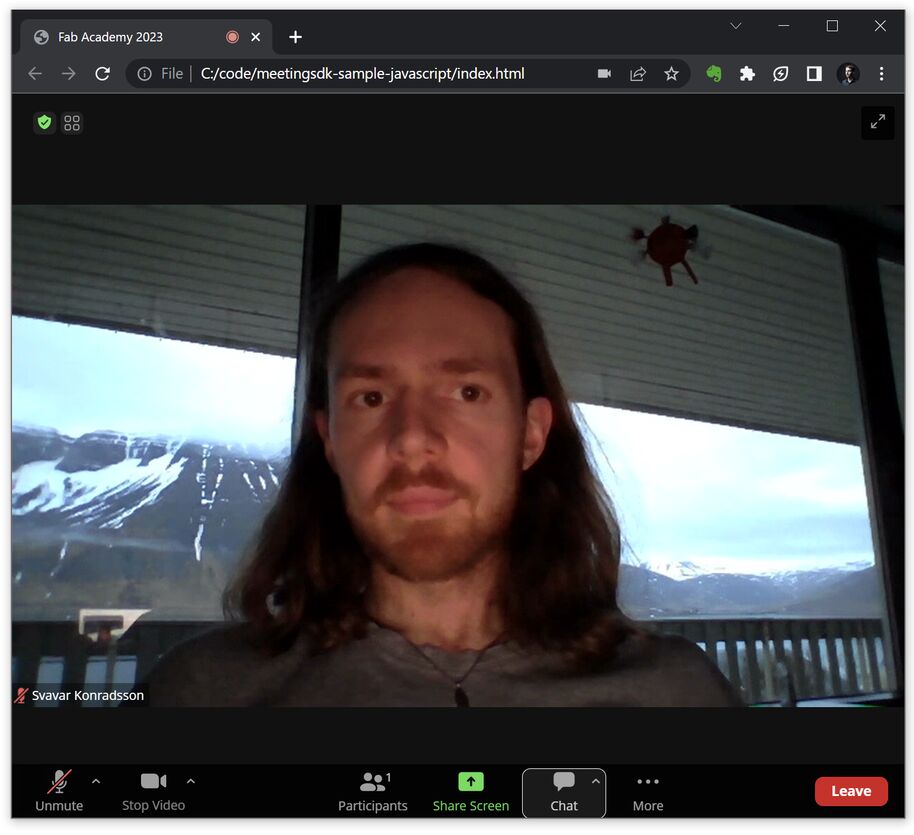 The example works on its own.
For this example to work you need to get a special authentication repo, which runs a node js server that listens. You go to Zoom Marketplace and get developer credentials and put them into the code in this repo and run the node server. Then when you press Join Meeting on the FMCU website, the website sends a message to the authentication server and gets a passkey, and then logs you into Zoom automatically.
 Now it's in a sidebar!
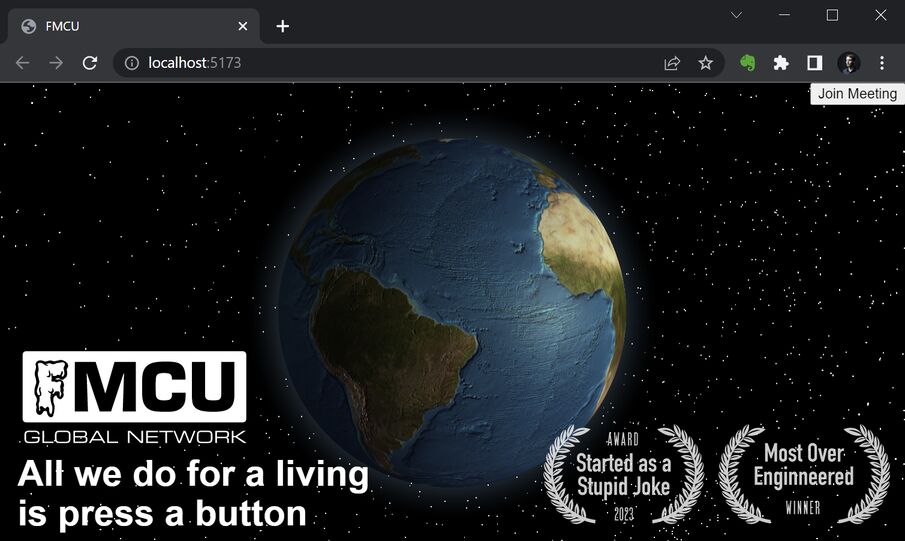 I added the Zoom Meeting SDK JavaScript code, but the button doesn't work.
I took to Mattermost and showed the non-working "Join Meeting" button to Þórarinn and Fran. Fran replied with this:

So I looked at the two CSS files in the FMCU repo and saw two instances of a hyperlink having the .repo CSS class. So I gave the Zoom code the .repo CSS class and ran the Node server:
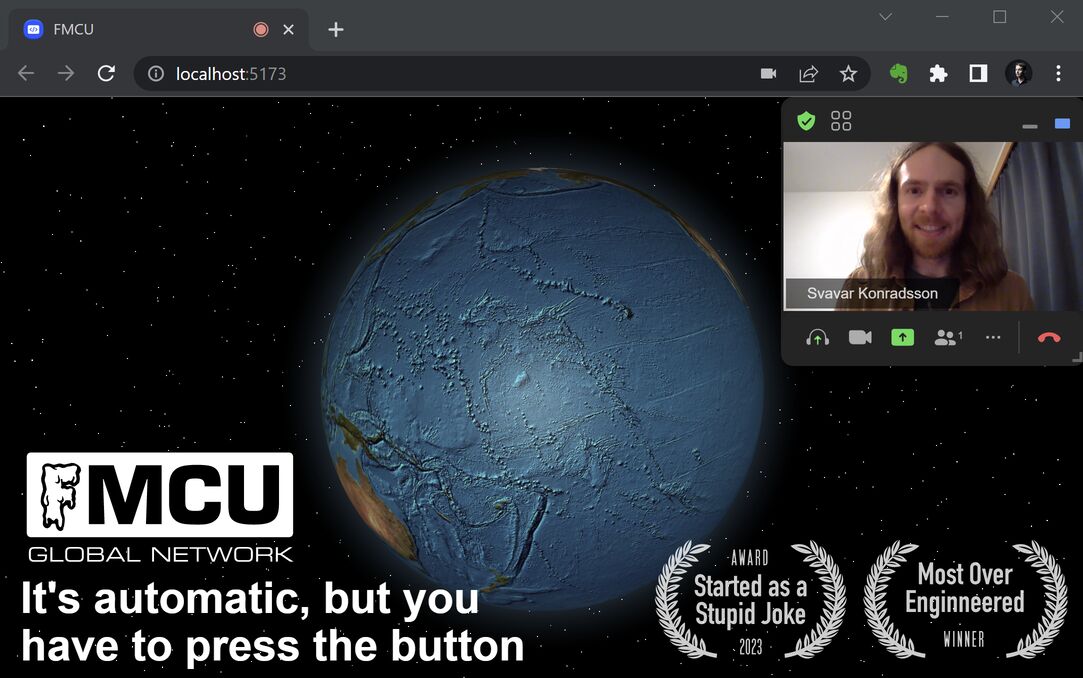 It works! Wow, I didn't really expect that.
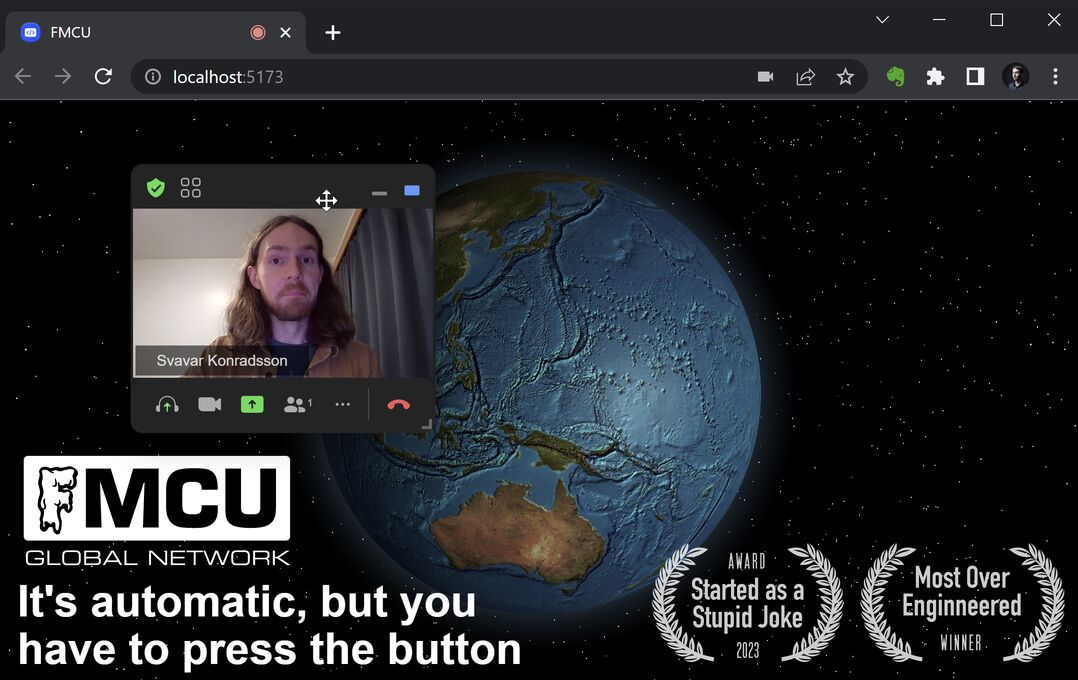 I can even move the window around.
Now I need to connect this to a physical circuit. I'm looking into how the FMCU button uses MQTT to send a message to the Node server. I'm also looking for a way to do serial communication using Node.
Design files
Here's the code with instructions on how to run it locally:
Visualizing a light sensor
I experimented with creating a computer interface for the light sensor that I made in Input Devices week. The code that runs on the Xiao is very simple. It comes from Adrián Torres. The code uses analogRead to read the value from the IR sensor and then writes it to the serial port:
I used a few different Python scripts to receive the IR light values from the serial port. First I tried Neil's hello.light.45.py code but it reads single characters from the serial port and I had programmed the Xiao to send whole lines at a time. I stopped there with Neil's code.
Then I found a nice tutorial showing how you can list the available COM devices in the terminal, pick one by typing its number, and open it using serial.tools.
Once the serial port is open, I run an infinite while loop and read one line from the serial port at a time, decode it using UTF-8 character encoding and then turn that string into an integer. I do the reading and converting in only two lines of Python code:
Then, to get a very rudimentary graphical representation going, I use an if statement and display one - if the value is between 0 and 100, display -- if the value is between 100 and 200 and so on, up to 1000 (----------).
As simple as it gets. This barely counts as a graphical user interface.
I also tried to make a GUI using Tkinter. I found a useful code snippet in example 1 in this tutorial, which creates a small GUI window and displays a title and a red and green rectangle with empty space between them. It's static, but by using my y variable (the number that is streaming into the serial port) instead of hardcoded numbers, I can make the bar move.
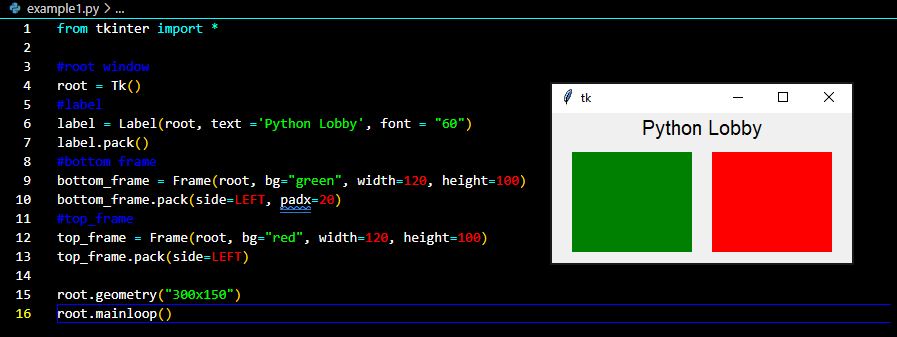 The static GUI example.
I could get the Tkinter interface to run separately and I could also get a stream of data from the IR sensor separately, but I had trouble combining them. Apparently, the reason is that I have two infinite while loops and the one that comes first in the code blocks the other. While the code waits for input from the serial port, nothing else can happen. And while the interface is running, nothing else can happen. I couldn't figure this out using the examples that I found online.
The following day I gave up and asked ChatGPT to change the code to make the two loops run concurrently. That resulted in code that ran, but I needed to make some changes to it. Only the grey bar was changing size between 0 and 1000 pixels, so I put 1000-y as the width of the black bar. That worked nicely. The interface was also sluggish, but I fixed that by changing root.after(100, readFromSerial) to root.after(10, readFromSerial). Then there is a much shorter delay for updating the interface.
We have a GUI that runs smoothly.
Design files
Download IR sensor Arduino code
Download Python terminal visualization code
Possible interface tools for my robot arm
I've looked into many ways of making an interface for a robot arm. Highlights include:
- Python Tkinter: This is what I used to make the simple interface for my IR sensor. Quite simple and works well.
- PyQt5: These are Python bindings for the powerful Qt5 interface library. Many, many desktop applications are built on Qt5, including CAD software. It's possible to build a standalone application using this library.
- ROS: The standard library to control all kinds of robots. Used extensively in reasearch and industry, very full featured but difficult to get into.
- Modular Things: A really nice web interface that works with Jake Read's OSAP network layer (which runs on the microcontrollers). You plug all sorts of Modular Things into USB ports, they pop up in the web interface, it knows what they are and then you write short JavaScript codes to make them interact and form complex machines. I really like this system but I've had trouble writing HTML and JavaScript code that works in it. It seems a bit different than plain HTML/JavaScript.
- Processing: Visual programming and device control for artists. It would be possible to make an interface using Processing, but I'm not very familiar with it. One plus is that it's popular in the Fab Lab community.
- P5.js: The JavaScript port of Processing, can connect to web cams and more using standard web protocols. This is one option if I want to create a browser-based interface from scratch. And hey- since it's JavaScript, I may be able to run it inside the Modular Things web interface.
- Python script in Blender: I've seen a few examples of robot control using Python scripting in Blender. Then you can animate a 3D model of the robot and have it act out those moves in real life. Nice.
- Python script in Fusion 360: Similar deal as in Blender, except I read online that the Fusion 360 Python version is a bit limited and constricted, and it's difficult to add Python libraries to it. But it should be possible.*
- Python script in FreeCAD: Similar to the other two I guess, but FreeCAD is a bit difficult to use.
- FreeCAD robot workbench: Just throwing this in here, haven't looked at it much.
- RoboDK: Industry standard user-friendly robot control software that works with lots of robots. Not free.
- Grasshopper: It should be possible to make a 3D model control a physical robot using Grasshopper, but I'm not familiar enough with it to try. Fab Academy students have made interfaces with their circuits using Grasshopper.
- WebSerial: The web standard that makes it possible for browser-based interfaces to control machines using serial ports. Mods Community Edition uses this and I think the Modular Things web interface does too. I use it in my simple two-motor control web interface.
- PyScript: My browser-based interface uses PyScript. I like Python. It's nice. If I can use it to program the robot in a browser and even plot its joint positions using Matplotlib and possibly use computer vision libraries and stuff like that, then that is interesting.
- WebAssembly: WebAssembly is what makes PyScript work. The Pyodide environment takes a while to load, because it uses a WebAssembly version of CPython that you need to download every time you load the website. Loading time is the disadvantage, but the advantage is that now we can port lots of performant code written in languages like C and C++ and run them at near-native speeds in the browser without installing anything! I want to look into more WebAssembly packages in the future.
- ThreeJS: The standard JavaScript library for creating 3D graphics in the browser. I could potentially use this to display a 3D rendering of my robot in a web-based control interface.
- OpenCV: The standard open-source computer vision library. I would like to add a camera to my robot in the future so that it can detect objects and pick them up.
- Svelte: I read somewhere that this is a good framework for creating responsive web sites. I don't know much about it.
- Phew! This is a web server library written specifically for the Raspberry Pi Pico by Pimoroni. I got interested in it when I saw this tutorial on how to build a captive portal using MicroPython. A captive portal works like this: The Pi Pico emits a WiFi network signal. You connect your phone to that WiFi network and try to open any web page in your browser. The browser opens the web page that the Pi Pico is serving instead. That's what a captive portal means, you can't escape it! It's often used by hotels, so that you need to input a code or contact information into the captive portal before it allows you to browse the web freely. You can make a whole robot control interface in a captive portal using web technologies.
- Simplest Pi Pico web server: I also like this web server from Doctor Monk's DIY Electronics Blog.
- Streamlit: A really simple way to make a web site out of your Python calculation scripts. I tried the example and it ran locally on my machine. But it's quite narrowly focused and limited in what it can do.
- NiceGUI: Good name. This is similar to Streamlit, a simplified way to turn your Python code into a web site. Also limited in what kind of GUI elements you can use.
- CodeMirror: I discovered this when browsing the Hack Club GitHub repo. This is what powers the Sprig web-based programming interface. I guess that this is also used in the Modular Things web-based code editor. This is one way to enable users to write code to run on my robot.
- Chilipeppr: I discovered this many years ago, when Alden Hart came to Fab Lab Reykjavík in 2015 to introduce his sophisticated CNC motion controller TinyG, which is used in Bantam Tools CNC machines and more. He also made tehe 9-axis g2core. He showed us this nifty CNC control software with a 3D preview that runs in the browser. I still haven't tried it, though.
- Johnny-Five: A JavaScript robotic control framework. I haven't looked into it that much.
- Crossbar.io: Another web networking protocol for hardware devices.