Molding and Casting 
Assignment
Group assignment
- Review the safety data sheets for each of your molding and casting materials,
- then make and compare test casts with each of them
- Extra credit: try other molding and casting processes
Individual assignment
- Design a mold around the stock and tooling that you'll be using,
- mill it (rough cut + three-axis finish cut),
- and use it to cast parts
- Extra credit: use more than two mold parts
See more info and recording of the lecture here.
The Guerilla guide to CNC and resing casting
I came across the Guerrilla guide to CNC and resin casting by Michal Zalewski some months ago and was fascinated by the depth of technical information and practical skills displayed in the guide and in his Omnibot Mk II build. Look at that tiny DIY planetary gearbox! His adventures in CNC and robotics are inspiring. And others have used his methods successfully; just look at this hybrid walker robot (video).So I took his recommendations and tried to order the main materials that he uses for his resin casting projects: Medium density modeling board, Quantum Silicones Q262 molding silicone and Innovative Polymers IE-3075 polyurethane for casting parts with excellent material properties. The problem was that no one wanted to sell them to me:
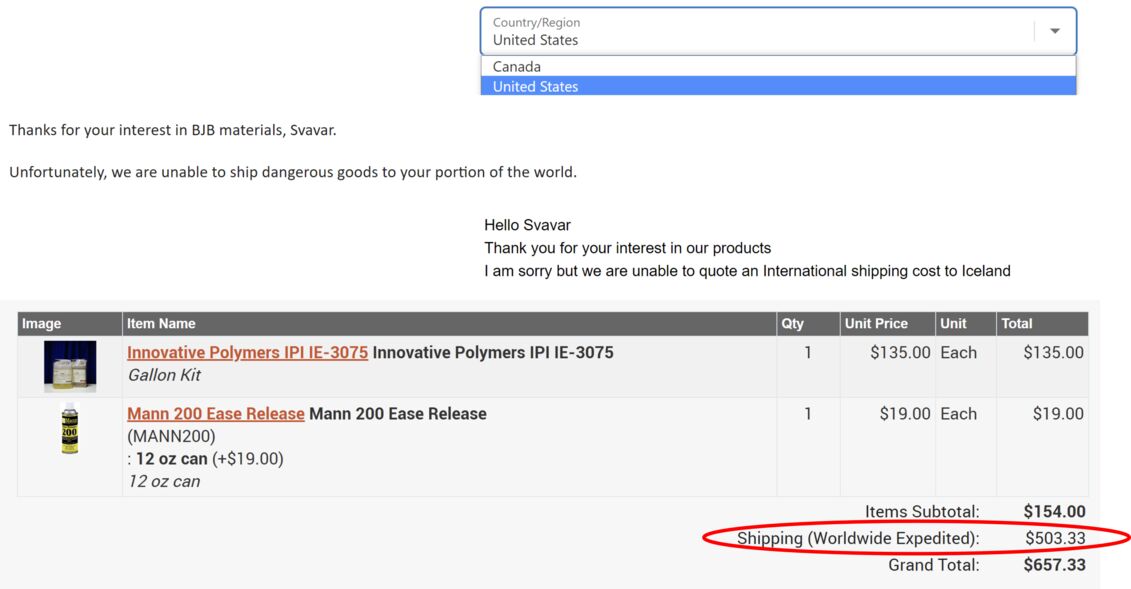 This seemed like a dead end.
Then I remembered a service I had used once before to order something obscure from a US based company that didn't ship to Iceland: ShopUSA. You can have things shipped to their warehouse in Virginia, and they forward your package to any country in the world. They shipped my polyurethane resin by air, which was convenient, but the silicone that I needed to make molds went by sea, because that package was above a weight limit. I also found someone on eBay who was selling relatively small pieces of medium density modeling board for milling. This is the stuff that's in all the ads from Roland, it's dimensionally stable, easy to machine and leaves a nice surface finish, not unlike a metal mold that has been glass bead blasted:
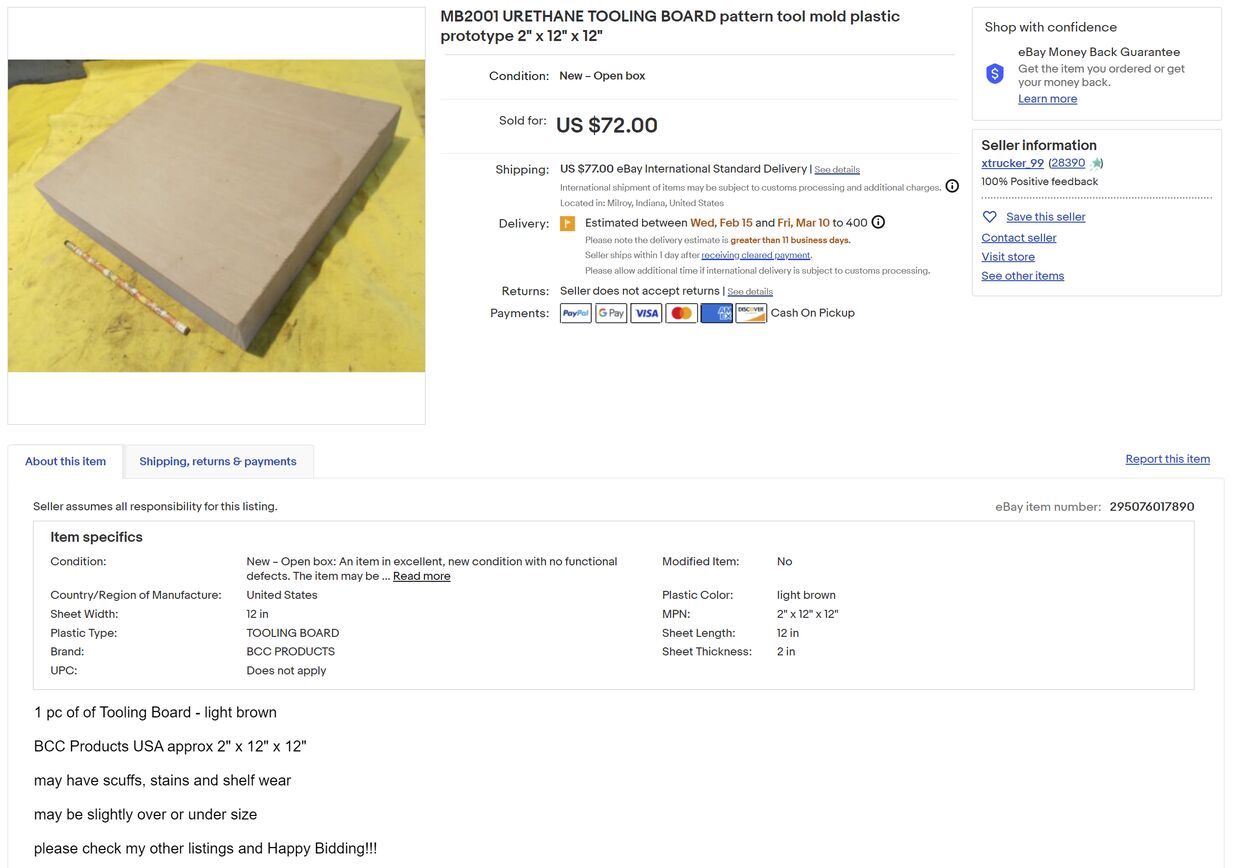 I like this stuff. It's like machinable wax, but with a filler, so you get a uniform, slightly textured finish. It takes well to sanding.
Mold pattern 1 modeling and toolpath generation
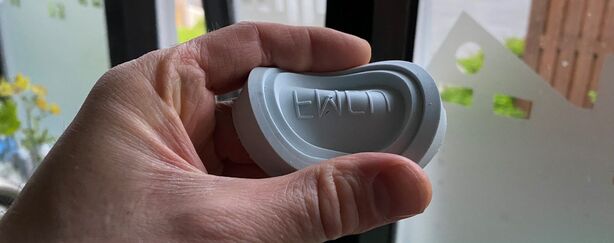
I decided to make a button for the Frankenstein MCU that my instructor Þórarinn is working on with Francisco Sanchez Arroyo. You push the button and your Fab Lab goes online. You can see the Fab Labs appear on the spinning globe, with connections forming between all the labs.
It's a simple design, mainly meant to test the 3D spiral toolpath in Fusion 360 and the surface finish that is achievable with the modeling board. First I embossed the text and tried a parallel 3D toolpath in Fusion 360:
 I couldn't get the detail I wanted with this approach.
Next, I used a single line font for the text and used the Project command to mill it into the curved surface of the button with a 3D strategy:
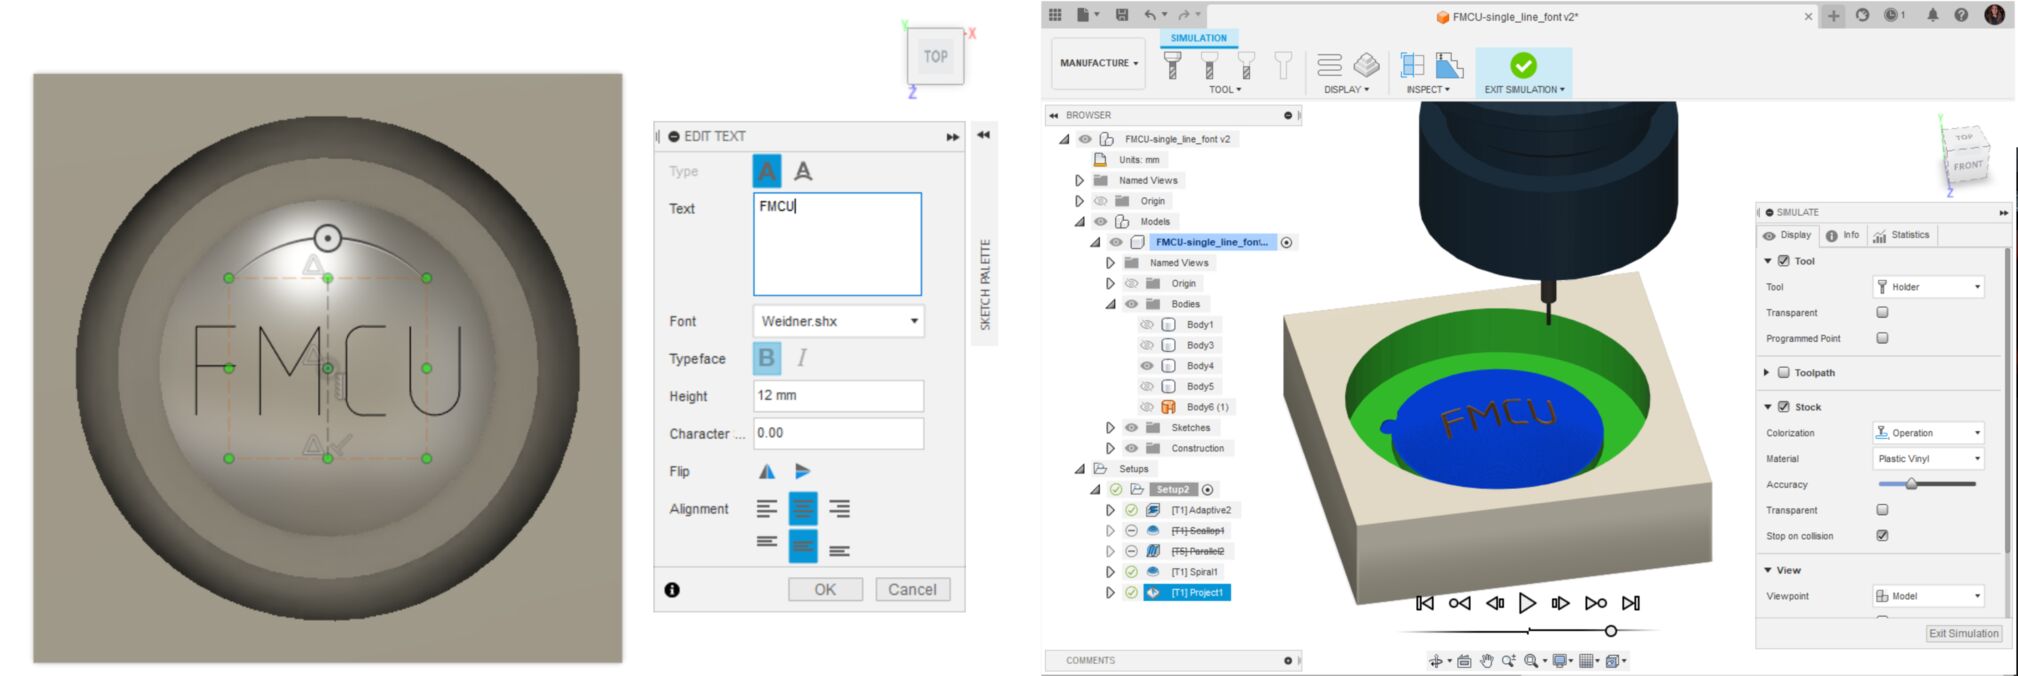 The single line font, coupled with the Project milling strategy, worked really well .
Milling mold pattern 1
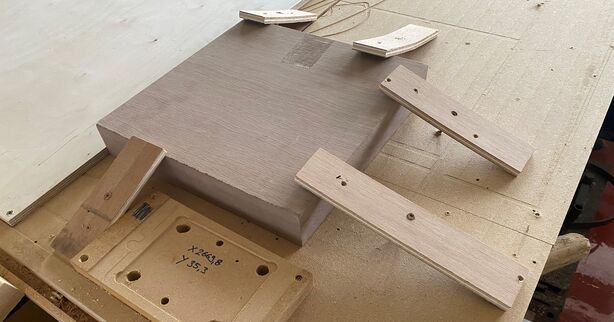 I used a simple fixturing method that my instructor Þórarinn showed me.
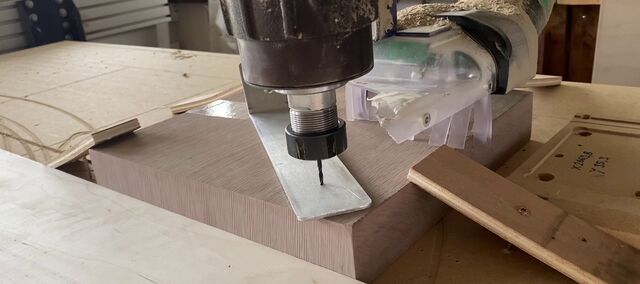 I used the zeroing plate on the Shopbot.
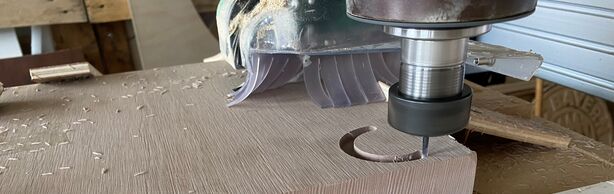 The milling chips look really nice when running adaptive clearing.
 Roughing pass being completed.
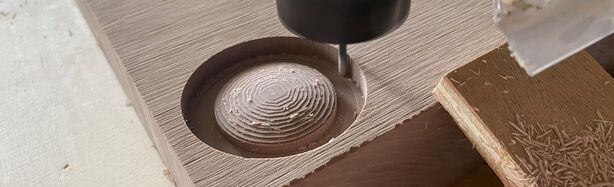
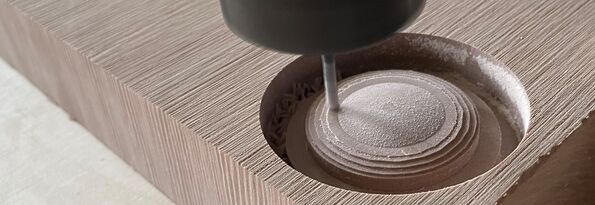 Finishing pass looking good.
Molding mold pattern 1
Since my silicone hadn't arrived, I got the help of my father-in-law, who is a recently retired dentist. He uses Impregum Penta from 3M to take impressions of teeth. It comes with a handy machine which mixes the two parts in the right proportions and dispenses the silicone.
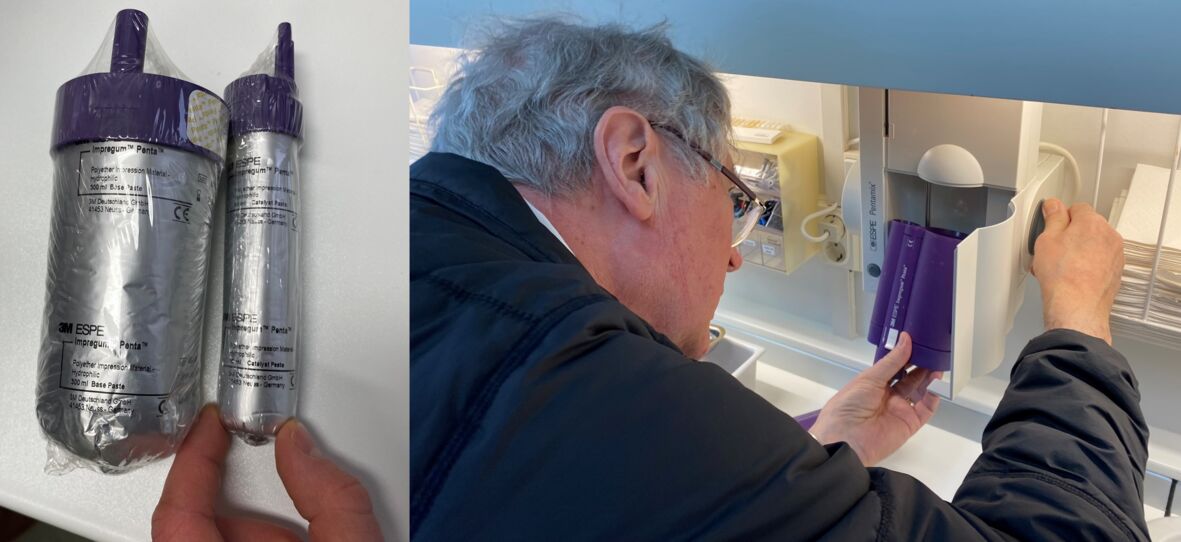 Still knows all the moves.
This dental silicone is really viscous, so it's hard to prevent bubbles from being trapped in it when dispensing into the mold. Also, I didn't add draft angles to the geometry, so it was hard to get the silicone out, and I damaged the mold pattern:
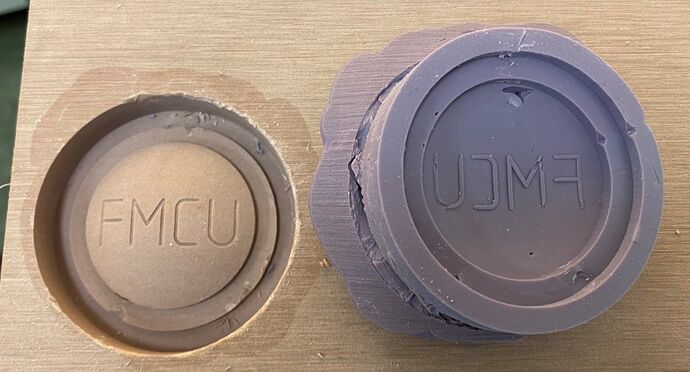 I thought the mold was shallow enough to not need a draft angle, but it really does need it.
Mold pattern 2
 Comparison between the profile sketches of the first and second mold pattern.
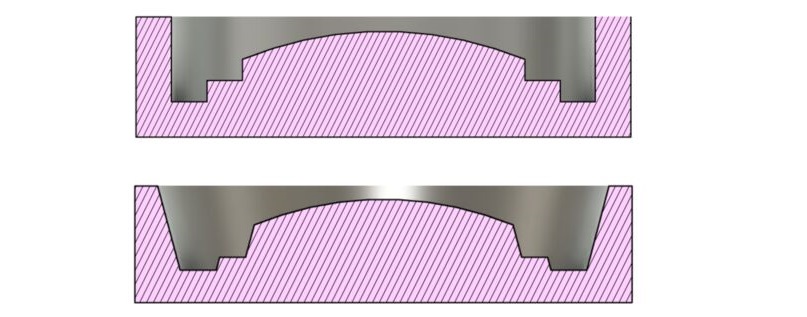 Section analysis of first and second mold pattern.
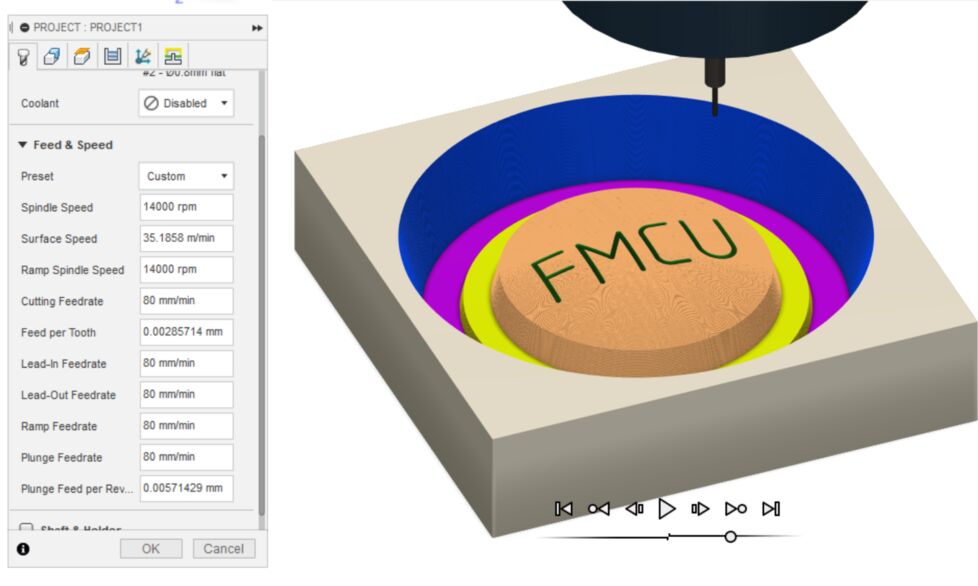 The second mold pattern toolpath. On the left are the feeds and speeds for the text engraving.
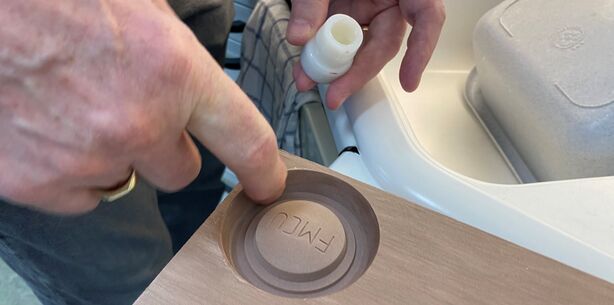
My father-in-law put some Vaseline on the edge of the second mold pattern. That worked well. With the addition of the draft angles, it was much easier to get the silicone mold out of the modeling board. I used a syringe to put the silicone in this second mold pattern, so that I could get into all the little engraved letters. That strategy worked, but I still got bubbles in the silicone.
 A bit of Vaseline as mold release.
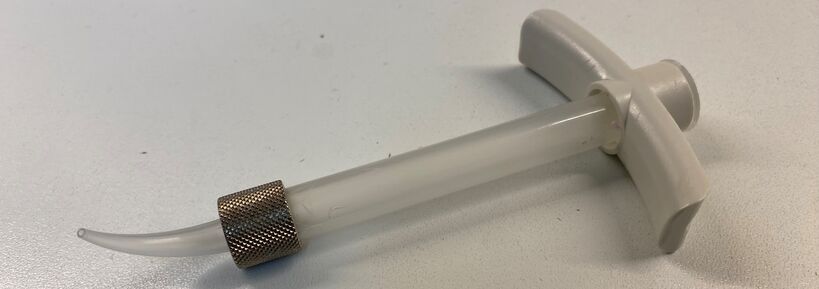 This is the only picture I have of the syringe, because I needed both hands to apply the silicone.
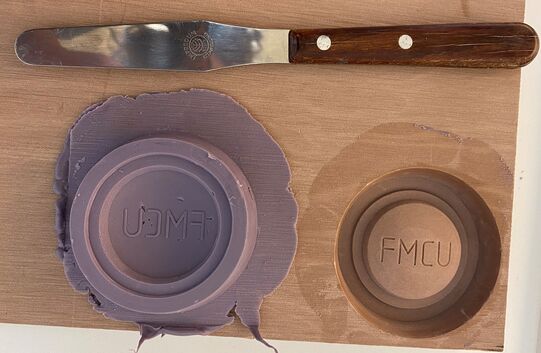 The second mold came out well, except for a few bubbles. With the help of my father-in-law, I made another mold from this pattern, but it turned out the same.
The right silicone arrives
Then my silicone arrived from Hobby Silicone! I also got a vacuum pot that my friend Páll Einarsson made. That's a great thing to have when molding and casting! But I was disappointed when I plugged it in. I got no vacuum at all. If anything, the needle on the meter went up. I tried pressing down on the lid to seal it, but no luck. Then I felt air blowing out from under the lid. Aha!
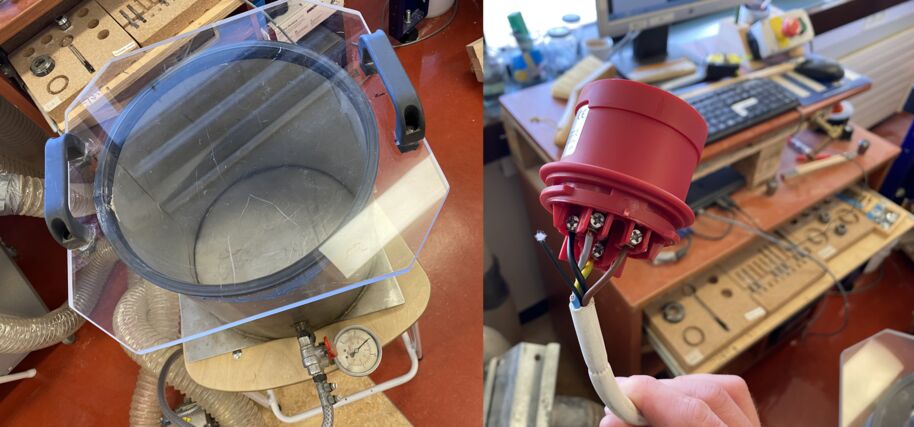 DIY vacuum pot.
When Sigurður, the electrical teacher at the school came to the lab I got him to take a look at the three-phase plug with me. He showed me how to open it and he suggested that I try swapping the brown and black wires. That worked! The vacuum pump now blows in the right direction and I can degas the silicone and polyurethane. I ordered QM-262, which is quite stiff with Shore 60A hardness, and also Soft 107, which only has a 7A Shore hardness. I tried the softer one.
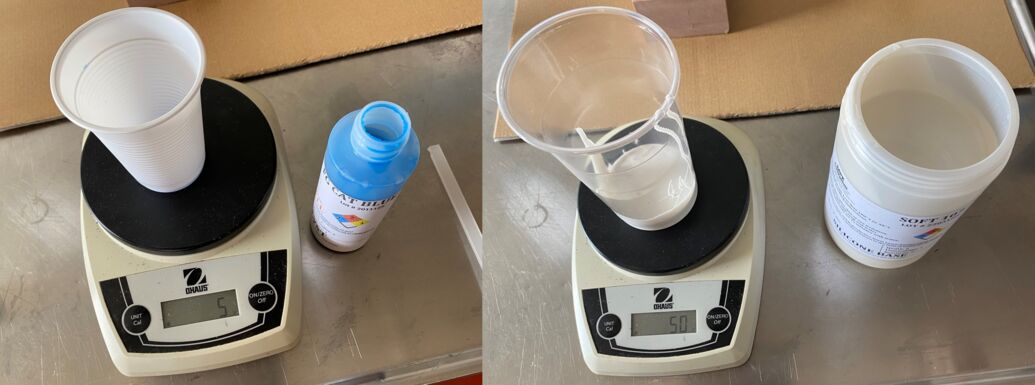 One part blue catalyst to ten parts silicone.
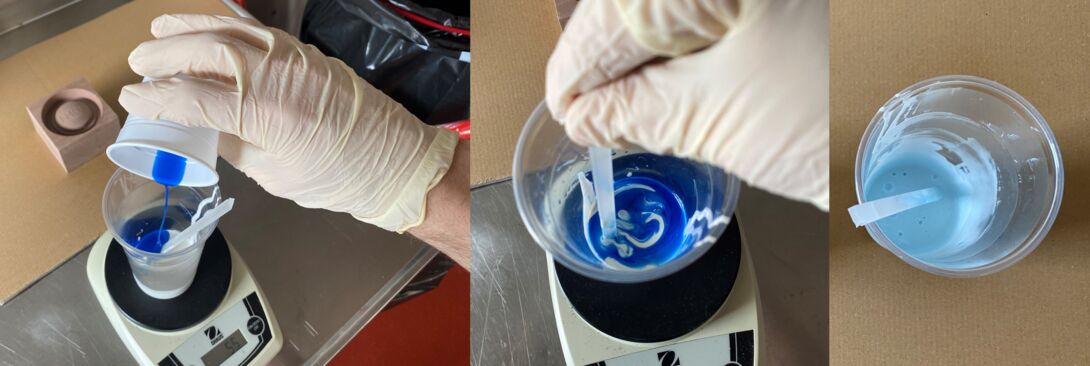 Mixing the silicone and scraping the sides of the cup until the color is uniform with no streaks.
I mixed one part catalyst (5g) with ten parts silicone (50g) as per the manufacturer's instructions, and tried to shear it (Stir only laterally, not up and down, so as not to get bubbles in the mix). When the color was even I put the mix into the vacuum pot and let it sit for five minutes. A lot of bubbles surfaced and popped. I then let air back in and put the vacuum back on twice for two minutes.
Then I poured the light blue mixed silicone into the mold pattern (after spraying it with Ultralease from Hobby Silicone). I poured in a thin stream into the same place the whole time, really slowly.
Then I put it into the vacuum pot. A surprising number of bubbles came up. After a whole work day, I checked on the remains of the mixed silicone in the cup. It was still flowing freely. That was discouraging. My wife Aðalbjörg worked for OK Prosthetics making prosthetic legs and silicone liners and she said that they heated up the aluminum molds to accelerate the curing process. Any remains took days to cure. They used to put the silicone mixing nozzles into an oven to be able to get the remains out and use the nozzle again quickly. She said that it depends on the chemistry and especially the catalyst, but she said that my silicone might still cure.
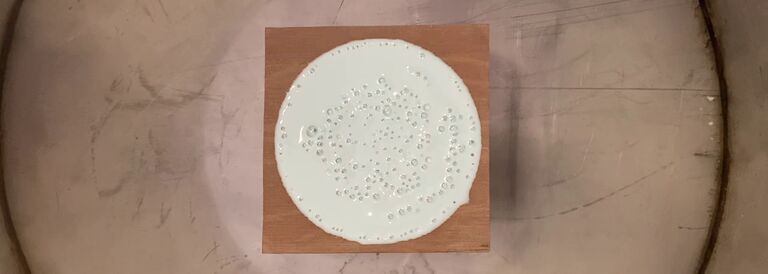 Degassing the mold after pouring.
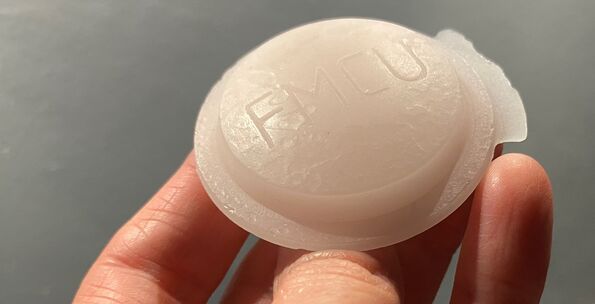
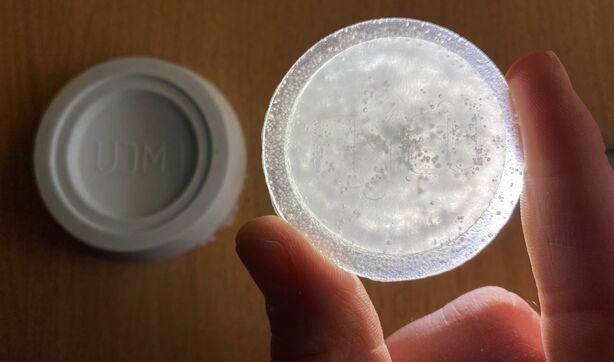
After a week of waiting and then going to the Fab Lab Bootcamp in Neskaupstaður for another week, I came back and removed the mold from the master pattern.
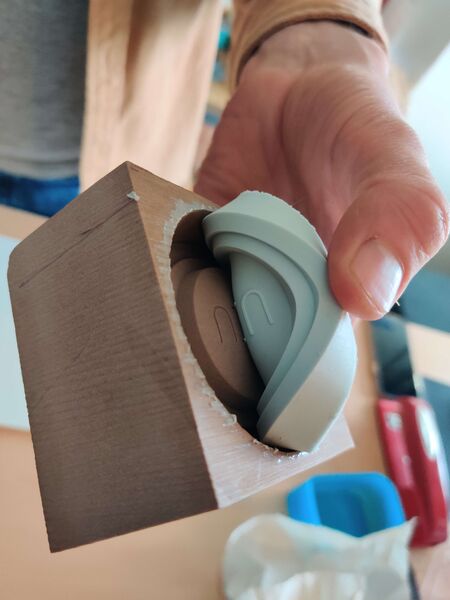 This silicone mold is very flexible.
I'm very happy with the results. There are absolutely no bubbles in the mold and the text was captured perfectly. But I may need to contact the silicone manufacturer, because the datasheet says that it should cure in 24 hours.
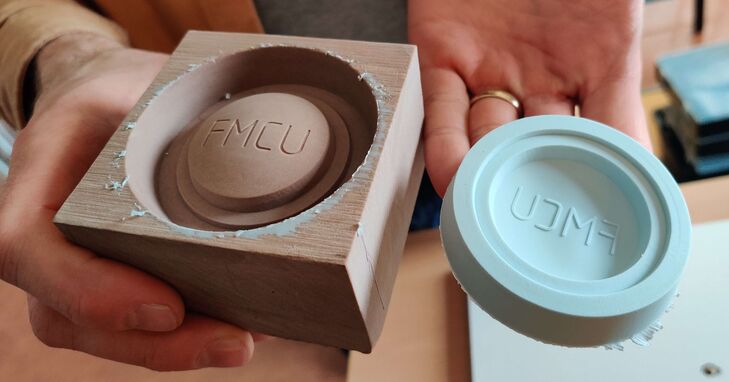 That's a nice-looking mold with no bubbles.
Design file
Download FMCU button Fusion 360 model
Trying to mix polyurethane
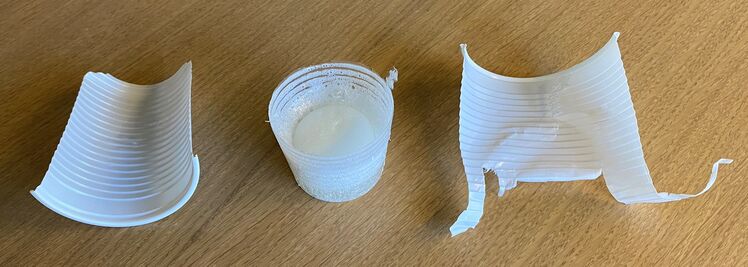
I made an attempt to mix the IE-3075 polyurethane to cast it in the silicone mold. The bottles said that I should agitate them before mixing, because they may have settled in storage. I probably shook them way too hard, because when I put the 1:1 by volume mixture into the vacuum pot, it foamed and immediately started to set. I made a rigid foam. Those can be useful as core materials in composites, but that's not what I intended to make.
Casting wax in the mold
Just to cast something in the mold, I tried candle wax. So I took the mold home and heated up an old candle.
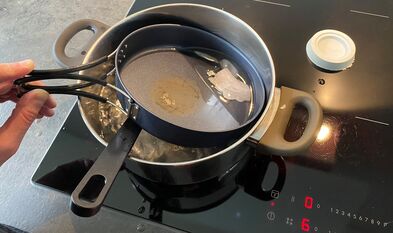 Heating the candle wax over a water bath.
When all the wax had turned liquid and transparent, I poured it carefully into the mold.
I may have heated the wax too quickly. As it gets hotter, the wax continues to expand according to its coefficient of thermal expansion. Then I poured it into the mold and it starts to cool down and contract. The greater the difference between these two temperatures, the worse the warping and wrinkles get.
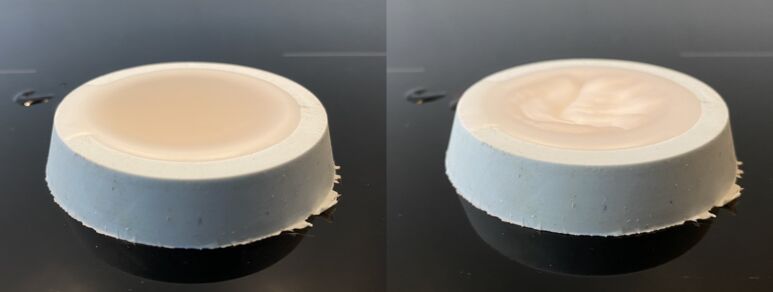 Thermal contraction during cooling results in wrinkles on the surface.
Then I removed the cast wax part from the silicone mold.
A small hand immediately grabbed the cast wax part after I removed it from the mold.
The resulting part is not nearly as smooth as the mold is. Apparently the thermal contractions were so bad that this side got wrinkled too.
 The surface is all wrinkled after thermal contraction. But the text came out well.
My little helper played around with the mold for a second. This resulted in the mold being bent all the way backwards and developing cracks. He wasn't trying to damage it, he was just being very four years old. This is a lesson for me, the mold was too thin in the middle. I was trying to save material and I thought I could get away with it.
 "There is a crack in everything. That's how the light gets in," sang Leonard Cohen.
Trying polyurethane again
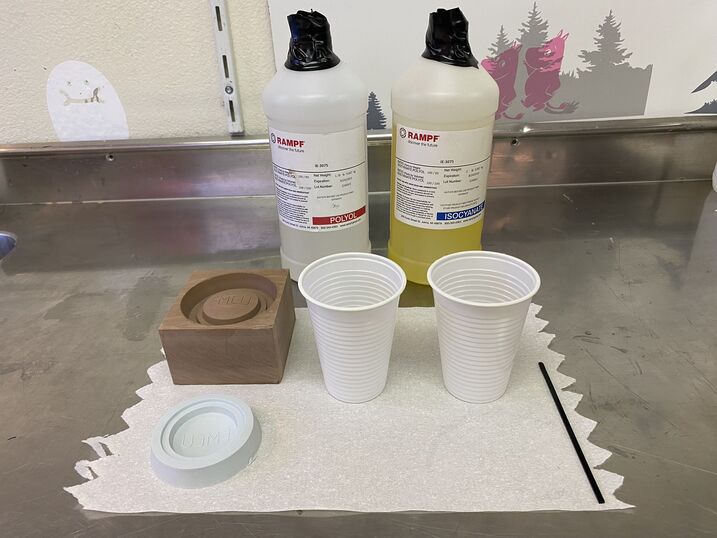
This time I poured the isocyanate and polyol into separate plastic cups in the right proportions. I put them both into the vacuum pot and pulled a vacuum. No bubbles surfaced, so I took the silicone mold, grabbed a piece leftover acrylic to put under it, and placed it inside the vacuum pot. I then mixed the polyurethane parts together, stirring carefully with a thin acrylic stick.
I poured the cloudy mixture into the mold in a thick stream, closed the chamber and pulled a vacuum. Lots of bubbles surfaced, but they didn't pop. Is the liquid to viscous? Is the vacuum pump not powerful enough? I let the air back in to see if the bubbles would pop. They shrank, but became bigger I pulled the vacuum again.
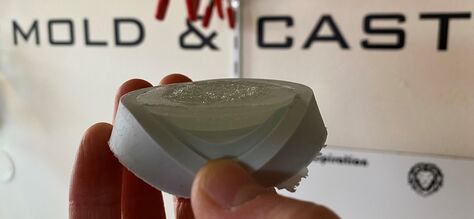 The button came out of the mold without any trouble. I just had to make sure not to rip the silicone text when removing the resin part.
 The part is full of bubbles! Darn it.
The FMCU text is very faintly visible. I would need to fill the letters with paint to make them stand out. I'm going to claim stone cold that that was the plan all along.
My instructor Þórarinn mentioned that there is a pressure pot in the Chemistry lab in the school. Maybe that will work better. Instead of drawing a vacuum, which enlarges the trapped bubbles and encourages them to rise to the surface, I will make the bubbles collapse until I can't see them anymore. When I have some spare time. This will have to do for now.
Safety Data Sheets
The silicones and the polyurethane that I ordered came with Safety Data Sheets.
Soft 107 Silicone
Soft 107 is a very soft and flexible two-component, room temperature condensation cure silicone. It has a durometer of 6. I guess they named it before they got the results back from the official durometer test. The condensation cure (or tin curing) means that this silicone probably shrinks a bit when curing. But the great thing about this material is that it's food safe (indirect contact). Because it's so soft, it's also ideal to make pads for pad printing. I've wanted to try pad printing for years, now I have what I need to do it. The silicone is mixed with a blue catalyst in a 10:1 silicone to catalyst ratio by weight. It's recommended to mix the silicone in a clean plastic container with a volume 3-4 times the volume of the silicone being mixed. Then there's space for it to expand when you put it in a vacuum pot to draw out the bubbles. If you don't have access to a vacuum chamber, they recommend a high pour: You pour into the bottom corner of the mold the whole time, keeping the mixing cup high enough above it to form a thin, steady stream of silicone. The bubbles will be pushed out before entering the thin stream and then the silcone mass slowly levels itself in the mold. This is what I did, and I also used a vacuum pot.
The Soft 107 silicone may be harmful in contact with skin. Always use disposable gloves when handling it. Ensure good ventilation while working with it. Make sure that it doesn't leak into the environment. You must make sure that it cures before disposing of any remains. It's good to have a shower, an eyewash station and a ventilation system. It would be good for the Fab Lab to get an eyewash station. Rinse with plenty of water if you get the uncured material on your skin, in your eyes or into your mouth.
Quantum Silicones QM 262 Silicone
QM 262 is a two-component, room temperature addition cure (platinum cure) silicon material. The platinum cure means that there is essentially no shrinkage while curing. This silicone has excellent mechanical properties and is Michal Zalewski's favorite silicone for precision mold making. It has a high durometer of 60 Shore A. You mix it 10:1 silicone to blue catalyst by weight. The mixing instructions are the same as for the Soft 107 silicone material.
The safety instructions are also the same as for the Soft 107 silicone.
Innovative Polymers IE-3075 polyurethane
This very strong polyurethane is mixed 1:1 by volume from an isocyanate and a polyol:
RAKU TOOL IE-3075 Isocyanate
Rinse with plenty of water and call a poison center if you get the uncured material on yourself. It may cause respiratory irritation and damage to organs through prolonged or repeated exposure. The material is suspected of causing cancer. Use protective glasses, glove, clothing and in case of inadequate ventilation, wear respiratory protection. Heating may cause an explosion.
Make sure to completely cure the material before discarding the container.
RAKU TOOL IE-3075 Polyol
The safety procedures are very similar to the isocyanate, except the polyol is less flammable. There is much less information in its Safety Data Sheet.
Ultralease URE GP Urethane Parfilm Mold Release
Ultralease URE GP is a solvent-less and virtually odorless mold release. It's heat stable to 315°C, so it should also be good for injection molding. It doesn't interfere with painting, coating or bonding. It should last for several molding cycles. It's recommended for use with polyurethanes, silicones and rubbers.
Wear eye protection, long sleeves, chemical resistant gloves and an organic vapor respirator. Also ensure proper ventilation. The can may explode if heated and the contents may displace oxygen and cause rapid suffocation. Keep away from heat, sparks, flames and hot surfaces. Do not pierce or burn the pressurized container, even after use. And definitely don't spray it onto an open flame. Rinse with plenty of water if you get it on yourself. And because it's in an aerosol can, contact with the rapidly expanding gas may cause burns or frostbite, as the gas removes heat from your skin to fuel its expansion.