Principles and Practices 
Assignment
- Set up a documentation website using GitLab.
- Plan and sketch a potential final project.
See more info and recording of the lecture here.
Final project sketch
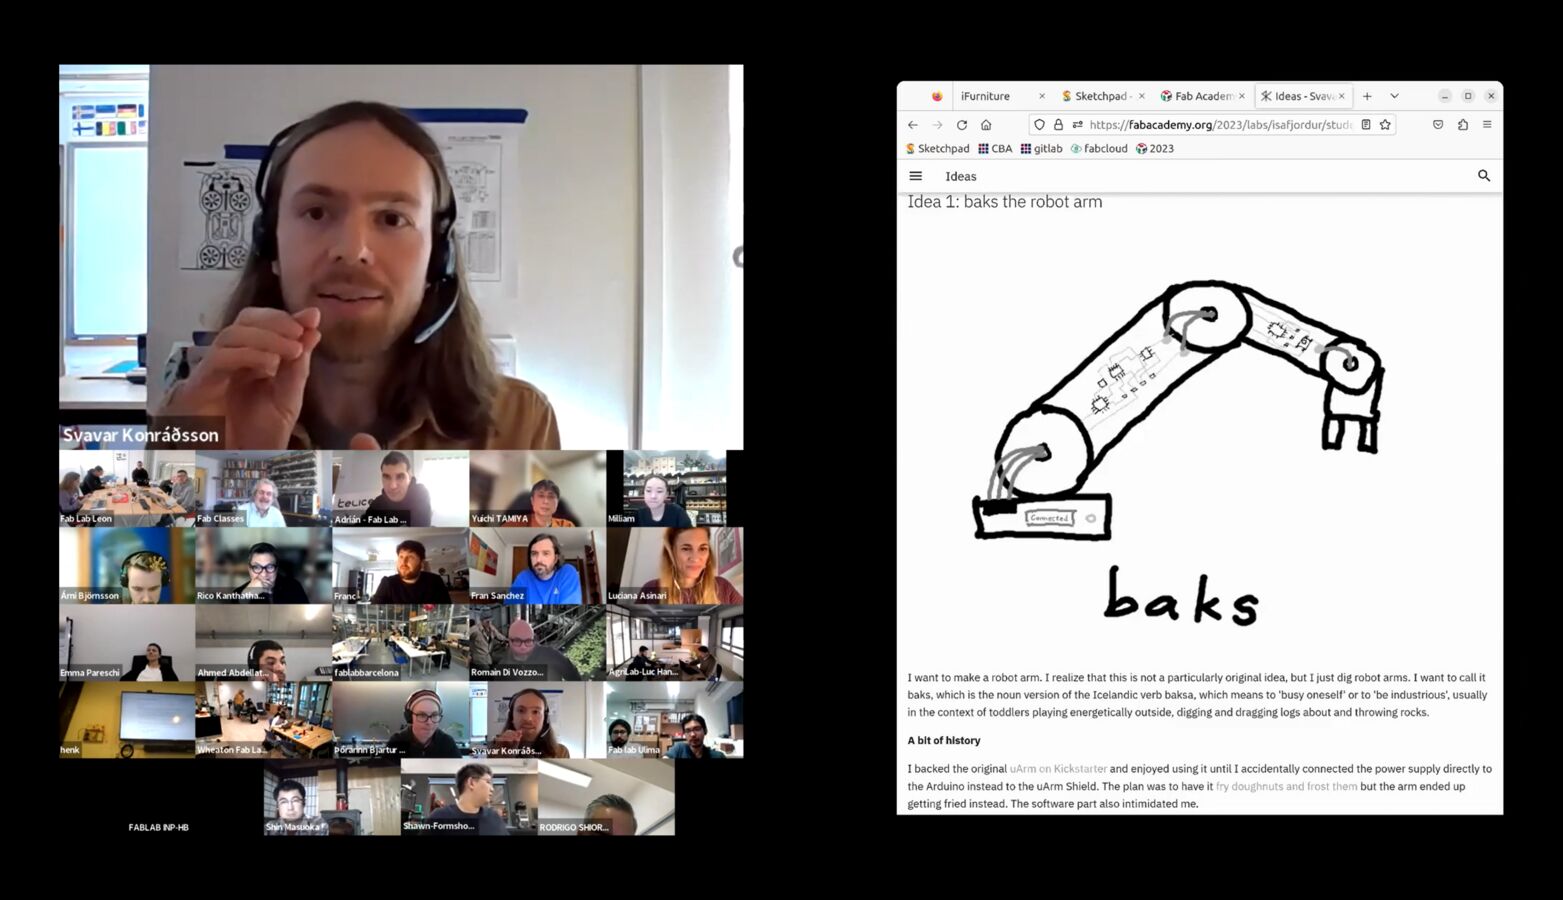 Here I am describing my final project idea to Neil Gershenfeld and the students and instructors in Fab Academy cycle 2023. Link to the video.
This week, I set up an ideas page with the three ideas that I have for a final project in the Fab Academy. Check them out, they're quite fun! I ended up picking the friendly little educational robot arm called baks. It's powered by brushless servomotors and has a structure made entirely of PCBs! So the robot consists of motors and PCBs and nothing else! I may not be able to get all the way there during the Fab Academy, but I do want to make that happen eventually.
I put the Student Agreement on my About page. This is a document that I sign by committing it to my repository and it states the code of conduct that I will abide by during my Fab Academy studies.
Image compression for the web
This is the string of ImageMagick commands that I use to compress images for this website on a Linux machine:
Note
While I was in the Fab Academy I used Windows, and there the command is 'magick' instead of 'convert'.
Tip
Sometimes I want to convert a PNG with a transparent background to a compressed JPEG with a white background. To do that, I add the commands '-background white -flatten -alpha off'. Otherwise, the background becomes black by default.
To compress all the images in a folder on a Windows machine (I rarely use this):
You can edit the text right here in the text boxes and then copy it into your terminal to compress your image. That's what I do. If you've installed ImageMagick, all you have to do is click in the address bar in the folder containing your image, type cmd and Enter and paste the commands from the text box into the Command Prompt. I learned how to make the text box here, it's just basic HTML.
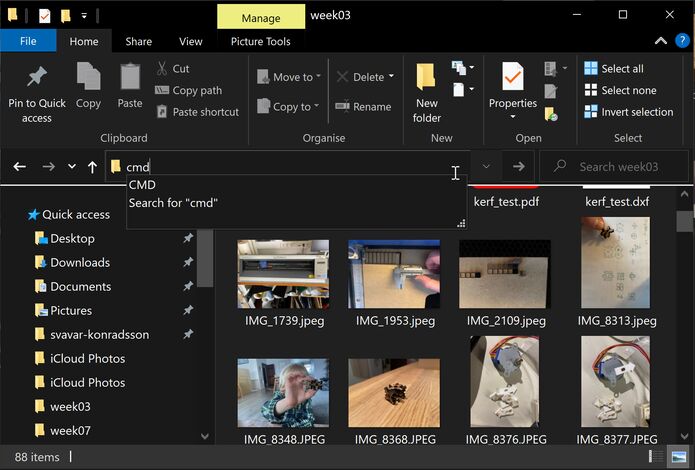 How to open the Command Prompt in your image folder.
I always use -quality 80, but I vary the -resize based on how big the original image is and how much detail I need to show. The resolution is based on how big the image is displayed, which is determined by the width of the central column on my site. I think it's about 690 pixels wide.
Note
Hang on! I just discovered that I can copy the ImageMagick commands straight into the address bar in Windows Explorer and press Enter. Now that's convenient.
Video compression for the web
This is the string of FFMPEG commands that I use to compress videos for this website:
If you've installed FFMPEG, you do the same thing as with the images above, you just type cmd and Enter into the address line of your image folder and copy the commands from the text box above into the Command Prompt. Now you have a much smaller video!
I'm quite ruthless about lowering video resolution for my website. The standard resolution I use is 360 lines, this is defined by the scale command. When I just need to show that something blinks or moves, I go down to 240 lines and when I need to show text or other details I go up to 480 lines. I used to use:
ffmpeg -i input_video.mov -vcodec libx264 -crf 25 -preset medium -vf scale=-2:360 -acodec libmp3lame -q:a 4 -ar 48000 -ac 2 output_video.mp4
But I got no audio on iPhones.
I found a solution to the no audio on iPhone problem on this website.
User DLCom said:
ffmpeg -i input -c:v libx264 -b:v 2600k -pass 2 -c:a aac -b:a 128k output.mp4 from the official ffmpeg documentation.
So I took the "-c:a aac -b:a 128k" and put it instead of the "-acodec libmp3lame -q:a 4 -ar 48000 -ac 2" that I had been using and I got sound on the video on my iPhone.
Then I added from the official FFmpeg documentation: https://trac.ffmpeg.org/wiki/Encode/H.264 "veryslow" instead of "medium", to get better encoding quality I also added "-movflags +faststart" so that the video starts playing before it's fully loaded in the browser. The final video compression command is the one in the text box above.
Recently I've discovered that I can't move the slider to go forwards and backwards in my latest videos. I can do it in the older ones. I need to look into that.
Setting up this website
I love Material for MkDocs. I use a lot of its features on this website. But one thing is a little annoying: I store all the images and videos and design files in the docs folder and when MkDocs builds the site, it copies all those files over to the public folder! So everything I put on this site gets doubled. I suspect that this is how all static site generators work. It would be really nice to get away with having only one copy of each media file. But even with this drawback, I will continue to use Material for MkDocs, because I'm really happy with this site.
The rest of this page is dedicated to how I set up this website using Material for MkDocs. The website is hosted on Gitlab and deployed automatically using this file. But you can also easily deploy an MkDocs website to GitHub Pages. I did that before starting the Fab Academy, to get a little bit of a head start. You can check out the test site. I experimented with lots of different colors, but ended up finding black and white cleaner and more elegant. I also added a dark mode that you can toggle, but removed it again when it didn't work very well with the color scheme I ended up with. I really liked trying all the features in Material for MkDocs, it's a really well designed package and superbly documented.
In a video call a few months before the Fab Academy started, Árni Björnsson showed Móses and me how to set up MkDocs and Git. I've summarized all the steps here, with a few extra resources I found along the way:
MkDocs setup from scratch
First, I installed the VSCode editor.
Then, as Árni Björnsson suggested, I created a folder called code directly in my C: drive, so that Dropbox and OneDrive don't try to sync the folder and mess up my GitHub connection.
I followed this tutorial to set up MkDocs. There are a few steps to it:
- It starts with installing the Python extension for VSCode.
- The
pippackage manager is included with the Python extension, but for some reason you don't always get the latest version. It may be a good idea to check the version. I opened a new terminal in the top menu in VSCode (Terminal -> New Terminal) and typed and if it says it's out of date you can upgrade pip like this: - Now it was time to install MkDocs:
- Then, as the tutorial suggests, I typed
mkdocs --versionto see if the installation went OK: - (optional) I also installed the Material theme because it seemed nice and it includes expandable code annotations:
Note
To enable notes like this one in MkDocs, I added Admonitions to the extensions in the mkdocs.yml file:
Then, to create a note, start with!!! note and then indent the note text:
MkDocs test drive
I followed this tutorial to set up a small test website and get a live preview.
- After installing Material for MkDocs, I made a folder called Mkdocs. Then I opened a terminal and made sure that it was in the right folder: Then I simply typed and that was enough to create a simple site! Well, there are a few extra steps to view the site and deploy it, but this whole process is very simple.
- Then I added the following lines to mkdocs.yml: This is geared towards the Material theme for MkDocs, so if you're using a different theme, the only thing you need to change is the the theme line in the mkdocs.yml file.
- Set up autocomplete. The tutorial suggests adding a line to settings.json, but it doesn't mention where that file is in VSCode. But it does provide a link to instructions. You go into
File -> Preferences -> Settings, scroll all the way down to Yaml: Schemas, and clickEdit in settings.json.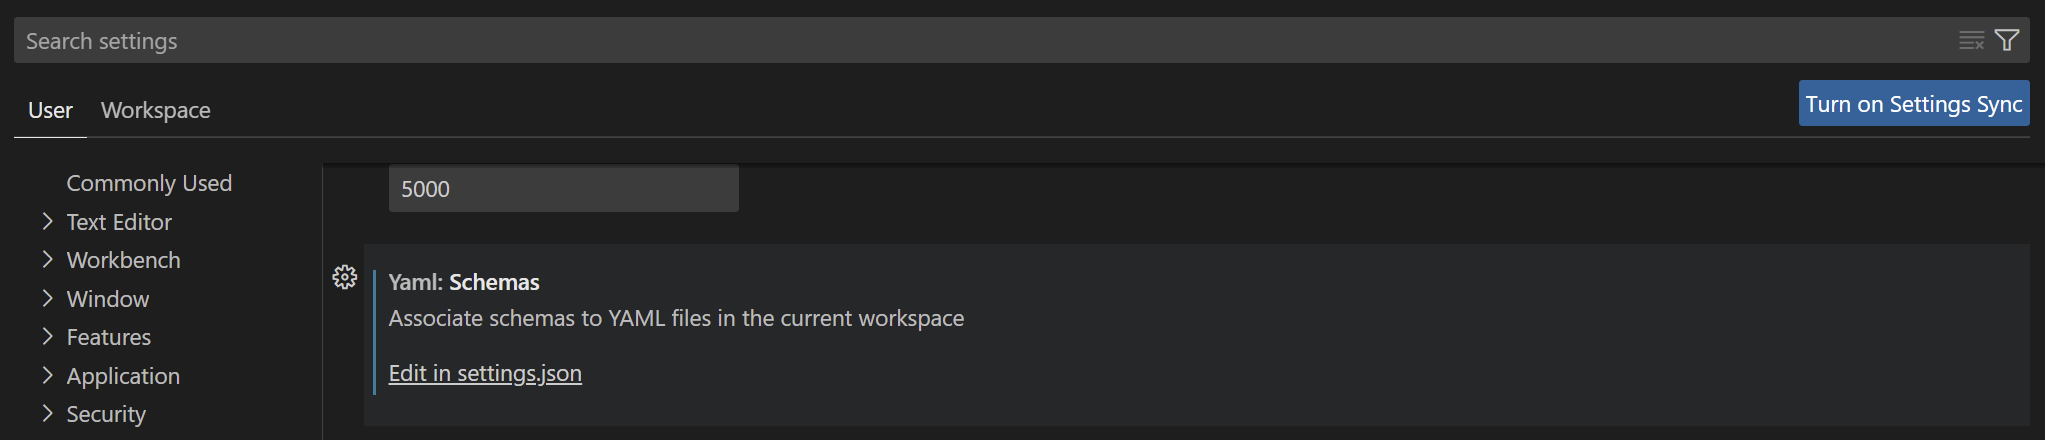 Then you add the line
 "https://squidfunk.github.io/mkdocs-material/schema.json": "mkdocs.yml", so in the end it looks like this: - OK, now we're yearning for something to happen. Type the following into the terminal: Now open your browser and write localhost:8000 in the address bar. Voilá! We have a live preview for an MkDocs website!
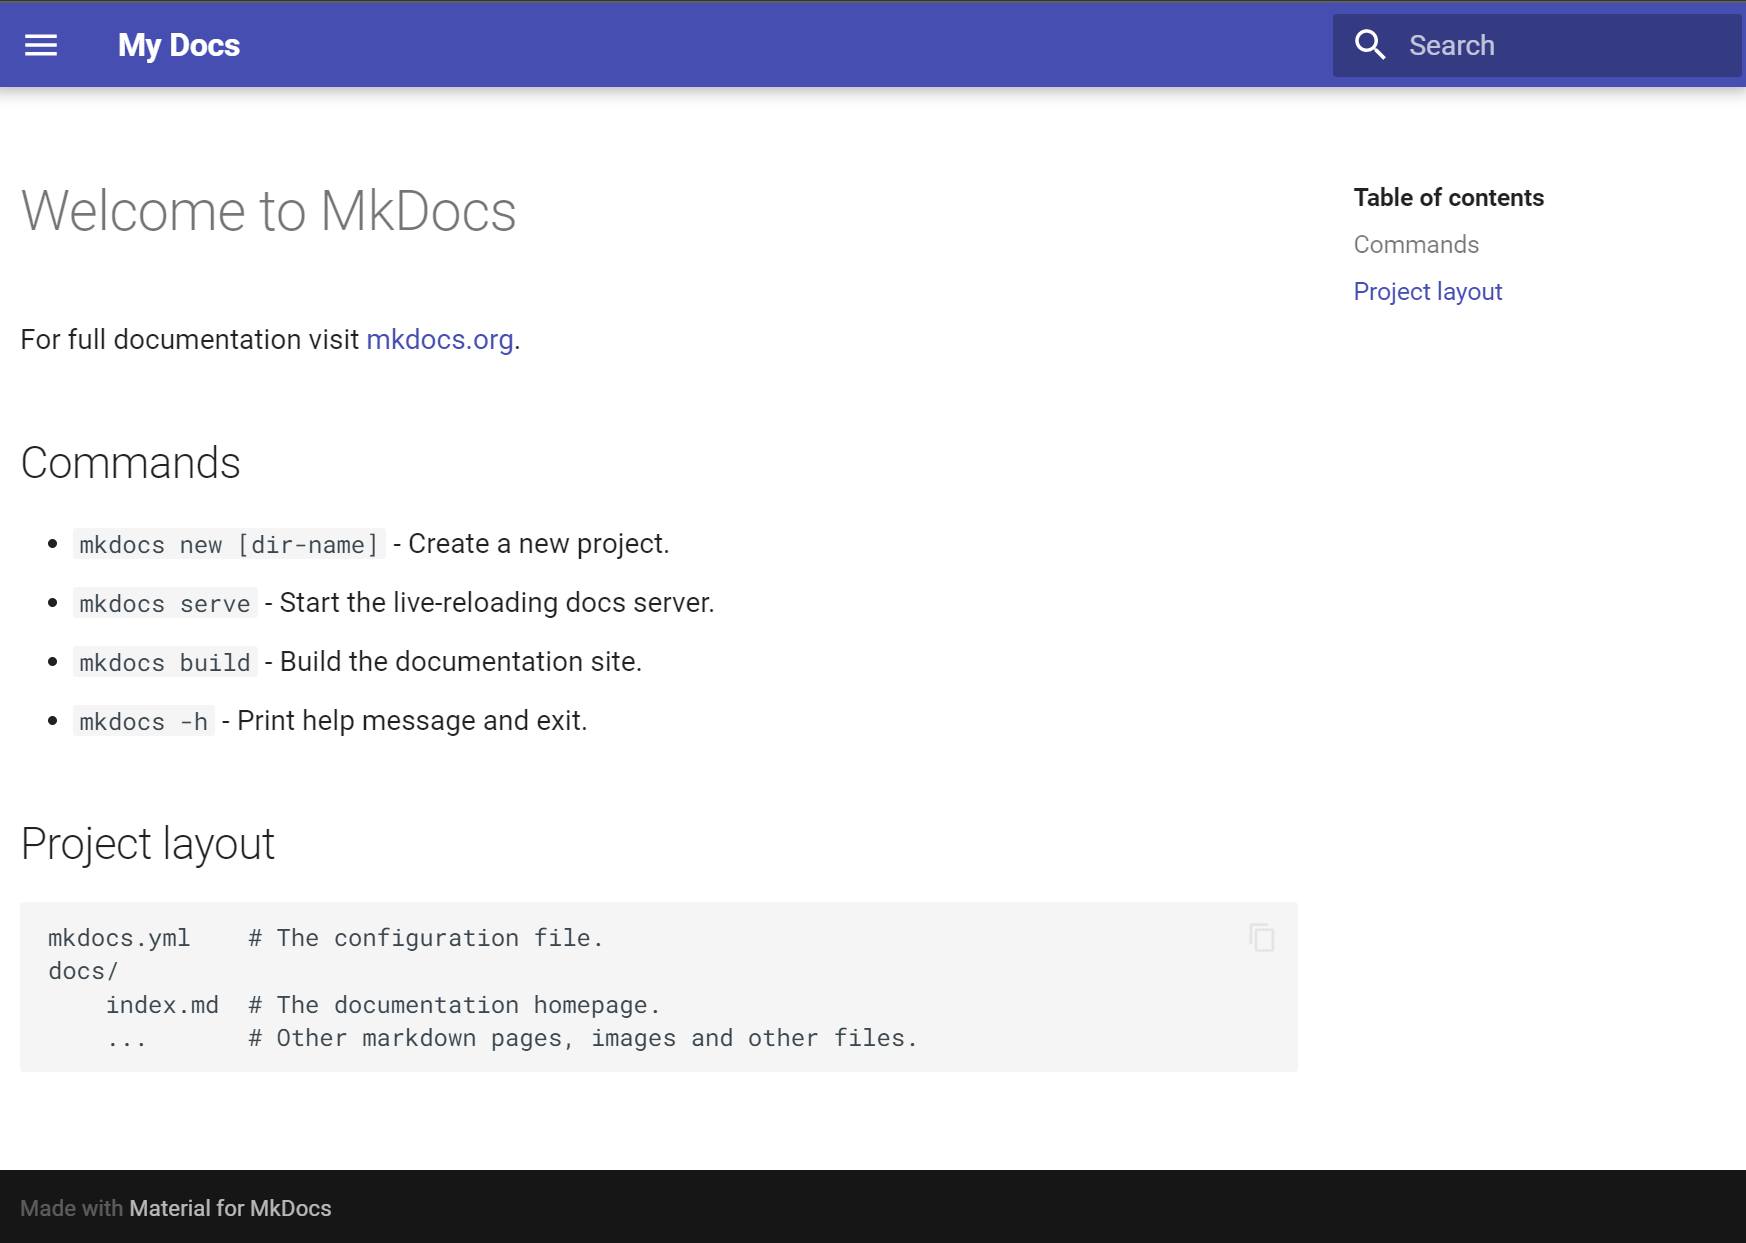
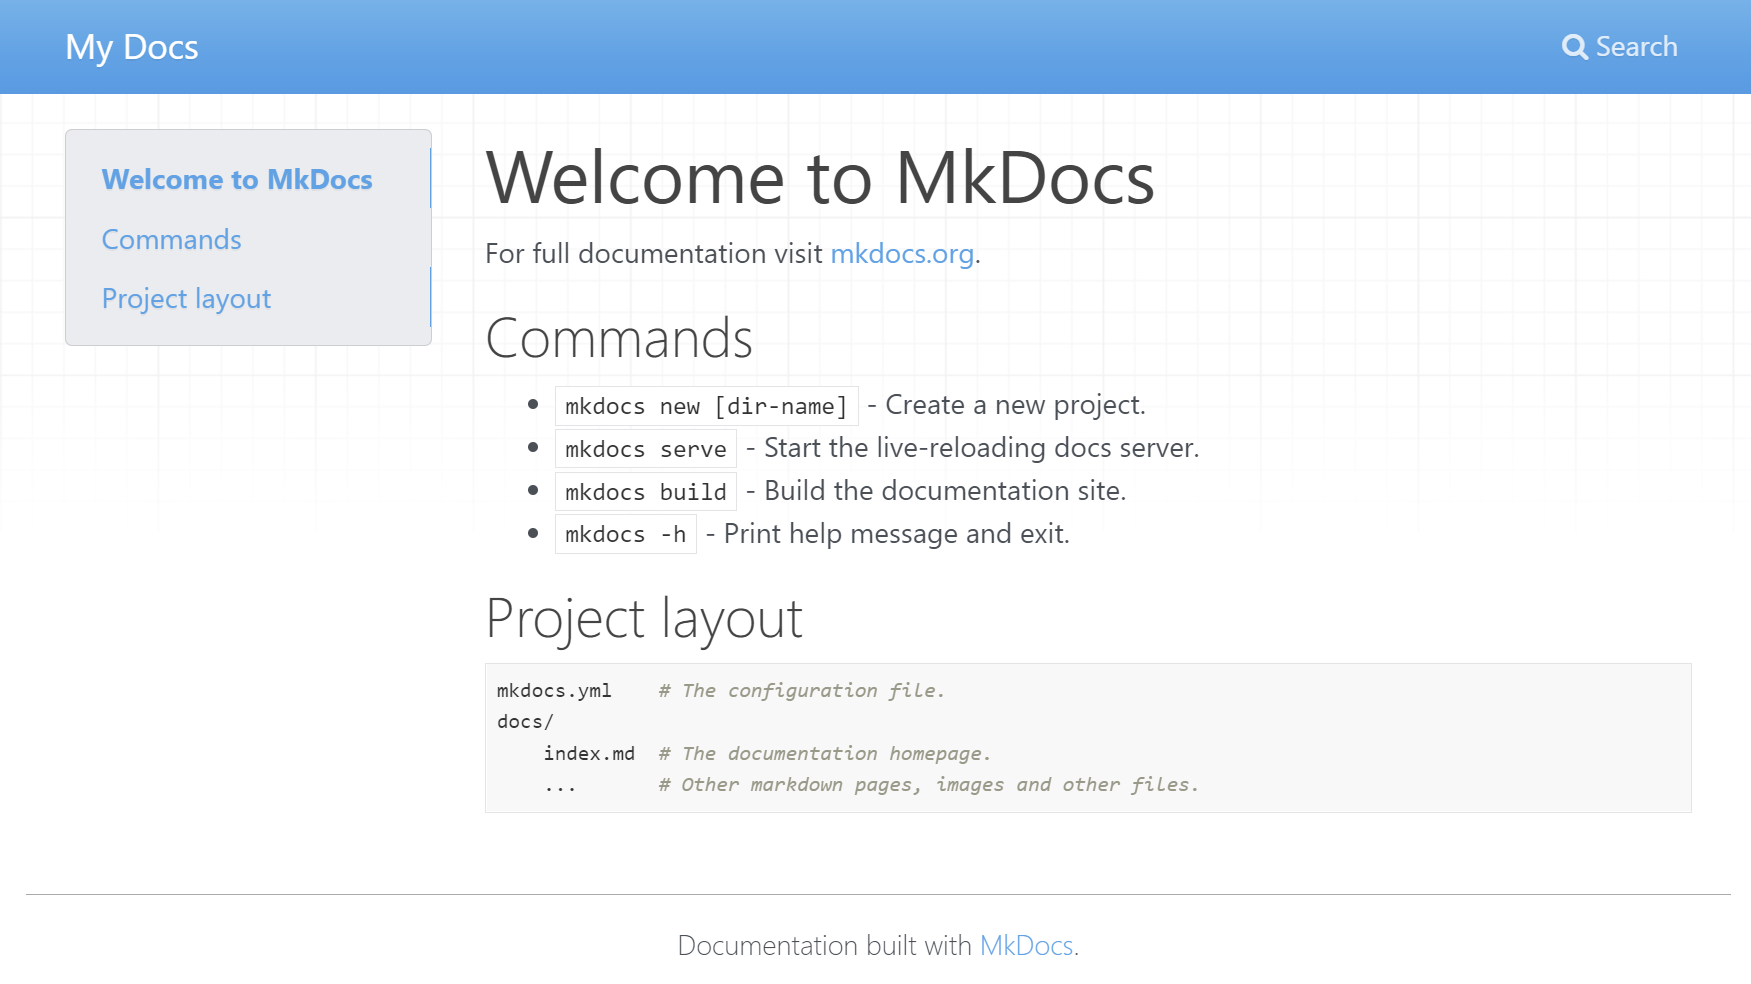
The source code for this site, written in Markdown, looks like this:
# Welcome to MkDocs

For full documentation visit [mkdocs.org](https://www.mkdocs.org).

## Commands

* `mkdocs new [dir-name]` - Create a new project.
* `mkdocs serve` - Start the live-reloading docs server.
* `mkdocs build` - Build the documentation site.
* `mkdocs -h` - Print help message and exit.

## Project layout

    mkdocs.yml    # The configuration file.
    docs/
        index.md  # The documentation homepage.
        ...       # Other markdown pages, images and other files.
# gives you the biggest heading, ## gives you heading 2, and so on. Put * in front of text to make a bullet point. To add a link, you do this: [mkdocs.org](https://www.mkdocs.org) and to add an image you do the same, but with an exclamation mark: 
5. Finally, to build a static site, write this in the terminal:
I tried this and got an index page that works fine. But when I clicked the Setup page (this page) I got this:
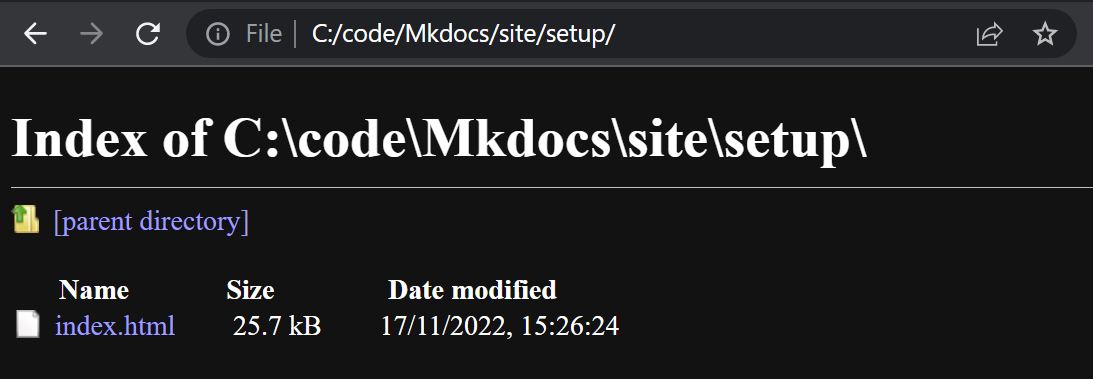 Hm. Apparently you need to put the structure of the site into your
 mkdocs.yml file to explicitly state the site navigation. So I opened it up and added
  nav:
    - 'index.md'
    - 'code.md'     # The code page is just a few code block tests in different languages.
    - 'setup.md'
mkdocs.yml:
It works! And the first solution is unnecessary; MkDocs will infer the site navigation based on the pages you create in the docs folder.
Setting up MkDocs and getting the live preview working took me an hour in the morning. Writing up how I did it took me the rest of the day. Writing this documentation was a great way to learn Markdown. I like Markdown, with one exception; I don't have the ` symbol on my keyboard. I need to use this symbol quite a lot for code snippets. I did a bit of searching and found that the shortcut Alt-96 is bound to the ` symbol. Now I use that shortcut all the time.
And this page serves as my Markdown reference, when I start to forget how to format things.
Note
To enable code highlighting (coloring the code, similar to how it looks in the VSCode editor), I added the following lines to mkdocs.yml:
markdown_extensions:
- pymdownx.highlight:
    anchor_linenums: true
- pymdownx.inlinehilite
- pymdownx.snippets
- pymdownx.superfences
- pymdownx.details
One more thing, I also added
to add the ability to align images, add captions and mark large images for lazy loading, as per this tutorial.Customizing the theme
There is a way to toggle between light and dark mode. This tutorial says that it's enough to copy the following code into mkdocs.yml:
=== "Light/dark toggle"
``` yaml
theme:
    palette:

    # Palette toggle for light mode
    - scheme: default
      toggle:
        icon: material/brightness-7
        name: Switch to dark mode

    # Palette toggle for dark mode
    - scheme: slate
      toggle:
        icon: material/brightness-4
        name: Switch to light mode
```
=== "Light/dark toggle + Color change"
``` yaml
palette:
# Palette toggle for light mode
- scheme: default
toggle:
icon: material/brightness-7
name: Switch to dark mode
primary: red
accent: red
# Palette toggle for dark mode
- scheme: slate
toggle:
icon: material/brightness-4
name: Switch to light mode
primary: red
accent: red
```
Note
How to enable content tabs in mkdocs.yaml:
I also discovered that if you select a command, right click and select Change All Occurrences in VSCode, you only need to write the new color once, instead of four times. Nice!
Finally, I made a logo in Inkscape. I designed this logo in grade school, it's a kind of Icelandic rune that combines my initials S and K. Then I added two lines to mkdocs.yml to change the logo in the top left corner and also the favicon (the icon you see in the browser tab).
/images/SK_logo.SVG and VSCode complained about the formatting. I found that you can right click the image and select Copy Relative Path to get the right formatting. That gave me docs\images\SK_logo.svg, which didn't work, but when I changed it to images\SK_logo.svg it worked.
I also enabled two navigation options:
theme:
  features:
    - navigation.instant    # Instant loading (page behaves like a single-page application, search persists between pages)
    - navigation.tabs       # The pages are visible as tabs at the top instead of on the left hand side.
Page source
The Markdown code for the View page Source button is like this:
I'm going to put it on every page of my documentation. If you see an interesting element in the page, you can then easily see how to set it up. Pointing to a.md file doesn't work, so my workaround is to make a copy of the Markdown source file and change its extension to .txt.
I made a Python script using this tutorial and put it in the MkDocs folder. The script copies all the .md files in the docs folder to another folder called textfiles and converts their extension to .txt. The View Page Source button at the bottom of each page links to its respective .txt file. The Python code has some bug, so that it only converts code.md to code.txt, but I'm happy that I was able to get that far.
To change the theme for just the home page, I followed tmeuze's advice in this issue. To mkdocs.yml I added
docs/overrides folder. Then I was unsure how to set up a custom theme, so I stopped there.
To enable the Github Repository button in the top right corner, I followed this example and added the following to my mkdocs.yml, just below site_name:
I added
so that the URL in the address bar changes as you scroll down the page. If you copy the URL, the page will open in the section where you were when you copied it. Might be convenient if someone wants to link to something on this site.I also added
to make the top navigation follow you as you scroll down the page.By default, an "Edit this page" symbol is added to the right of the headline of every page.
 When you click it you just get a 404 error. I followed this to remove the edit button. I just add the CSS code
To enable icons and emojis, I followed the Material for MkDocs documentation on icons and emojis and added the following to mkdocs.yml:
markdown_extensions:
  - attr_list
  - pymdownx.emoji:
      emoji_index: !!python/name:materialx.emoji.twemoji
      emoji_generator: !!python/name:materialx.emoji.to_svg
To enable keyboard keys like Ctrl+Alt+Del, I added the following to mkdocs.yml:
++ctrl+alt+del++. Here is the key reference.
There is no way to make image captions in Markdown. This seems like a glaring omission. I used this method of putting the caption in the next line after the image tag and enclosing the caption with **. Like this:
The image and caption are displayed like this:
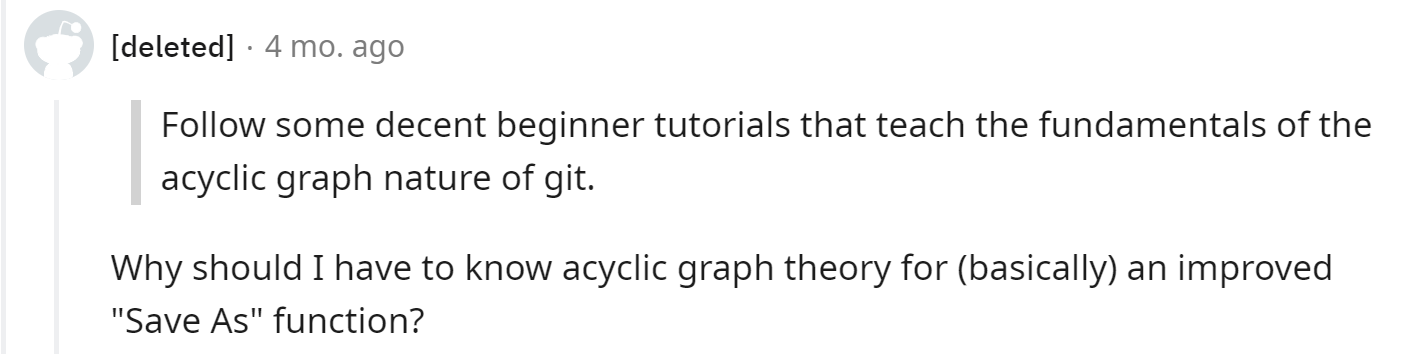 Sentiments about Git
The caption is inline with the image, which is not great, but the workflow is simple, so I'm keeping it. If the caption doesn't work, put it inline with the image tag.
I've stopped using the page source button above, which links to a text file that I need to update manually. I've instead added an icon next to the page title at the top. I got the icon from Iconify. The icon links to the page source in the Github repository.
MathJax
I installed MathJax by following the steps in the Material for MkDocs documentation. Now I can display beautiful equations on my website, using LaTex syntax.
Git setup
I cloned my Fab Academy repository on Gitlab to my computer with
$ git clone https://gitlab.fabcloud.org/academany/fabacademy/2023/labs/isafjordur/students/svavar-konradsson.git
Cloning into 'svavar-konradsson'...
remote: Enumerating objects: 15, done.
remote: Counting objects: 100% (15/15), done.
remote: Compressing objects: 100% (14/14), done.
remote: Total 15 (delta 1), reused 0 (delta 0), pack-reused 0
Receiving objects: 100% (15/15), 28.91 KiB | 7.23 MiB/s, done.
Resolving deltas: 100% (1/1), done.
git push
warning: missing OAuth configuration for gitlab.fabcloud.org - see https://aka.ms/gcm/gitlab for more information
remote: HTTP Basic: Access denied. The provided password or token is incorrect or your account has 2FA enabled and you must use a personal access token instead of a password. See https://gitlab.fabcloud.org/help/topics/git/troubleshooting_git#error-on-git-fetch-http-basic-access-denied
fatal: Authentication failed for 'https://gitlab.fabcloud.org/academany/fabacademy/2023/labs/isafjordur/students/svavar-konradsson.git/'
$ ssh-keygen -t ed25519 -C "generate an ssh key for gitlab to clone my repository"
Generating public/private ed25519 key pair.
Enter file in which to save the key (/n//.ssh/id_ed25519):
Enter passphrase (empty for no passphrase):
OK, I have an SSH key, but what do I do with it? And why? Why is this so complicated? I just want to upload some files to the internet.
Then I found this tutorial on adding an SSH key to my Gitlab account and followed it blindly.
I used $ cat ~/.ssh/id_ed25519.pub | clip to copy the contents of the SSH key file.
Put it into the Gitlab account under profile -> SSH keys -> Add an SSH key.
Then went into C:/code and said `git clone "the thing I copied when I pressed clone in gitlab"'
Then I got the message:
*** Please tell me who you are.

Run

  git config --global user.email "you@example.com"
  git config --global user.name "Your Name"

to set your account's default identity.
PS C:\code\svavar-konradsson> git config --global user.email "my@email.com"
PS C:\code\svavar-konradsson> git config --global user.name "Svavar Konradsson"
and then said git clone
That worked! I opened index.html, put my name into the title and saved. That appeared under Source control in Gitlab, I wrote a comment in a field and clicked Commit. Then a Sync button appeared and I pressed that and it pushed the site onto the online repo.
Now I need to type my passphrase twice every time that I push files to the online repo. That's annoying, so I'm going to generate a new SSH key and skip the passphrase. I followed Árni Björnsson documentation to generate an RSA key and put it into my Gitlab profile.
Every time I made major changes in Windows Explorer; deleted lots of files and moved others, I needed to generate a new SSH key. The last one was
ssh-keygen -t rsa -b 2048 cat ~/.ssh/id_rsa.pub | clip
The MkDocs convention is to put the built web page into a folder called site, but Gitlab needs the web site to be in a folder called public. Finally I found the site_dir setting, which I can change in mkdocs.yml so that I can rename the site folder to public.
At first I manually renamed site to public and pushed the files to the Gitlab repo. I got into trouble when the dot in front of the file .gitlab-ci.yml was erased somehow and the site wasn't deployed. My instructor Þórarinn found the problem and after that the site worked.