Final Project: Folded Fixed Wing Drone
30/03/23
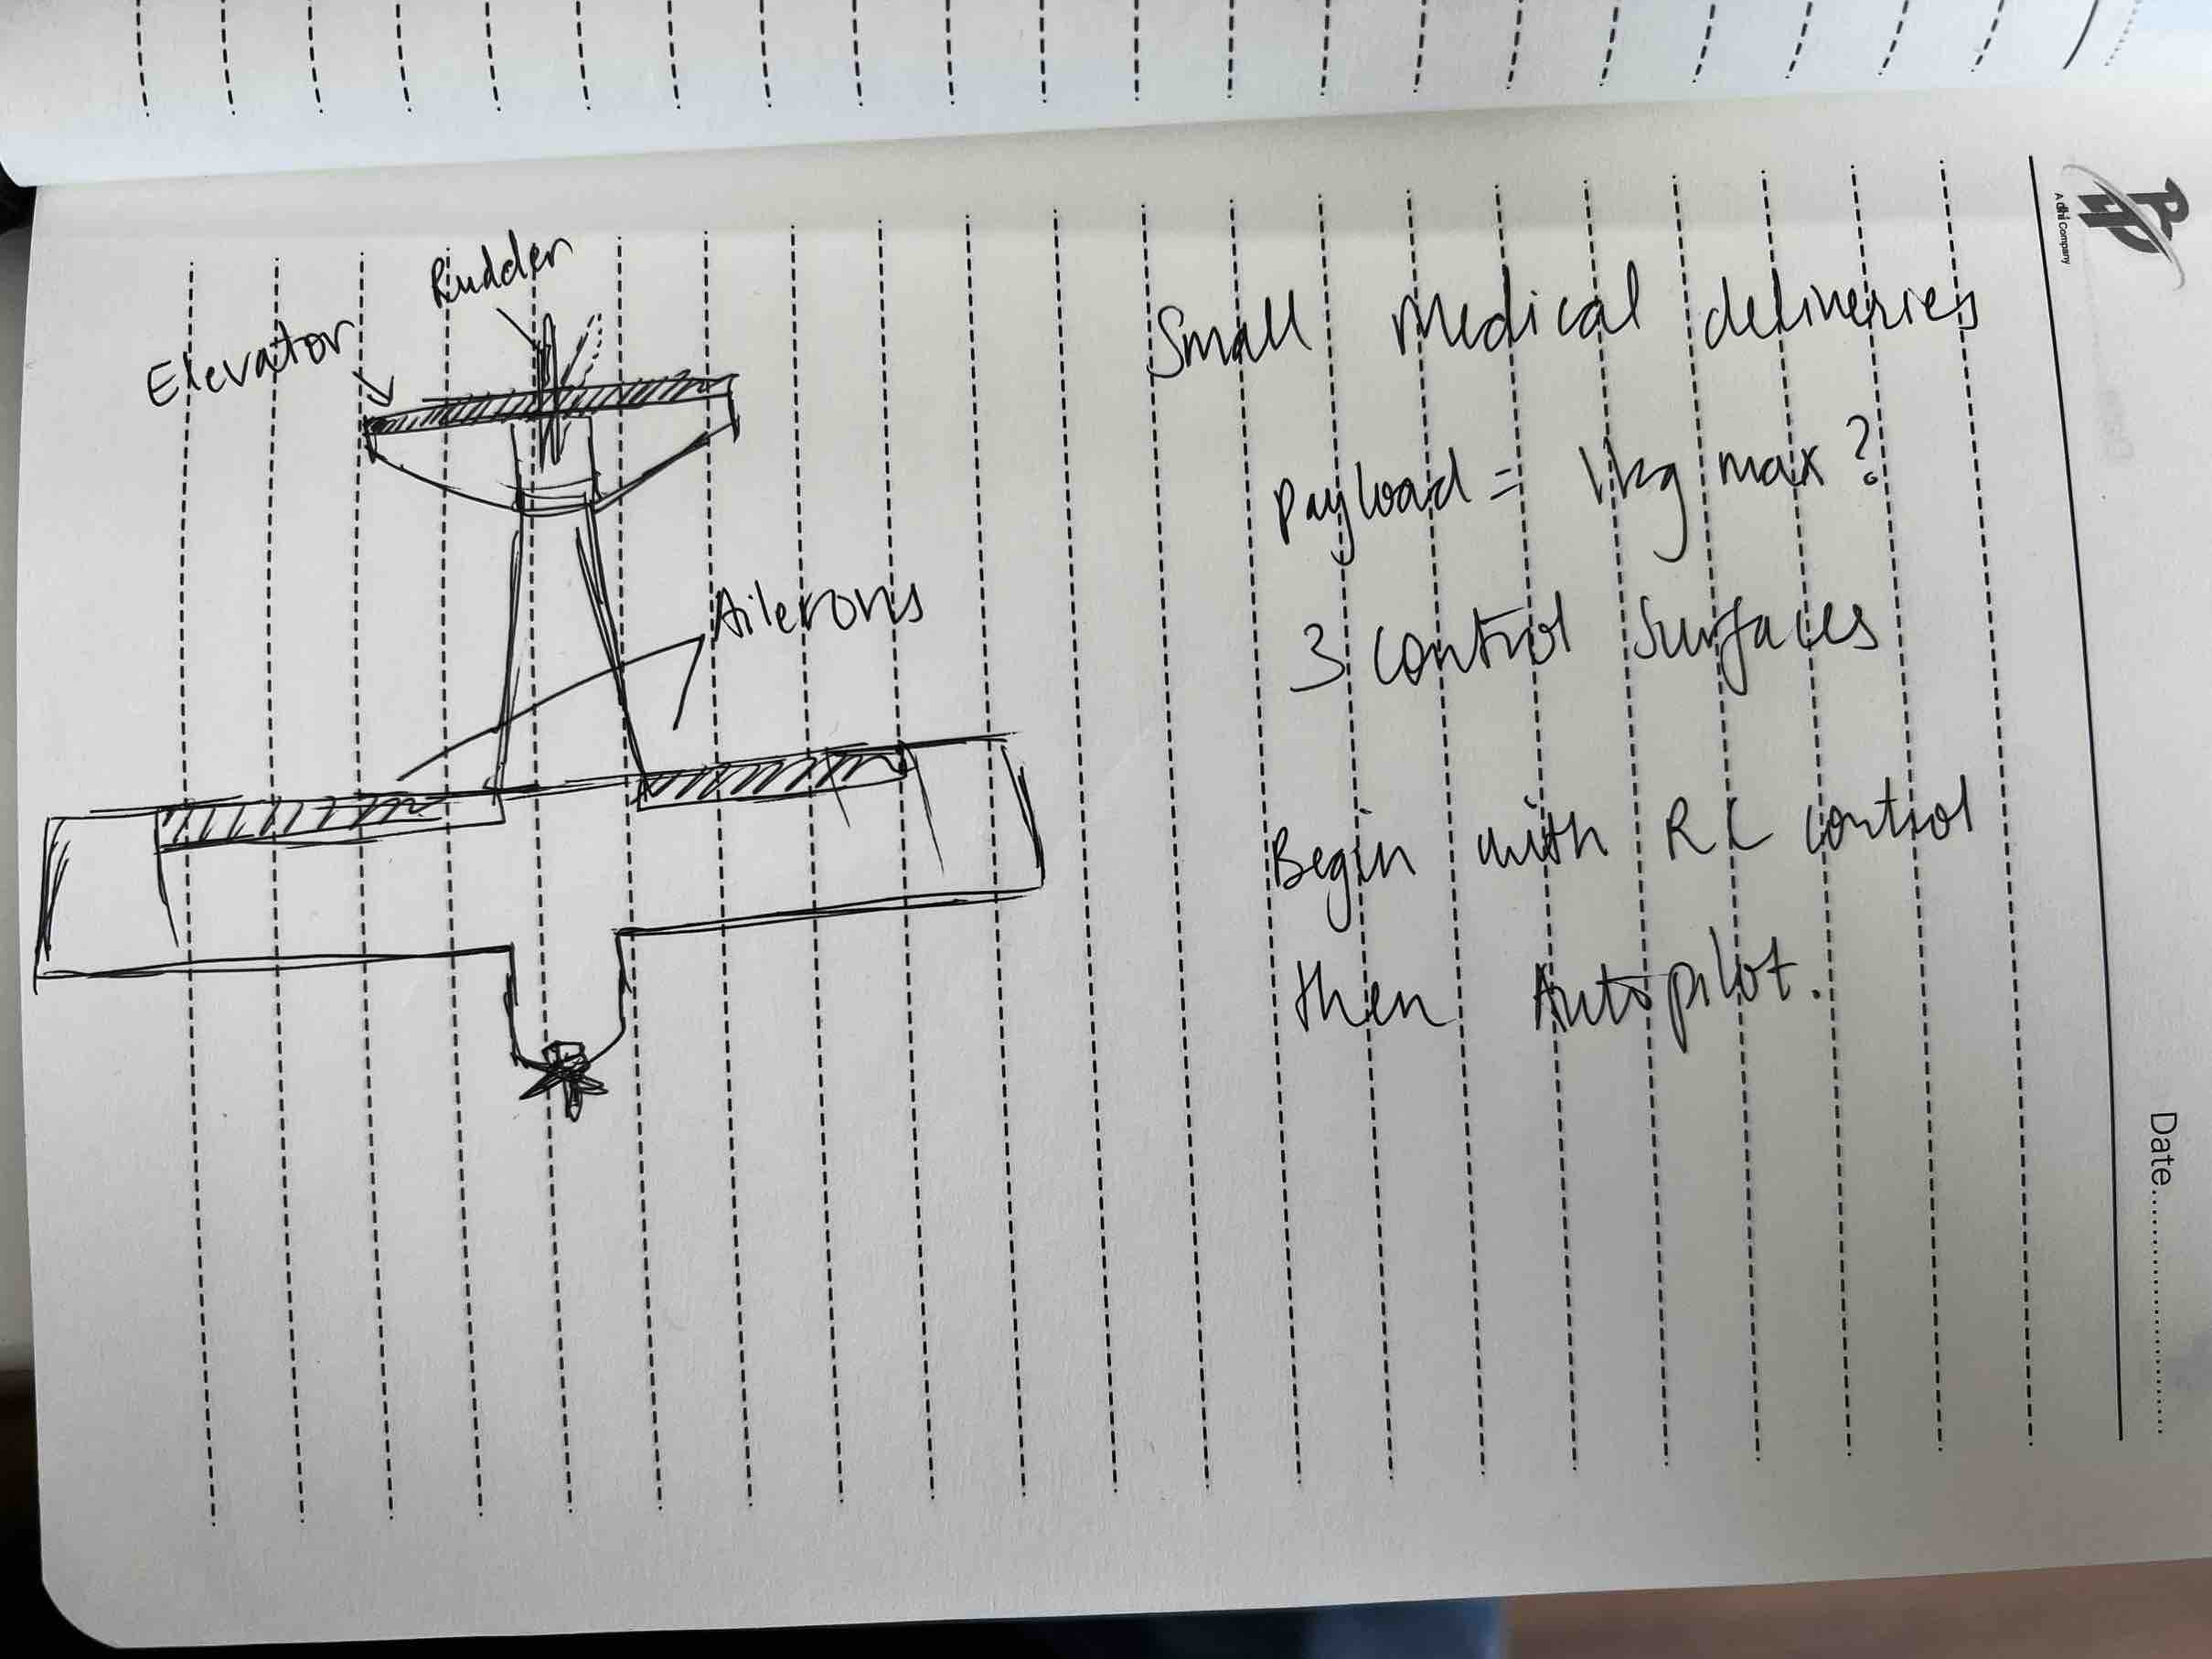
The main goal is to develop a folded fixed wing drone in the Super fablab that is to be able to deliver crucial items (very small payload < 1kg) to Bhutan’s remote areas such as Lunana for example.
Core Components for deliverables (Spiral 1)
-
2D and 3D Design : Drone in Fusion360 and Rhino3D
-
Subtractive Manufacturing : Cutting the drone body with
cardboardin the Zünd -
Additive Manufacturing : 3D printed transmitter case, Motor Holder
-
Fabbed MCU : Custom transmitter made with an ATMGEA328 capable of controlling Servos and thrust of the BLDC
-
Output : Servo + BLDC
-
Input : Joystick (dual axis potentiometer)
Workflow:
-
Create an excel sheet for calculating
flight time, etc -
Design and model in Fusion360, Unfold the structure in Rhino3d to prepare for cutting
-
Cut the model in the Zund. Mill the PCBs and solder
-
Post-process the cardboard
-
Once this spiral is done, try and incorporate either ArduPilot or Pixhawk for the autopilot system.
-
The final spiral would be to create my own joystick, receiver/transmitter with potentiometers etc.
Why Cardboard?
Atypical folded fixed wing drones are made with using foamboards, which are lighter than cardboard and have really good folding characteristics. One issue Bhutan faces is that it is difficult to obtain simple items such as foamboards so I wanted to work with a more readily available (not as light) material in cardboard that also has decent foldabilty.
I also read an article by Otherlab, wherein they created gliders using cardboard that could deliver up to 2 lbs payload. While cardboard may not be the best material, this example gives me hope that it may not be all that bad.
A major issue with using just regular cardboard, is that it is not weather proof. Especially given Bhutan’s terrain and uncertain inclement weather, I will need to post process the cardboard drone to make it more durable.
Some methods for this:
Funnily enough, just a week ago an Australian company Sypac made Cardboard drones and got a defense grant to make and send such drones to Ukraine.
Weekly:
Week 8
This week in the lab, we had a 2 hour final rapid prototyping session, wherein we had to develop our prototypes using cardboard (real size), cello-tape and glue. This great idea came from our remote guru Rico and local instructor Zina.
After the two hours, we had to present to the rest of the group, our progress, what we learnt and how our components would fit into the model. I spent an hour and 10 minutes trying to design my drone from scratch, but after all that effort Fusion360’s unfold function didn’t work so I had to redesign my drone frm scratch all in 2D in inkscape. Then I used the zund to cut the parts and I used cello-tape to hold the parts together.

Final Project Components
- Physical Fabrication
Subtractive:Zund to fabricate the body of the plane from cardboard. additional: Cutting some carbon fiberAdditive:3D printed motor holder/mound and hopefully landing gear. And linkages (push/pull) if unable to procure.Plan for Redesign and Re-fabrication:Minimum of two plane designs and maybe strengthening the cardboard with material (Wildcard week)
- Electronics & Power
Micro-controller Board: what MCU? how many digital/analog pins required to connect FP devices?:Leaning towards ATMEGA2560 + NRF24L01 Transceiver. Total required pins: 9Input(s) & circuit/power requirementsOutput(s) & circuit/power requirements: Max consumption 180WPower Source(s): 4S 5000 mah LiPo rechargeable batteryWiring, Switches & Connectors (more challenging for smaller enclosures):All the wiring will be inside the plane. y type connector required for the aileron servosCircuit design & fabrication time planning:Kicad to design, RolandSRM20 to fabricate
- Programming > Modules
Input(s):Commands to the servos and motorOutput(s):The control surfaces and motor move accordingly. Maybe ESP32CAM- Aggregation Logic
- Plan for plenty of Debugging
- Project Assembly
- Hot Glue gun
- Duct Tape
- screws for the motor and mount
-
Presentation: Video & Slides
- Function description: The plane and its goal of delivery
- Component description: In-depth look at all the subsystems
- Narrative: Difficult to deliver due to terrain by road (takes days). Drone can do in sub one hour
- Process: Integration of the systems and flight
- Successful functionality
Small update:
While waiting for my electronics to come in, I wanted to test to see if the servos were capable enough to move the ailerons of a cardboard wing. I did not have push/pull rods so I had to made do with a paper clip which definitely hindered the performance but it still worked. I used my own farbricated board for this.
Update 09/05
I’ve come up with two plans and the electronic diagrams for both and will also be finishing up the electronic mcu design this week.
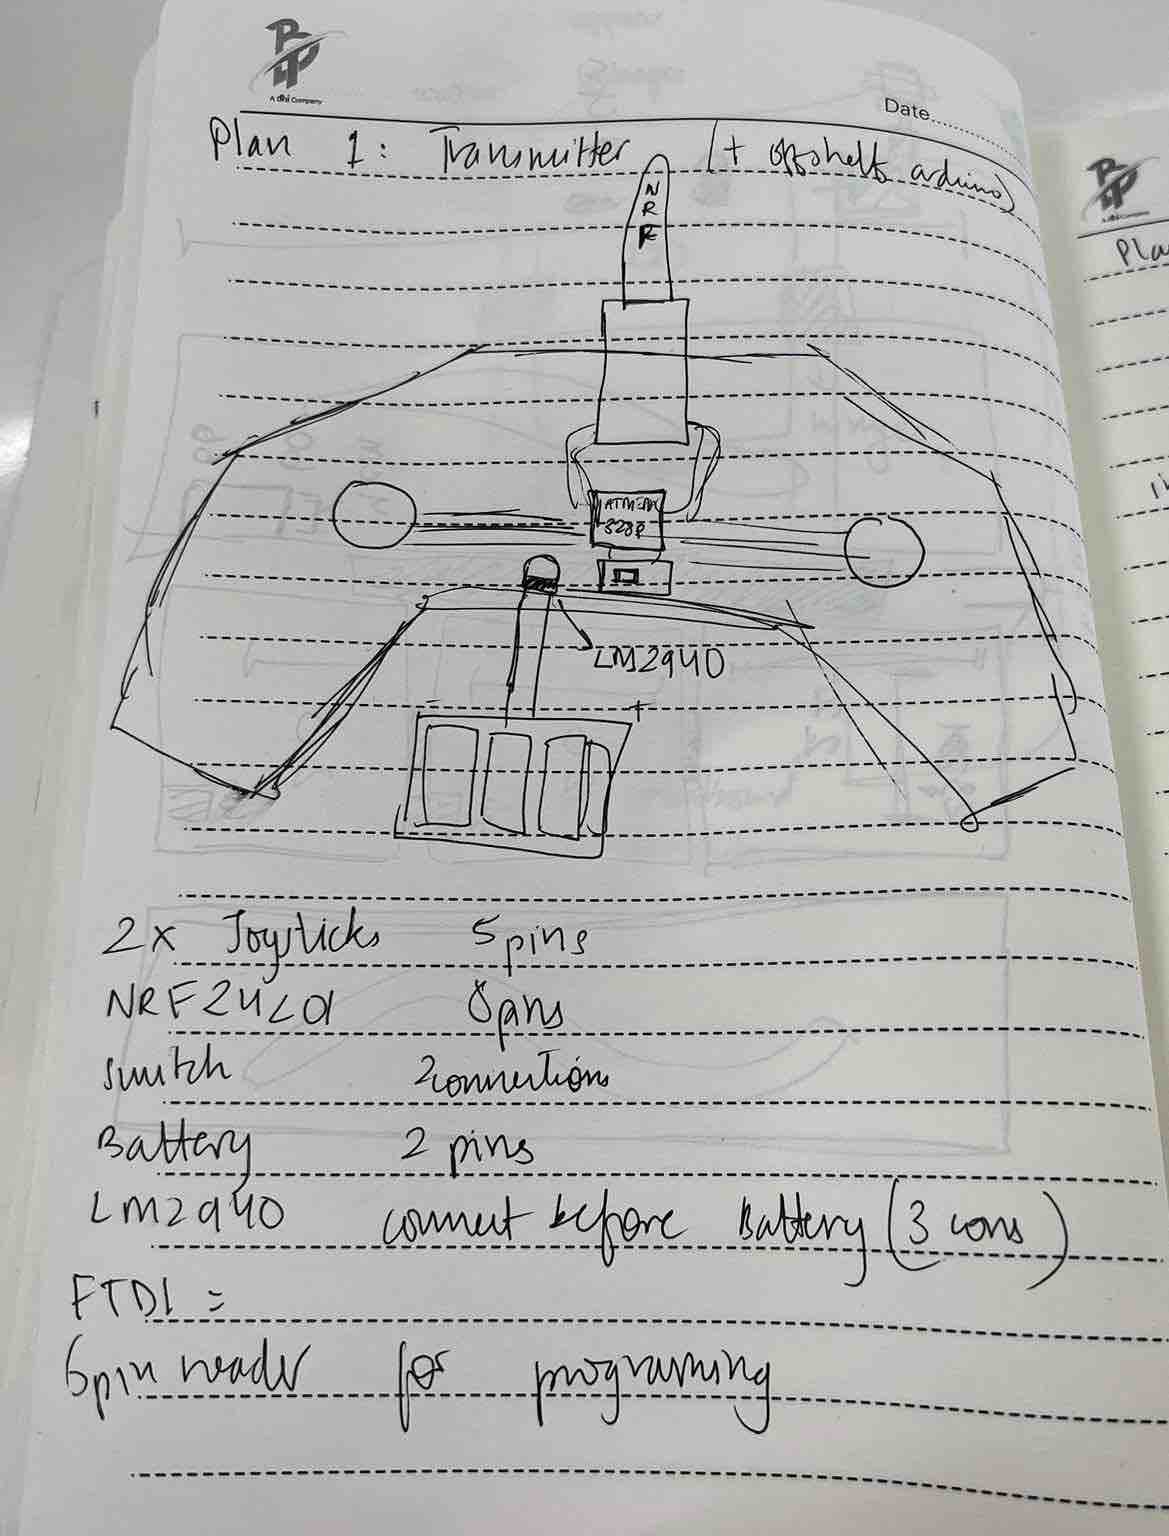
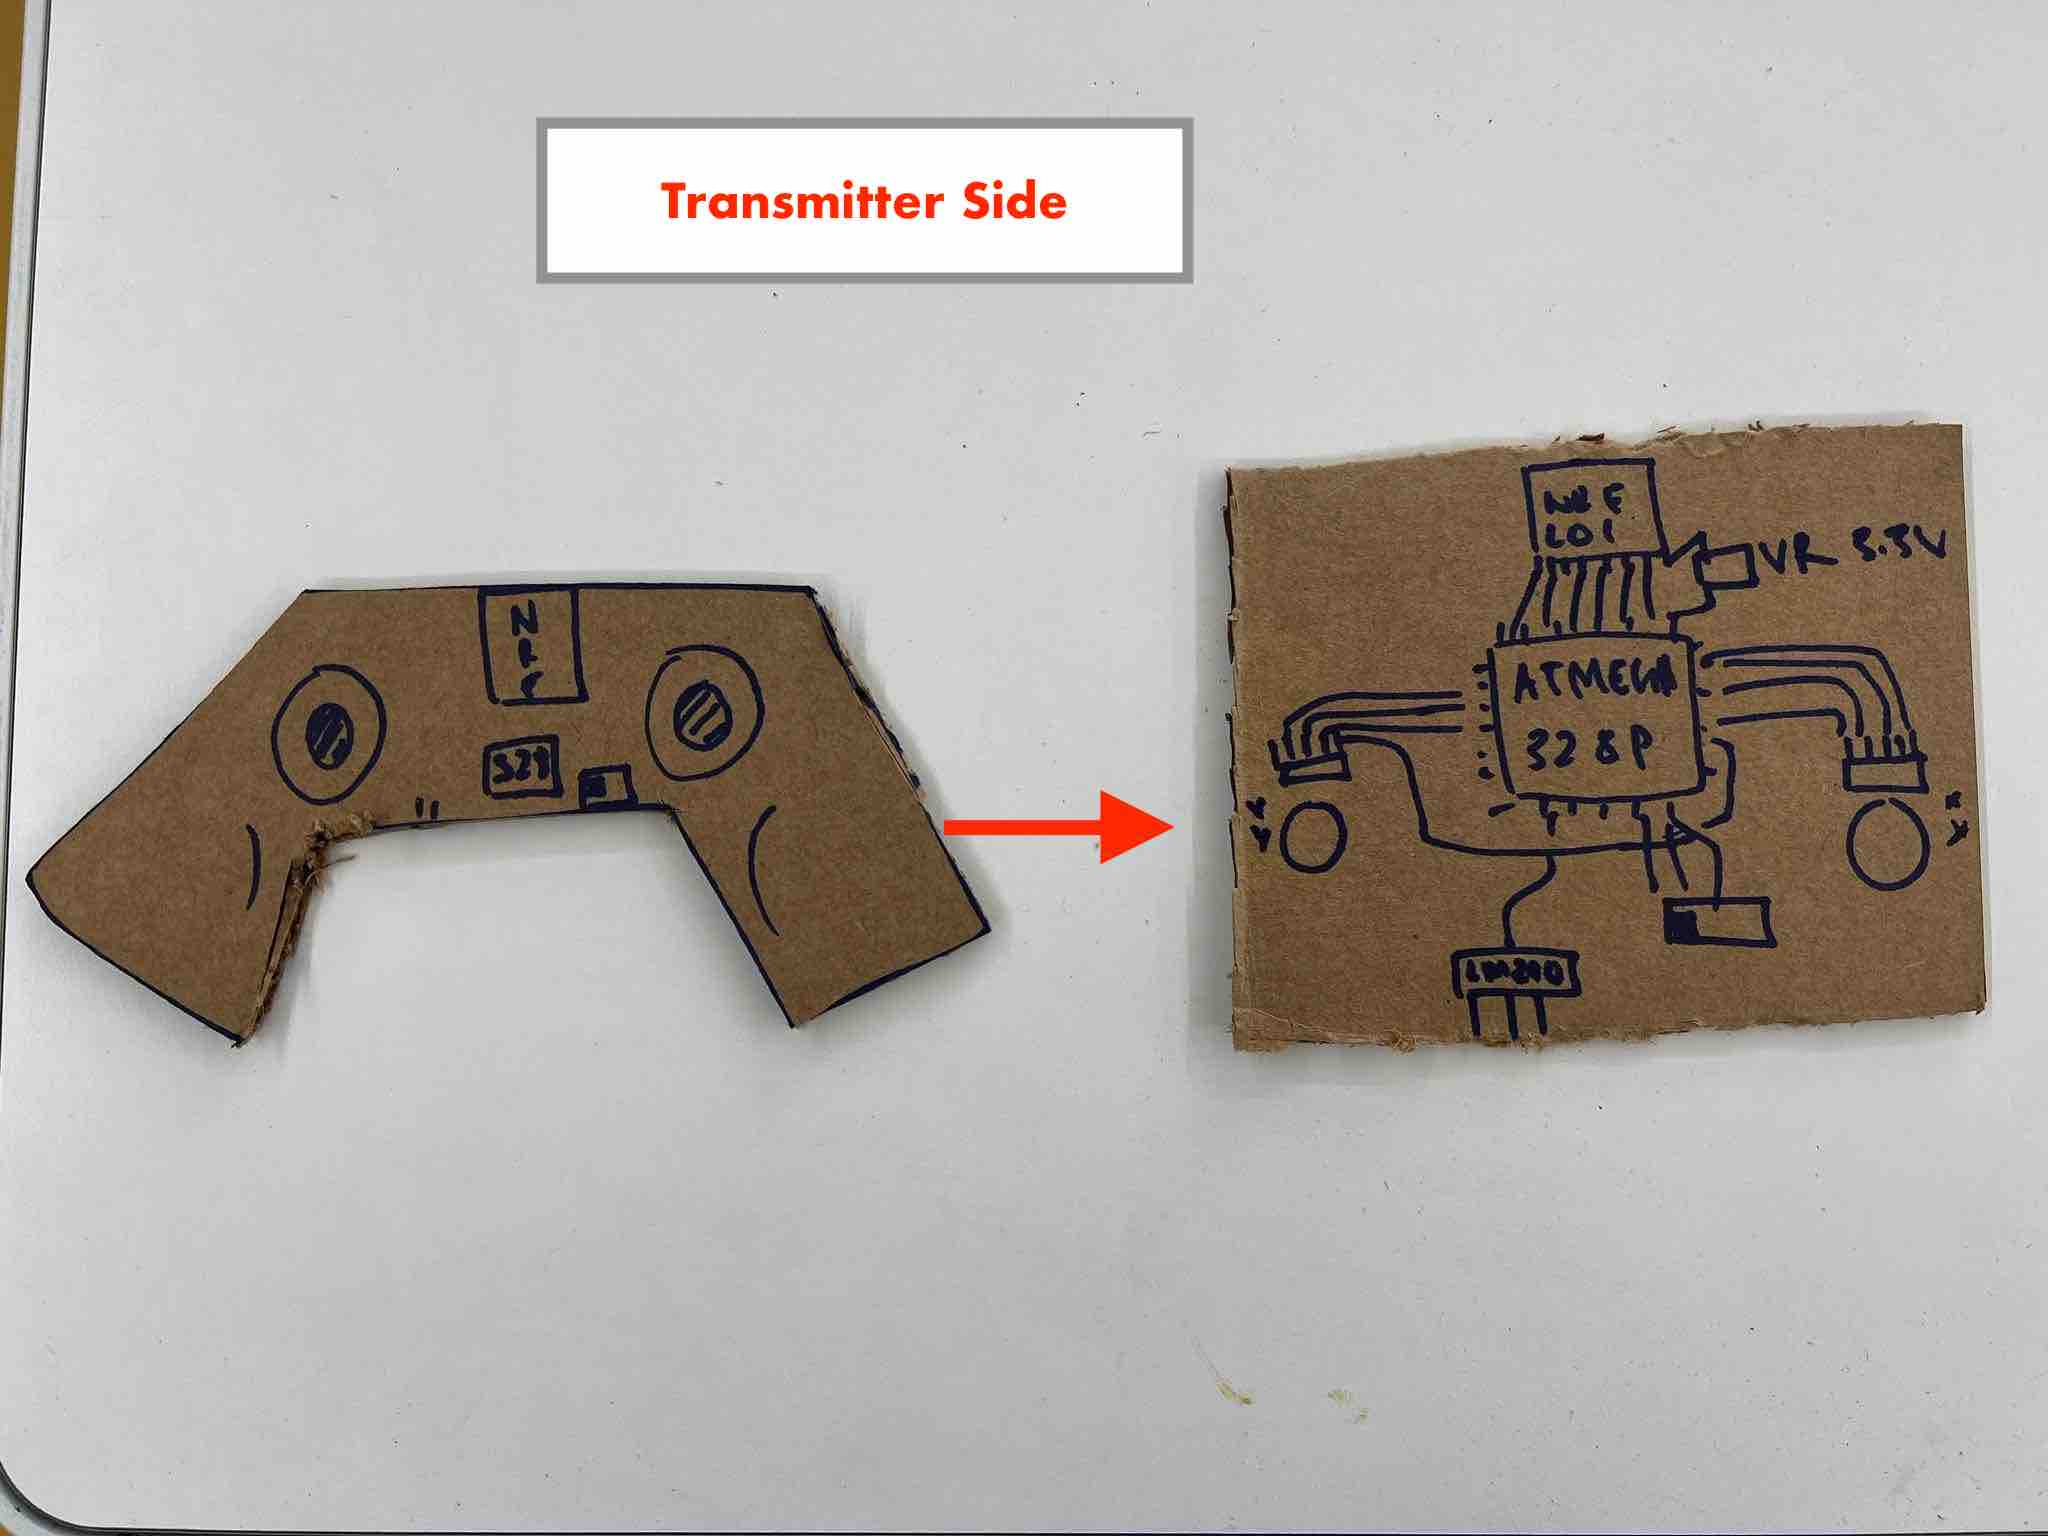
Plan 1:
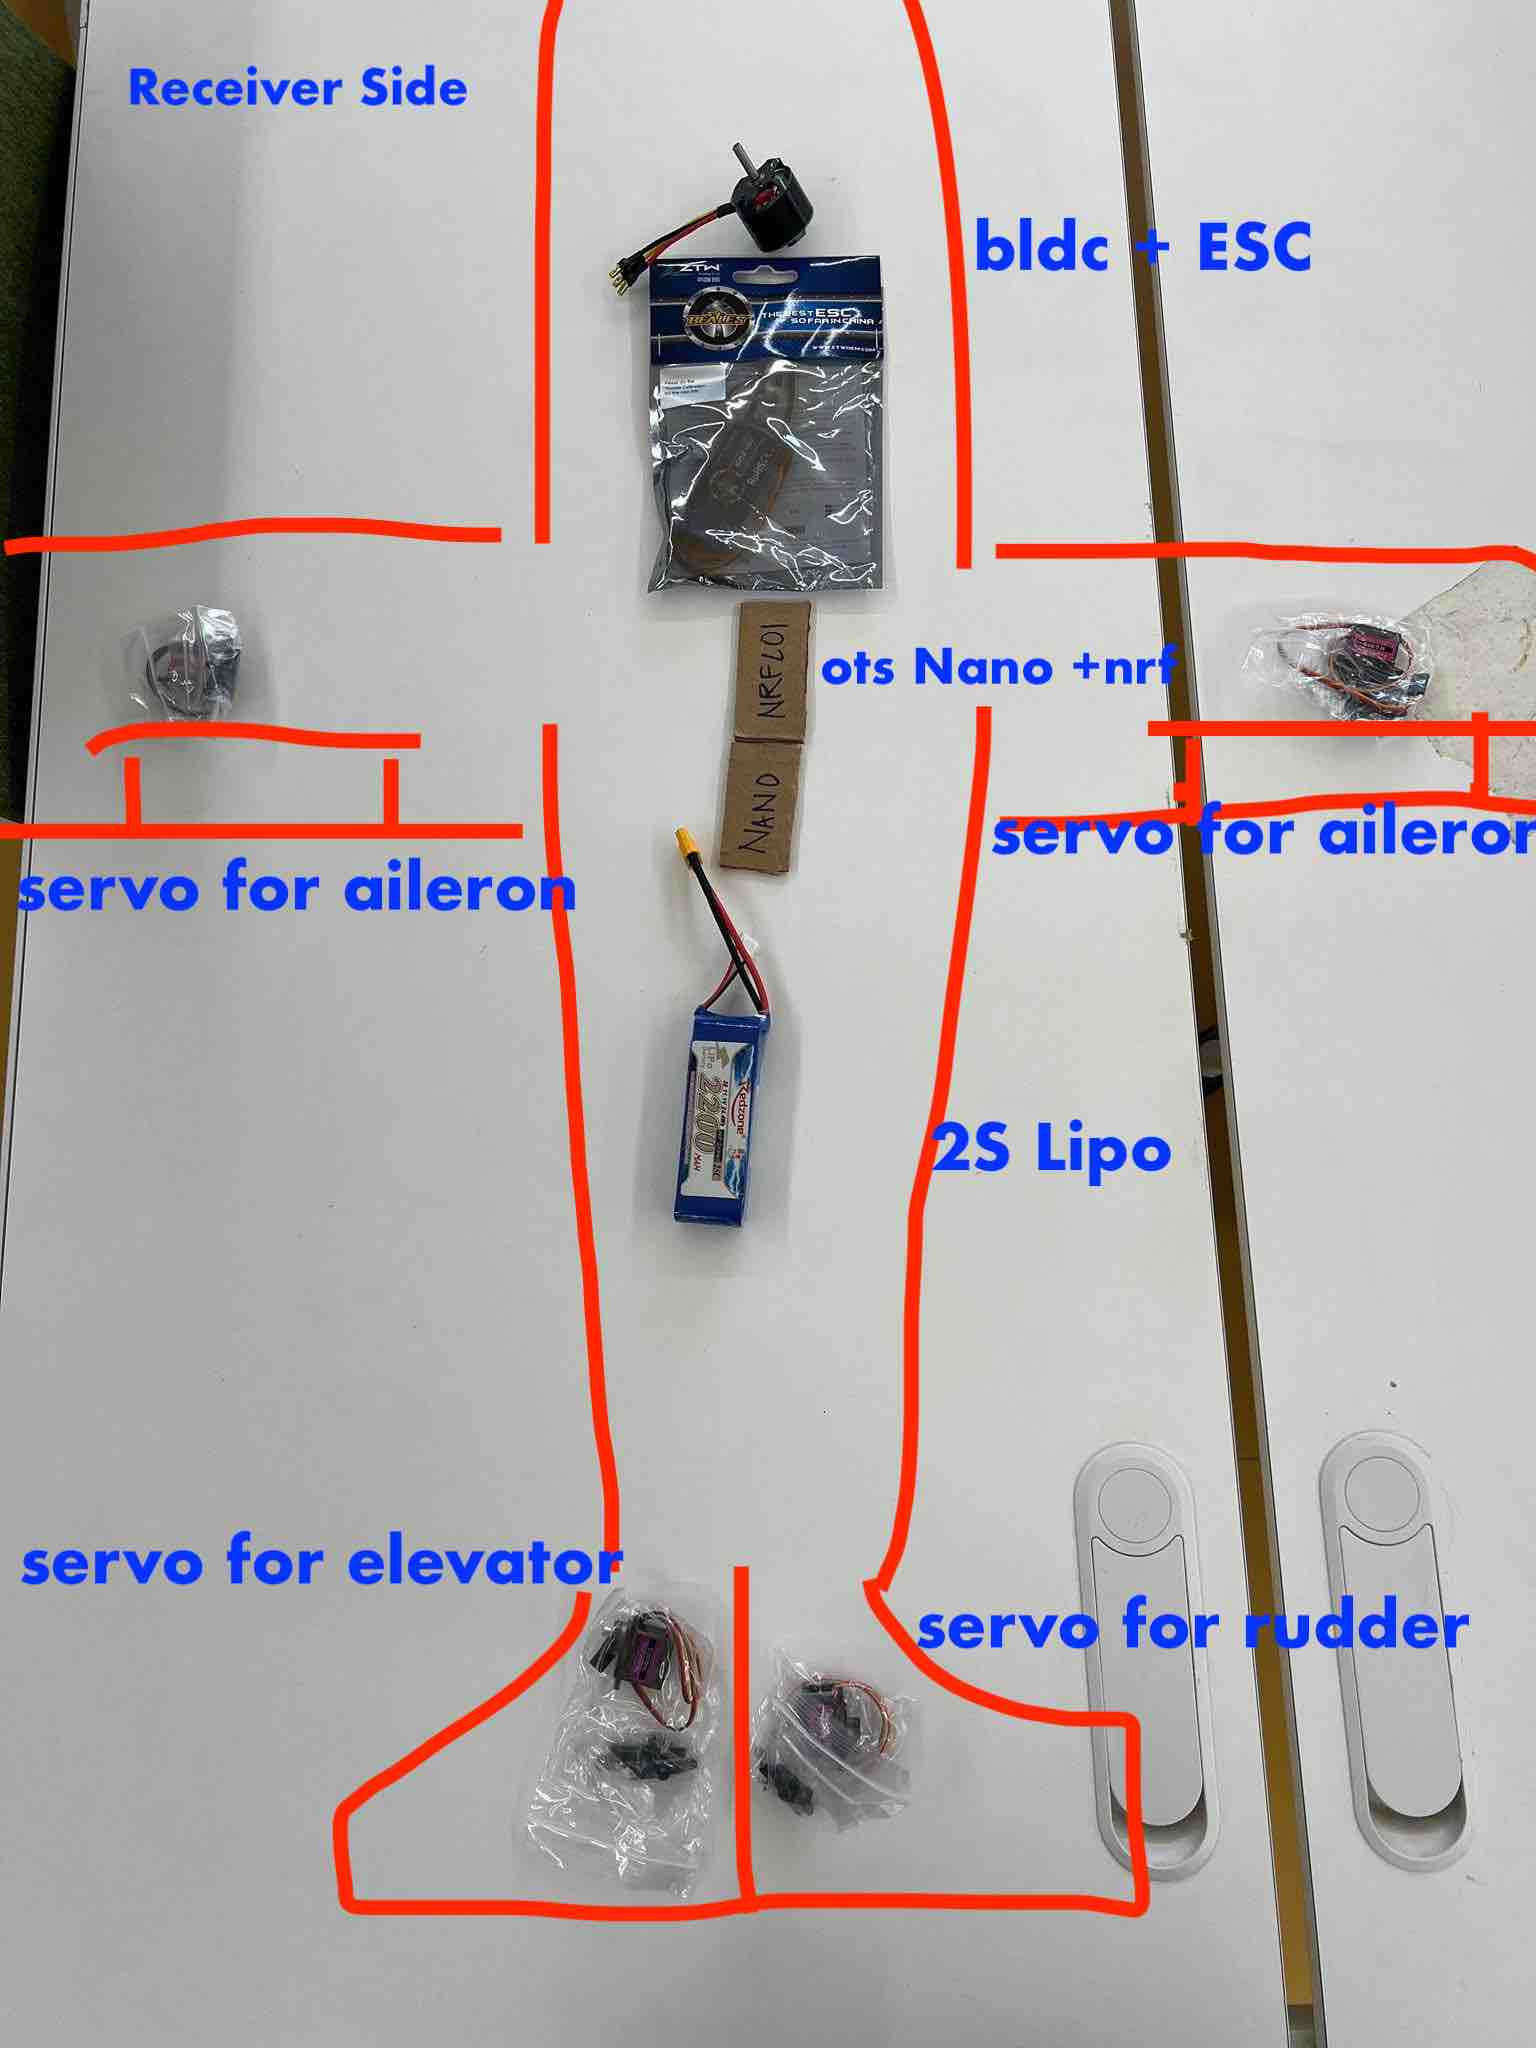
Plan 1 entails creating my own AtMega328p board with the NRF module for the transmitter and then using off the shelf arduino for the receiver side on the drone (If making the receiver board takes too long).
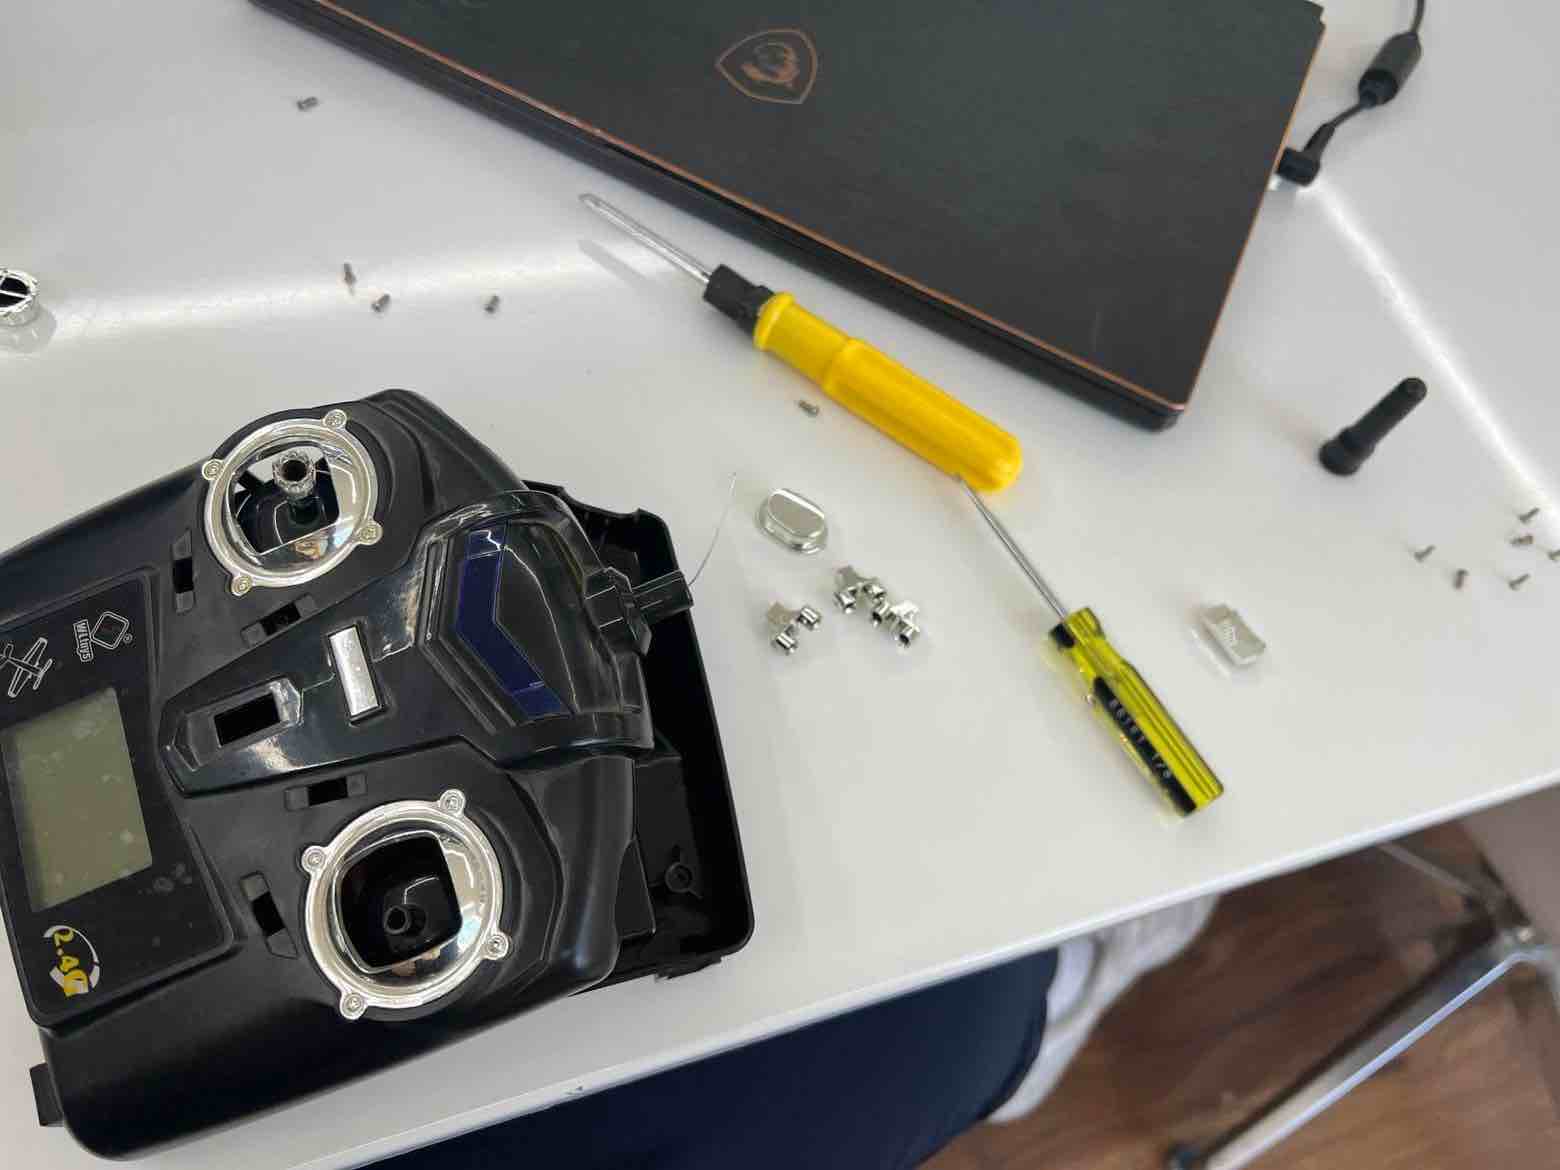
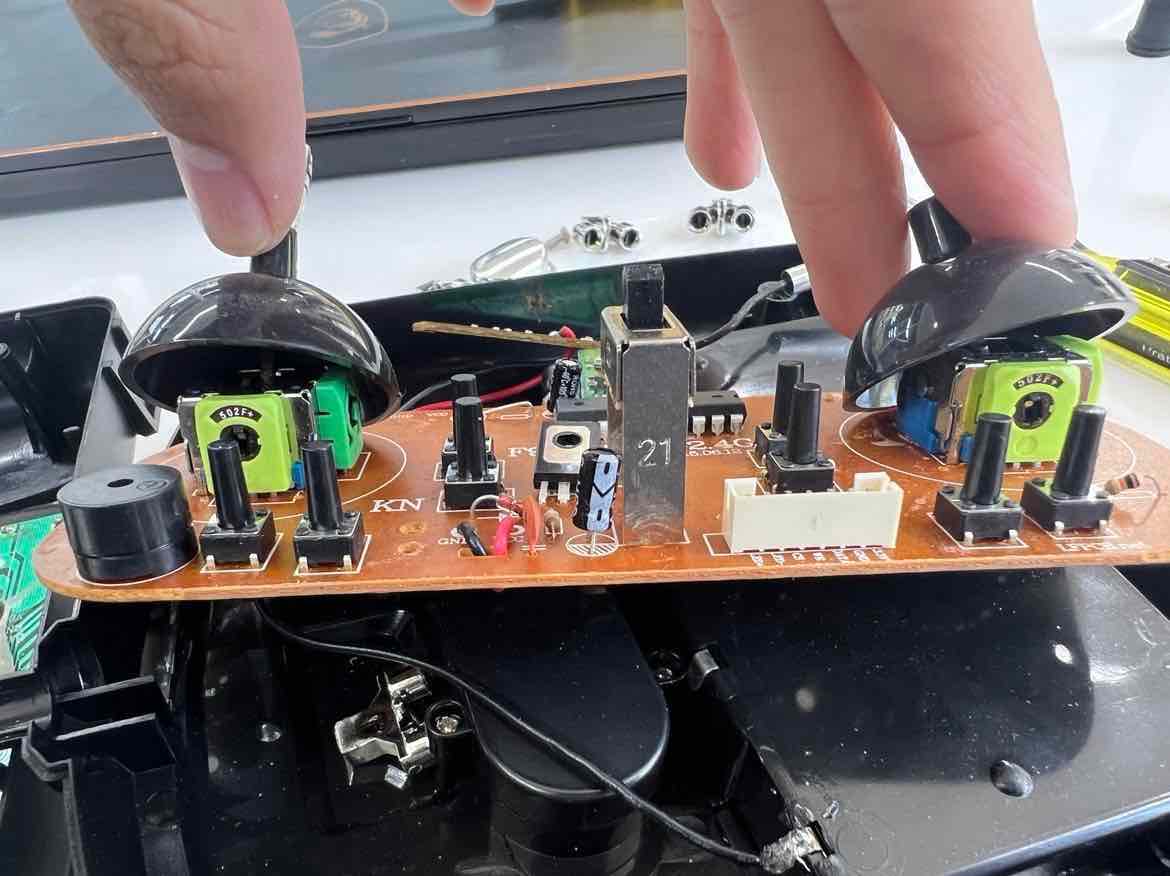
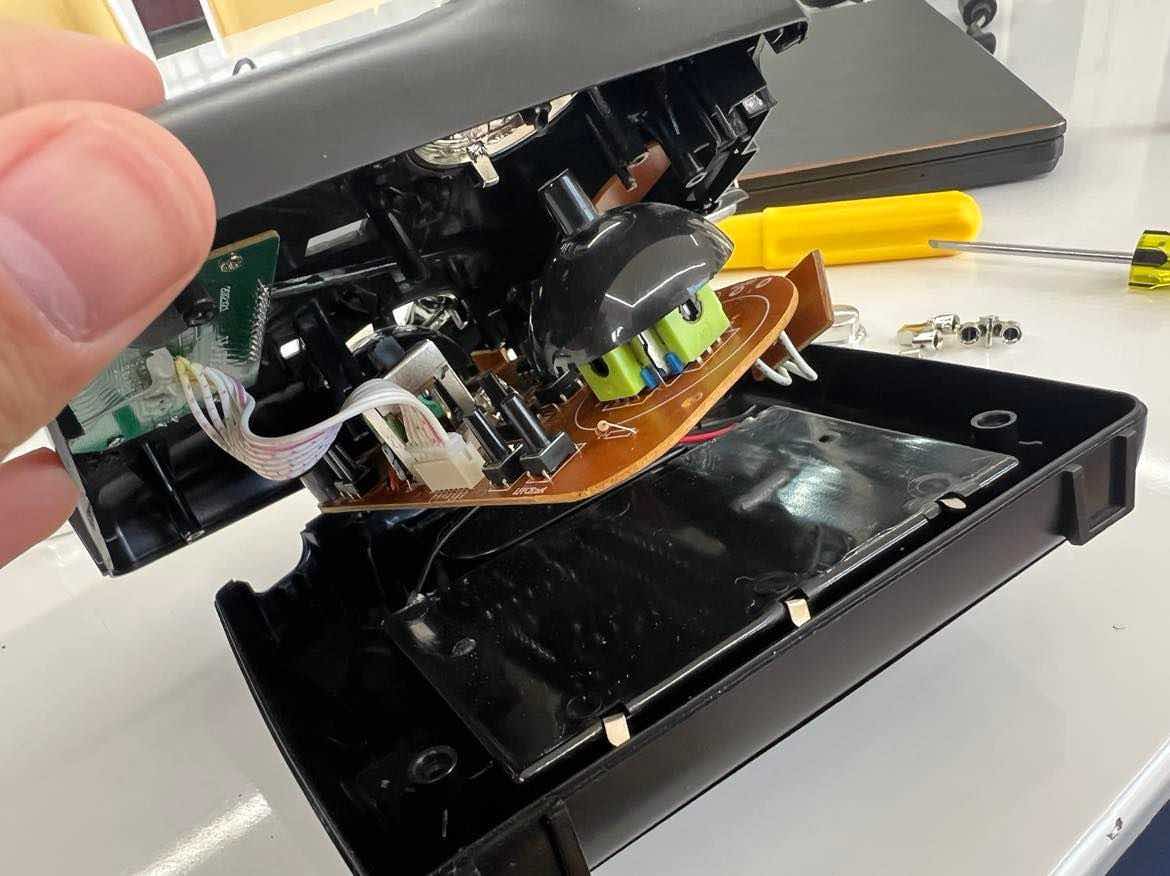
since we do not have joysticks in our lab, I have been trying to pry open an old transmitter system to study it and to get ideas from it.
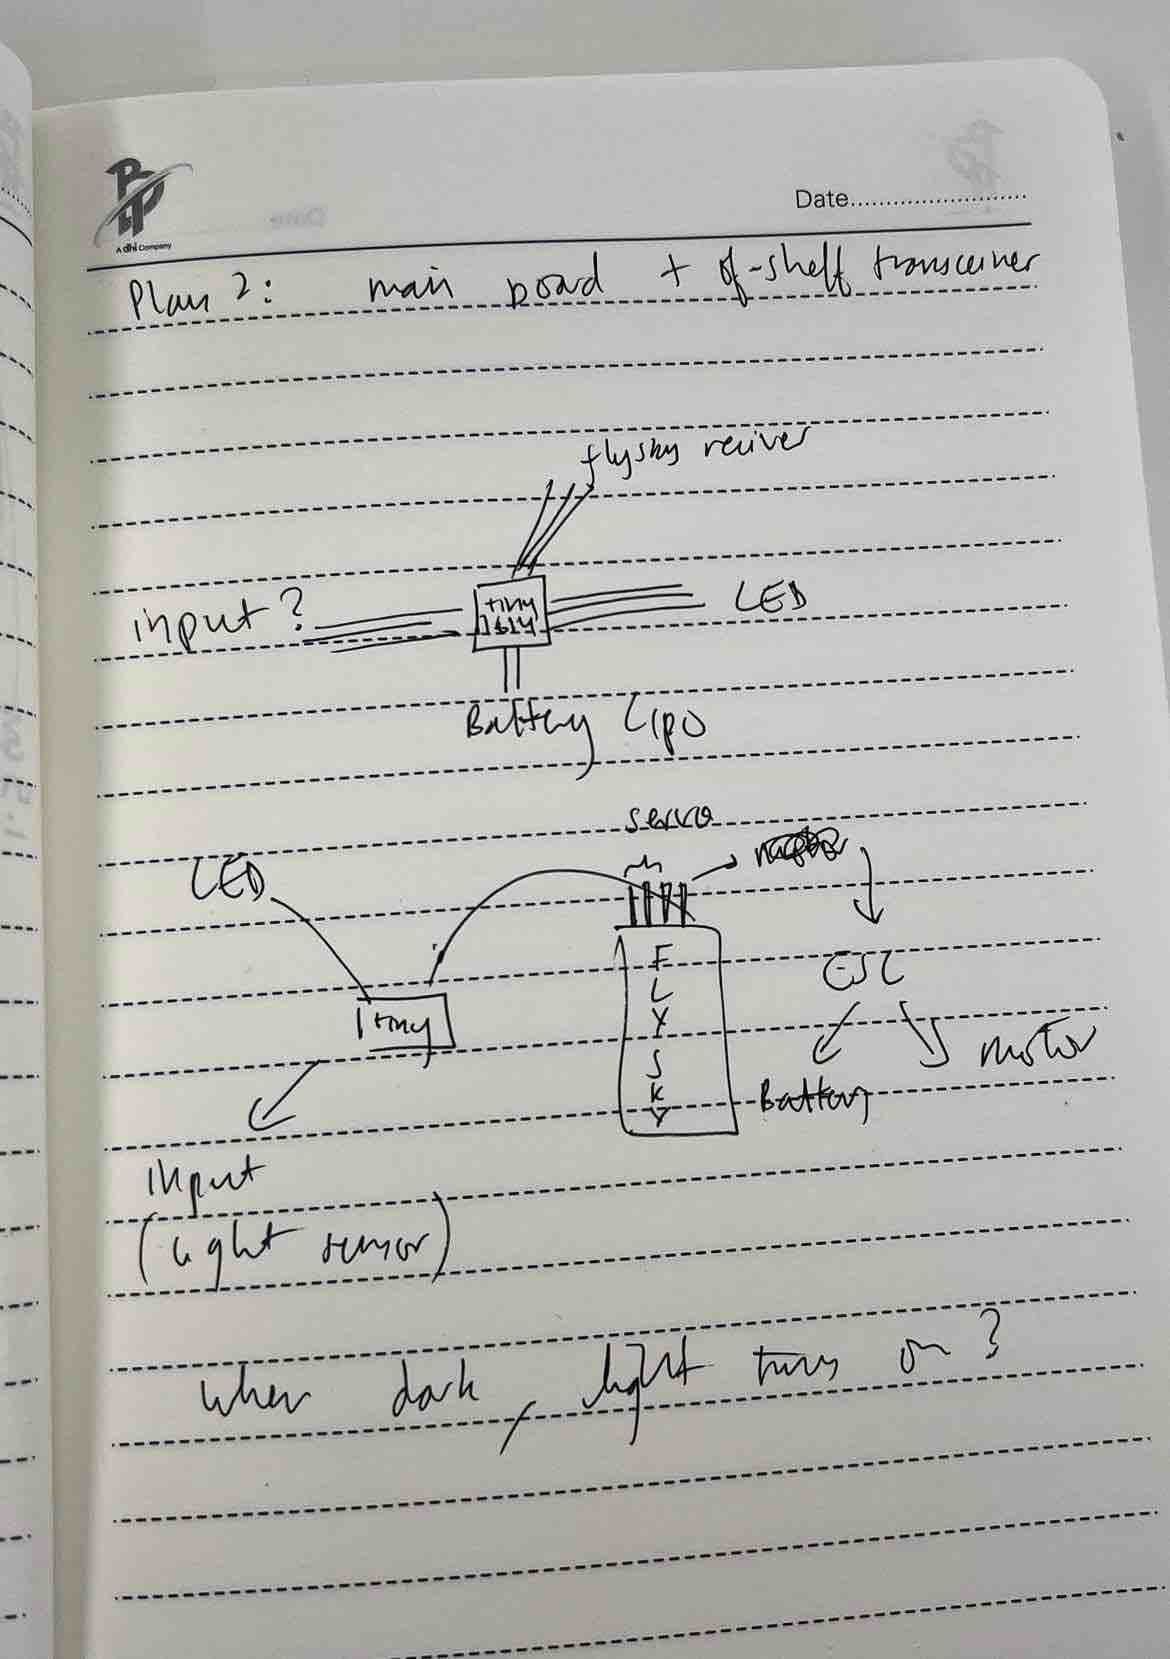
Plan 2:
Plan 2 would be to not worry about the transceiver but to use flysky’s off the shelf transceiver that, will connect to a attiny1614 board. The board will have an input like a light sensor and output of LEDS, so that the drone will auto lightup once its dark.
Beginning electronics design:
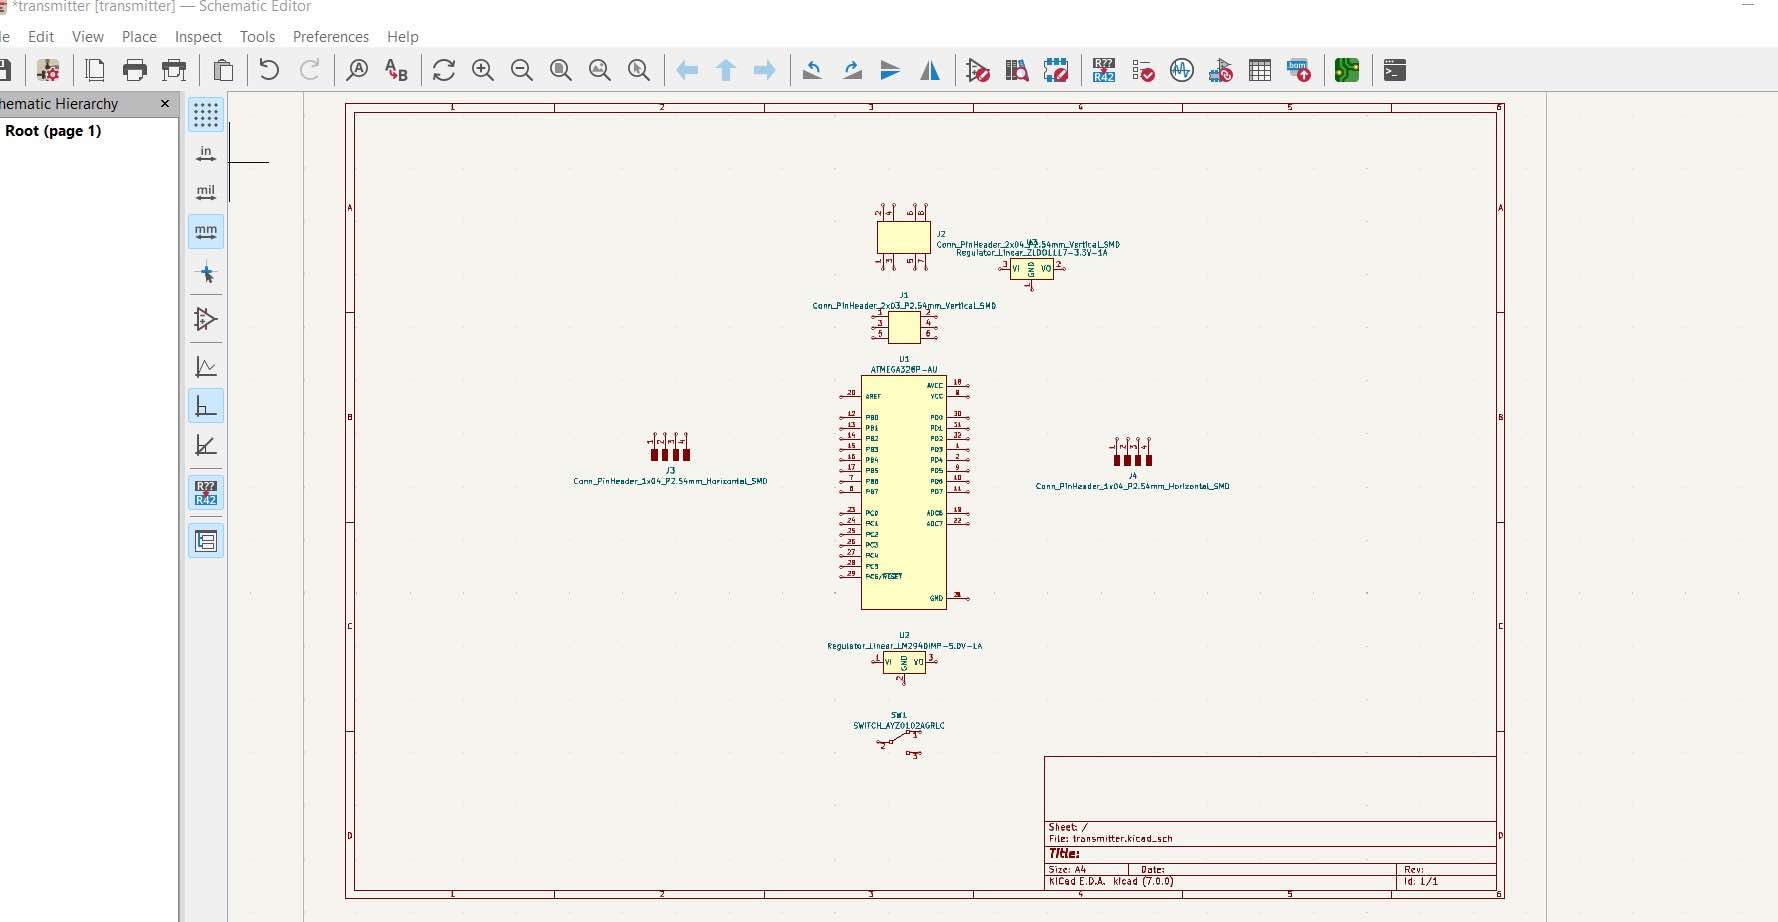
I had to spend quite a lot of time doing research to figure out how to design and fab my transmitter’s board. After that, I began putting listing together my components in KiCAD.
In KiCAD, I realized that I did not have the Atmega328p-AU symbol and footprint so I had to download and install it from SnapEDA. Atmega328p-au link. Once downloaded it needs to be brought into Kicad. To do this,
first in the Schematic editor:
- go to
preferences manage symbol libraries- click on the
foldericon on the bottom left - select the newly downloaded sch file (inside the folder) from SnapEDA
- hit ok
then, in the PCB editor,
- go to preferences
manage footprint libraries- click on the
foldericon on the bottom left - Select the newly downloaded folder from SnapEDA
- hit ok
Im still figuring out how I will connect the battery to the board but here is the current progress:
Final update before moving onto individual links:
Ive decided that I want to pivot my final project into making RC joystick for my Drone (and or any other RC uses). focusing on the controller and its electronics is a huge challenge for me and I want to take on the challenge and work on that.
Useful Referred Links:
Transmitter and Reciver wiring
Adrian’s for battery reference
Another arduino to program FabAcademy
Yazan Fabacademy simple joystick module
Yadu Fab Single Joystick with atmega328
Atmega milled + nrf for sprinkler
Mega + nrf for water sprinkler