Week 5. 3D Scanning and Printing
Group Assignment:
Link to Group assignment: 3D Group Assignment
Takeaways:
- Stringing can occur and this can typically be controlled by reducing the speed or temperature.
- The Prusa’s self levelling capabilities makes it so much more user friendly than the Creality Ender-3 pro
Individual Assignments:
3D printing:
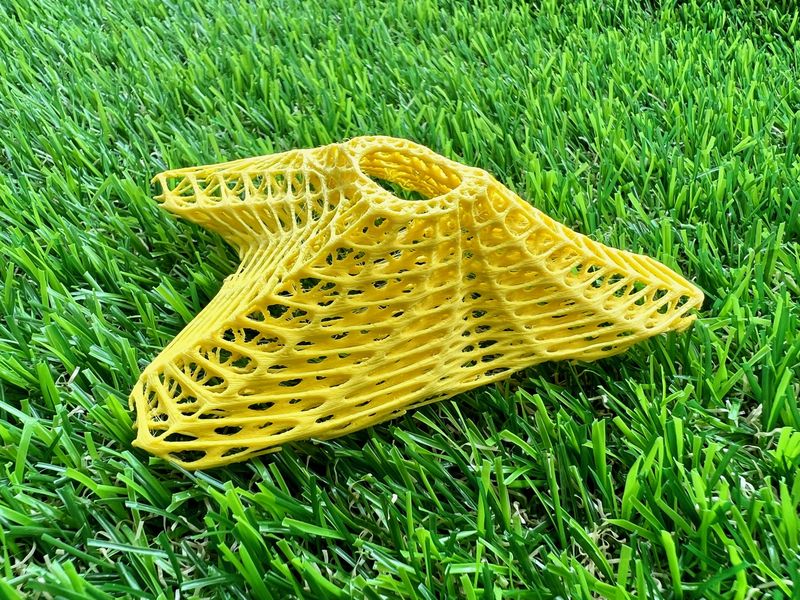
Hero Shot:
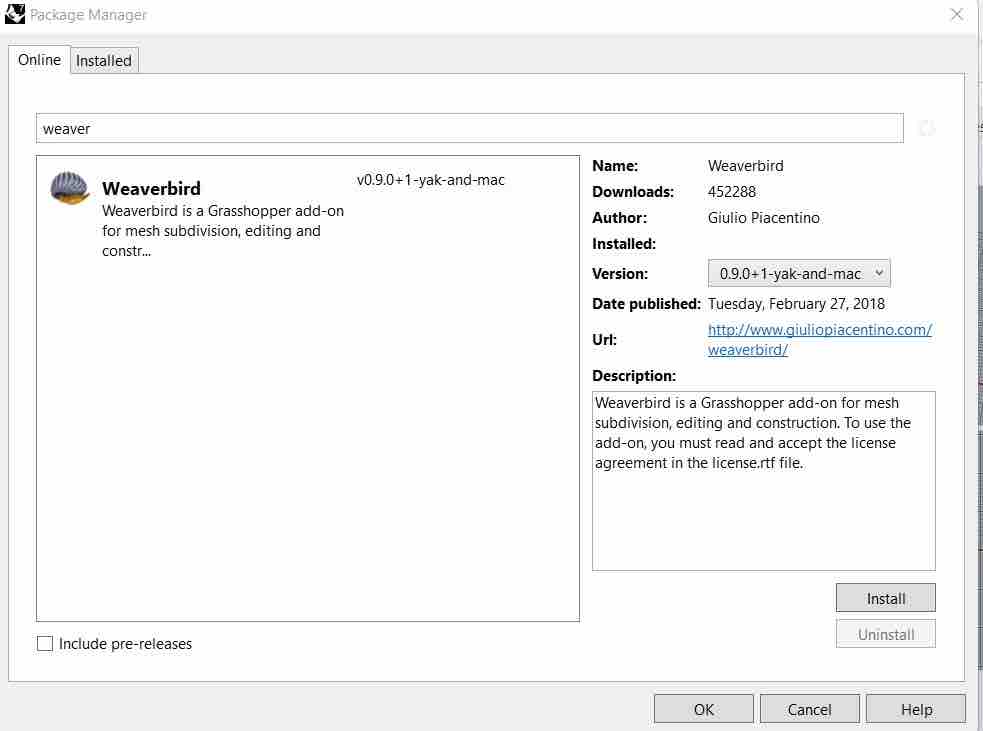
For the Design aspect for this week, I wanted to learn a new software so I went ahead and downloaded Rhino. Since it is Rhino 7, Grasshopper came in-built. I decided to install some important plugin packages. To do this, I went into tools -> package manager -> under online -> Searched what I wanted and installed them.
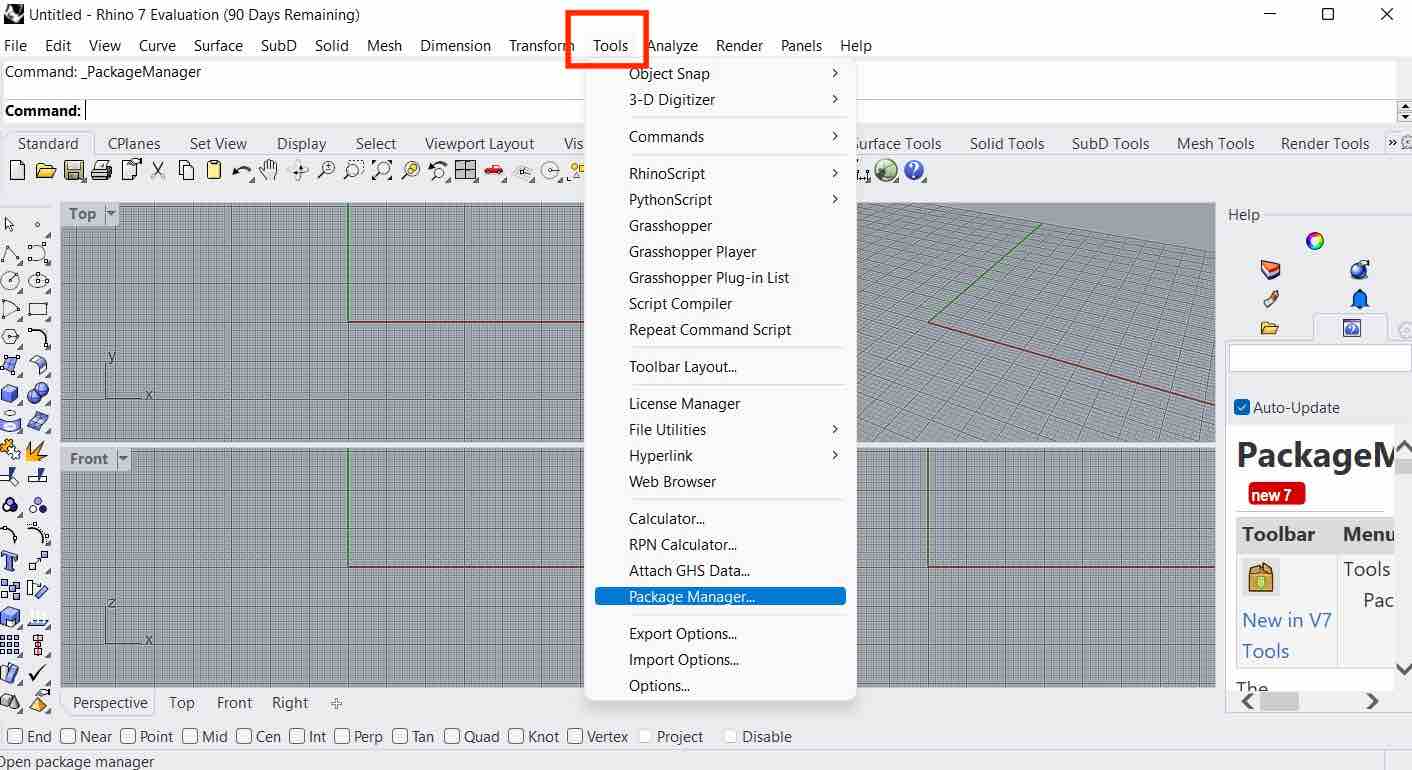
The additional plugins I installed were: WeaverBird and LunchBox.
I went through the tutorials provided in Rhino and then began brainstorming what I wanted.
To begin with, I wanted to learn Rhino and grasshopper because I was intrigued by generating lattice and nested structures (typically seen in architecture). This gave me an idea and for this week I wanted to 3D print a nested 3D contour map. With the nesting making the model impossible to make subtractively.
Design, Modelling and Printing
This was the tutorial that gave me the inspiration and help for the structure: parameterized lattice
First I made the three curves (with interpCrv) and used the ctrl button to edit the points to make the curves 3 dimensional in nature.

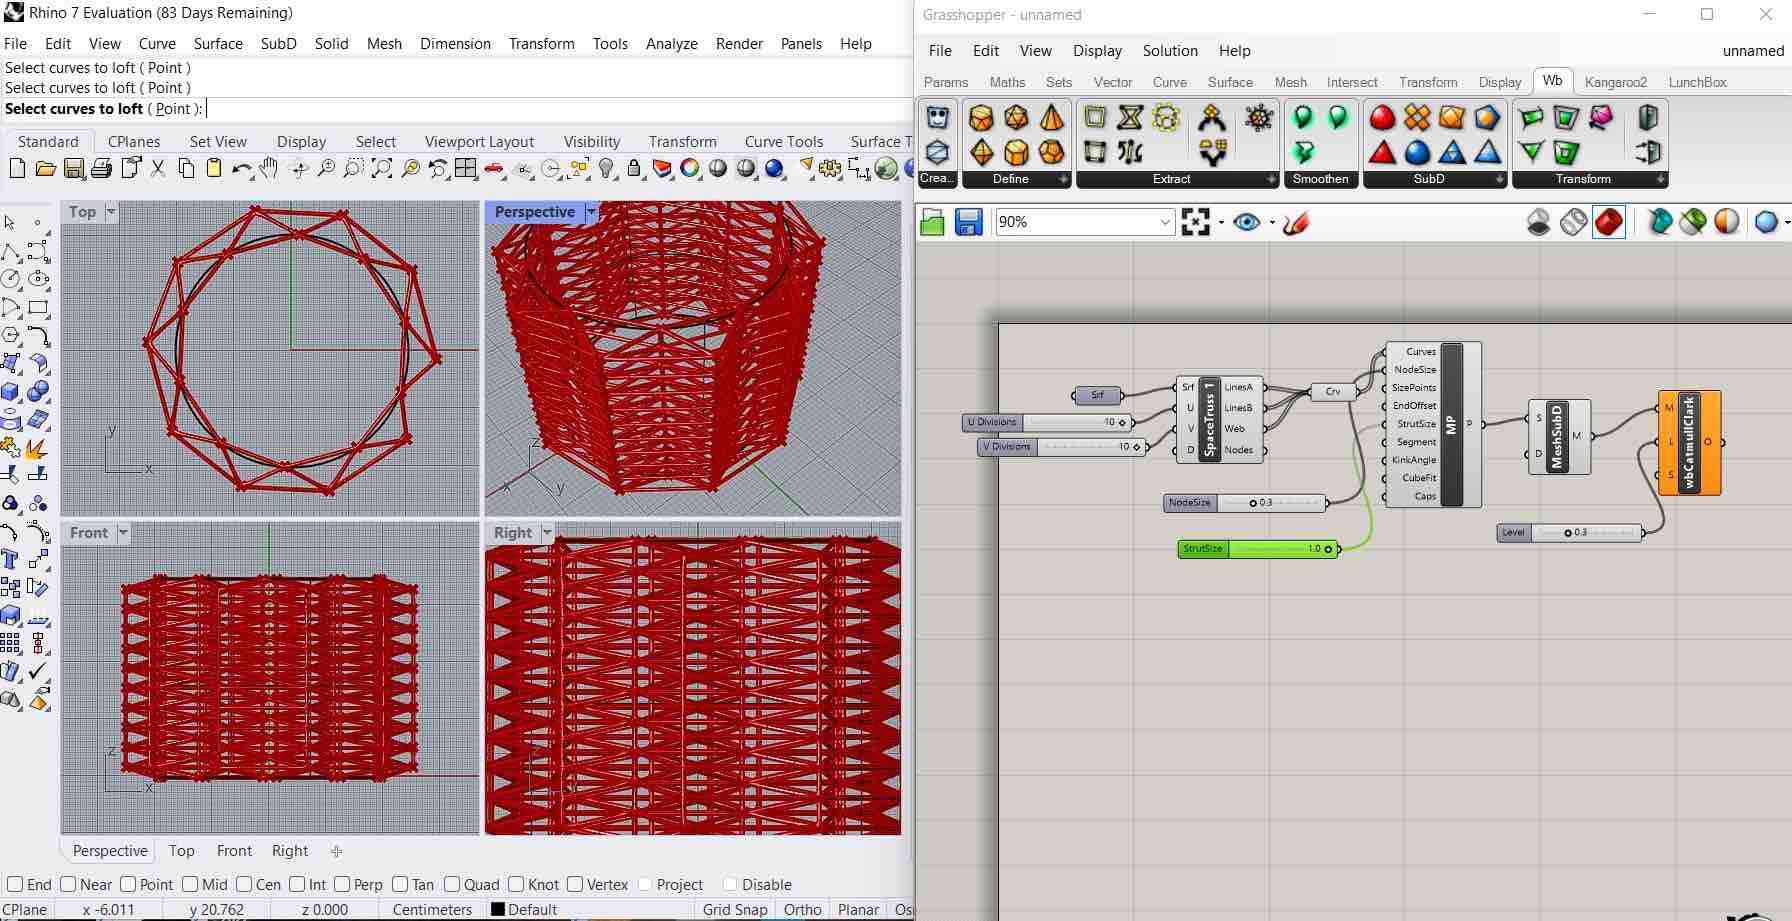
Then I used the loft (typed loft in command line) function to create a surface from the three curves. After this is where the Grasshopper built-in extension comes into play. To activate grasshopper, I typed grasshopper in the command line.
Grasshopper Steps
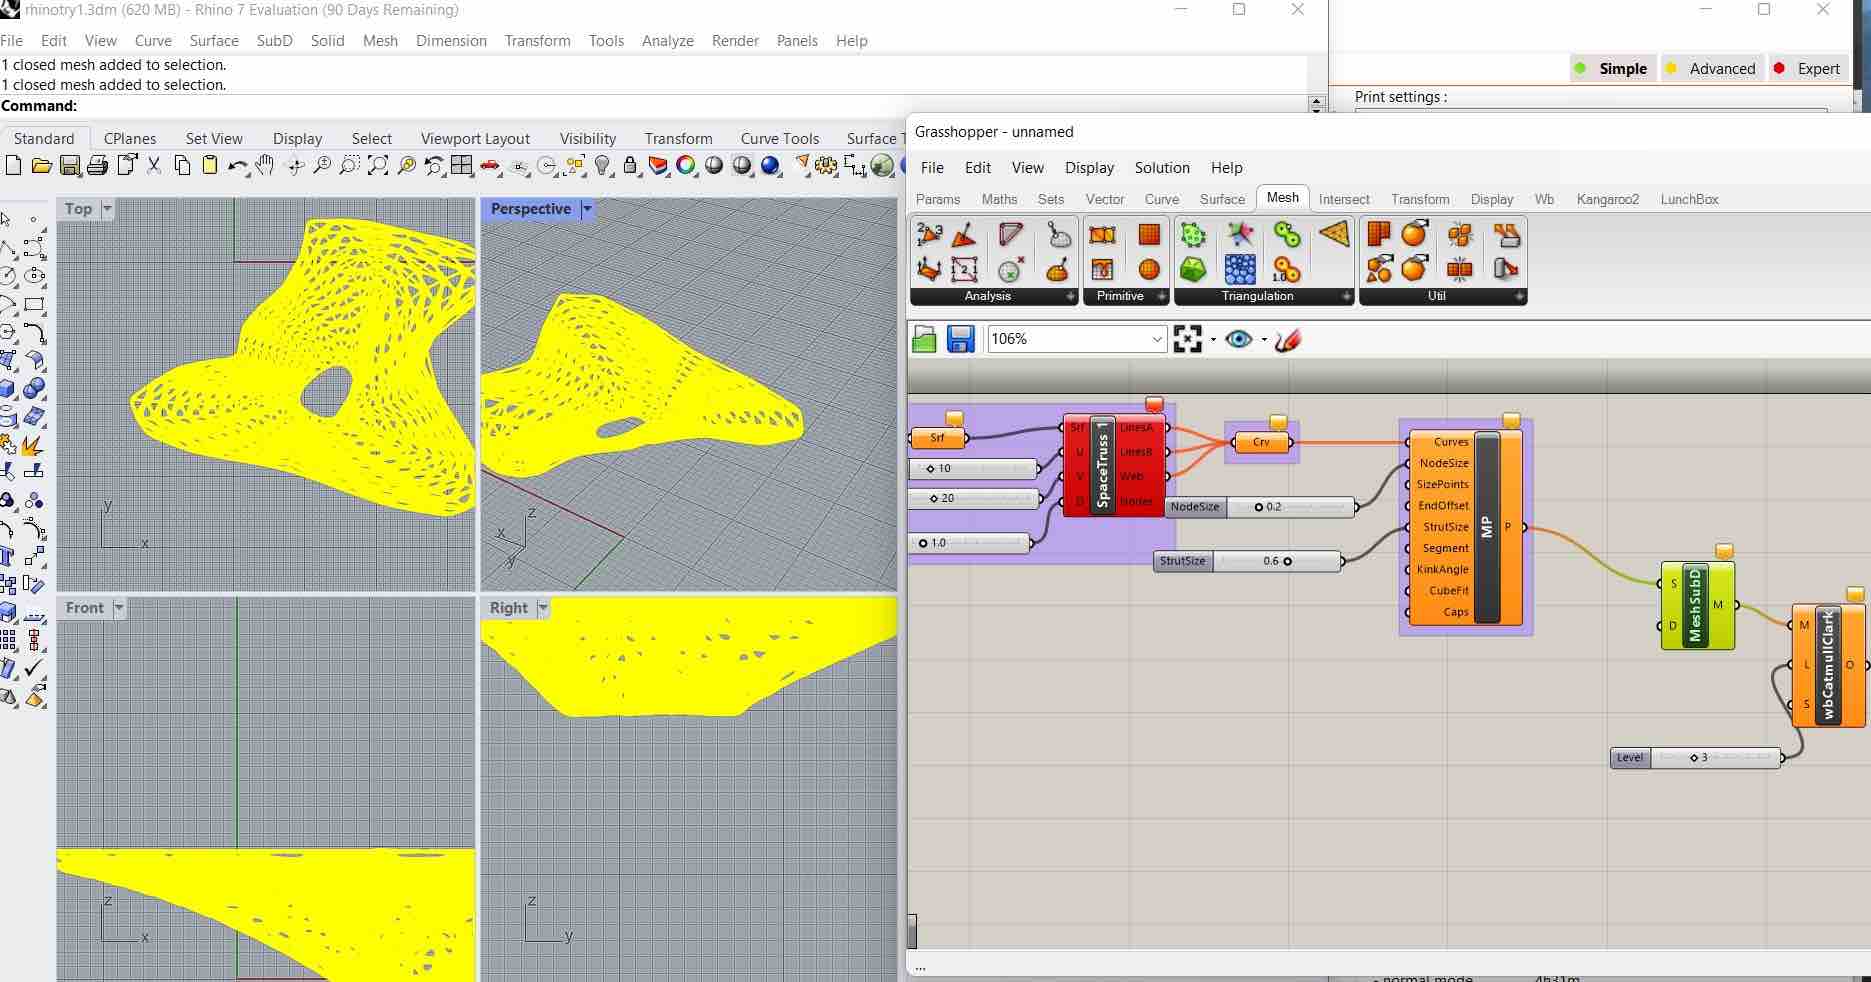
In Grasshopper, I went through the following steps:
- I double clicked in grasshopper and added a
surfaceparameter. - Right clicked the added surface parameter, selected
set one surfaceand selected my surface in Rhino - From the
Lunchboxtab, I selected aSpace Truss Structureand connected the surface to it. - right clicked in grasshopoer Added numbers to the u and v divisions of the trusses and to the depth of the truss
- right clicked and added a
curveparameter as an outlet for the new truss structure. Connected the two primary lines and web lines to the curve. - from the
subDtool bar, I added themulti-pipeto the schematic. This function creates pipes as the name suggests. - I connected the curve parameter to the new multi-pipe, and added number sliders to control the node size a strut size of the multi pipe.
- right clicked and added a
custom preview, connected the multi pipe to the geometry to view the model. - to create mesh out of the structure, from the subD toolbar, I selected
mesh from subDand connected the multi pipe to this. - To further smoothen the structure, from the
WeaverBirdplugin, I added theCatmull-clark sub divisionparameter from under the subD section of WeaverBird. -
I connected the mesh to this para meter and added a number slider to control the level.
This is where I struggled. as a new user of Rhino and Grasshopper I wasn’t aware that I had to bake my grasshopper model for it to form in Rhino (to export as STL). I kept trying to export as STL but I kept getting a smooth surface. Finally after much research, I realized I had to bake my mode after which it all worked out well.
-
I right clicked my last parameter in Grasshopper and
bakedit. -
Once the model was successfully baked into Rhino, I saved the model as an STL.
3D Printing (PrusaSlicer)
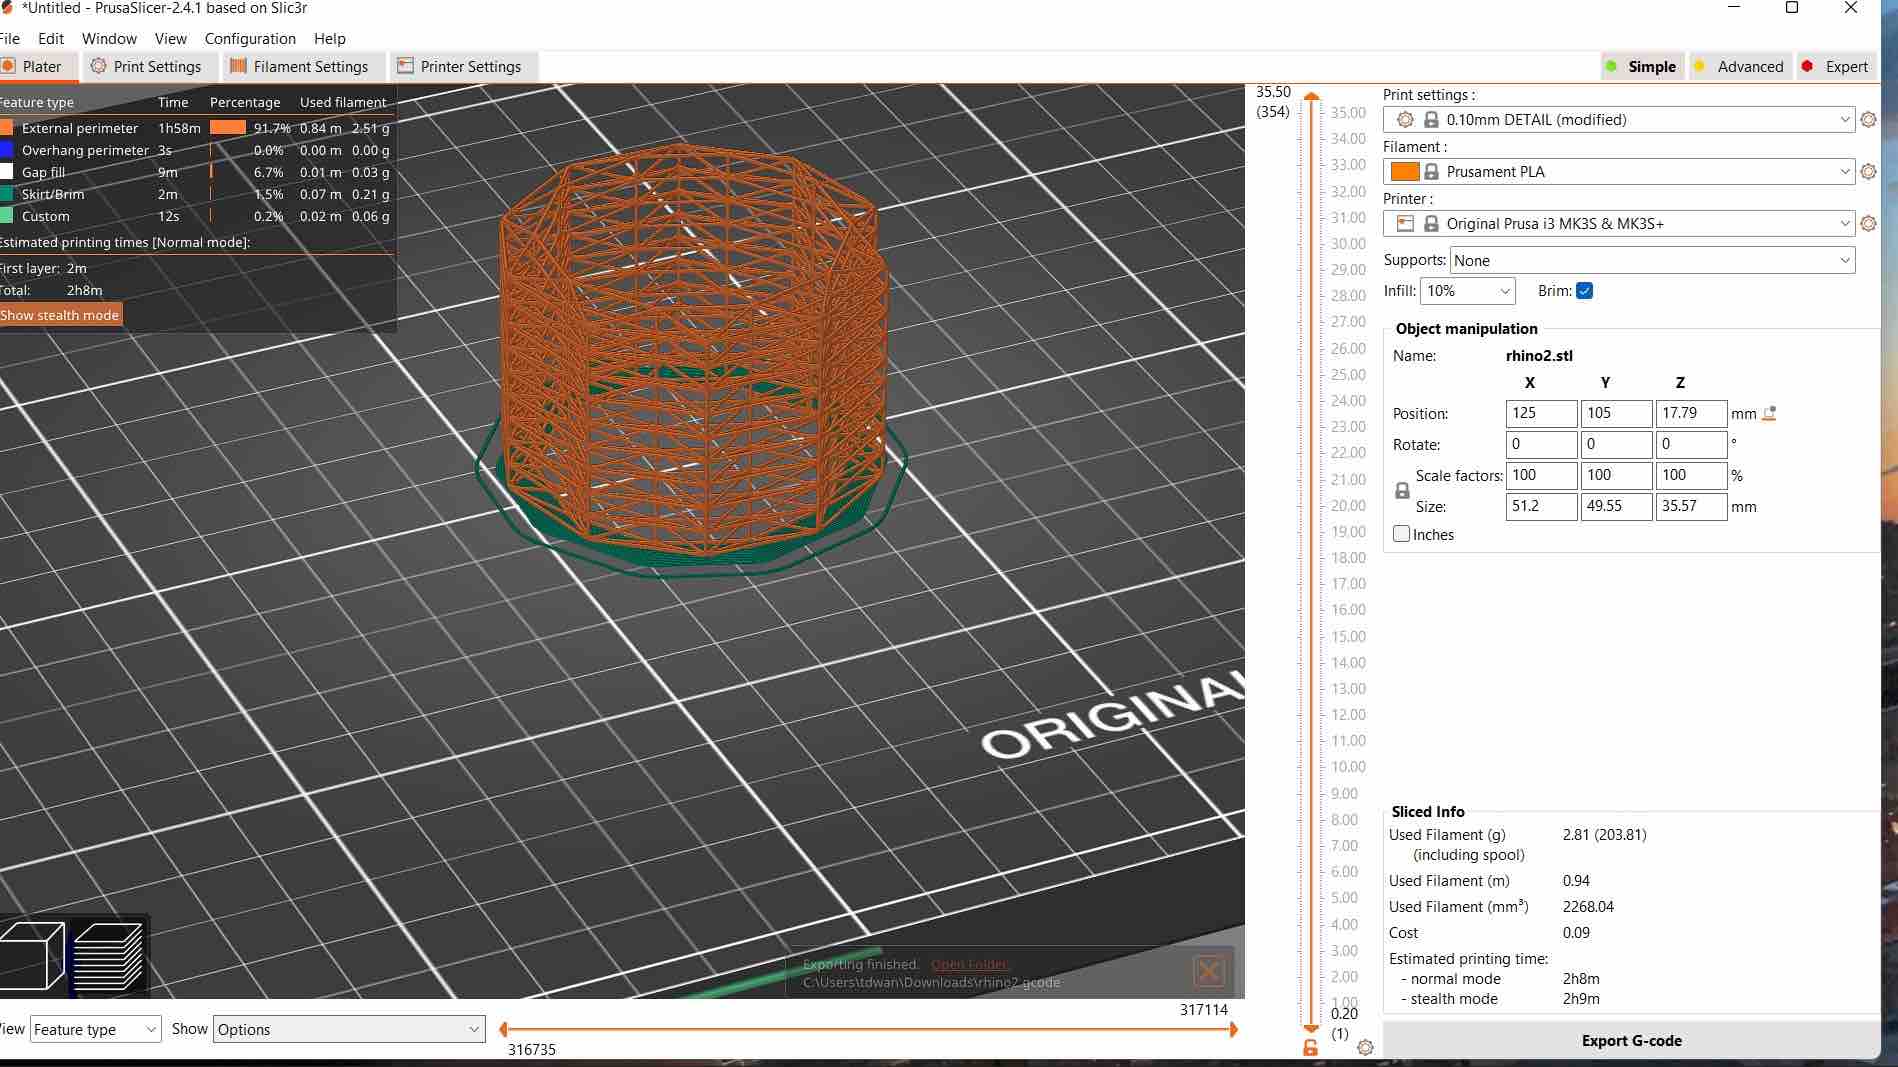
Now that I had my STL file, I needed a slicer to convert my STL (stereolithography) file into gcode for the 3D printer to understand. Since we have the Prusa I3 mk3s+ 3d printer in the lab, I downloaded the Prusa Slicer as my slicer of choice.
Steps I used in the slicer:
- Import the STL file
- Rescale the model according ensuring the lock button was on to maintain aspect ratio
- Selected PLA as my material
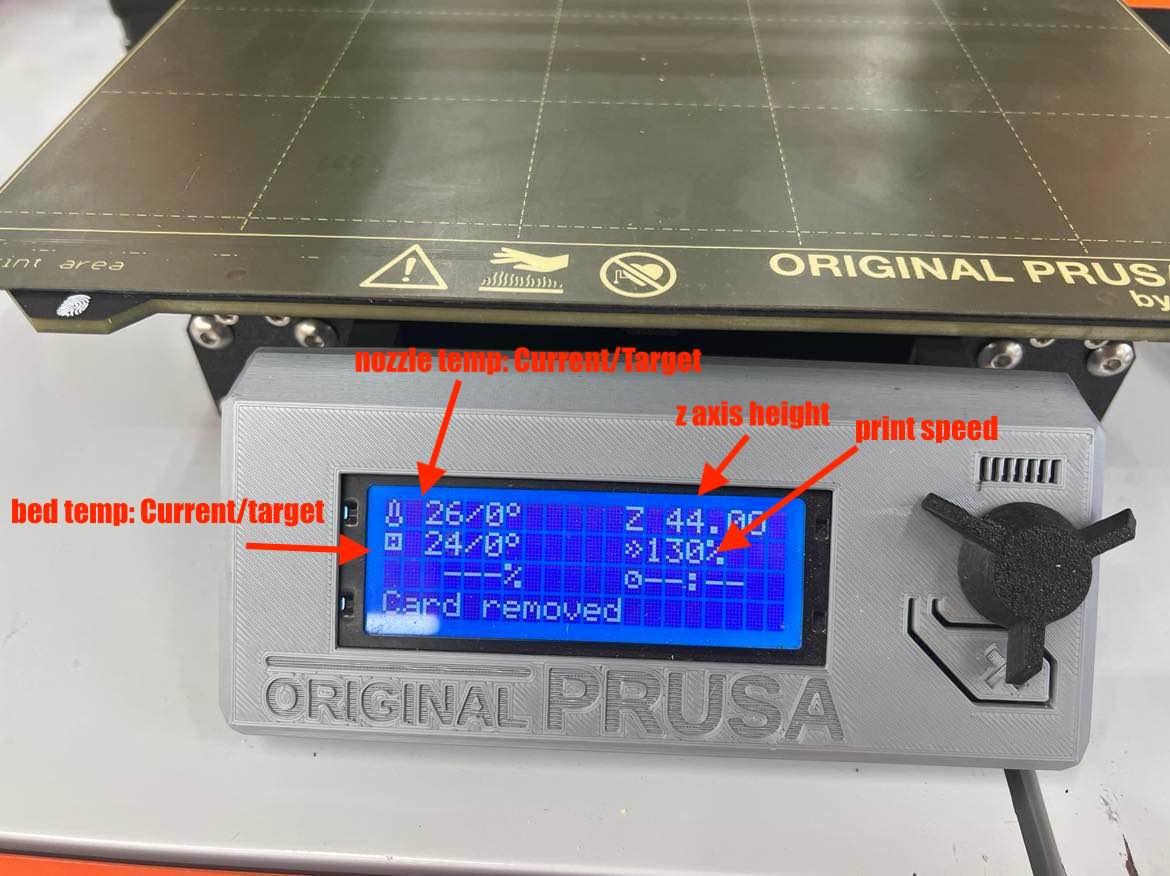
- Selected the Prusa i3 mk3s+ as the printer so the slicer communicates the right settings (nozzle temp, bed temp etc) to the printer.
- I selected an infill of 10% since I didn’t need the model to have high strength
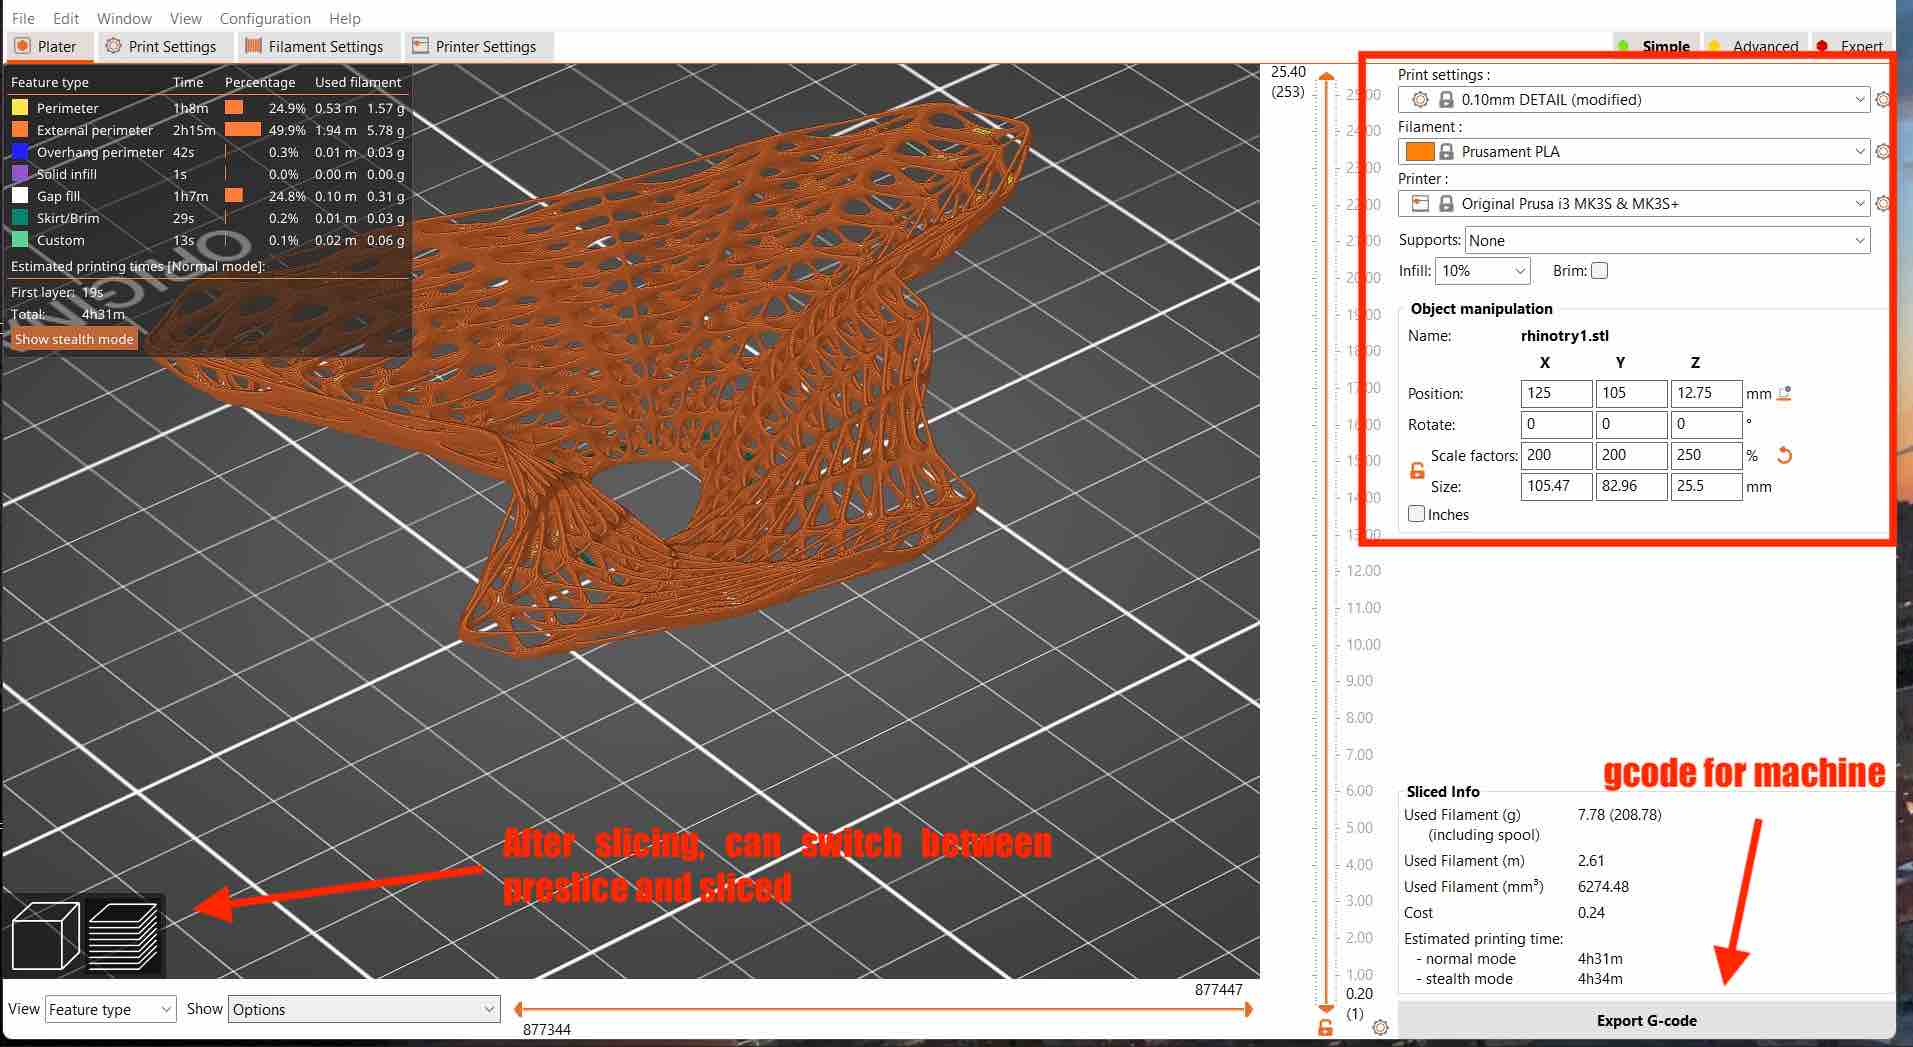
- I chose the 0.10 mm DETAIL option for the print settings layer height however, since my model was intricate and I wanted it to come out well.
- Hit
Slicein the bottom right. - You will be able to see the print time and how much time is taken by the different parts (support etc)
-
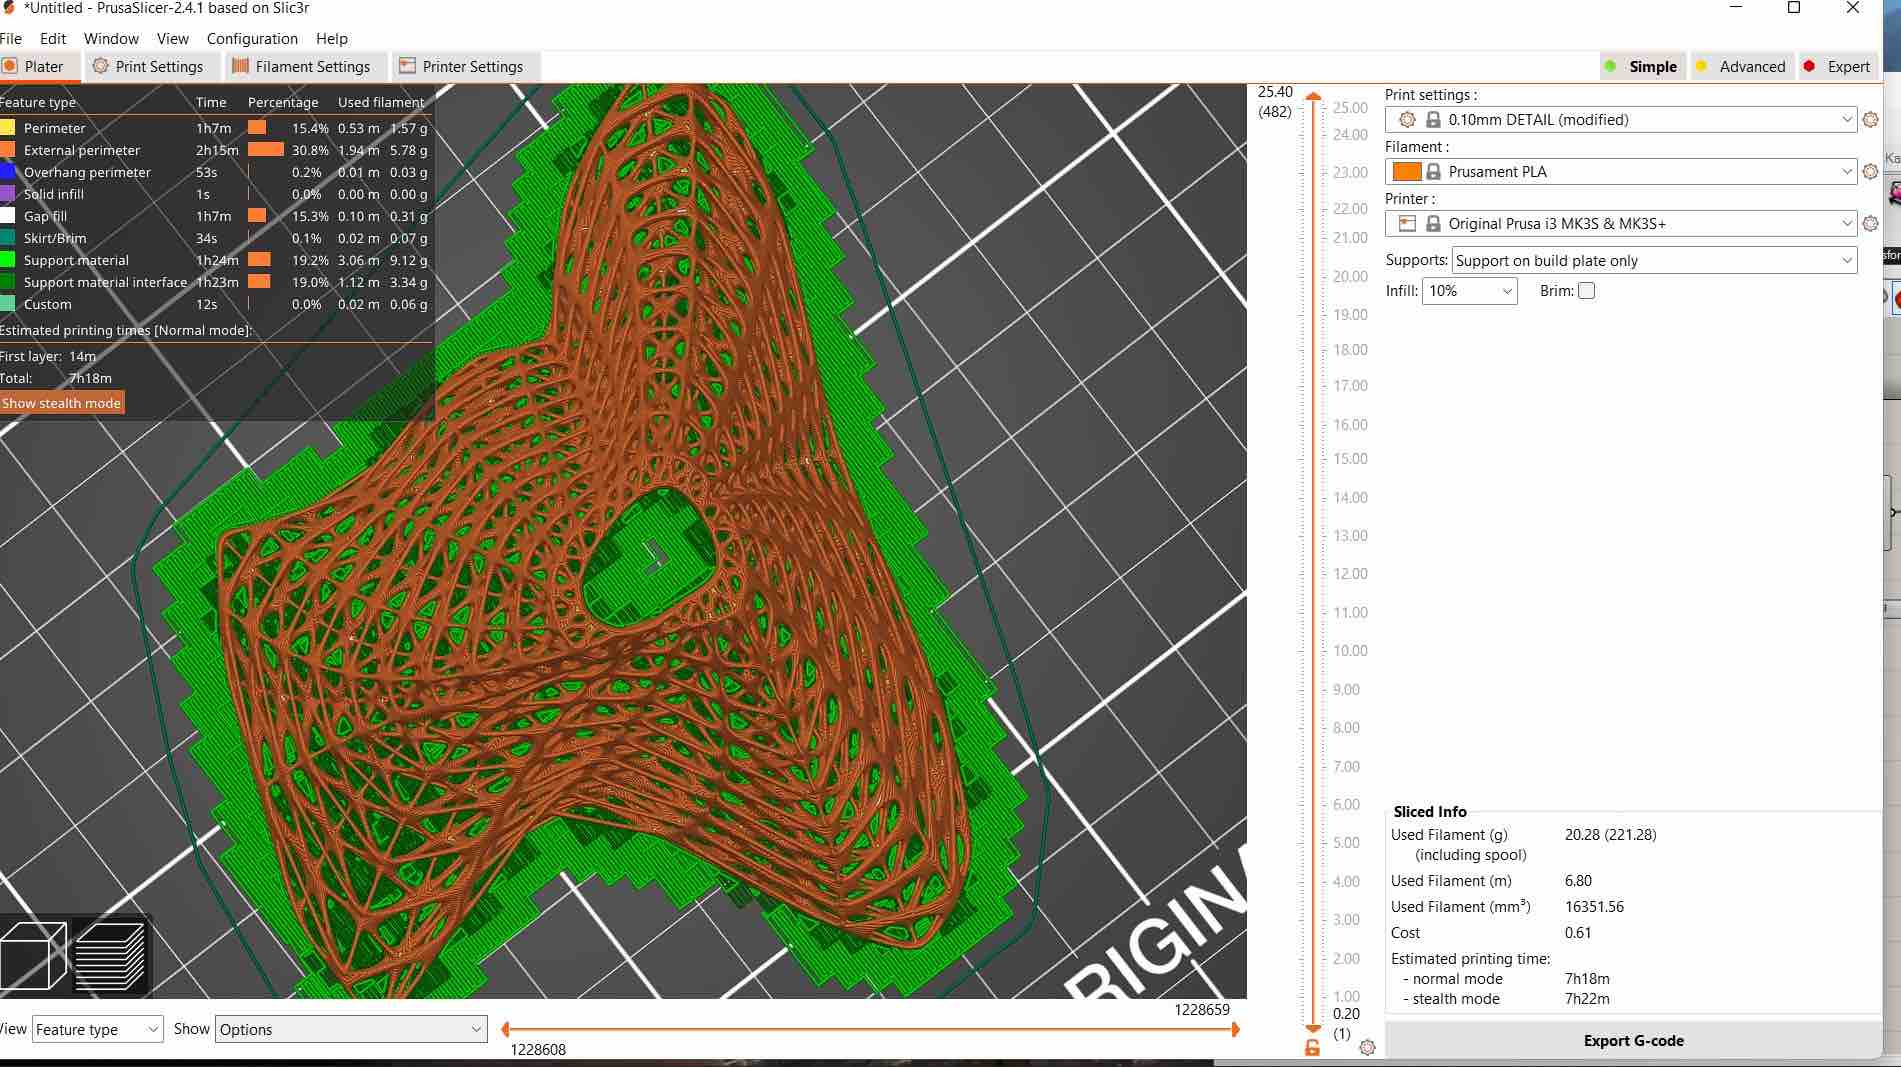
Initially, I tried printing in the orientation shown in th picture below without support. But it failed. So I flipped the model, and added supports to the base plate.
-
Once I was happy with the slice, I hit
export G-codeon the bottom right, saved the g-code on an SD card and inserted it into the 3D printer. -
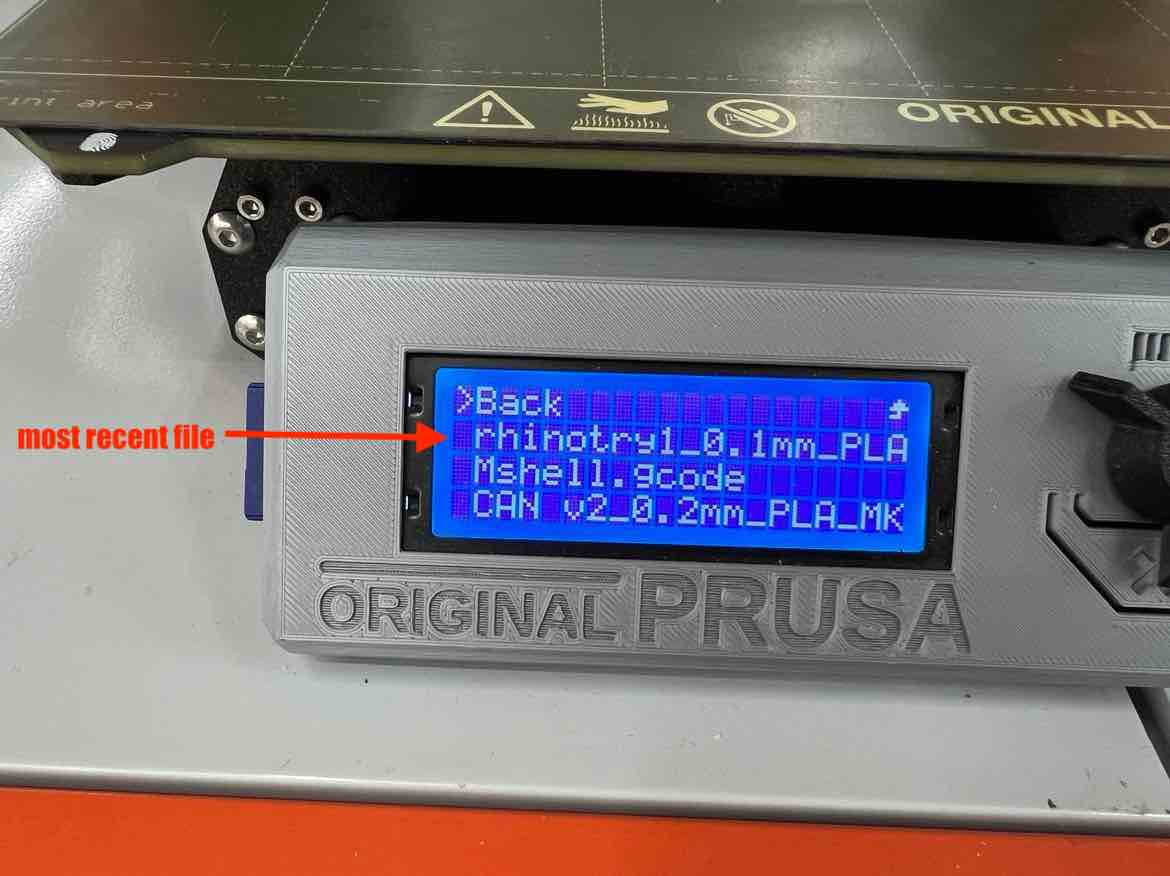
As soon as you enter the SD card, its contents come up and you can begin the print by going to the gcode (typically most recent will be the first) and hitting the knob on the printer.
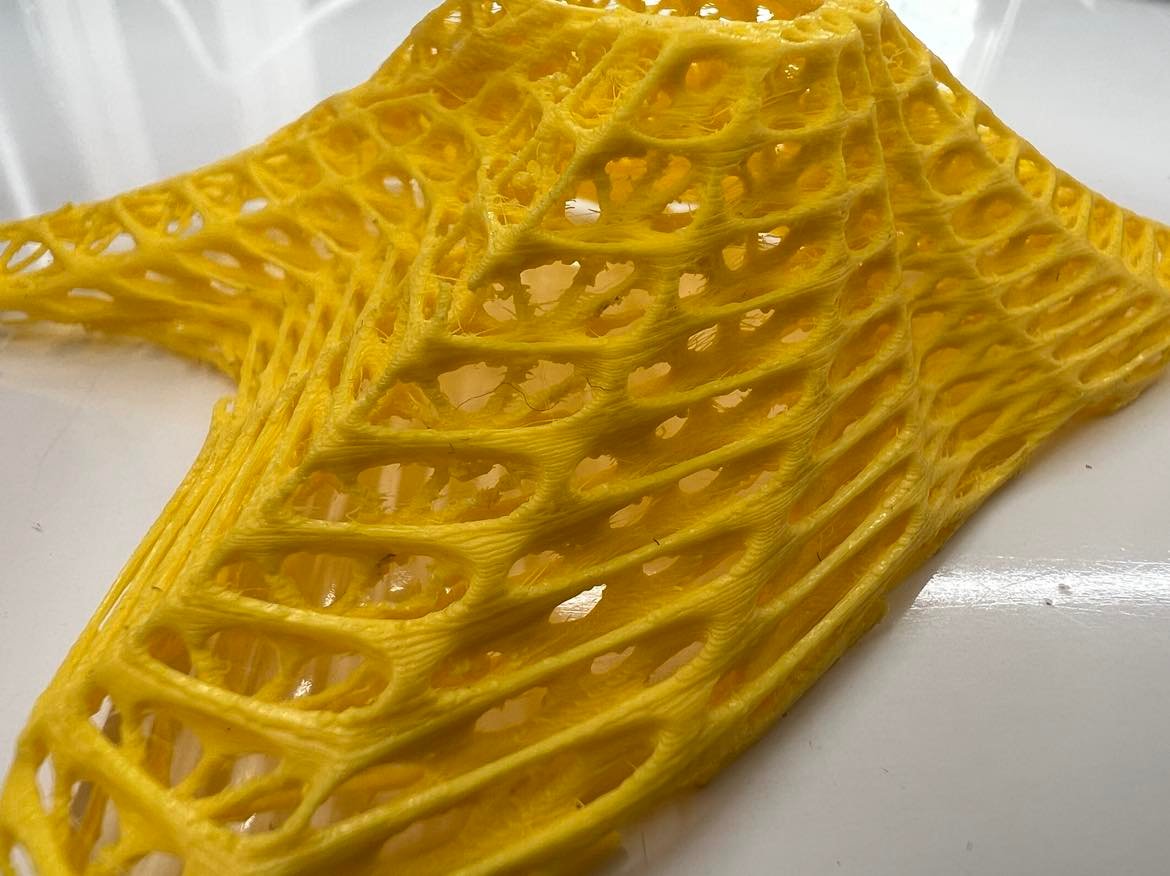
Done print:
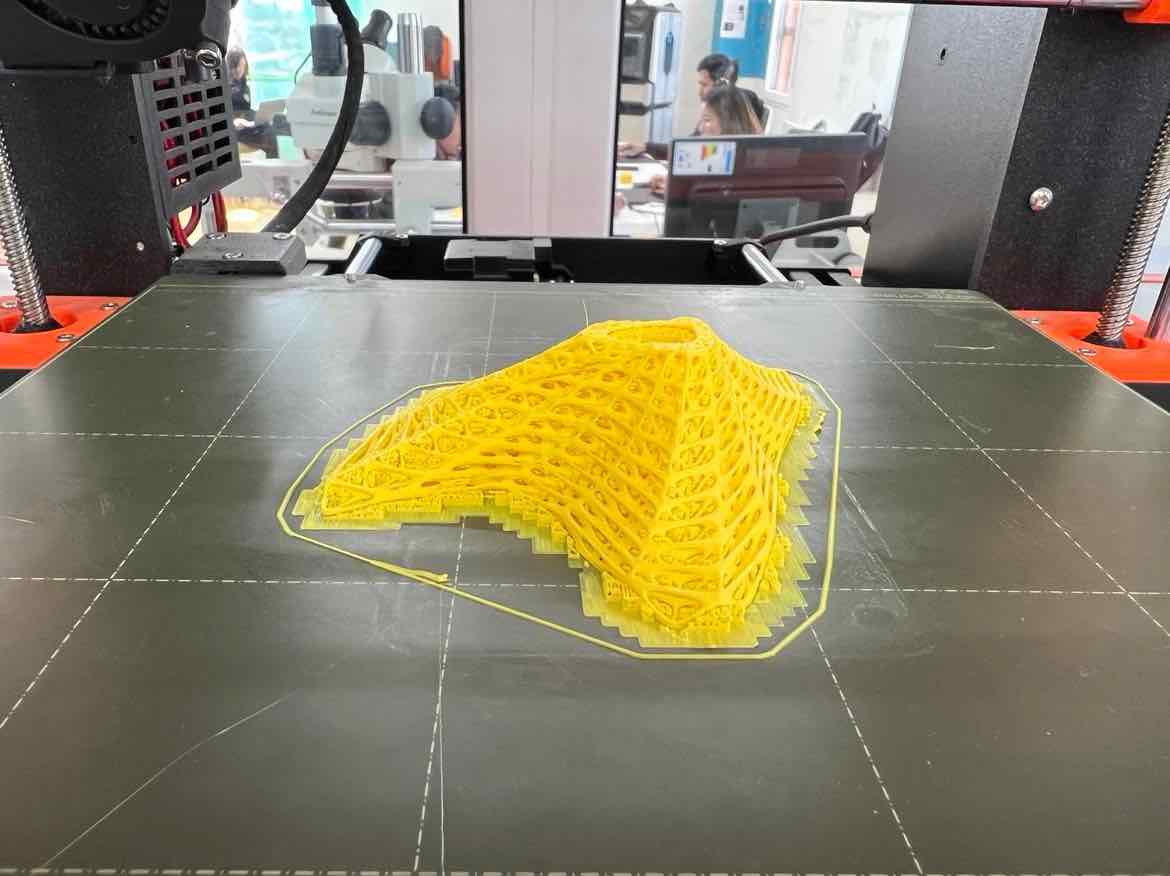
A mistake I made was that the support material was over whelming and was quite hard to remove so I spent almost an hour removing it. A lesson learnt the hard way.
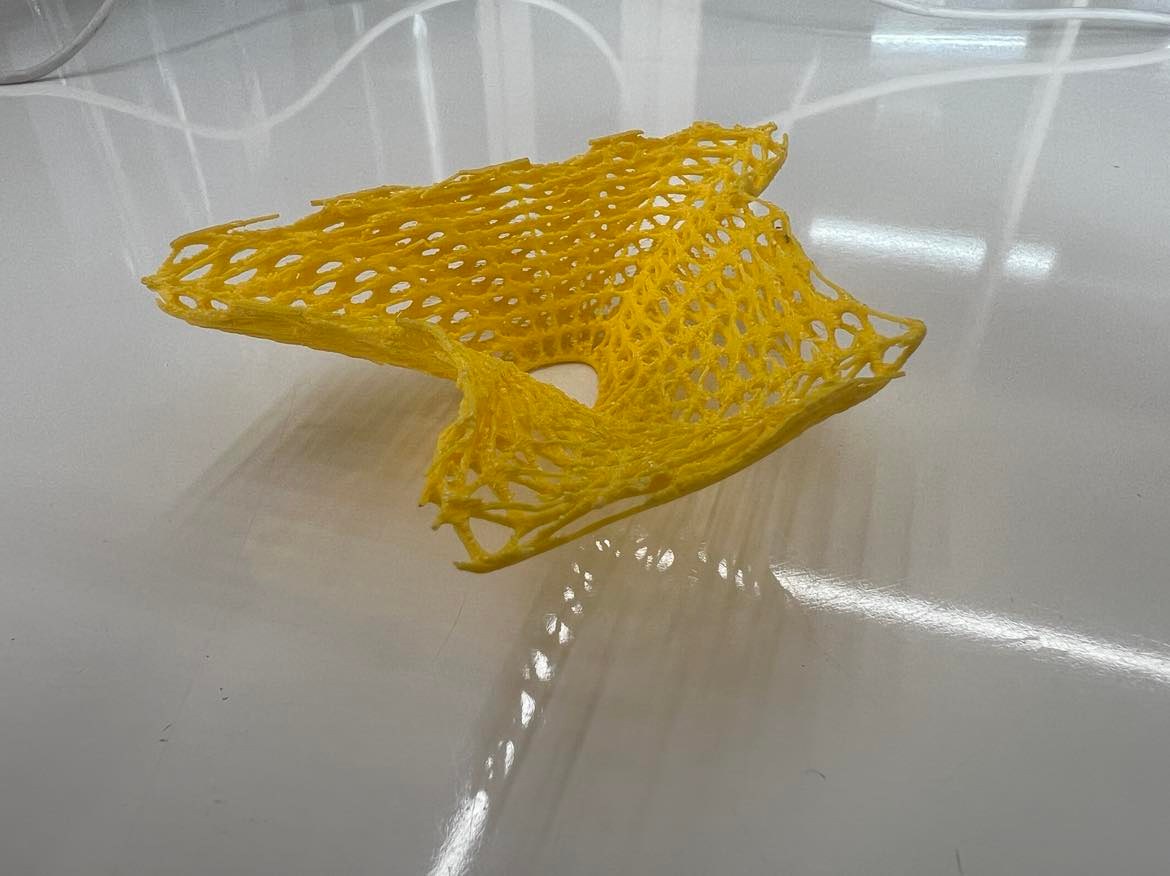
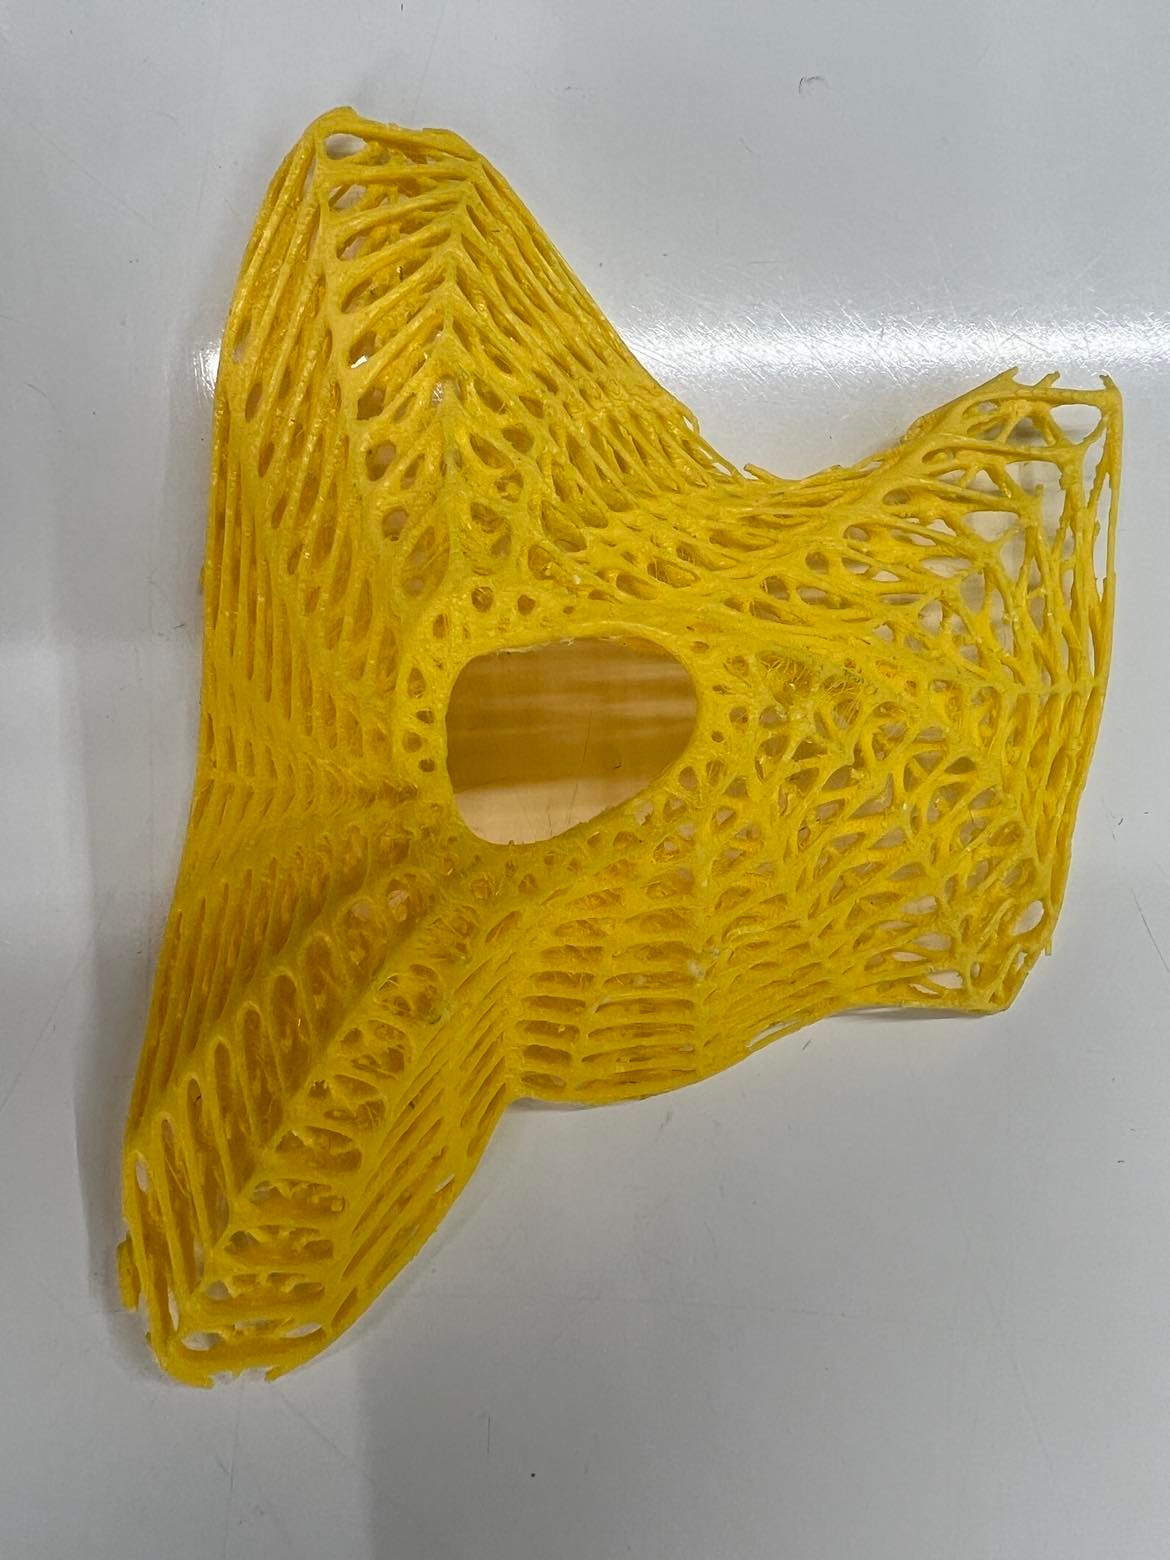
I was happy with the result though and although the resolution of the pictures are bad, I think you can see the nesting which came out very well!
(additional) Second design and print Rhino
After completing the design and print for my individual assignment, I wanted to mess around with rhino + grasshopper some more so I design and printed the following multi-pipe cylinder:
This time I didn’t use supports and just added a brim to the design.
Final Look:
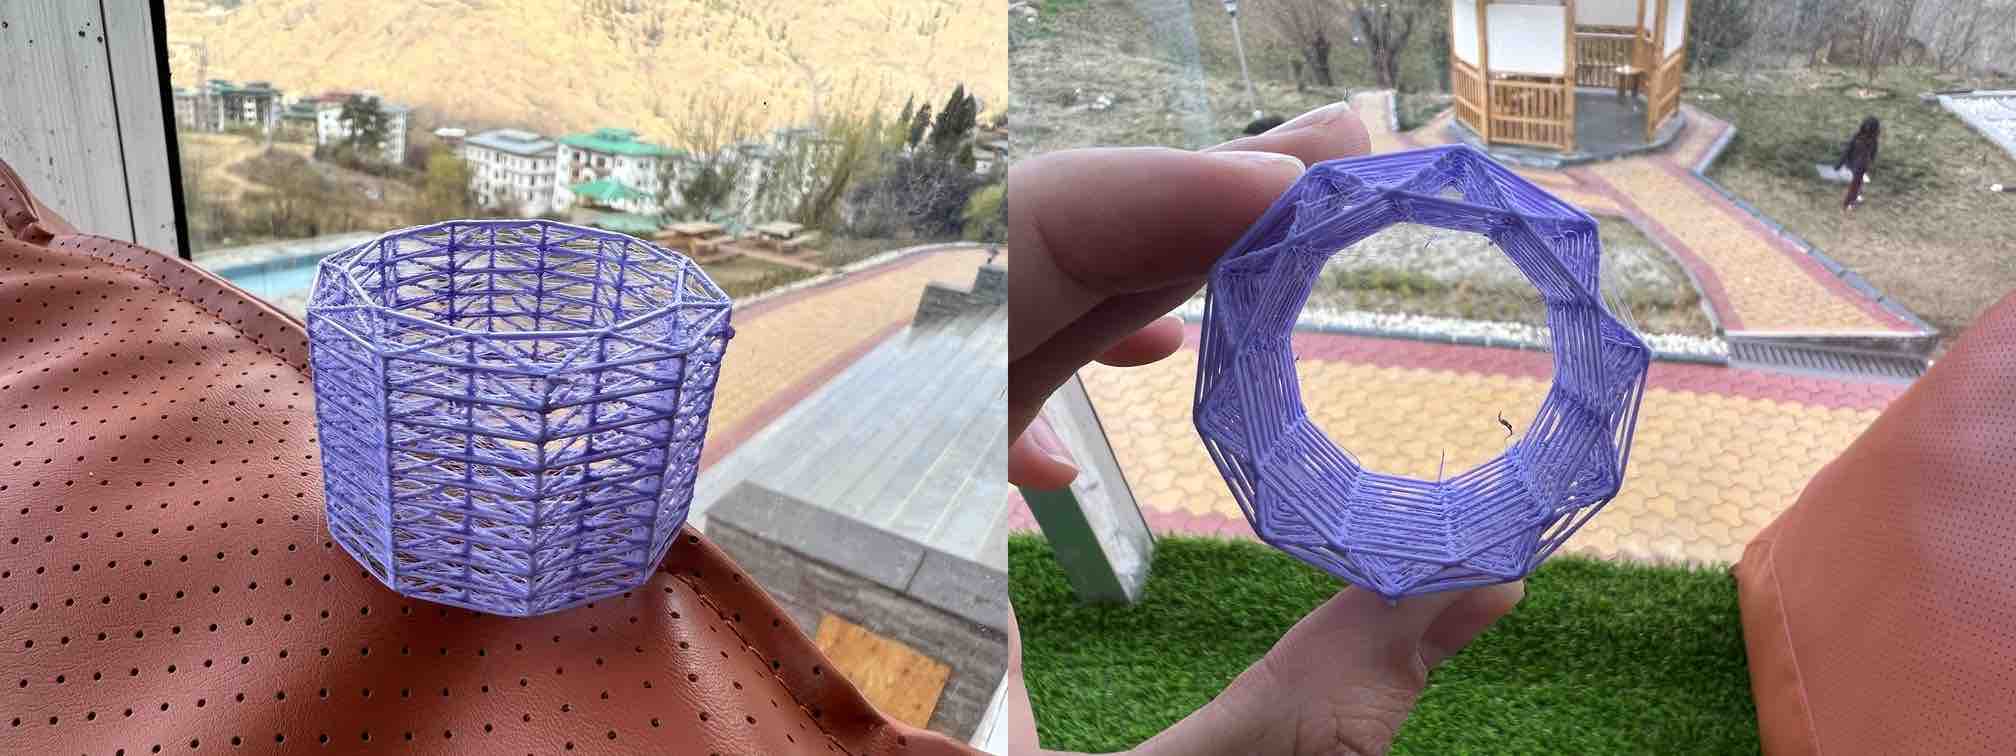
Bit of stringing issues, but since I did the print over night I wasn’t there to observe the print.
Scanning
We have an Artec EVA scanner in the lab, and have used it before however, the computer with a GPU powerful enough to connect to it has malfunctioned so when we try using the scanner on other pcs without gpus, it is near impossible to use (can’t delete unwanted/extra elements/background).
Due to this, I went ahead and used the Kiri Engine 3D Scanner, which is a phone cloud-based 3D scanner that works with inputting photographs.
How to use:
- Download the app from the app store
- Hit the
+Sign in the app and selecttake photos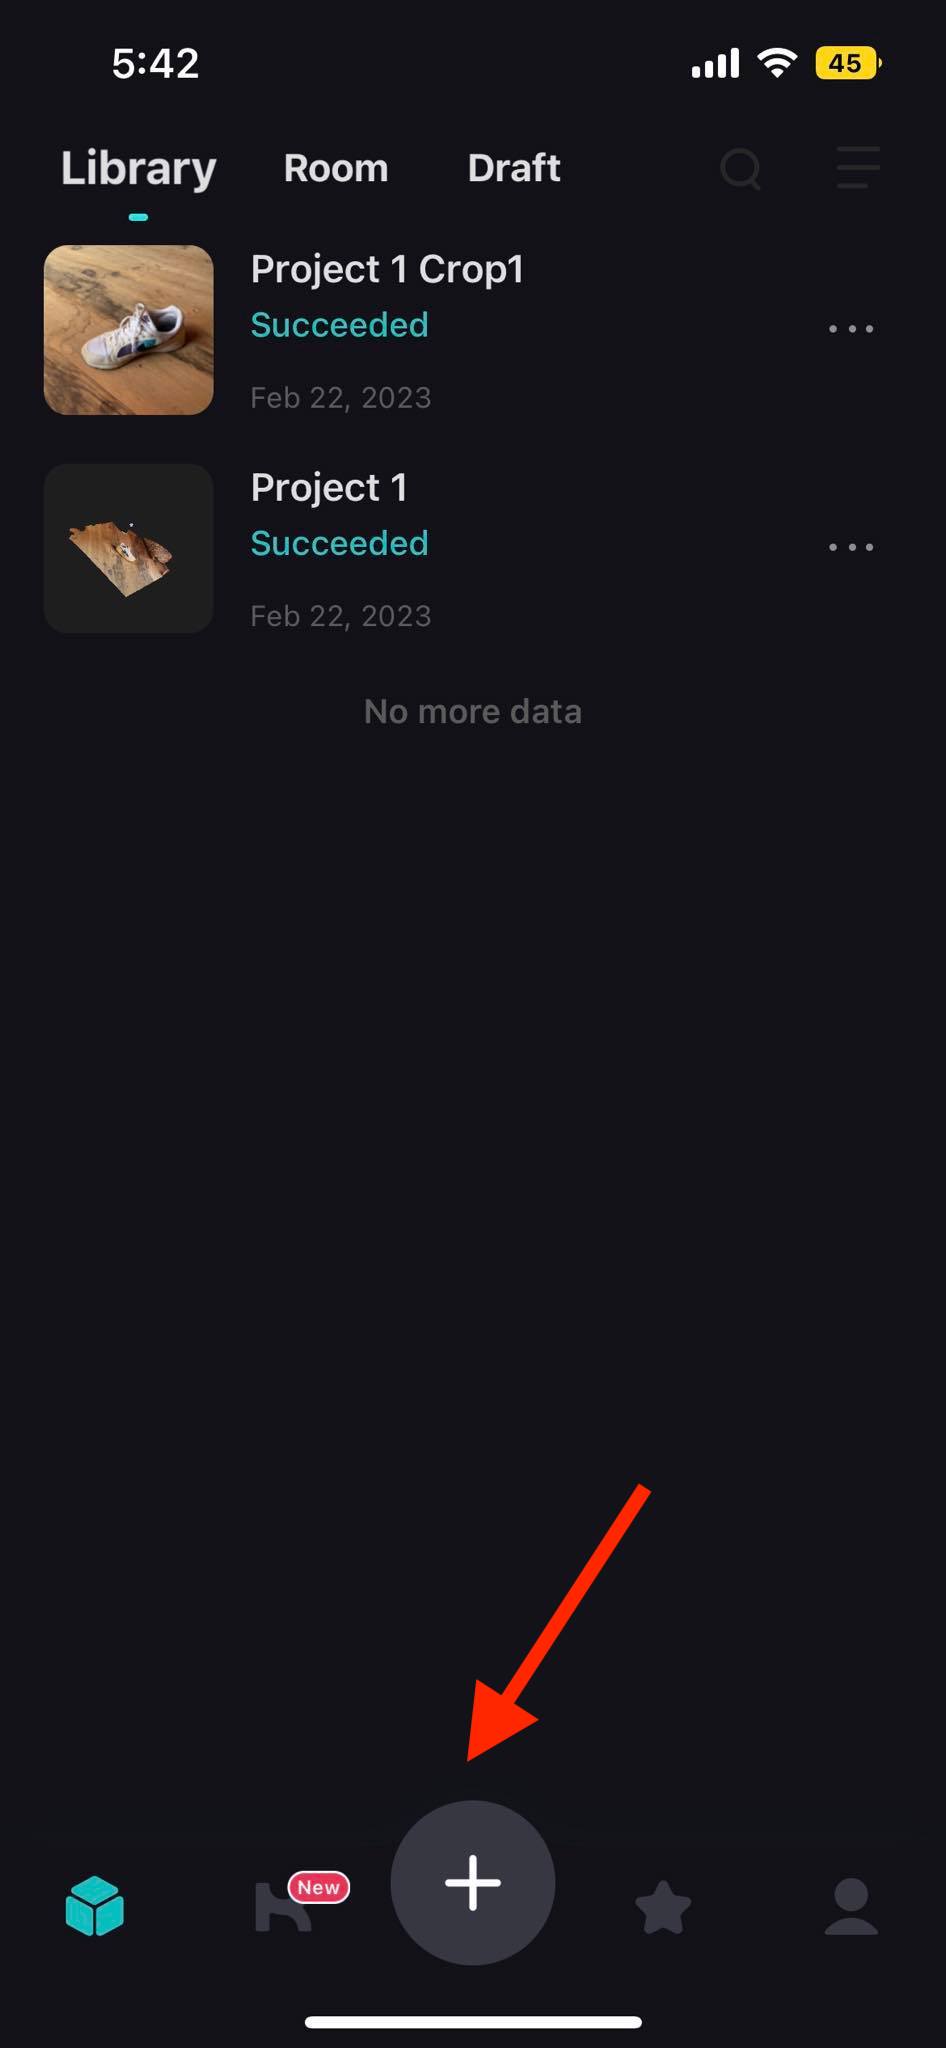
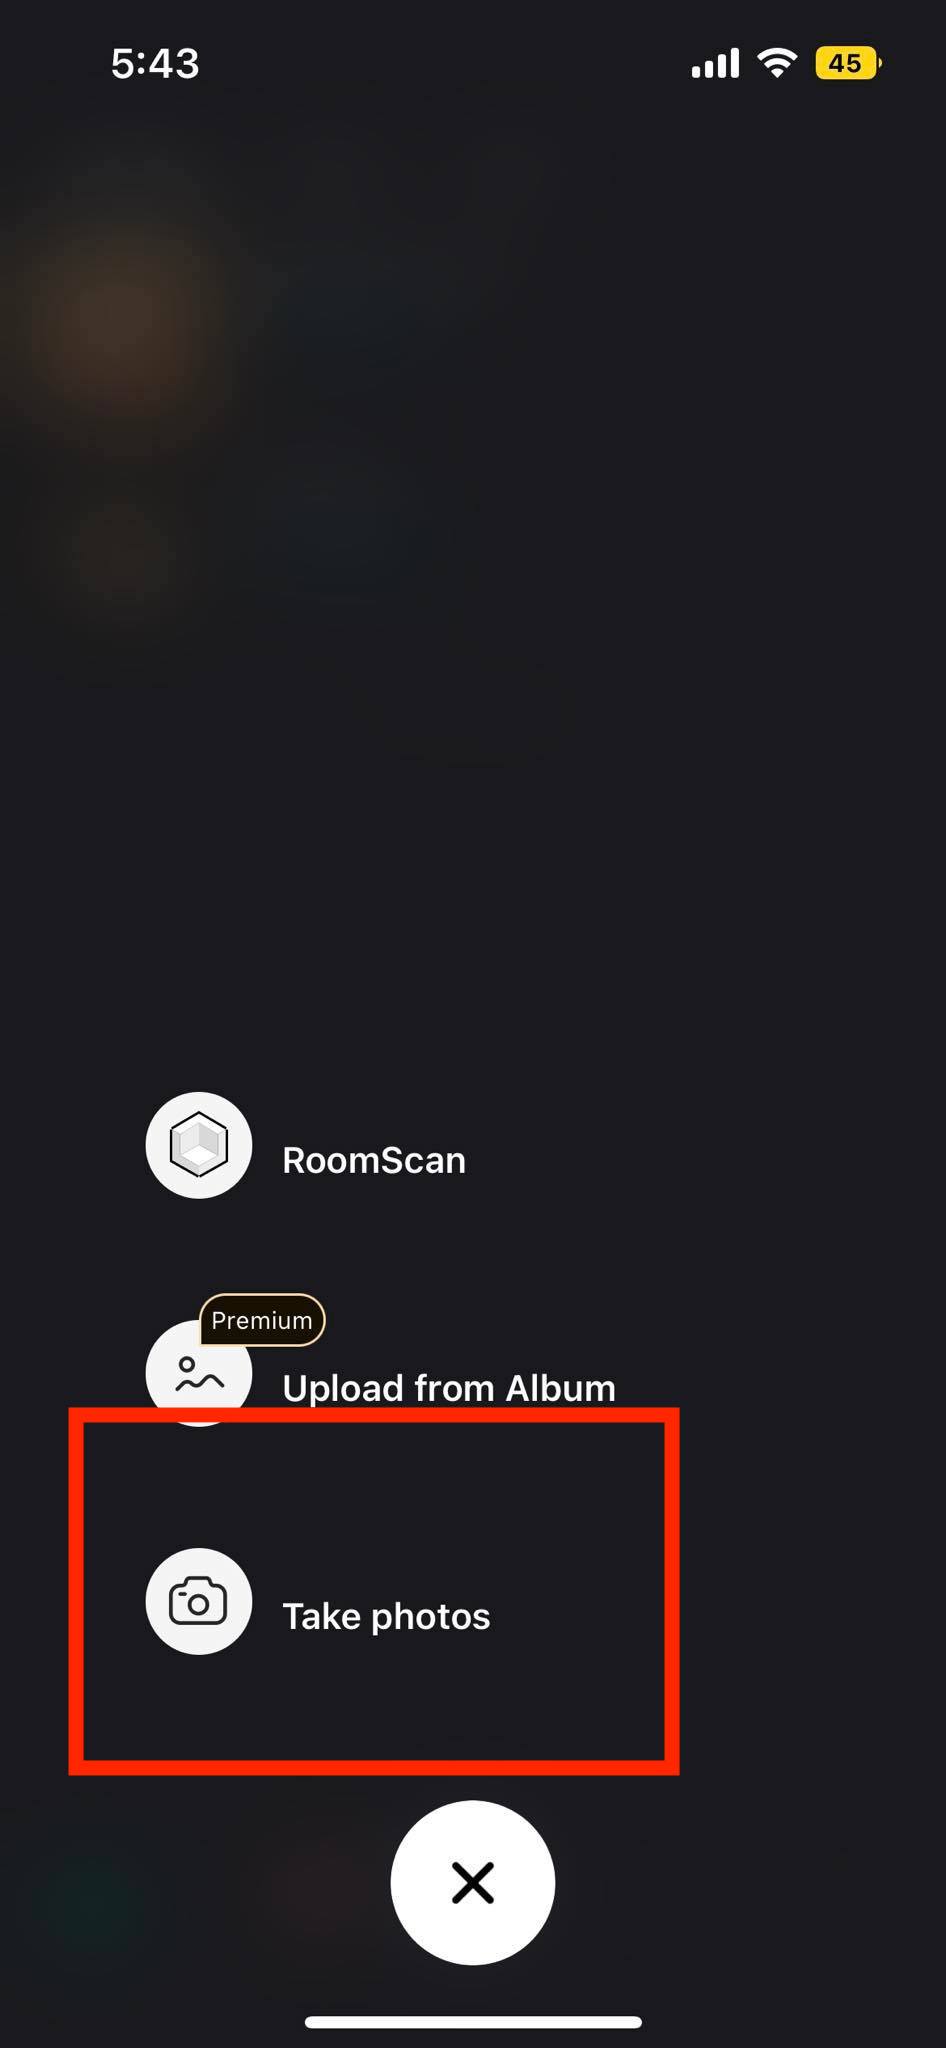
- Take as many photos of your subject as you can (max 70), trying to capture as many angles as possible.
- Try and have a white background/backdrop (I didn’t follow this for my first scan. A mistake)
- Upload the photos, the app will then create a render with the provided photos. This step takes a while.
- Once the render is complete, you can check your scan, you can crop the scan and even add more pictures if you see any deficiencies in your render. (this is very useful)
- You can export the render as an STL and edit it on another software of your choice.
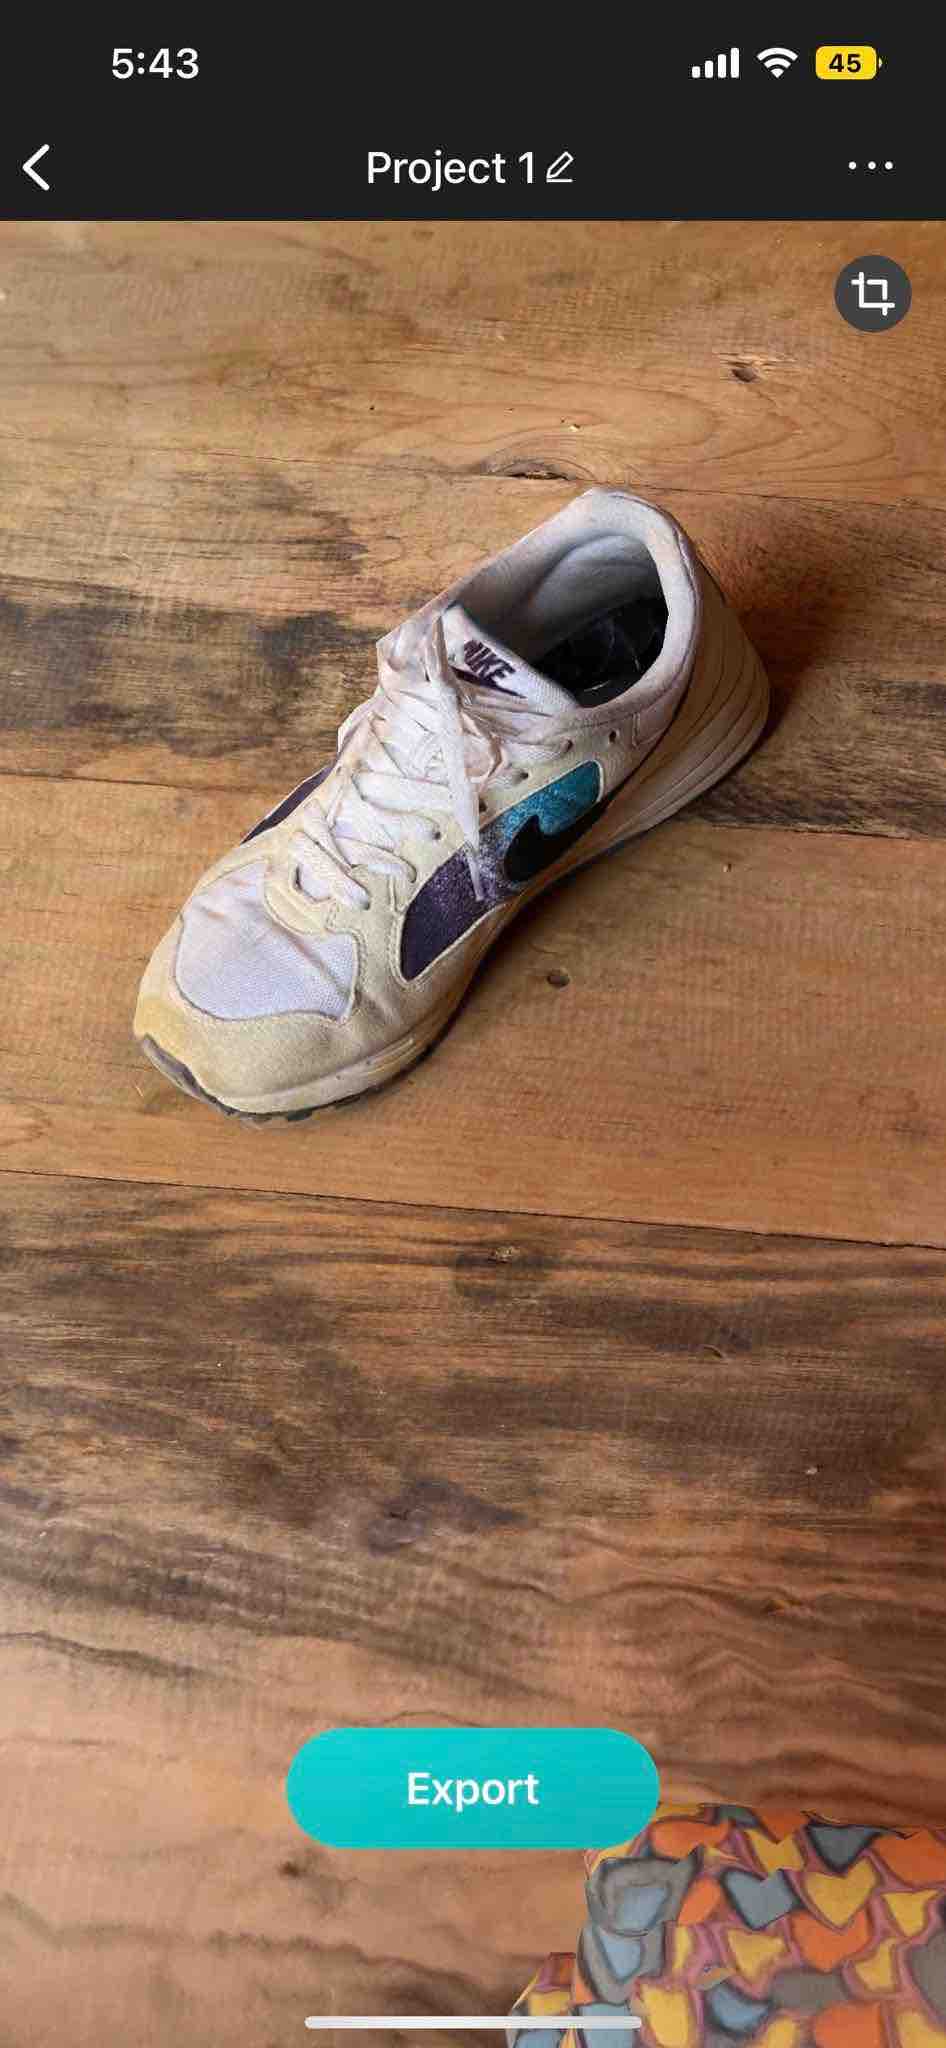
Initial Try
I went ahead and scanned a shoe (apologies for the dirty shoe haha) but it was just to try out the app. The scan worked:
Final Model
After playing around with Kiri after my first try, I then scanned a model that I was actually interested in.
The model:
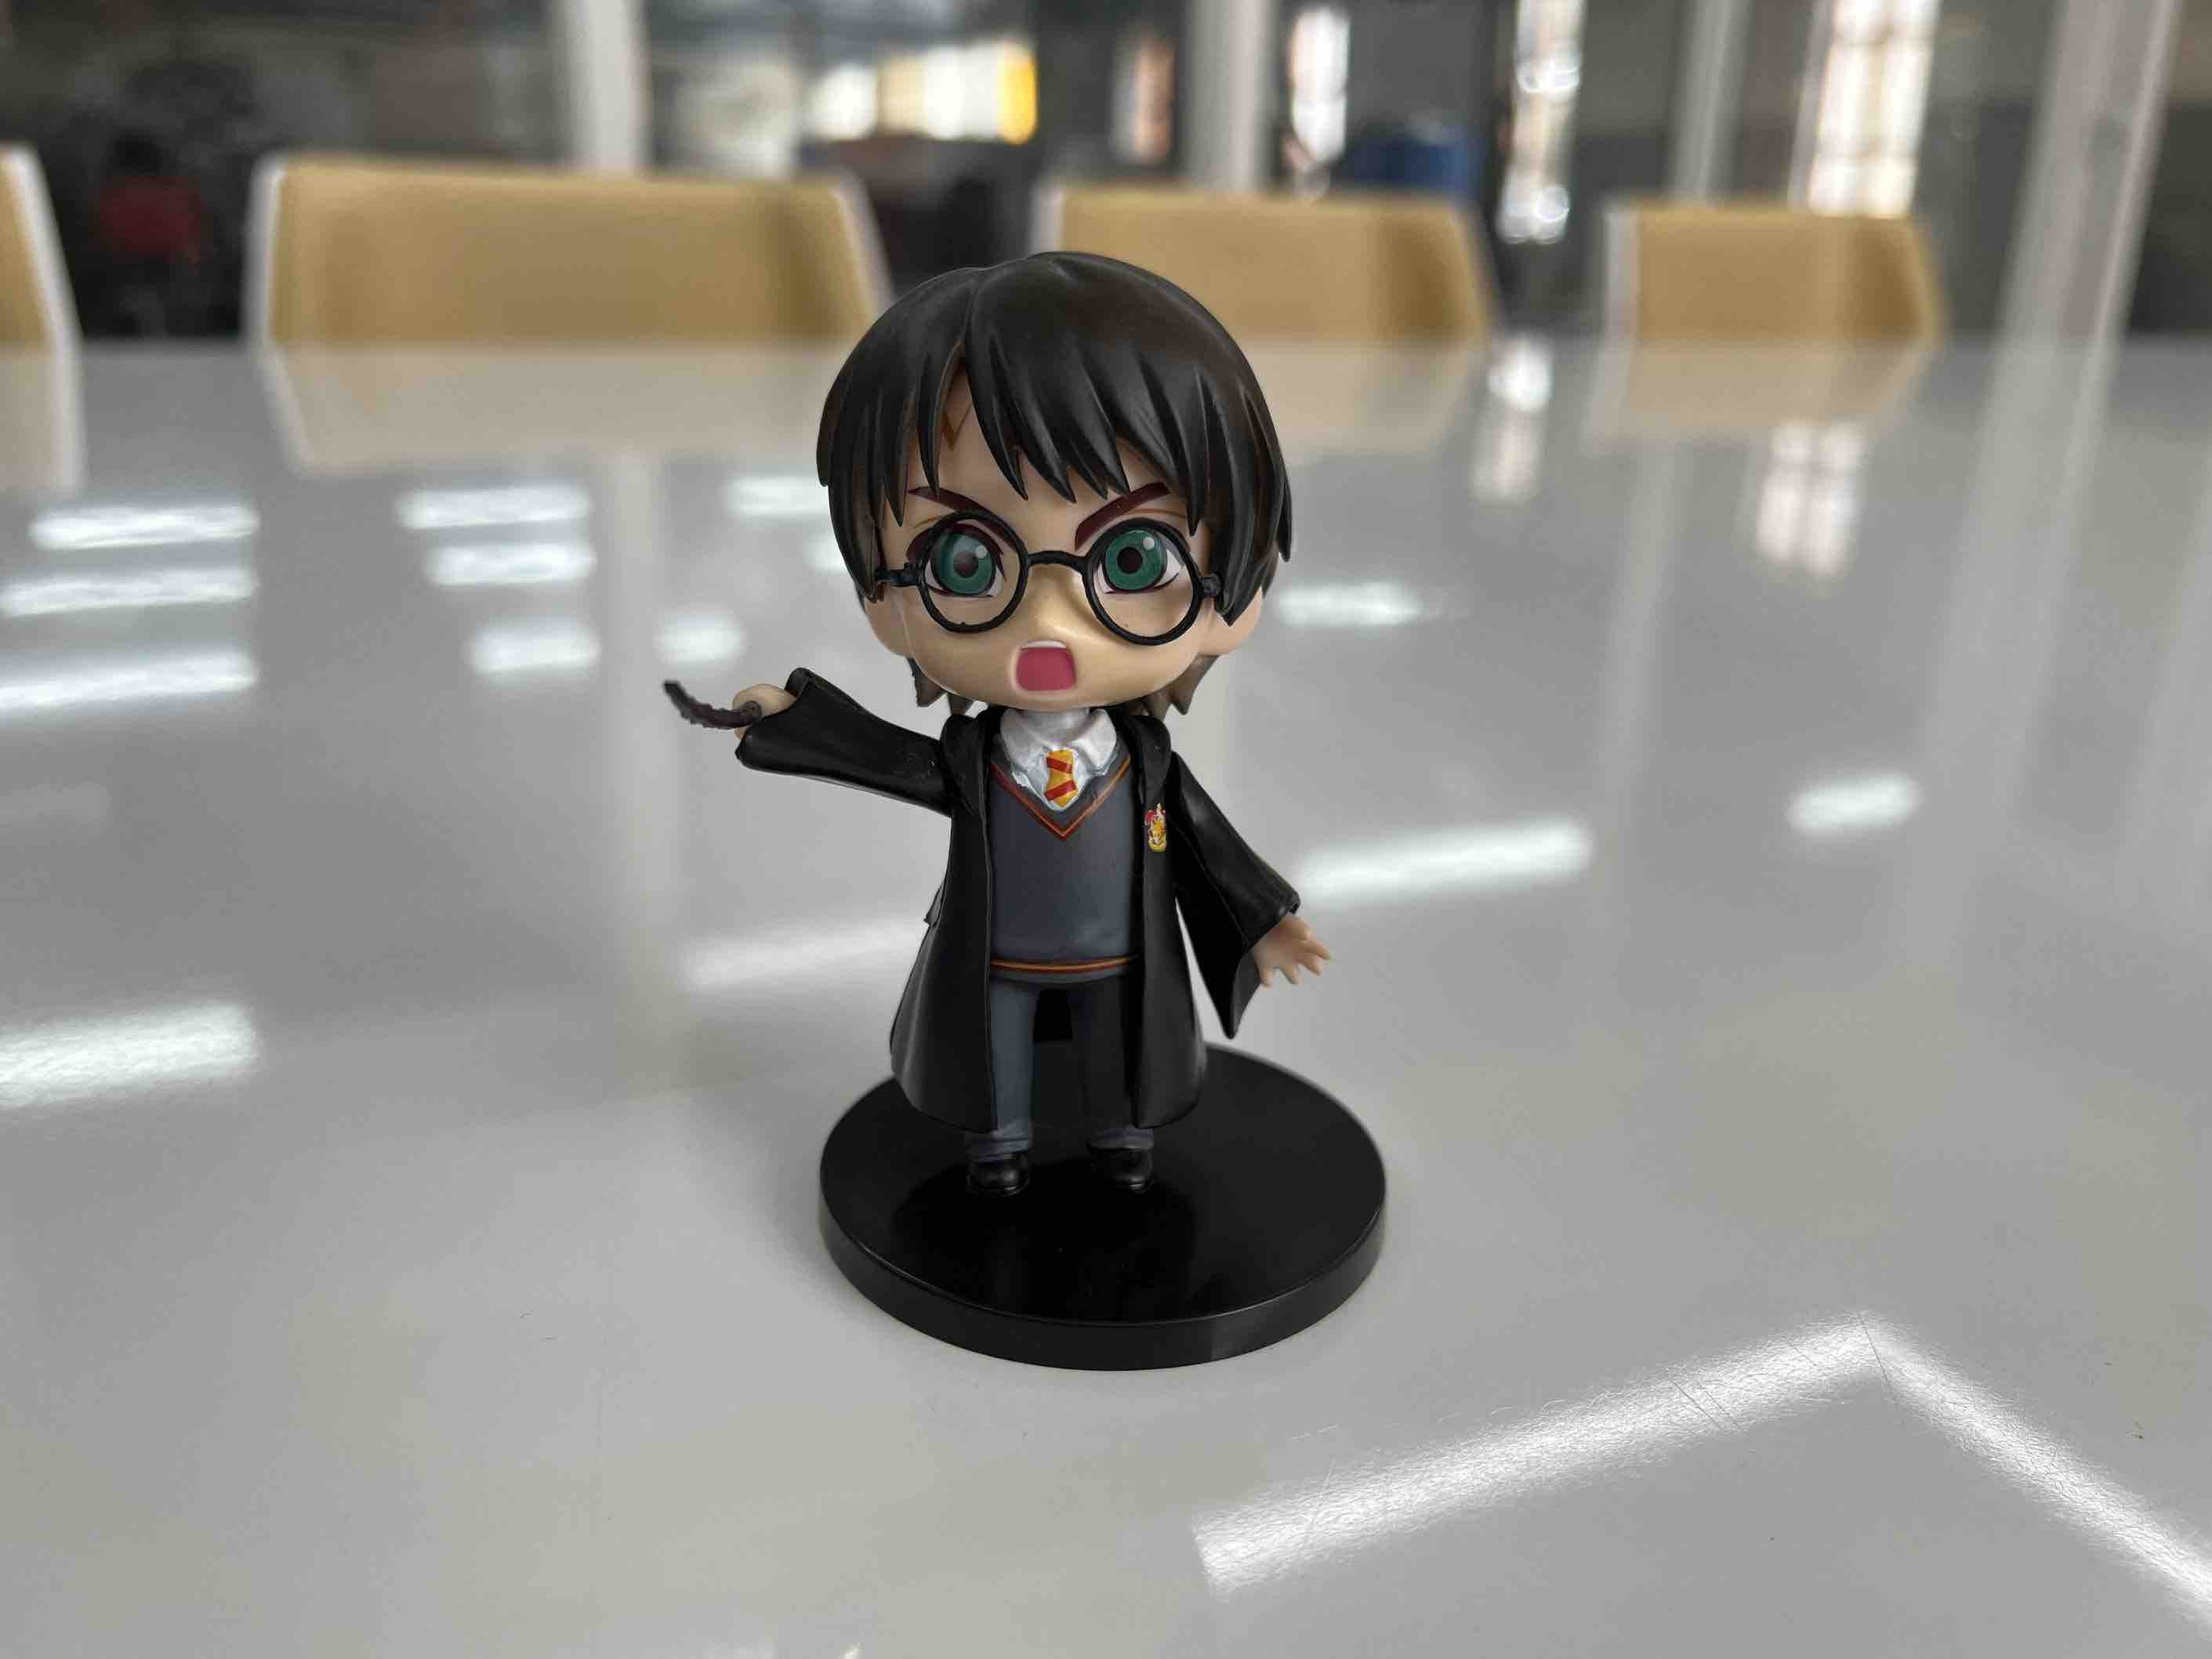
This time, I made sure to have a clear white background for ease of post processing since Kiri scans the background as well.
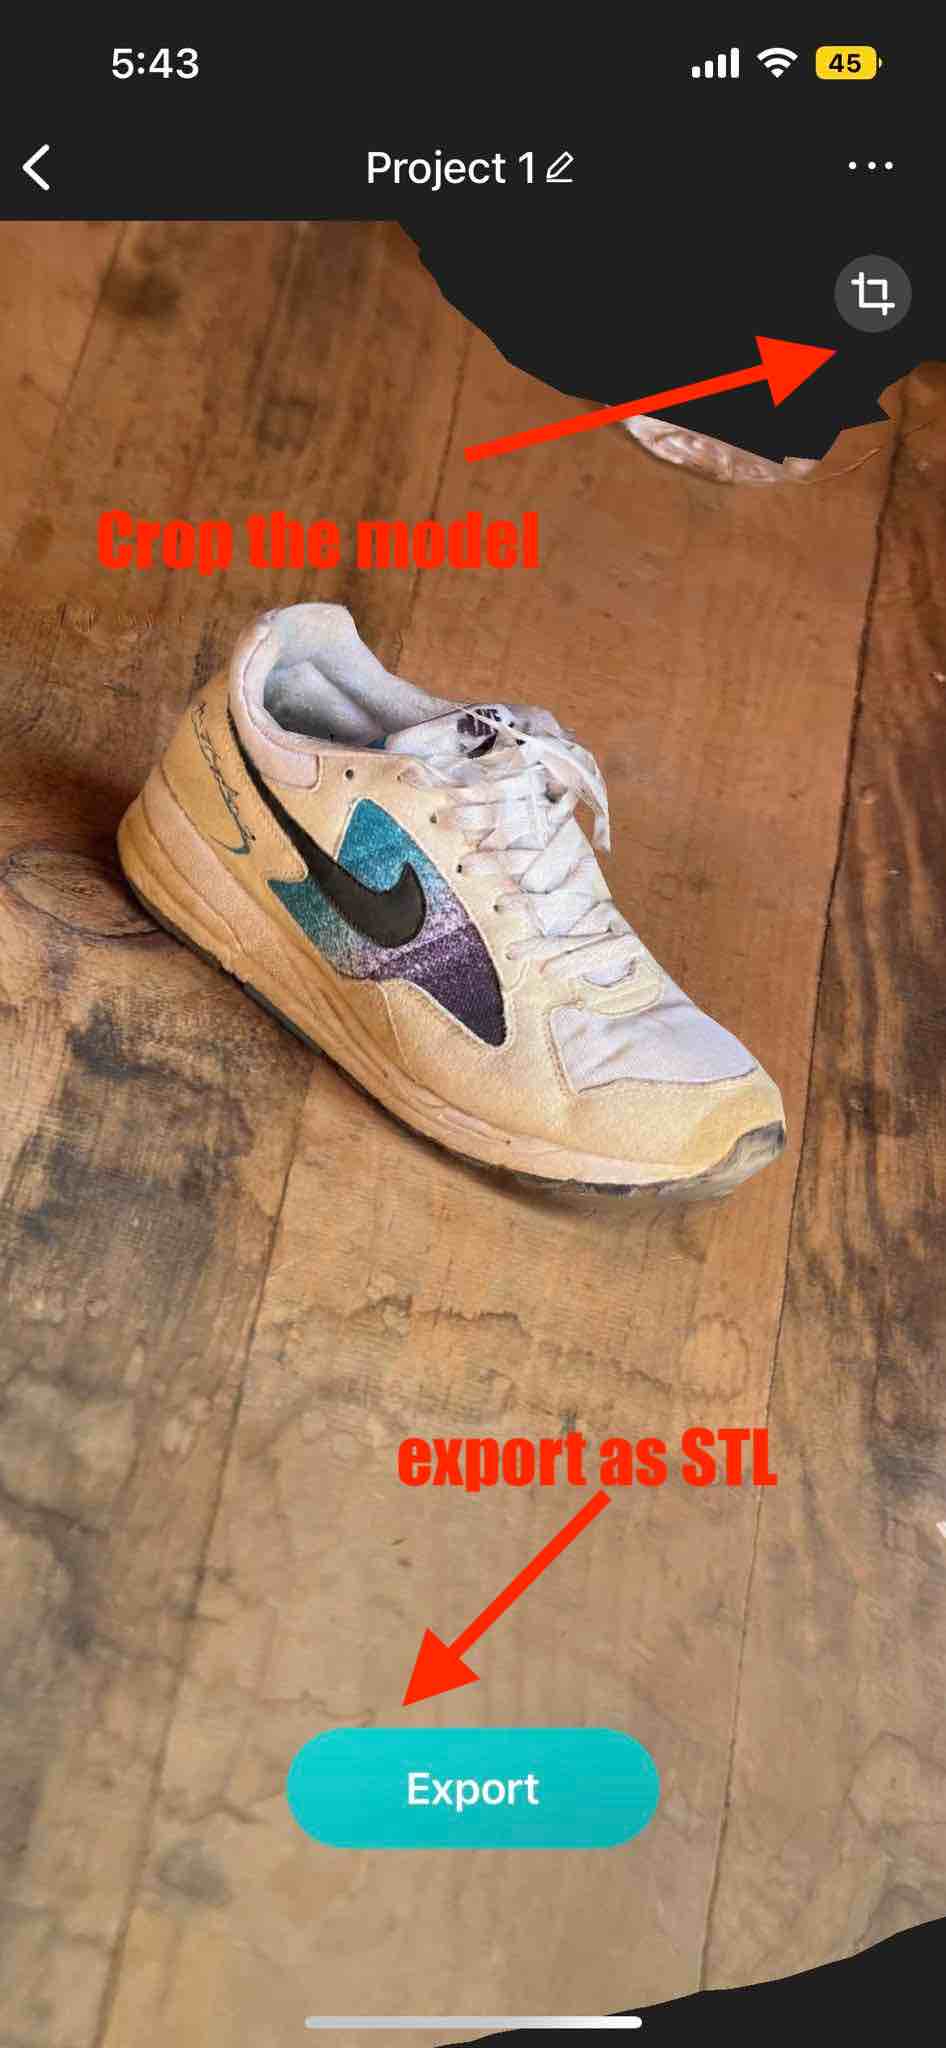
After the scan:
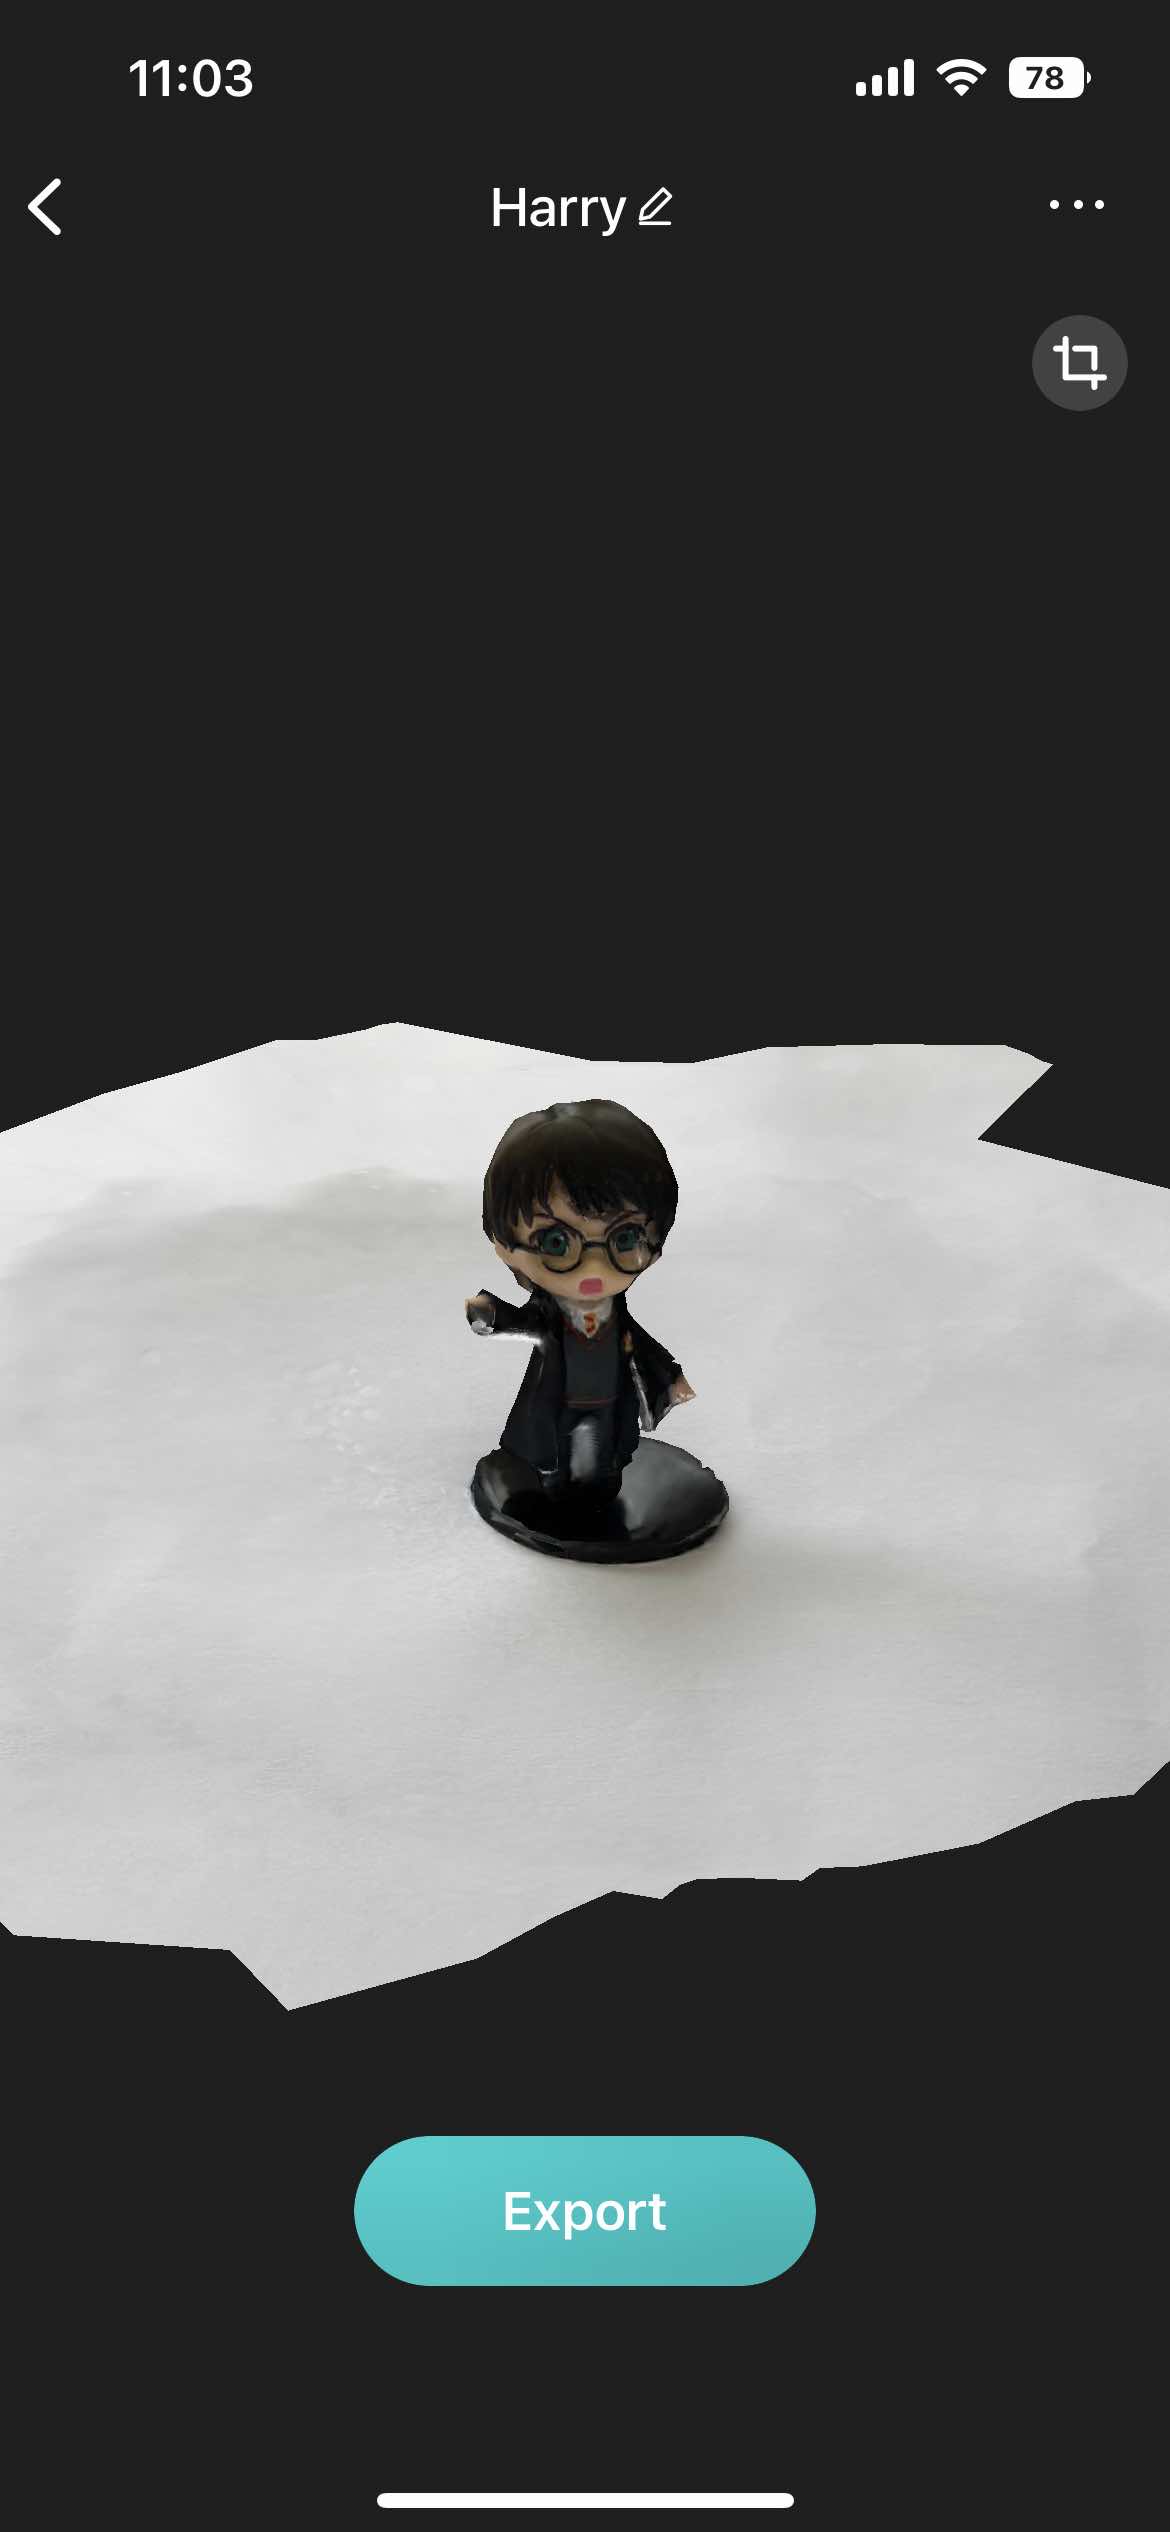
This was the model before cropping. I hit the crop icon on the top right and then the following crop interface shows up where I cropped the background.
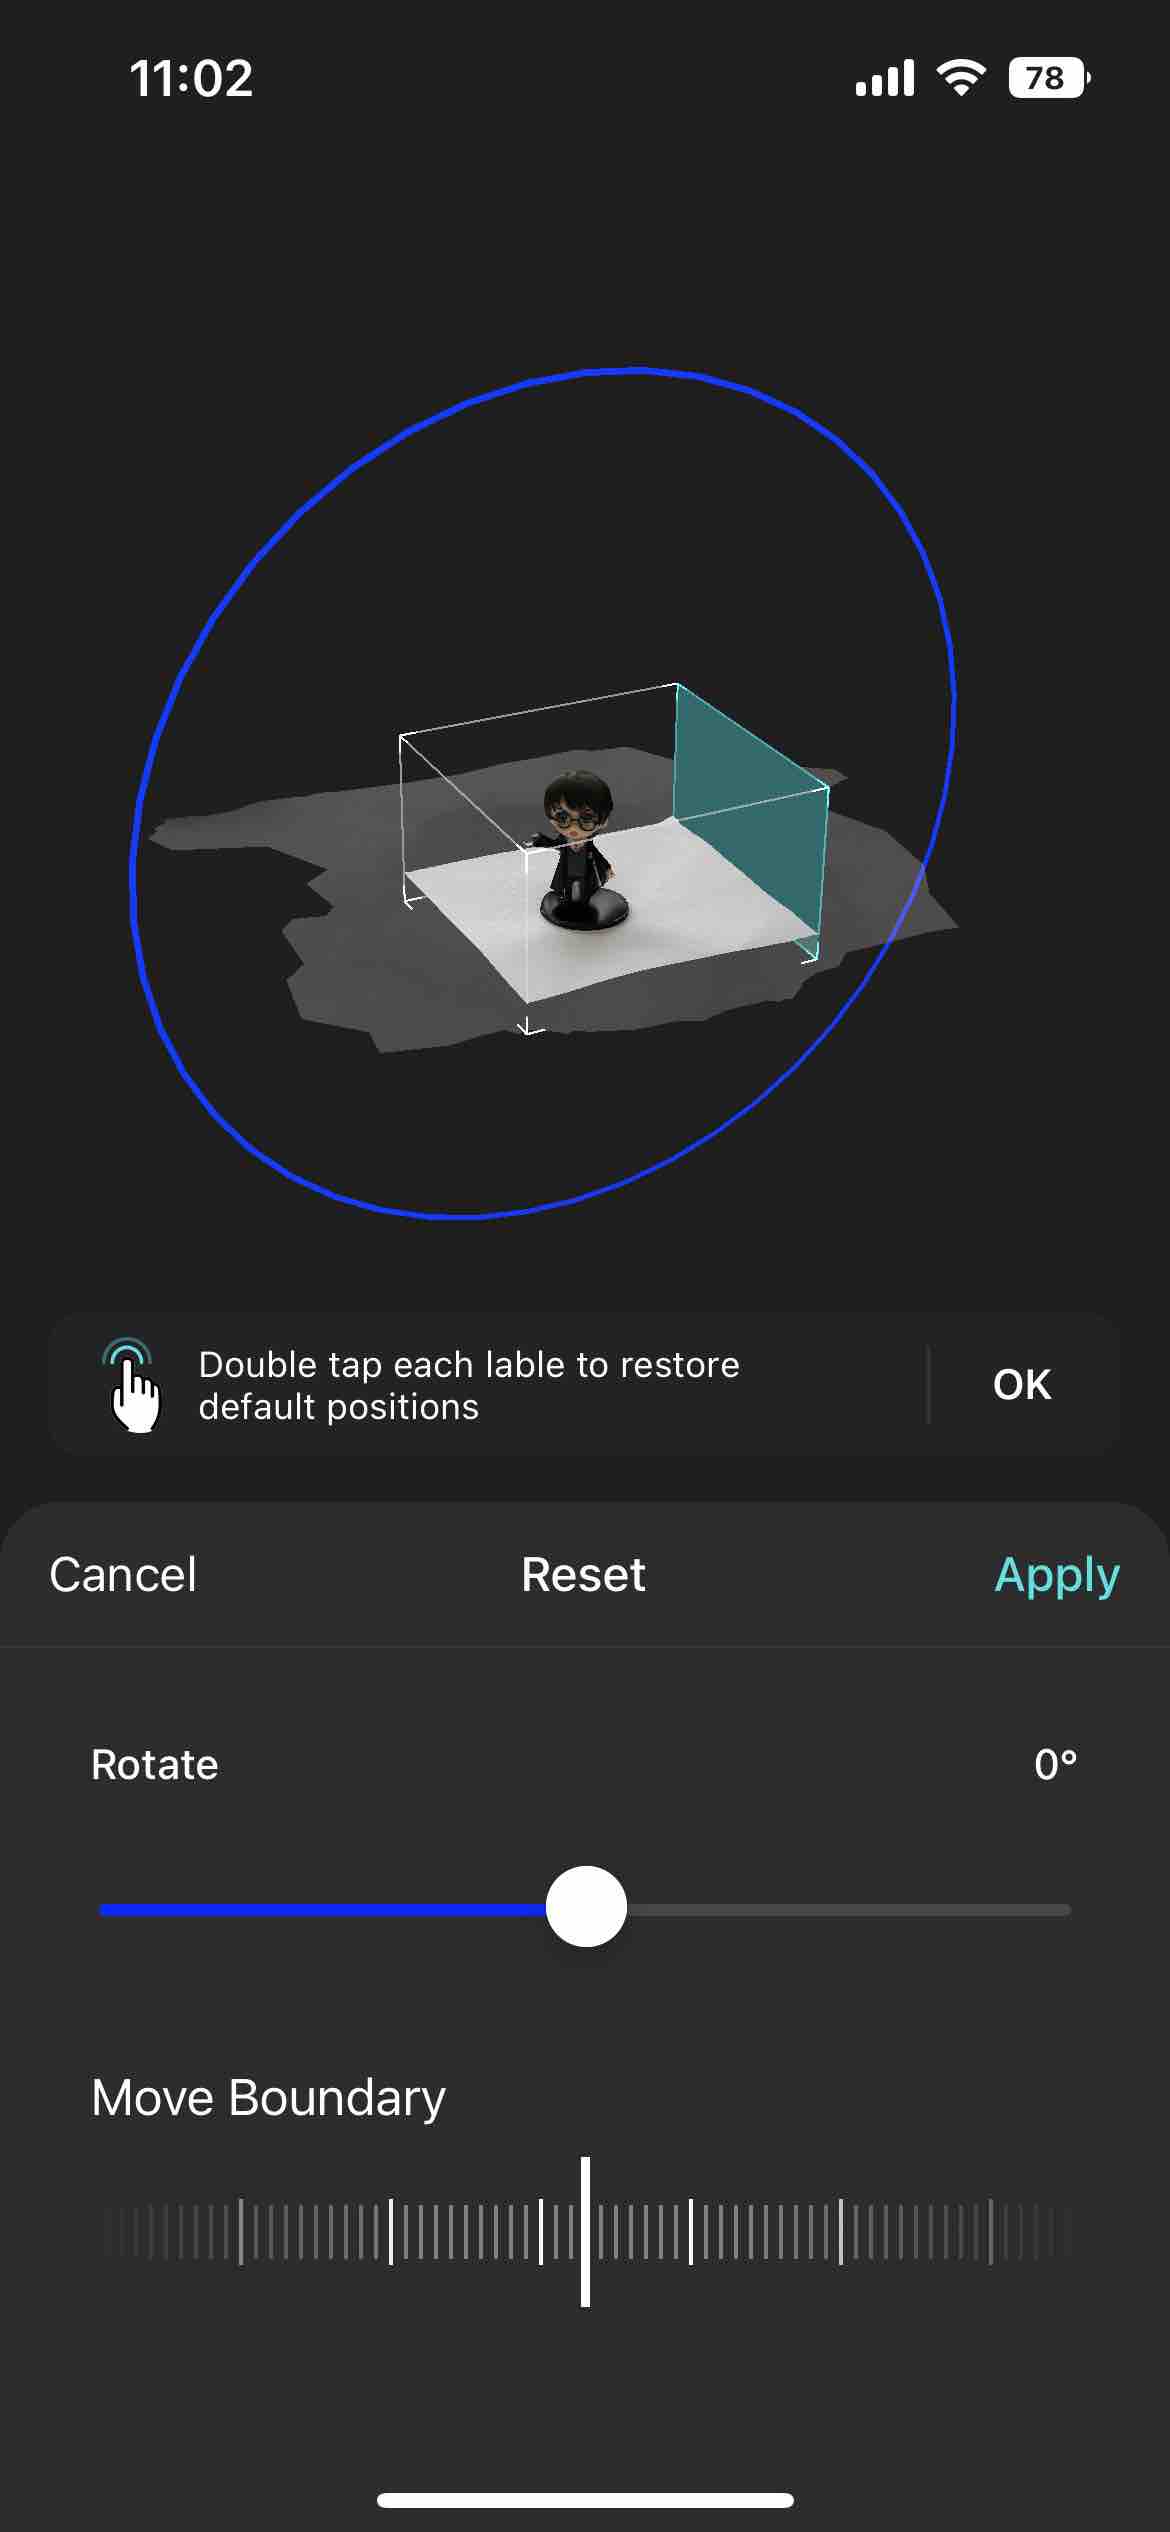
After Cropping I hit apply and I go the final model which I was happy with.
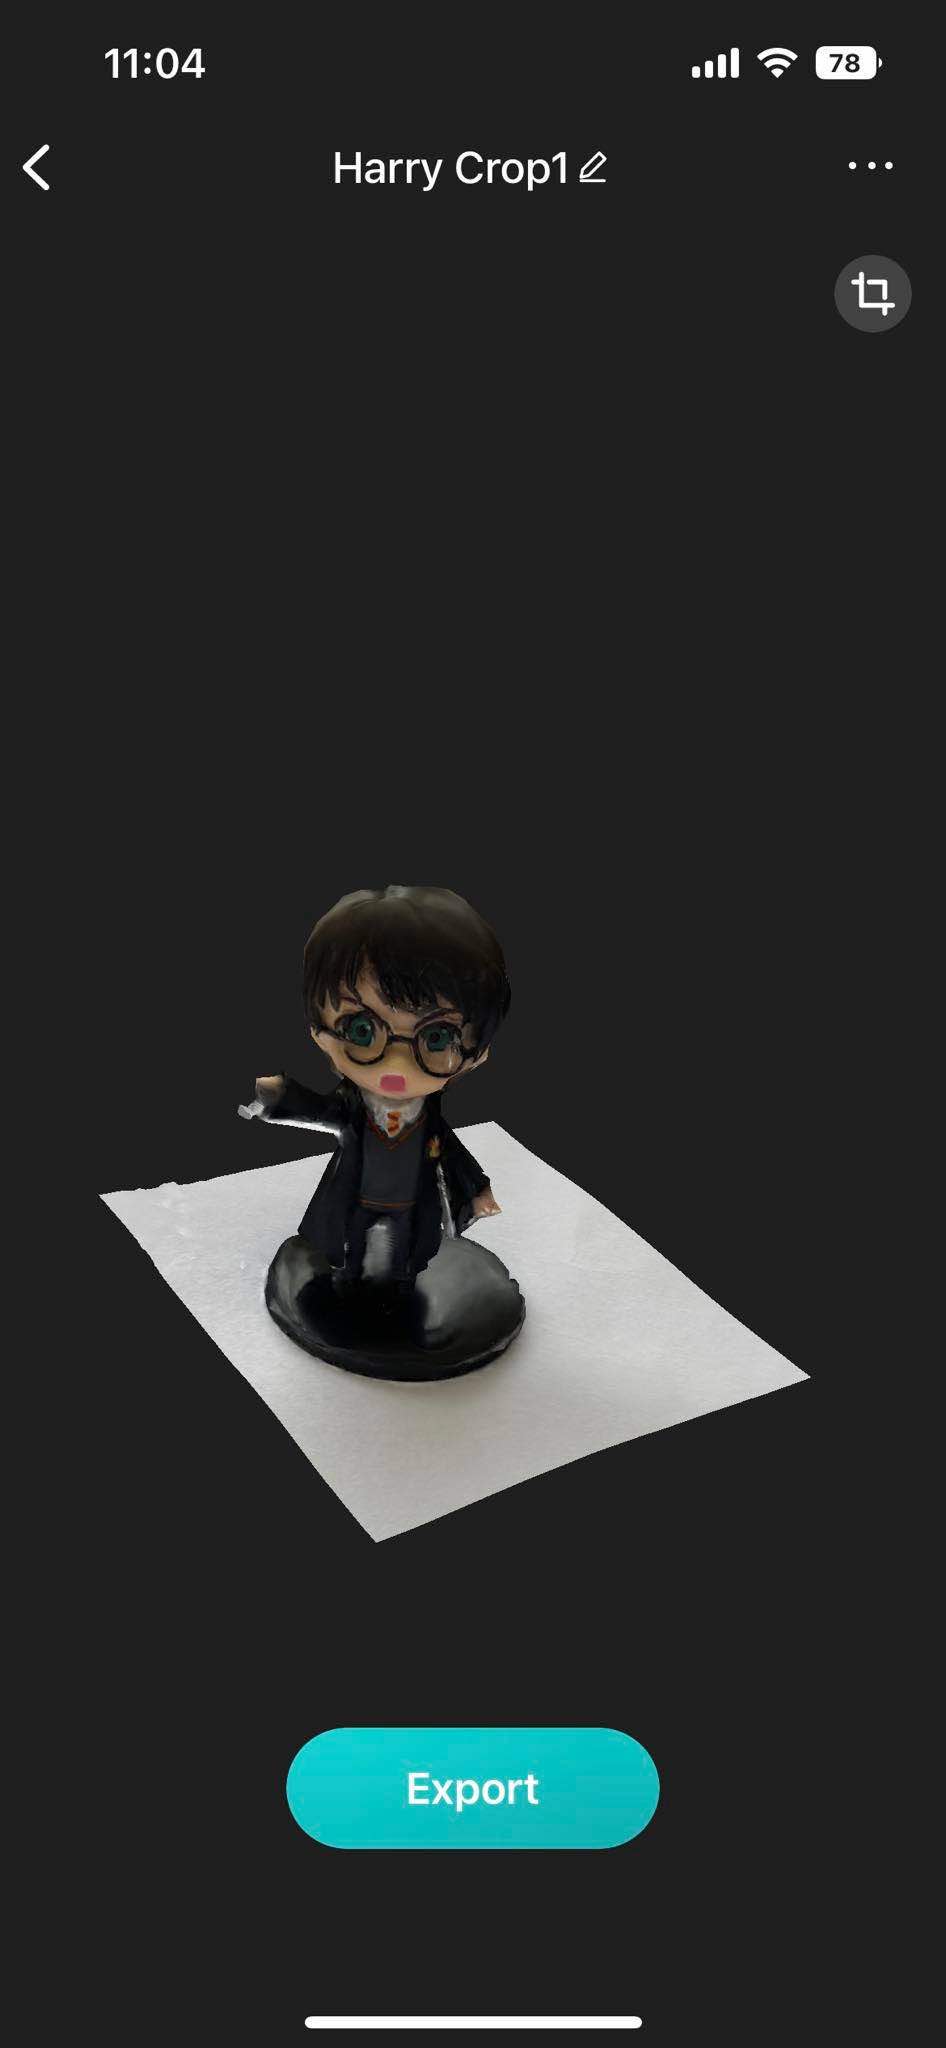
Then I exported the model as n obj file, since I was going to import it into GrabCAD for printing in the Stratasys J55. Since we still cannot use the printer due to expired material I will not be printing it this time. But wanted to set up the model in GrabCAD.
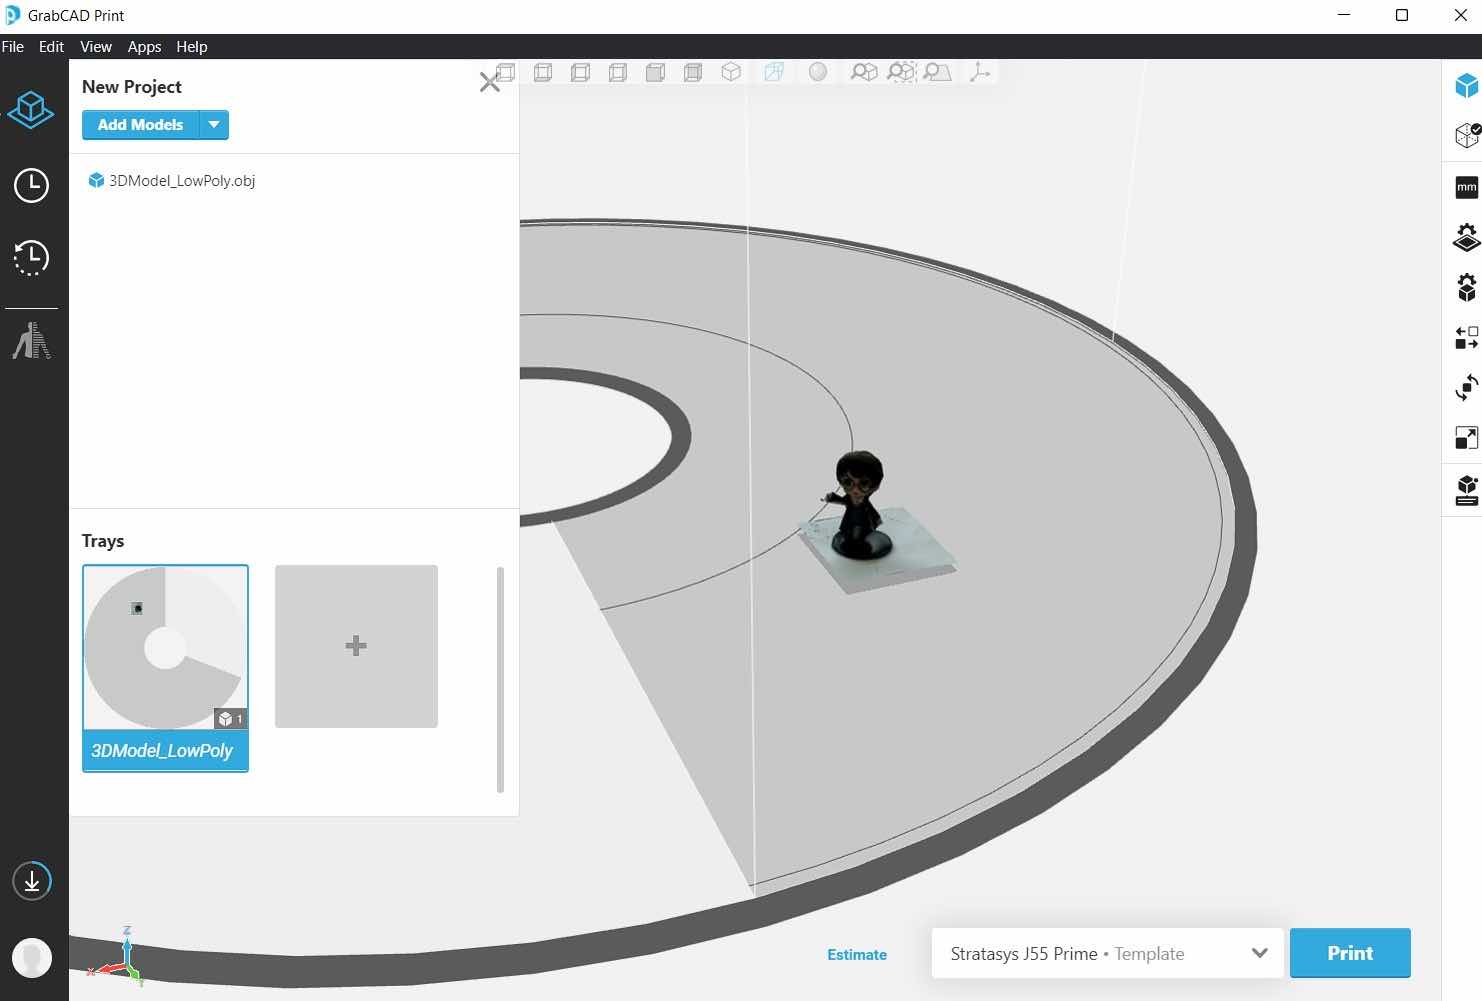
I ensured to select the Stratasys J55 prime for the template after which the bed changes to the circular shape of the J55. Then I scaled my object and made sure it fit in the bounds of the work bed.