Week 12. Molding and Casting
Group Assignment:
Takeaways: * Always read the datasheets for the materials * Milling the wax takes a while so plan accordingly
Individual Assignment
Hero Shots:
This week we dove into the world of molding and casting to mass produce things at a faster rate as compared to a 3D printer.
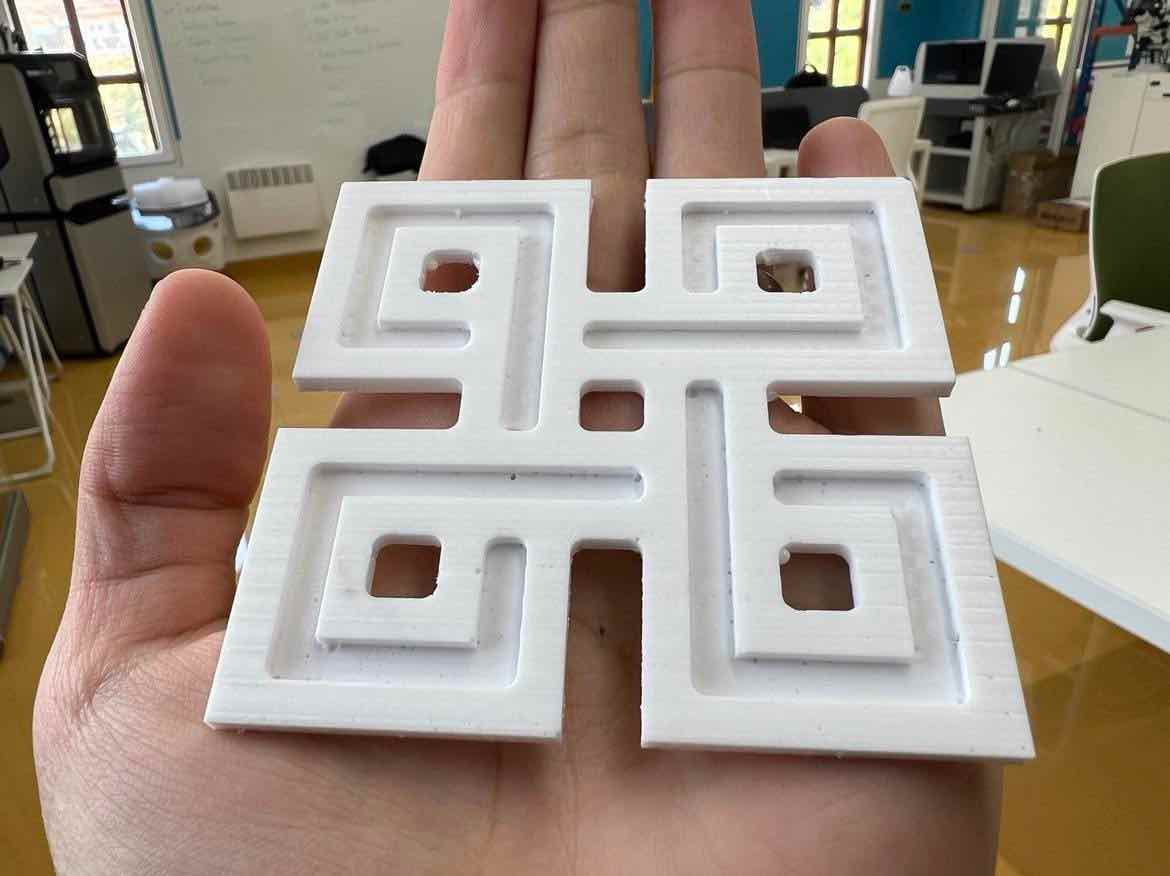
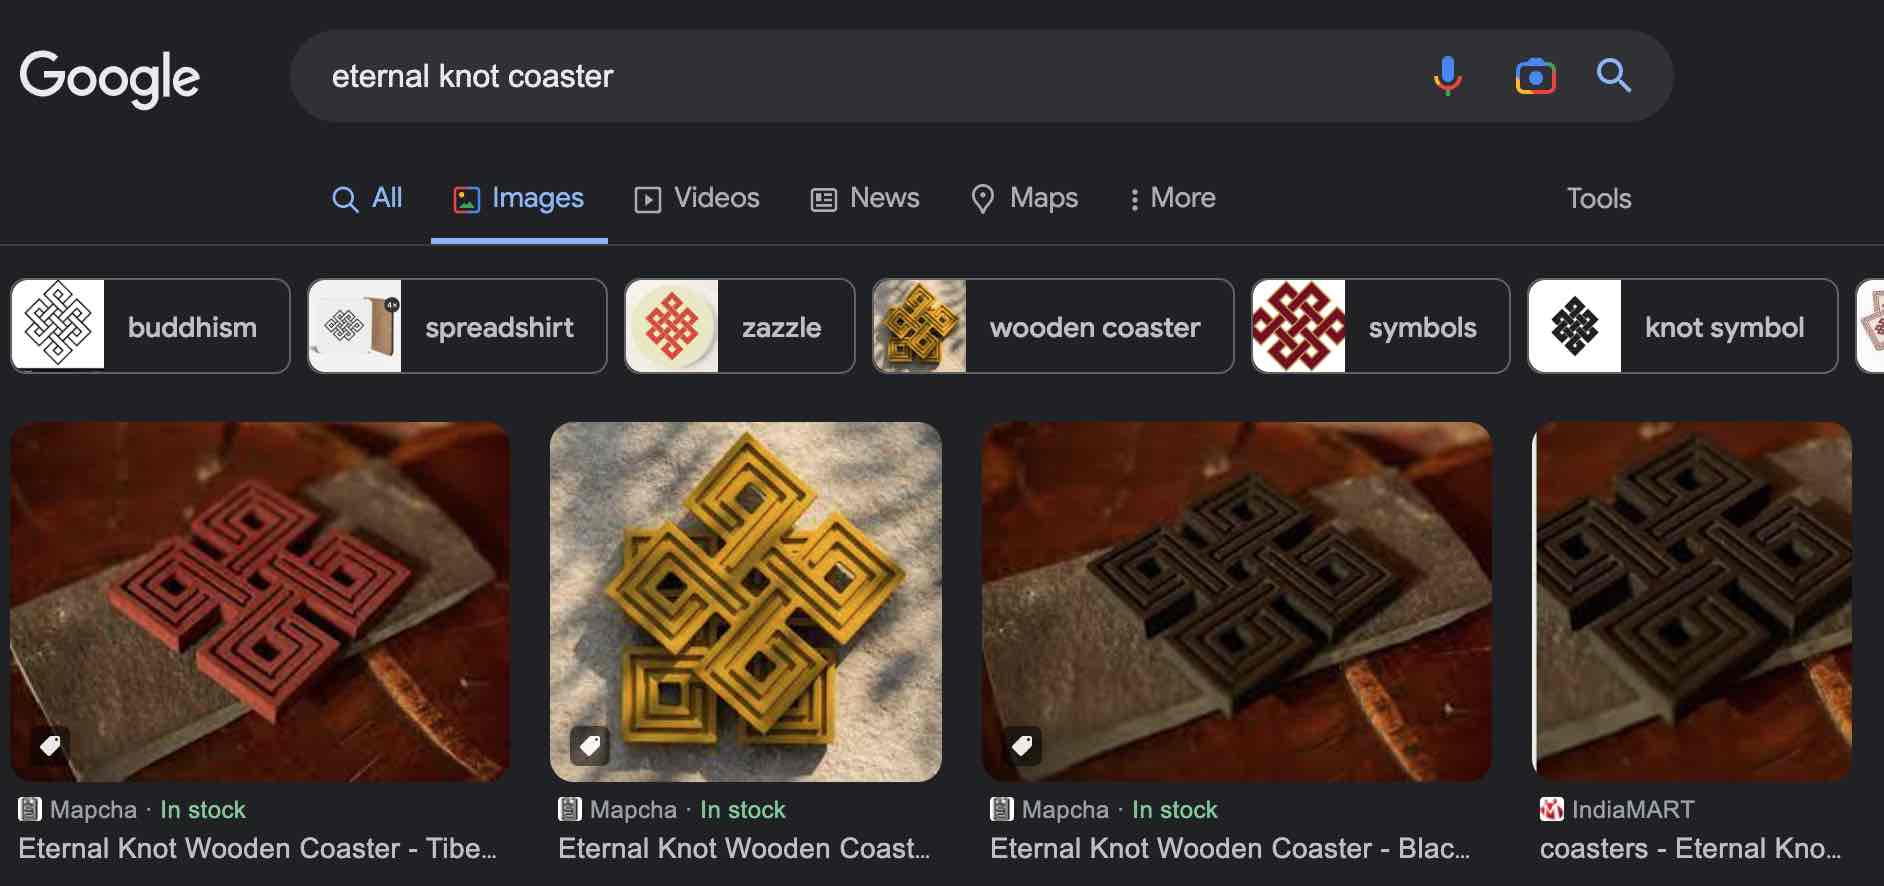
I was thinking about what I wanted to make this week so I thought about making some eternal knot coasters. I scoured the internet and found this really cool design that I wanted to replicate:
I will use Fusion360 to design it, Modela Player 4 to get the tool path and .prn file and the Roland SRM-20 to mill the positive mold on machinable wax
Fusion360
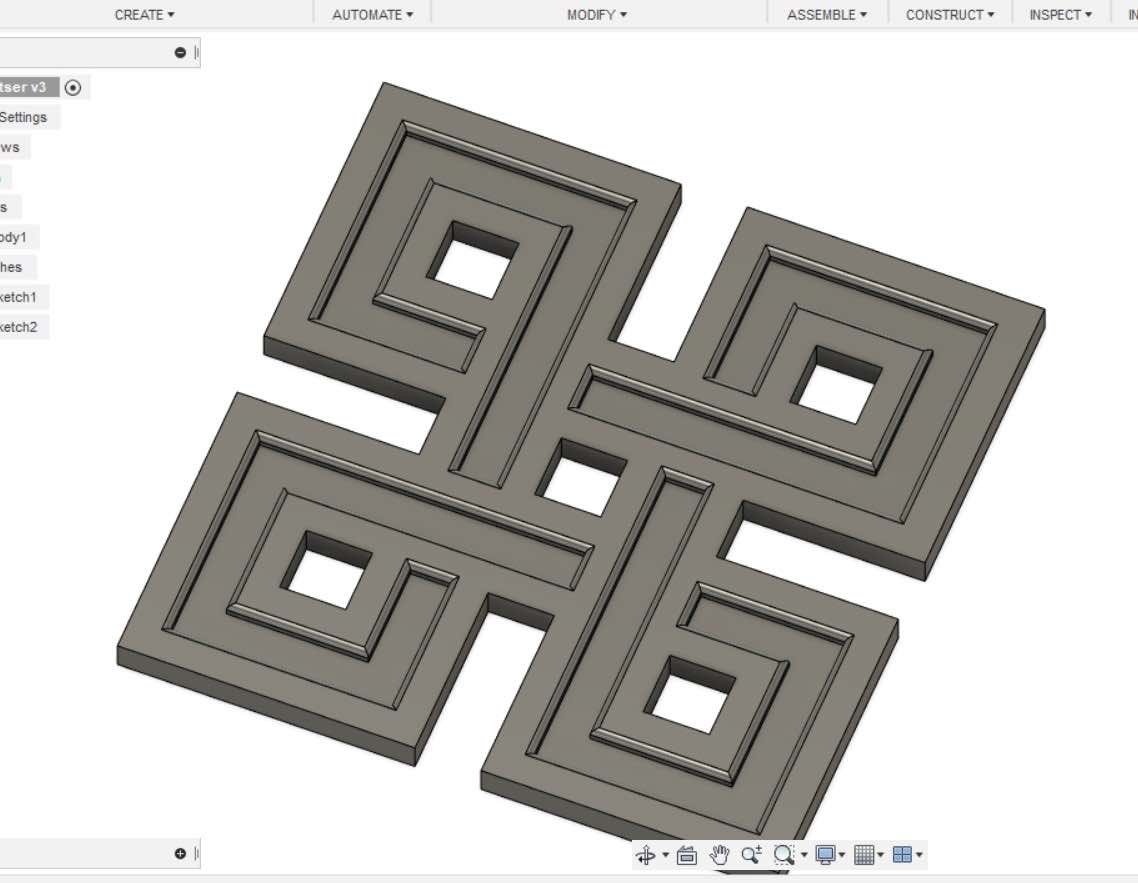
I opened up fusion360 and began designing the eternal knot coaster. I began with the sketch:
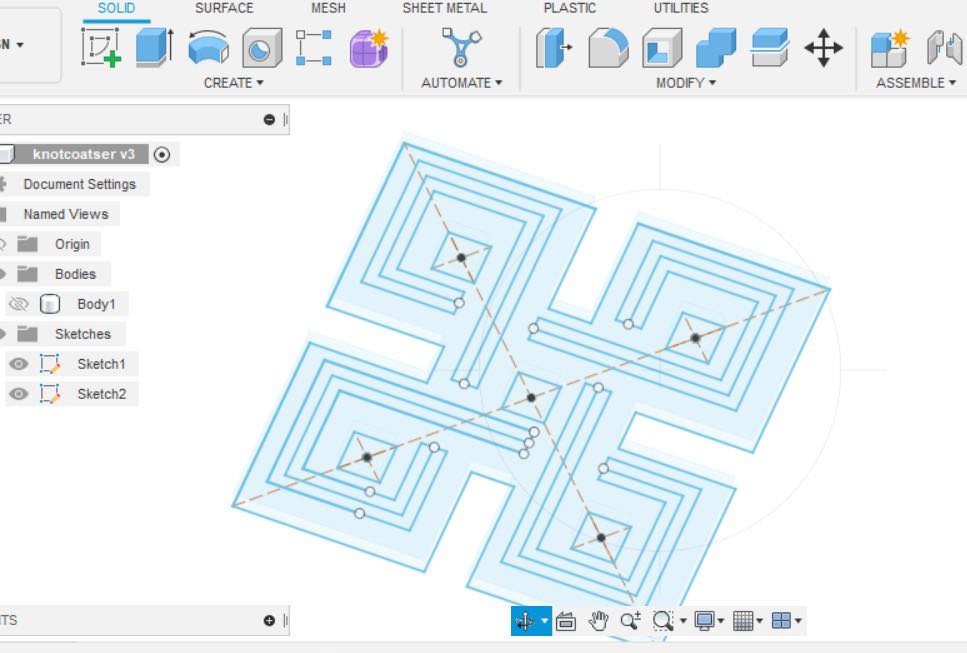
and then extruded it,and then engraved the lines to make it look much more like the original version:
I filleted the edges of the engraved walls in order to increase the complexity of the design and to also test the 3 axis milling capabilities of the machine.
I then exported the file as an stl.
Modela
I then moved to working on the tool path for the milling. For this I used the Modela Player 4.
WorkFlow
-
Open Modela
-
from under
fileopen yourstlfile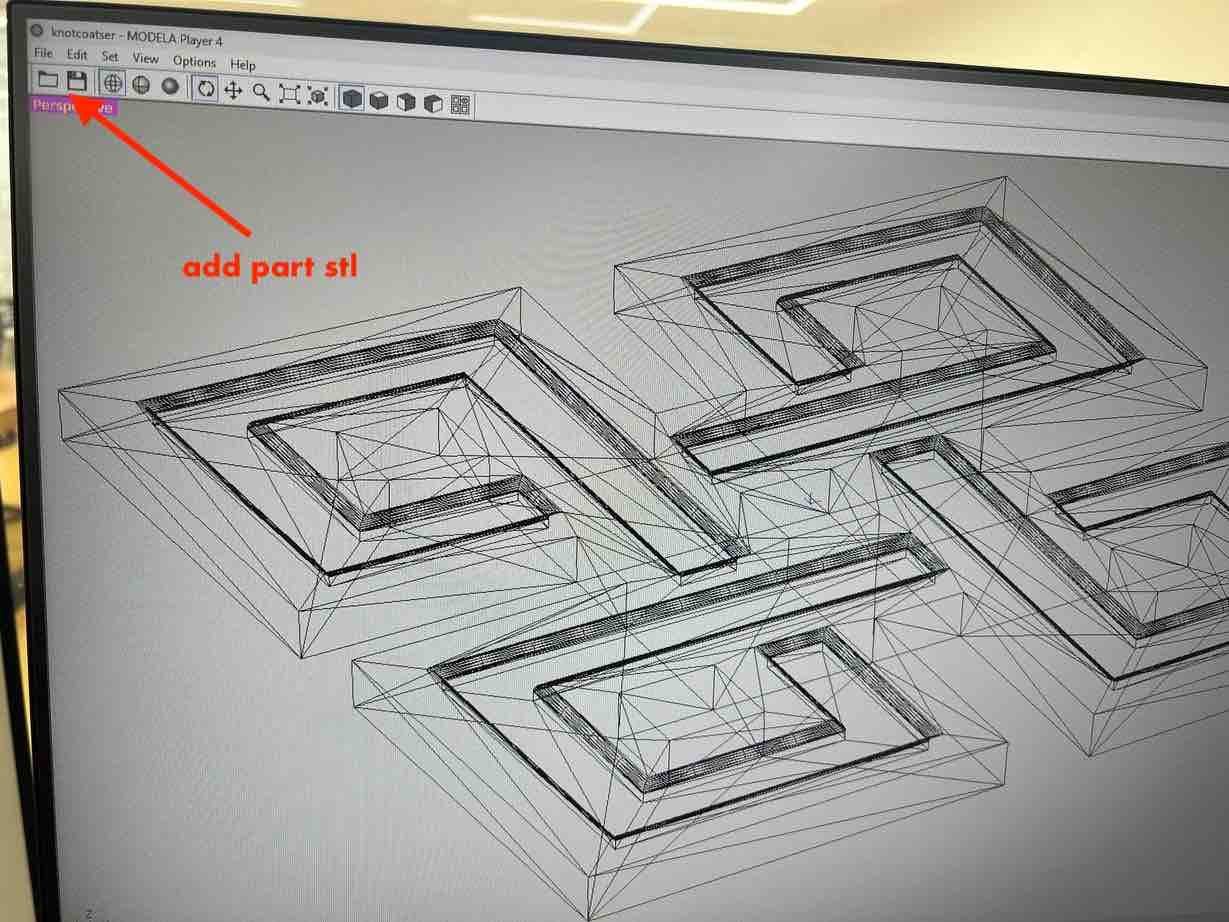
-
From the top right, select the
material. Material:Molding Wax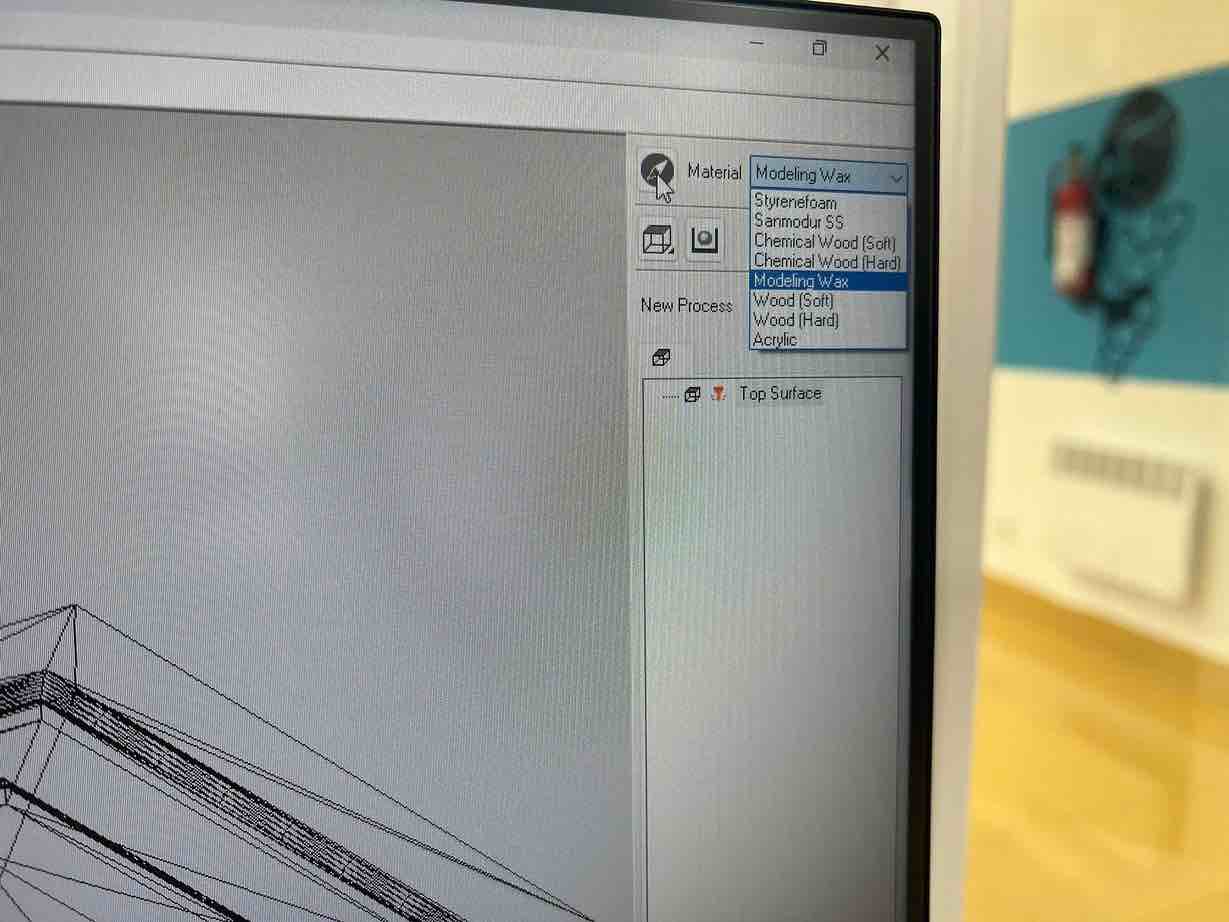
-
Next click on the
modelicon (the compass looking one) next to it, check the dimensions of your part an ensure toselect Top Surface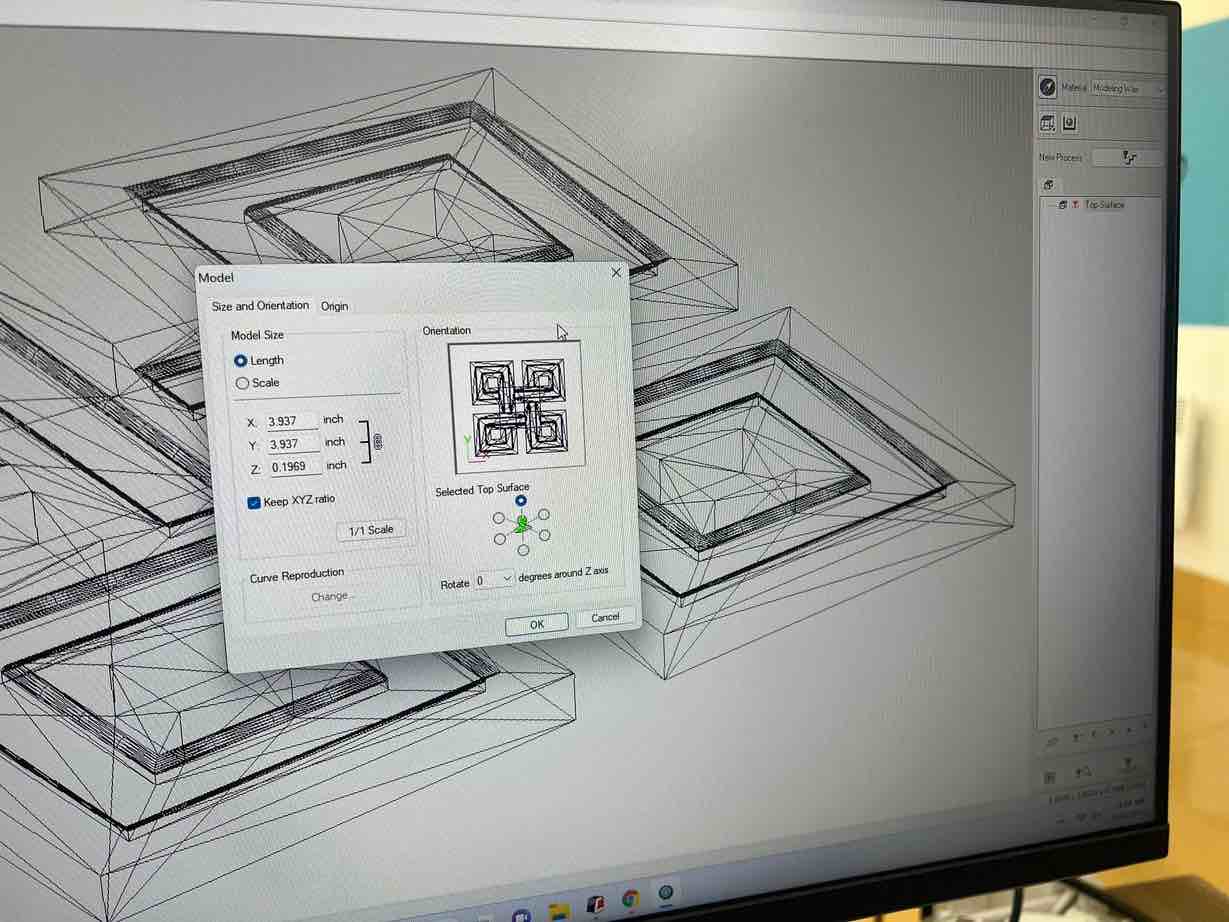
-
In the next
origin tab, ensure to select the bottom right as the origin.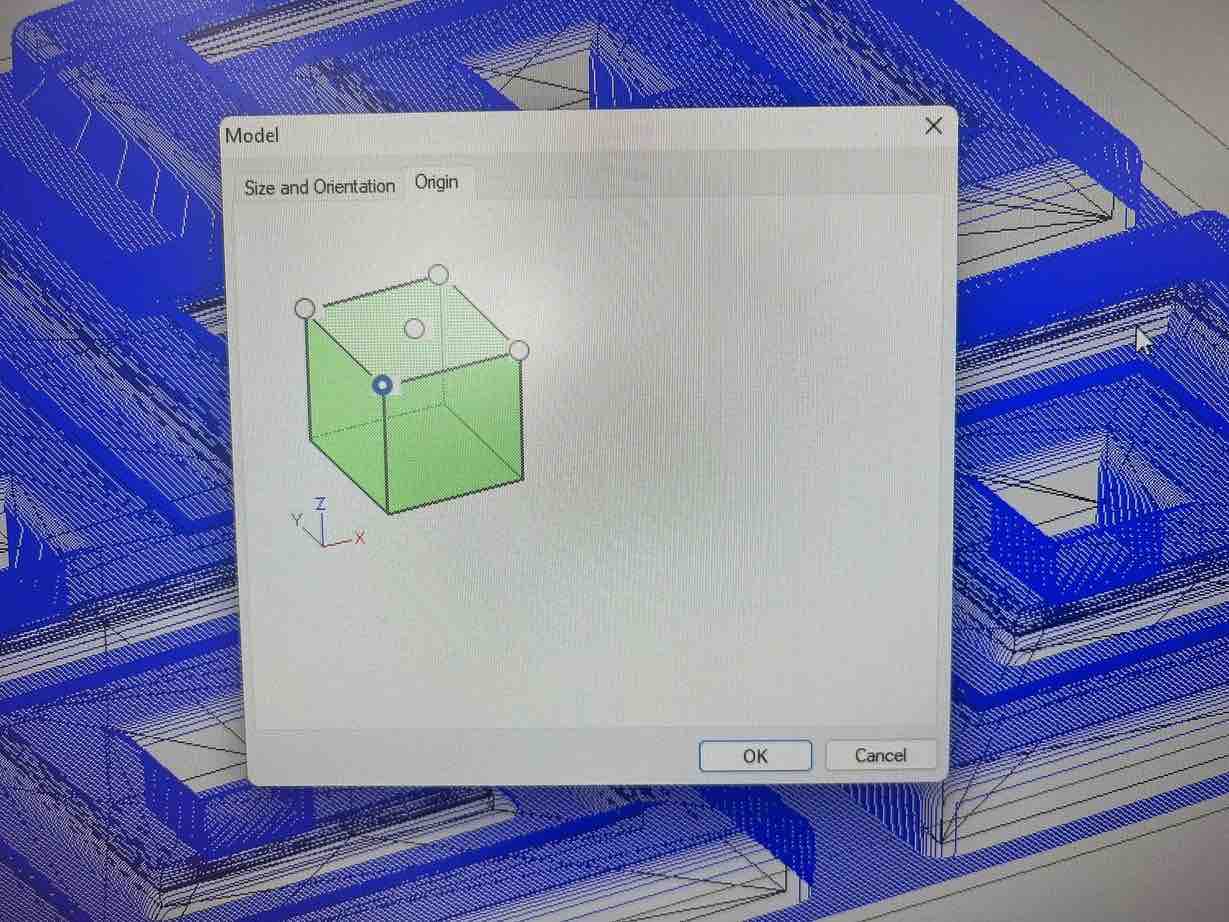
Mill 1: Roughing
-
Now hit
New Process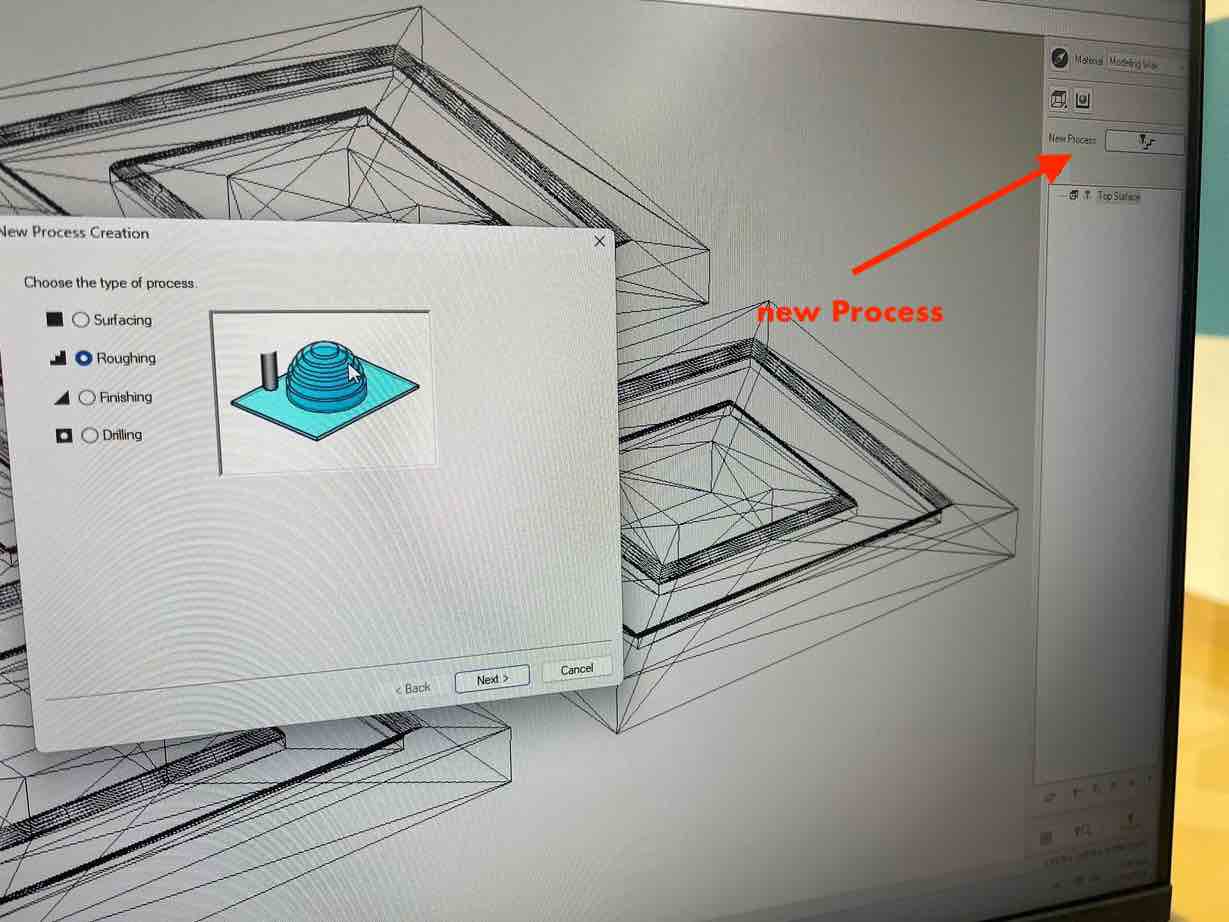
-
select the
Roughing Process. Select thetopcutting surface. -
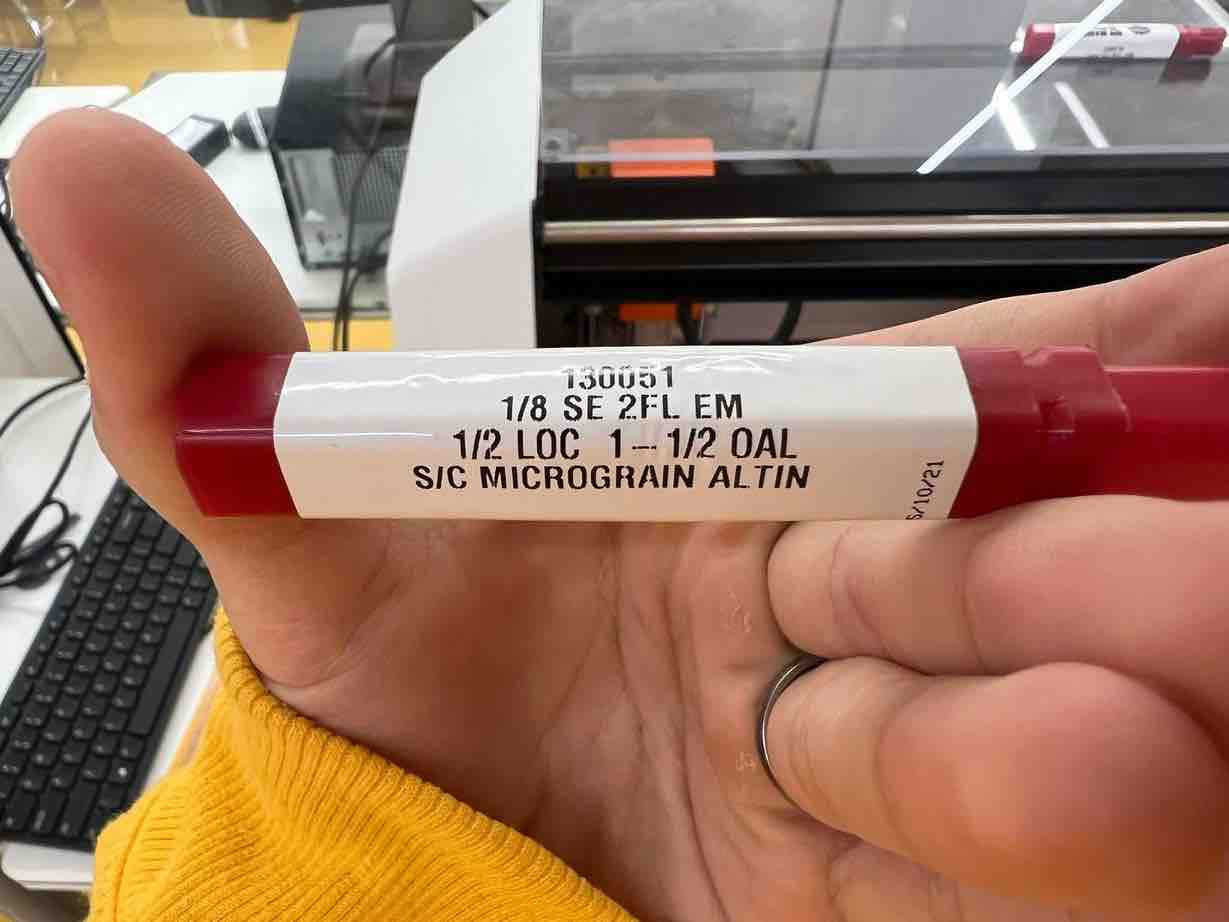
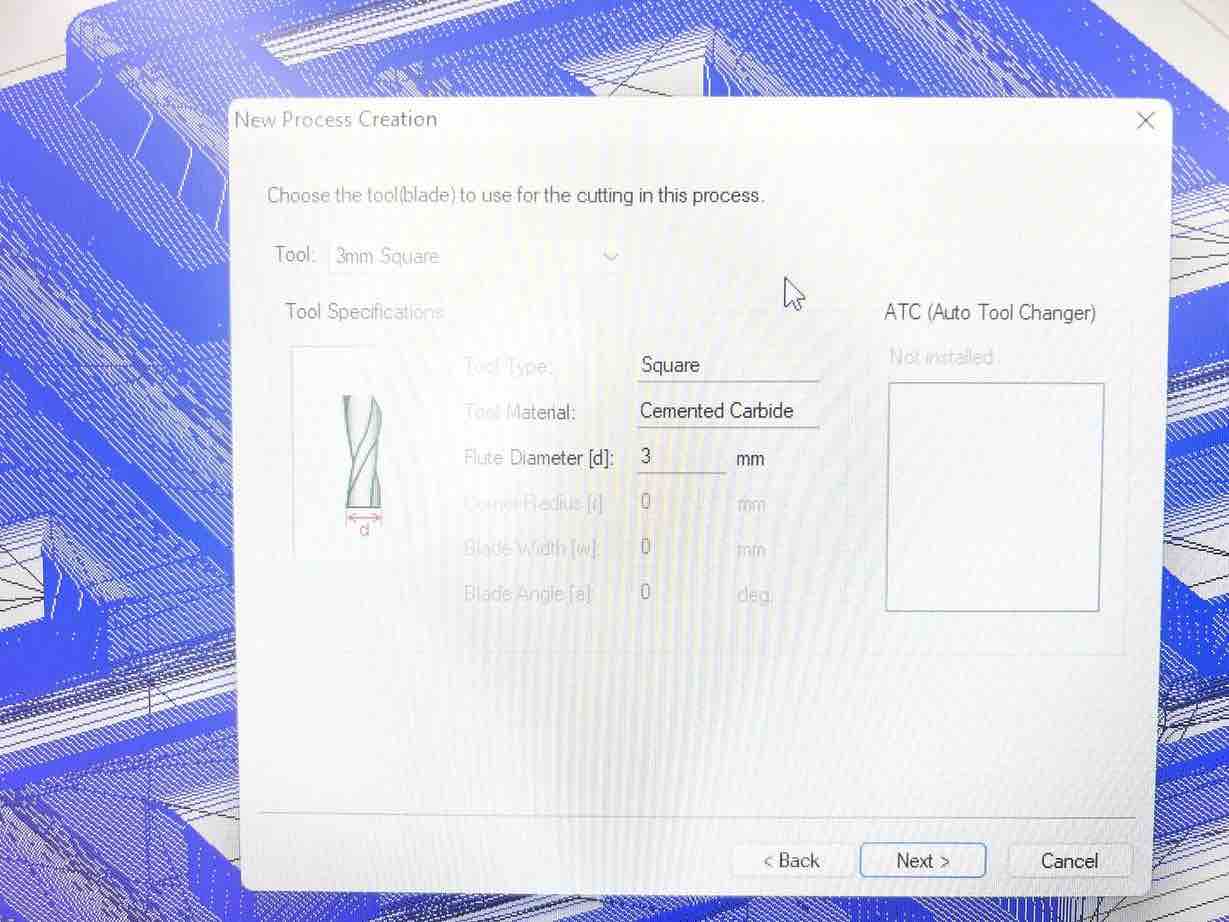
Choose the correct Tool size, for the roughing, we will be using a 1/8 inch bit which translates to around 3.175 mm. For the Tool, we selected 3mm Square tool.
-
In the cutting area and depth section, select
partialand then thethickness iconand set thestart heightof thedepthto5 mm.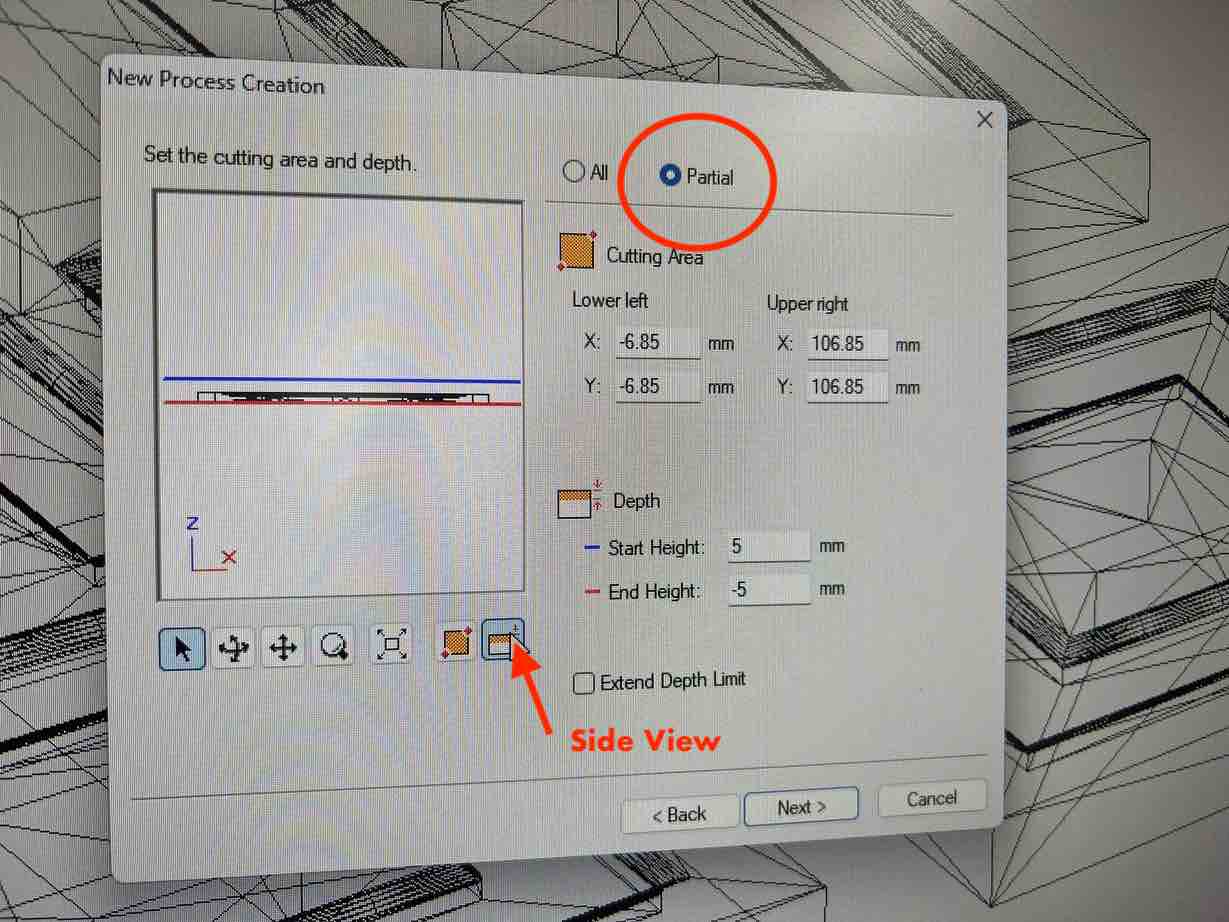
-
Next in the
type of toolpathselectCountour Lines: Up Cut. With the Cutting Start position being Lower Left.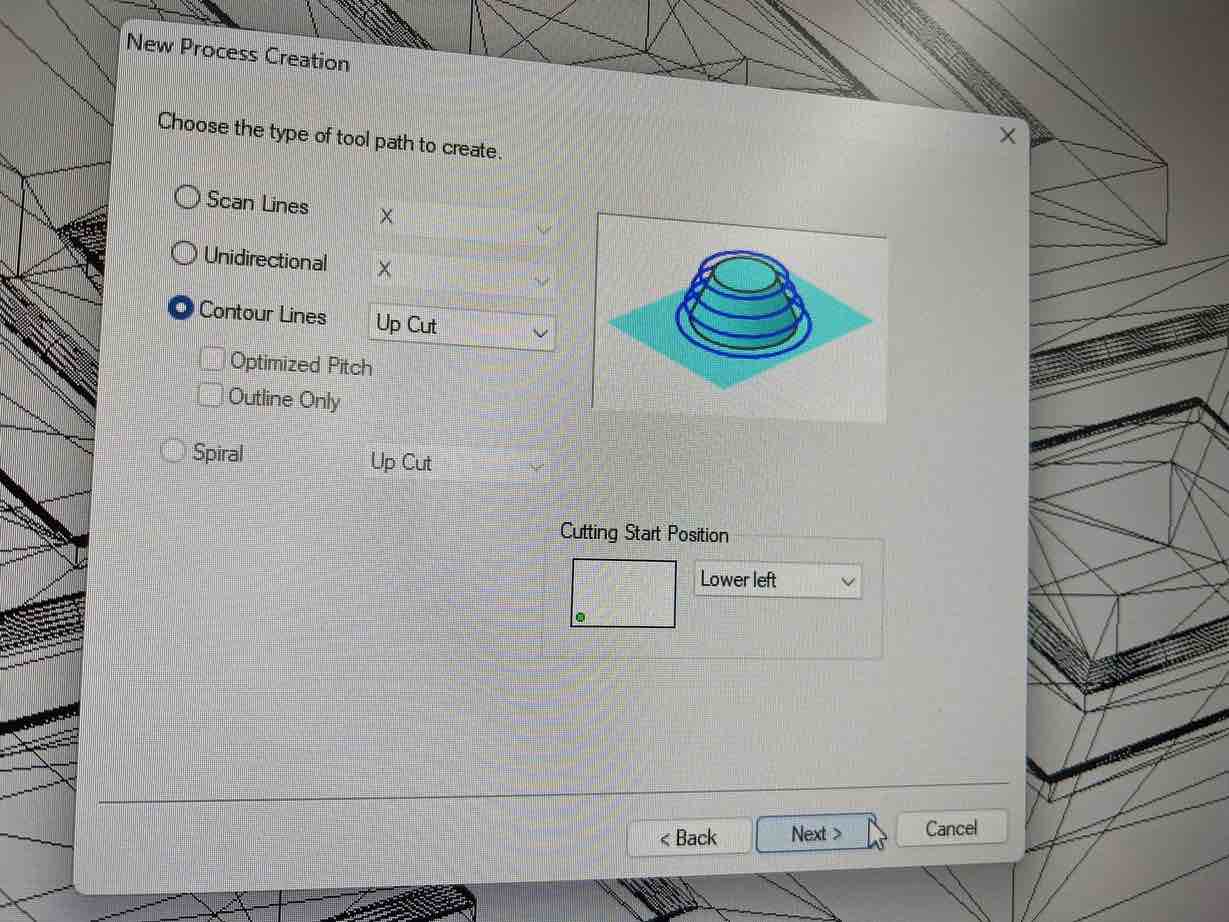
-
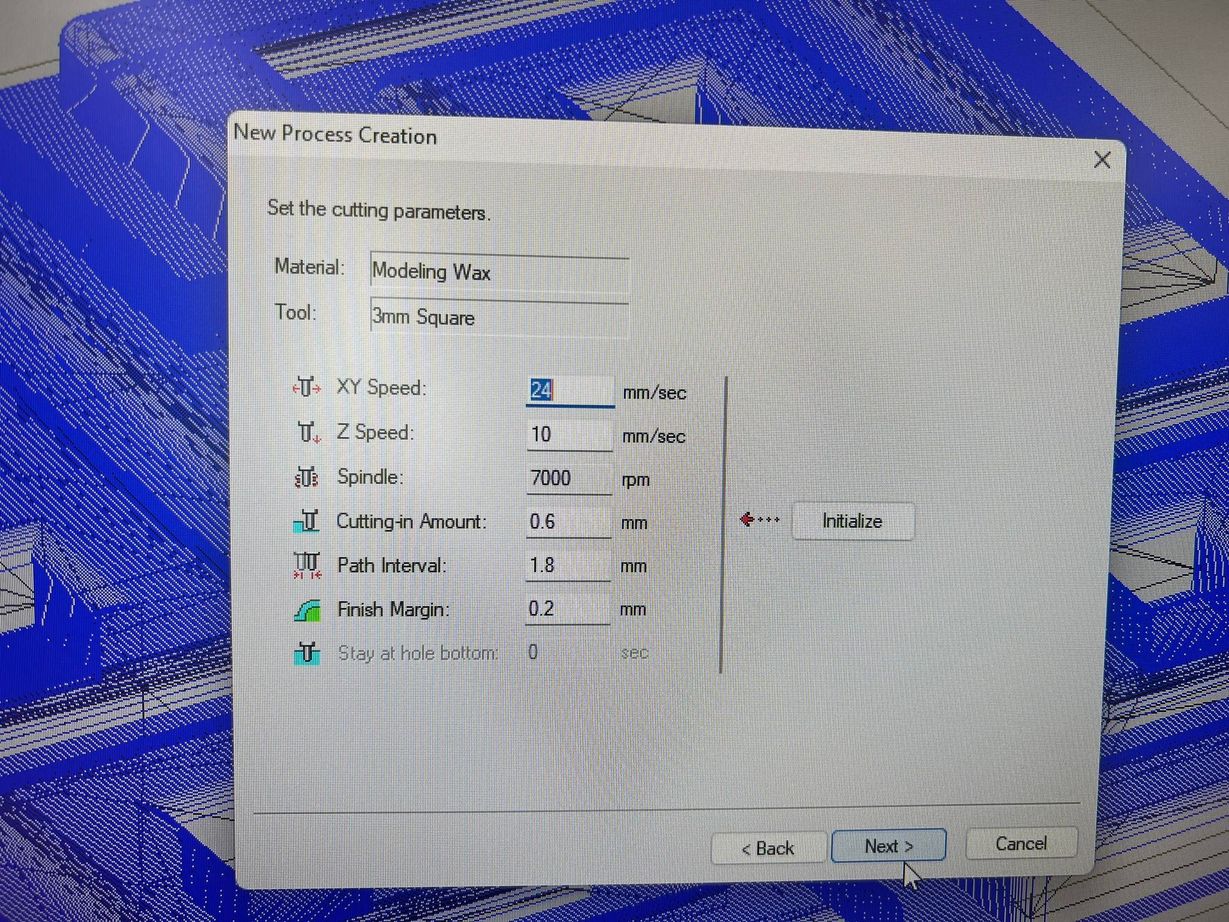
In the cutting parameters, set your desired settings, I stuck with the default.
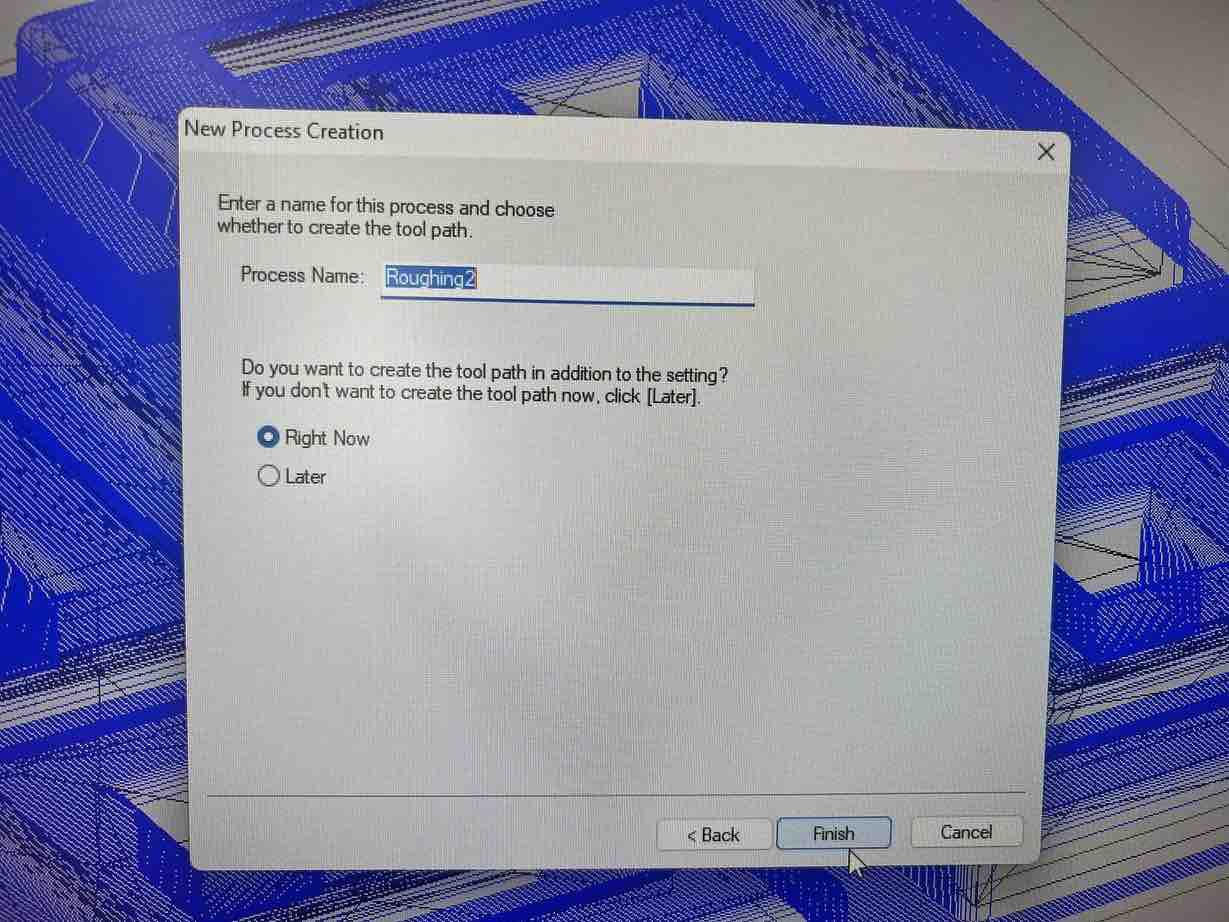
-
Lastly, save the process with a desired name.
Mill 2: Finishing
-
Hit
new process -
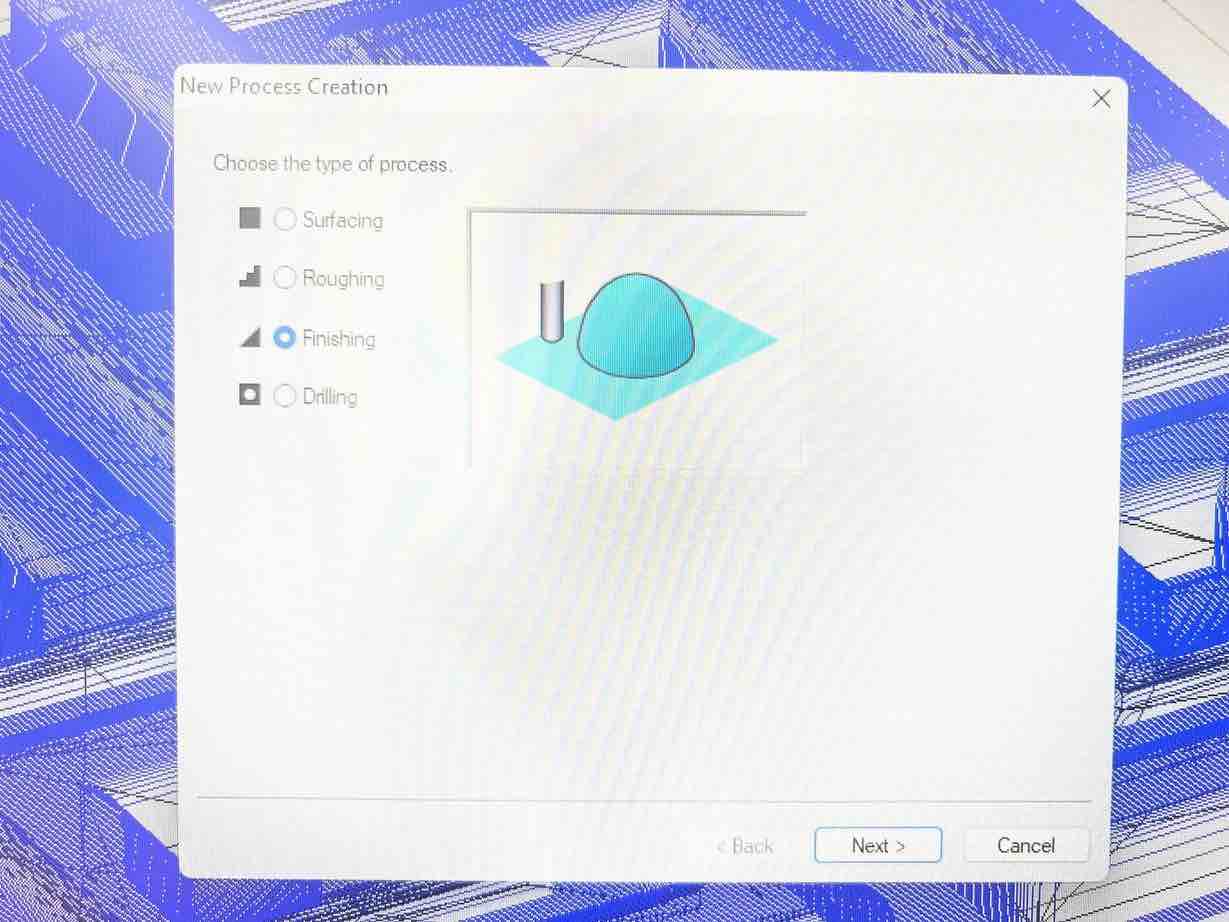
Select Finishing this time
-
Select
topagain -
in the Tool selection, select
R1.5Ball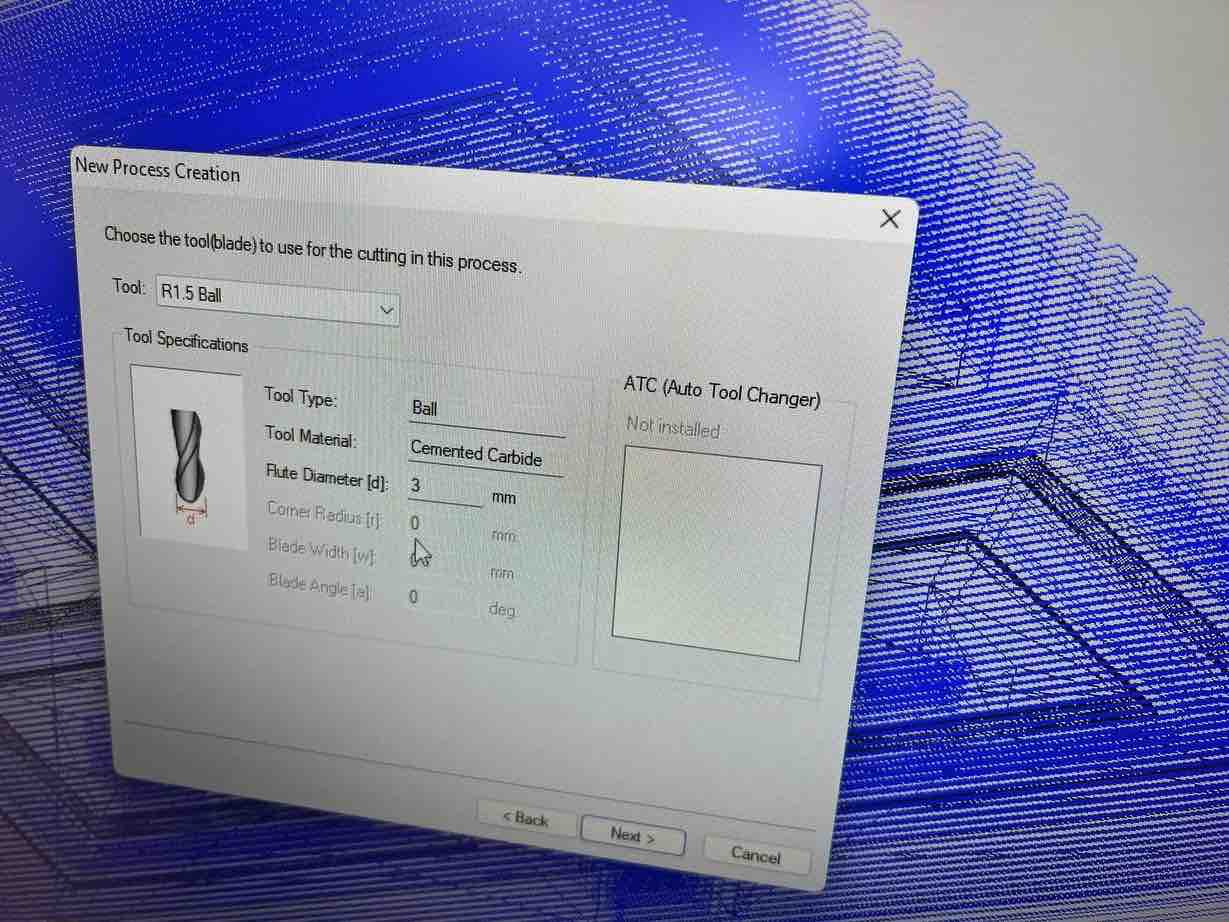
-
do the same as the roughing in the cutting area and depth section, setting start height to 5mm
-
In choose toolpath,
Select scan lines: Xwith starting position lower left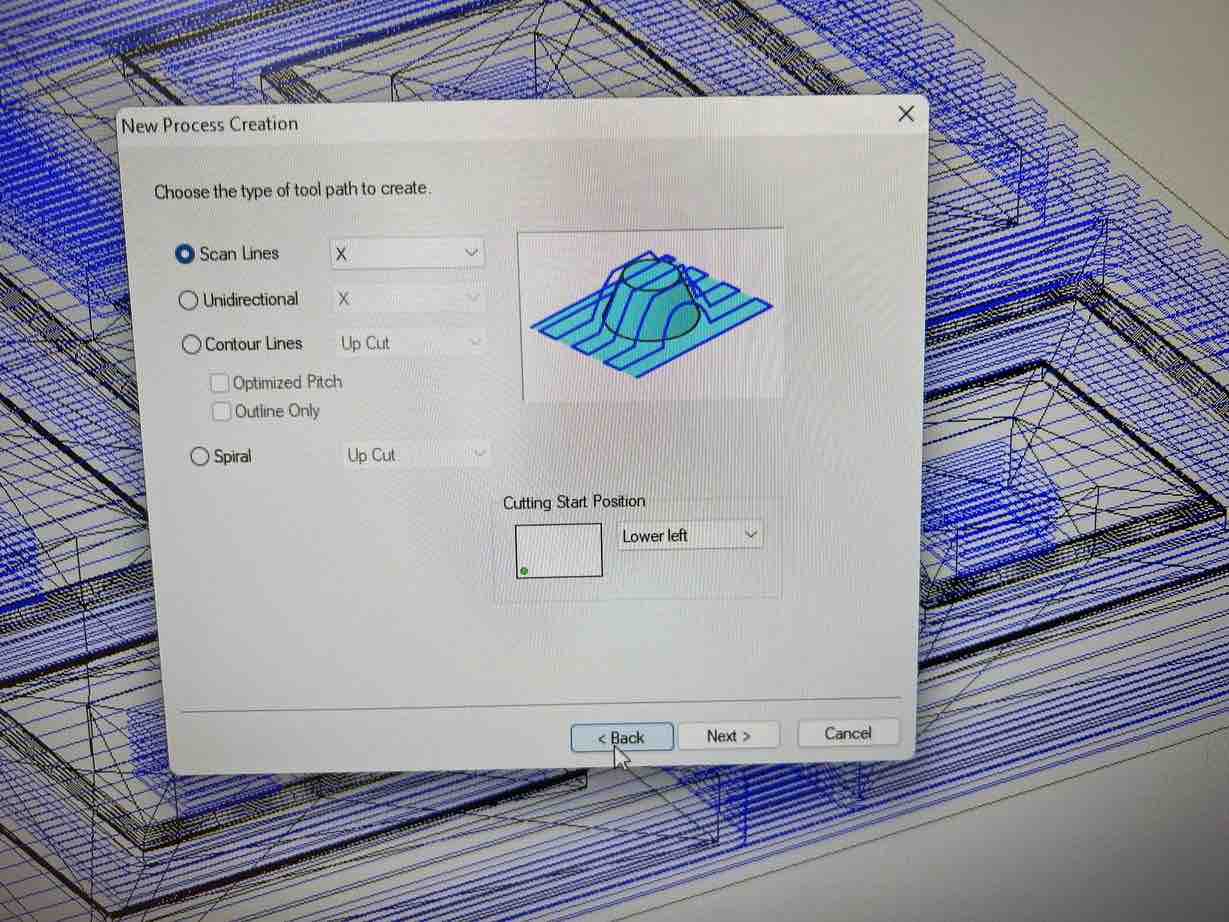
-
set the desired cutting parameters and save the process again.
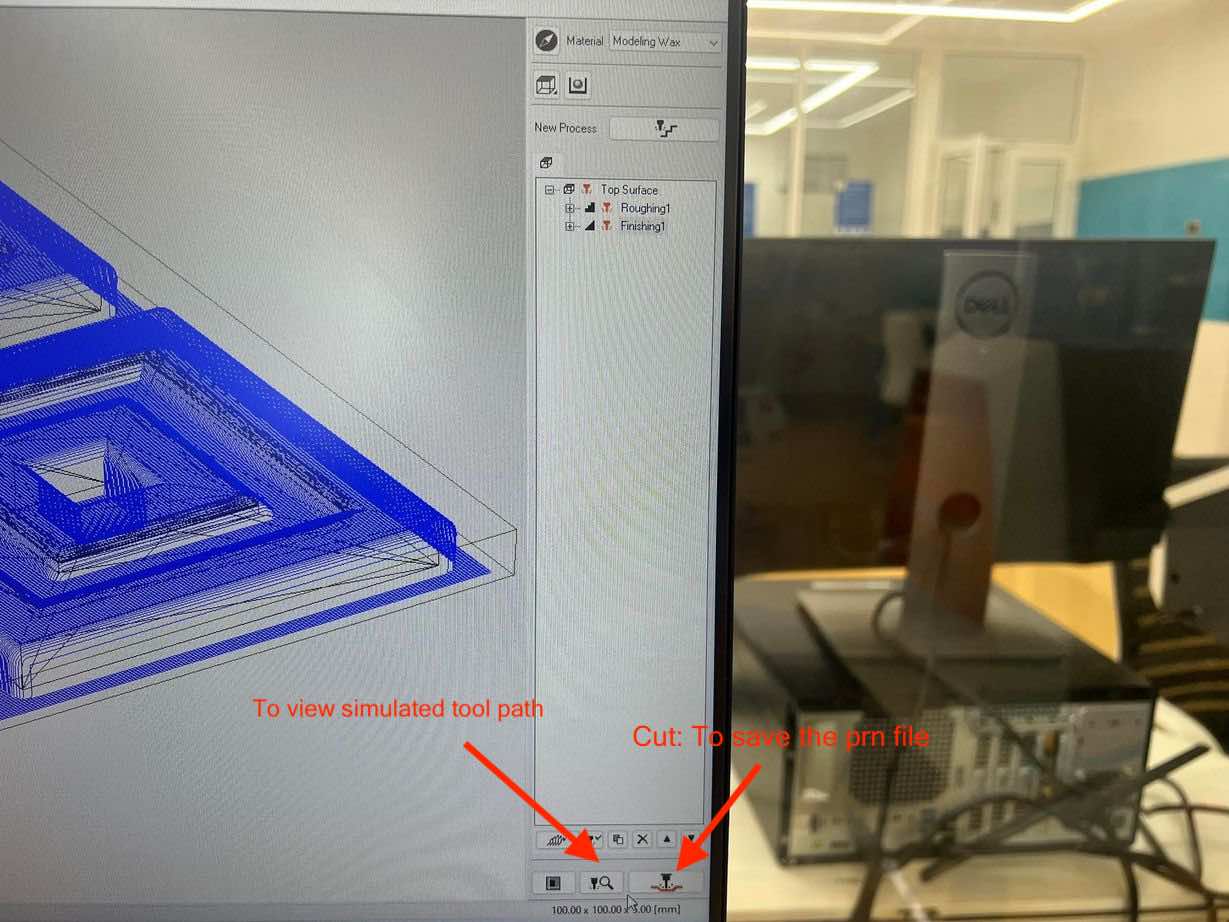
toolpath:

-
Now you can see the Roughing and Finishing process in the work tree.
-
You can hit
Preview Cuttingto view the simulated tool path.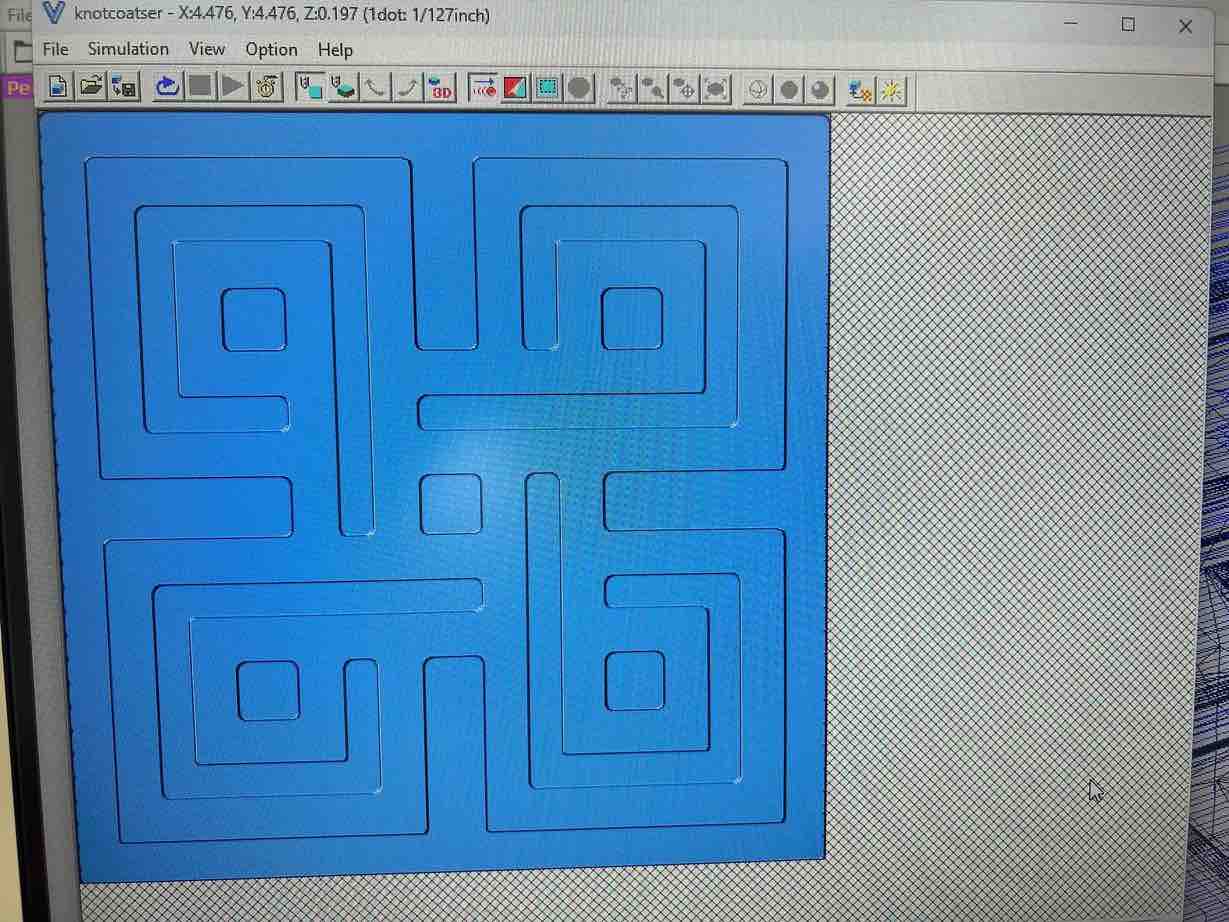
-
Once you are satisfied with everything, you can hit
Cut, selectoutput to filand your two.prnfiles will be saved.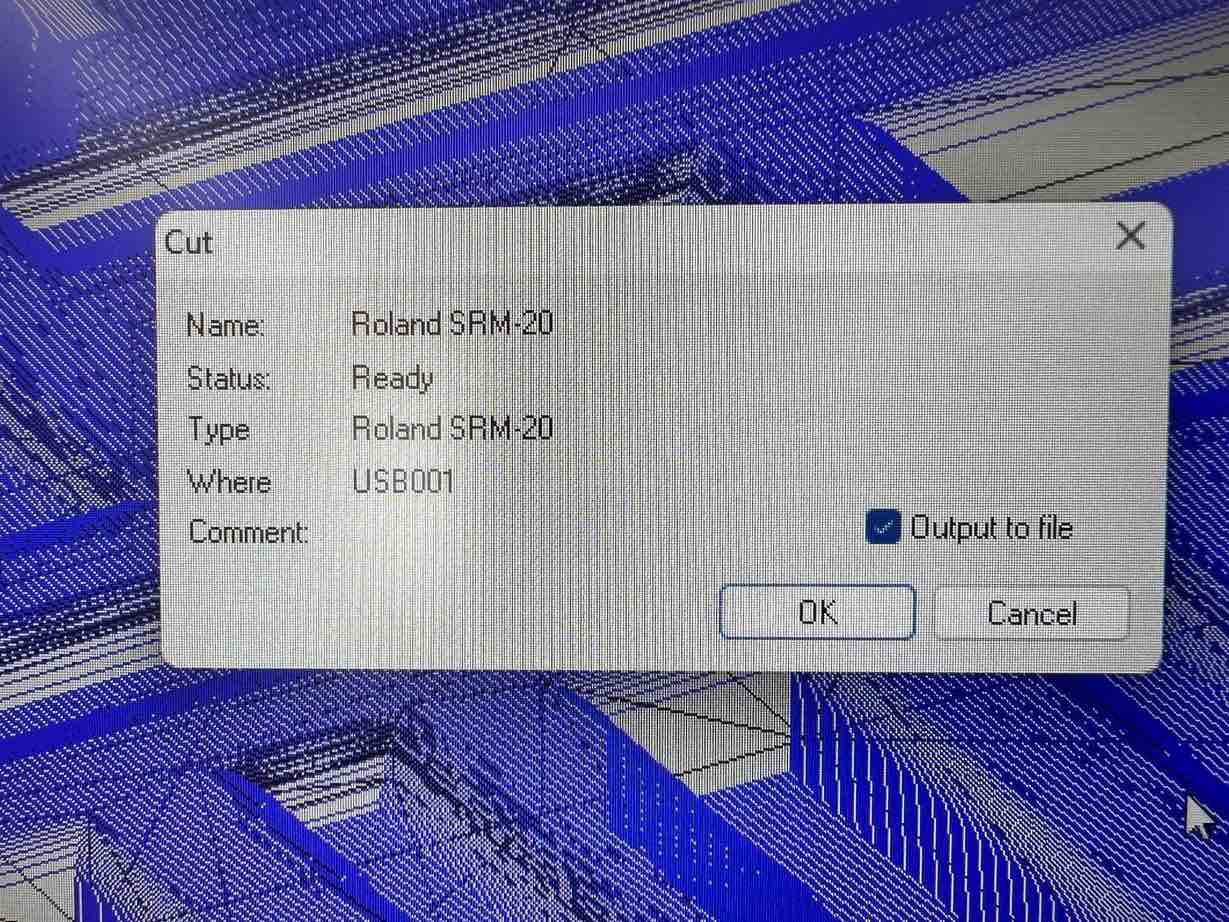
Roland SRM-20 and Vpanel
-
Stick the Wax onto the work space in the Roland SRM20 using double sided tape.
-
take the XY to the bottom right of the job piece and set that as the
XYorigin inVpanel. -
Remove the bit and insert the 1/8 Bit. then slowly drop the bit until it touches the workpiece and then tighten. Set that as the
Zon vpanel. -
then go to
Cut in Vpanel->delete old files->add roughing.prn fileand hitOutputand the milling will begin. -
Once the
Roughing is done. take the bit to the XY origin in Vpanel. -
Then Remove the 1/8 bit and insert the
1/8 BN bit.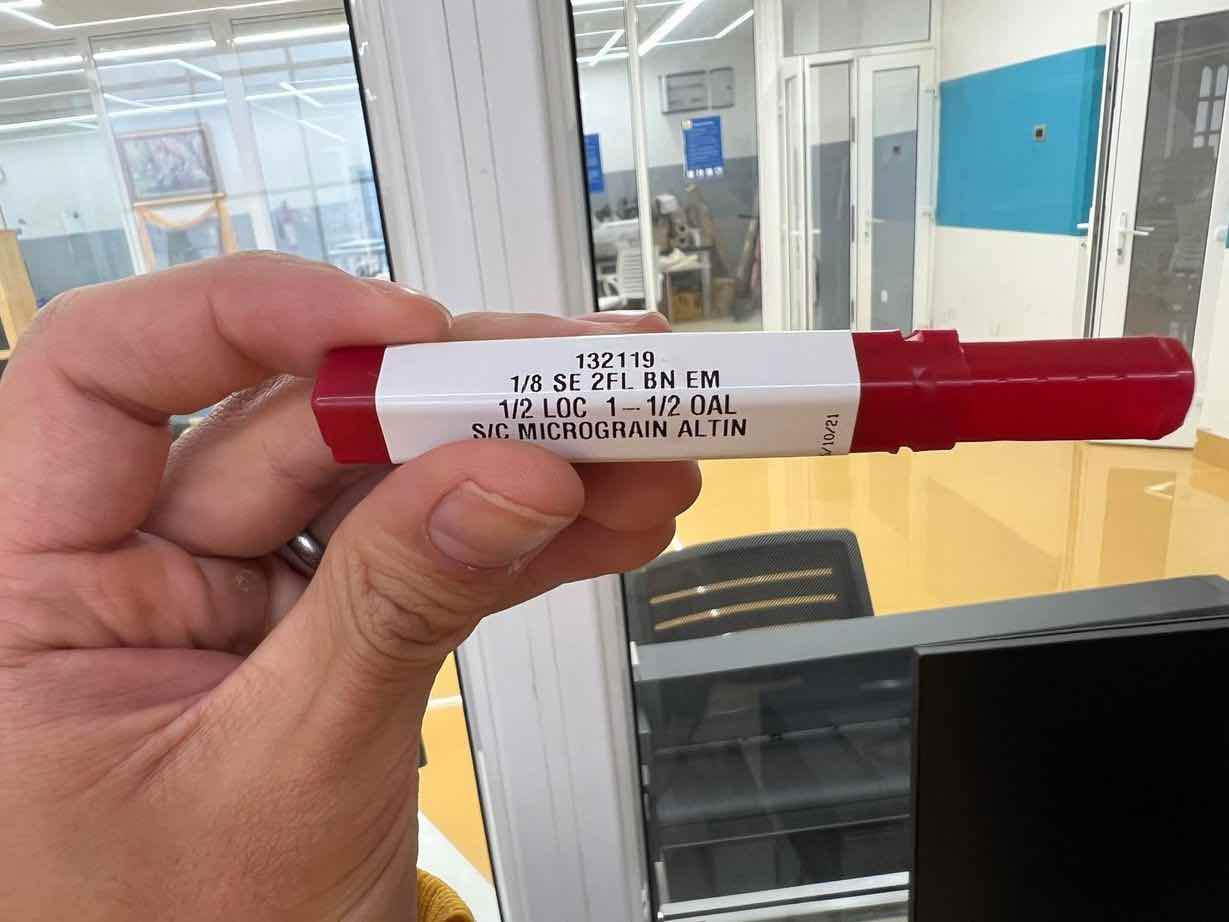
-
Set the Z axis as earlier, then go to
Cut->add the finishing.prn file->outputand the finishing mill will begin -
Keep in mind that Finishing takes much longer time than Roughing.
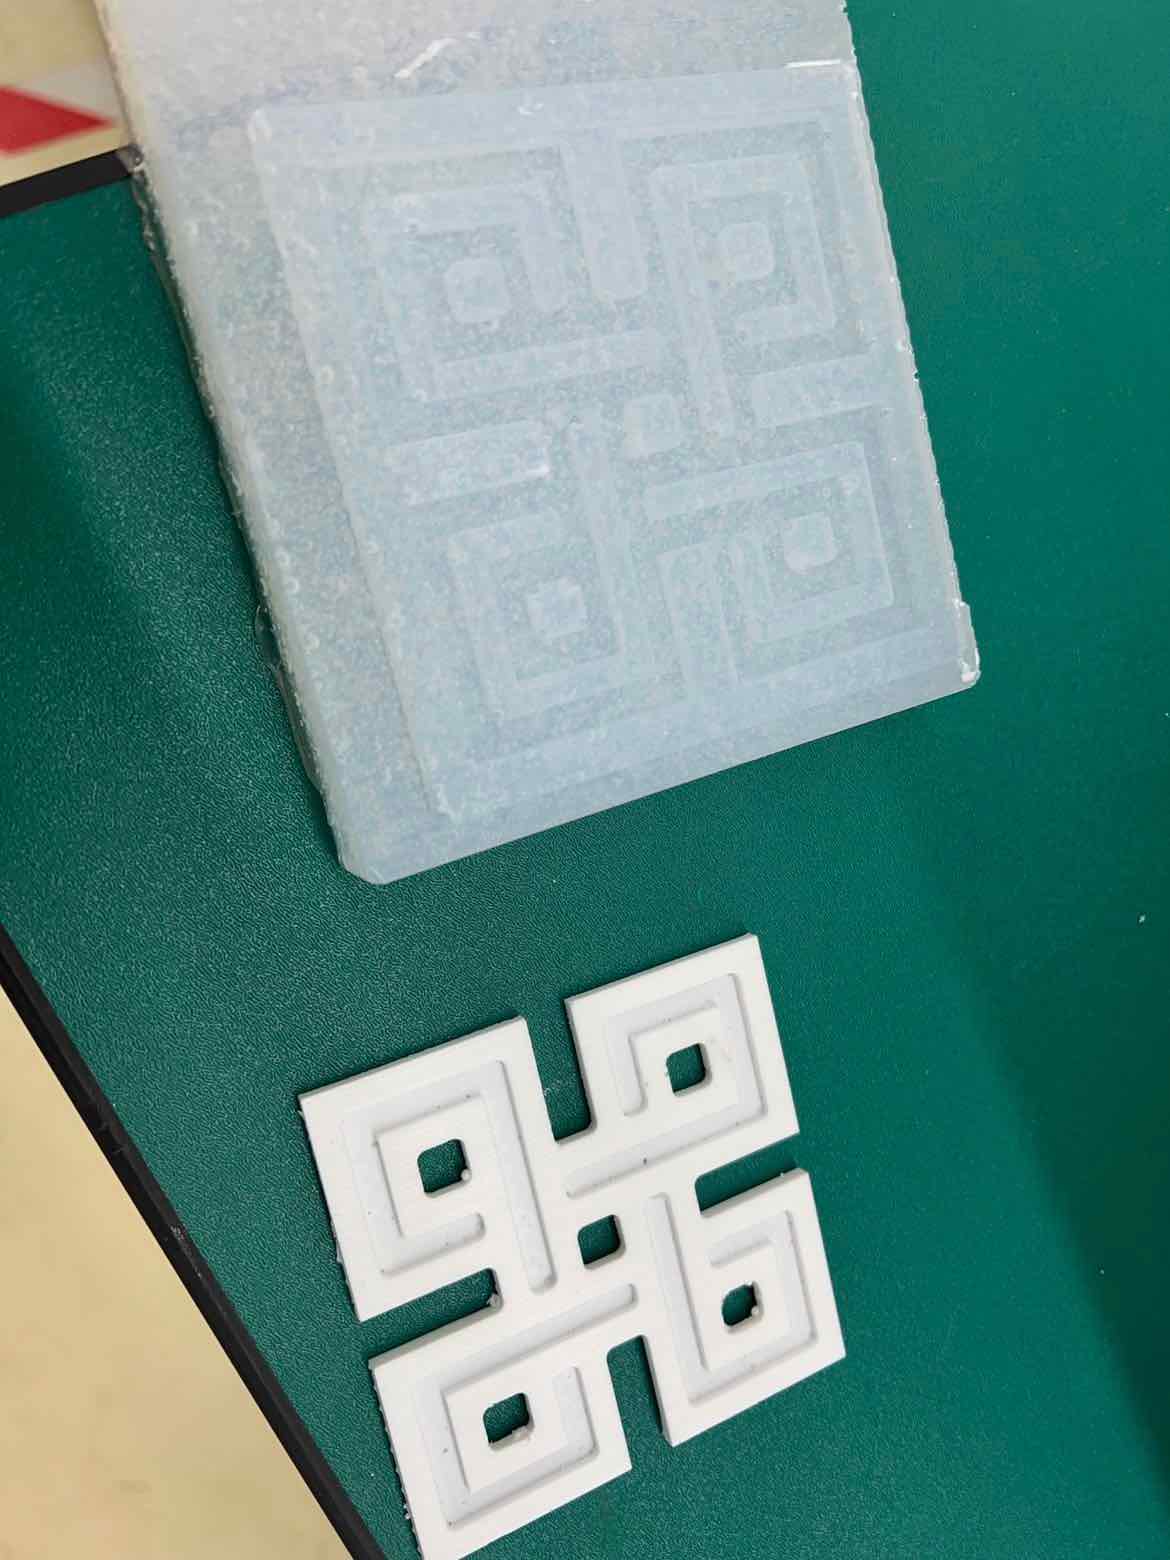
RESULTS
My wax was milled pretty good to my liking but I made two mistakes:
-
The knot was too close to the edge so one “Wall” of the wax piece was milled as well
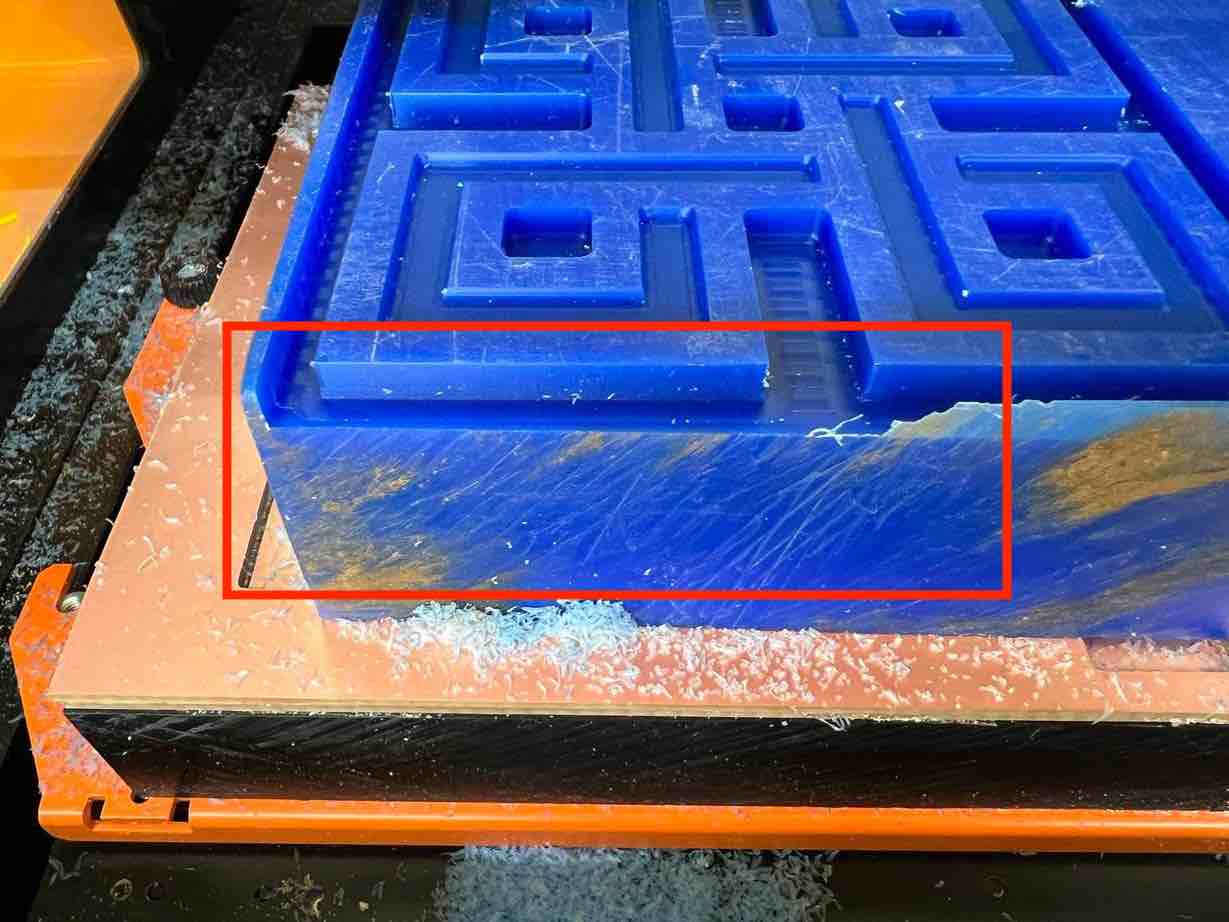
-
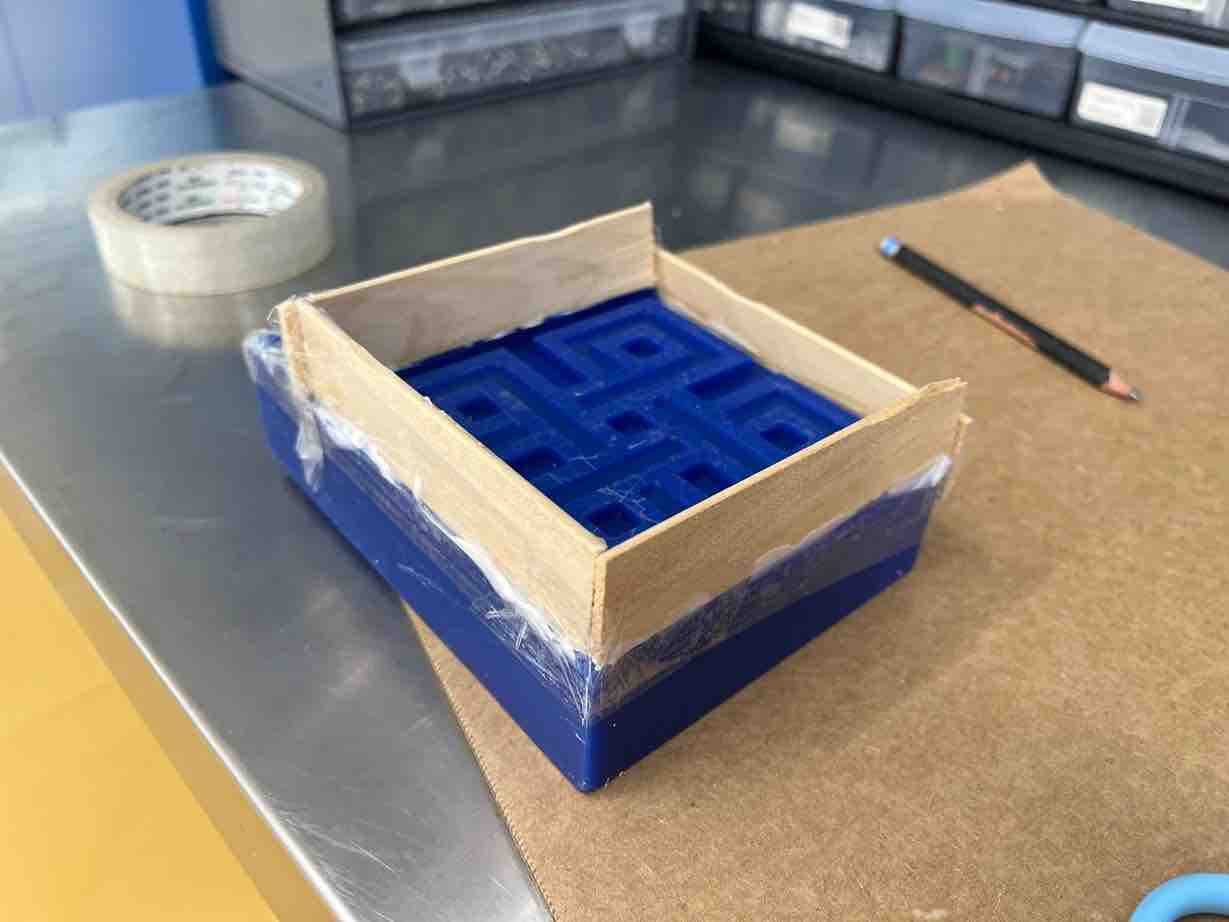
The Depth of the piece wasn’t set deep enough so I had to add artificial walls to ensure the mold would set nicely.
makeshift:
Molding
For creating the negative mold now, we have two options in the lab, both from Smooth-On. One being the oomoo 25 and the other being Sorta-Clear 37.
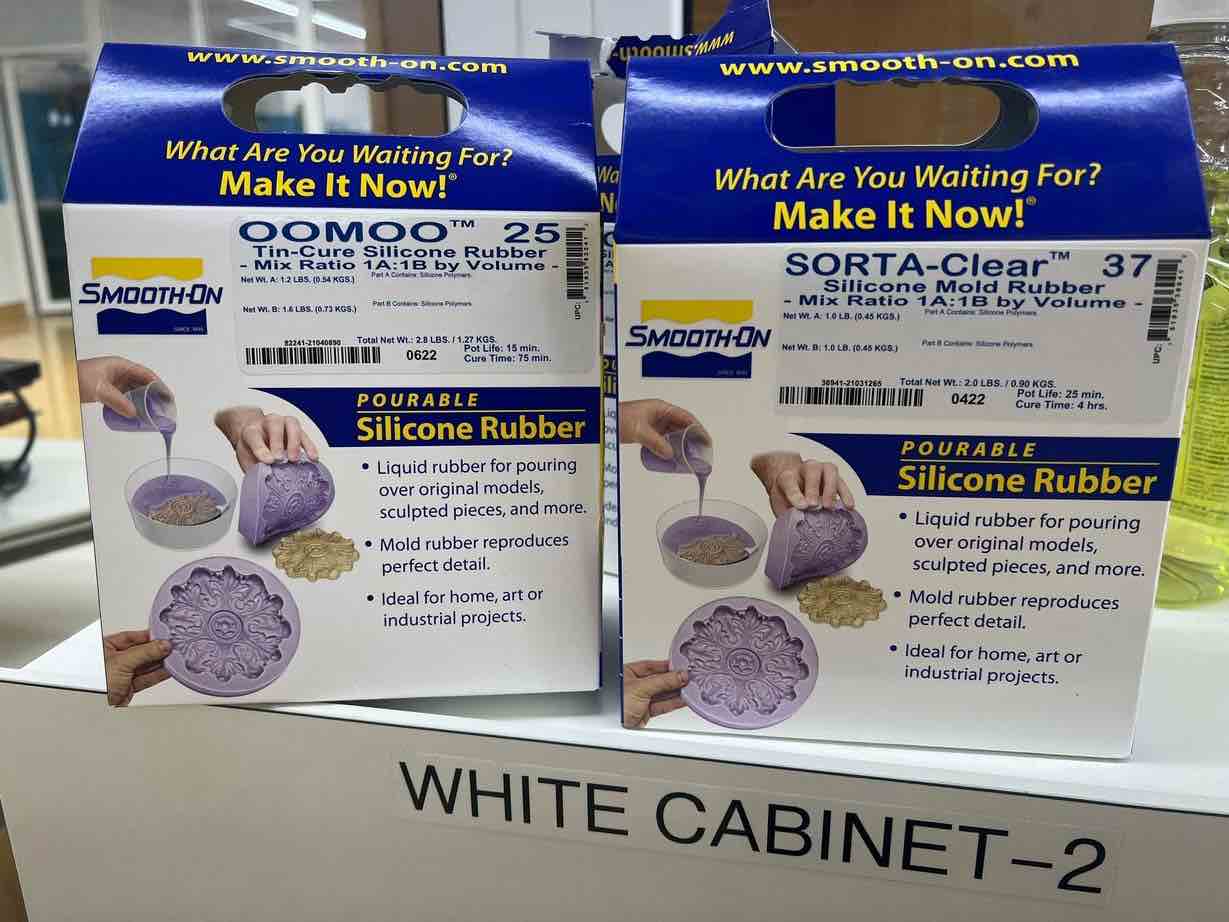
The first I did was read the Datasheet/product information of both the products. Oomoo25 and (Sorta Clear 37)[https://www.smooth-on.com/products/sorta-clear-37/]
SAFETY STEPS * I wore a face mask * I wore goggles * I wore cloves * I wore clothes that I was fine with getting dirty and ensure to cover every inch of skin. * I laid down a cardboard layer under my work space * washed my hands after completing the job
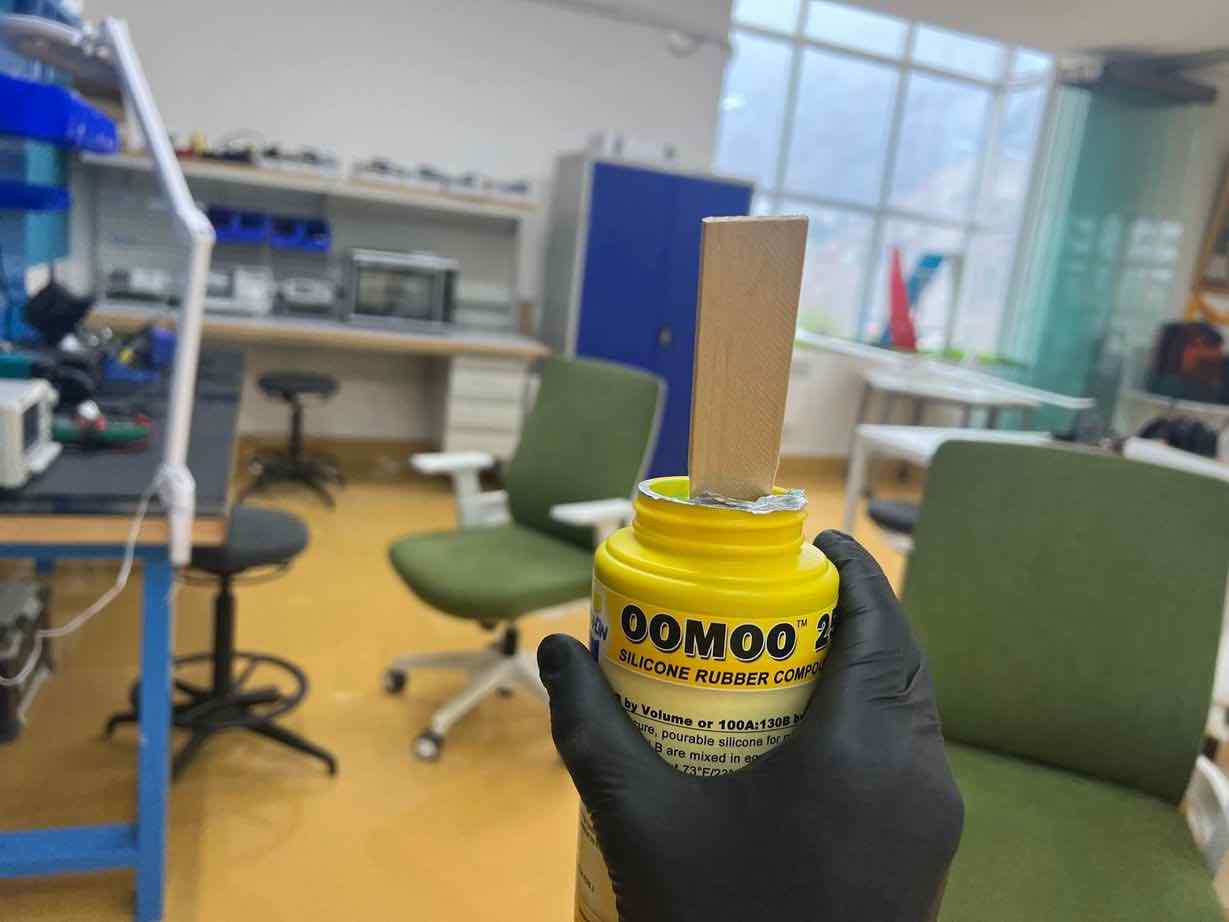
Oomoo 25
I will be using Oomoo 25 since I have used both before and prefer it over the two.
As instructed by the guide, I first thoroughly stirred both liquids (Part A and Part B) individually with a wooden stick.
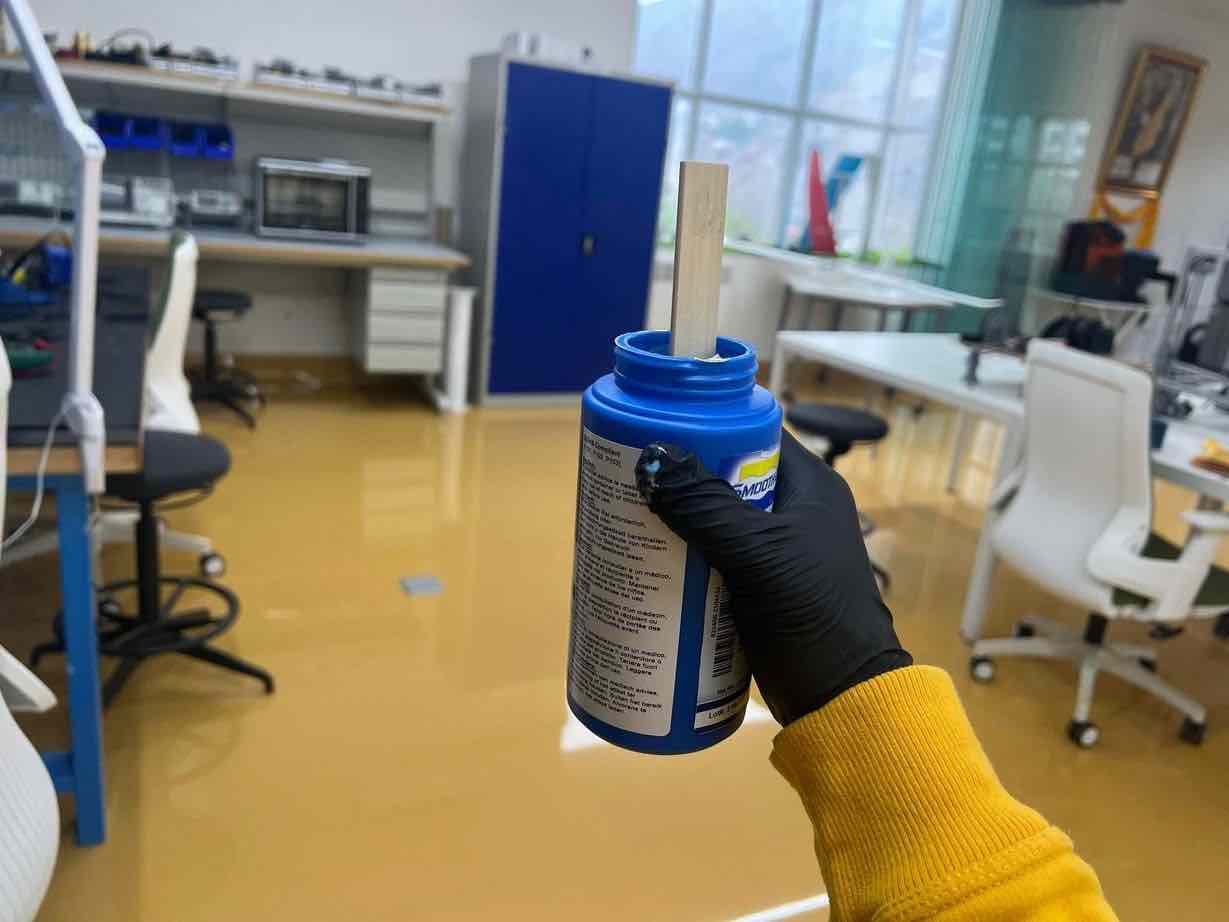
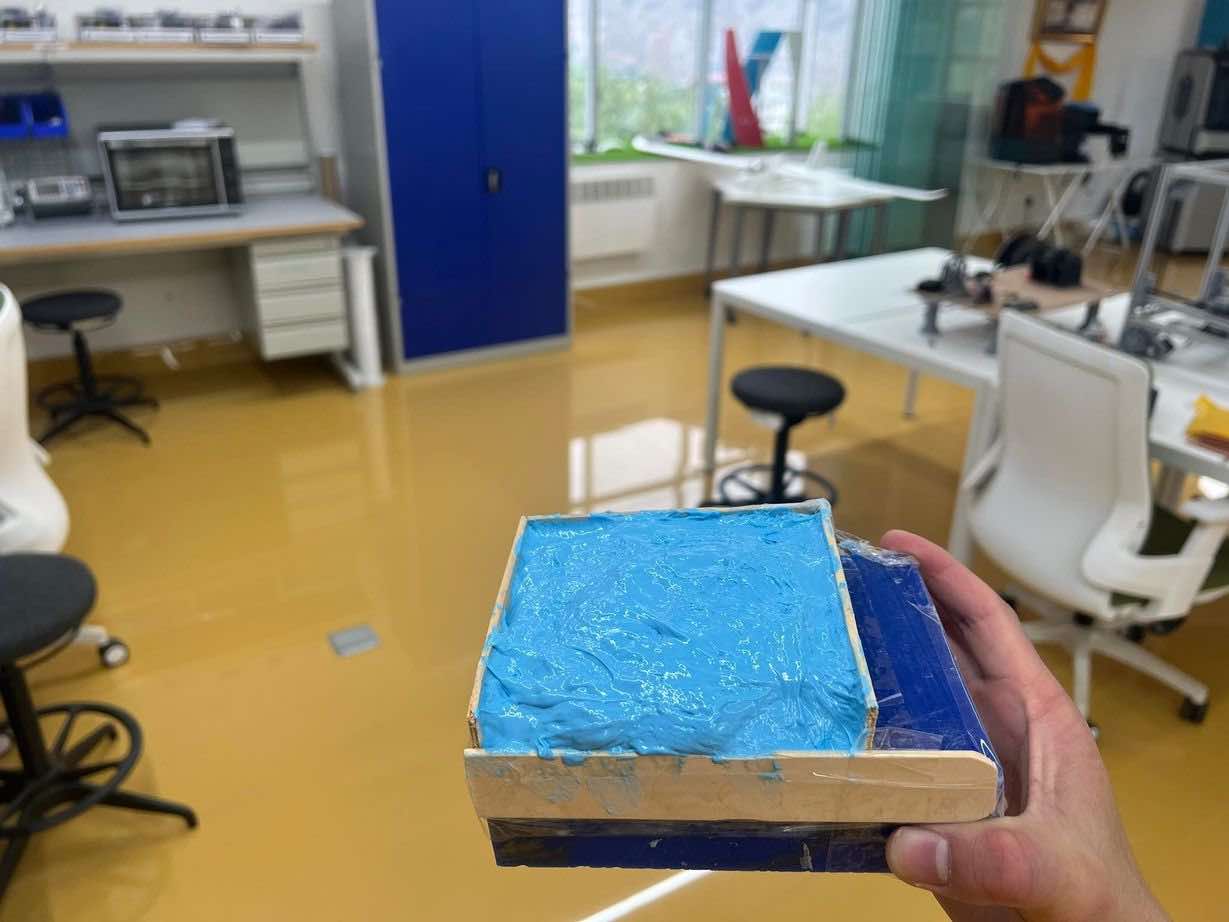
Once both liquids are stirred, I poured two equal parts of both liquids into a single cup and mixed them well, stirring for at least 2 mins in order for the mixtures to have mixed properly.
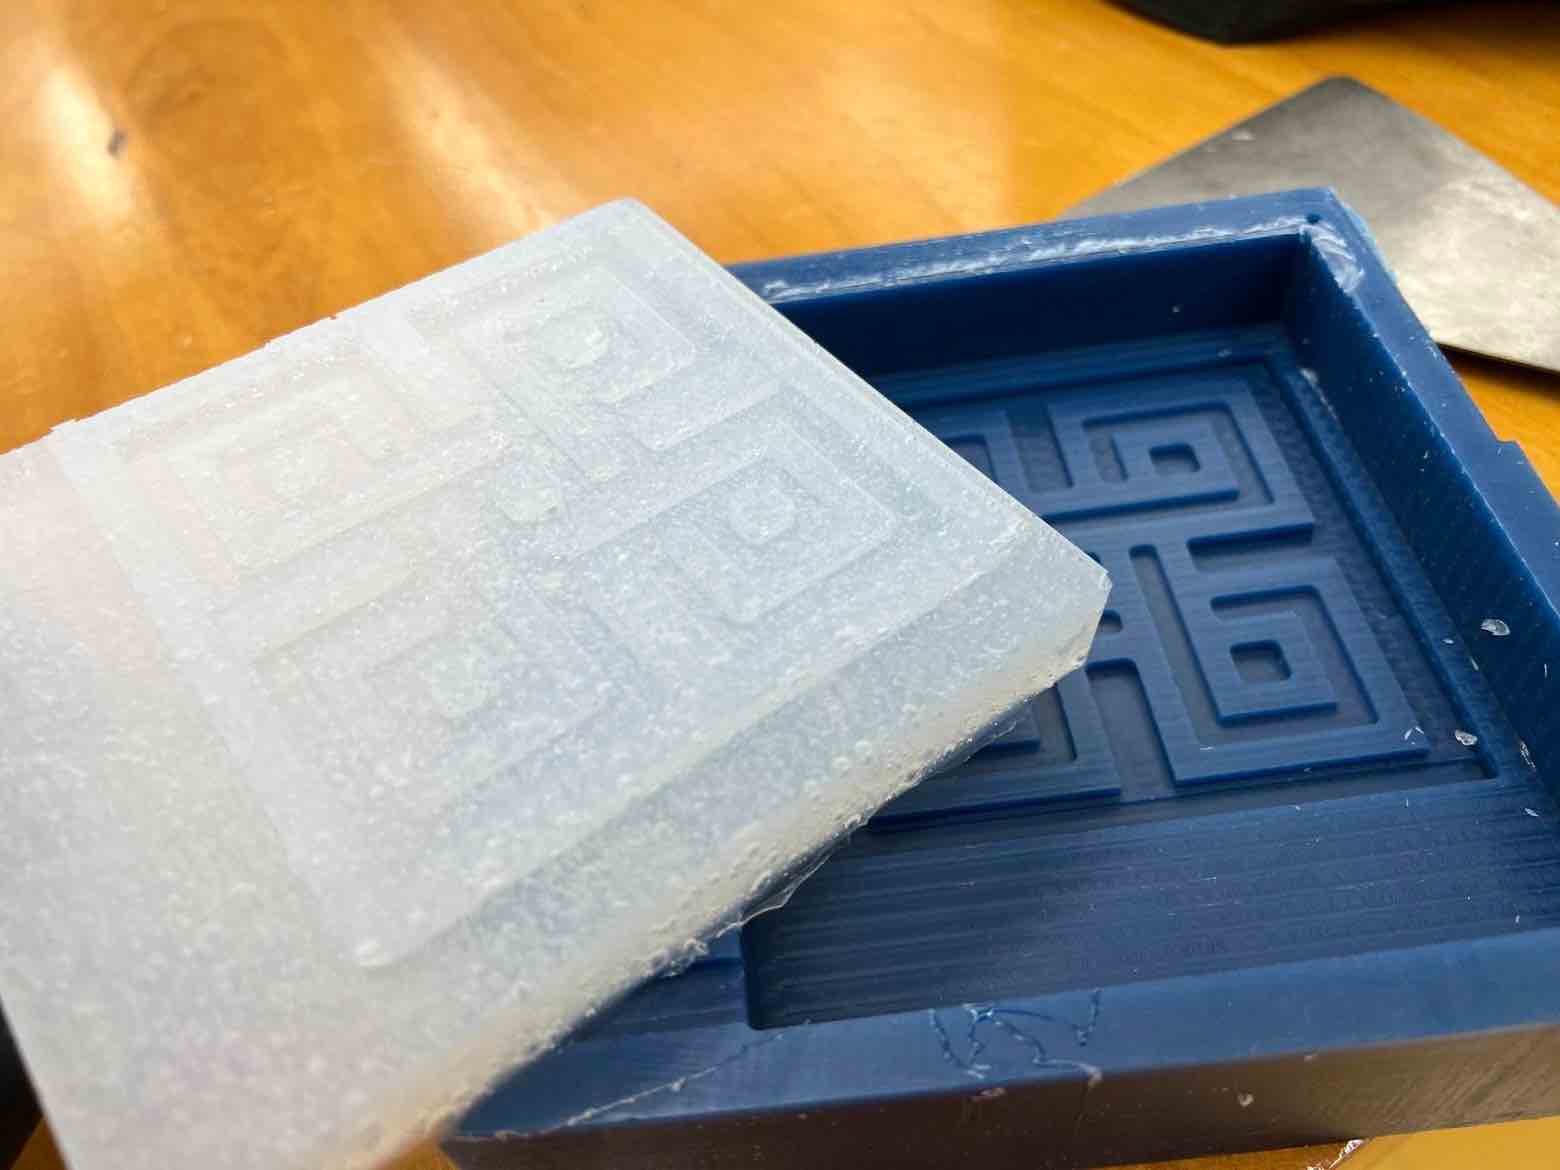
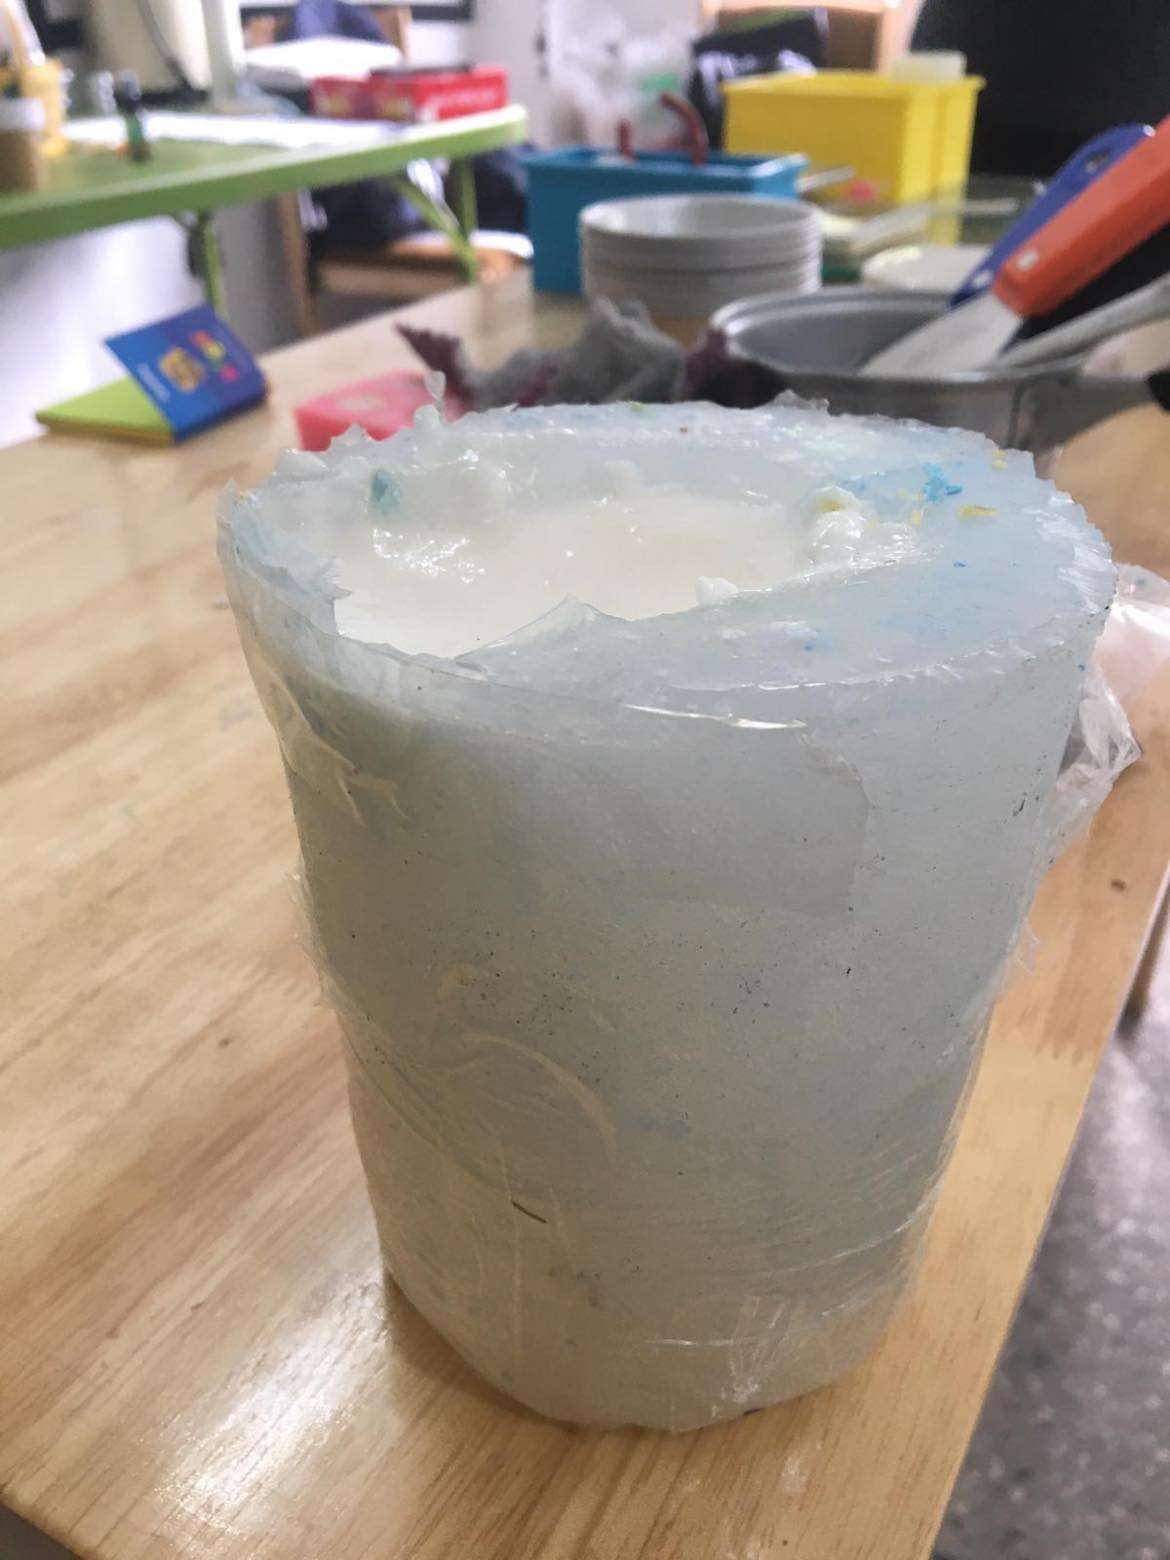
One the mixture is completely mixed, I poured it onto my positive wax mold and let it sit for few hours (In my case I left it overnight since I left to go home).
Negative Silicon Rubber Mold:

The mold did not come out great unfortunately.
FAIL:
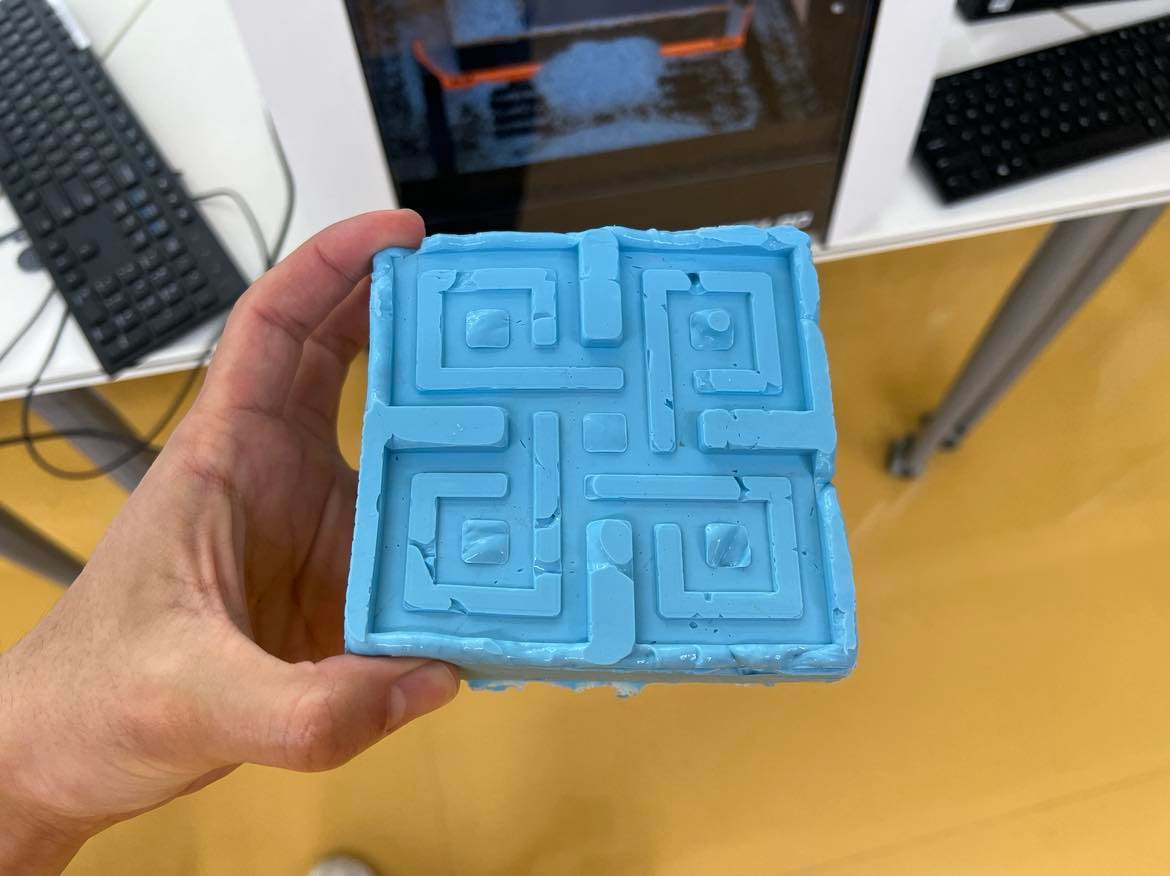
Why it failed:
I also think I have injured my right arm. Its definitely strained after stirring the super hard mixtures with the small stick.
It failed because the initial mill was too close to the edge and therefore the natural walls of the knot was milled out and I had to use the makeshift wood pieces as seen above, and therefore the mold did not conform to the shape of the negative wax well. Also, the fact that it was hard to mix definitely affected the success as I probably did not mix it well.
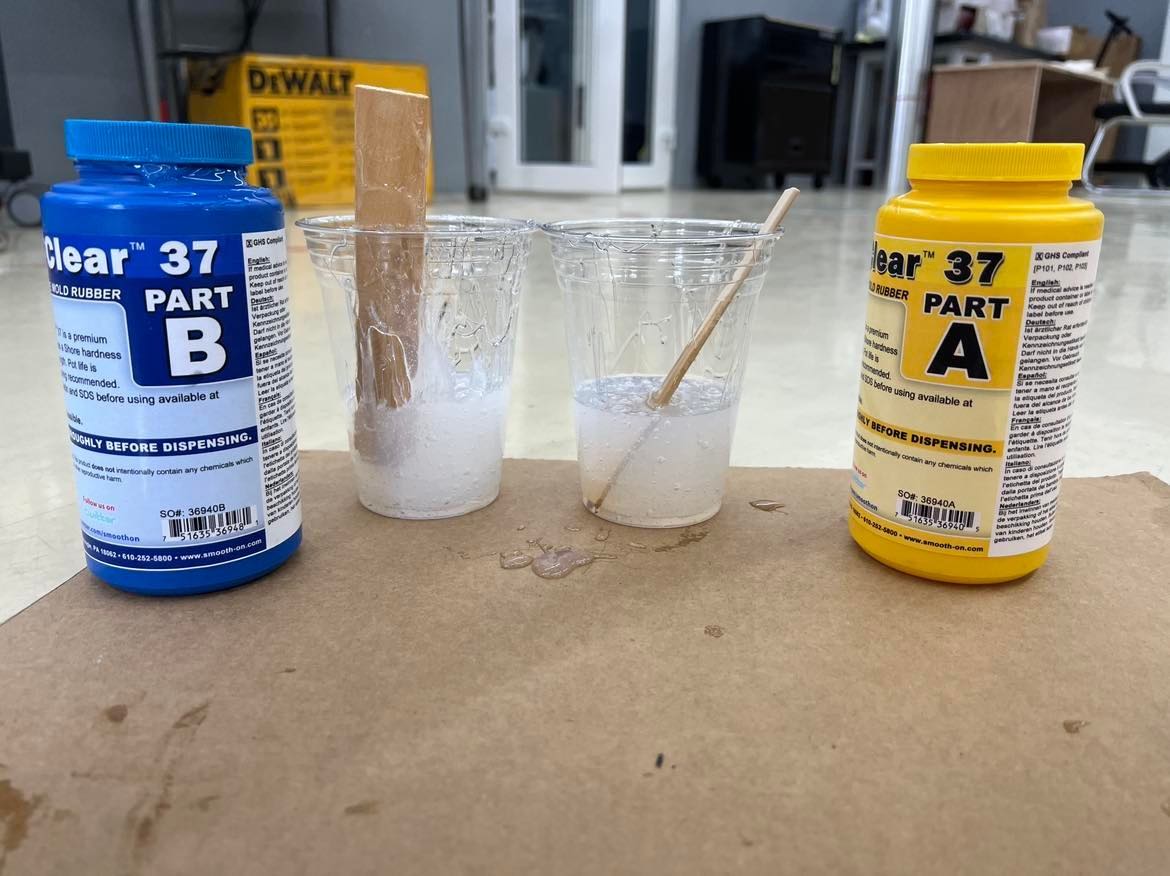
Sorta Clear 37
While I wanted to stick with Oomoo25, as seen above, my mold did not come well and it was such a pain to mix oomoo25 so I decided to work with Sorta Clear. I followed the same steps. Stirred both part A and B individually, then poured out equal volumes of the two and mixed them. Once mixed well, I poured it onto my wax mold and let it cure for its intended 4 hours of curing time.
One issue I faced on my mold was that the exterior walls were not tall enough so it as difficult for the silicon to stay in the boundaries.
I tried changing every setting in Modela but somehow it wouldn’t cut deeper than surface level. So what I did was first I removed a rectangles worth of wax by milling and then began milling the coaster design on the removed part. This way the walls were intact.
Mold 1:

Mold 2 with the new wax positive:
Casting
For casting, we have again have two options in the lab Resin and hydro stone. The Resin is again made by Smooth on and it’s called Smooth-Cast.
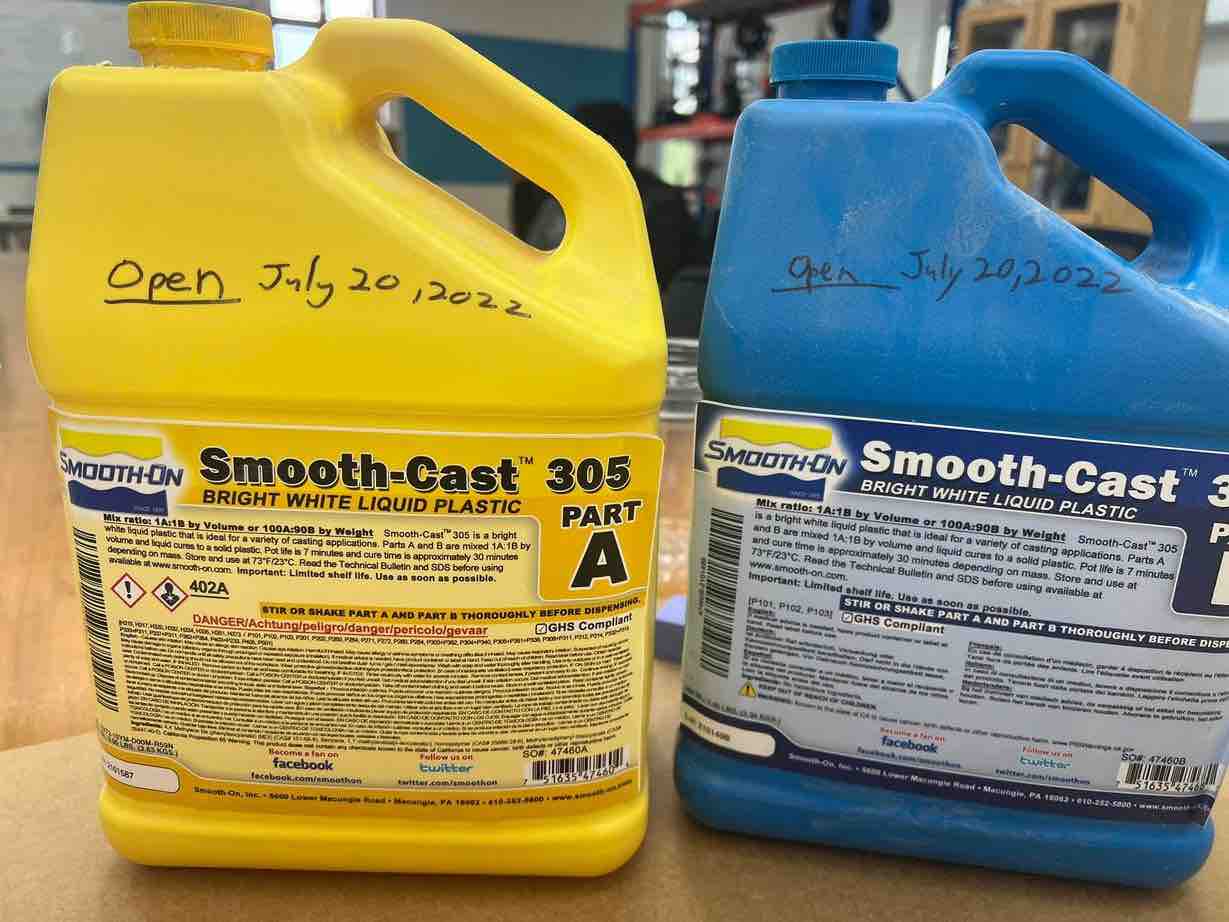
I decided to use the Resin over the Hydro stone since I wanted to make coasters.
I began with reading the datasheet/product information
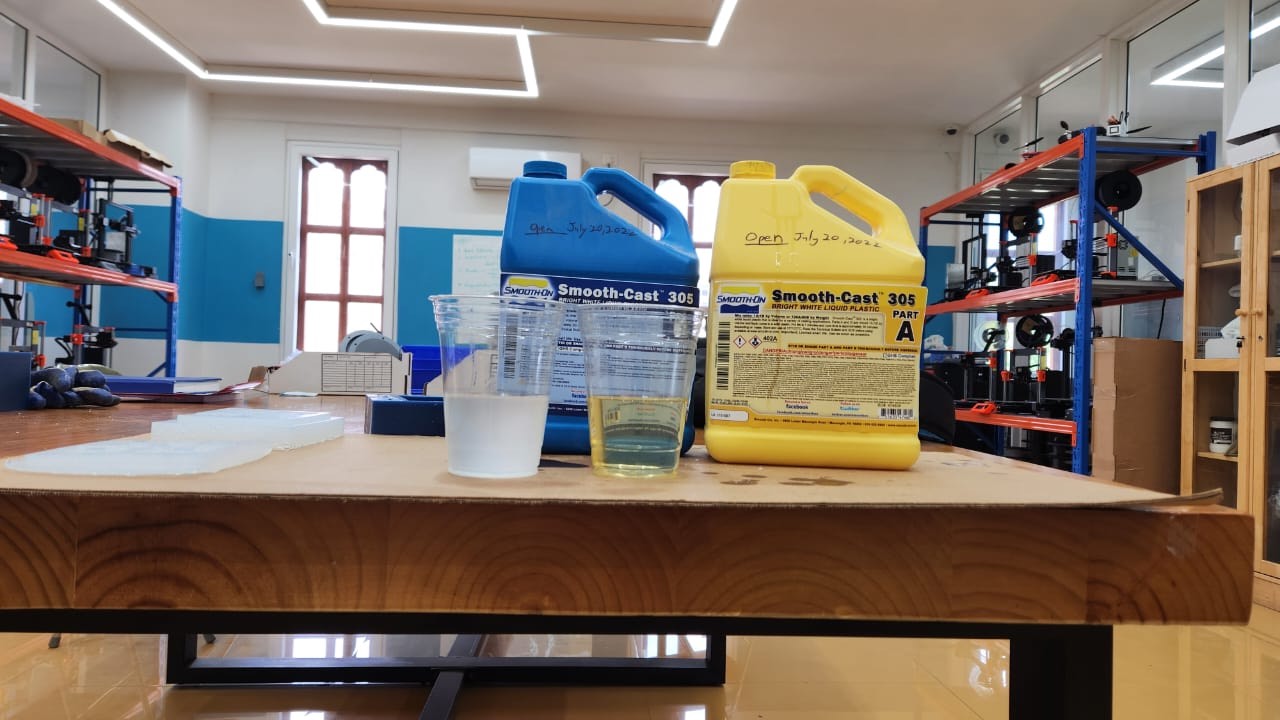
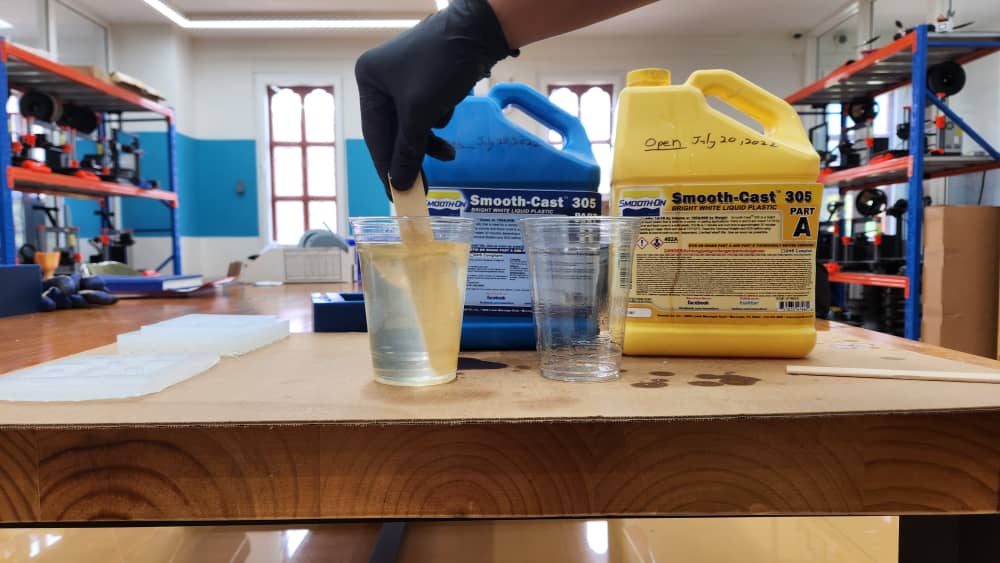
I weighed out two equal parts in volume of Part A and Part B of the smooth cast and then mixed them together as I did the mold.
Then I poured it into the negative silicon mold and let it sit for its curing duration (30-40 mins).
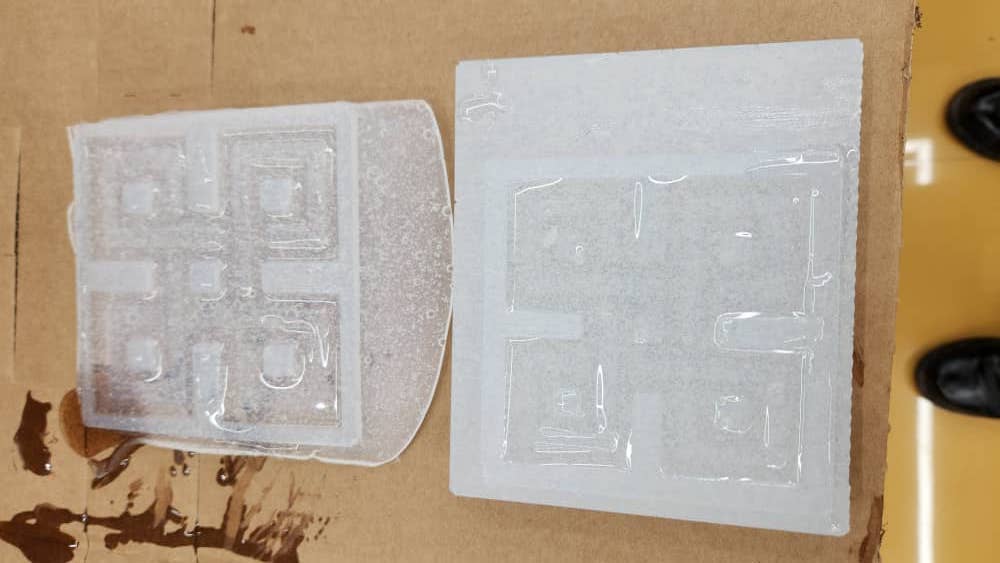
Final Coaster:
EXTRA MOLDING AND CASTING WORK
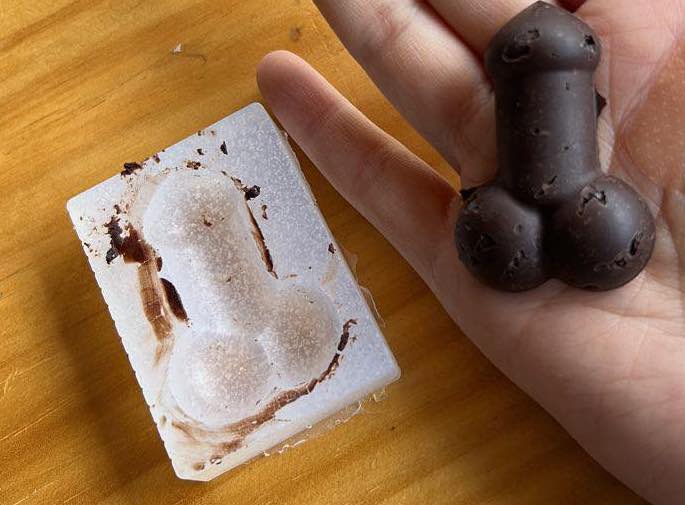
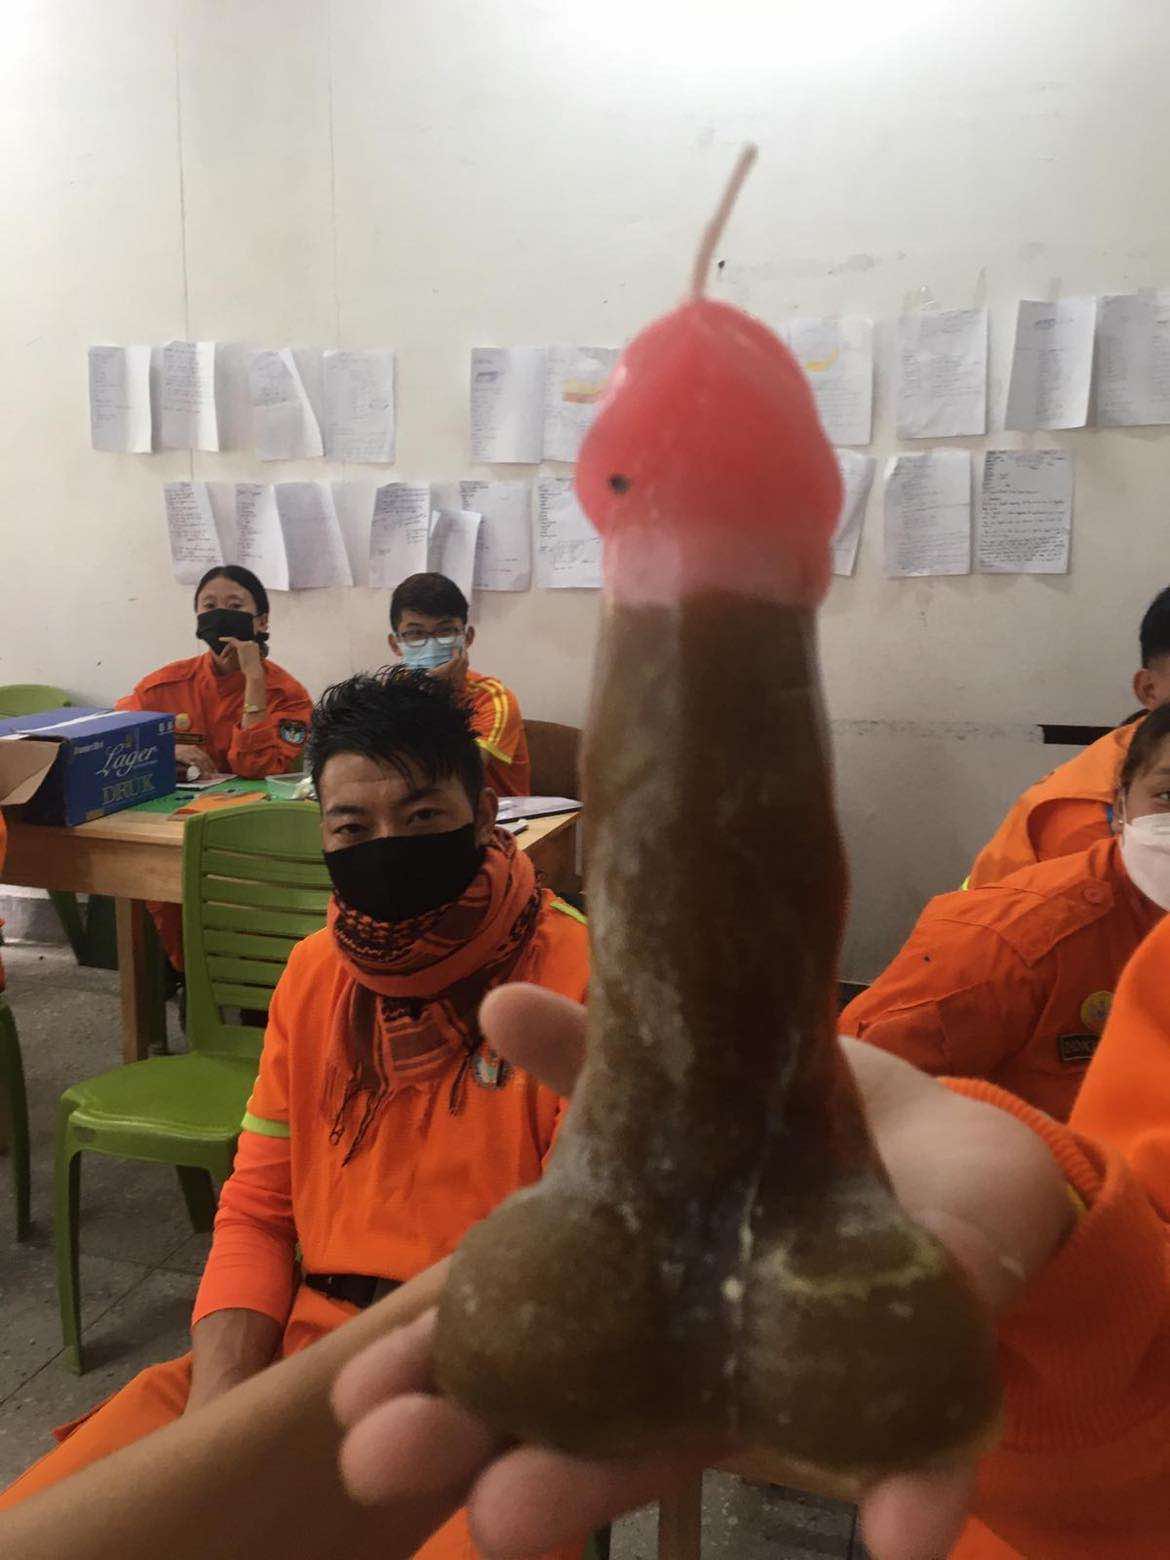
Just an example of an older project that Zina and I worked on:
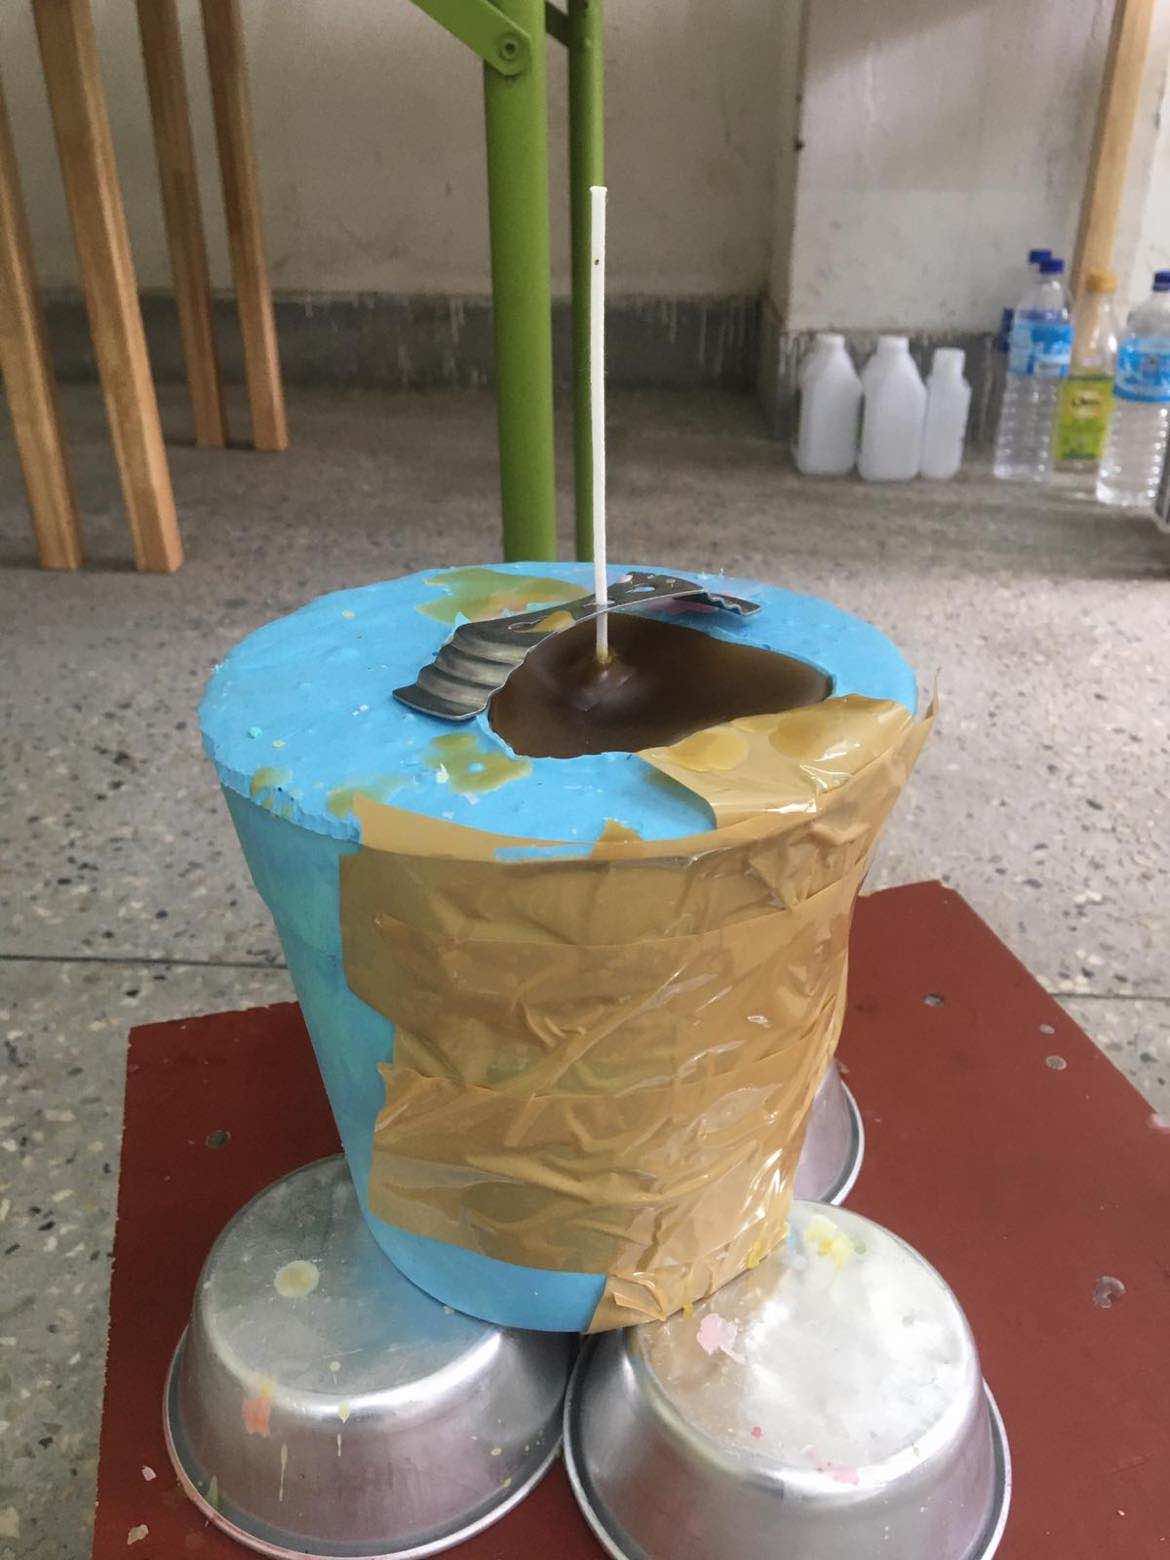
Phallus Candles!:
New Design
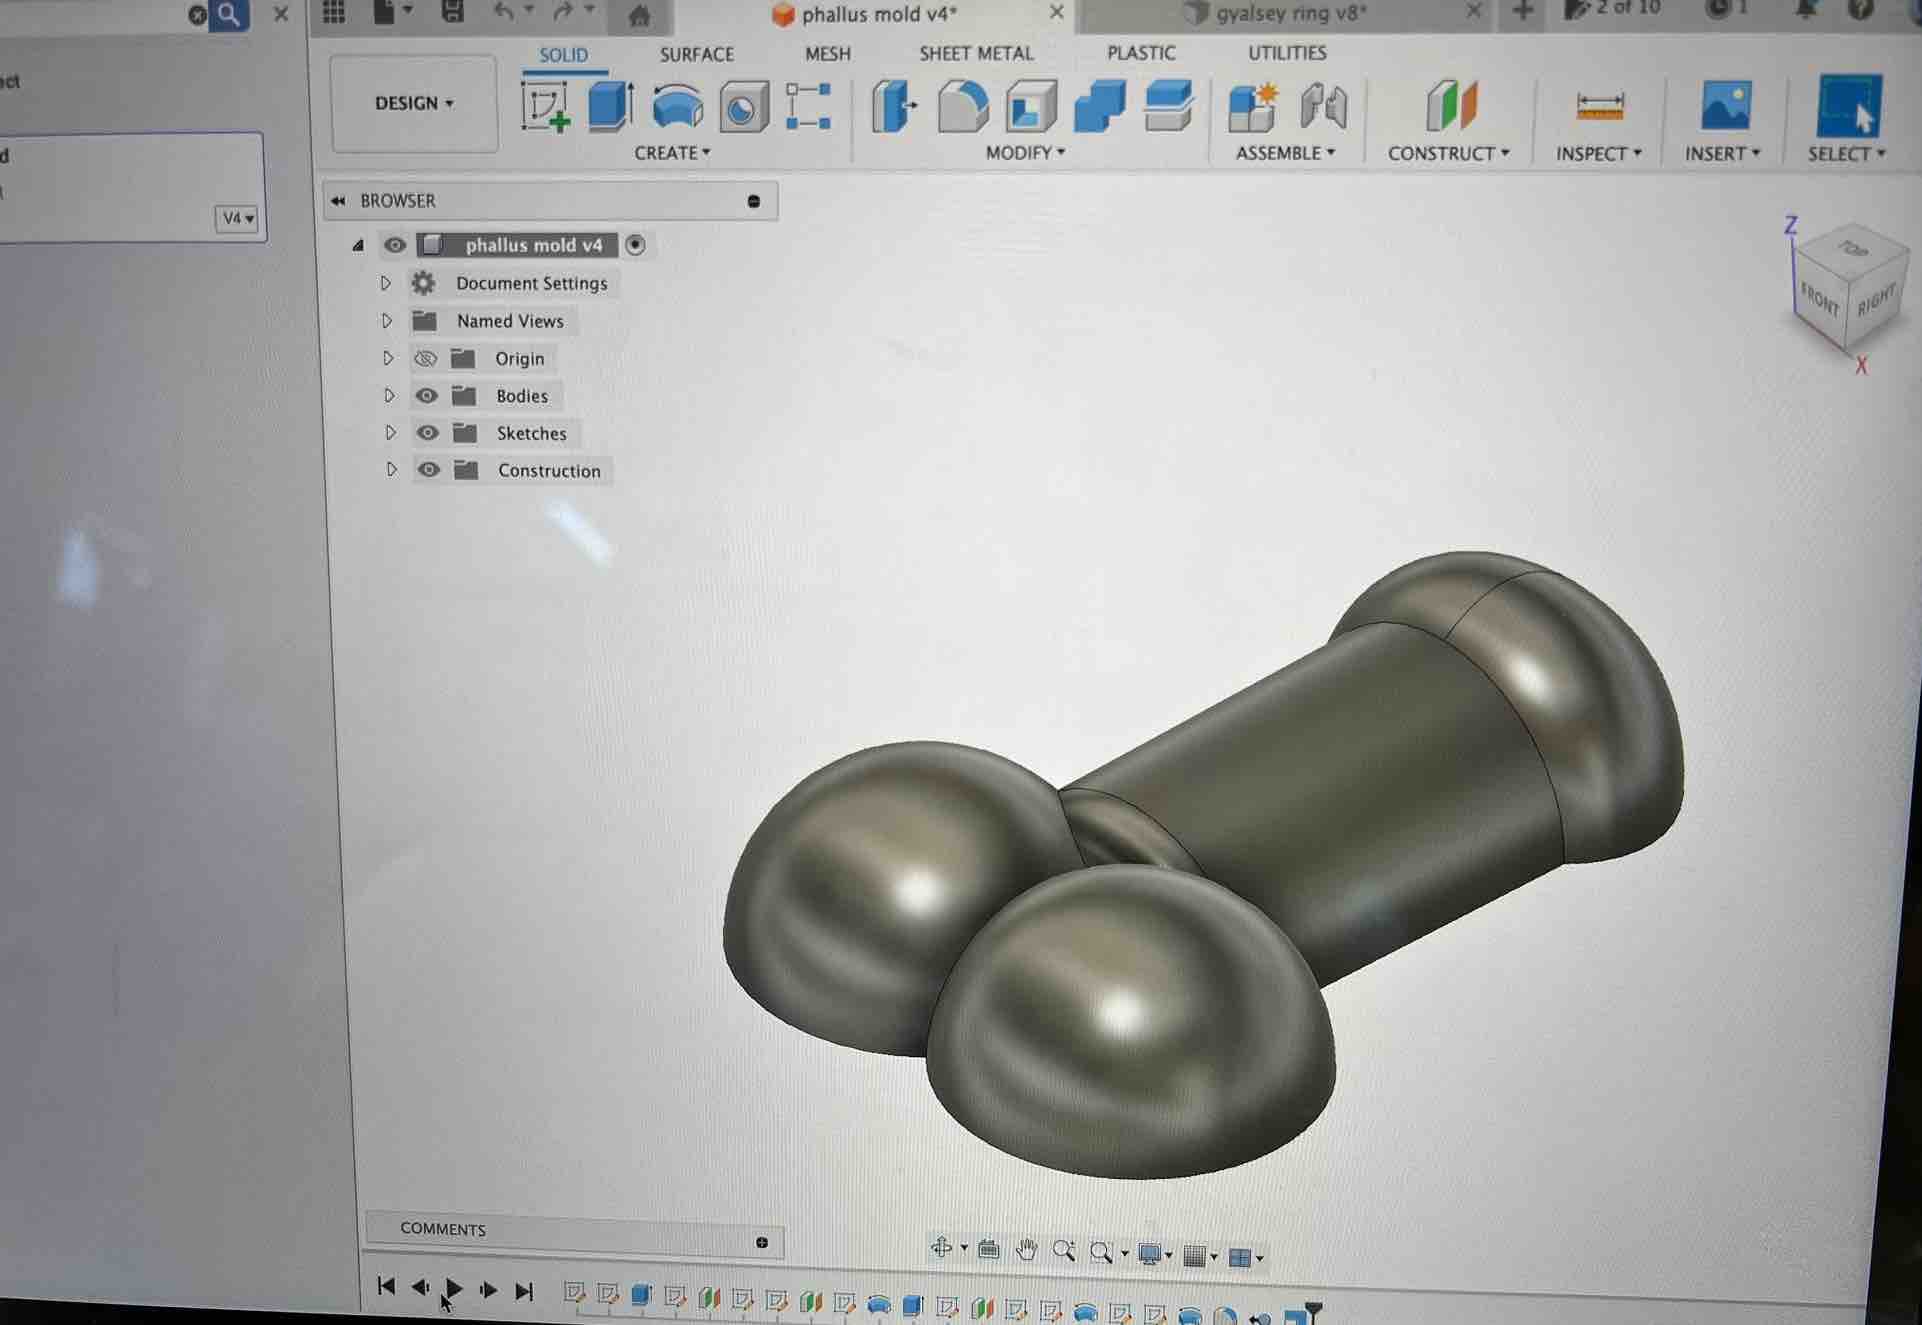
With doubts regarding whether my design was 2D or 3D or 2.5D, I was requested to redo it in 3D and so I went ahead with that after my final project.
Fusion360 + Modela Player 4
For the design, again I used fusion360 to design the 3D structure and Modela Player 4 to get the tool path.
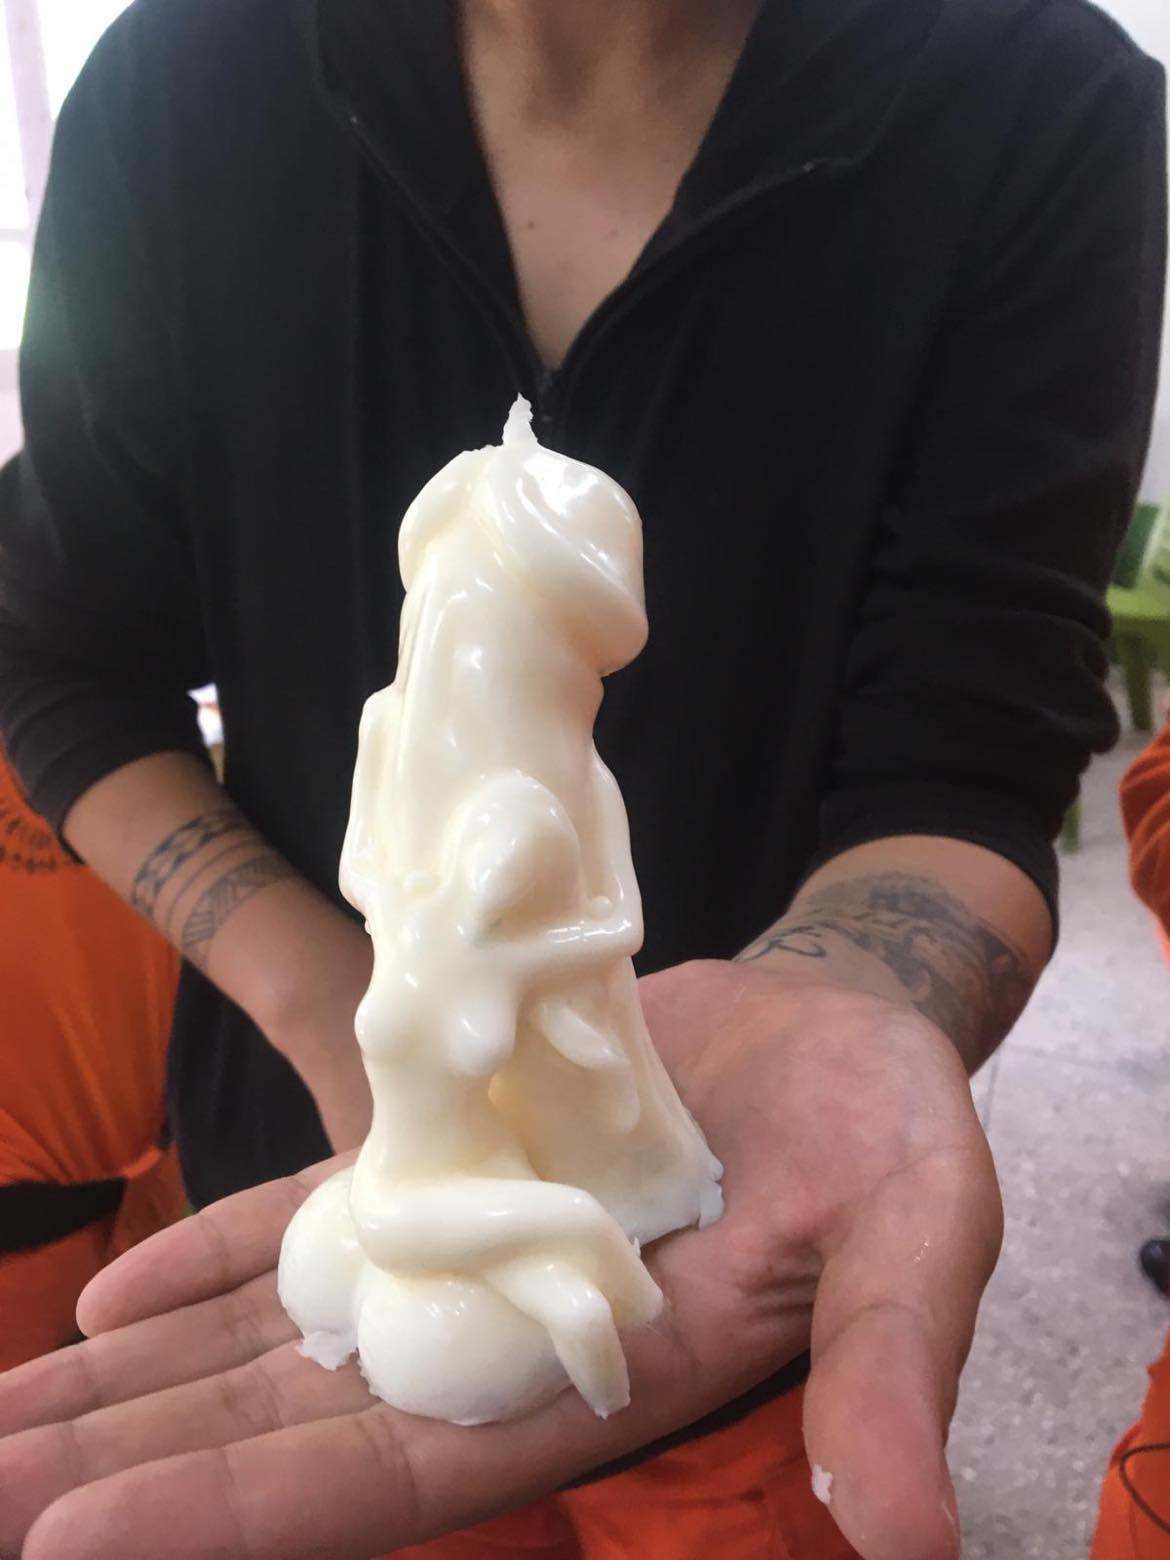
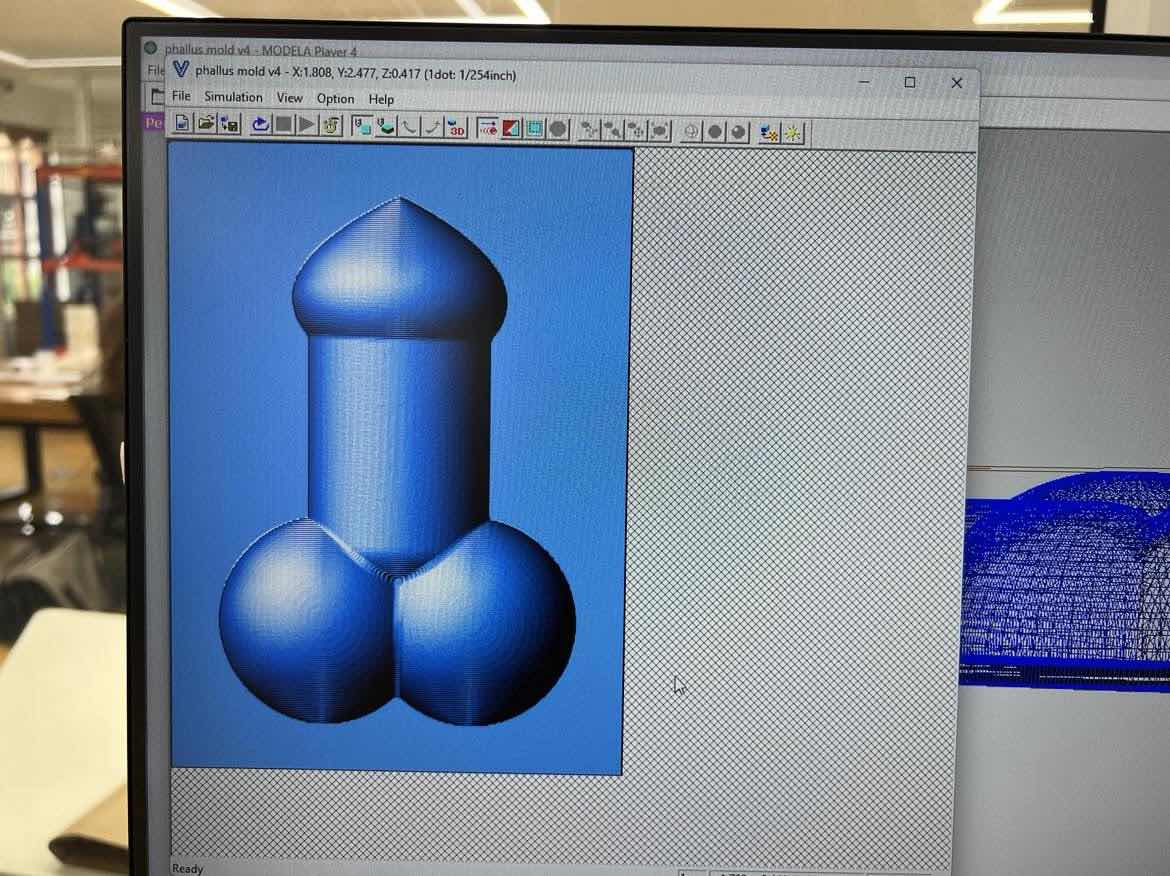
This was my inspiration:
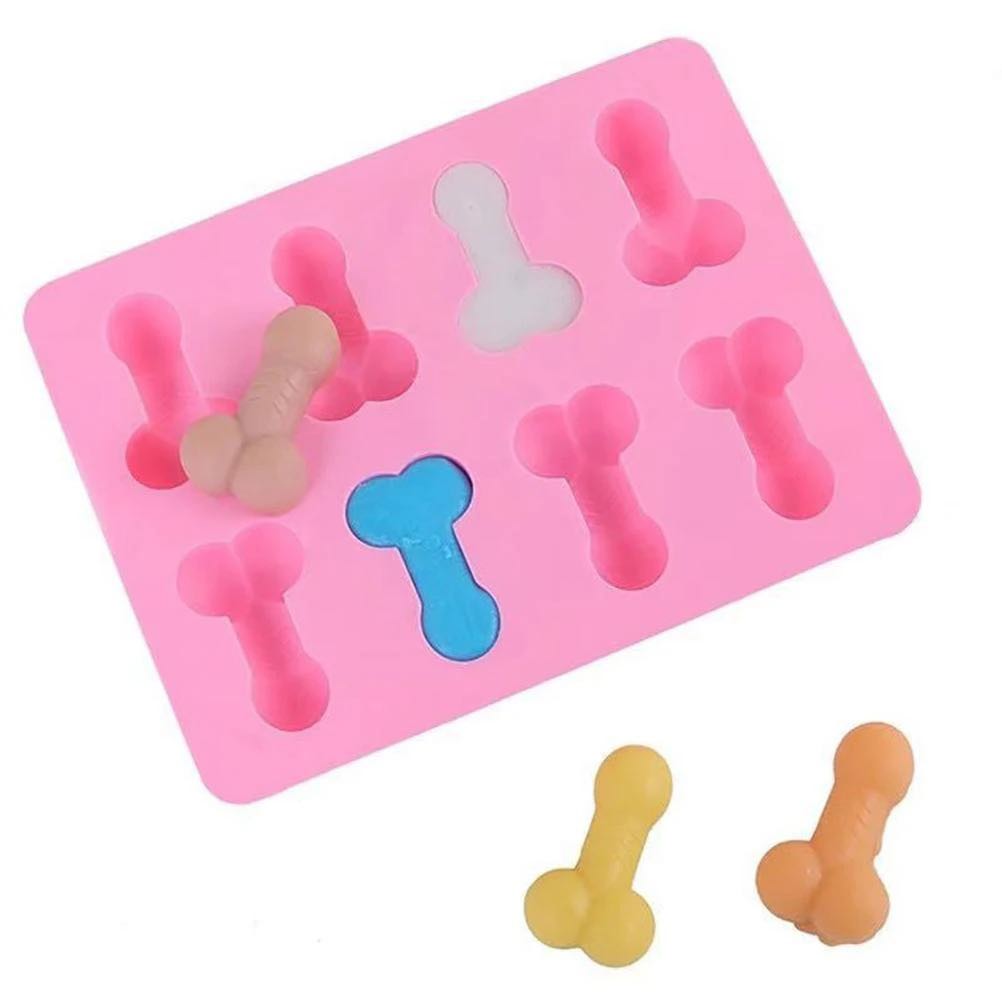
The phallus symbol is very lucky in Bhutan so I wanted to make a playful mold for chocolates.
In Modela 4:
I imported the STL and followed all the steps as explained above. Since all the other work is documented, I will leave out the instructions for this portion.
The Roughing path:
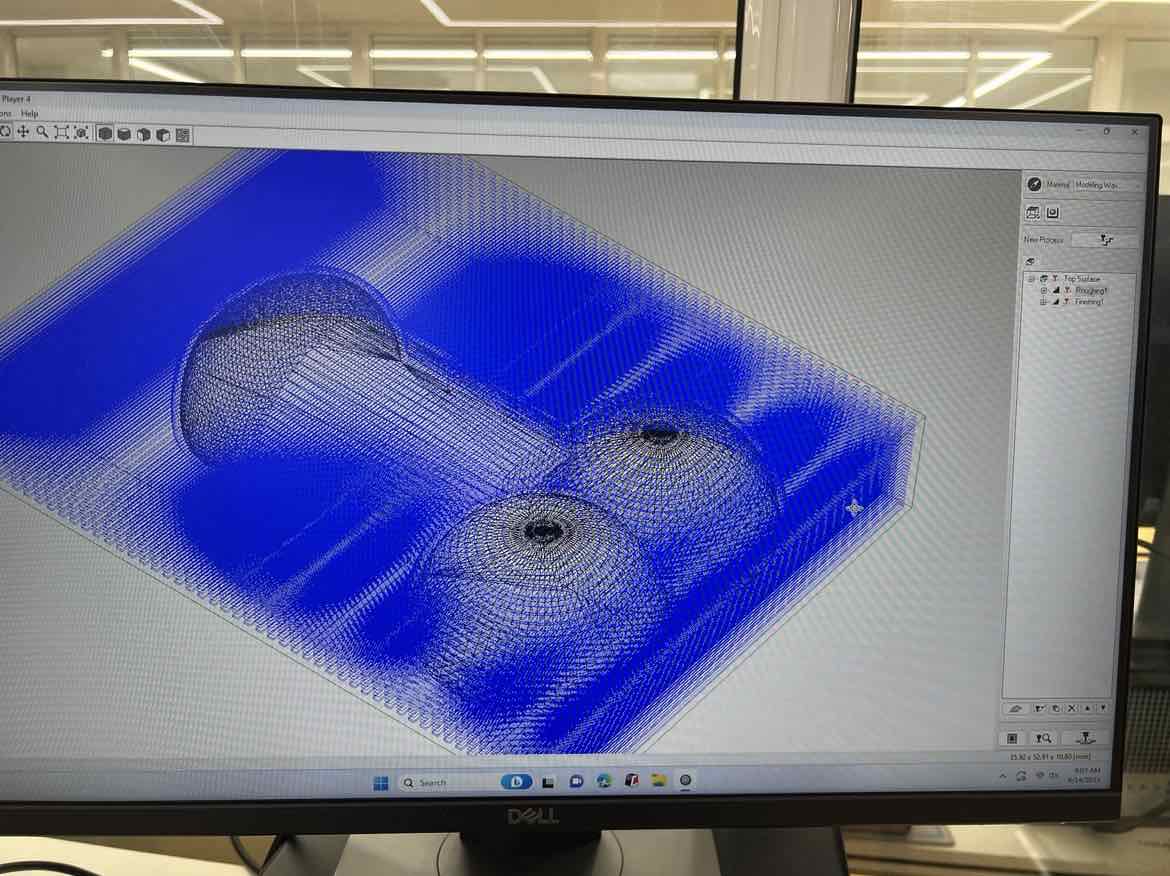
The Finishing Path:
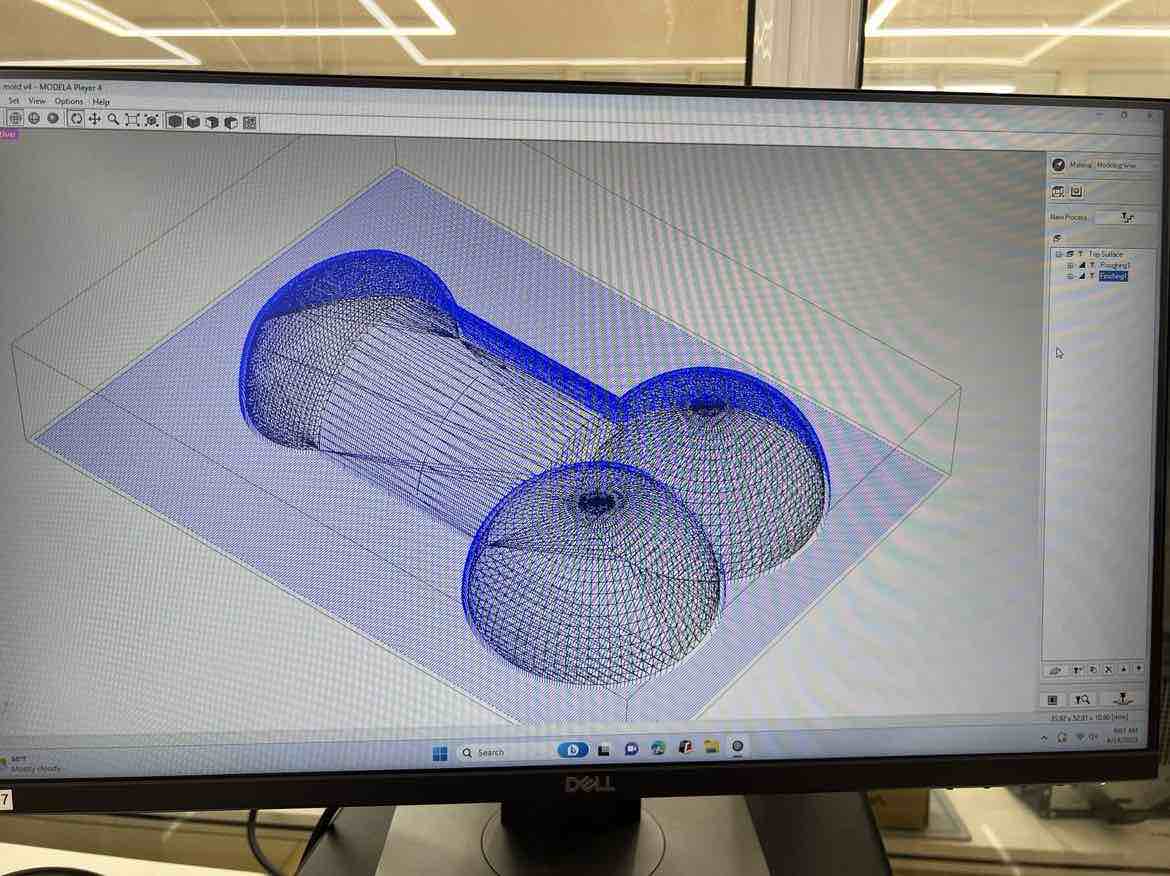
The Simulation toolpath:
Mill and Mold
Then I milled the negative using the SRM20:

Post Vacuum 1:
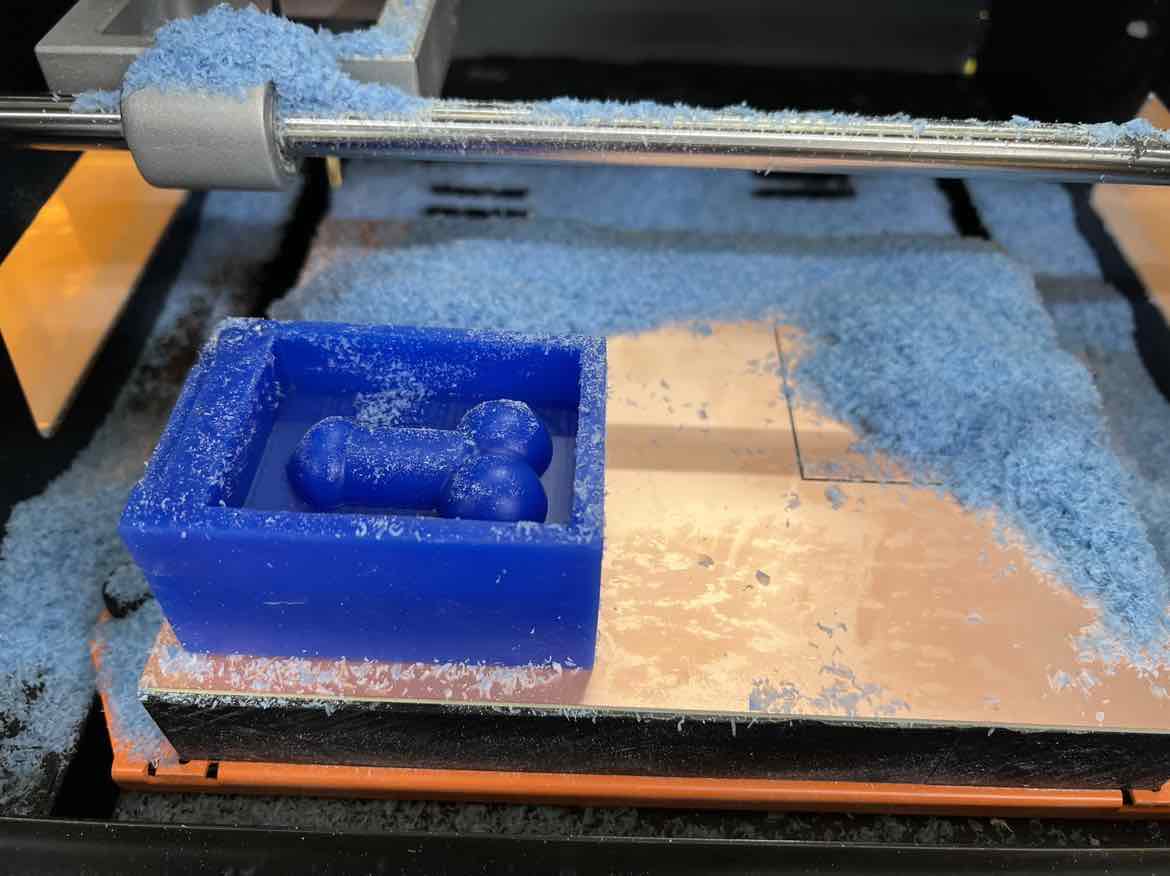
Post Vacuum 2:
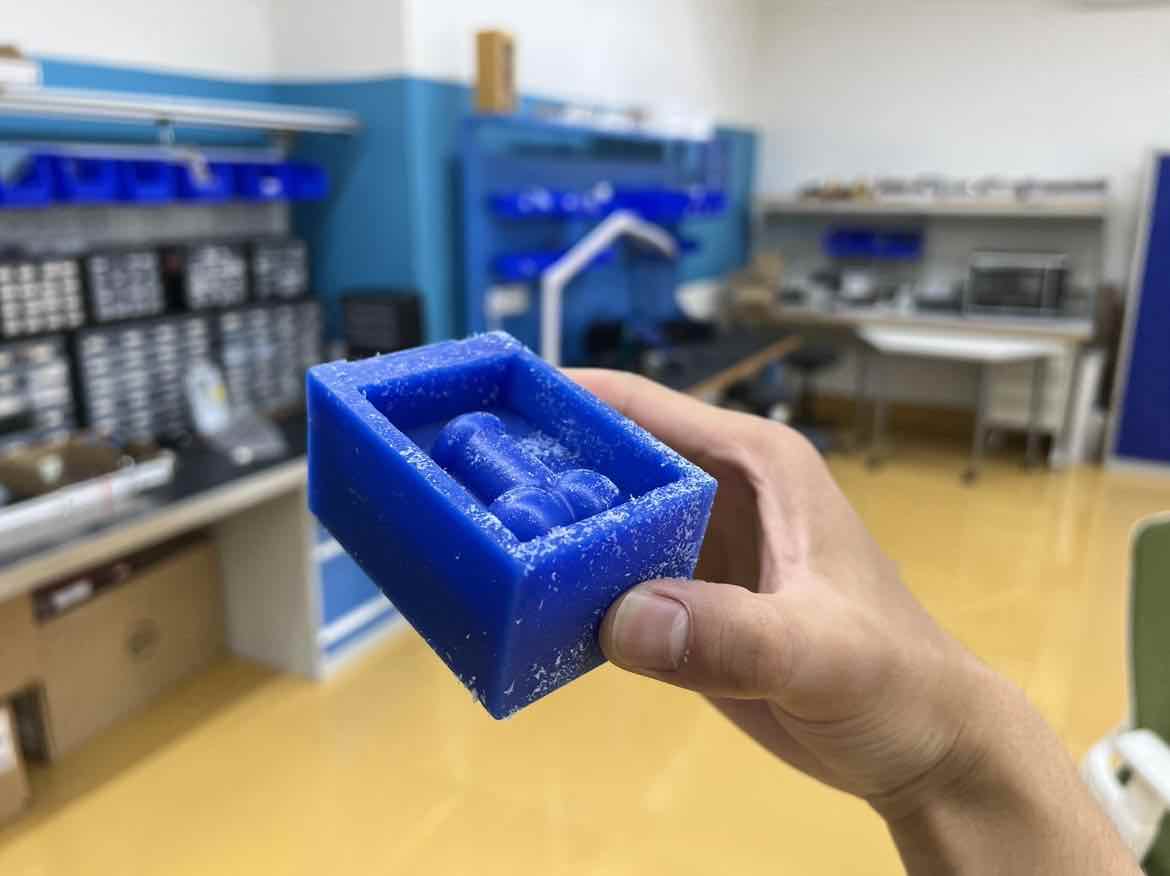
I cleaned the mold to remove the wax debris.
Then I used sorta clear as the positive mold, following the steps as above, this is because sorta clear is food safe.
Then finally, the phallus chocolate was casted using chocolate chips which were melted in the microwave: