12. Molding and Casting
Week Assignment
- Review the safety data sheets for molding and casting materials, then make and compare test casts with each of them (Group)
- Design a mold, mill it, and use it to cast parts (Individually)
Review of Safety Data Sheets and Testing
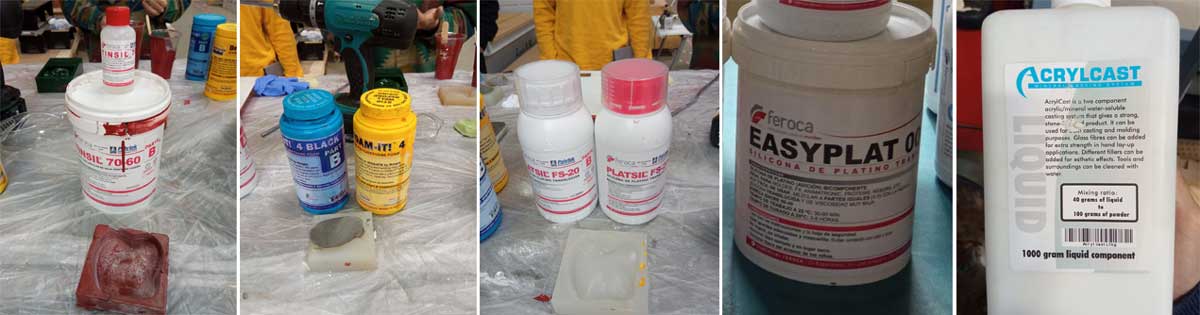
During this week, we reviewed several molding and casting materials available at the lab with Edu. We focused on understanding safety practices and thoroughly examined the safety data sheets for each material. Adrien compiled all this information into a comprehensive table and shared it with the group.
We conducted tests using these materials to evaluate their properties and suitability for our projects. The goal was to understand how each material behaves during the casting process and to determine which would be the best fit for our needs.
Here is a summary of the materials we tested:
- Material A: Known for its high durability but requires careful handling due to its chemical properties.
- Material B: Easier to work with and has a faster setting time, but slightly less durable.
- Material C: Provides excellent finish and detail, though it has a longer curing time.
By comparing the results of these tests, we were able to make informed decisions about which materials to use for our individual mold designs and casting projects.
| Product | TINSIL 70-60 | FOAM-IT 4 | PLASTIL FS-20 | EasyPlast 00-40 | Acrylcast |
|---|---|---|---|---|---|
| Producer | Polytek | Smooth-on | Feroca | Feroca | AcrylCast |
| Specificity | Good for metal | 14 times its size | quality/fast curing | Easy to use | Stone like |
| Shore Hardness | A60 | N/A | A20 | A40 | Hard |
| Shrinking | -0.8% | 1400% | NO | <-0.1% | - |
| Pot Time | 30mn | 1.5mn | 8mn | 30-60mn | - |
| Curing Time | 24hs/2hs-100ºC) | 20mn | 25mn | 3-6hrs/20mn-120°C | - |
| Mixing | 5A/100B | 1/1 vol | 1A:1B | 1:1 vol | - |
| Degassing | YES | NO | NO | Not compulsory | - |
| Release Agent | Powder | N/A | Pol Ease 2500 silicon-free | N/A | - |
Testing
Machinable waxes come in blocks of various colors and sizes. In the FabLab, these waxes are often recycled from machining remnants of other waxes. Generally, darker blocks are stronger, but recycled waxes may have colors influenced by the mixture of different waxes. It’s crucial to know the correct temperature for heating the wax. For new blocks, the recommended temperature is usually indicated on the box. For recycled blocks in the lab, temperatures above 100 degrees Celsius are not recommended.
Mixing and Degassing
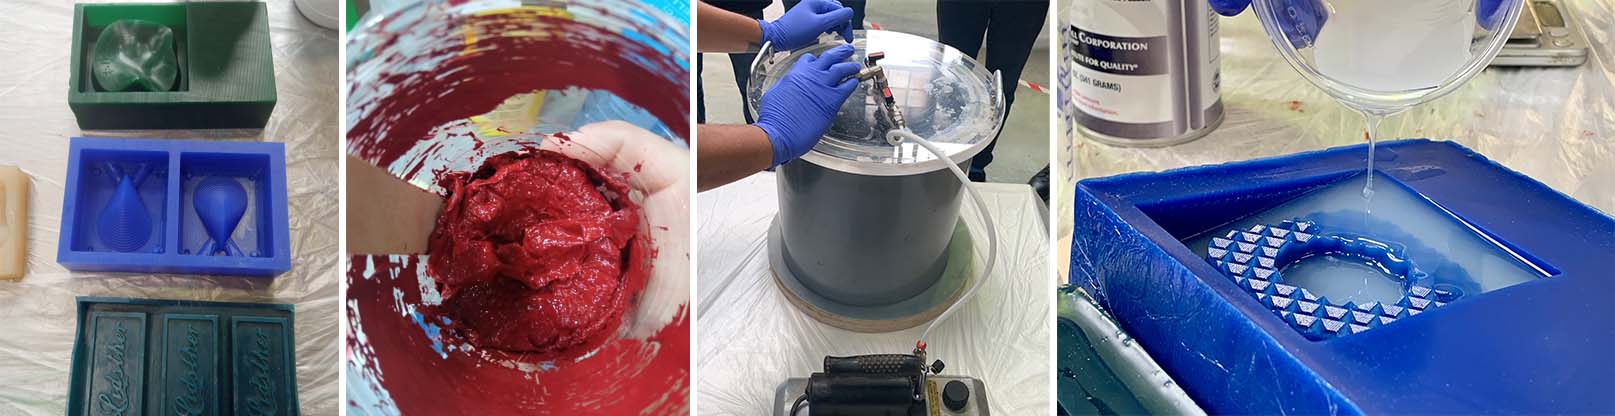
Accurate proportions according to the technical sheets of each product are vital, especially for high ratio mixes (e.g., 5/100). With the TINSIL 70-60, we encountered issues as it began curing before we could pour it into the mold.
When working with mixtures that have a short working time, setting a timer for mixing and pouring is essential. Bubbles in the mixture can affect the final result. To achieve a bubble-free surface, degassing is necessary. This can be done mechanically by tapping the container or mold, or using a vacuum pump for silicones with a longer working time. Reducing pressure with a vacuum pump increases bubble size, allowing them to rise to the surface.
Demolding
Using release agents can make demolding easier. Here are some tips:
- Use a silicone-free release agent for silicone molds.
- Olive oil or similar inexpensive options can be effective.
- For metal casting, use powder compatible with your mold.
- Petroleum-based sprays are also an option.
- Blowing compressed air into the mold’s interior corners after the silicone has fully cured can help.
Safety
Following the safety information on material data sheets is crucial. Basic safety measures include:
- Wear protective glasses.
- Use two pairs of gloves to ensure you can remove one if it gets contaminated.
- Avoid mixing materials from different products.
- Wash any product that comes into contact with your skin immediately.
- Use toxic products in a well-ventilated area.
Designing and Milling a Mold
For this assignment, I aimed for a simple yet detailed design. I started by modeling my shape in Blender, which is well-suited for creating organic shapes. My design was a cubic dead octopus, saved as an .obj file to import into Tinkercad.
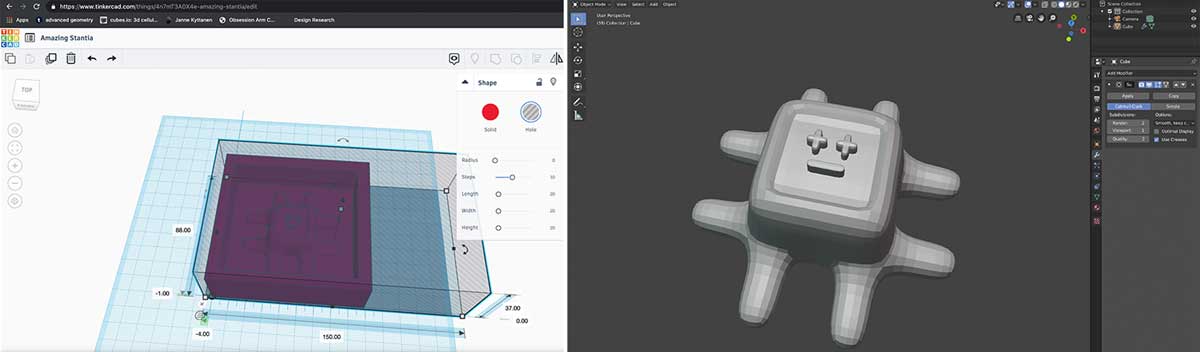
Following Josep’s guide, I used Tinkercad to scale the model. As my model was cut in half to create a one-sided mold, I added box walls and measured the wax block size to ensure proper fit. The wax block measured 148 x 88 x 37 mm.
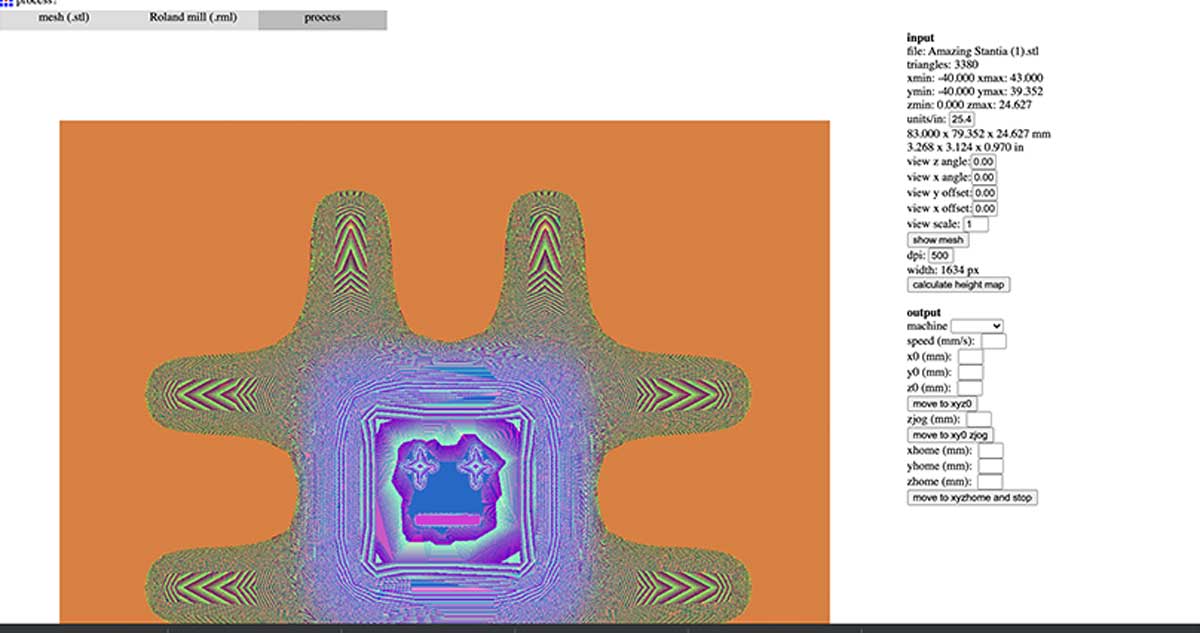
After finalizing the design, I exported the file as an .stl for use in Fabmodules to create the CNC path.
Here are the steps I followed:
- Selected input format as mesh(.stl) and loaded my model.
- Configured parameters:
- Units/in: 25.4
- View scale: 1
- DPI: 500
- Clicked calculate height map.
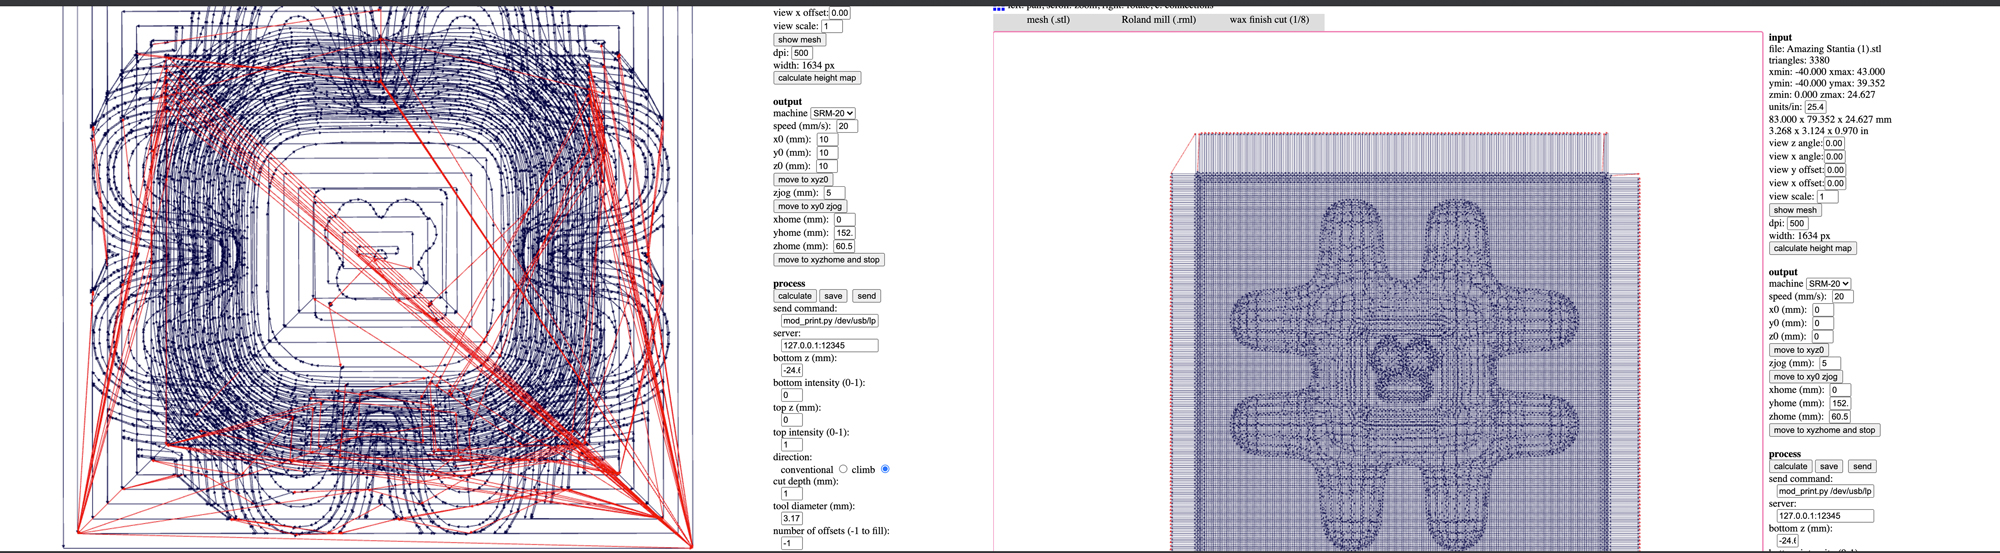
For the first cut, I:
- Selected output format as Rolland mill(.rml)
- Chose wax rough cut (1/8).
- Set parameters:
- Machine: SRM-20
- x0 (mm): 0
- y0 (mm): 0
- z0 (mm): 0
- zjog (mm): 5
- Verified values for the process and used a 1/8 end-mill.
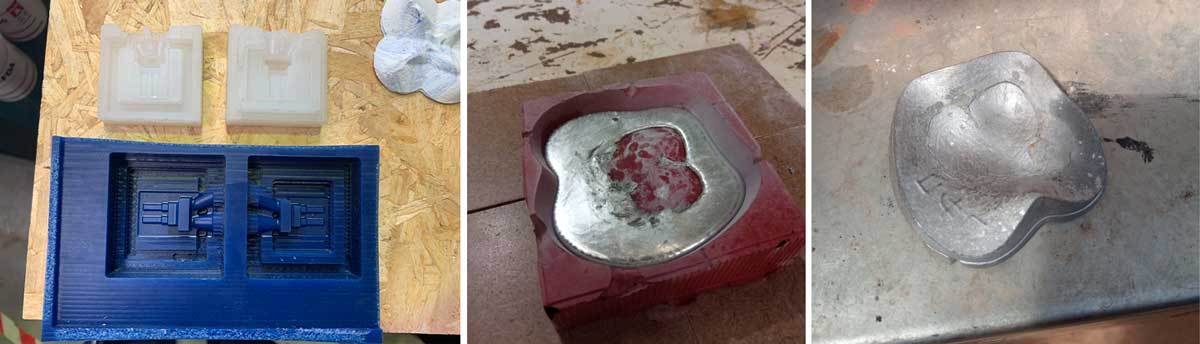
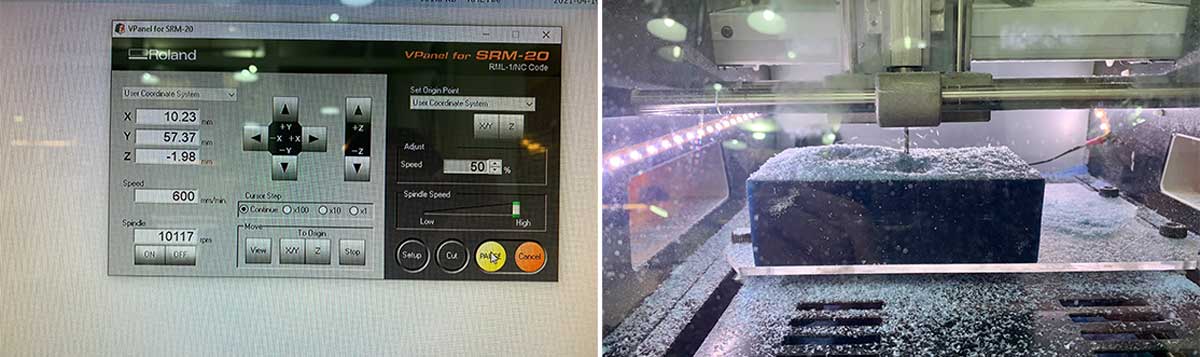
After simulating the cut, I saved the file and prepared the wax block. I applied double-sided tape to secure it in the Rolland SRM-20 machine, set the origin XYZ, and initiated the cut. Initially, the machine produced an unusual sound, so I reduced the speed to 50% for a smoother cut.
I then prepared the finishing file:
- Switched to wax finish cut (1/8) and updated parameters:
- Tool type: Ball end for improved surface finishing due to rounded edges.
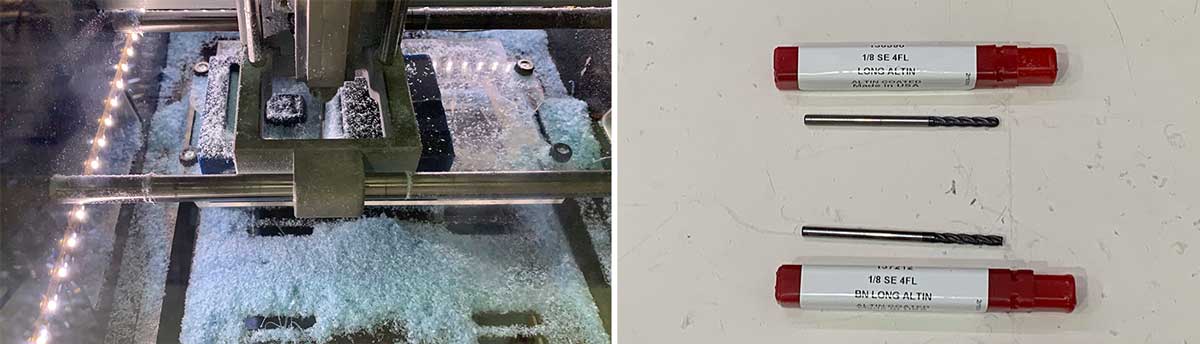
I used a 1/8 4-flute flat-end mill for the rough cut and a 1/8 4-flute ball-end mill for the finish cut.
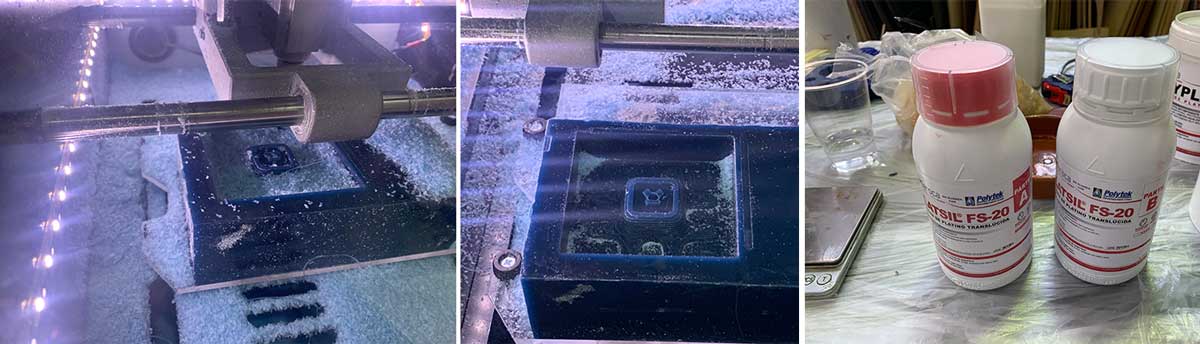
While waiting, I decided to use Easy Crystal silicone. I reviewed the instructions on the website to ensure proper usage. ```
| Product | Work time | Work time | Curing time | Shore hardness | Mix Viscosity | Color |
|---|---|---|---|---|---|---|
| EASY CRYSTAL | 1A:1B vol | 45 min | 4 - 5 hours | A25 | 500 +- 100 cps | transparent |
I wanted something faster so I checked the Platsil FS-20
| Product | Work time | Work time | Curing time | Shore hardness | Mix Viscosity | Color |
|---|---|---|---|---|---|---|
| PlatSil FS-20 | 1A:1B vol or weight | 8 min | 25 min. | A20 | 3.800 cP. | translucid |
The data sheet indicated that the silicone used has minimal contraction.
After completing the milling, I ensured that any wax removed from the block was collected in the machine’s collection tray.
I proceeded by filling my mold with water to determine its volume. I then poured the water into a plastic glass to use as a reference for measuring the silicone mix. Using a digital scale, I measured equal parts of silicone A and B. I first poured 70 grams of silicone A into a plastic cup, then added silicone B until the total weight reached 170 grams.
Nil set a timer for 8 minutes, and I mixed the components for 2 minutes. Despite the mixture being quite bubbly, it was evenly mixed. I poured the silicone into the mold slowly from one end to ensure it filled all cavities. After pouring, I allowed the silicone to cure for 25 minutes.
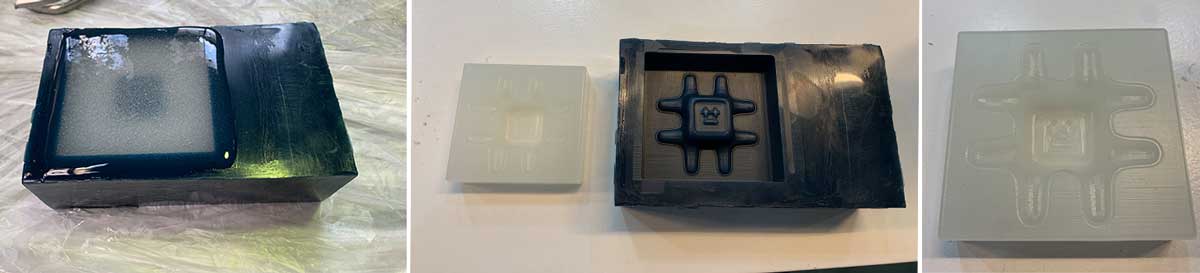
I returned after 30 minutes and found the mold ready. Although I had forgotten to use a mold-release agent, the silicone’s flexibility and the simple design of the mold made it easy to demold the piece.
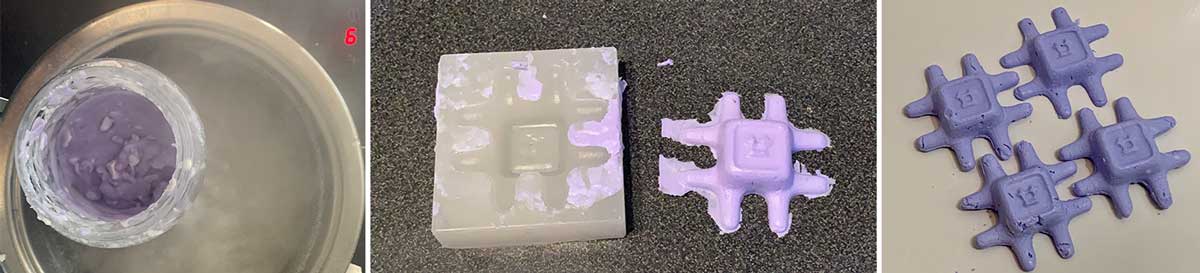
Casting the Octopus
To test the mold, I decided to make octopus-shaped soaps. I chopped up some soap, placed it in a glass jar, and added cream. I then used a bain-marie to melt the mixture.
Unlike pure glycerin, toilet soap is creamier and solidifies very quickly, which made the process a bit challenging. Nevertheless, I managed to produce about four octopus soaps.
Find the final files here: