16. Wildcard Week
Week Assignment
- I have to design and produce something with a digital fabrication process (incorporating computer-aided design and manufacturing) not covered in another assignment.
Vacuum Forming Machine to Make Packaging
I wanted to use this week to create the packaging for my project. So, I decided to use the vacuum forming process. As the object I’m developing for my project is small, Edu suggested I partner with Carla, who was also interested in trying the vacuum forming machine. We discussed the fastest way of doing it and ended up deciding to 3D print the molds.
We documented the steps as the machine is pretty easy to use but has its tricks.
- The Design
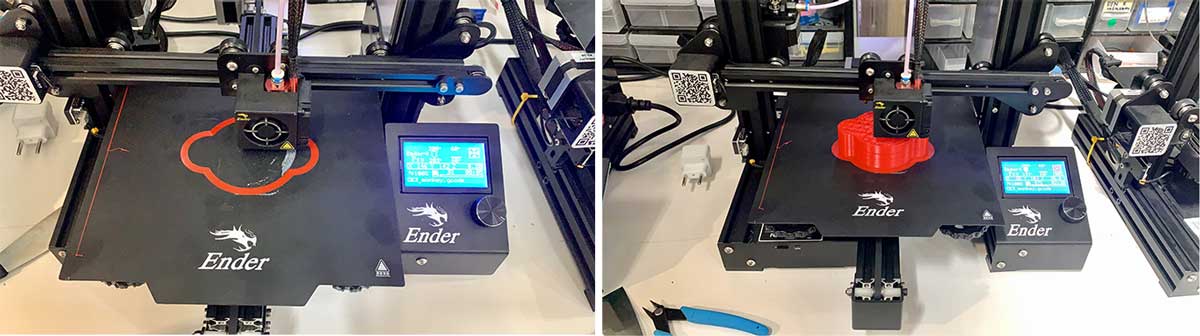
I created a very simple design to test the thermoforming process with the machine we had available in the lab. The idea was to test a possible packaging. I made my design in Rhino by joining two circles and an ellipse, thus creating a polyline that I then extruded with an angle of 2 degrees in case the part had problems with demoulding.
I did not do any other operations on this piece because the objective was to test the process.
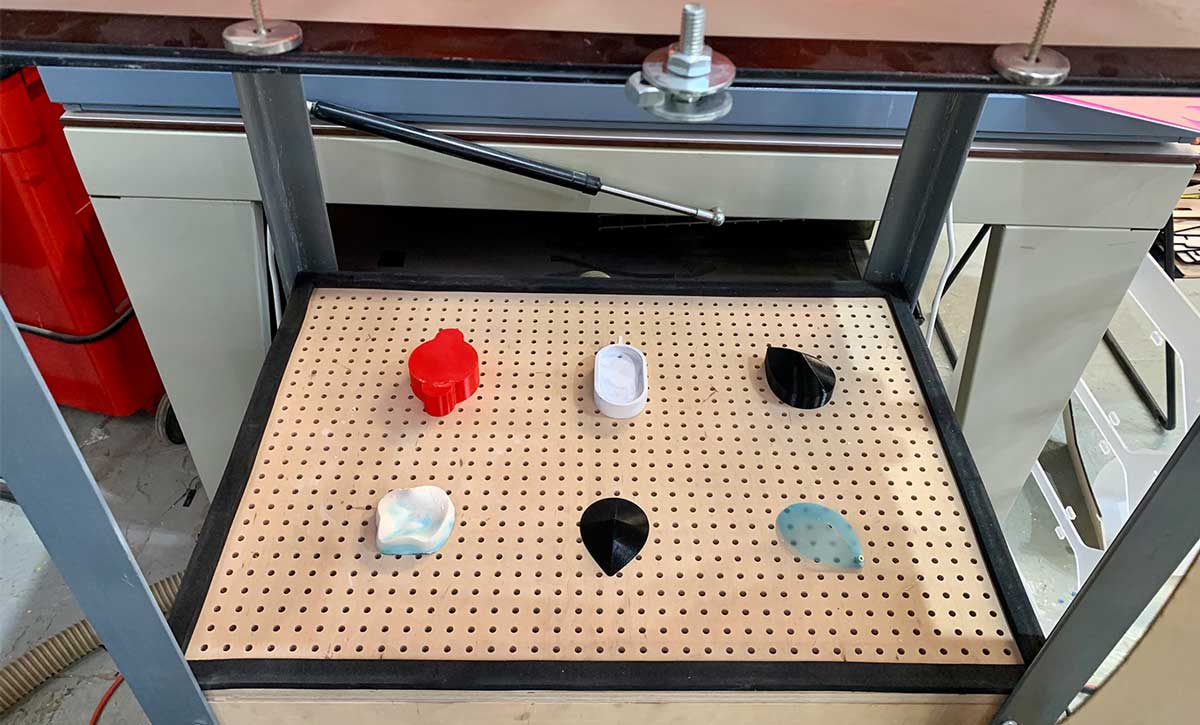
- Making the Model
We decided to 3D print our models and place them on the bed of the machine. As our pieces were simple and small, it was not necessary to double-check design issues. The most important thing was to ensure it was possible to demold and that there were no nooks and crannies.
- Framing the Material
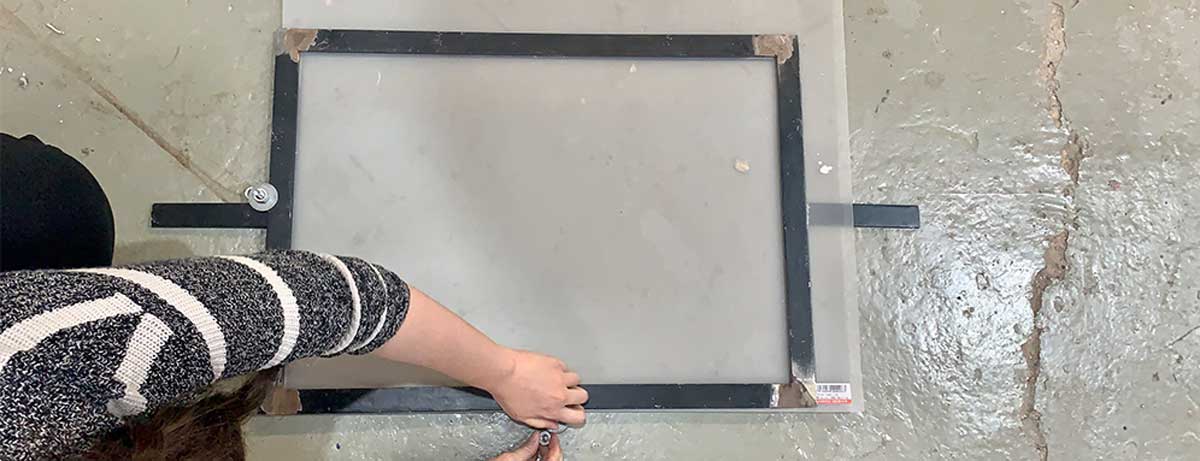
The first step is to get the material into the frame. To do this, we need to trap the material into 2 rectangular metal frames. We used screws and big washers to hold both frames together. We didn’t look for the most suitable material for this process; we just used a Polypropylene sheet we found in the lab. Not the best idea. We cut the edges that protruded from the frame to make the sandwich: frame / material / frame.
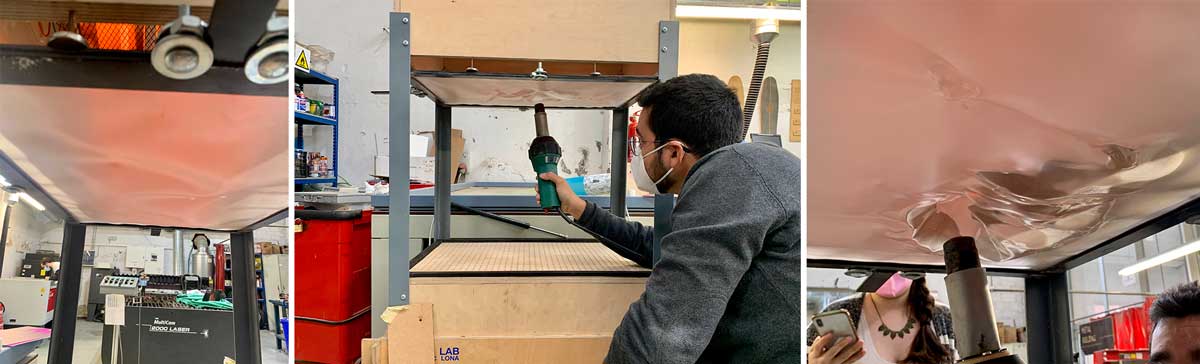
- The Machine
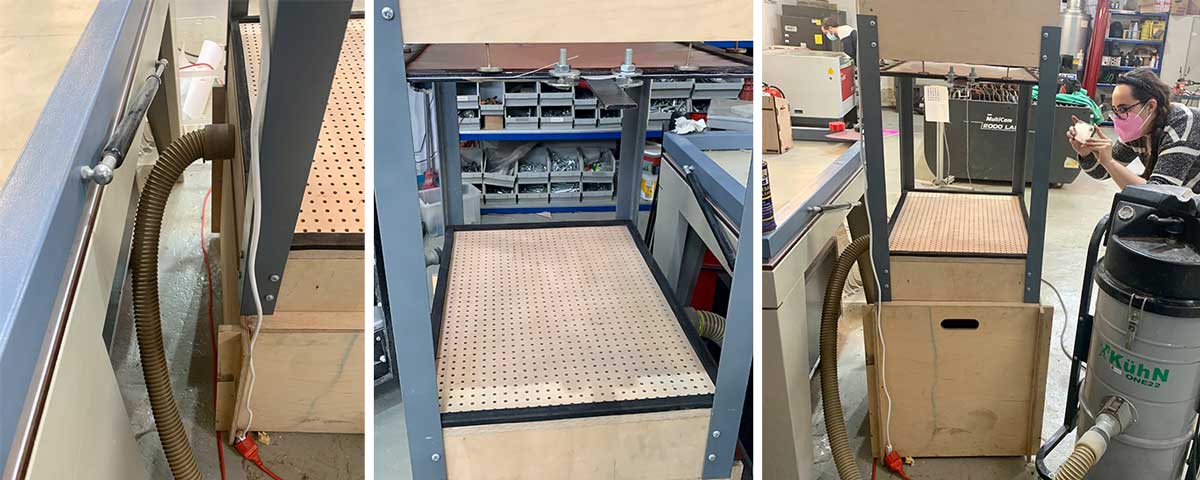
We needed to turn on the machine, which has two plugs and an inlet for the vacuum cleaner. The machine has resistors in the upper part, which heat the material. It also has a series of magnets that hold the metal frame to keep it close to the heat. The bed has some holes, which, when connecting the vacuum cleaner, create a vacuum.
The process involves heating the sheet of plastic material until it is soft enough, then turning on the vacuum cleaner and lowering the sheet in a plastic state so that it takes the shape of the molds.
- The Process
Before starting, we applied a mold release agent to the molds, the same one we used for the molding and casting week.
Our machine is a custom-built lab machine. Therefore, it has its tricks. Given that Polypropylene is not the best material for this process, the first issue we encountered was that the heat was not homogeneous. Edu helped us with a heat gun. We managed to heat an area of the sheet, so we moved our pieces to that section. When we were ready, we wore protective gloves, grabbed the frame by its grip, and on the count of 1, 2, 3, we lowered the frame towards the molds.
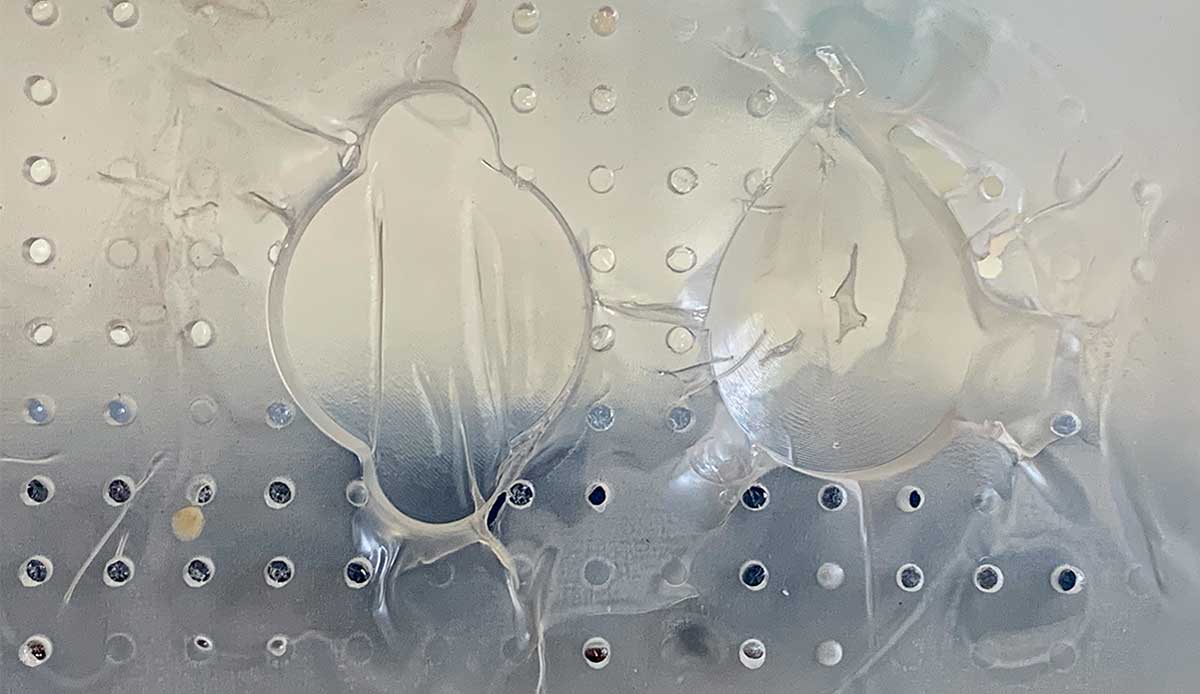
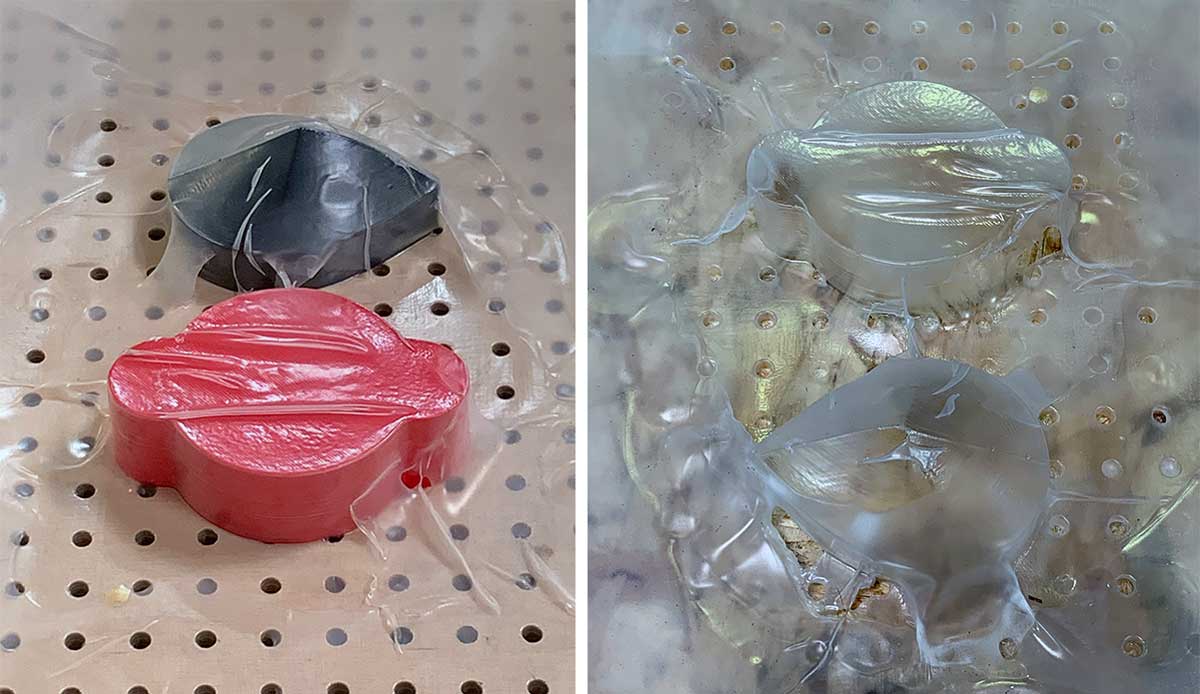
To our disappointment, the molds did not turn out well.
Download files here:
Learnings
The preparation process is long for how simple the procedure is. Partly because of the characteristics of this machine, where you have to do a lot of manual work, and partly because we did not choose a good material for the process.
I think it is key to take into account the limitations of the machines one uses and to maximize their efficiency. In our case, the problem was clearly the material.