Interface Design and Programming Process
The goal of this project is to demonstrate how a game can interact with a device. Rather than developing a full game, this prototype focuses on syncing device data (steps) with the game.
Overview
For this project, I used a free Space Shooter game template from the Unity Asset Store. This section covers the modifications made to the template and additional resources utilized.
For detailed information on Bluetooth integration, refer to the Interface app & programming week documentation.
Unity 3D Game Development
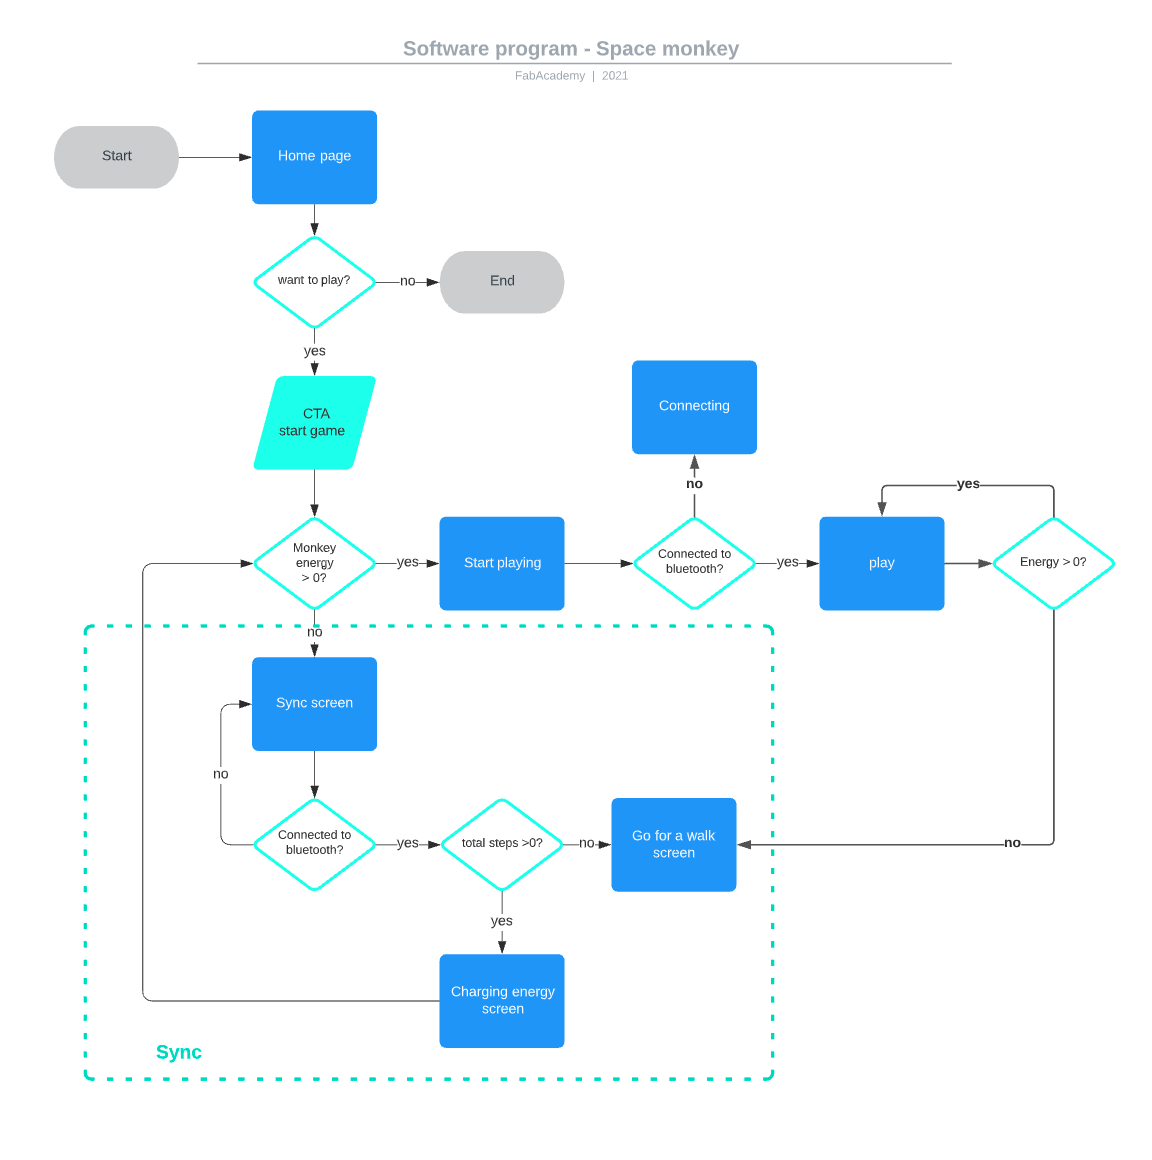
To start, I created a diagram to outline the intended functionality. Note that some elements, such as the ‘counting steps’ screen, are simulated. This screen was added later, which affected its integration.
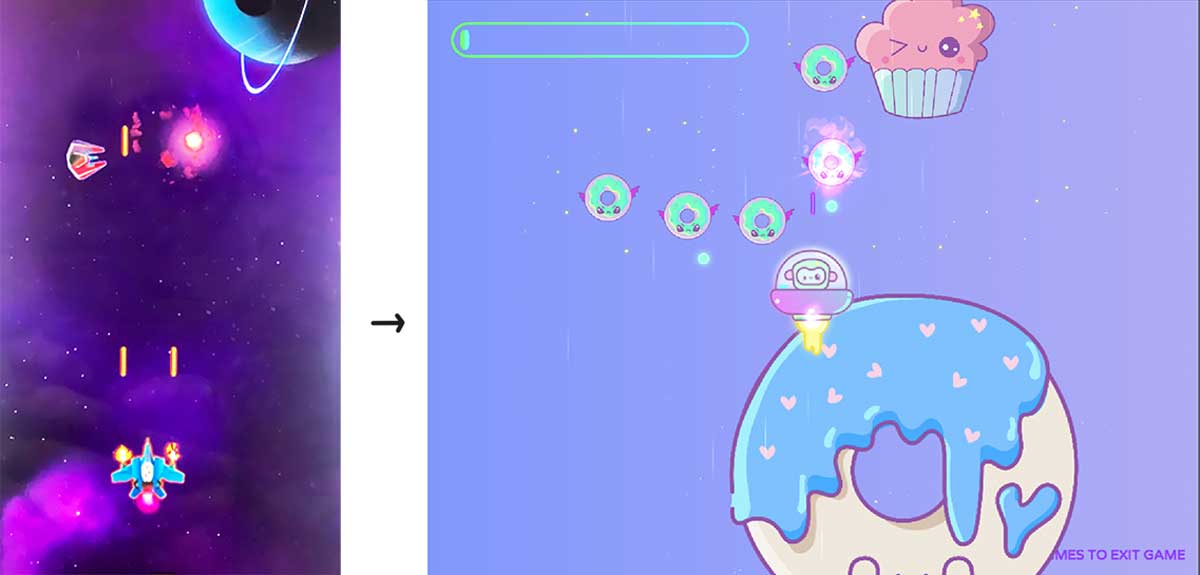
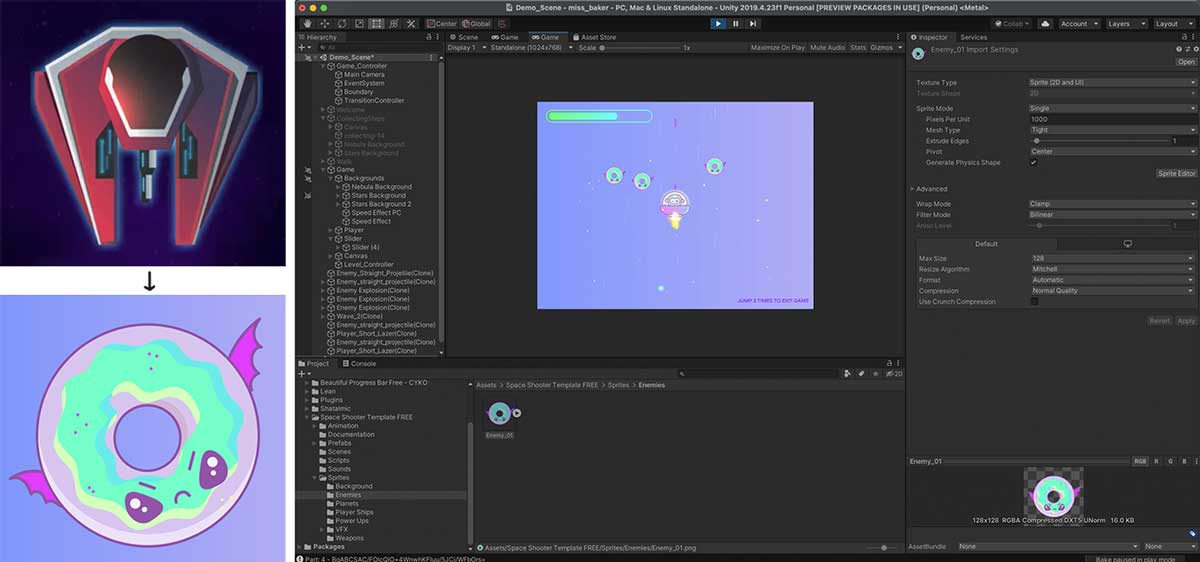
Replacing Sprites
Updating the sprites was crucial for maintaining graphic coherence. Here’s how I approached it:
- Sprite Editing: I imported the original sprites into Illustrator, created custom sprites of the same dimensions, and exported them as PNG files.
- Replacing Sprites: The new PNG sprites were then used to replace the original ones in Unity.
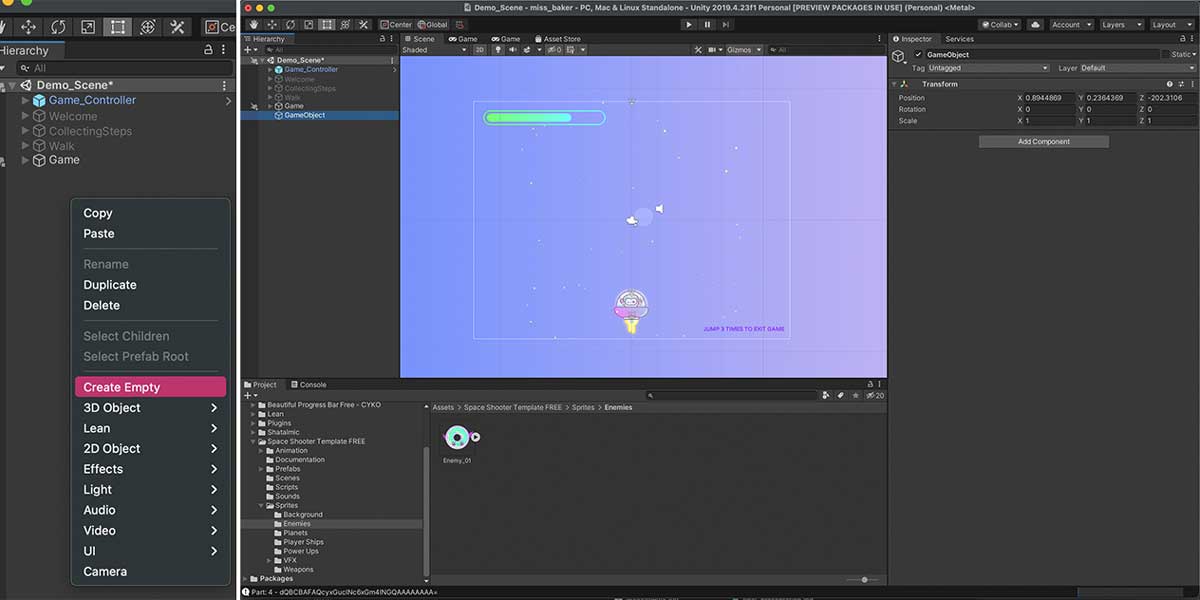
Creating New Screens
To add new screens:
- Create an Empty Object: This object will serve as the container for background and UI elements.
- Add Elements: Instead of creating separate Scenes, I used the same camera setup to simplify transitioning between screens.
Creating Buttons and UI Components
For UI elements:
- Use Lean GUI: I employed the Lean GUI library to add and customize buttons. This library allows easy modification directly within the Unity interface.
- Add Canvas: A Canvas is necessary to contain UI elements. I utilized an example Canvas provided with Lean GUI.
For the progress bar, I used Beautiful Progress Bar Free - CYKO, available for free on the Unity Asset Store.
Moving Between Screens
To manage transitions between screens, I created a script named TransitionController:
//required libraries
using System.Collections;
using System.Collections.Generic;
using UnityEngine;
using System.Threading.Tasks;

#region Serializable classes
[System.Serializable]

#endregion

public class TransitionController : MonoBehaviour {

    [SerializeField] // allows to assign objects in the unity UI
    GameObject walk, game, welcome, steps; // reference to all game screens

    [SerializeField]
    LevelController levelController; // component that manages the game state

    public async void GoWalk() { // function that is called when the ship is destroyed
        await Task.Delay(3000);
        levelController.StopGame();
        game.SetActive(false); // inactive game screen
        walk.SetActive(true);  // set active walk screen
    }

    public void StartGame()  // function that is called when collecting step finishes
    {
        steps.SetActive(false); // inactive counting steps screen
        game.SetActive(true); // set active game screen
    }

}
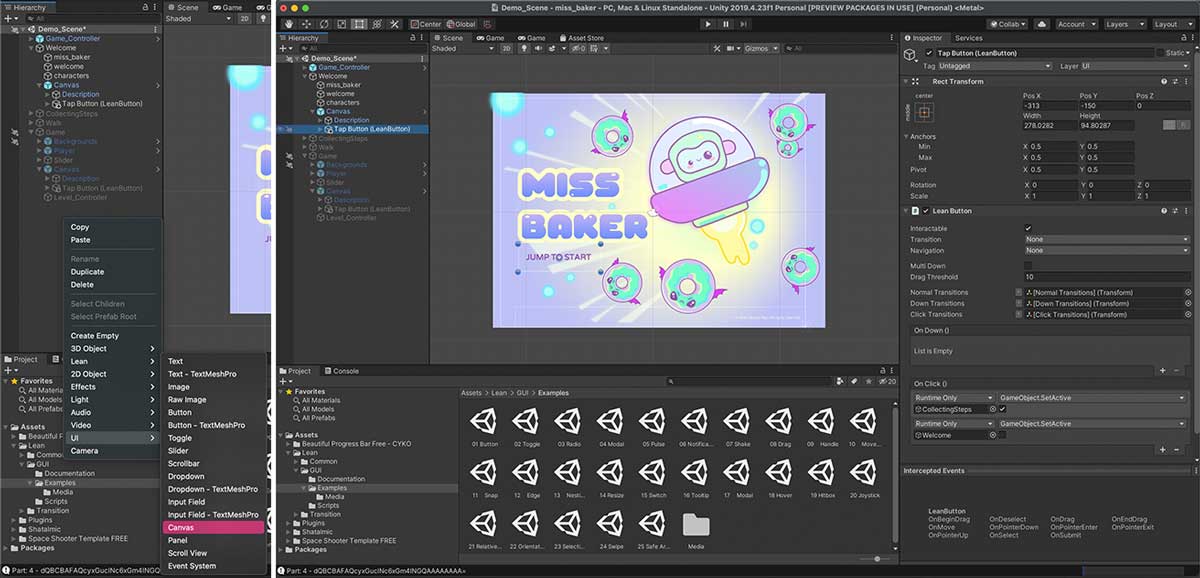
UI with ‘SerializeField’
Here’s how the UI looks when using the [SerializeField] attribute in Unity:
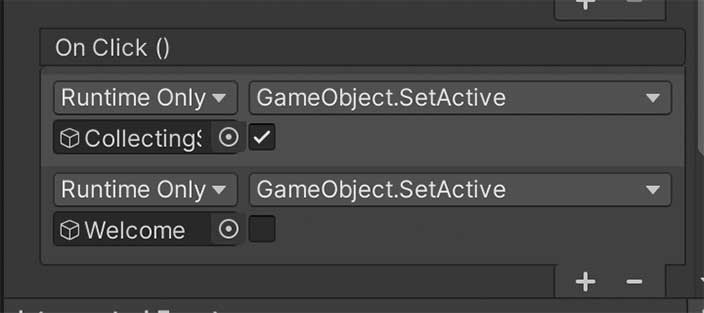
When the “Jump to Start” button is pressed: 1. Activates the “Collecting Steps” screen. 2. Deactivates the “Welcome” screen.
Once the “Collecting Steps” screen has completed collecting the required steps and displays the progress on the progress bar, it: 1. Deactivates the “Collecting Steps” screen. 2. Activates the “Game” screen.
To manage this functionality, a new script named StepController was created. This script handles the transition between screens based on the step collection status.
using System.Collections;
using System.Collections.Generic;
using UnityEngine;
using UnityEngine.UI;

public class StepController : MonoBehaviour
{
    private float var; // value that is being charged on the progress bar
    private float steps = 10f; // amount of steps that the progress bar will sum up (this is simulated for now)

    // this will let us control the slider using the UI
    [SerializeField]
    private Slider stepsBar;

    [SerializeField]
    private TransitionController transitionController;

    // Update is called once per frame
    void Update()
    {
        var = Mathf.Lerp(var, steps, 1 * Time.deltaTime); // lerp is a function form Unity math package. Interpolates A and B by T, which means that it will try to grow from the origin value (var) to the maximum value (steps) this what simulates that the progress bar fill animation

        stepsBar.value = var;

        // Advanced when charge is above 90%
        if (var / steps > 0.9) {
            transitionController.StartGame(); // calls the function start game from TransitionController script
        }
    }
}
LevelController scrip is the one that manage the game
When the ship is destroy ‘StopGame’ is called and it will stop the game and go to ‘go to walk’ screen
When the game starts there are 3 different routines running:
- Planets moving
- Enemies waves
- Bonus
  public void StopGame() {
        foreach (Coroutine c in routines)
        {
            if (c != null ){
                StopCoroutine(c); // all game routines are stoped
            }
        }

        // look for all the things that already are in the screen and errase them
        foreach (var p in GameObject.FindGameObjectsWithTag("Planet"))
        {
            if (p != null)
            {
                Destroy(p);
            }
        }

        foreach (var p in GameObject.FindGameObjectsWithTag("Projectile"))
        {
            if (p != null)
            {
                Destroy(p);
            }
        }

        foreach (var p in GameObject.FindGameObjectsWithTag("Bonus"))
        {
            if (p != null)
            {
                Destroy(p);
            }
        }

        foreach (var e in GameObject.FindGameObjectsWithTag("Enemy"))
        {
            if (e != null)
            {
                Destroy(e);
            }
        }
    }
LevelController to manage the screen transitions.
How to Load Steps into the Game
To handle the synchronization of steps with the game, I used a script called PlayerBluetoothConnect. This script integrates with the Bluetooth library used during the Interface app & programming week.
You can find the PlayerBluetoothConnect script here: PlayerBluetoothConnect.cs
Sending Data to the Device
Part of the PlayerBluetoothConnect script is responsible for sending a command to the device to reset the step count. Here’s how it looks:
//  HM10_Status.text = "Received Serial: " + Encoding.UTF8.GetString (bytes);
                    string data = Encoding.UTF8.GetString (bytes); //getting the bluetooth data and turning it into text to be able to process it (data = y : x)
                    Debug.Log(data + " bluetooth " + Player.instance + "pepe");
                    string[] values = data.Split(':'); //values to recieve and tranform into an array (split the x and the y into separate values --> values = ["10.0","20.0"])
                    AngleY = float.Parse (values[0]); // variable Y: transform the text for Y into a number
                    AngleX = float.Parse (values[1]); //Variable X: transform the text for X into a number
                    Steps = int.Parse (values[2]); //Variable Steps: transform the text for X into a number
                    if(Steps > 0 && Player.instance != null && !Player.instance.gameObject.activeInHierarchy)//if the player is not active and steps are more than 0
                    {
                        LevelController.UpdateSteps(Steps);//Updates the steps from the device
                        SendString ("Y");
                    }
                    });
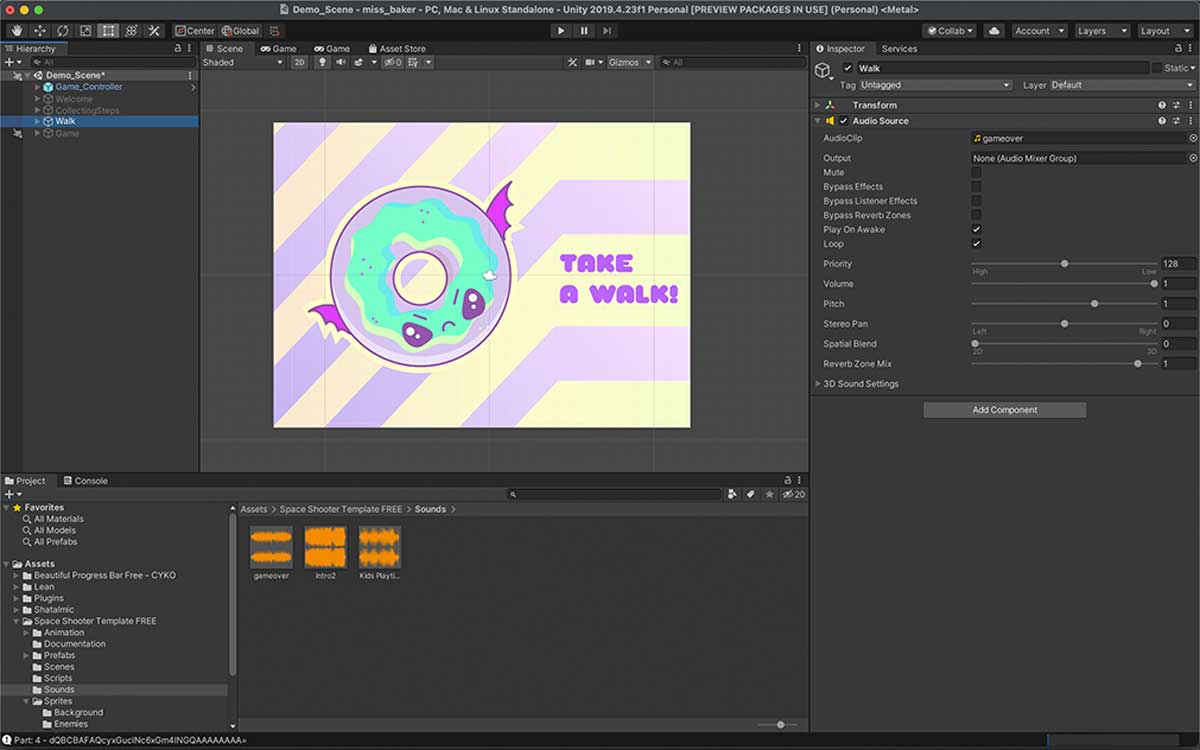
Adding Music
Adding music in Unity is simple:
- Add Music Files: Place your audio files into the
Assetsfolder. - Create an Audio Source: On the screen where you want the music, create an
Audio Sourcecomponent. - Assign the Audio Clip: Drag the music file to the
AudioClipinput field of theAudio Sourcecomponent.
Device Interface
I created a hardware diagram to guide the development process. While not all components are fully operational yet, this diagram represents the ideal functionality of the prototype.

Counting Steps Using the Accelerometer
During the Interface app & programming week, I documented how to display faces on the OLED screen and switch between
//If the user walks then change the face
  if (steps - prevSteps > 0) {
    oled.bitmap(0, 0, 128 , 8, happyface_bitmap); //happy face
    lastHappyTime = millis(); //asign the amount of time since the board was on and the face was happy
    //decide how much to wait to change the face back to sad
  } else if ( millis() - lastHappyTime > 5000) {
    oled.bitmap(0, 0, 128 , 8, sadface_bitmap); //sad face

  }
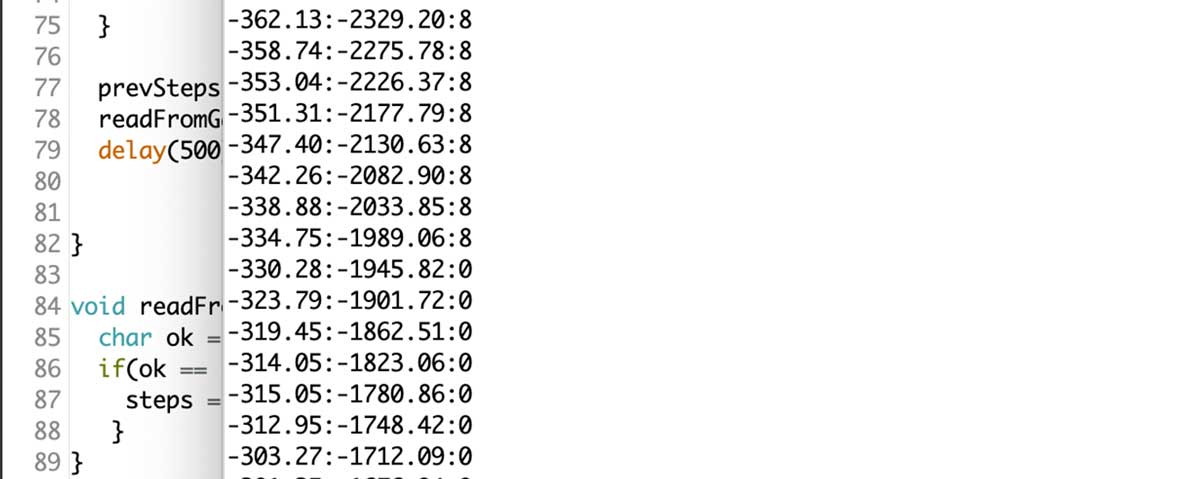
Additionally I added this to send the steps to the game and then restet the value to 0:
prevSteps = steps; //update step count

  //read the value from the bluetooth
  char readCommand = bluetooth.read();
  resetSteps(readCommand);
  calibrate(readCommand);

}


void resetSteps(char c) {
  if (c == 'Y') {
    steps = 0;
  }
}
I also added this part to send a ‘C’ to the device for calibration. I didn’t implement this yet on the game code.
void calibrate(char c) {
  if (c == 'C') {
    mpu.calcOffsets(true, true); // gyro and accelero

  }
}
Connecting the Device with the Game and Using the Gyroscope to Play
I documented the process for connecting the device with the game and using the gyroscope in the Interface app & programming week. Initially, I encountered issues with the stability of the gyroscope values. To address this, I switched from the older <MPU6050_tockn.h> library to the newer <MPU6050_light.h>. This update improved the stability of the gyroscope readings.