4. Computer Controlled Cutting
Week Assignment
- Characterize a laser-cutter (in group)
- Cut something with the vinyl-cutter (individually)
- Design and laser-cut a parametric construction kit (individually).
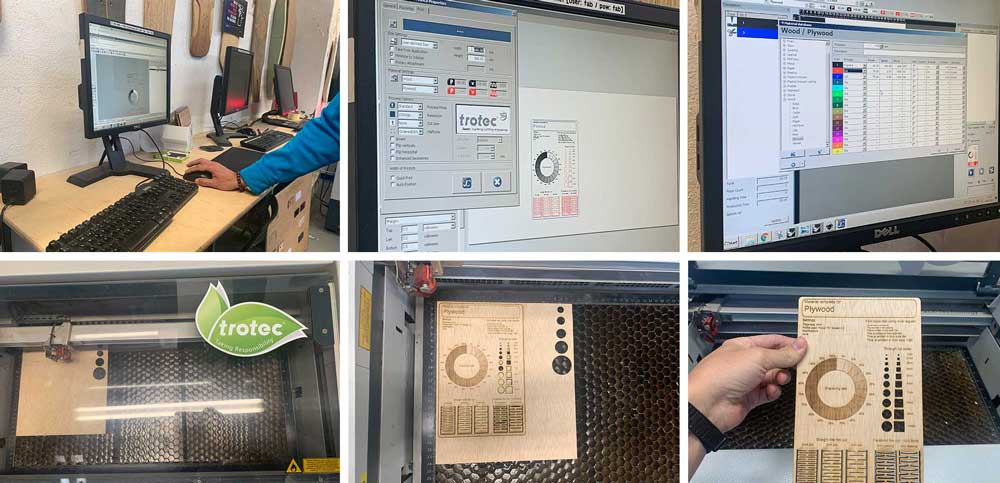
Characterize a Laser-Cutter
Before starting with our assignment, we conducted tests to understand how to use the machines and the basic principles to consider:
- Machine focus
- Ensuring the fans are on
- Correctly setting speed and power according to the material

We divided into groups to test different materials. My group tested plywood.
We used this test file for Rhino5 to test the Trotec Speedy 100 laser cutter. We had to use part of a file provided by an instructor and overlay a raster from another file because the original files did not import properly in Rhino.
The settings we used for 4mm plywood:
| Plywood | Power | Speed | PPI/Hz | Color |
|---|---|---|---|---|
| Engrave | 65 | 100 | 1000PPI | Black |
| First Cut | 75 | 0.5 | 1000Hz | Red |
| Last Cut | 75 | 0.5 | 1000Hz | Blue |
Parametric Construction Kit
For this part of the assignment, I found a nice lime green acrylic among the scrap.
I first tested the kerf. First mistake: Where to put the numbers indicating the size of the joint. I used 3.85mm for 4mm thick acrylic, but the material was not very homogeneous, so a tighter joint was more suitable.
The first cut had several problems:
I used another machine with the same parameters but didn’t test it beforehand. The laser didn’t cut my pieces completely.
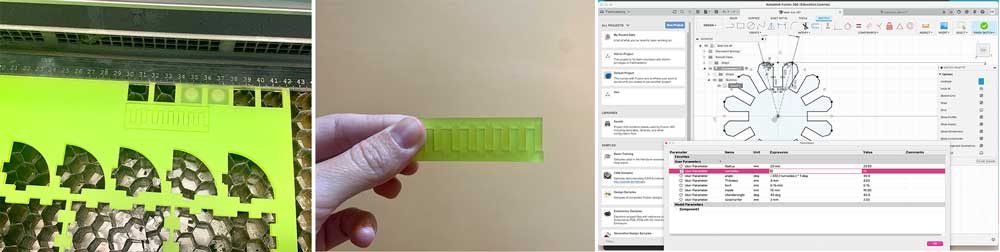
With limited material, I shrunk the pieces but didn’t adjust the joint depth. This caused loose fittings and issues with assembling the pieces.
The pieces were nice but didn’t fit properly 😑 So, I decided to start over with smaller pieces.
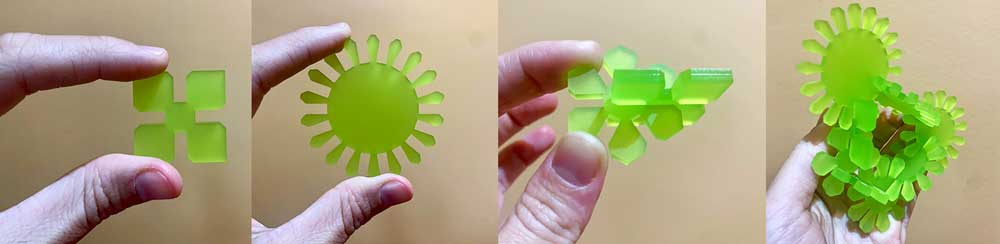
These are the shapes that I cut and this is the Fusion 360 file with the parameters.
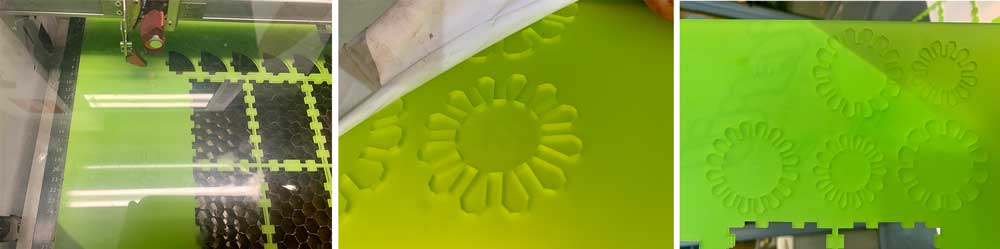
To make the most of the material, I designed a more compact and versatile shape, adjusting to the available scrap material.
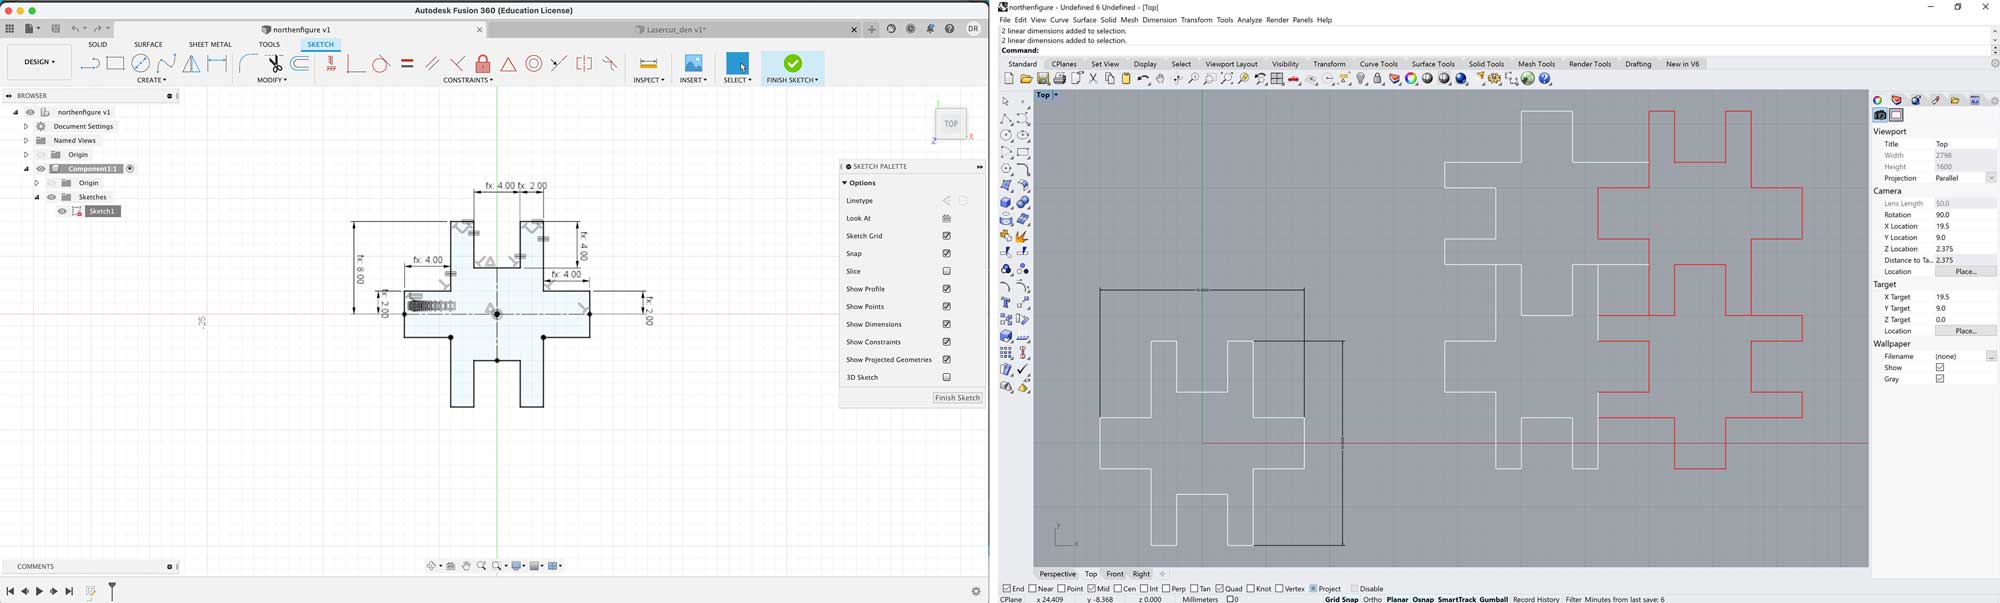
This is the shape that I cut and this is the Fusion 360 file with the parameters.
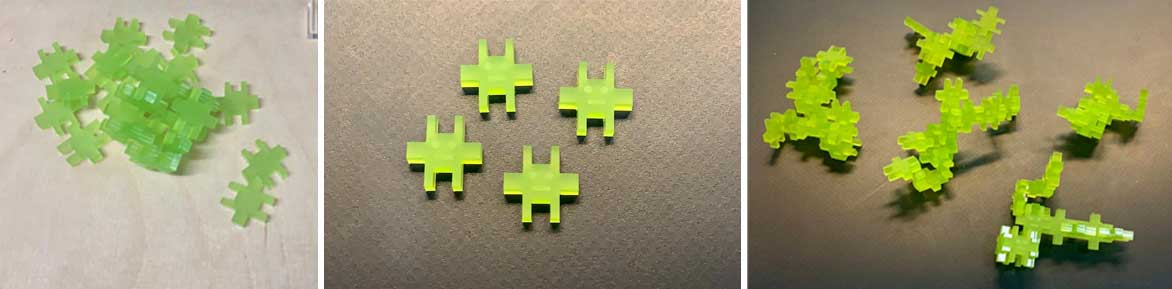
The new shape was effective due to its small size and various joint types. The issue with uneven material thickness (3.85mm to 4.07mm) was resolved with this design, as the small size allowed for easier adjustments.
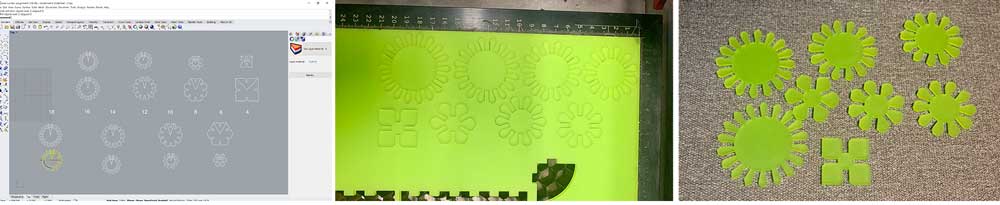
The settings I used for translucent 4mm acrylic:
| Acrylic | Power | Speed | PPI/Hz | Color |
|---|---|---|---|---|
| Engrave | 60 | 100 | 1000PPI | Black |
| Cut | 85 | 0.5 | 1000Hz | Red |
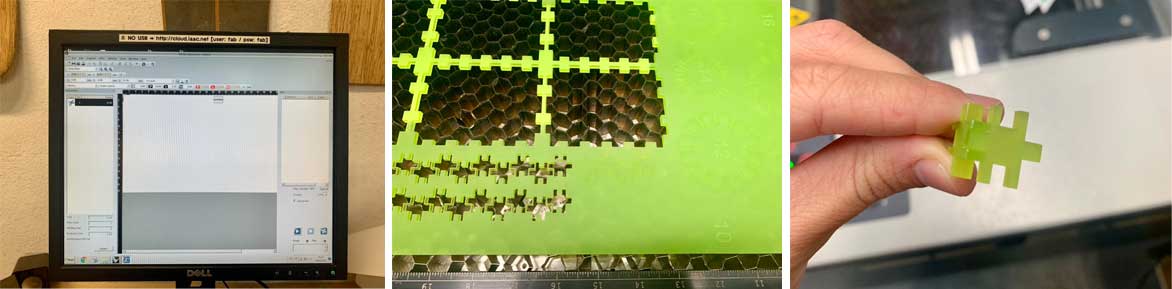
I tested the kerf again and used 3.70mm for the same 4mm thick acrylic. The fit was perfect, although the thickness variations still caused some pieces to be slightly tighter or looser.
Cut Something with the Vinyl-Cutter
I used some faces from the previous week’s assignment, merging both files (the laser-cut shapes and the faces) in Illustrator. I used a speed of 16 to cut the shapes, as the faces were small. The initial attempt resulted in characters being too small, so I scaled them up by 50%.
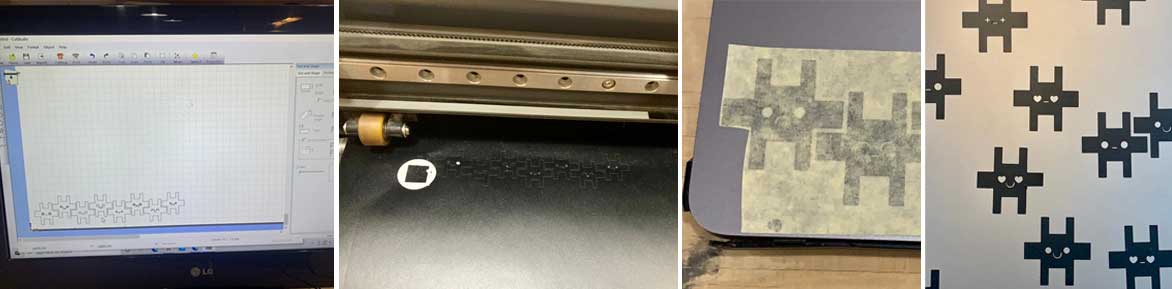
This is the file that I used to cut the shapes with the vinyl-cutter.
Tips and Tricks for the Vinyl-Cutter
- I created my file in Illustrator but saved it as Illustrator 8 format to directly drag and drop it into the vinyl-cutter software.
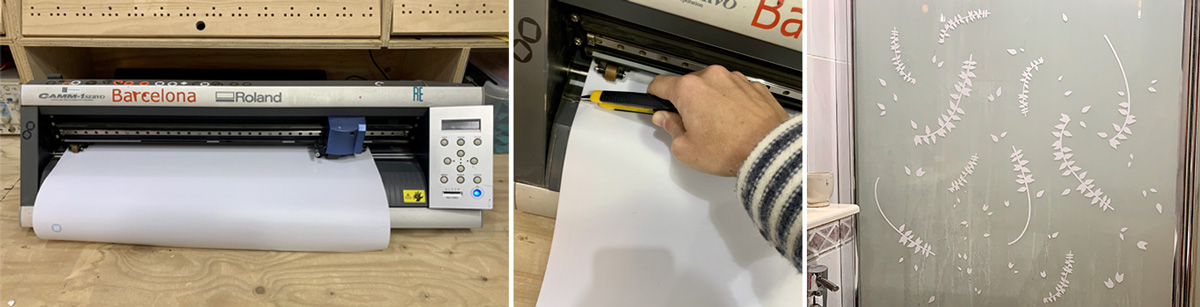
I used the Roland CAMM-1 Servo, which requires specific settings:
- I chose a matte white vinyl roll, but you can use a piece instead.
- Feed the vinyl from the back until it is visible from the other side and has passed the small wheels on the sides.
- Align it with the vertical lines on the machine’s front piece.
- Move the wheels (from the back of the machine) to ensure they are over the vinyl area and on the white parts. This is crucial to avoid machine errors when setting the origin.
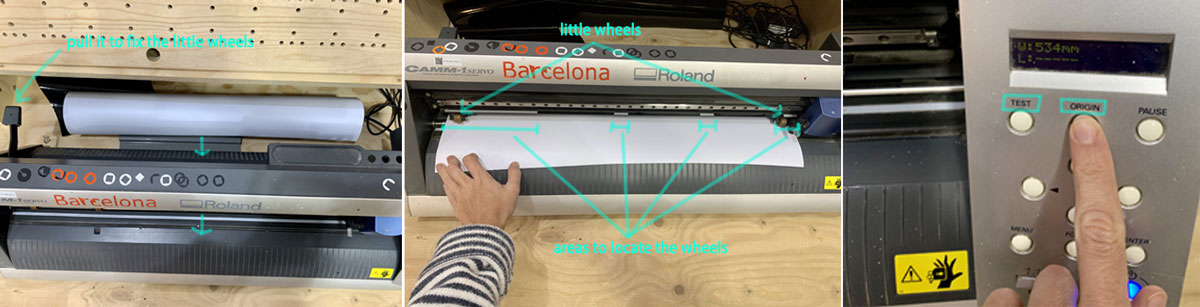
- At the top left is a lever that fixes the wheels holding the vinyl. Push it down.
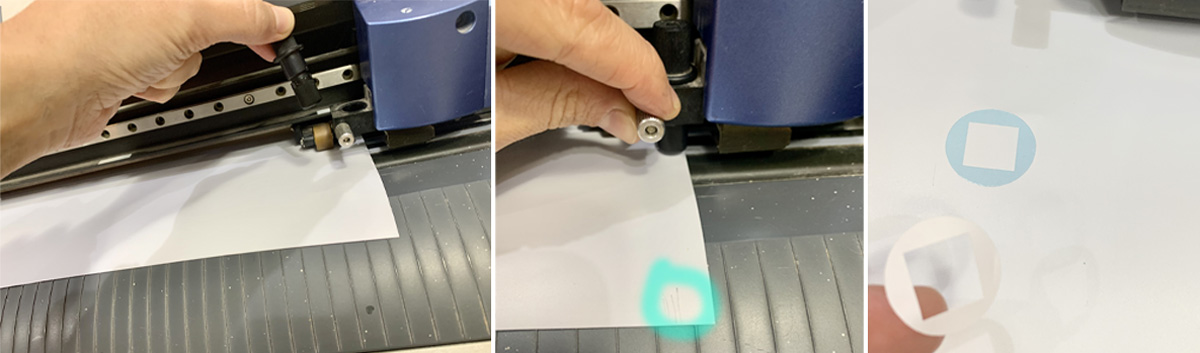
- Check the blade edge by unscrewing the thread, releasing the black piece, and pressing it on the vinyl to slice. Adjust the blade if necessary. My blade was fine.
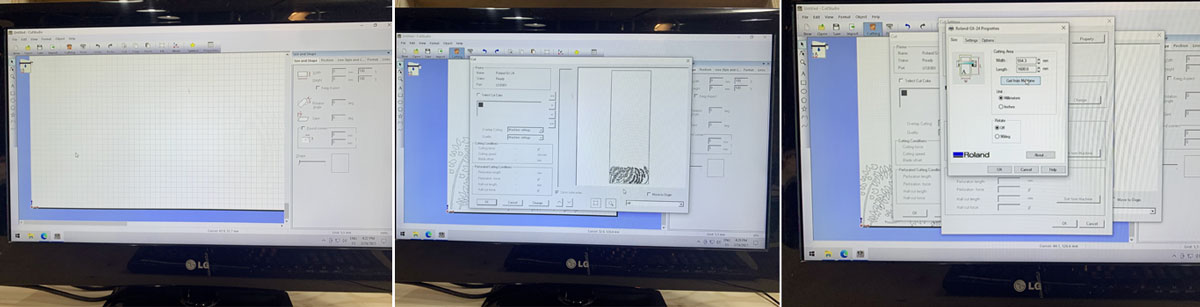
- Set the origin by pushing the “origin” button, defining whether it’s a roll or a piece. The machine will automatically check the vinyl width. You can also set a custom origin by positioning and double-pressing the origin button.
- Perform a quick initial test with a square inside a circle to check if the blade cuts the paper side. Adjust if necessary. My blade was perfect.
Back to the file
-
After setting up the machine, define the vinyl size directly from the machine. This is straightforward.
-
Check that everything fits and send the file to the vinyl-cutter. Done!
Find All the Files Here:
- Test file for Rhino5
- Shape that I cut
- Fusion 360 file
- File that I used to cut Den Invaders
- File that I used to cut the plants